Drivetrain How to install a forge inlet tube on a 2010 JCW
#1
 07-23-2014, 05:48 PM


How to install a forge inlet tube on a 2010 JCW
If this thread doesn't make sense, it is because I have re-purposed it to be a detailed write up. Here it goes:
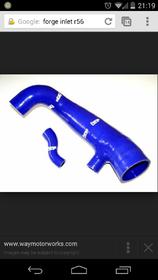
Forge offers a silicone alternative to our cheap rubber/plastic inlet tube that have been know to break (some attribute this to aftermarket intakes). The factory one is about $120-$140 and forge offers theirs for about $20 more expensive for silicone ($155 shipped). Silicone is robust and does not absorb heat like rubber or plastic. It also will not wear down and crack like plastic or rubber. Finally it just looks cool to add blue/red accents to your engine bay. Moving on, here is a list of what you will need:
Forge Kit (more on this later)
Flat head screwdriver
7 or 8mm socket (depending on your hose clamp sizes)

First buying the proper piece. When selecting the R56 one, that is correct one. The text under it will tell you to evaluate the location of your PCV "bung" to determine if you need that one or the one they label for the countryman. Select the R56 one if you have a R56, simple as that. I asked which to buy, they told me the wrong one, and it took almost a month for them to send the right piece. Moving on.
Here is what the stock set up looks like. Now, you may or may not have a 3rd clamp (the one in the middle) but rather a zip tie. I replaced the zip tie with a clamp. Otherwise it should look like this.
1) First disconnect the small black line over the inlet tube (small clip to push in) and set aside. Remove the clamps that are circled, and then disconnect the PCV bung from the factory inlet tube by removing a clamp or cutting the zip tie (blue arrow). Use the appropriate socket size to do this

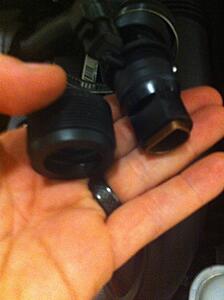
2) Using the flat head, pry the rubber ribbed seal off the PCV bung. Just stick it between the rubber and plastic part then work it around. Here is a picture with it off
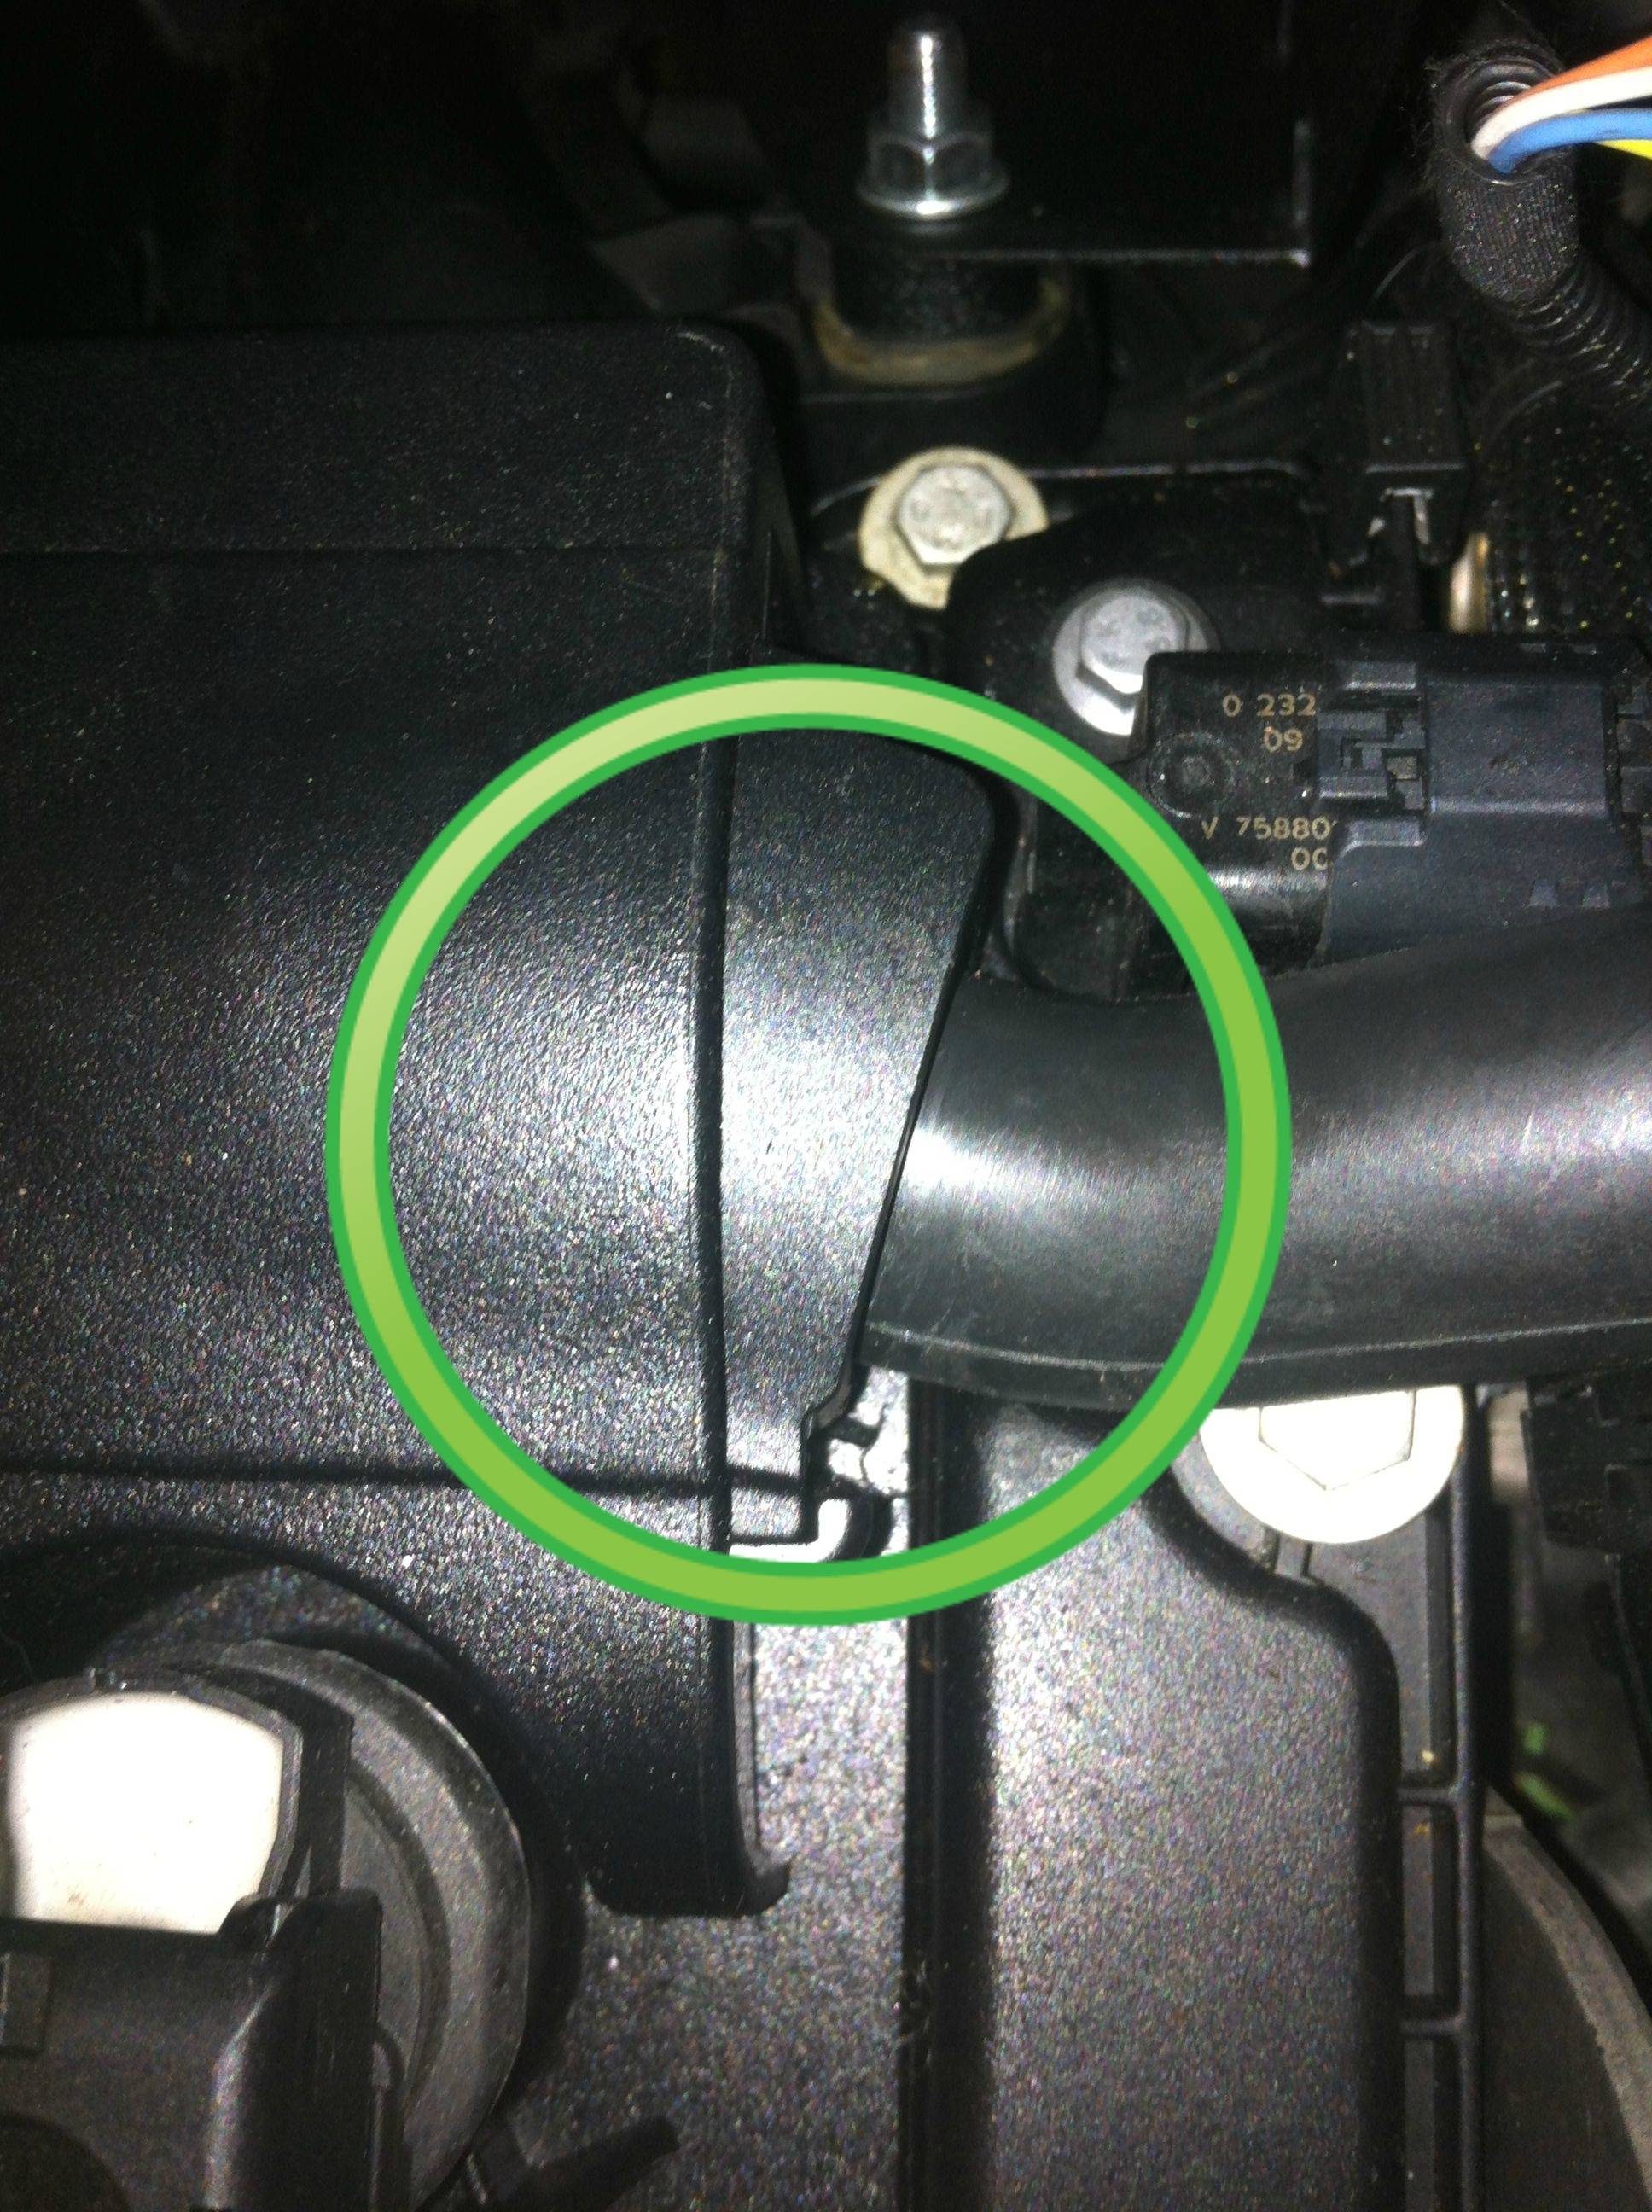
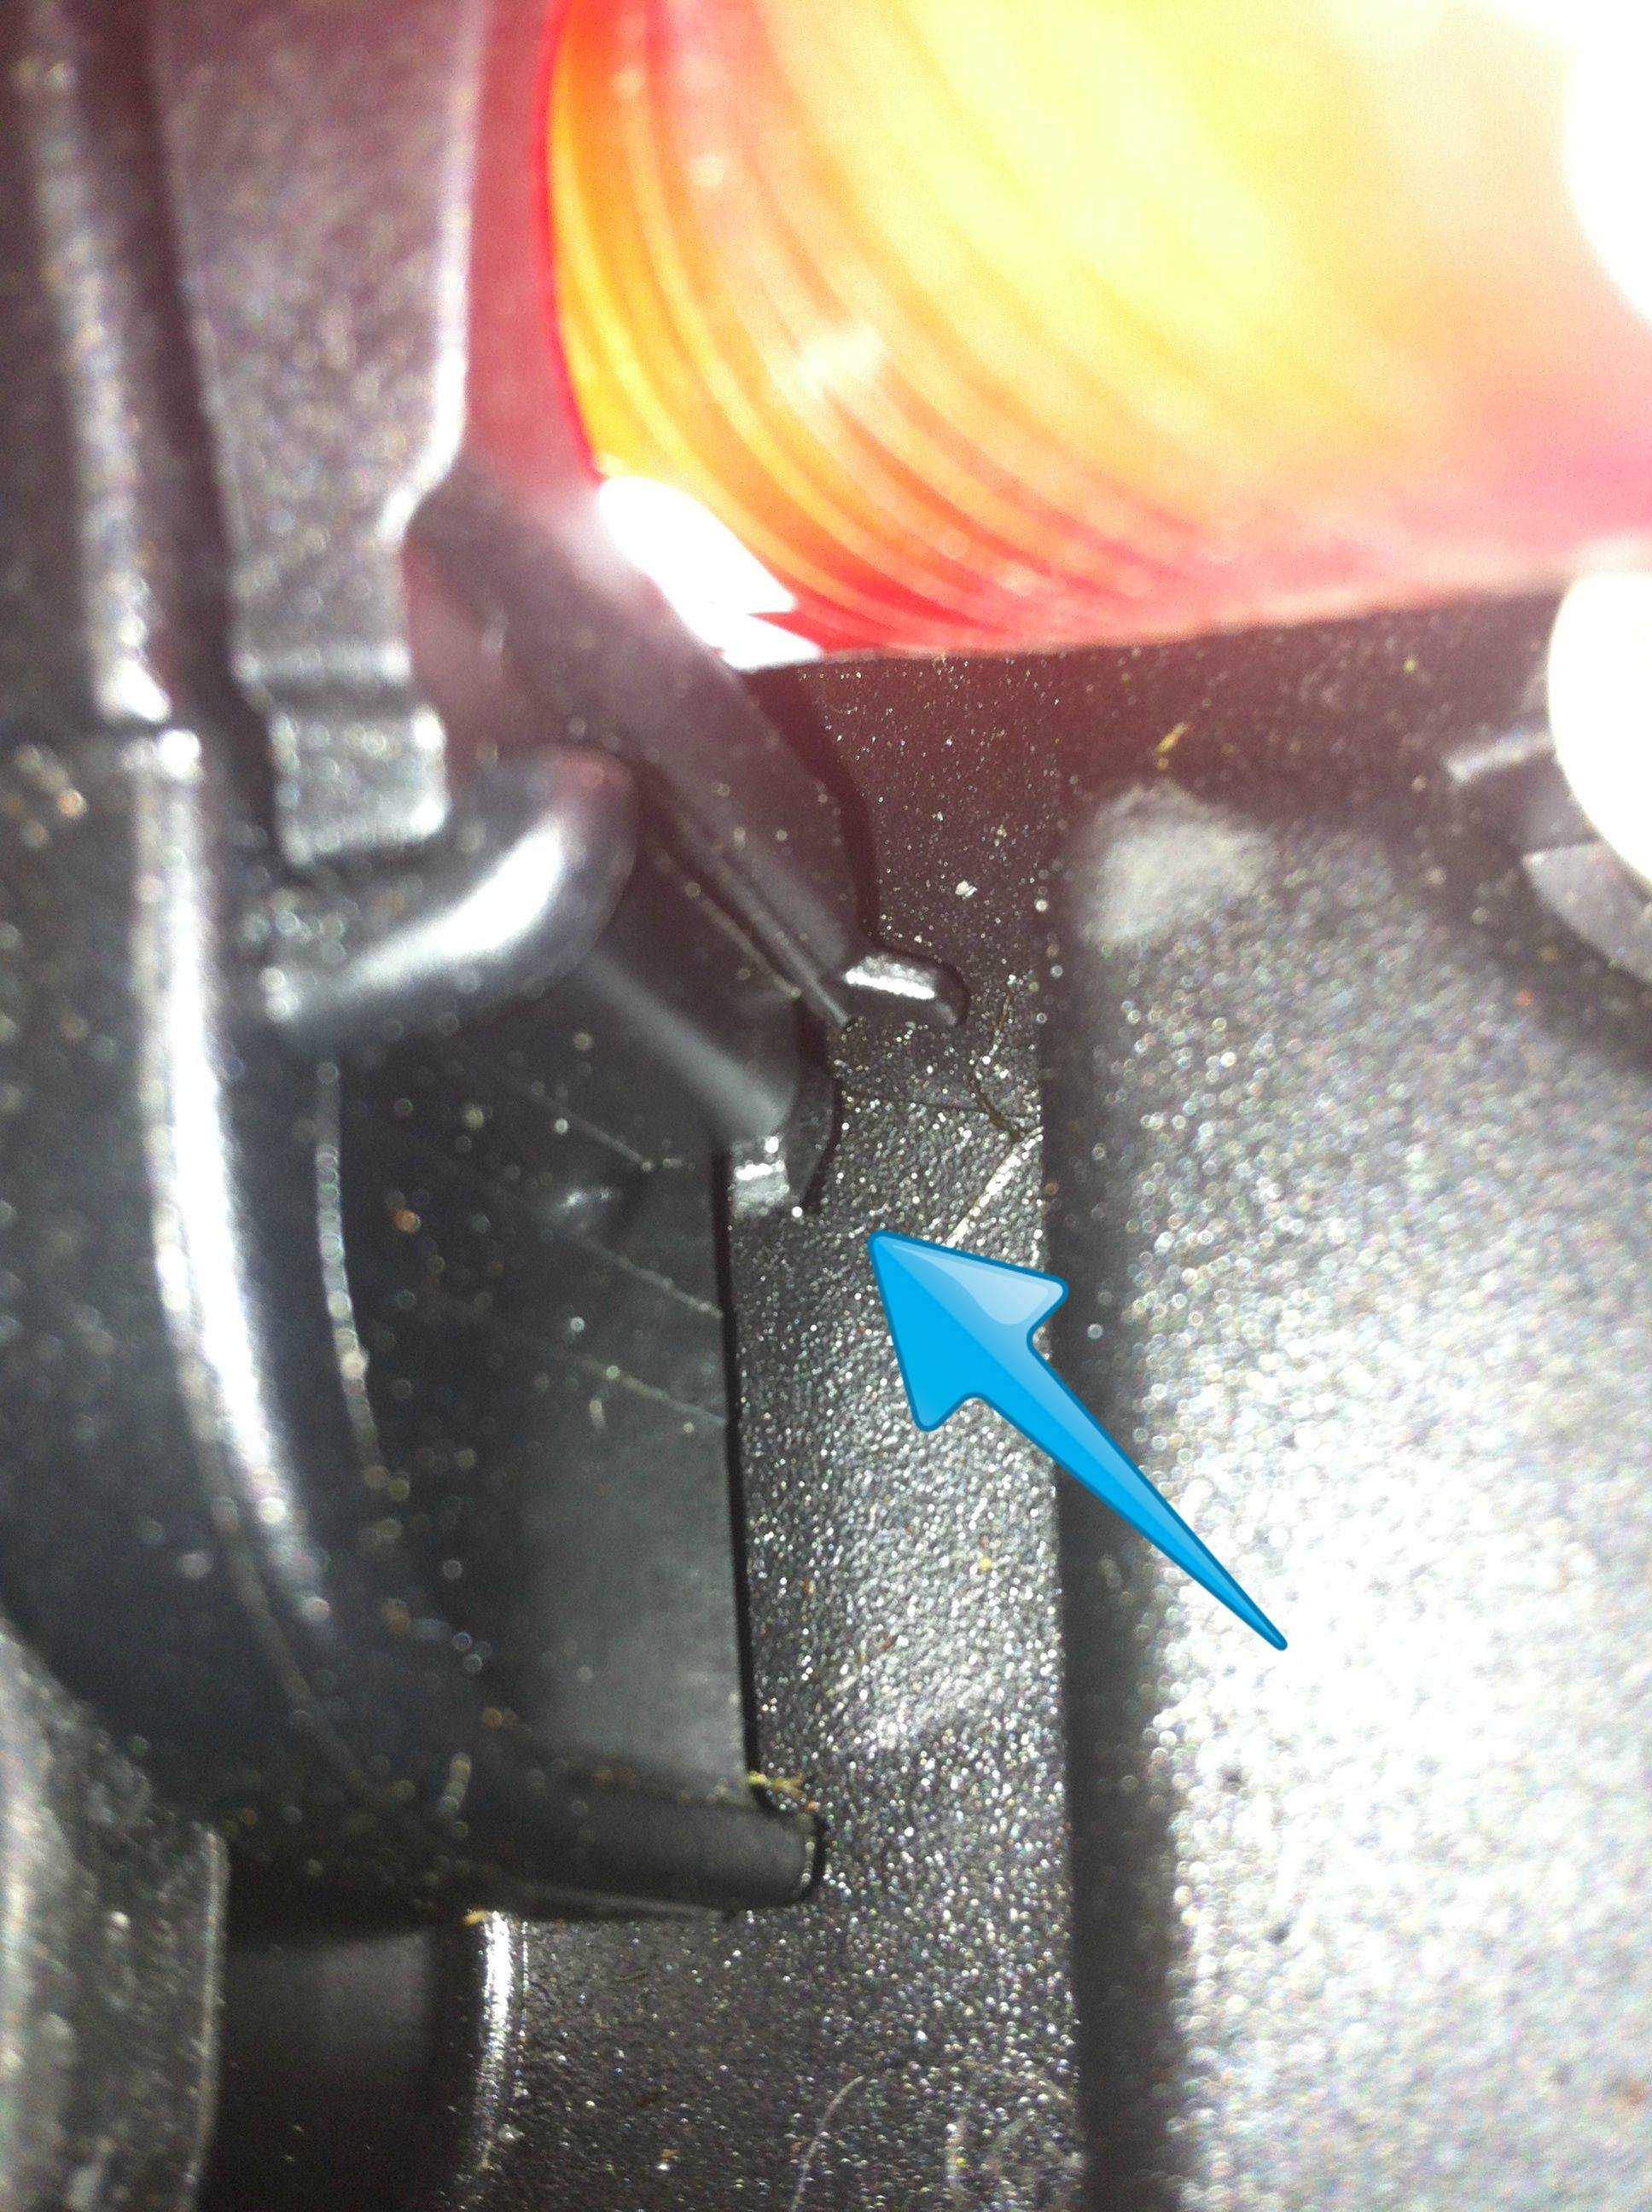
3) Remove the rubber tubing from the engine block. There is a small clip holding it there (green circle). Moving from the top of the clip to either side, use the flat head to push in a tab on the clip (blue arrow) and pop the clip up. Then simply pull off the rubber portion from the block. Finally, separate the rubber hose from the PCV bung using the flathead method above. Here are some bad pictures showing you the clip and where to press
4) Take the small piece and connect the smaller side to the engine block where you just removed the old black rubber tubing (yellow arrow). Now take the large portion and attach it to the Mass airflow sensor housing and to the turbo inlet. The fat portion goes up top and the small bent portion goes on bottom. Clamp these down with the included clamps Green circle).

5) slip the 2 identical medium clams on either side of the small and large pieces (orange squares) then shove the plastic PCV bung into both holes (blue arrow).
6) tighten all clamps, reconnect the small connect to the PCV bung and reconnect the small black break line to the engine block. You are done. Now marvel and throw back a cold one. I hope this clarified future Forge customers on how to do this simple install. Also, That is what she said should have been said like 100 times in this thread.
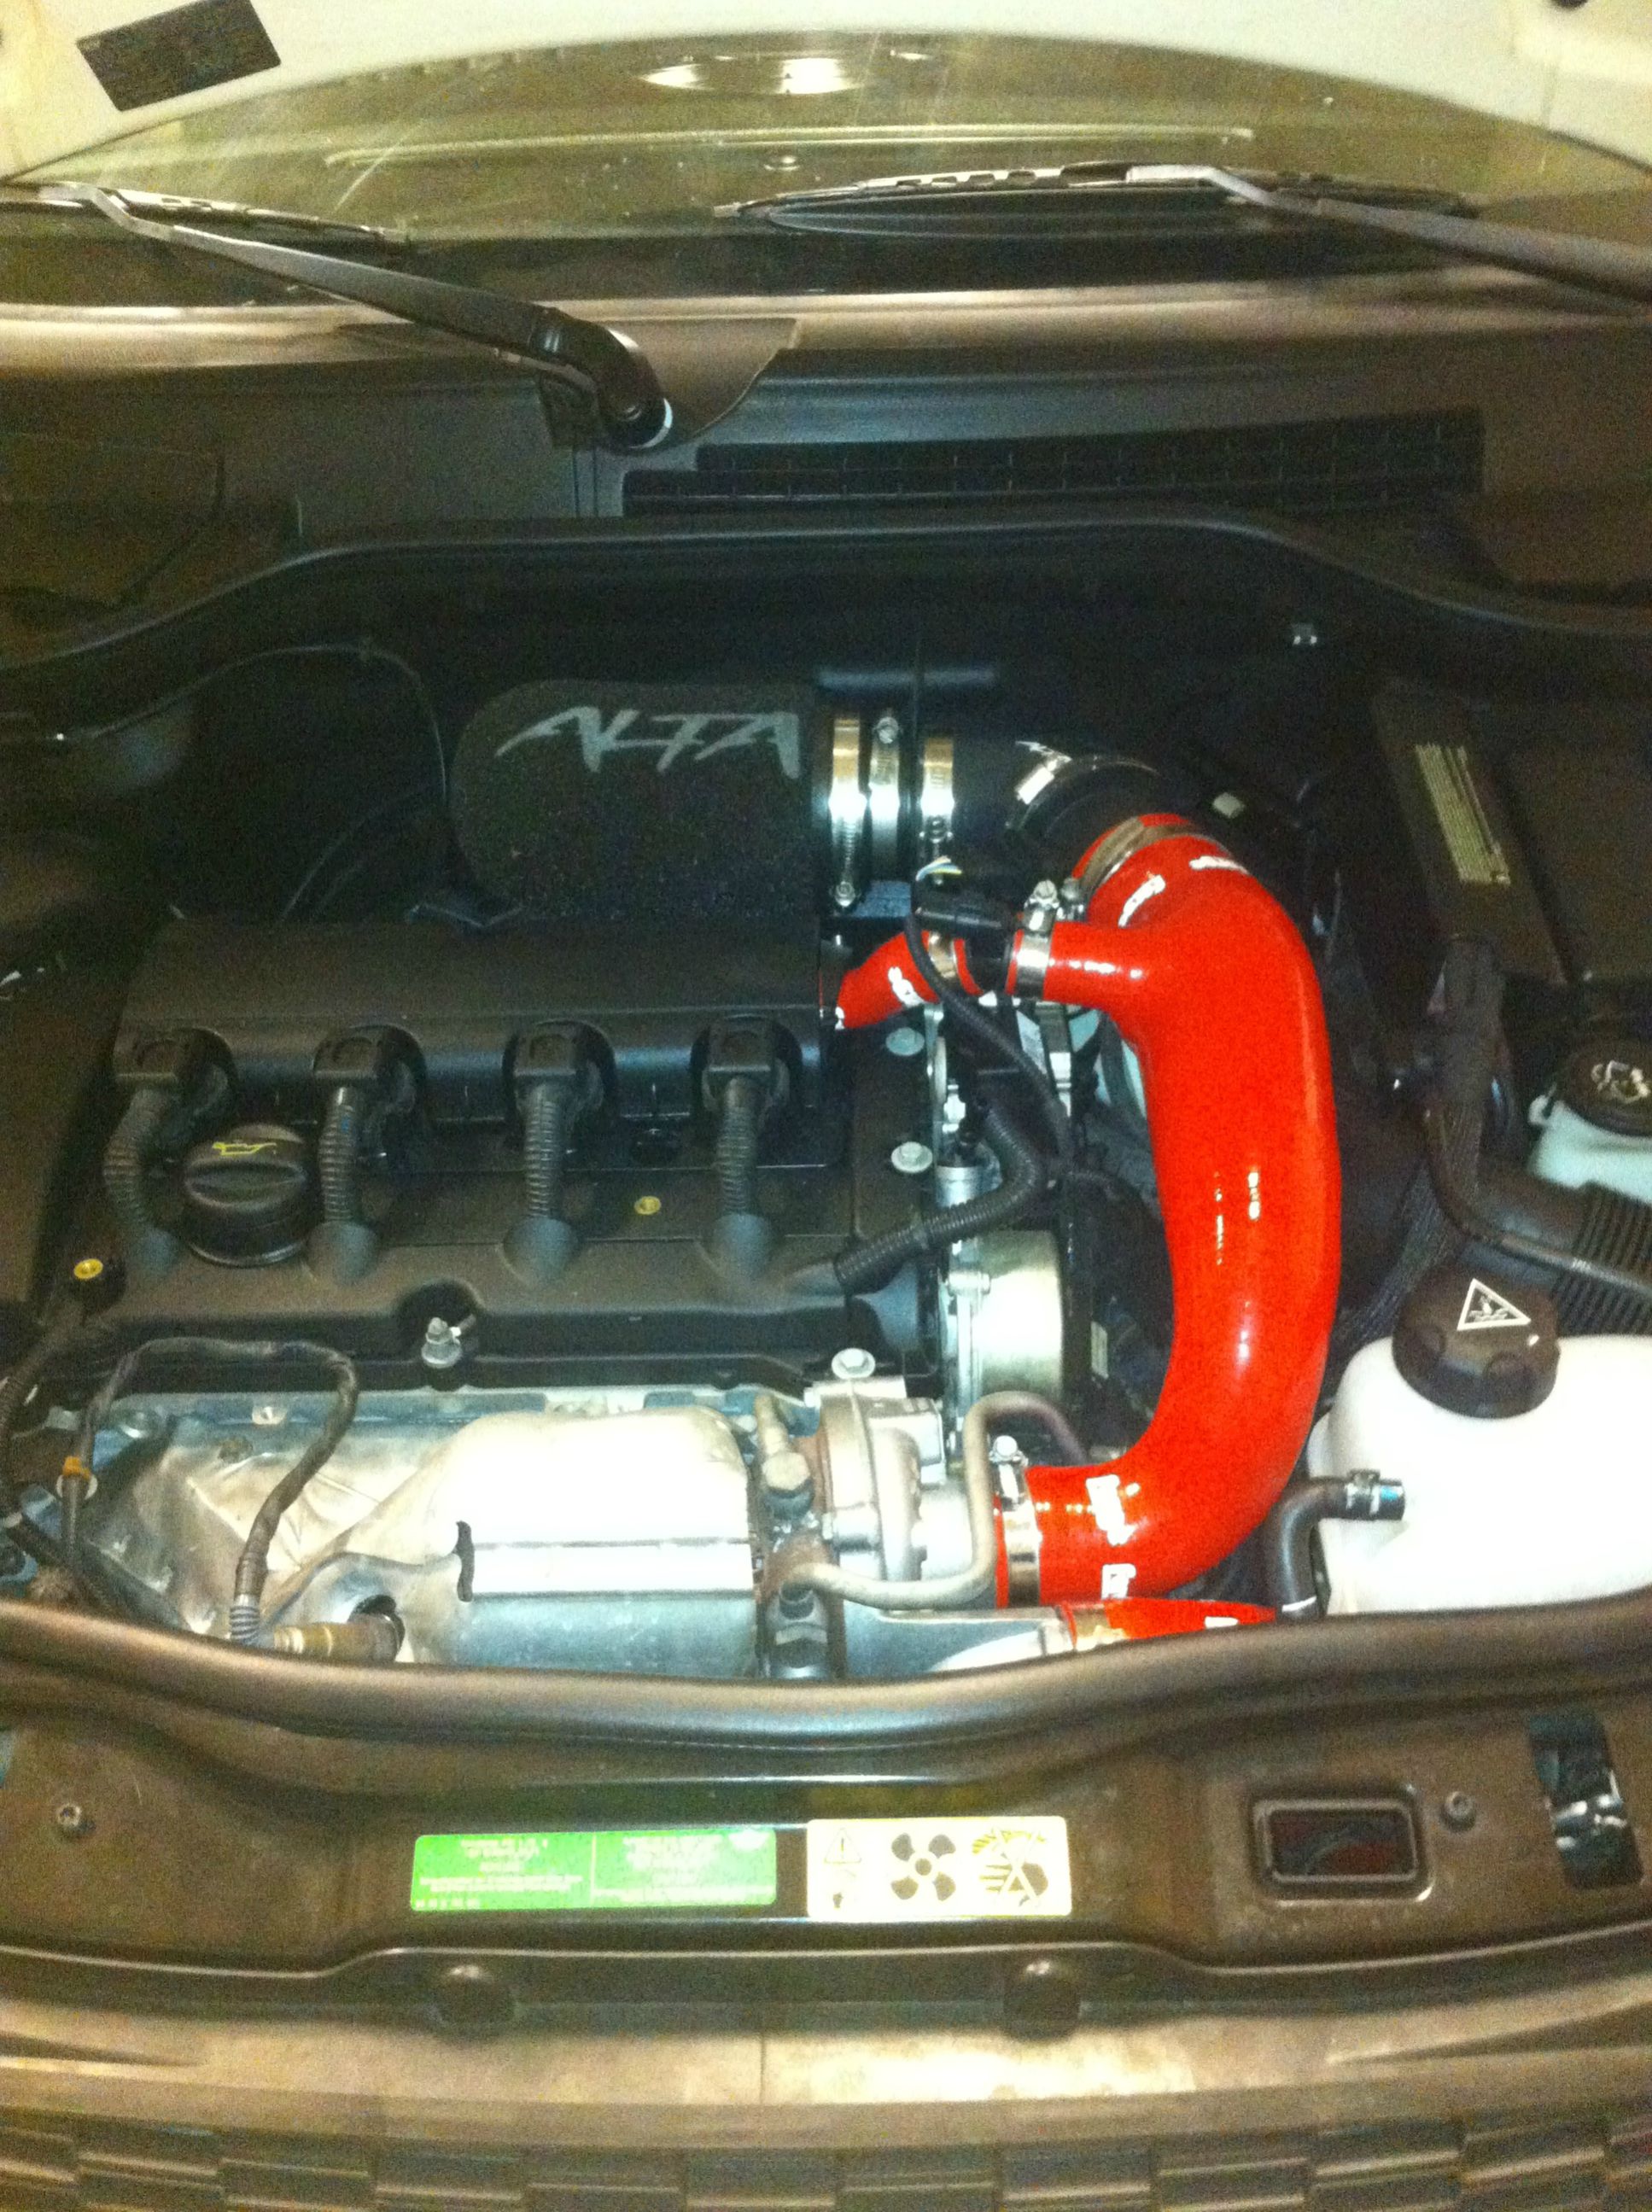
Finished product. Realize I hadn't connected the break line in this picture. You should have that small line going over top of the inlet hose, if you do not reconnect it, your breaks will not work. DO NOT FORGET THIS:

Forge offers a silicone alternative to our cheap rubber/plastic inlet tube that have been know to break (some attribute this to aftermarket intakes). The factory one is about $120-$140 and forge offers theirs for about $20 more expensive for silicone ($155 shipped). Silicone is robust and does not absorb heat like rubber or plastic. It also will not wear down and crack like plastic or rubber. Finally it just looks cool to add blue/red accents to your engine bay. Moving on, here is a list of what you will need:
Forge Kit (more on this later)
Flat head screwdriver
7 or 8mm socket (depending on your hose clamp sizes)

First buying the proper piece. When selecting the R56 one, that is correct one. The text under it will tell you to evaluate the location of your PCV "bung" to determine if you need that one or the one they label for the countryman. Select the R56 one if you have a R56, simple as that. I asked which to buy, they told me the wrong one, and it took almost a month for them to send the right piece. Moving on.
Here is what the stock set up looks like. Now, you may or may not have a 3rd clamp (the one in the middle) but rather a zip tie. I replaced the zip tie with a clamp. Otherwise it should look like this.
1) First disconnect the small black line over the inlet tube (small clip to push in) and set aside. Remove the clamps that are circled, and then disconnect the PCV bung from the factory inlet tube by removing a clamp or cutting the zip tie (blue arrow). Use the appropriate socket size to do this
2) Using the flat head, pry the rubber ribbed seal off the PCV bung. Just stick it between the rubber and plastic part then work it around. Here is a picture with it off

3) Remove the rubber tubing from the engine block. There is a small clip holding it there (green circle). Moving from the top of the clip to either side, use the flat head to push in a tab on the clip (blue arrow) and pop the clip up. Then simply pull off the rubber portion from the block. Finally, separate the rubber hose from the PCV bung using the flathead method above. Here are some bad pictures showing you the clip and where to press
4) Take the small piece and connect the smaller side to the engine block where you just removed the old black rubber tubing (yellow arrow). Now take the large portion and attach it to the Mass airflow sensor housing and to the turbo inlet. The fat portion goes up top and the small bent portion goes on bottom. Clamp these down with the included clamps Green circle).
5) slip the 2 identical medium clams on either side of the small and large pieces (orange squares) then shove the plastic PCV bung into both holes (blue arrow).
6) tighten all clamps, reconnect the small connect to the PCV bung and reconnect the small black break line to the engine block. You are done. Now marvel and throw back a cold one. I hope this clarified future Forge customers on how to do this simple install. Also, That is what she said should have been said like 100 times in this thread.
Finished product. Realize I hadn't connected the break line in this picture. You should have that small line going over top of the inlet hose, if you do not reconnect it, your breaks will not work. DO NOT FORGET THIS:
Last edited by '10JCW; 07-23-2014 at 09:22 PM. Reason: made it an actual DIY how to
#2
07-23-2014, 06:32 PM

#3
07-23-2014, 06:44 PM
Hmm I didn't think about that. It fits up just nicely around the MAF housing and the turbo inlet just not in regards to the diverted boost tube. I don't think non turbo coopers have this piping does it? Can anyone post a picture of a cooper S inlet tube (vs the JCW one)? Is the recirculation tubing in the same place? Thanks
#4
07-23-2014, 07:18 PM

4th Gear
Join Date: Jun 2013
Location: KC, MO
Posts: 402
Likes: 0
Received 0 Likes
on
0 Posts
#5
07-23-2014, 07:19 PM
4th Gear
Join Date: Jun 2013
Location: KC, MO
Posts: 402
Likes: 0
Received 0 Likes
on
0 Posts
#6
07-23-2014, 07:28 PM
#7
07-23-2014, 07:34 PM
4th Gear
Join Date: Jun 2013
Location: KC, MO
Posts: 402
Likes: 0
Received 0 Likes
on
0 Posts
I don't have a JCW but the sensor should push into the forge hose, aligning the timing feature with the notch. The little pipe should then press onto the otherside and go to the crankcase. Not sure why they would make the JCW any different than the mcs.
Sent from my Nexus using NAMotoring
Sent from my Nexus using NAMotoring
Trending Topics
#9
07-23-2014, 07:54 PM
4th Gear
Join Date: Jun 2013
Location: KC, MO
Posts: 402
Likes: 0
Received 0 Likes
on
0 Posts
Yeah, same sensor (at least it appears to be). Looks like forge only makes one induction hose for the N14 according to their site.
I have a samco that looks to be identical. I plan to install it with a catch can though which would not use that stubby hose. The sensor would still need to push fit into the induction hose port and appeared to on a test fit. Maybe use a little alcohol or windex as lube?
Sent from my Nexus using NAMotoring
#10
07-23-2014, 07:56 PM
#11
07-23-2014, 07:59 PM
4th Gear
Join Date: Jun 2013
Location: KC, MO
Posts: 402
Likes: 0
Received 0 Likes
on
0 Posts
There is a (upside down) u-shaped clip that holds it on. Look down the sides of the clip to find the tabs to push in with a screw driver. When you push them in, it just slides up and off. You can then remove the hose. The clip is right up against the valve cover.
Sent from my Nexus using NAMotoring
Sent from my Nexus using NAMotoring
Last edited by nine5raptor; 07-23-2014 at 08:16 PM.
#13
07-23-2014, 08:54 PM
4th Gear
Join Date: Jun 2013
Location: KC, MO
Posts: 402
Likes: 0
Received 0 Likes
on
0 Posts
#14
07-24-2014, 10:52 AM

Platinum Sponsor
Juts saw this and was answering it here. Nice write up.
https://www.northamericanmotoring.co...on-a-10-a.html
https://www.northamericanmotoring.co...on-a-10-a.html
__________________

MINI Guru/ MINI Owner Since 2004 | NEW Lifetime Part Replacement | Local Pickup
Milltek | Genuine MINI | Forge Motorsport | NM Engineering | ECS Performance | M7 Speed
Customer Service Hours: 8am-8pm EST|Sales Team Hours: 8am-11pm | SAT 10am-7pm 800.924.5172
MINI Guru/ MINI Owner Since 2004 | NEW Lifetime Part Replacement | Local Pickup
Milltek | Genuine MINI | Forge Motorsport | NM Engineering | ECS Performance | M7 Speed
Customer Service Hours: 8am-8pm EST|Sales Team Hours: 8am-11pm | SAT 10am-7pm 800.924.5172
#15
04-23-2015, 09:36 PM

great thread
I would have gotten frustrated and broken something if not for this thread. It has all the tricks to get you through it. Once it is clear what you need to pry off and discard and where the hidden tabs are to release the clips etc the kit fits perfectly and looks great, built to last (unlike the plastic stock one). Sounds different than stock.
#16
04-24-2015, 05:11 AM
Platinum Sponsor
Post up some pics, glad you got it one correctly.
__________________
MINI Guru/ MINI Owner Since 2004 | NEW Lifetime Part Replacement | Local Pickup
Milltek | Genuine MINI | Forge Motorsport | NM Engineering | ECS Performance | M7 Speed
Customer Service Hours: 8am-8pm EST|Sales Team Hours: 8am-11pm | SAT 10am-7pm 800.924.5172
MINI Guru/ MINI Owner Since 2004 | NEW Lifetime Part Replacement | Local Pickup
Milltek | Genuine MINI | Forge Motorsport | NM Engineering | ECS Performance | M7 Speed
Customer Service Hours: 8am-8pm EST|Sales Team Hours: 8am-11pm | SAT 10am-7pm 800.924.5172
#17
04-24-2015, 07:11 PM
4th Gear
Join Date: Jun 2013
Location: KC, MO
Posts: 402
Likes: 0
Received 0 Likes
on
0 Posts

Thread
Thread Starter
Forum
Replies
Last Post
Gil-galad
Eastern Iowa MINIs
63
11-17-2016 02:54 PM
squawSkiBum
MINI Parts for Sale
15
10-02-2015 09:21 AM
iamcamkeenan
R50/R53 :: Hatch Talk (2002-2006)
3
08-10-2015 03:31 PM