Drivetrain How to- put a S10 slave on your mini!
#1
 08-05-2012, 06:54 PM


Join Date: Feb 2010
Location: Seabrook, TX
Posts: 372
Likes: 0
Received 0 Likes
on
0 Posts
How to- put a S10 slave on your mini!
1990 s10 v-6 clutch slave swap, for 06 r53 getrag 6speed
So having replaced the factory 80 dollar all plastic slave 3 times, I said **** that ****. Did some searches and found 2 people had done it before but there were few details.
PowerTorque® - Clutch Slave Cylinder
Part # CS2219
13.99 from Oreilly’s
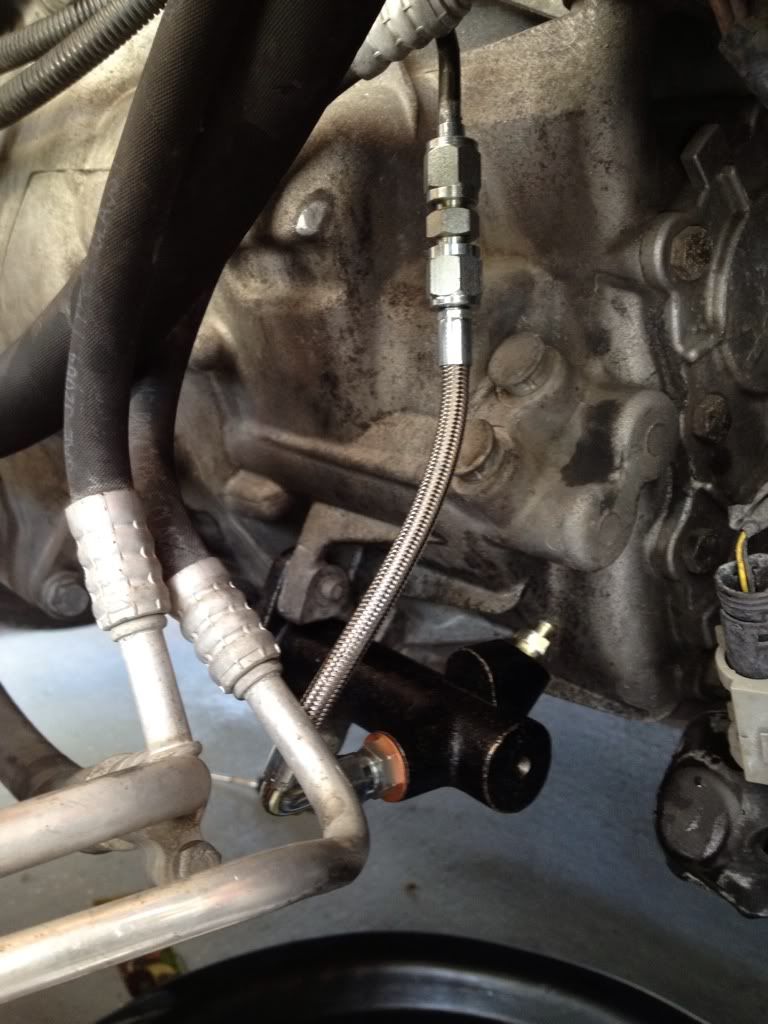
Mini uses a Ľ’’ inch hard line to feed the clutch, with some weird plastic fitting connection. The new slave is a standard threaded type connection M12 threads.
The factory slave is feed on the top, and the s10 slave is feed parallel to the ground. So to avoid a ton of adapters and ****
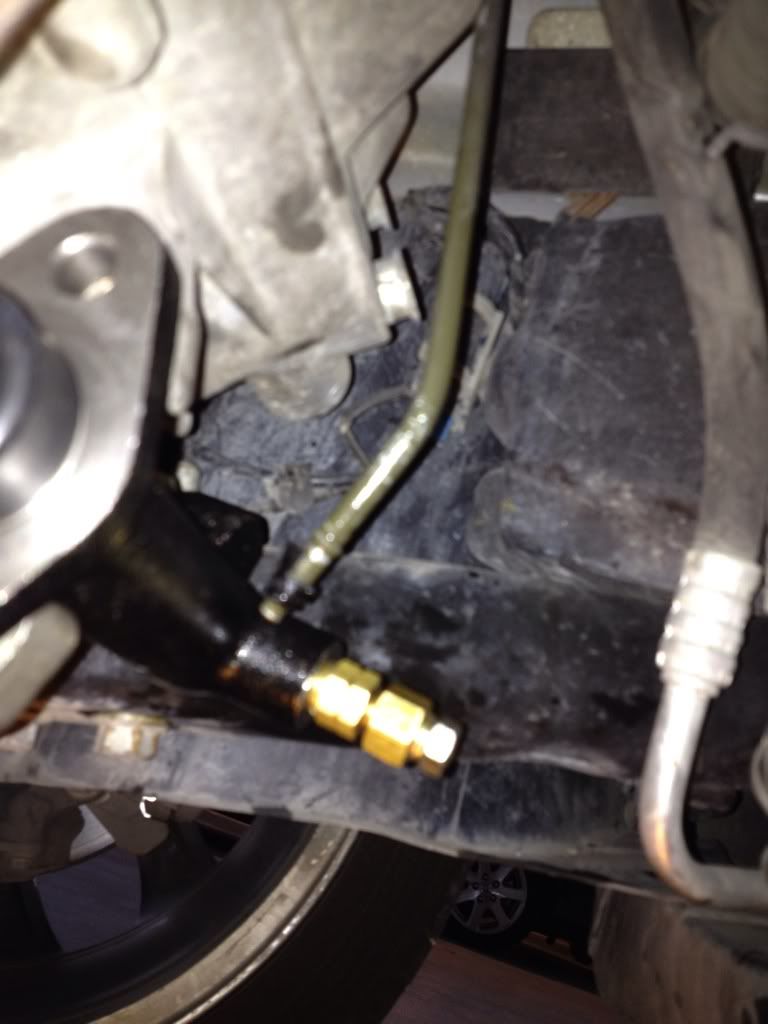
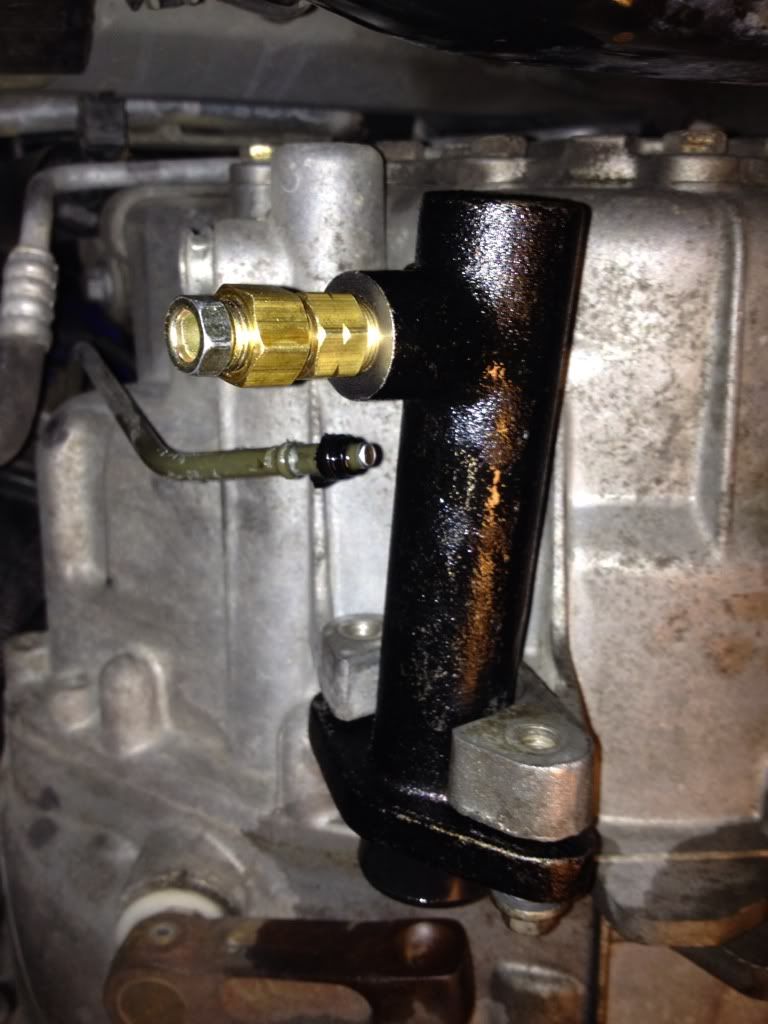
So I called up Joel Orme, of Orme brothers to make a SS line with mini on one side and s10 on the other with a 90* on the s10 side.
Thing was beautiful but a little longer than I thought it would be. Because of this I had to cut the factory hard line much higher= I had to pull the front of the car off to gain proper access to cut and flare the factory line.
Step 1.
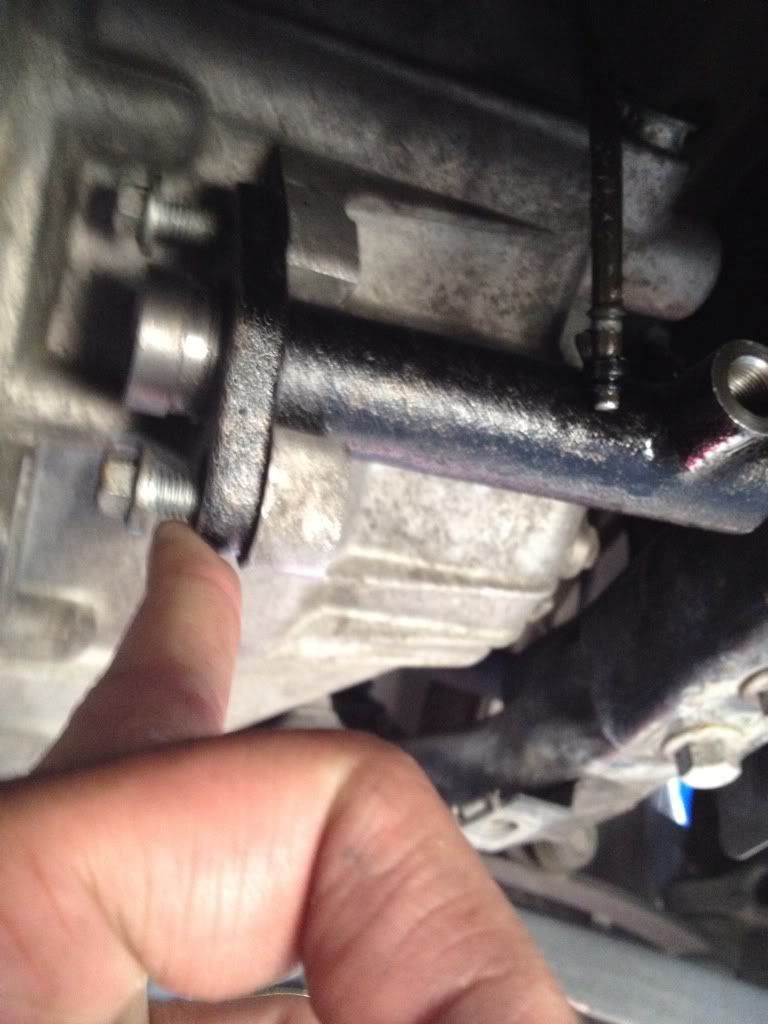
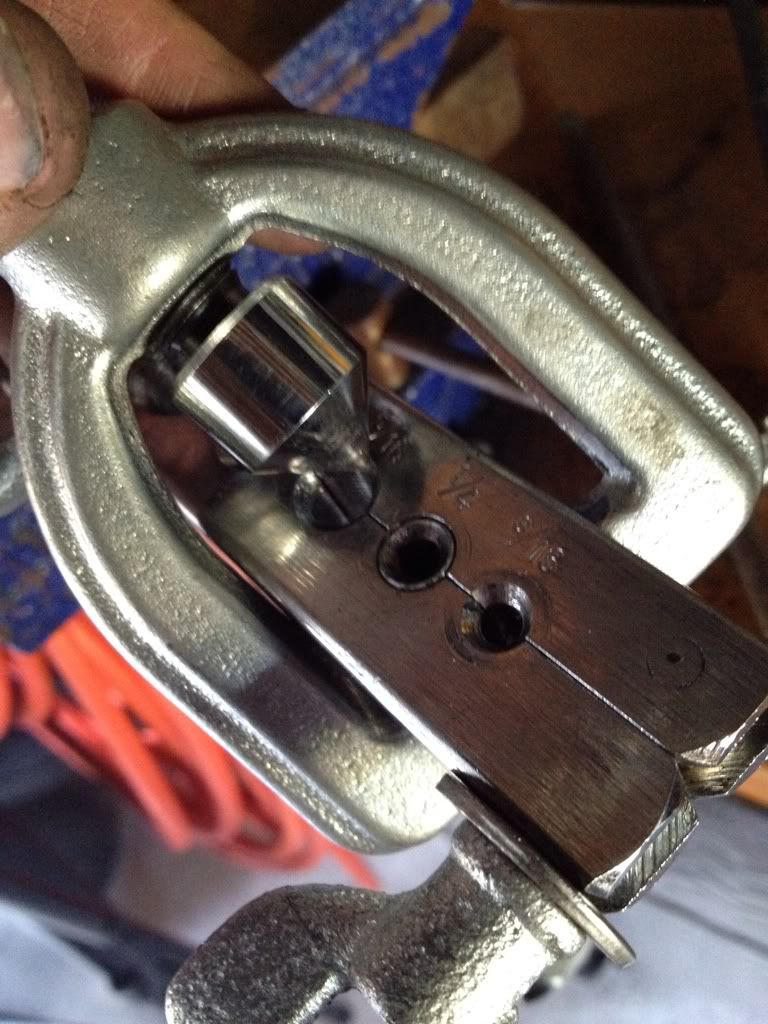
The holes on the s10 slave don’t quite match up, drill out one of the holes. I just used a drill bit a little larger that the hole was, and rocked it back and forth and pushed it sideways till the hole was big enough…

Step 2
make room to access the hard line for cutting and flaring. For me this was pulling the whole front of the car, it may be different for you. Depends on the how you adapt the stock line for the new slave.
Step 3.
Cut the sock line and prep it for flaring. File it flat, de ber the inside(use a razorblade), and add a slight bevel to the outside. Put it in the bar stock with enough sticking out so that it is flush with the shoulder on the Ľ adapter
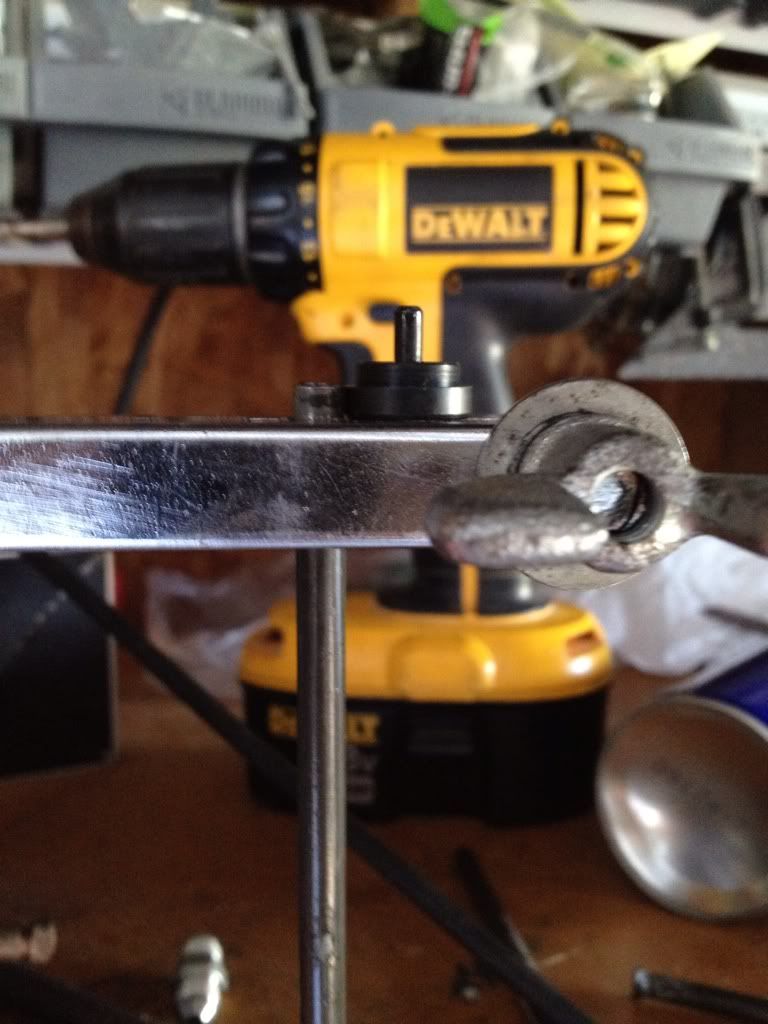
Then tighten the **** out of the bar stock.
Then push the adapter down till its flush with the bar stock
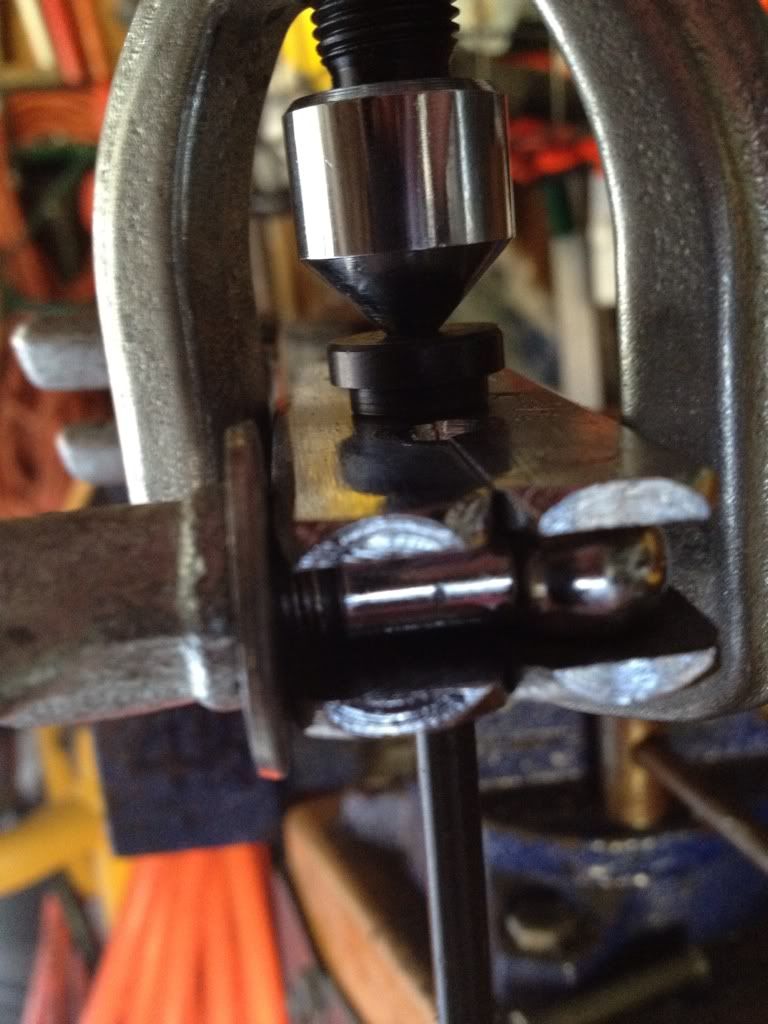
Then remove the adapter and run it down with just the cone
Good job you have made a flare.
Make sure the flare is even all the way around

Also the pics are of a flare I made to practice…
Make damn sure you put the fitting on before you flare the line when you do it for reals….
Step 4.
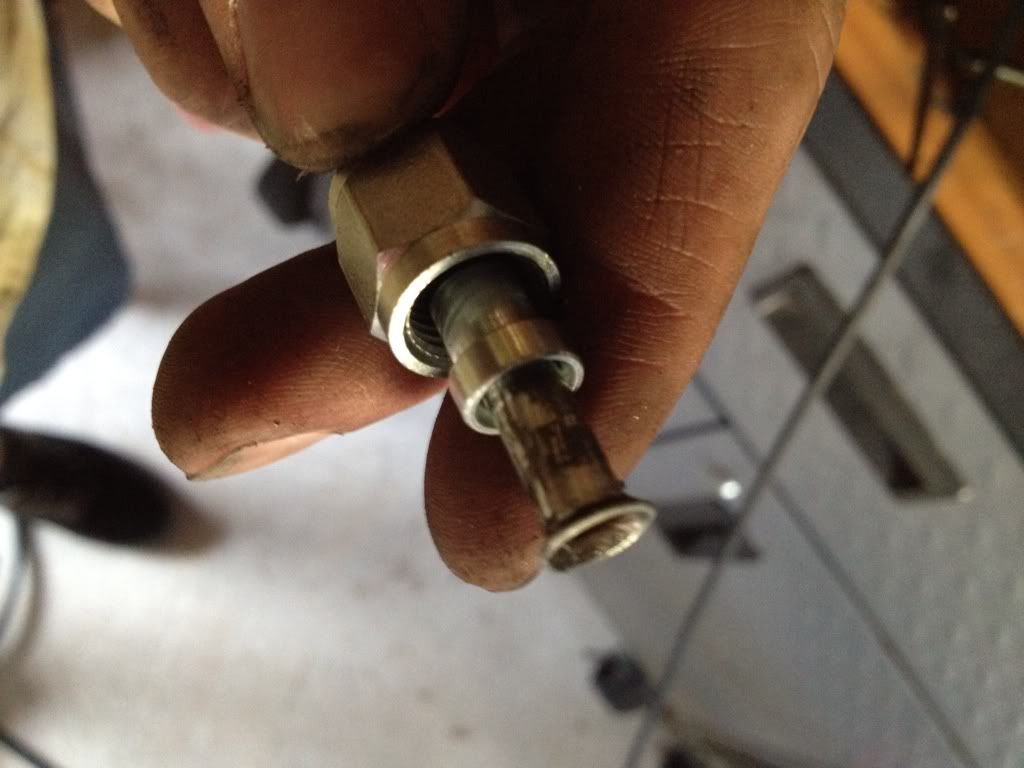
Get a 12mm crush washer. This took me 4 hours to find driving to every parts store in a 10 mile radius, and I still did not find one. Used a half inch washer. It was a little too big but no leaks yet..
I needed a crush washer because the nut on the fitting would bottom out on the face of the slave befor the seal could be made on the inside. So I used a crushwasher to make a seal between the nut on the fitting and the face of the slave…
See it here
Step 5
Tighten that **** up!
Step 6
Bleed the slave.
I did it just like you would the stock slave. Remove it from the tranny and compress and hold, bleed, release repeat. I did it about 10 times.
Step 7
bolt it up and put your car back together.
So having replaced the factory 80 dollar all plastic slave 3 times, I said **** that ****. Did some searches and found 2 people had done it before but there were few details.
PowerTorque® - Clutch Slave Cylinder
Part # CS2219
13.99 from Oreilly’s
Mini uses a Ľ’’ inch hard line to feed the clutch, with some weird plastic fitting connection. The new slave is a standard threaded type connection M12 threads.
The factory slave is feed on the top, and the s10 slave is feed parallel to the ground. So to avoid a ton of adapters and ****
So I called up Joel Orme, of Orme brothers to make a SS line with mini on one side and s10 on the other with a 90* on the s10 side.
Thing was beautiful but a little longer than I thought it would be. Because of this I had to cut the factory hard line much higher= I had to pull the front of the car off to gain proper access to cut and flare the factory line.
Step 1.
The holes on the s10 slave don’t quite match up, drill out one of the holes. I just used a drill bit a little larger that the hole was, and rocked it back and forth and pushed it sideways till the hole was big enough…
Step 2
make room to access the hard line for cutting and flaring. For me this was pulling the whole front of the car, it may be different for you. Depends on the how you adapt the stock line for the new slave.
Step 3.
Cut the sock line and prep it for flaring. File it flat, de ber the inside(use a razorblade), and add a slight bevel to the outside. Put it in the bar stock with enough sticking out so that it is flush with the shoulder on the Ľ adapter
Then tighten the **** out of the bar stock.
Then push the adapter down till its flush with the bar stock
Then remove the adapter and run it down with just the cone
Good job you have made a flare.
Make sure the flare is even all the way around
Also the pics are of a flare I made to practice…
Make damn sure you put the fitting on before you flare the line when you do it for reals….
Step 4.
Get a 12mm crush washer. This took me 4 hours to find driving to every parts store in a 10 mile radius, and I still did not find one. Used a half inch washer. It was a little too big but no leaks yet..
I needed a crush washer because the nut on the fitting would bottom out on the face of the slave befor the seal could be made on the inside. So I used a crushwasher to make a seal between the nut on the fitting and the face of the slave…
See it here
Step 5
Tighten that **** up!
Step 6
Bleed the slave.
I did it just like you would the stock slave. Remove it from the tranny and compress and hold, bleed, release repeat. I did it about 10 times.
Step 7
bolt it up and put your car back together.

#3
08-12-2012, 05:52 PM

Something you may want to consider doing this, You can pull the airbox and detach the slave line there over having to pull the front end, its not a well known fact their is a joint there.
just thought i would help try to save some time.
Also, would the compression fitting to An line adapters not work
I may want to try this.....
While im thinking about it, did you have to fuss with the push rod length or modify the arm on the transmission at all to hold the push rod better?
Great work its been rumored for a while this would work but all credit goes to you for making this work....

#5
11-29-2016, 06:37 PM
Join Date: Feb 2010
Location: Seabrook, TX
Posts: 372
Likes: 0
Received 0 Likes
on
0 Posts
#6
12-01-2016, 05:59 PM

5th Gear
FYI pelican parts sells the FTE slave (good part. good quality) for $24 
(ECS also carries it, but it's about 33% more expensive at $32)
FTE slave at pelican parts
(ECS also carries it, but it's about 33% more expensive at $32)
FTE slave at pelican parts


Thread
Thread Starter
Forum
Replies
Last Post
09R56
R56 :: Hatch Talk (2007+)
17
11-16-2022 10:49 AM
igzekyativ
MINIs & Minis for Sale
34
07-16-2020 12:54 PM
bc219
R50/R53 :: Hatch Talk (2002-2006)
13
08-10-2015 11:22 AM