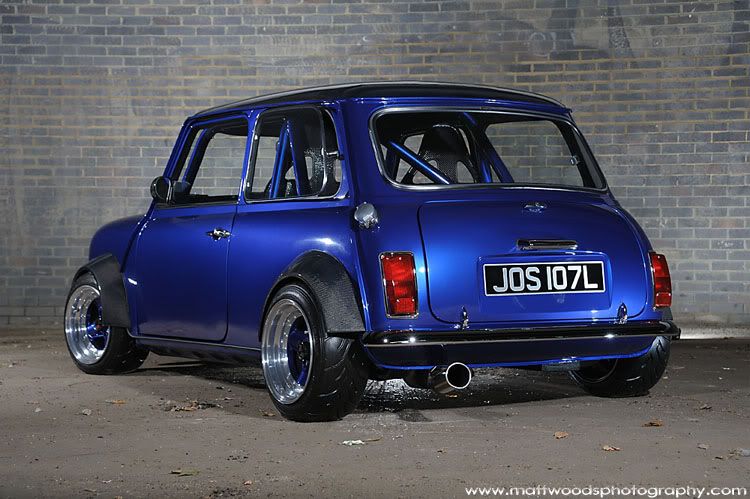
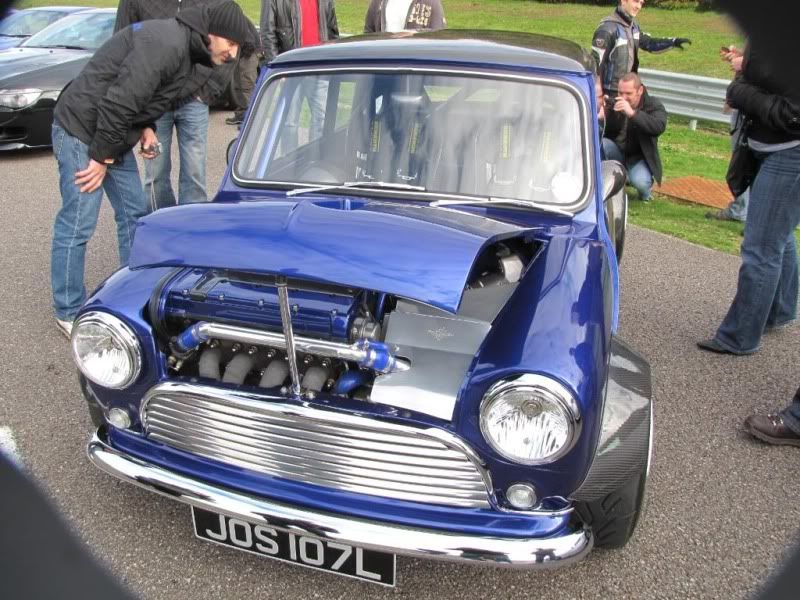
Carbon '72 C20XE Mini
#1
 03-26-2011, 12:07 PM


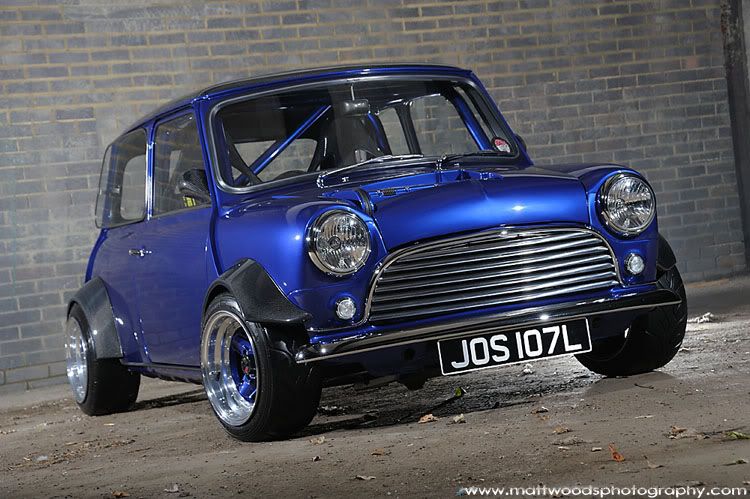
Carbon '72 C20XE Mini
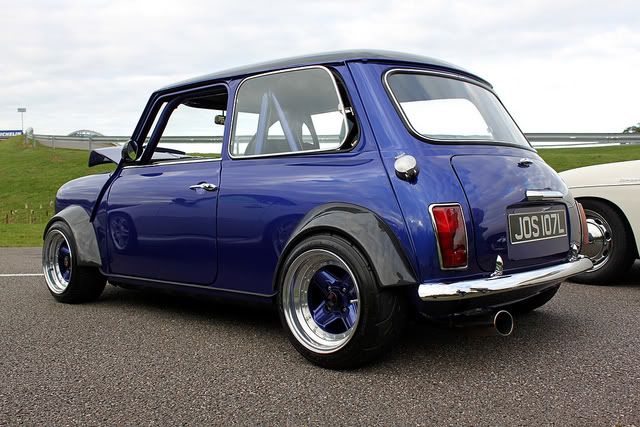
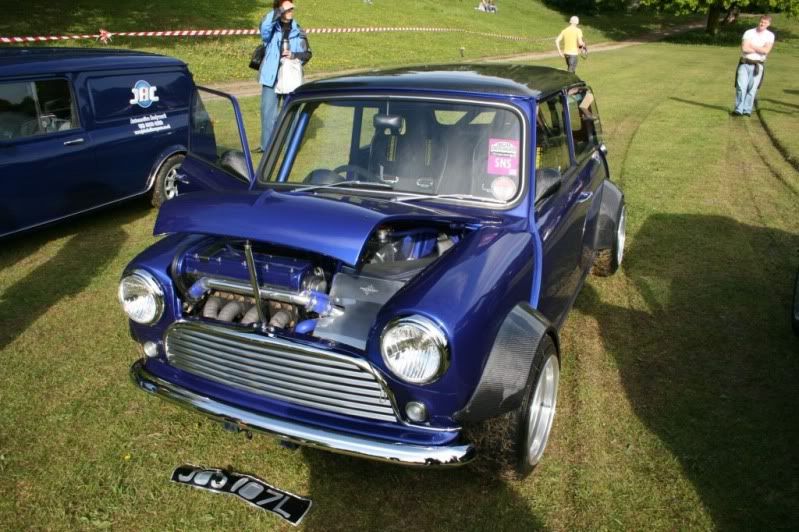
Hi Guys maybe a strange first post but just found your site and wondered if you wanted a look at my car and how we built it over the last few years in the Uk .
Maybe not to some of the US tastes but let me know what you think
Cheers Dougie


Maybe not to some of the US tastes but let me know what you think
Cheers Dougie
Last edited by DougieMc; 03-26-2011 at 12:36 PM.
#2
03-26-2011, 12:10 PM
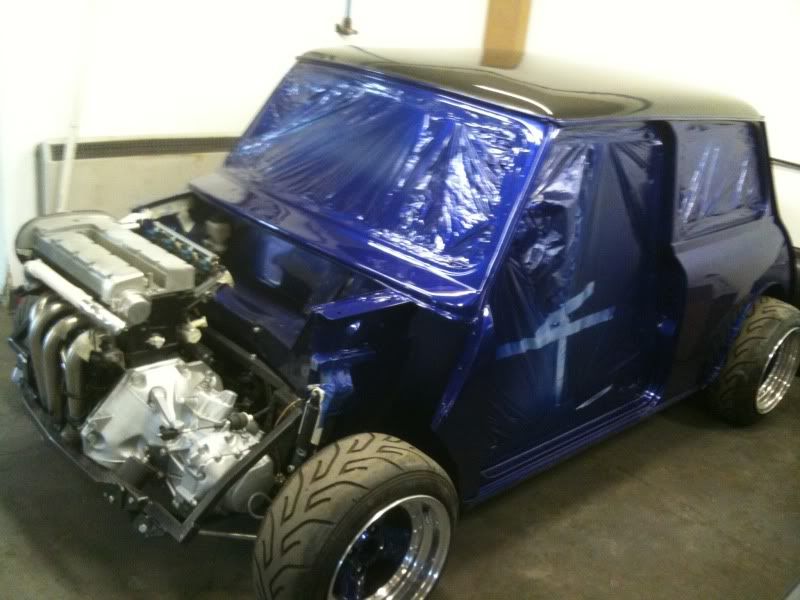
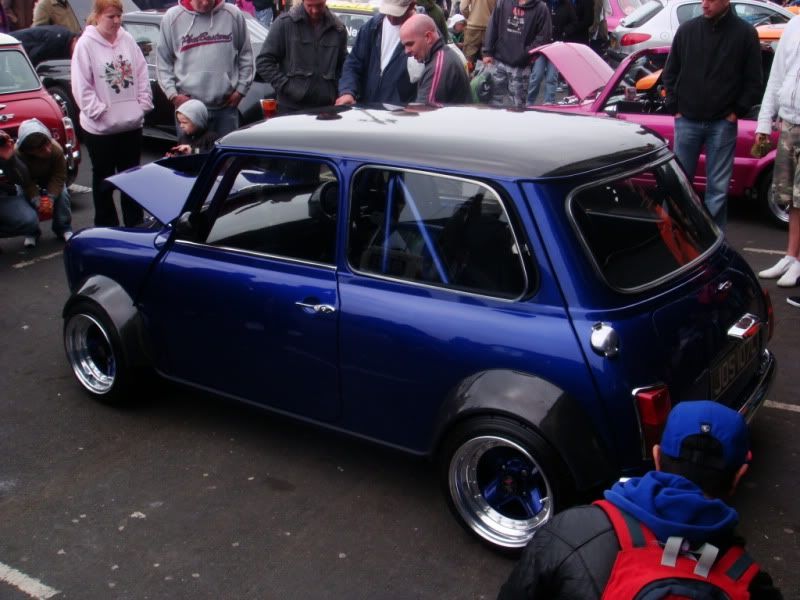
Since then we've had one successful year drawing crowds wherever we've taken the car, in one way or another it seems to appeal to everyone. We've attended all sorts of events from Mini Shows, Classic Car Shows and Pistonheads meets along side million pound Hypercars. When you pull up at an event and the crowd walk away from a Ferrari Enzo to see the 'old mini' that turns up, you know you've created something special.
Yes the car has one multiple trophies, had 2 Magazine covers, but its all credit to the team of people who spent 2 years building it. During the build we didn't really have time to post up, plus we wanted to keep it top secret so that we could hit last years show scene with a bang, which we did! Skunkworkz, Chris, Danny, myself and a load of other mates worked very hard as you will appreciate below.
We've included as much as possible without giving everything away.
Firstly, lets answer the main frustrating questions of 2010
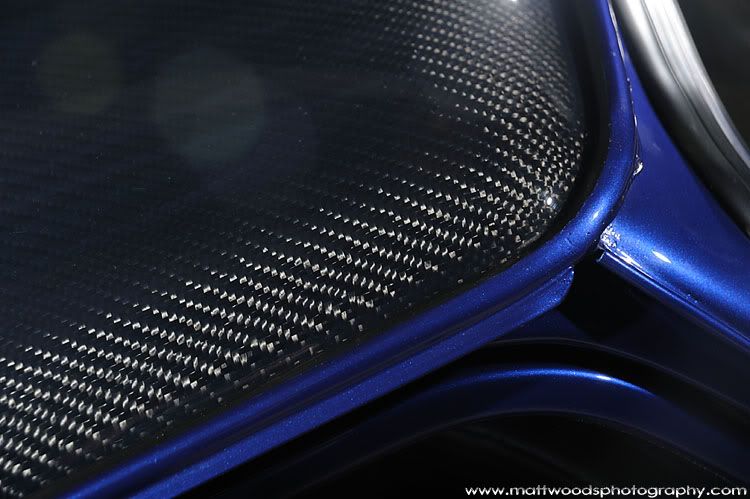
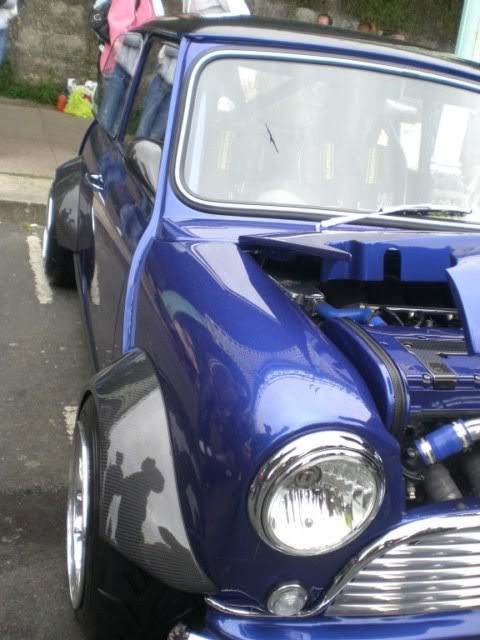
Is it all Carbon Wrap Vinyl?
afraid not, all real Carbon Fibre
How much is the front extended by?
its not, standard length roundnose
Is it Fibreglass?
nope, all metal panels apart from the Carbon Fibre. The front is a 1 piece removable aswell
Where's your Zeus Fasteners?
we hate them, all our fixings are hidden
Is it a VTEC?
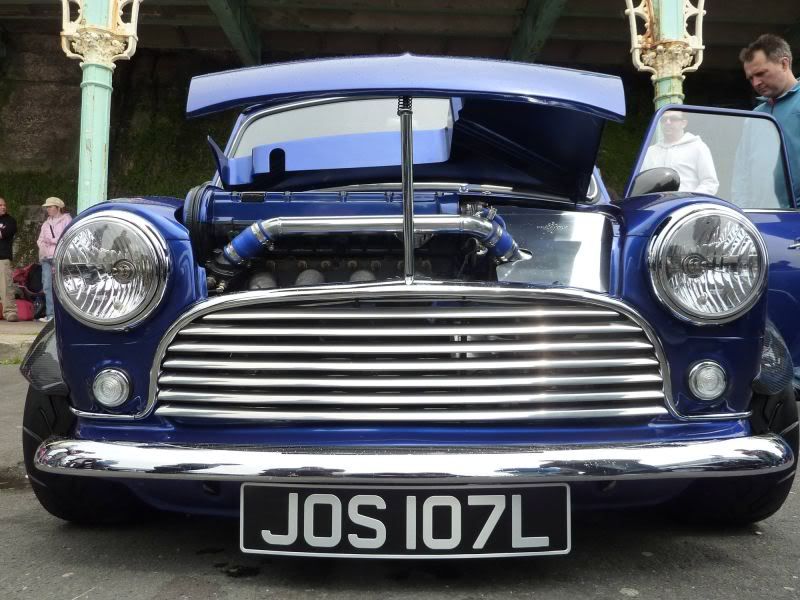
nope its an Vauxhall 2.0L 16v XE, this was partly because of our background and because i work for Vauxhall HQ
We hope this clears up any confusion :-)
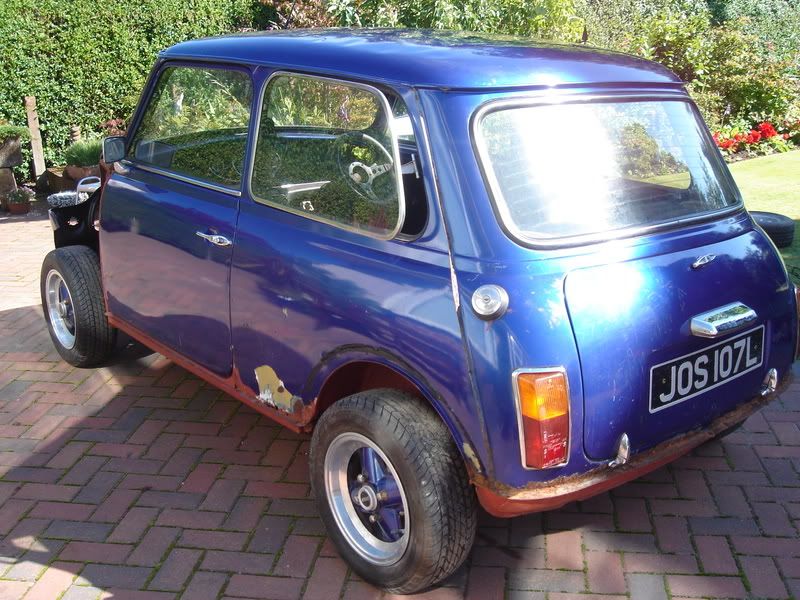
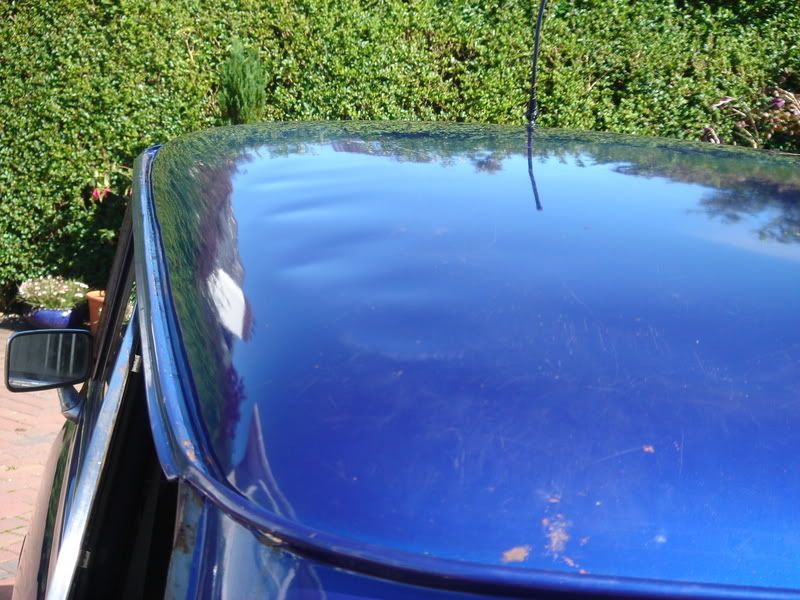
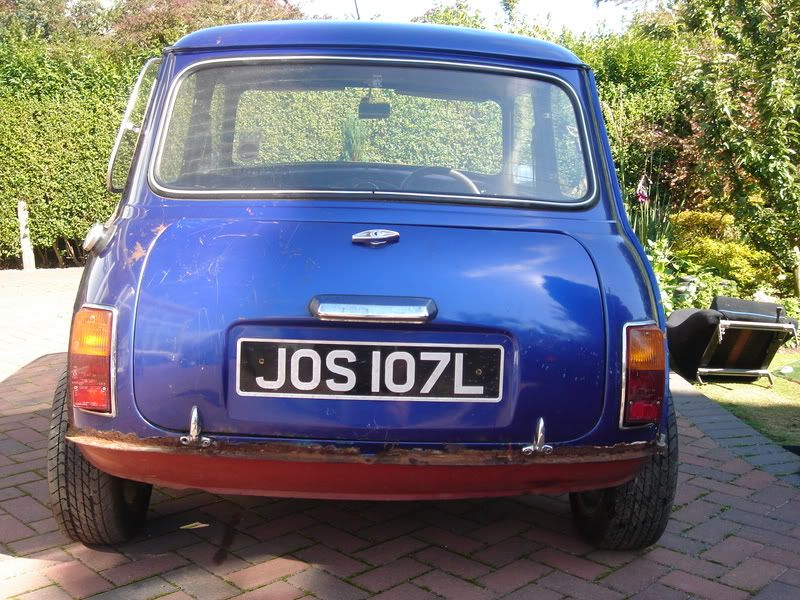
Breif history is it was my Grandfathers car from new in 1972, it stayed in the family until 1991 when I sold it after my little appearance in Miniworld May 1995.
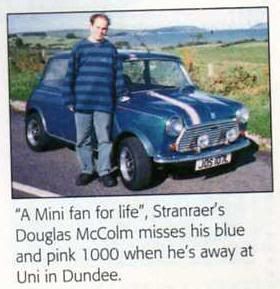
Then in 2008 I found it again with only 120miles extra on the clock since I sold it, but in a sorry state, I then bought it back, which is where the fun began.
Yes the car has one multiple trophies, had 2 Magazine covers, but its all credit to the team of people who spent 2 years building it. During the build we didn't really have time to post up, plus we wanted to keep it top secret so that we could hit last years show scene with a bang, which we did! Skunkworkz, Chris, Danny, myself and a load of other mates worked very hard as you will appreciate below.
We've included as much as possible without giving everything away.
Firstly, lets answer the main frustrating questions of 2010
Is it all Carbon Wrap Vinyl?
afraid not, all real Carbon Fibre
How much is the front extended by?
its not, standard length roundnose
Is it Fibreglass?
nope, all metal panels apart from the Carbon Fibre. The front is a 1 piece removable aswell
Where's your Zeus Fasteners?
we hate them, all our fixings are hidden
Is it a VTEC?
nope its an Vauxhall 2.0L 16v XE, this was partly because of our background and because i work for Vauxhall HQ
We hope this clears up any confusion :-)
Breif history is it was my Grandfathers car from new in 1972, it stayed in the family until 1991 when I sold it after my little appearance in Miniworld May 1995.
Then in 2008 I found it again with only 120miles extra on the clock since I sold it, but in a sorry state, I then bought it back, which is where the fun began.
Last edited by DougieMc; 03-26-2011 at 12:18 PM.
#3
03-26-2011, 12:18 PM
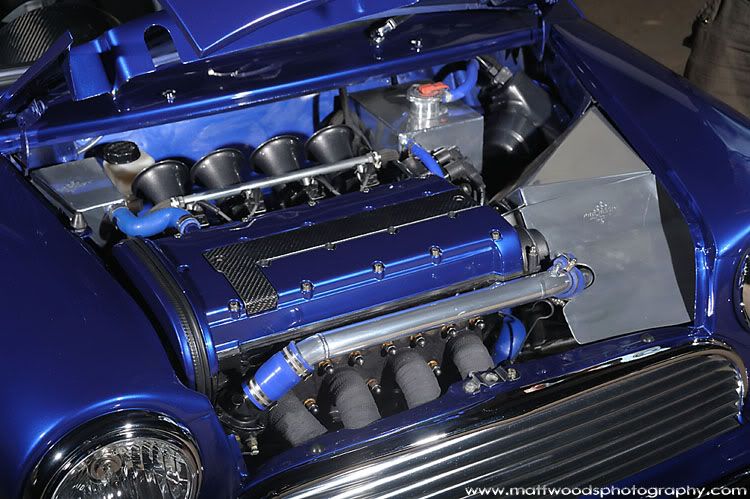
2.0 16V C20XE Allspeed Kit
QED Jenvey Throttle Bodies
Emerald Management
Z20LET Injectors
Piper 286 Road/Race Cams
Ported, Milled & Polished Head
Power Speed Custom 4-2-1 Manifold, 2.5” Bore, 3” Tailpipe
Quaife LSD
ProAlloy Custom Radiator, Header Tank, Pipe work & Oil Catch Tank
SFS Silicone Hoses
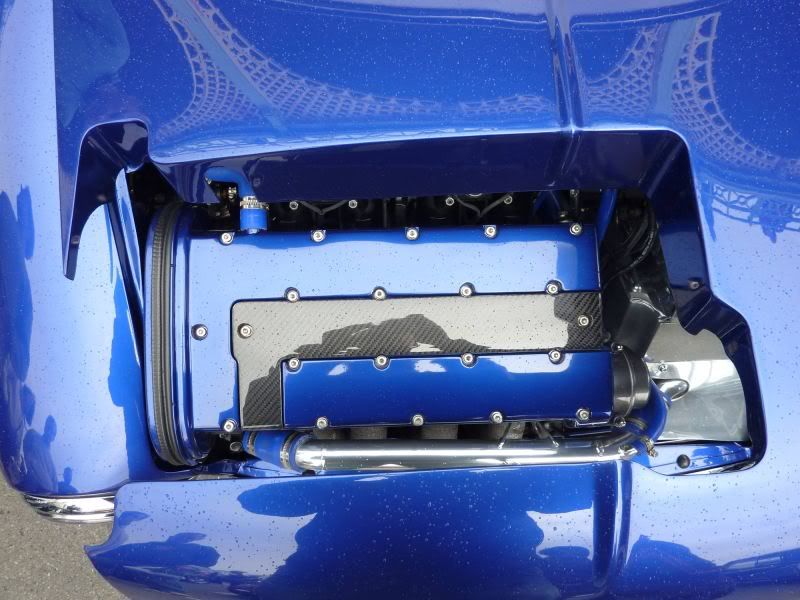
Rocker Cover Smoothed and Colour Coded with Oil Filler Cap & Removed & Breathers Rerouted
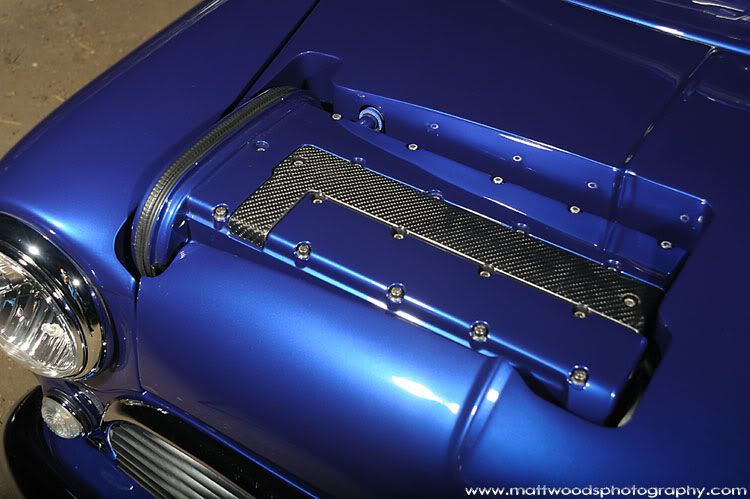
Custom Carbon Fibre Plug Cover
Custom Thermostat and Sensors
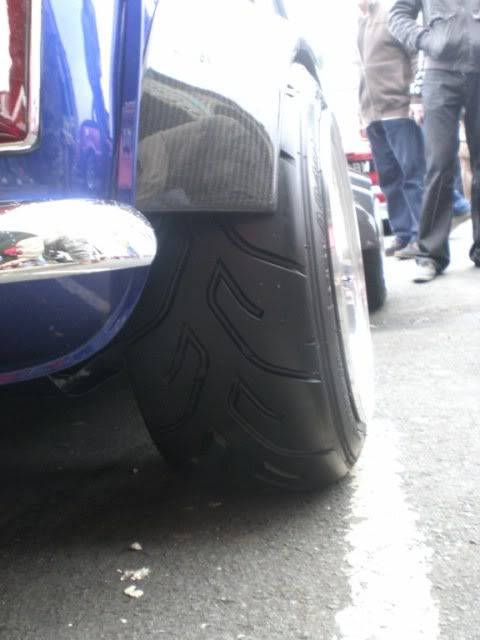
8x13 Revolution Split Rims
175-50-13 Yokohama A048
Front - Hi-Lo’s & Spax Adjustable Shocks
Rear - Hi-Lo’s & Spax Adjustable Shocks with Rear Camber Kit
Wilwood Dual Master Cylinder / Pedal assembly
Metro Turbo 4 Pot Callipers
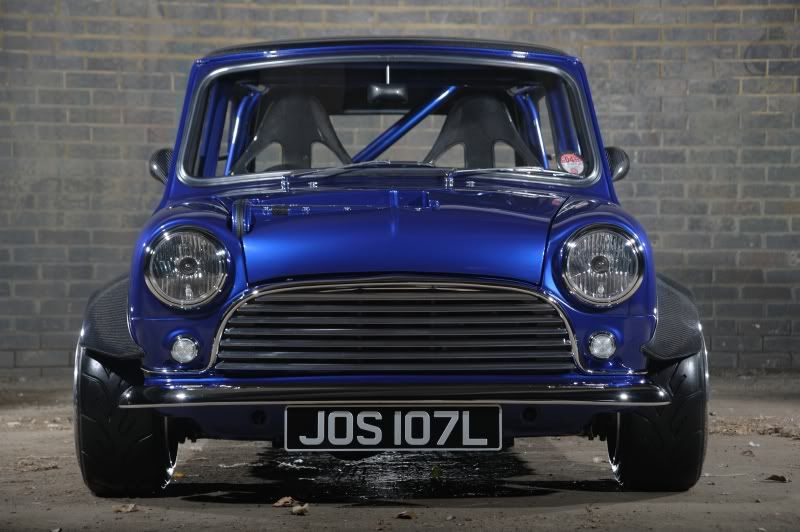
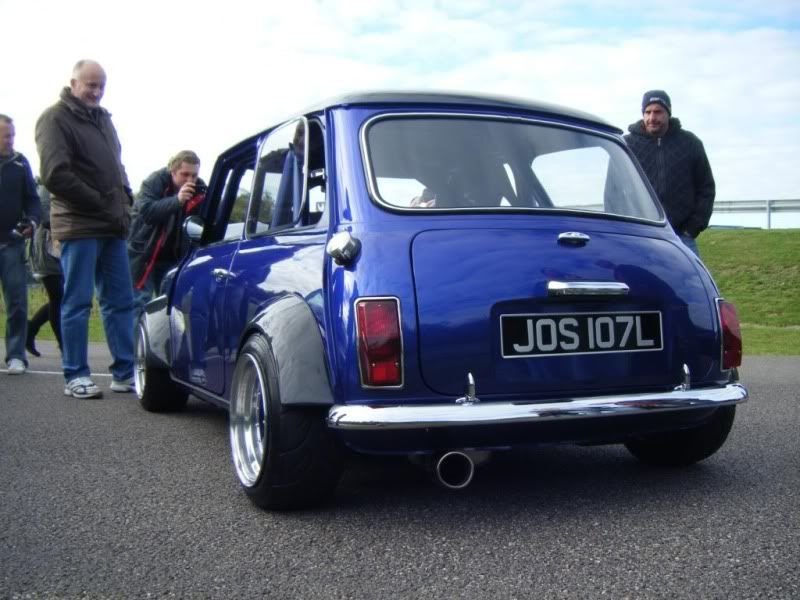
Repainted in Ford Imperial Blue
Standard Length Full Metal, Fully Removable Roundnose with Hidden Fixings
Custom Metal Bonnet with Removable Hinges
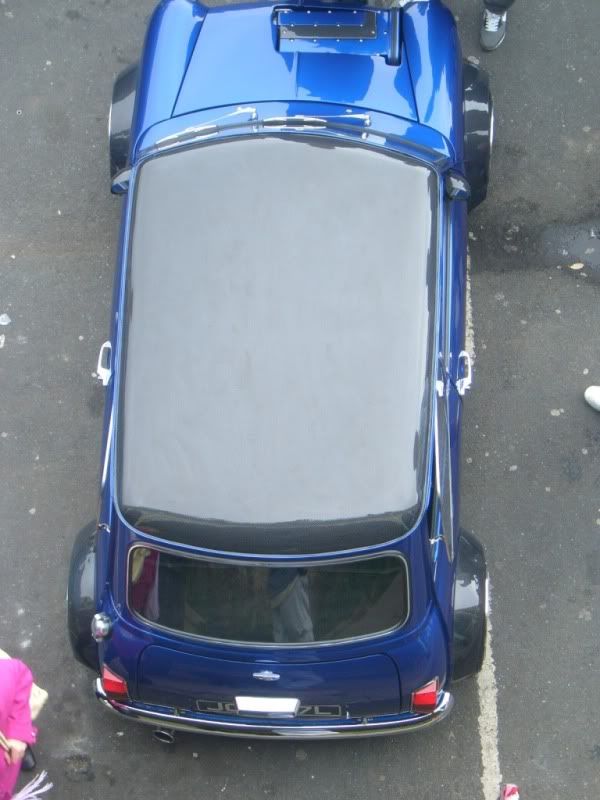
Carbon Fibre Roof Skin
Custom Carbon Fibre Mirrors & Internal Covers
Carbon Fibre Miglia Arches
Mk2 Pop Out Rear Windows
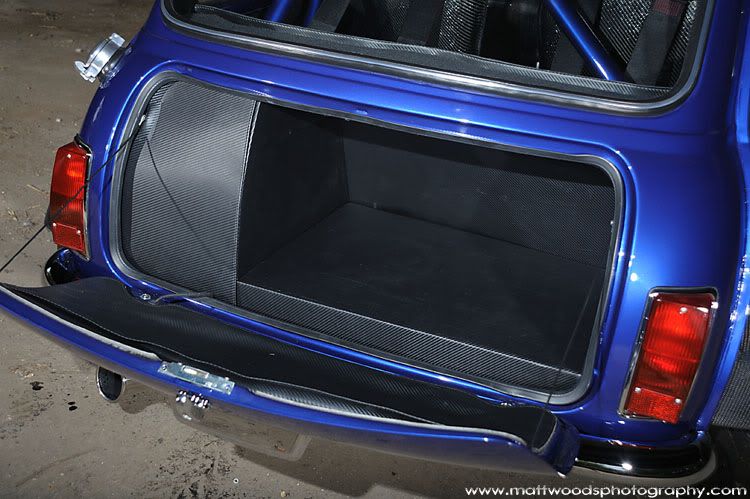
LED Number Plate Lights
Custom Red Rear Lights with LED Bulbs
Crystal Clear Headlights
Clear Flat Glass Front Indicators with LED Bulbs
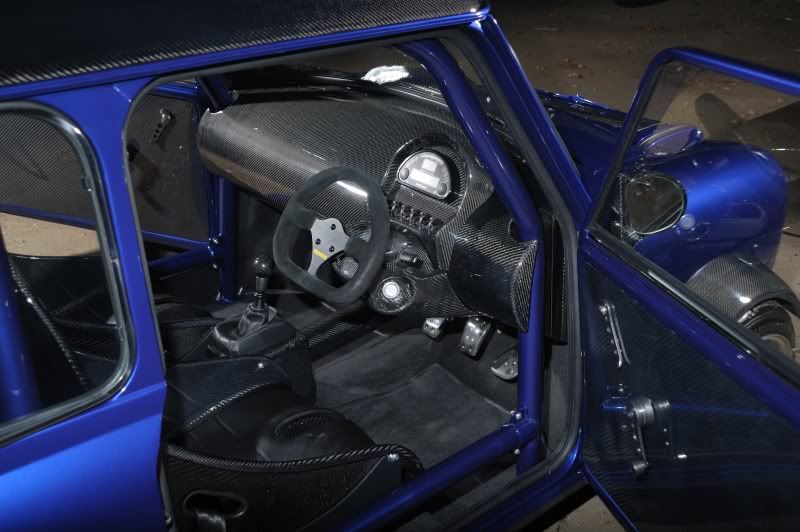
Carbon Fibre Shell Seats
Schroth 4 Point Harnesses
Custom 2” Diameter 6 Point Rollcage
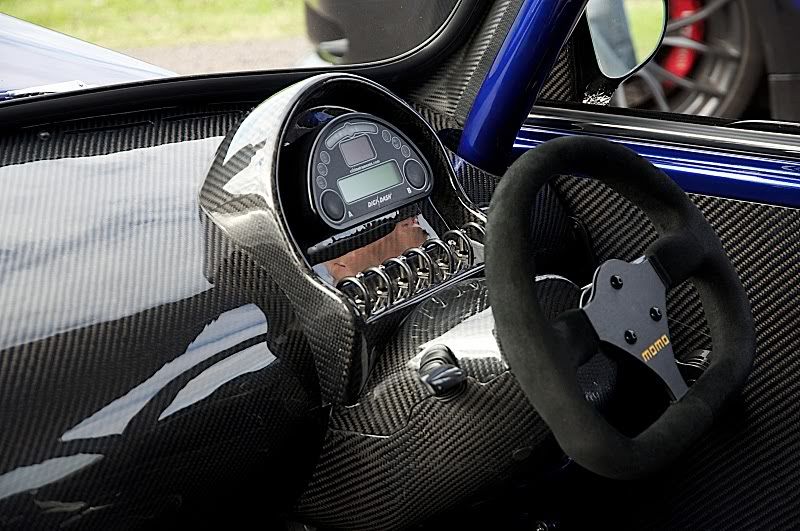
Custom Carbon Fibre Dashboard with Rollcage Fitment
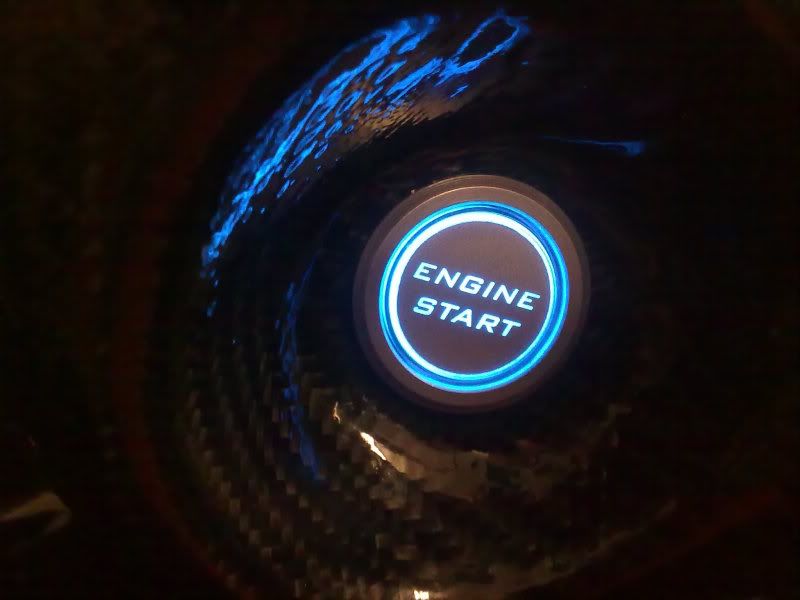
Custom Carbon Fibre Steering Column Shroud with Illuminated Starter Button
Custom Carbon Fibre Instrument Surround
Custom Carbon Fibre Gear lever Surround & Linkage Tube
New Mini Style Illuminated Switches with Loops
ETB Digital Dash
Corsa B Electric Power Steering
Momo Quick Release Steering Wheel
Carbon Fibre Gearknob
Handbrake Moved 8” Back
Custom Carbon Fibre Pedals
Custom 2 Speed Heater with Sealed
Custom Carbon Fibre Heater Cover
Custom Carbon Fibre Door Cards
Custom Billet Door Handles & Window Winders
Custom Made Wiring Loom
White LED Interior Puddle Lighting
Retro Re-trims Carbon Fibre Leather Headlining & A,B & C Pillar Covers
Retro Re-trims Carbon Fibre Leather Handbrake & Gearlever Gators
Retro Re-trims Carbon Fibre Leather Boot kit
Custom Carpet & Mats
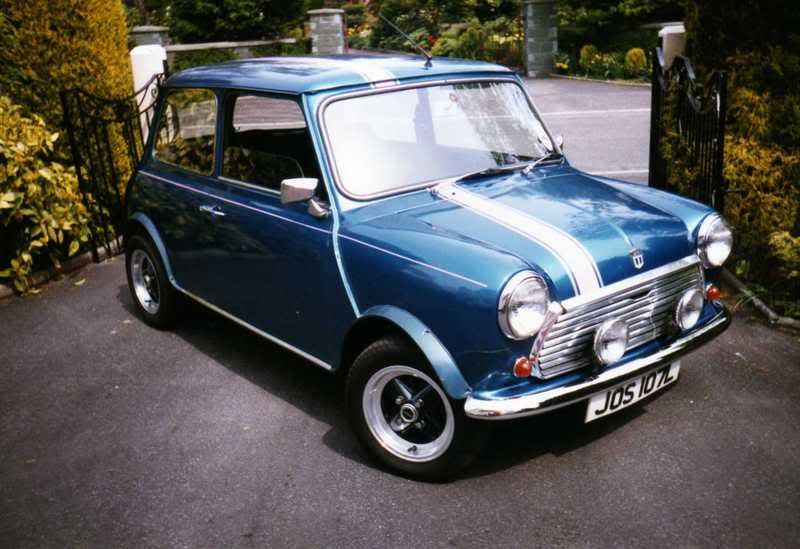
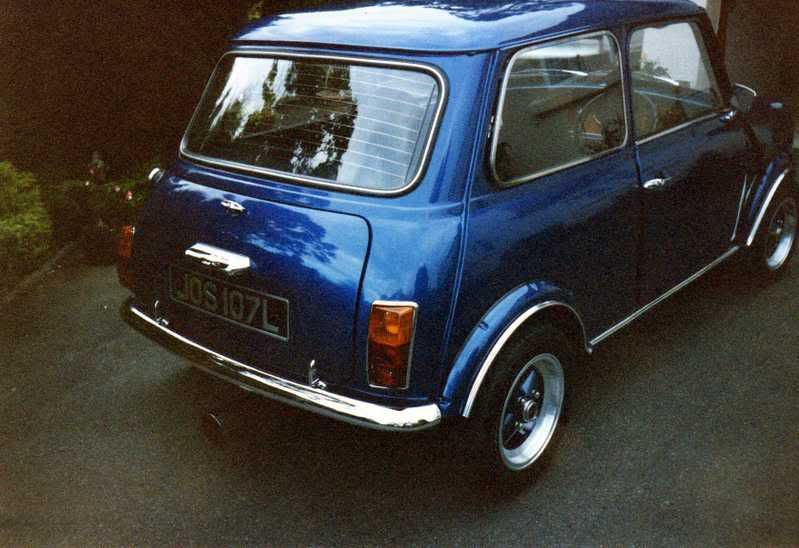
Original Pics - 1991 (First Owned)
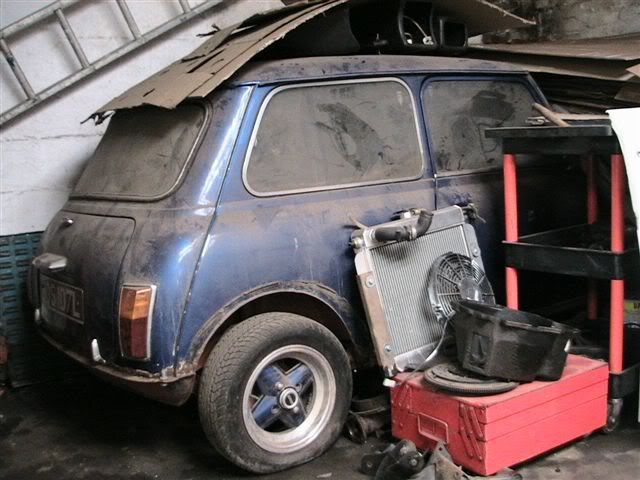
In the Barn - 2008 (Found after 13 years)
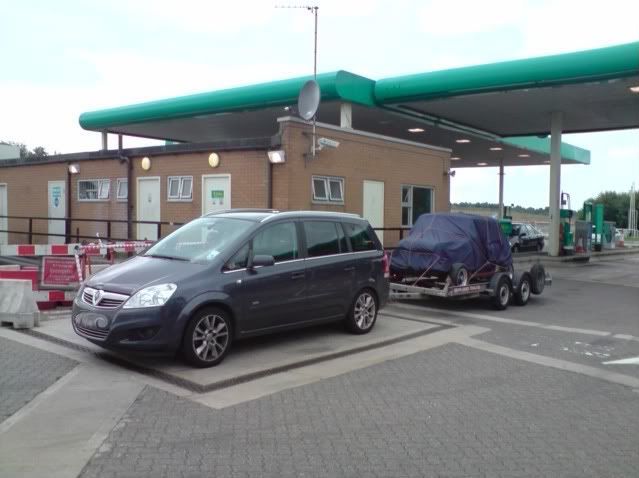
Moved to my parents house in Stranraer where we picked it up
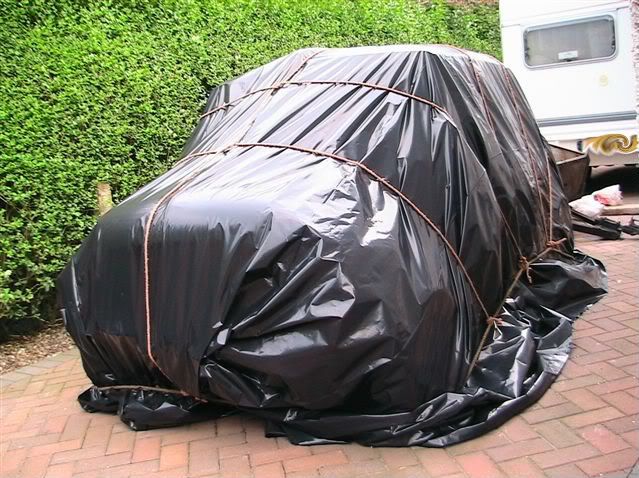
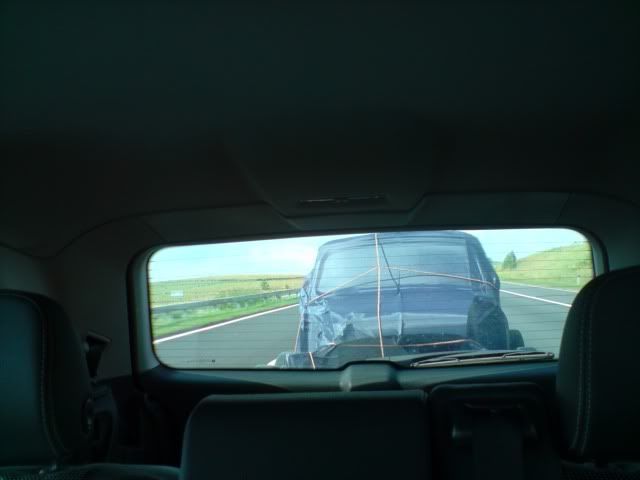
The journey from Stranraer to Bedfordshire
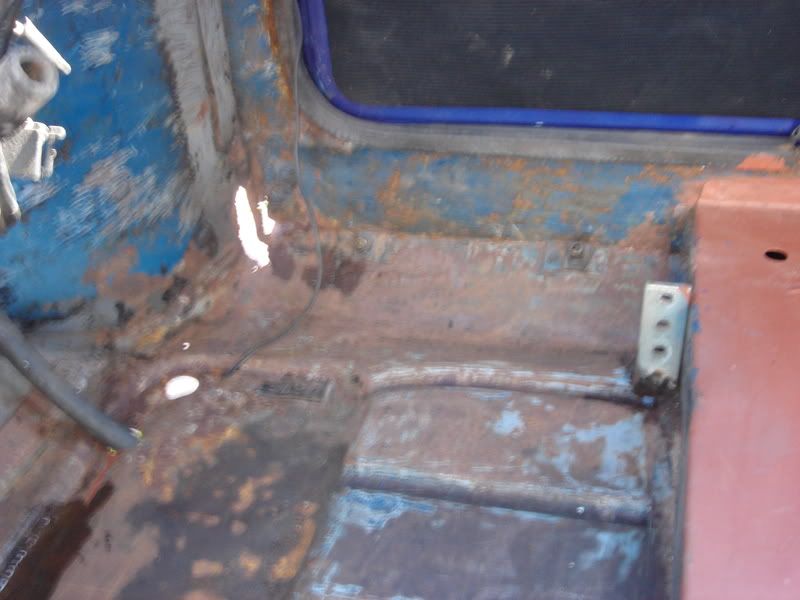
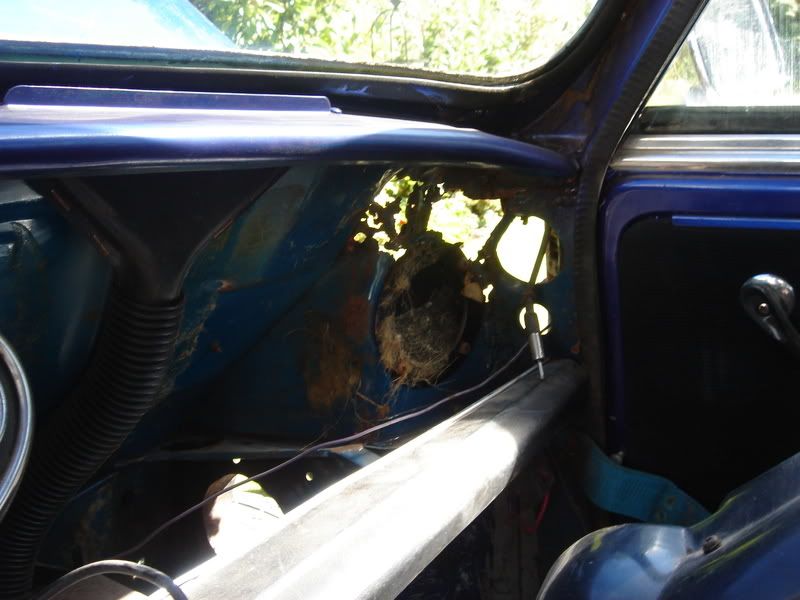
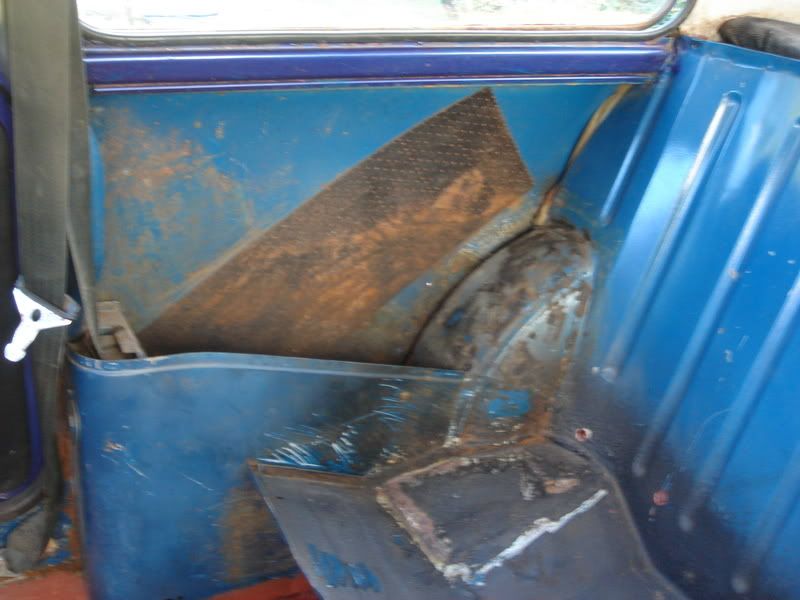
What we found
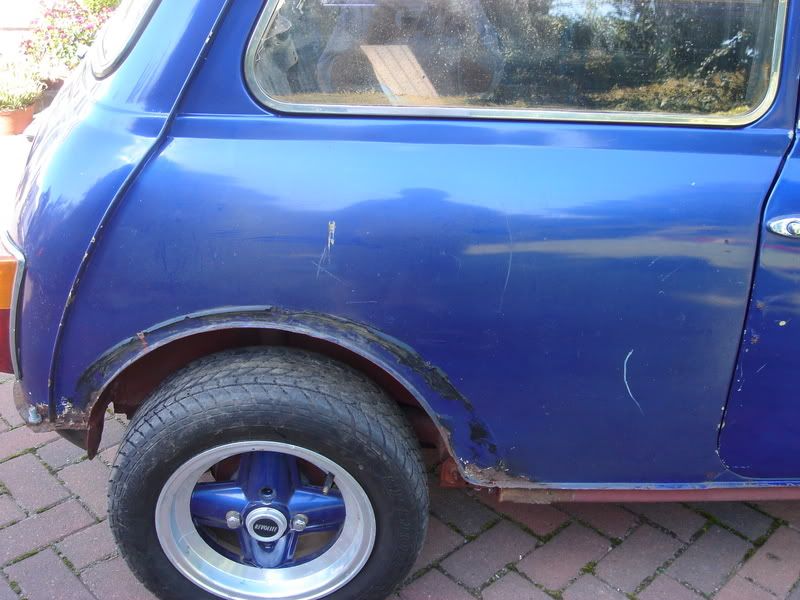
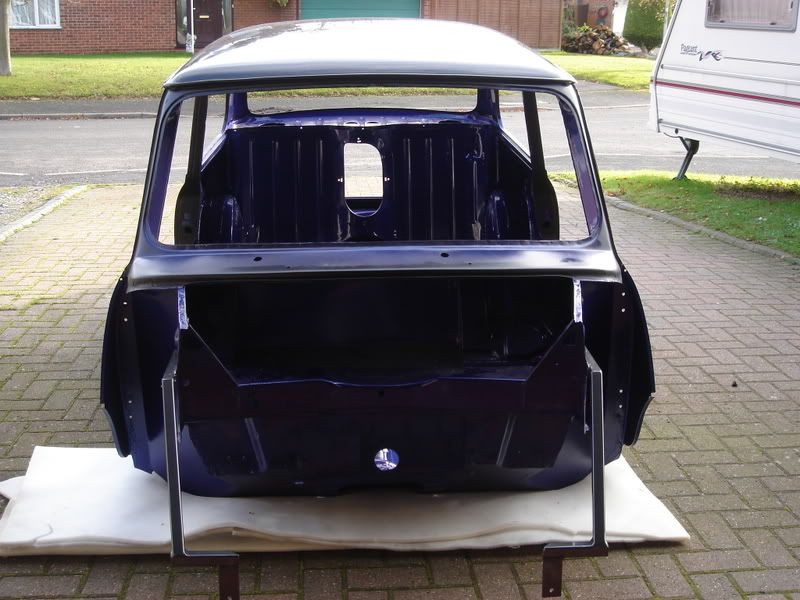
Strip down the whole car main shell and floor was still good as my grandfather used to coat the underneath with waste tractor oil (The best Waxoyl money can buy)
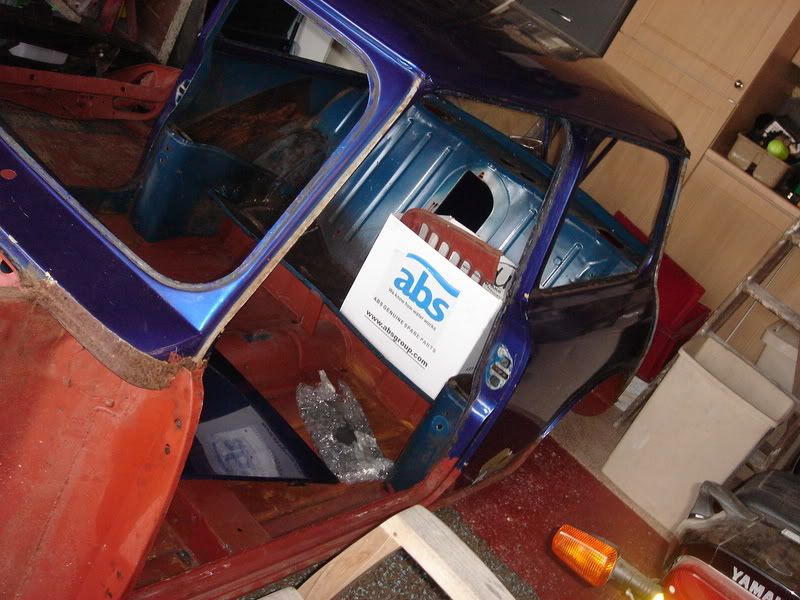
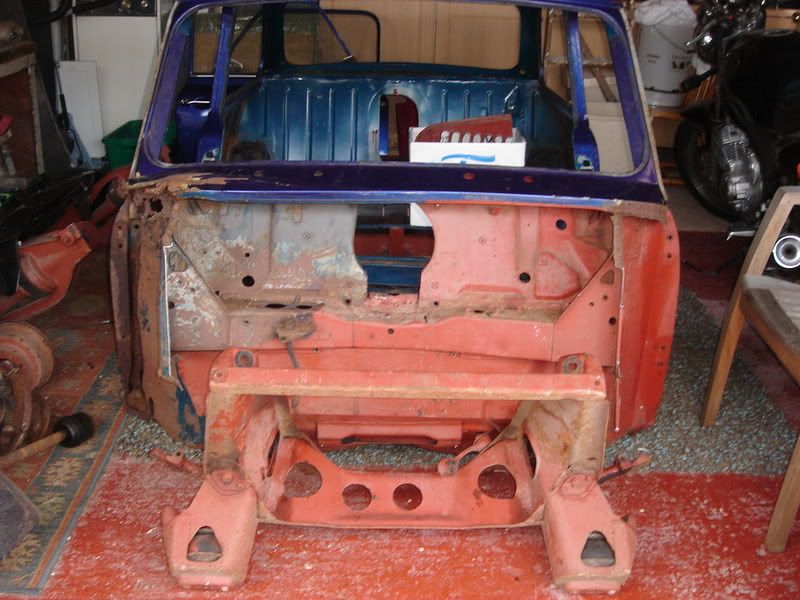
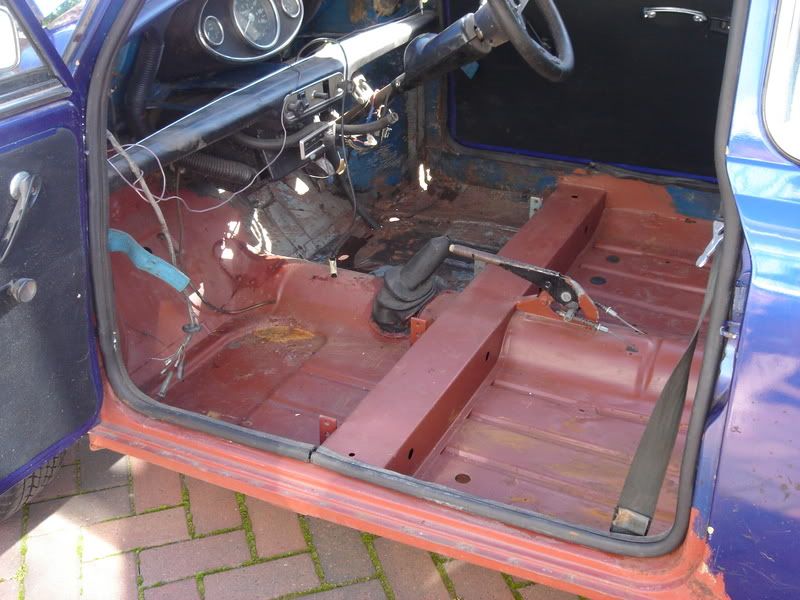
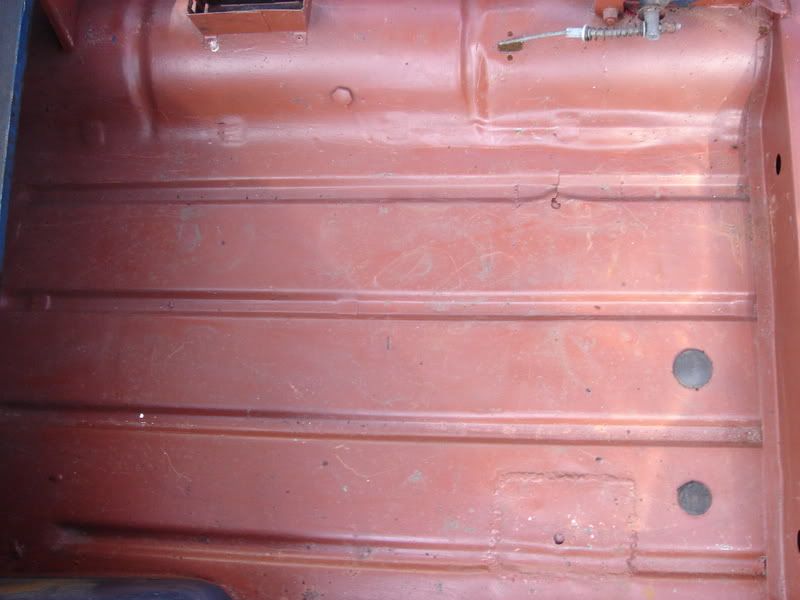
After stripping we took it to Alex at A.B.S. Blasting who blasted the shell with Plastic granules to remove the paint then olivine to remove any rust
They opened up the sills to get any rust out
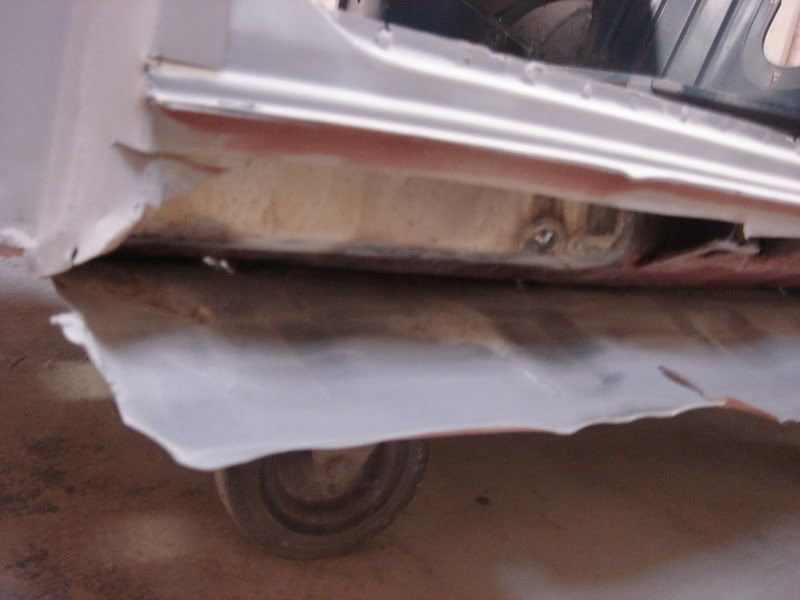
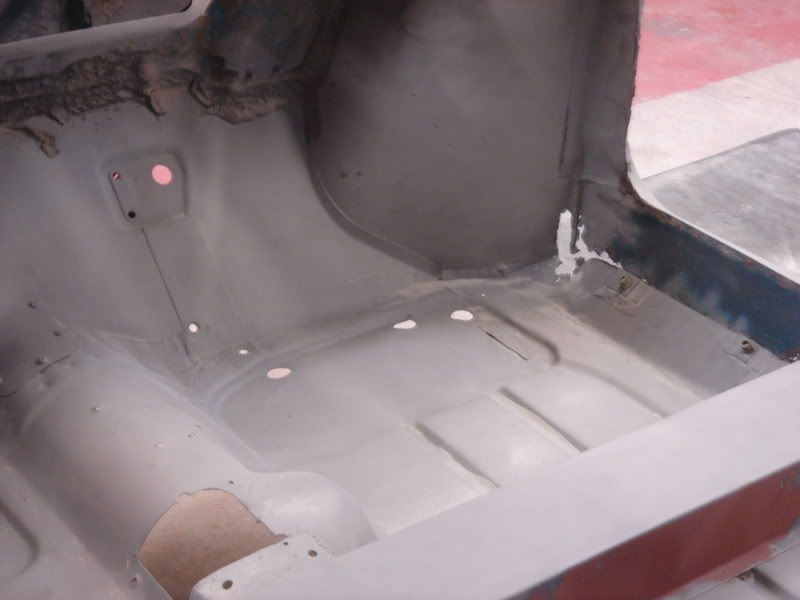
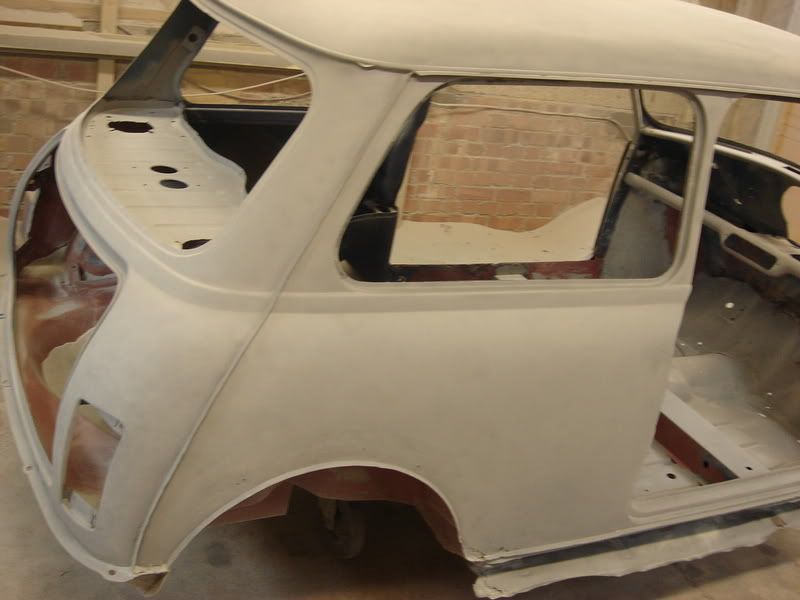
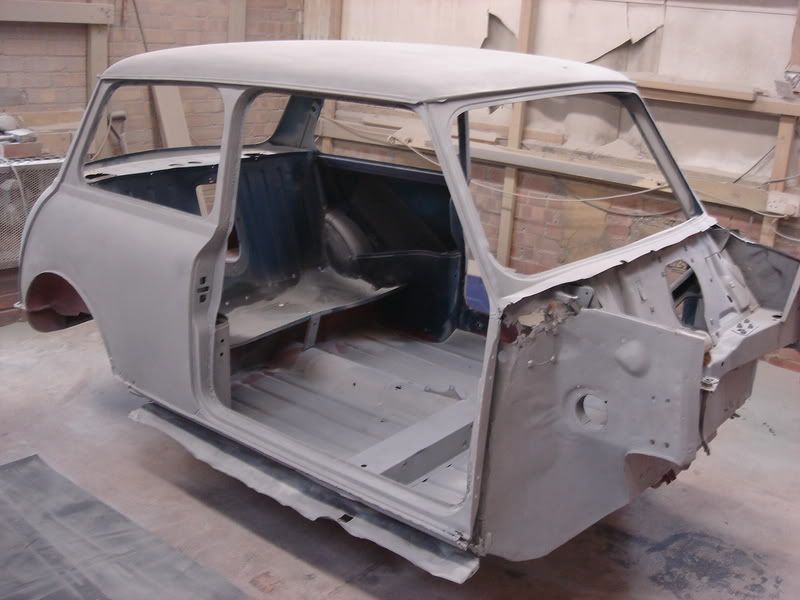
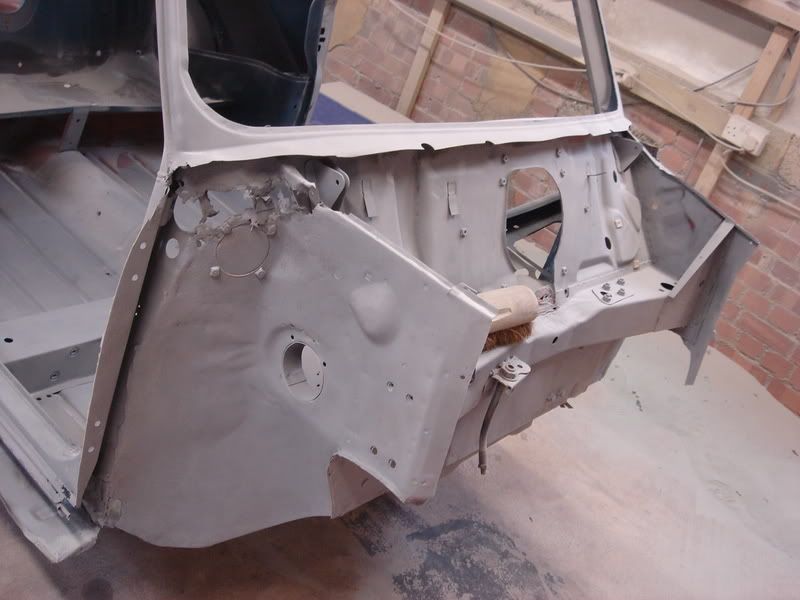
Once it was blasted, we took it to the bodyshop where they started chopping
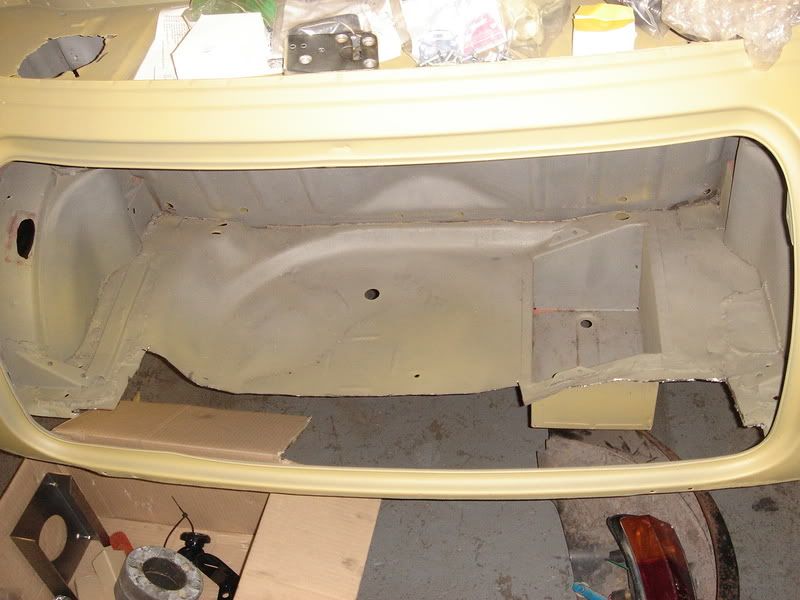
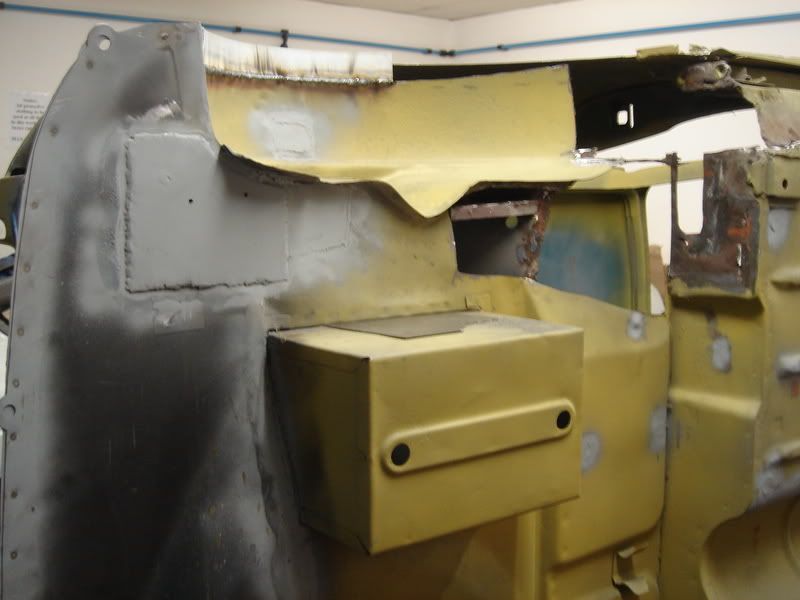
The part were listed, bought and then Lee at Crash Care Centre Hitchin started to make them fit
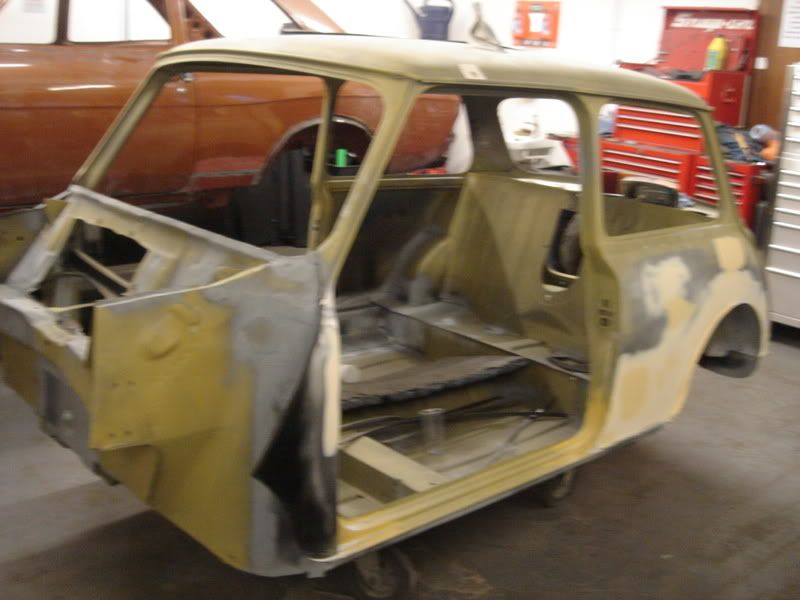
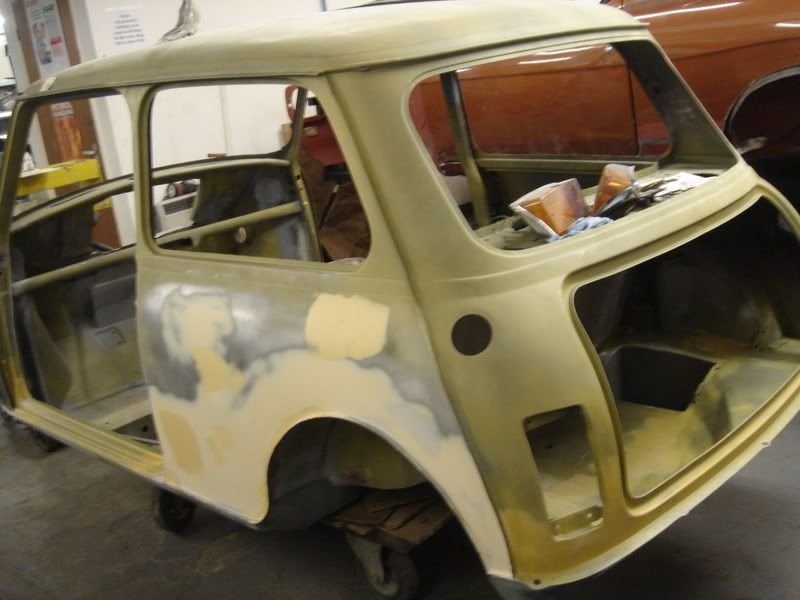
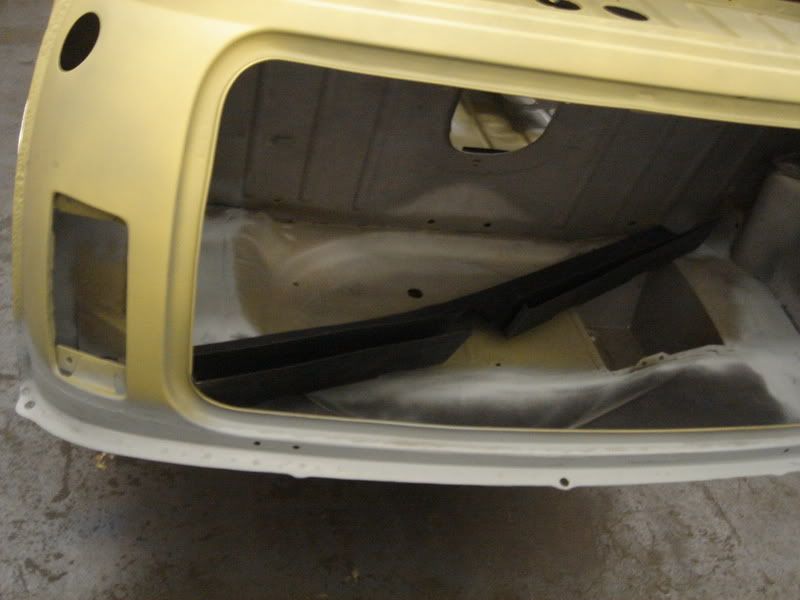
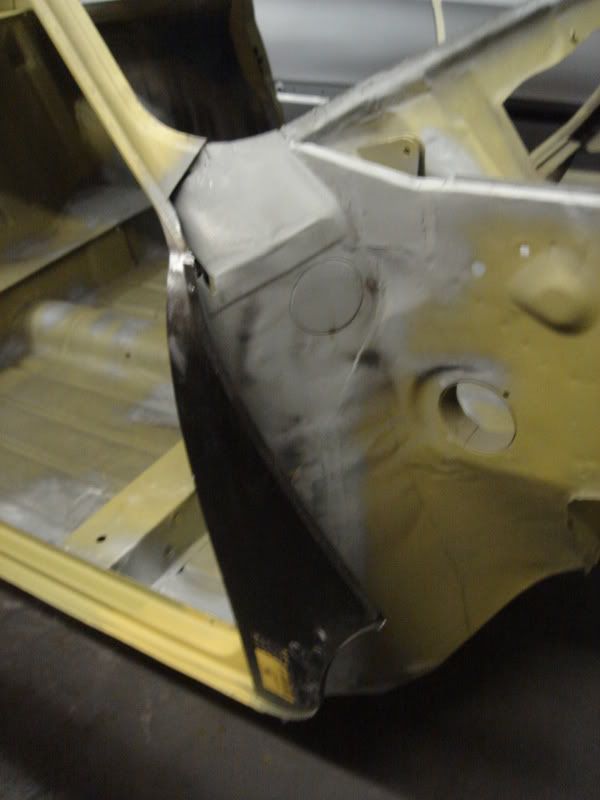
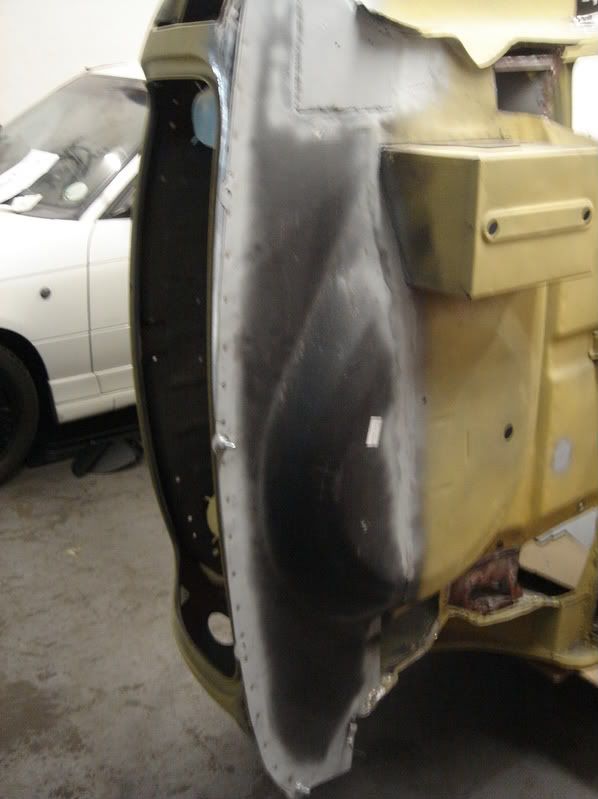
The bodyshop finished the welding including the fabricated Throttle body box, Allspeed brace bars, gear linkage hole removing the rear bins and tubbing the rear arched then finally the car was Etch Primed
QED Jenvey Throttle Bodies
Emerald Management
Z20LET Injectors
Piper 286 Road/Race Cams
Ported, Milled & Polished Head
Power Speed Custom 4-2-1 Manifold, 2.5” Bore, 3” Tailpipe
Quaife LSD
ProAlloy Custom Radiator, Header Tank, Pipe work & Oil Catch Tank
SFS Silicone Hoses
Rocker Cover Smoothed and Colour Coded with Oil Filler Cap & Removed & Breathers Rerouted
Custom Carbon Fibre Plug Cover
Custom Thermostat and Sensors
8x13 Revolution Split Rims
175-50-13 Yokohama A048
Front - Hi-Lo’s & Spax Adjustable Shocks
Rear - Hi-Lo’s & Spax Adjustable Shocks with Rear Camber Kit
Wilwood Dual Master Cylinder / Pedal assembly
Metro Turbo 4 Pot Callipers
Repainted in Ford Imperial Blue
Standard Length Full Metal, Fully Removable Roundnose with Hidden Fixings
Custom Metal Bonnet with Removable Hinges
Carbon Fibre Roof Skin
Custom Carbon Fibre Mirrors & Internal Covers
Carbon Fibre Miglia Arches
Mk2 Pop Out Rear Windows
LED Number Plate Lights
Custom Red Rear Lights with LED Bulbs
Crystal Clear Headlights
Clear Flat Glass Front Indicators with LED Bulbs
Carbon Fibre Shell Seats
Schroth 4 Point Harnesses
Custom 2” Diameter 6 Point Rollcage
Custom Carbon Fibre Dashboard with Rollcage Fitment
Custom Carbon Fibre Steering Column Shroud with Illuminated Starter Button
Custom Carbon Fibre Instrument Surround
Custom Carbon Fibre Gear lever Surround & Linkage Tube
New Mini Style Illuminated Switches with Loops
ETB Digital Dash
Corsa B Electric Power Steering
Momo Quick Release Steering Wheel
Carbon Fibre Gearknob
Handbrake Moved 8” Back
Custom Carbon Fibre Pedals
Custom 2 Speed Heater with Sealed
Custom Carbon Fibre Heater Cover
Custom Carbon Fibre Door Cards
Custom Billet Door Handles & Window Winders
Custom Made Wiring Loom
White LED Interior Puddle Lighting
Retro Re-trims Carbon Fibre Leather Headlining & A,B & C Pillar Covers
Retro Re-trims Carbon Fibre Leather Handbrake & Gearlever Gators
Retro Re-trims Carbon Fibre Leather Boot kit
Custom Carpet & Mats
Original Pics - 1991 (First Owned)
In the Barn - 2008 (Found after 13 years)
Moved to my parents house in Stranraer where we picked it up
The journey from Stranraer to Bedfordshire
What we found
Strip down the whole car main shell and floor was still good as my grandfather used to coat the underneath with waste tractor oil (The best Waxoyl money can buy)
After stripping we took it to Alex at A.B.S. Blasting who blasted the shell with Plastic granules to remove the paint then olivine to remove any rust
They opened up the sills to get any rust out
Once it was blasted, we took it to the bodyshop where they started chopping
The part were listed, bought and then Lee at Crash Care Centre Hitchin started to make them fit
The bodyshop finished the welding including the fabricated Throttle body box, Allspeed brace bars, gear linkage hole removing the rear bins and tubbing the rear arched then finally the car was Etch Primed
#4
03-26-2011, 12:19 PM
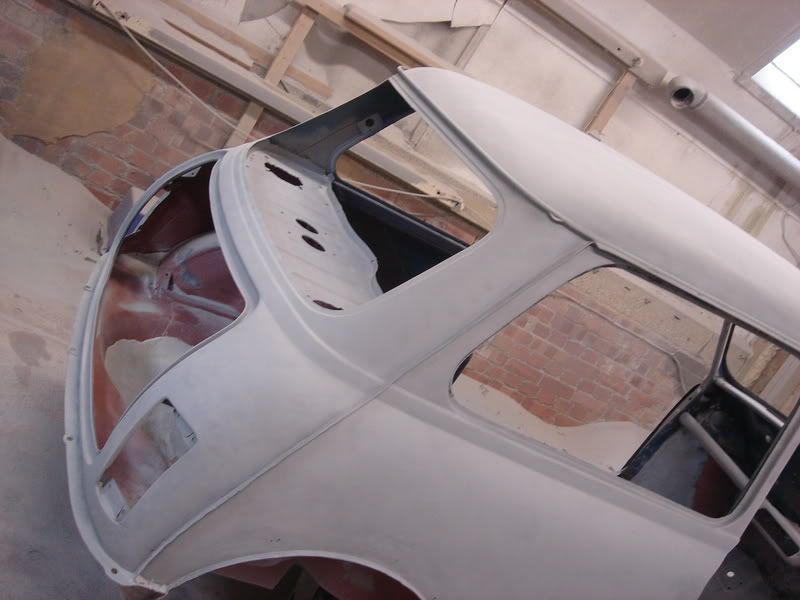
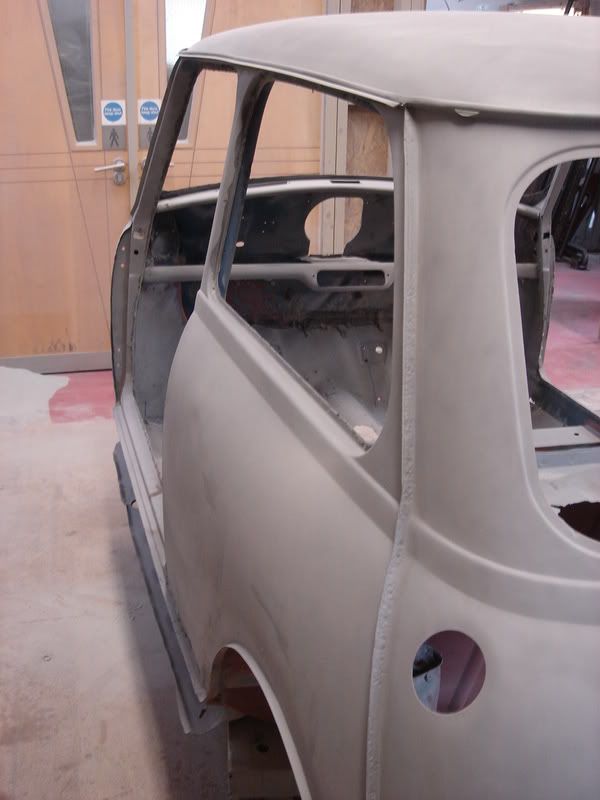
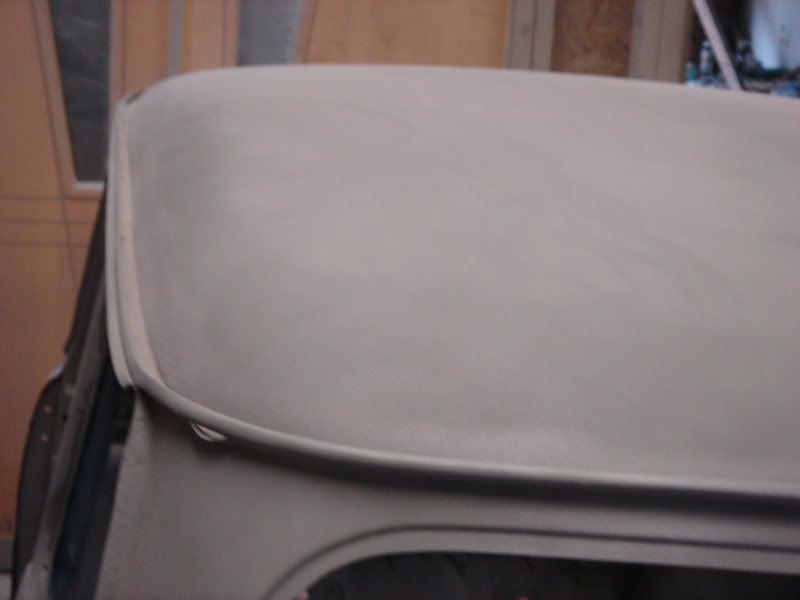
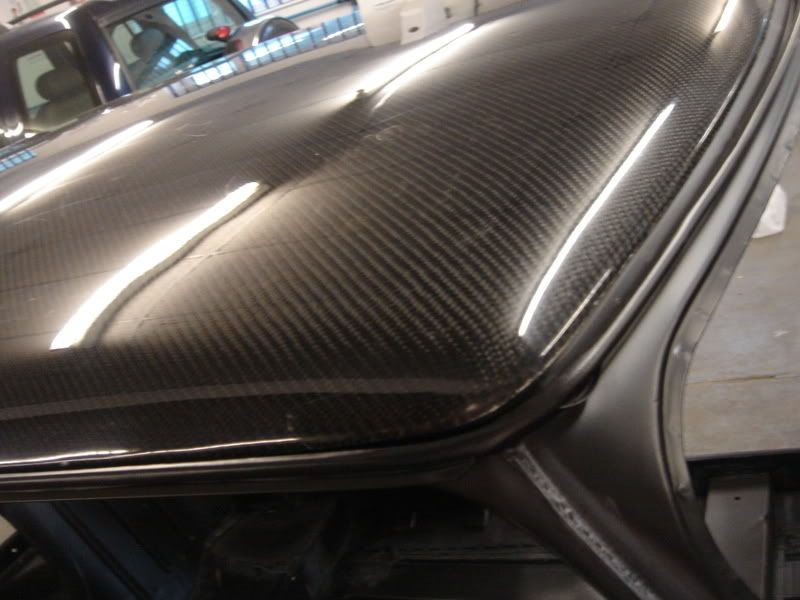
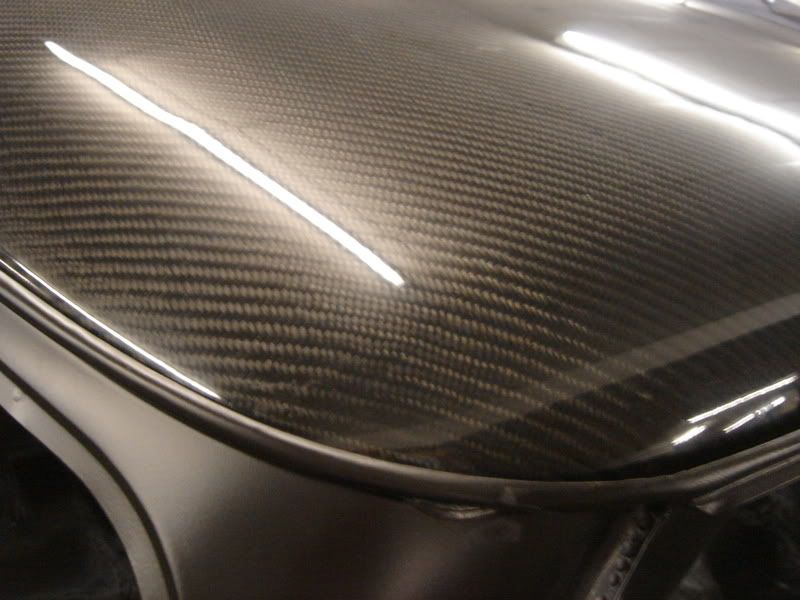
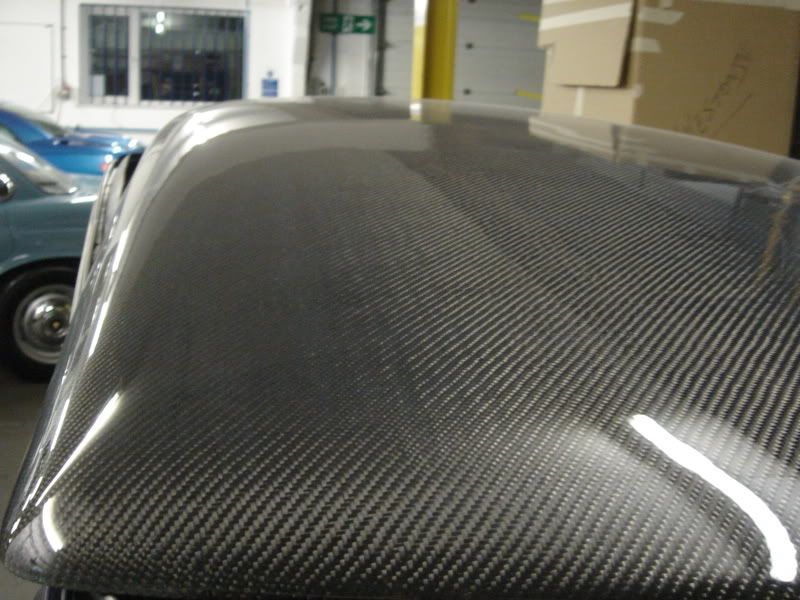
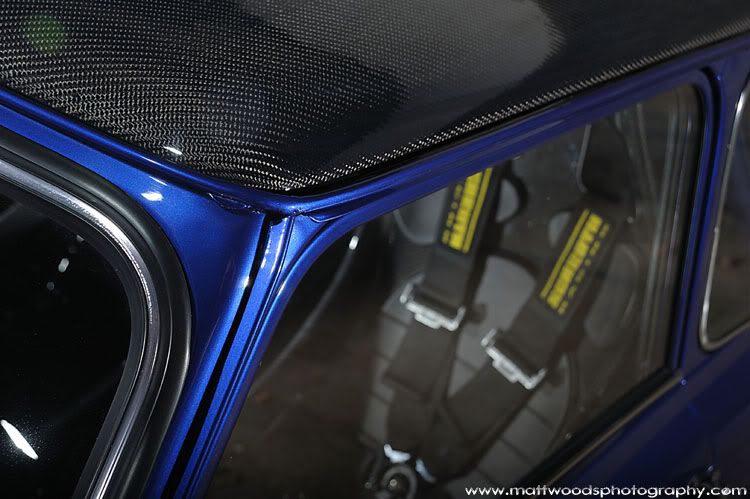
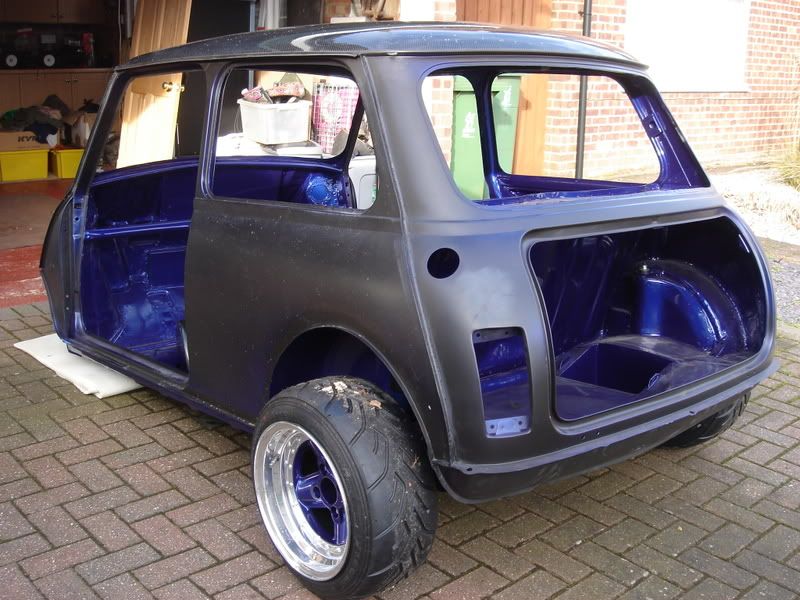
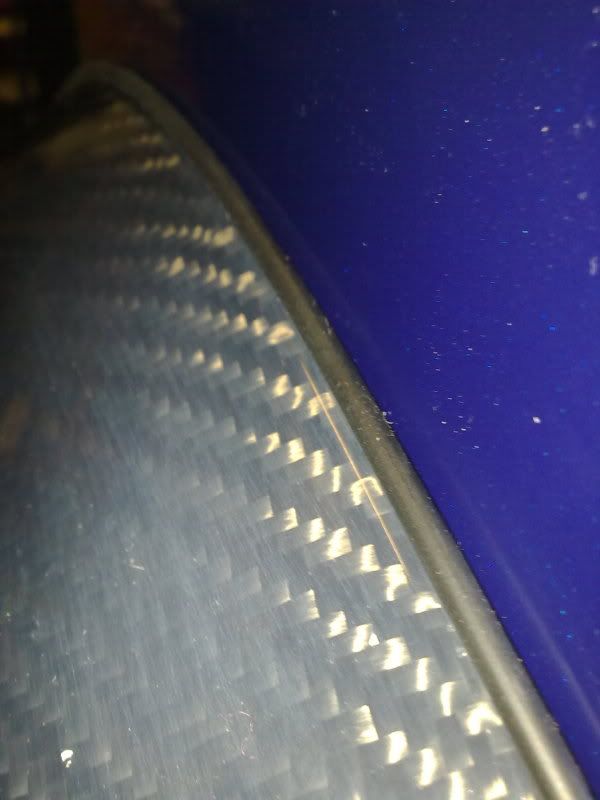
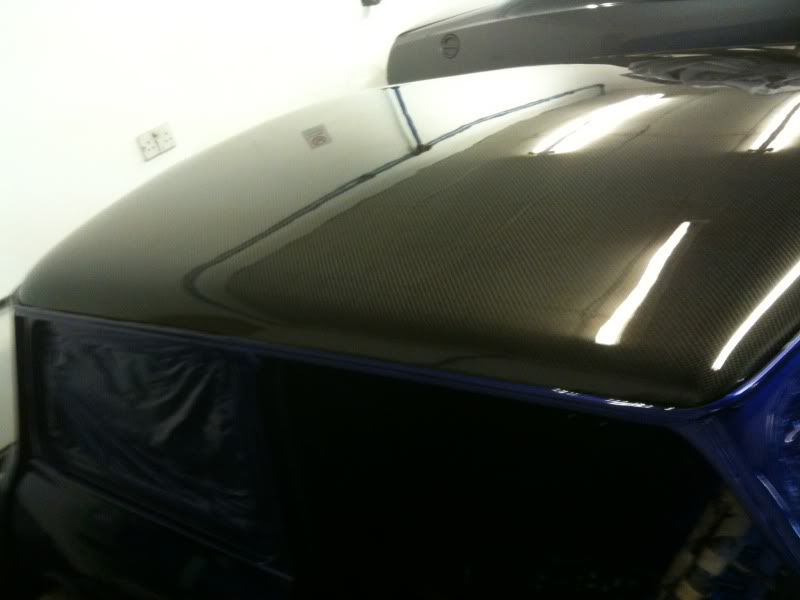
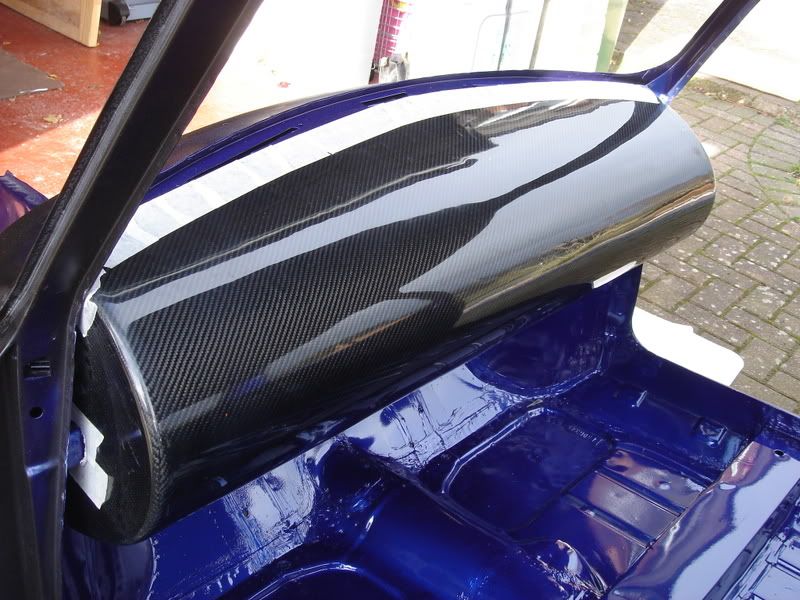
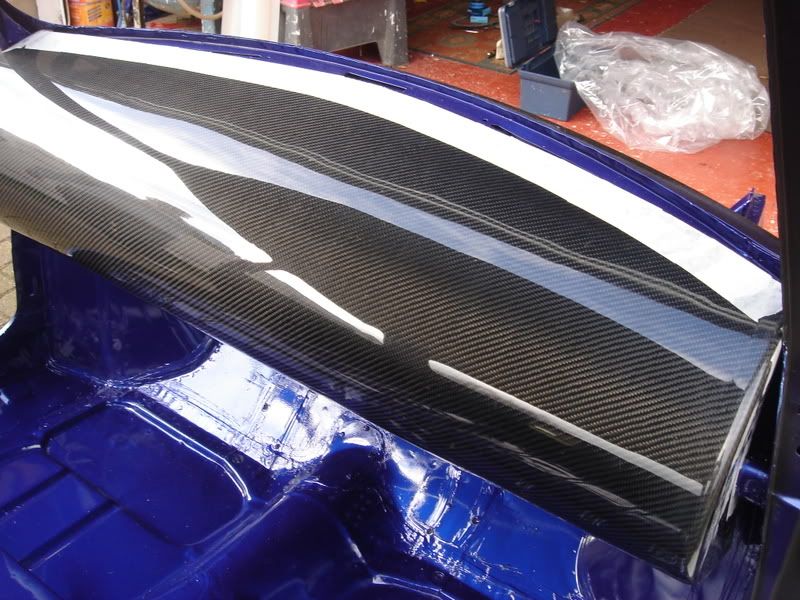
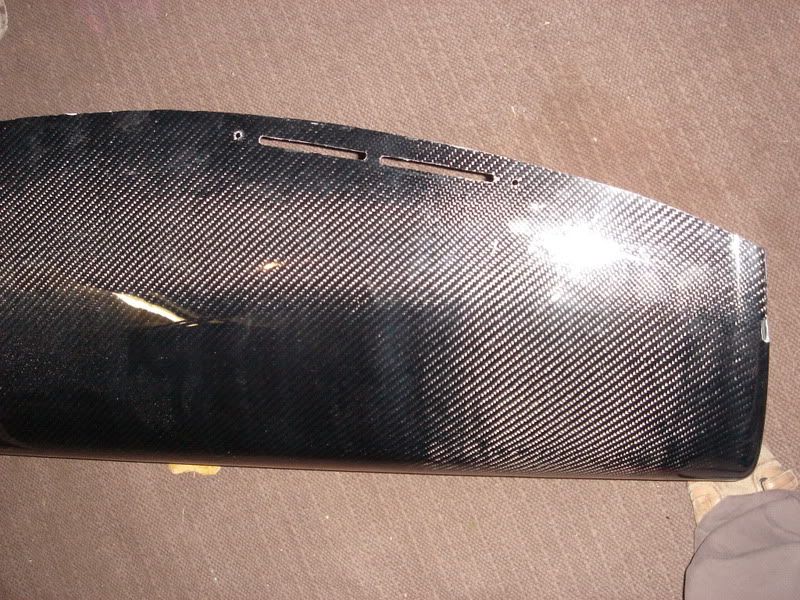
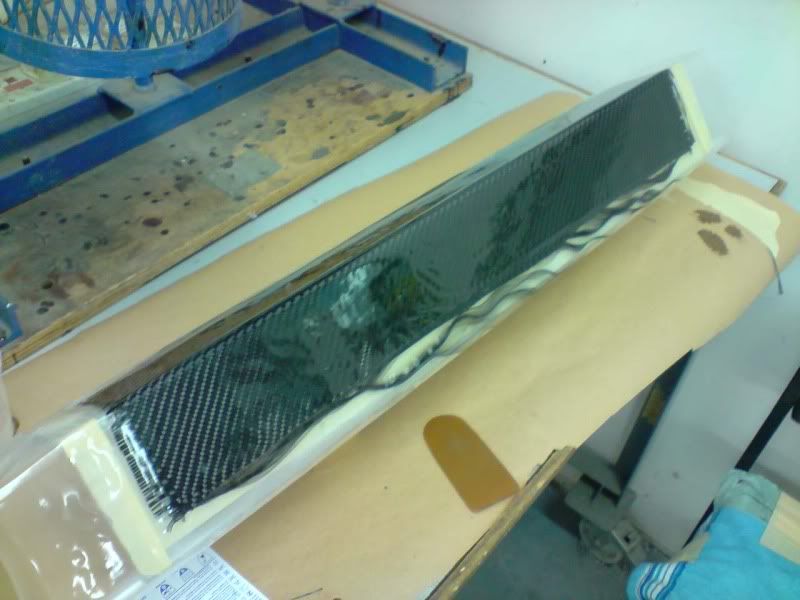
Carbon Roof
This was an off the shelf item, but again as with most other parts that have been 'off the shelf' it didn't fit straight away, in a way it was good as it allowed us to trim it down to get it to the perfect size.
Also we wanted the minimum metalwork left on the roof so 95% of it was chopped out leaving 1" around the edges to give us something to bond the Carbon to.
And after 17 coats of lacquer to make it the depth of Carbon that we wanted for the project.
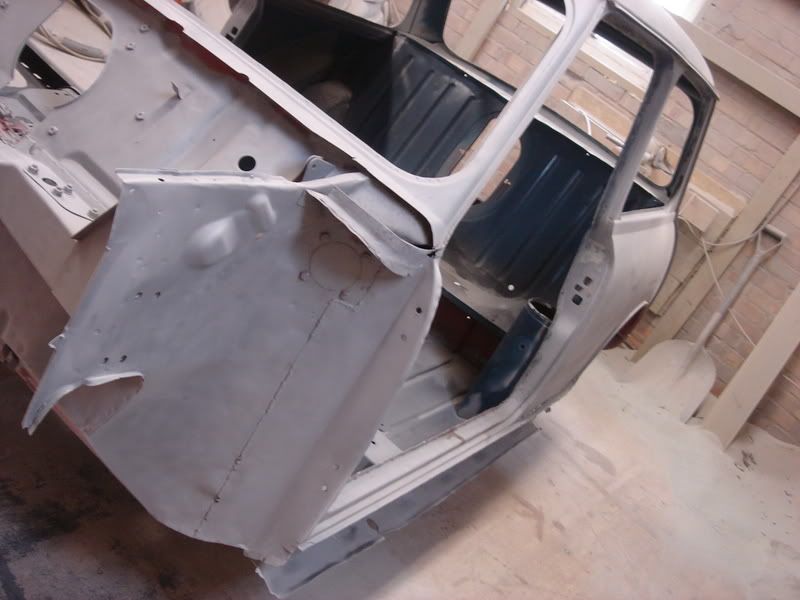
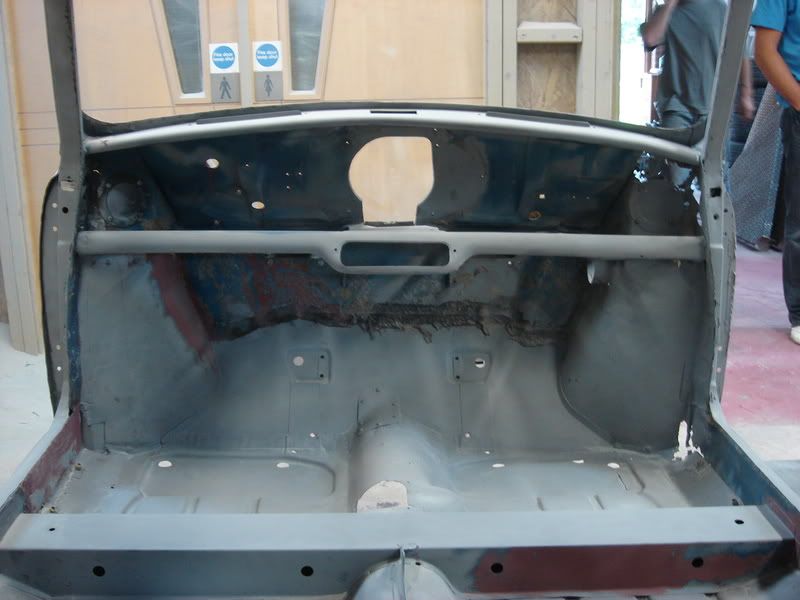
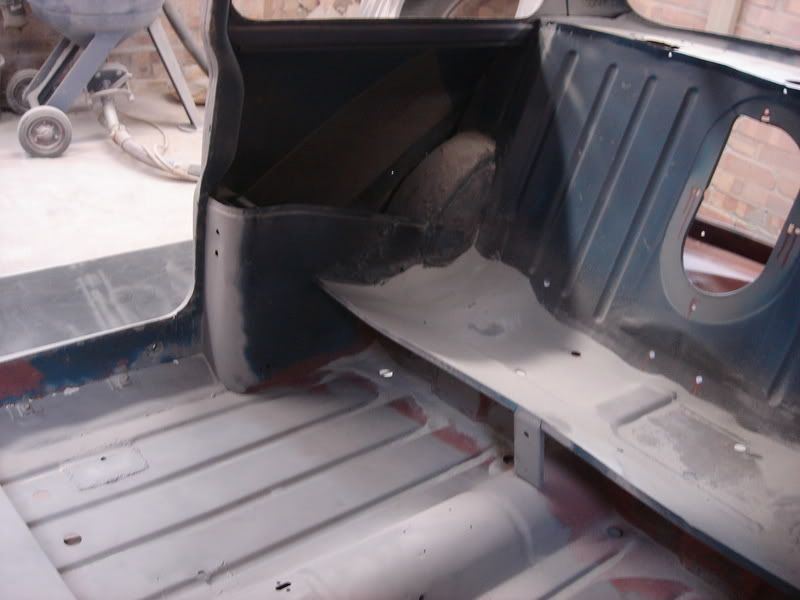
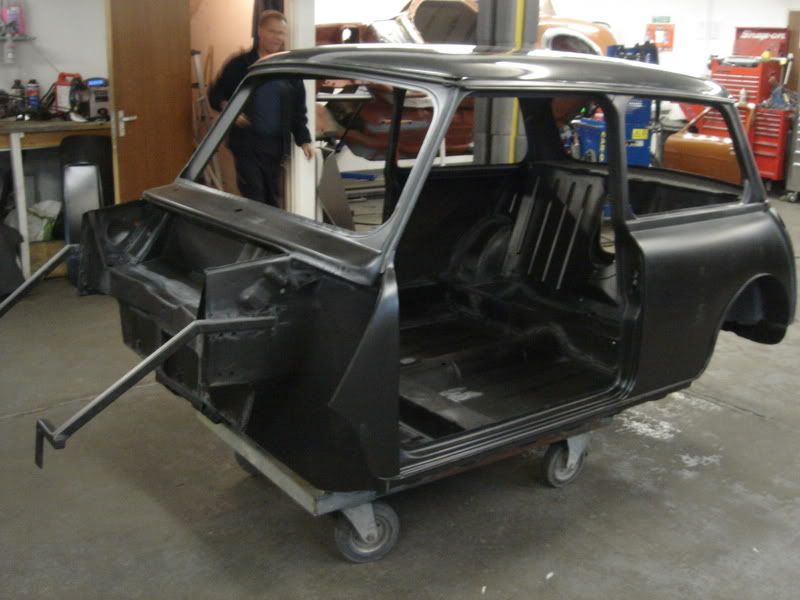
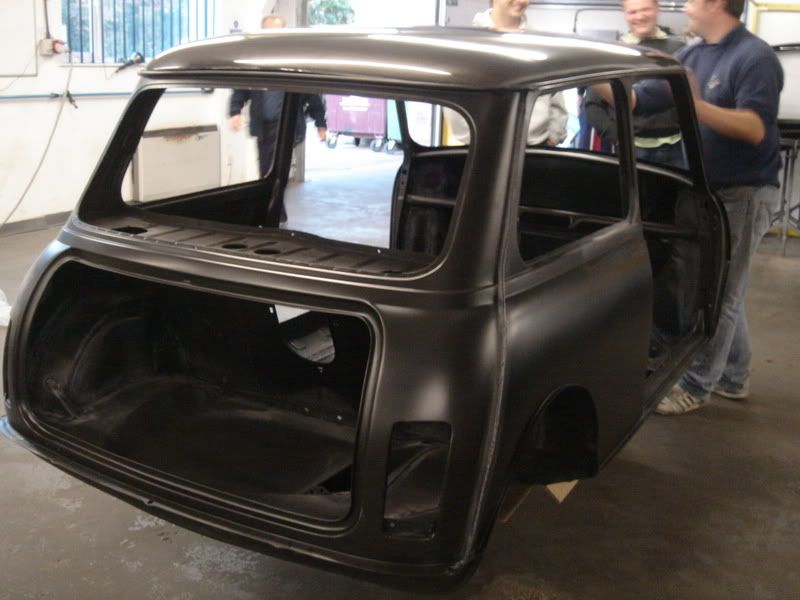
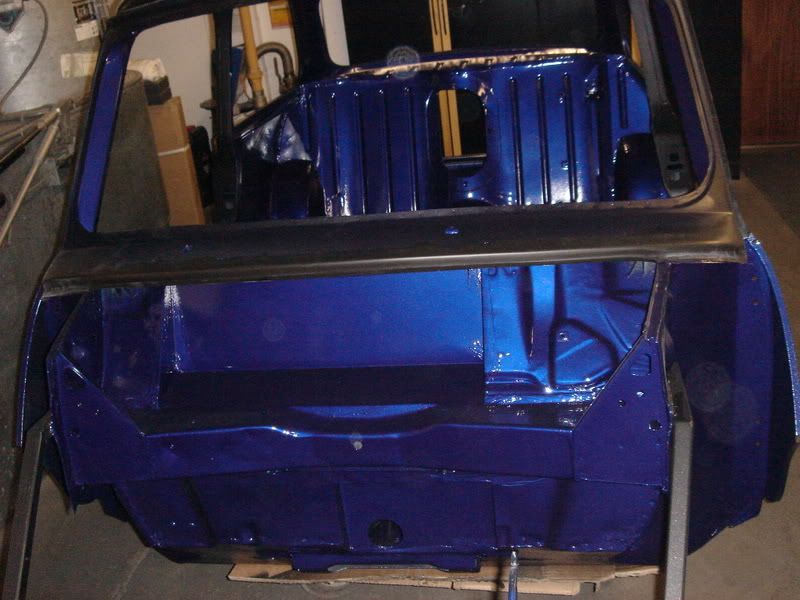
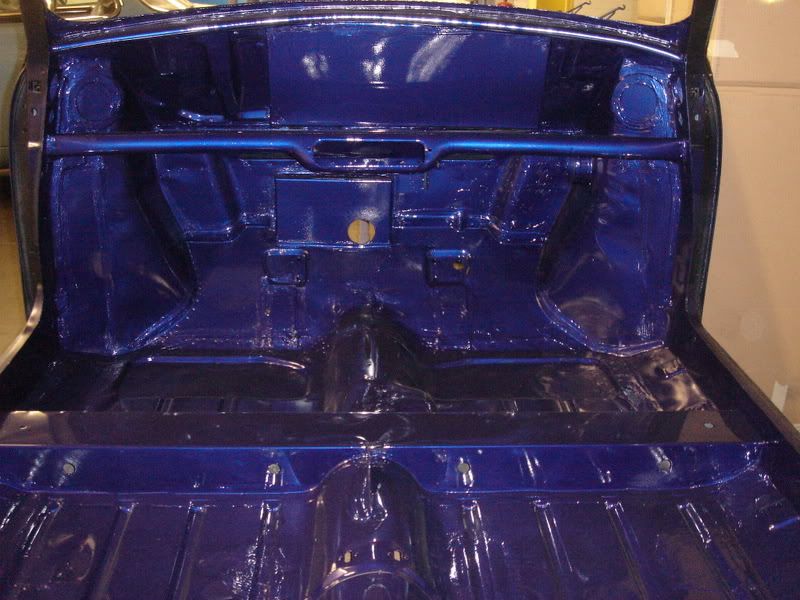
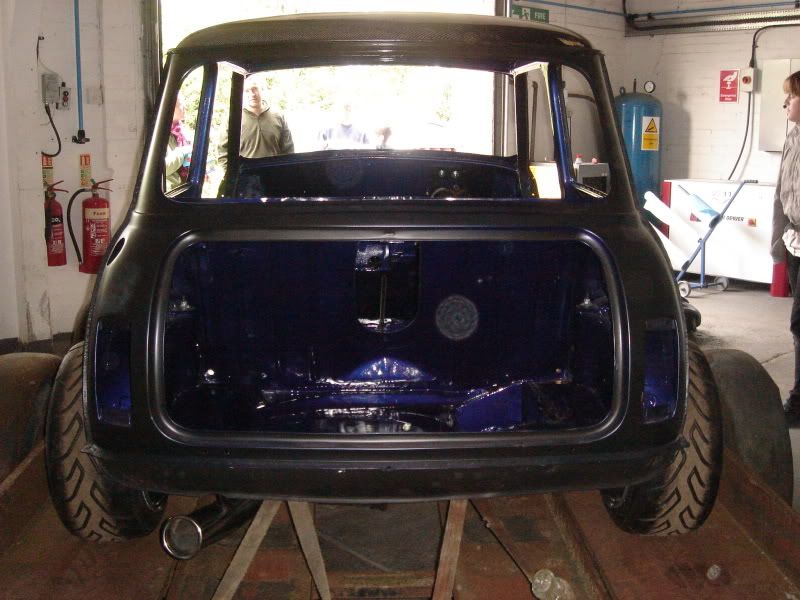
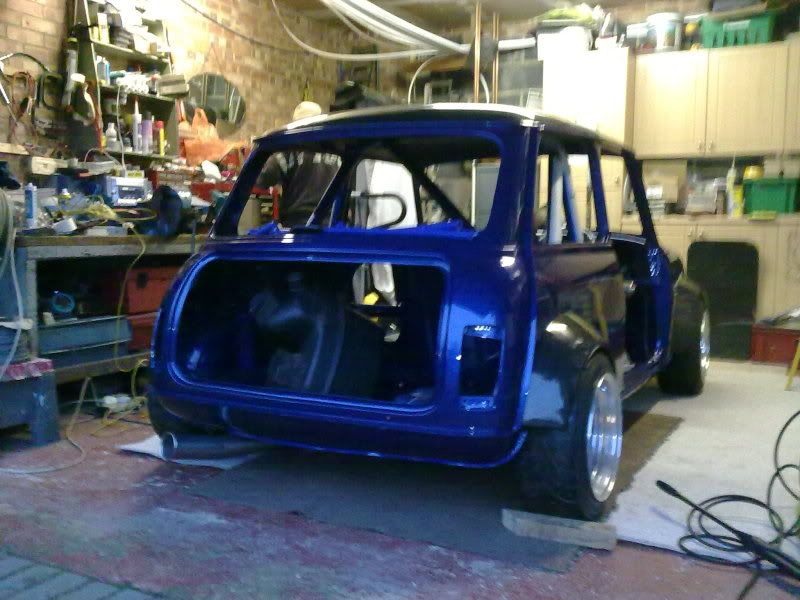
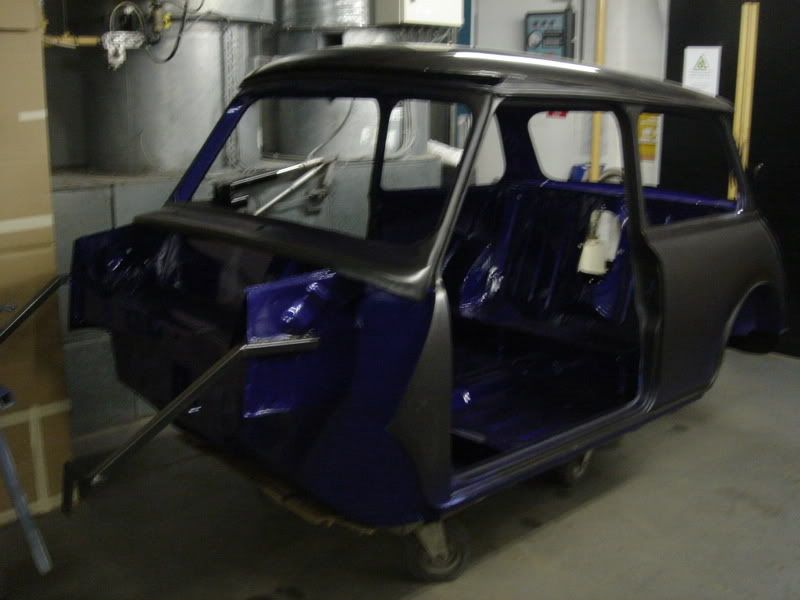
Then the engine bay, interior and boot were painted bodycolour
This would allow us to start fitting things up and being able to leave them in as apposed to removing them again before final paint.
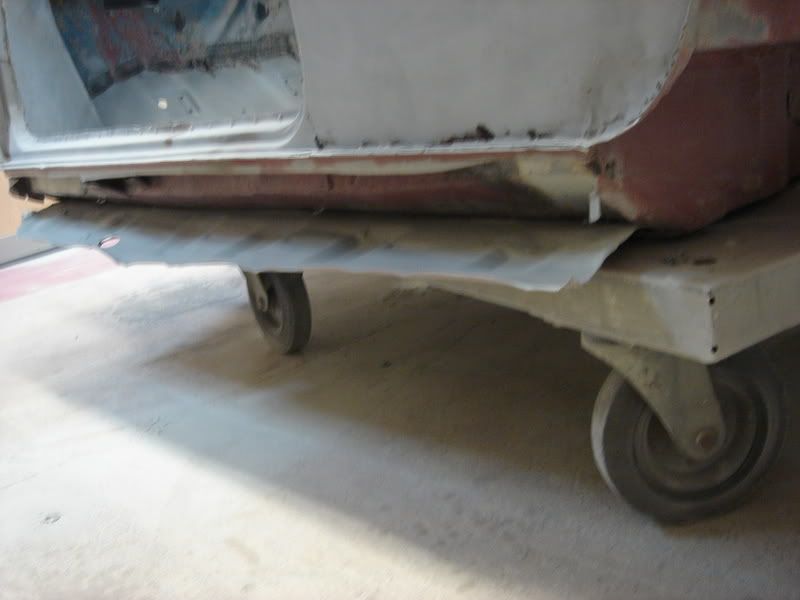
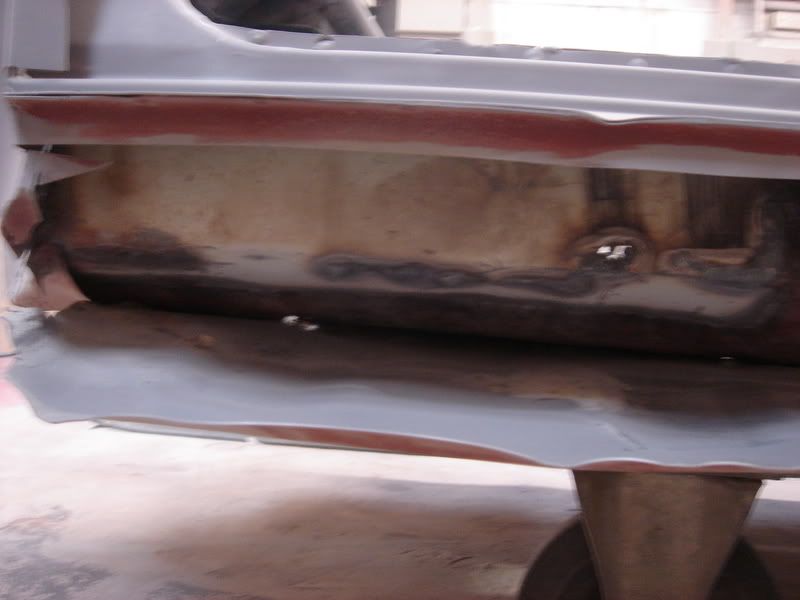
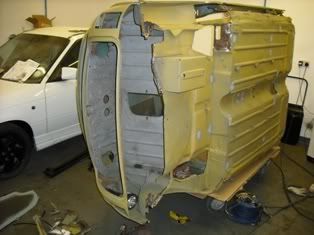
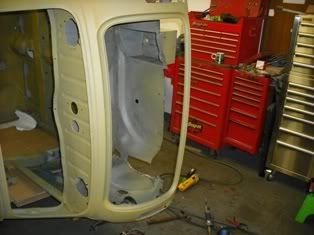
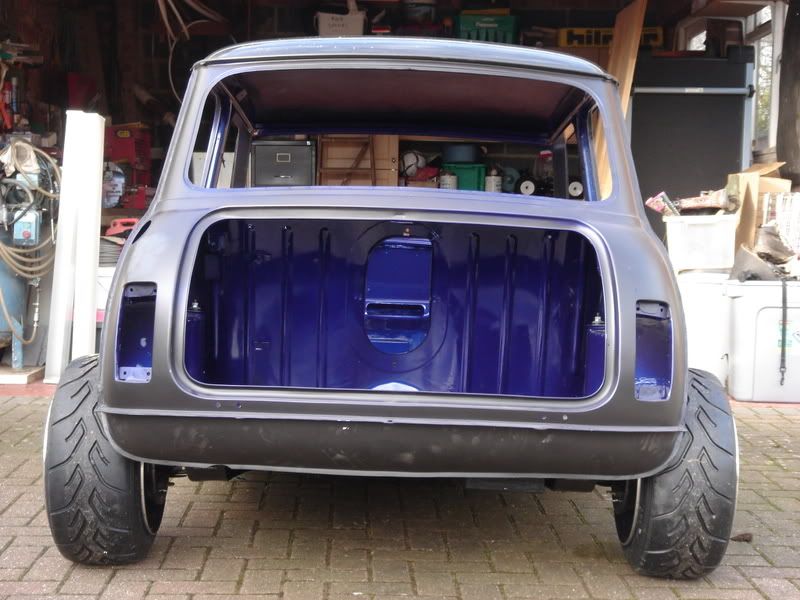
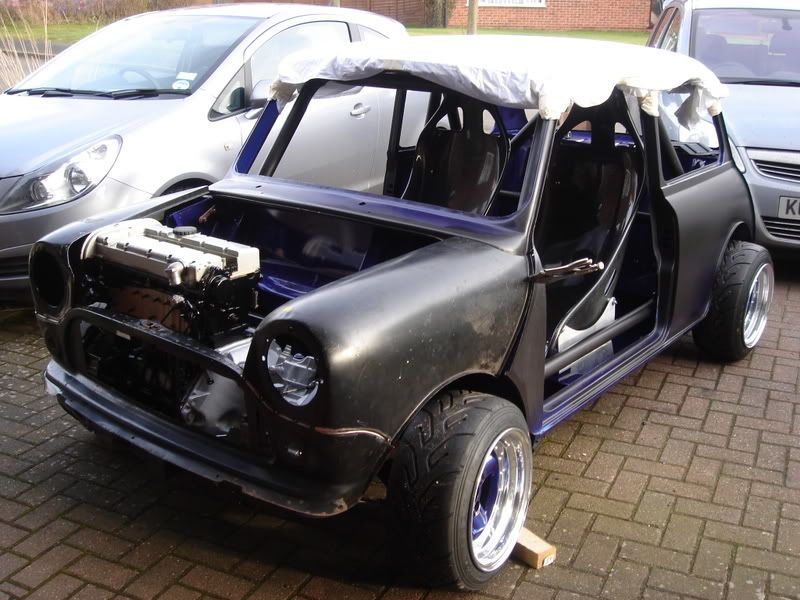
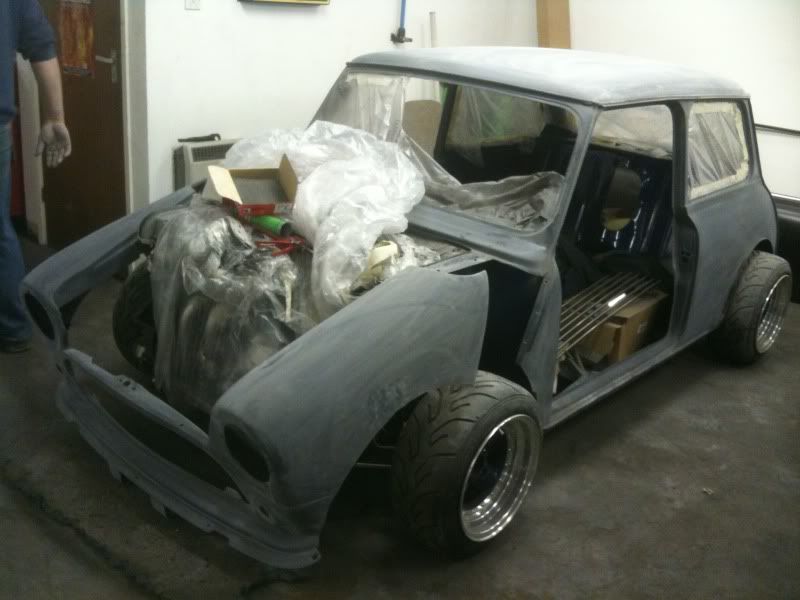
Once we got it back we started to get it rolling
We needed to get the car on its wheels to make it easier to move about, and to preserve the underseal/stonechip that had been applied at the bodyshop.
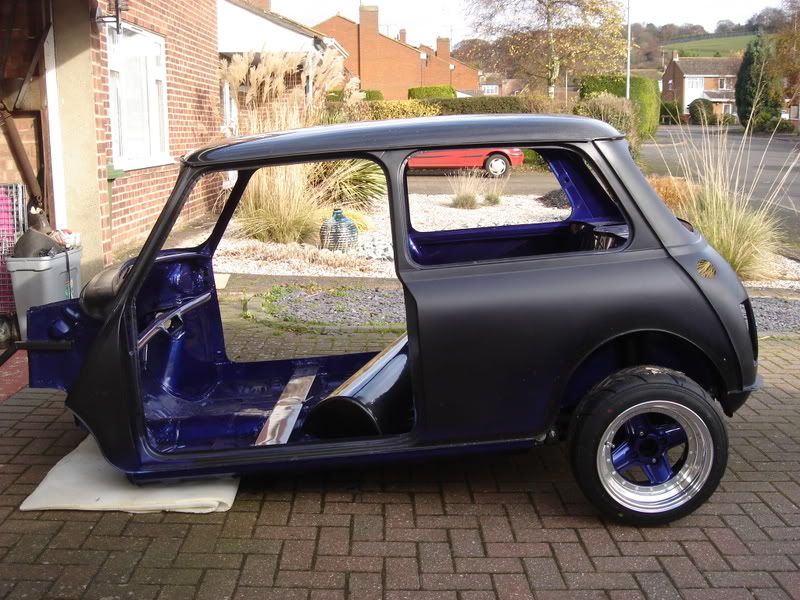
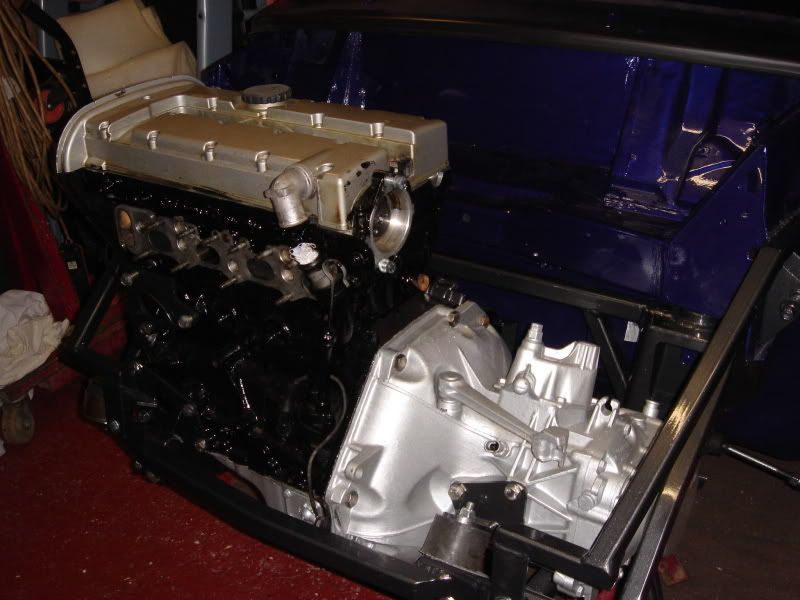
First chance to get engine subframe in and the engine mounted, started to piece together the suspension, steering etc..
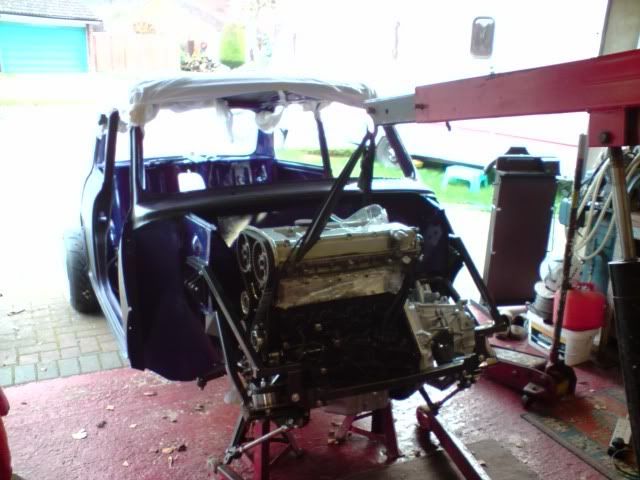
Trial Front end first fitted on to see what would need chopping, this was later replaced with all new panels
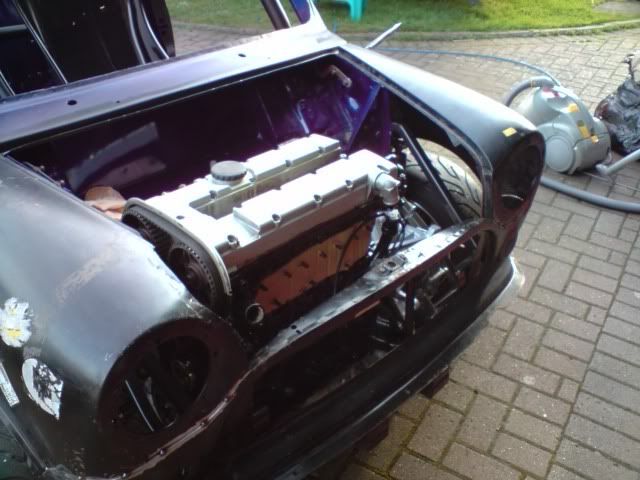
It was a bit higher than we expected.... this was where the fun started
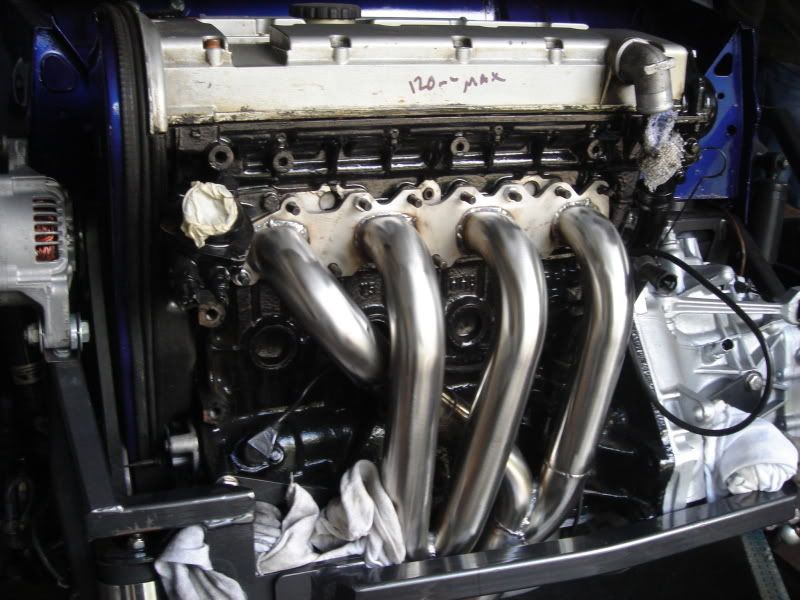
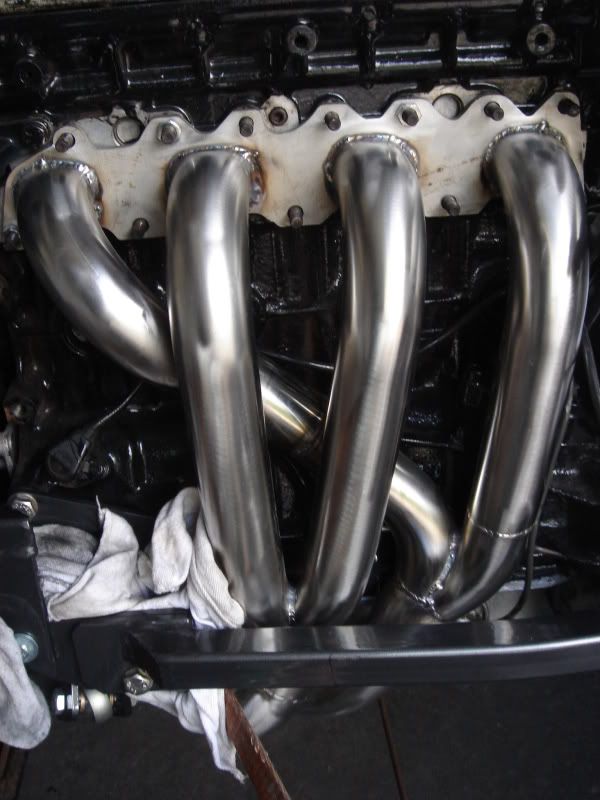
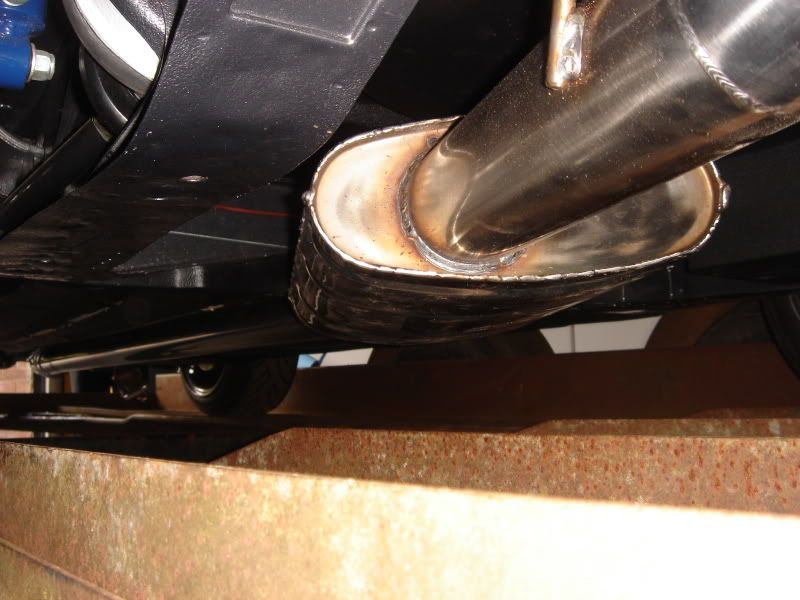
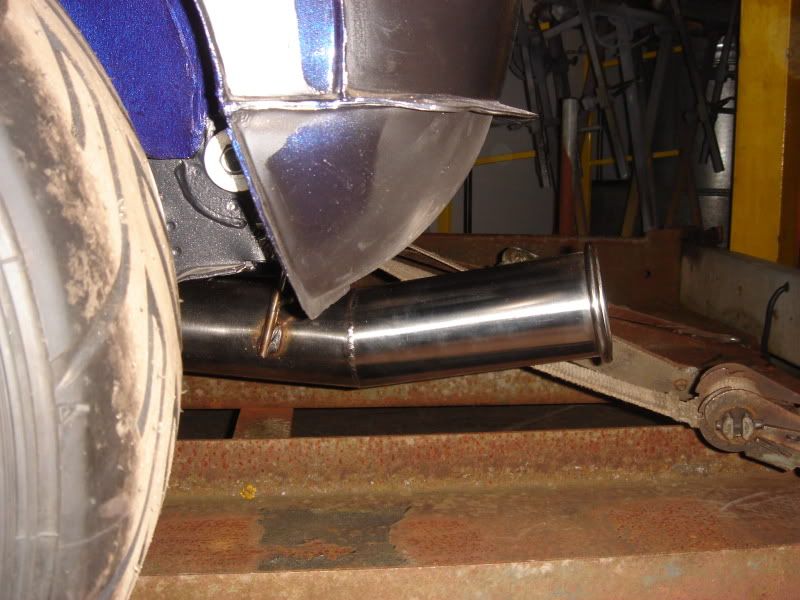
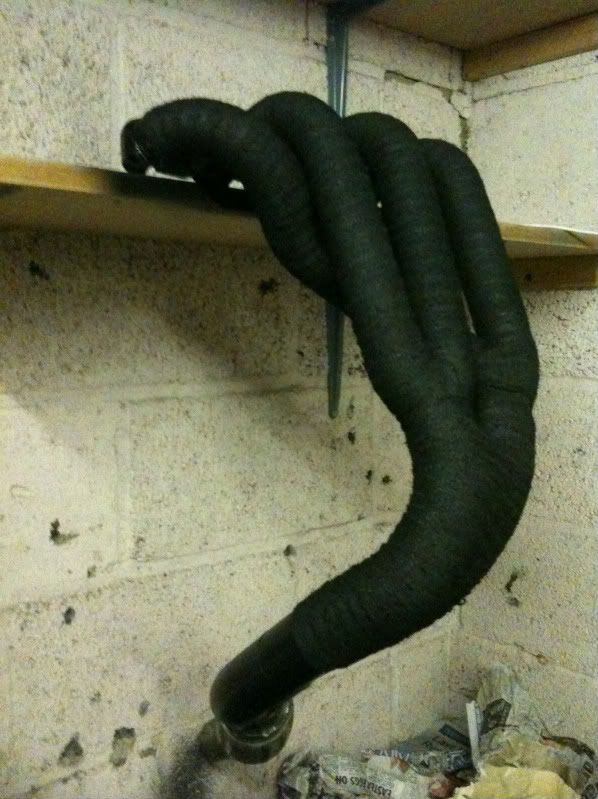
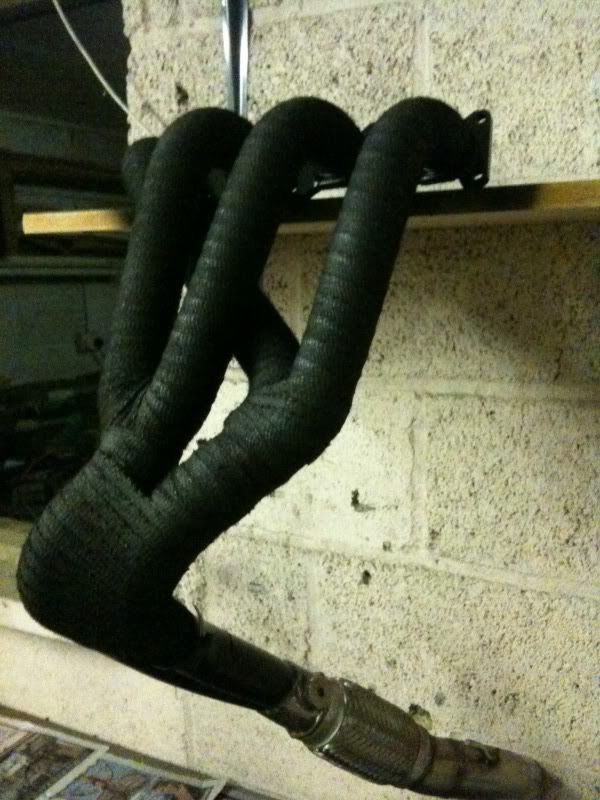
Exhaust by Powerspeed
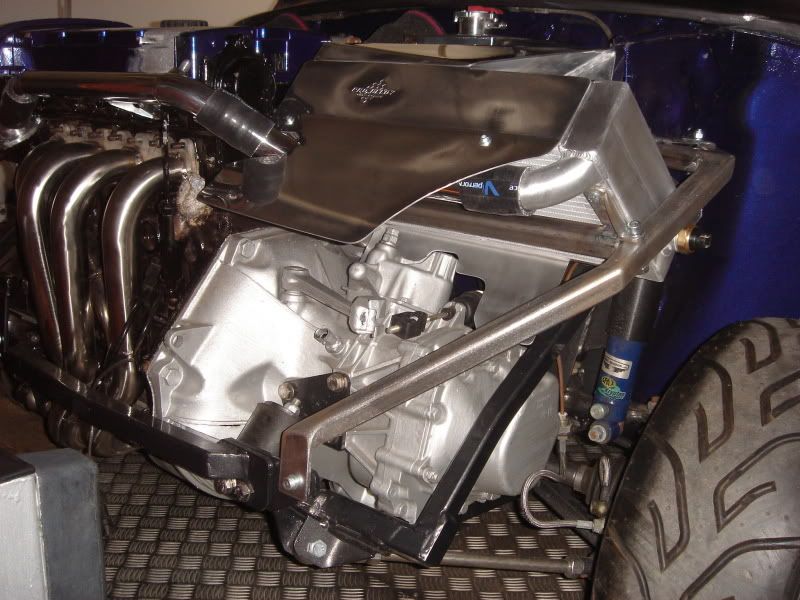
As part of our challenge to fit this huge engine under a standard length roundnose steel front end using an Allspeed subframe, we were going to be faced with a few problems, hence nobody had done it. Yes people have fitted XE's under roundnose mini's, but they are on custom made subframes that work for their application. But for us sadly we needed more ground clearance as we wanted to run the car nice and low.
So we needed a custom made exhaust. We'd been recommended Powerspeed by a friend who has a Dax Rush with a 450bhp C20LET out of a Calibra Turbo, they shoehorned a trick manifold into his small space so we knew they were the people for the job.
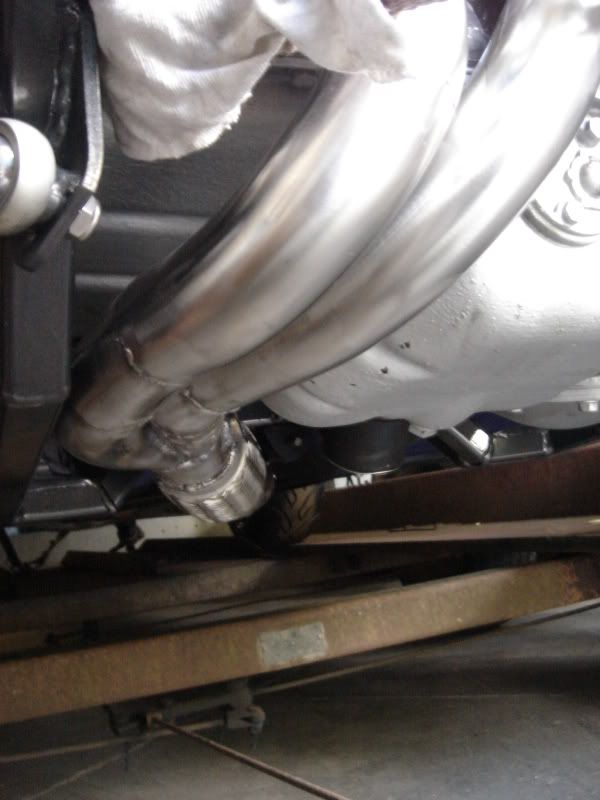
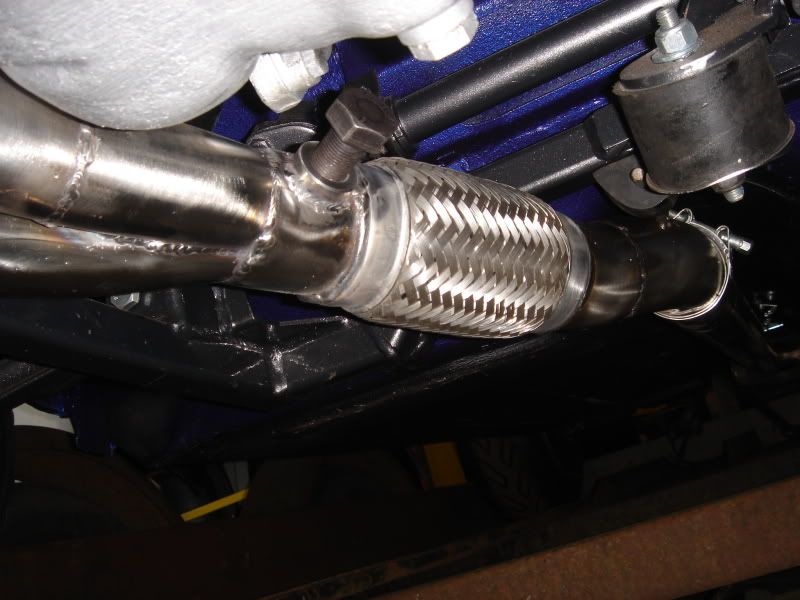
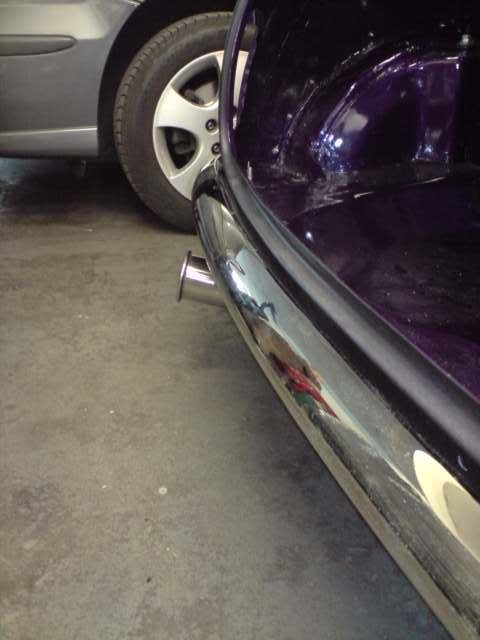
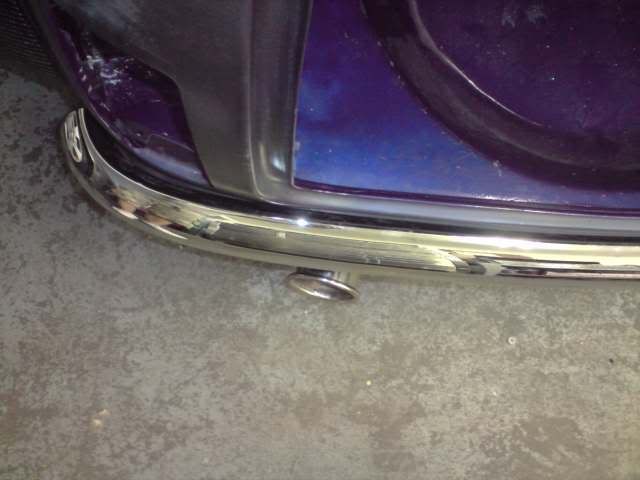
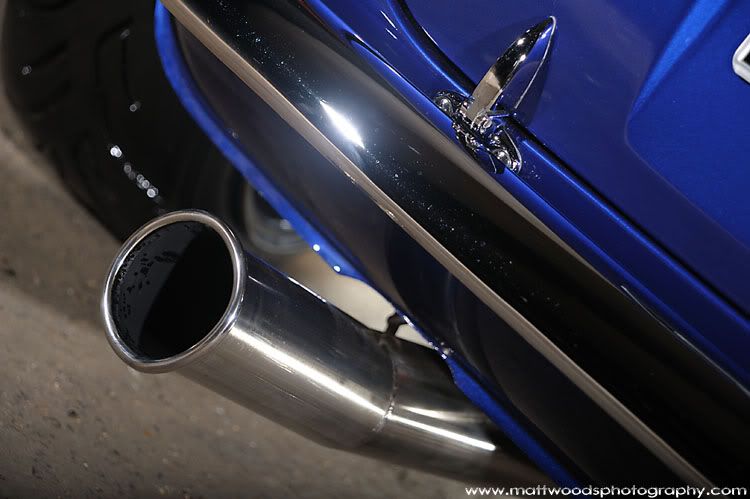
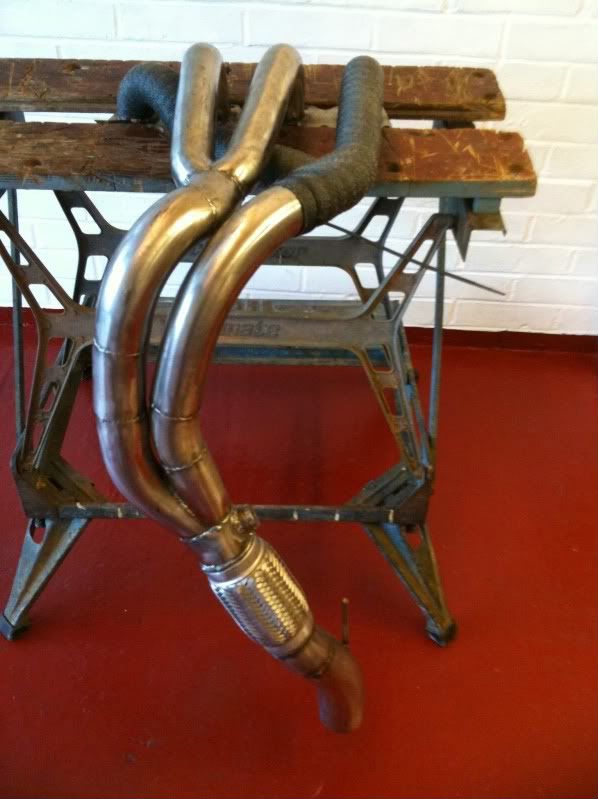
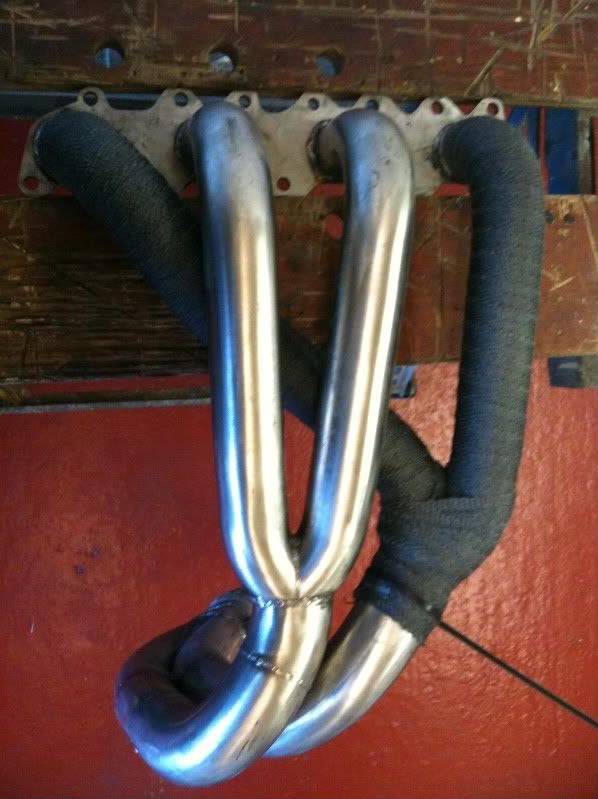
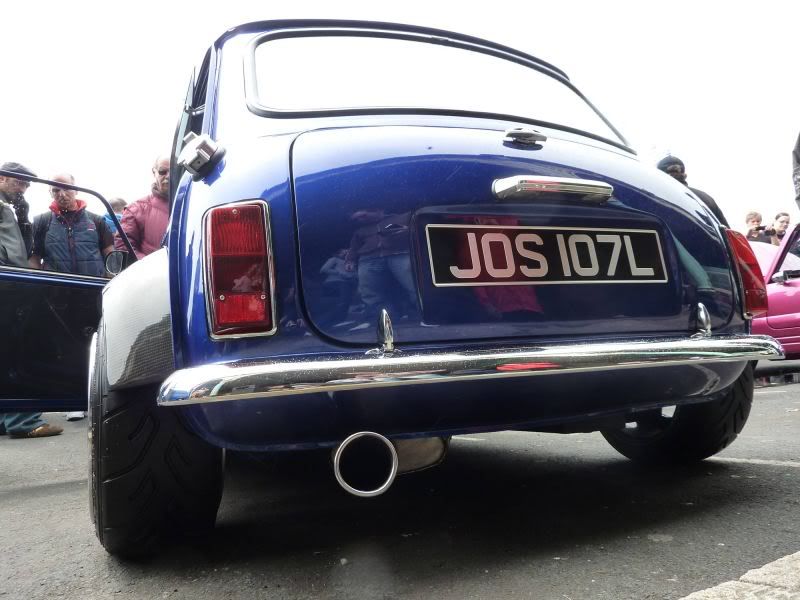
As with any custom exhaust we were asked the normal questions and from them gave our answers. We wanted a super skinny 4-2-1 manifold & downpipe that hugged the engine block as tight as possible, taking the standard route under the sump into a flexi joint, then into a straight 2.25" centre pipe, this would then join up with a medium sized backbox that needed to be tucked up as high as possible inside the rear subframe, then we wanted a 3" outwardly rolled tailpipe in the same position as many other performance exhausts. Oh and it needed a lambda boss welding in for when the car went for mapping. Not much eh!
Then we removed the manifold and wrapped it in heat resistant exhaust wrap to try to keep the engine bay temperatures down.
Then we painted the wrap in heat resistant exhaust paint
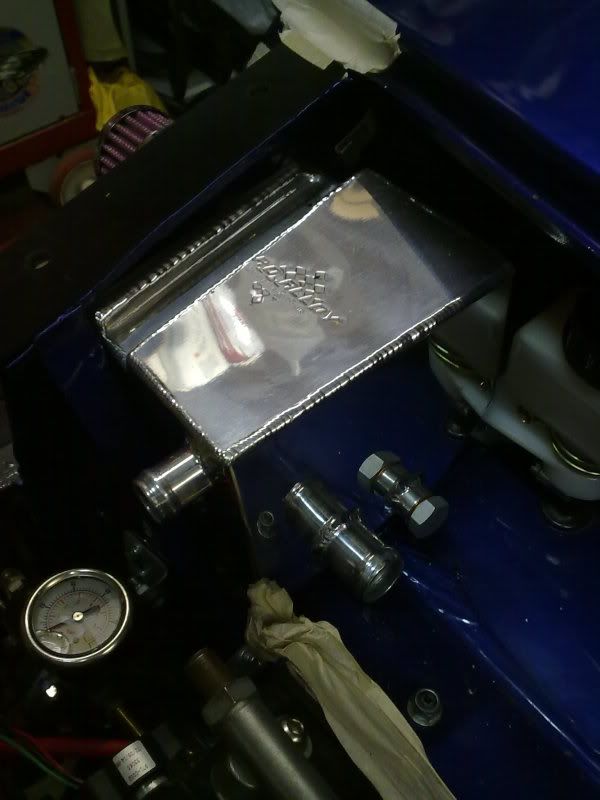
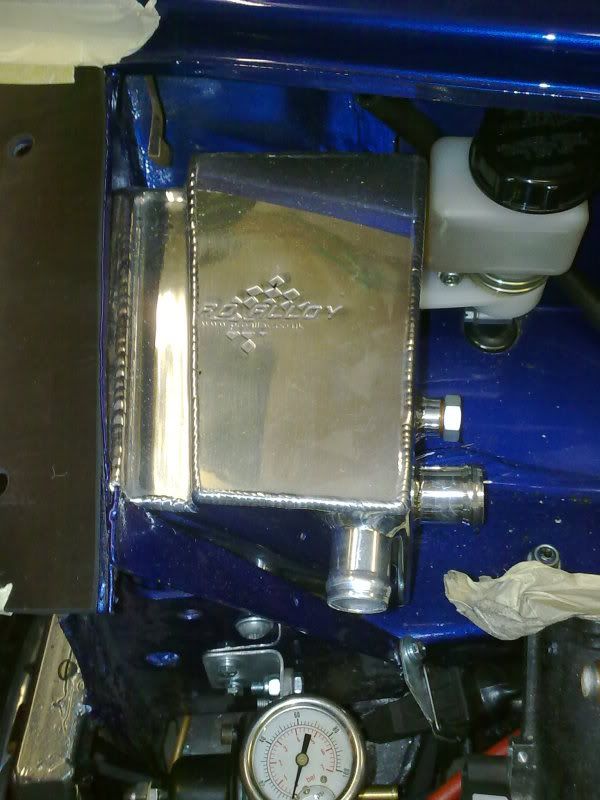
Radiator & Pipework Manufacture, & Thermostat mods by Pro Alloy
Coolant Expansion Tank & Breather catch tank & Pipework by Pro Alloy
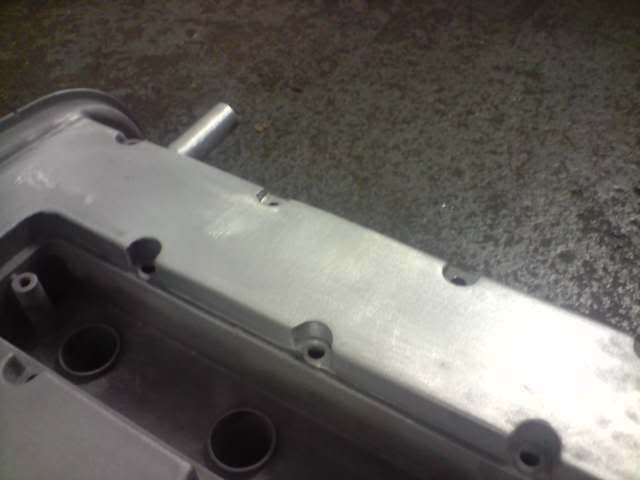
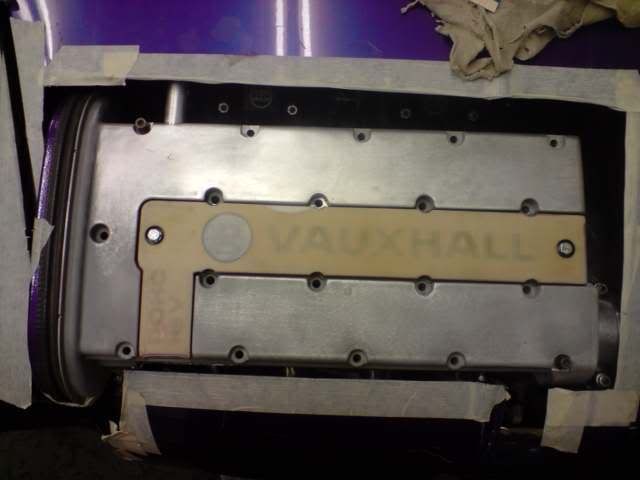
Rocker Cover Modifications by Pro Alloy
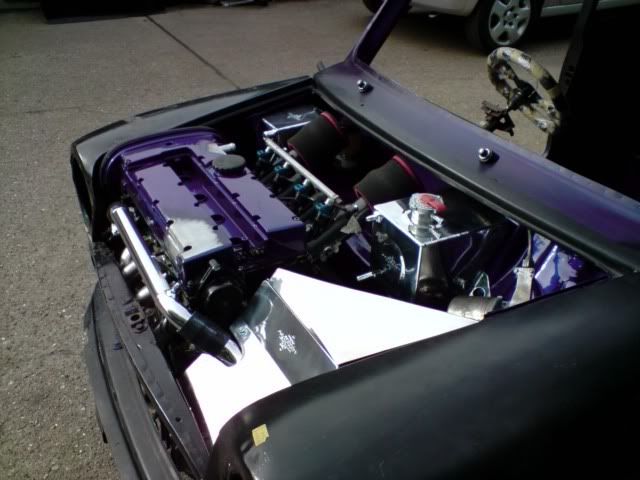
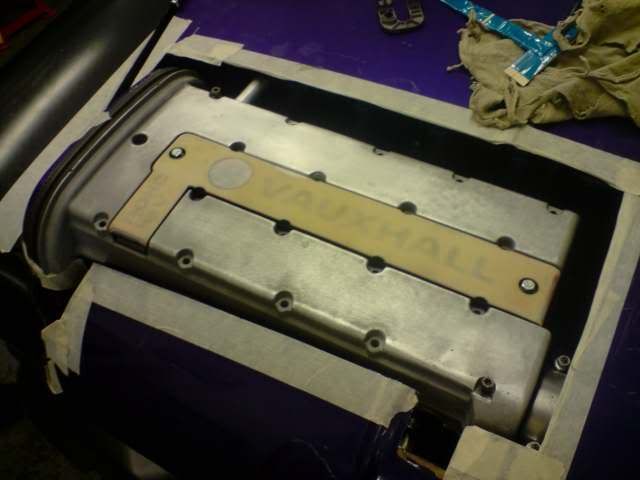
This picture shows the original rocker cover at the front, and the modified rocker cover at the back.
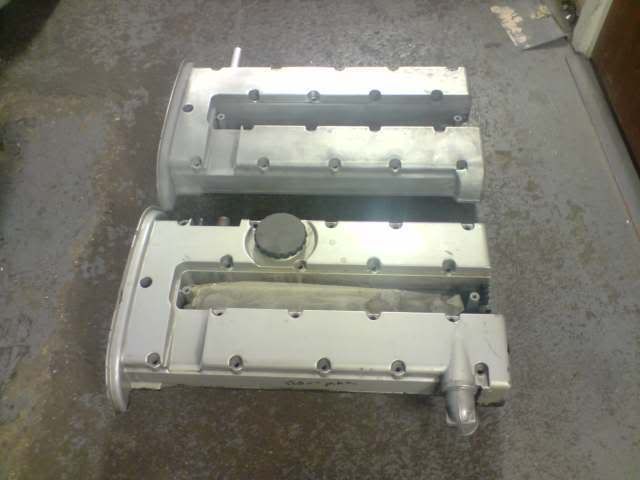
These were the 3 main mods that were carried out by Pro Alloy as well as Hotrod Guru and mate Jon Gurney.
Firstly the front breather was removed and smoothed over to fit under the bonnet.

Then the rear breathers (2) were chopped off and 1 large one was welded in instead, we also squared off this area of the rocker cover to make it smoother. Also note the removal of the oil filler cap, this is a modification that we have carried out before on other cars and really smoothes off the top of the engine, especially when its poking out of the bonnet! Not many people notice this unless you know what a standard engine looks like.
This was an off the shelf item, but again as with most other parts that have been 'off the shelf' it didn't fit straight away, in a way it was good as it allowed us to trim it down to get it to the perfect size.
Also we wanted the minimum metalwork left on the roof so 95% of it was chopped out leaving 1" around the edges to give us something to bond the Carbon to.
And after 17 coats of lacquer to make it the depth of Carbon that we wanted for the project.
Then the engine bay, interior and boot were painted bodycolour
This would allow us to start fitting things up and being able to leave them in as apposed to removing them again before final paint.
Once we got it back we started to get it rolling
We needed to get the car on its wheels to make it easier to move about, and to preserve the underseal/stonechip that had been applied at the bodyshop.
First chance to get engine subframe in and the engine mounted, started to piece together the suspension, steering etc..
Trial Front end first fitted on to see what would need chopping, this was later replaced with all new panels
It was a bit higher than we expected.... this was where the fun started
Exhaust by Powerspeed
As part of our challenge to fit this huge engine under a standard length roundnose steel front end using an Allspeed subframe, we were going to be faced with a few problems, hence nobody had done it. Yes people have fitted XE's under roundnose mini's, but they are on custom made subframes that work for their application. But for us sadly we needed more ground clearance as we wanted to run the car nice and low.
So we needed a custom made exhaust. We'd been recommended Powerspeed by a friend who has a Dax Rush with a 450bhp C20LET out of a Calibra Turbo, they shoehorned a trick manifold into his small space so we knew they were the people for the job.
As with any custom exhaust we were asked the normal questions and from them gave our answers. We wanted a super skinny 4-2-1 manifold & downpipe that hugged the engine block as tight as possible, taking the standard route under the sump into a flexi joint, then into a straight 2.25" centre pipe, this would then join up with a medium sized backbox that needed to be tucked up as high as possible inside the rear subframe, then we wanted a 3" outwardly rolled tailpipe in the same position as many other performance exhausts. Oh and it needed a lambda boss welding in for when the car went for mapping. Not much eh!
Then we removed the manifold and wrapped it in heat resistant exhaust wrap to try to keep the engine bay temperatures down.
Then we painted the wrap in heat resistant exhaust paint
Radiator & Pipework Manufacture, & Thermostat mods by Pro Alloy
Coolant Expansion Tank & Breather catch tank & Pipework by Pro Alloy
Rocker Cover Modifications by Pro Alloy
This picture shows the original rocker cover at the front, and the modified rocker cover at the back.
These were the 3 main mods that were carried out by Pro Alloy as well as Hotrod Guru and mate Jon Gurney.
Firstly the front breather was removed and smoothed over to fit under the bonnet.
Then the rear breathers (2) were chopped off and 1 large one was welded in instead, we also squared off this area of the rocker cover to make it smoother. Also note the removal of the oil filler cap, this is a modification that we have carried out before on other cars and really smoothes off the top of the engine, especially when its poking out of the bonnet! Not many people notice this unless you know what a standard engine looks like.
#5
03-26-2011, 12:20 PM
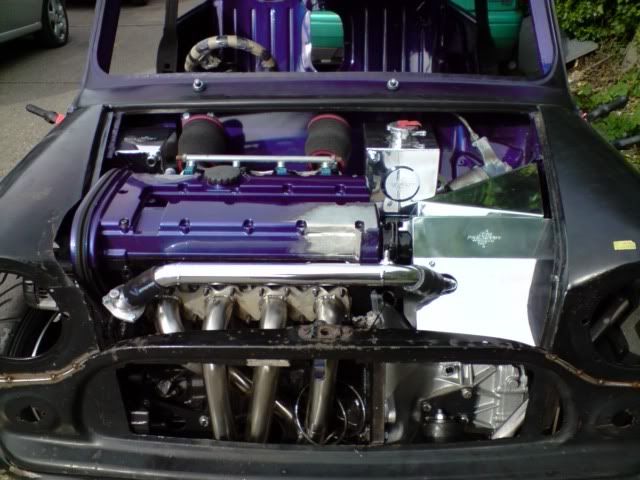
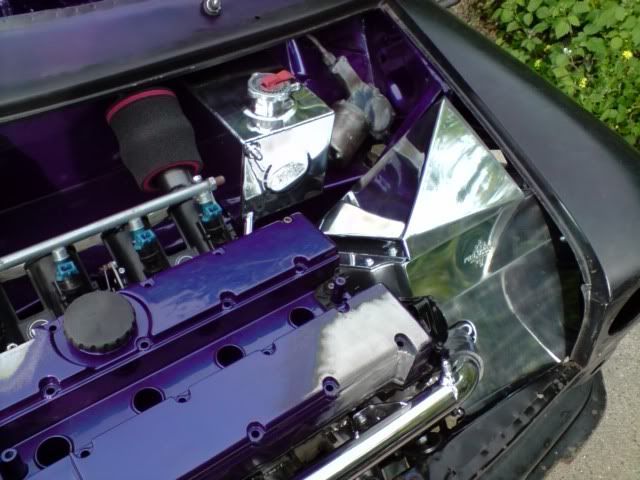
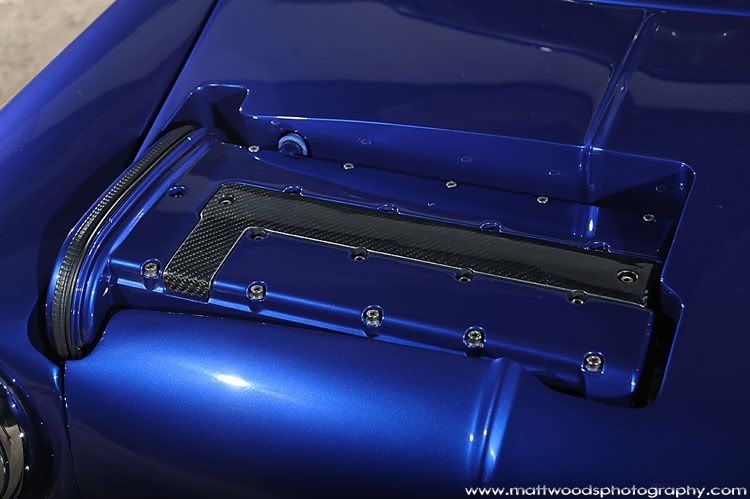
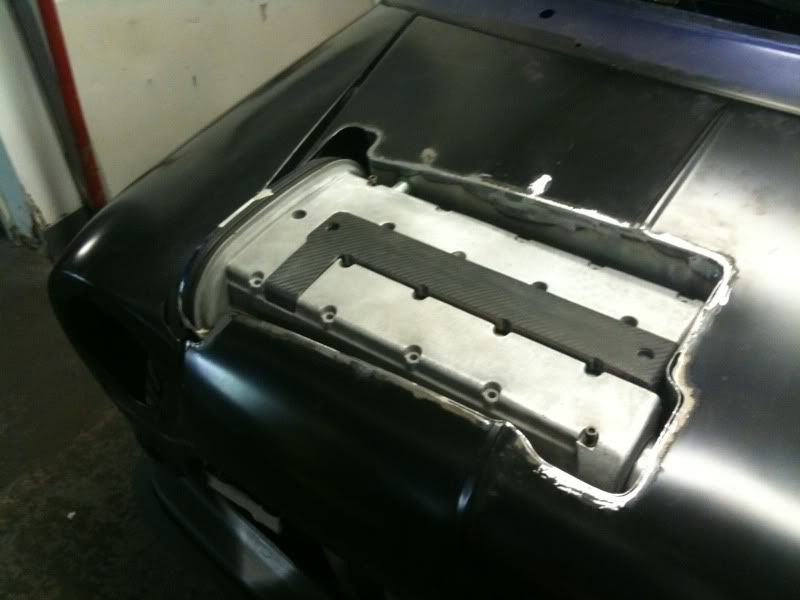
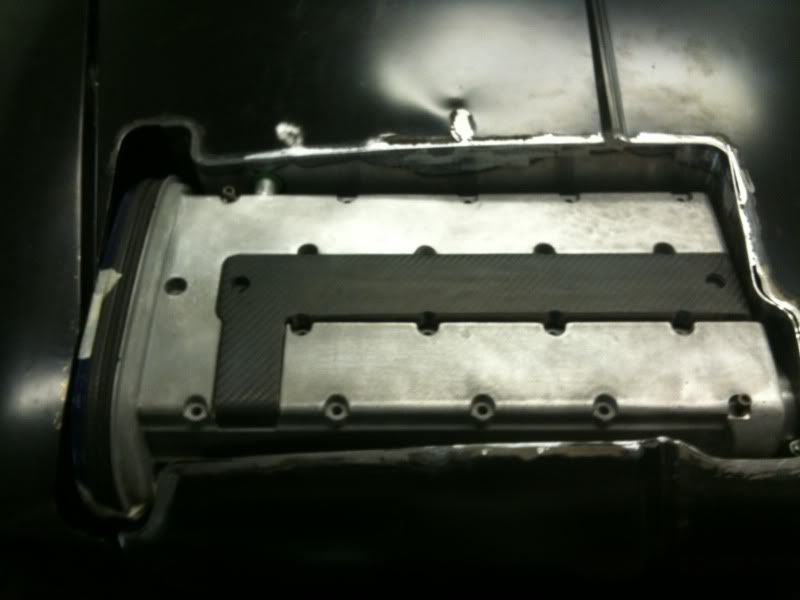
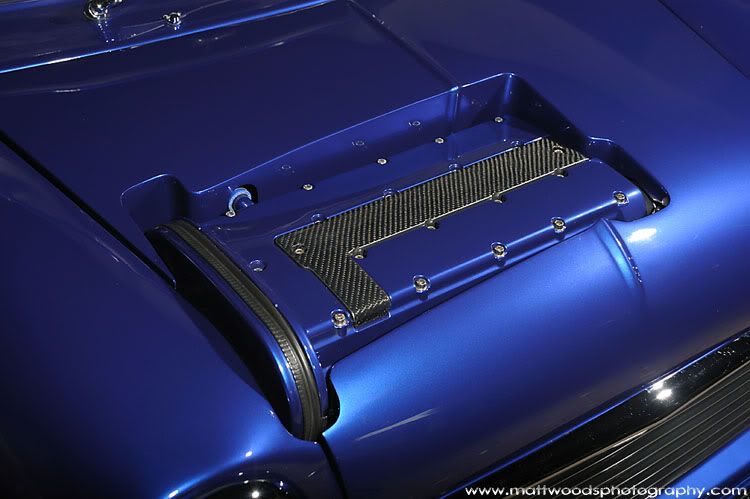
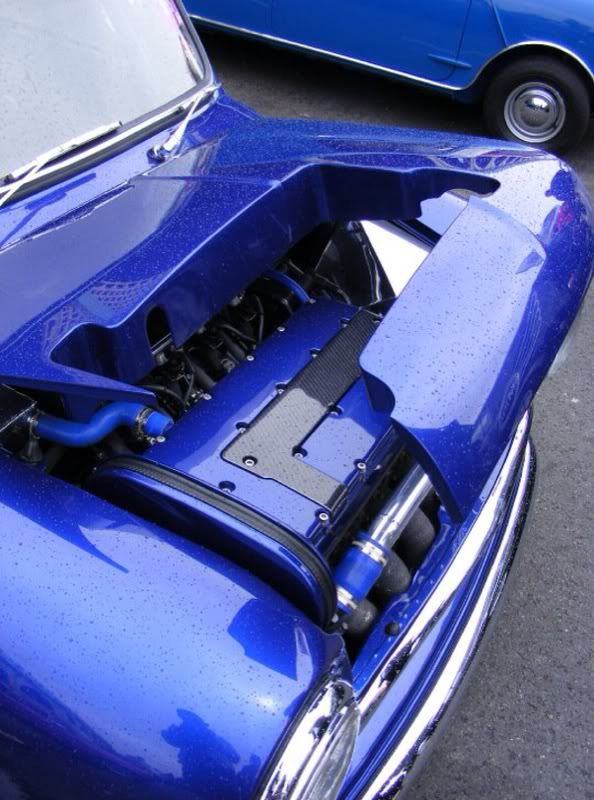
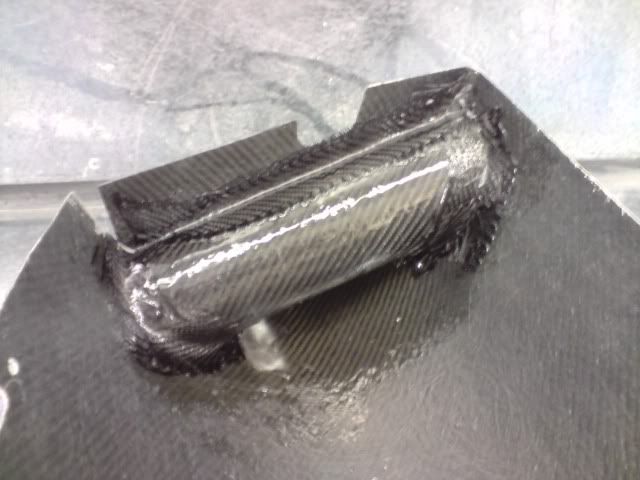
Plug Cover
We wanted a Carbon plug cover to break up the engine, especially as the engine would now be on show. Because of the changes to the rocker cover, there would be no 'off the shelf' cover, so the original one needed to be modified.
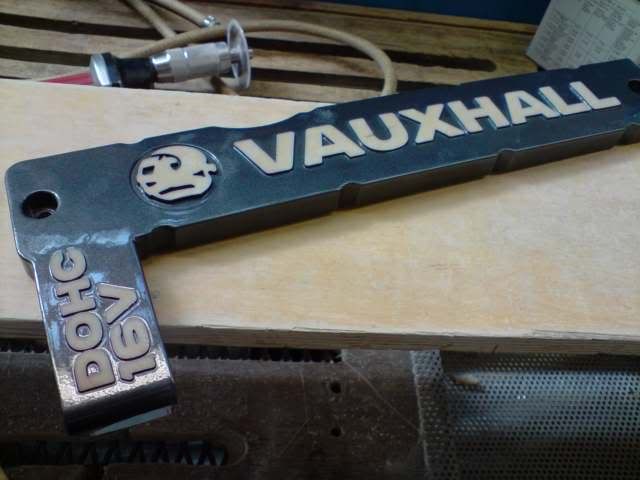
With the oil filler cap removed, there would be a small 1/8 of a circle part missing. So Rich filled it. Whilst he was there he filled the back of the cover with carbon fibre & resin. Then flatted the raised letters on the front down until the top face was flush.
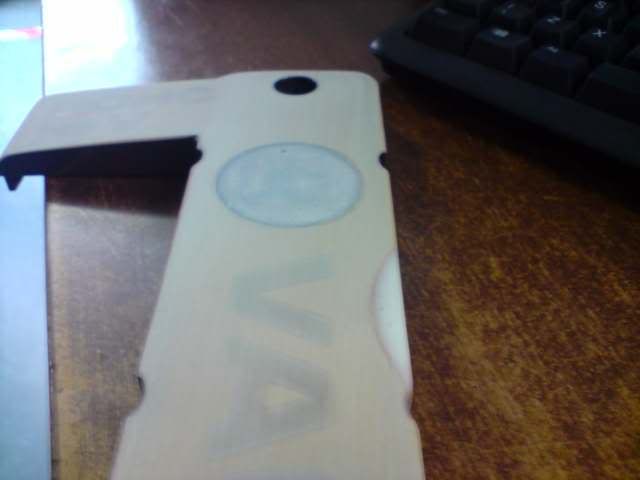
Once we'd tested the fit, it was then wrapped in Carbon. Admittedly its not complete Carbon, but it’s definitely not vinyl, so it was the best option available.
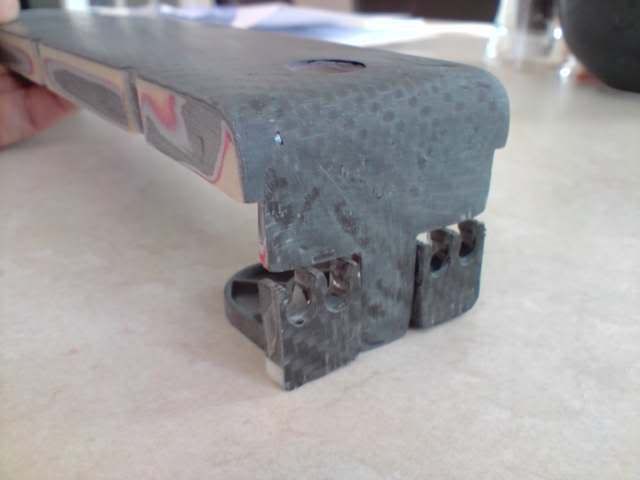
Rich also Carboned the plug lead holder that keeps the leads tidy (yes very ****, but attention to detail is everything)
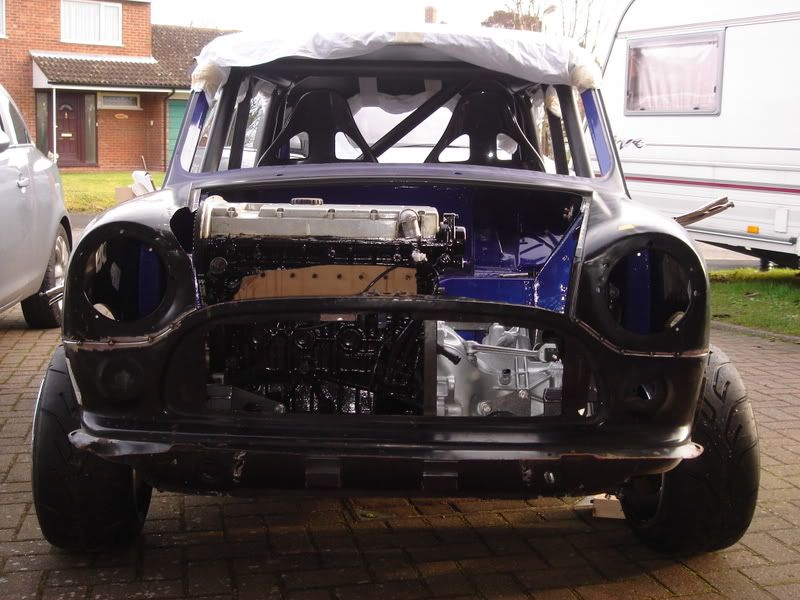
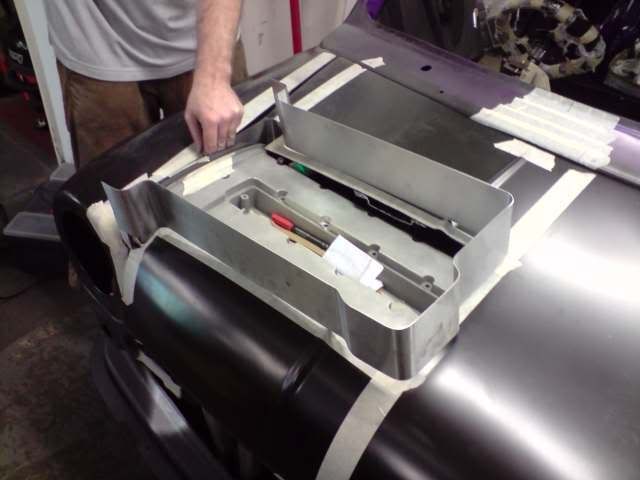
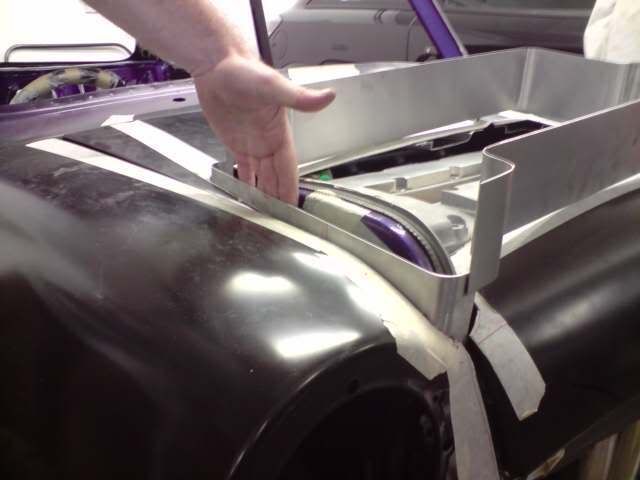
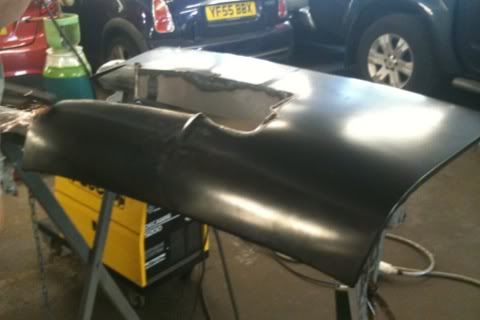
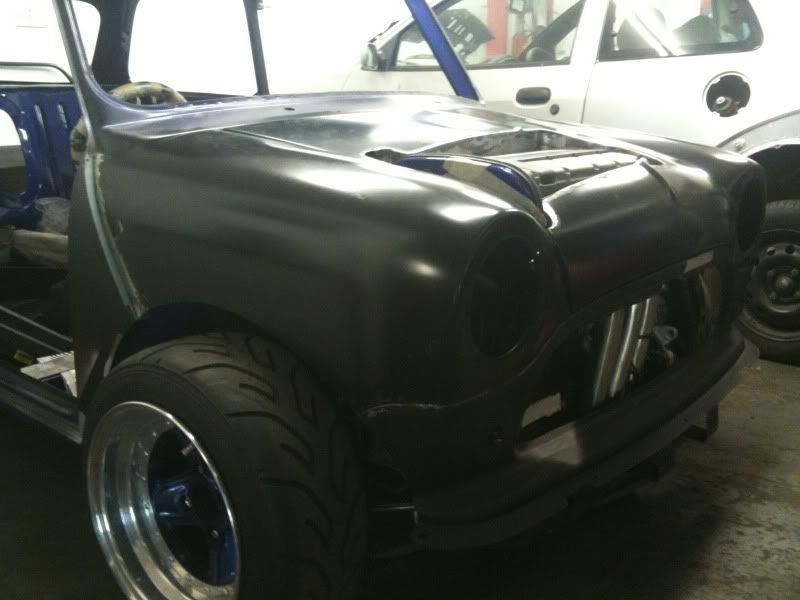
Bonnet Fabrication by Crash Care Centre
Now if you've either come and spoke to us at a show or if you've read one of the magazine features you may know the story behind this one.
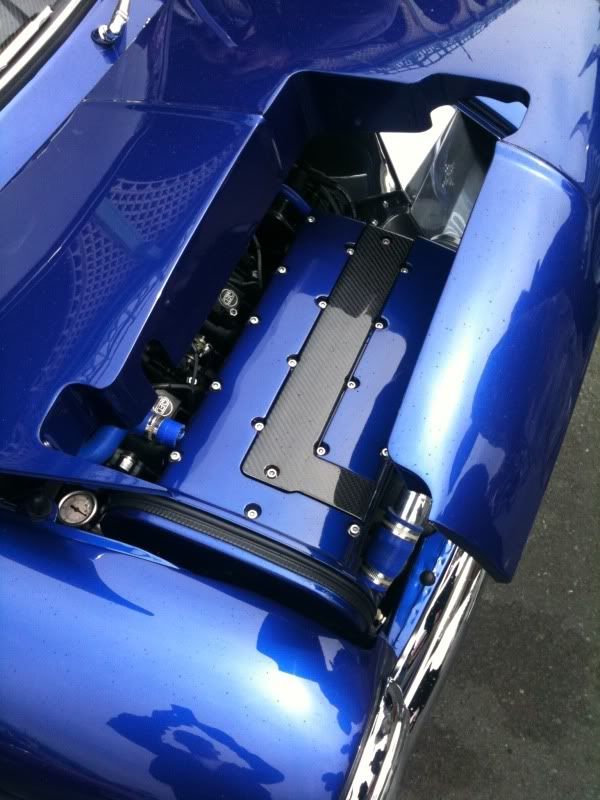
When we started looking at a few things such as how we wanted the engine to look with all the original covers, and obviously the engine position which finished above the wing level and how it would have had to be part of the front wing we knew that bulge would have took up half of the bonnet and gone into the wing.
So one night whilst having a 'thinking night' as apposed to a 'doing night' around the car, Chris's wife Karen who's house we were building the house at came out and suggested 'how about just cutting a hole in the bonnet?' At first I looked dubious, but as soon as the others heard it they was sold! After an agreement that we were going to have 2 bonnets, 1 for general use and 1 for show, I was sold! To this day we've never seen a 2nd bonnet, shows how much we all liked the crazy idea!
Luckily we had a spare bonnet, so we chopped a hole in it just to see what it would look like.
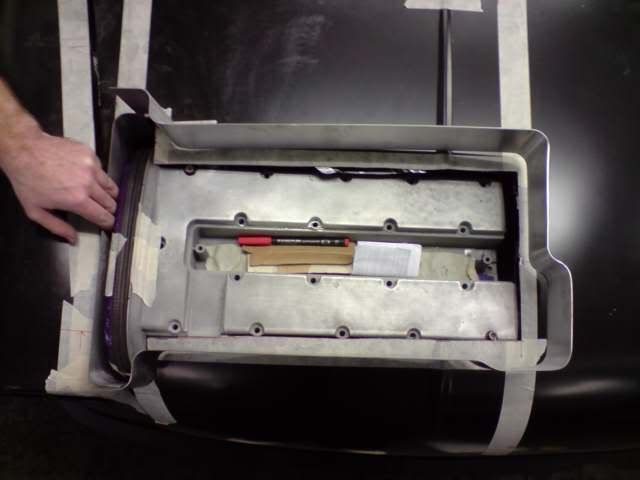
We got on the phone to top metal fabricator friend John who was up for making a frame for the bonnet, we dropped him over a spare rocker and some dimensions and days later he'd produced 2 identical frames that were rocker cover shaped with an even 10mm gap all the way around.
Now we had the parts needed we moved the car back to Crash Care Centre and explained the plan to Lee who luckily has a good imagination, and was well up for the challenge. Next thing you know we were cutting up a brand new bonnet and cutting in the edging strips ready for welding. We then handed it over to Lee for some expert welding.
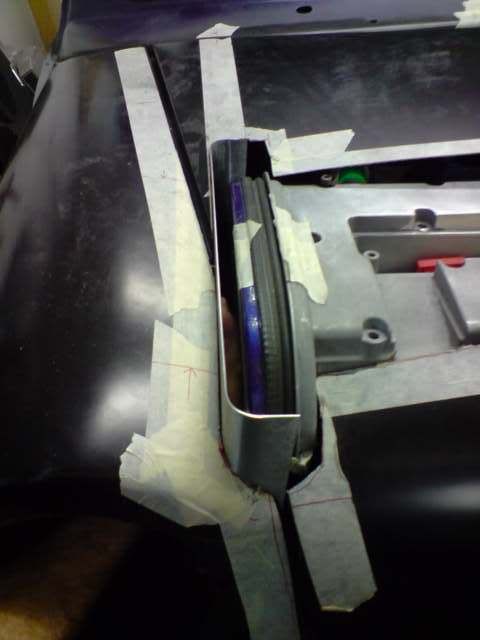
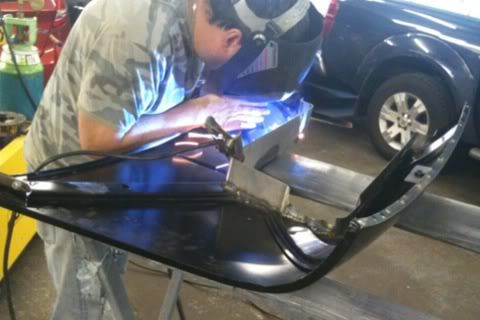
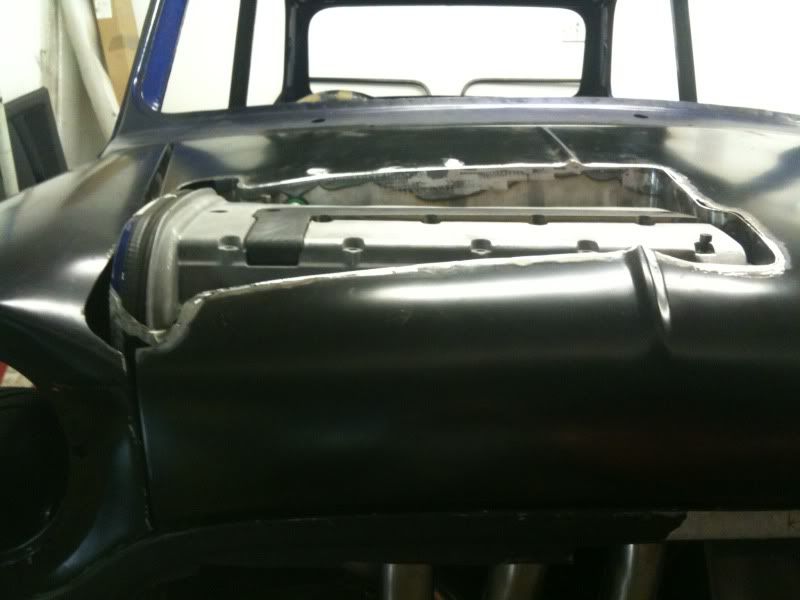

Anyone would think he knew what he was doing [FONT=Wingdings][FONT=Wingdings]J[/FONT][/FONT]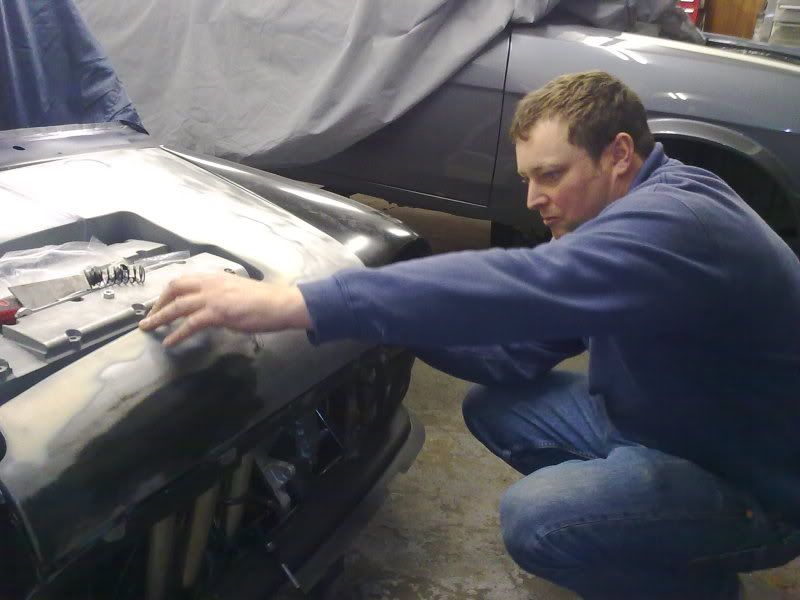
When Lee had the car back for final painting he added some more details to the bonnet including extending the bonnet centreline down the new metalwork on the bonnet.
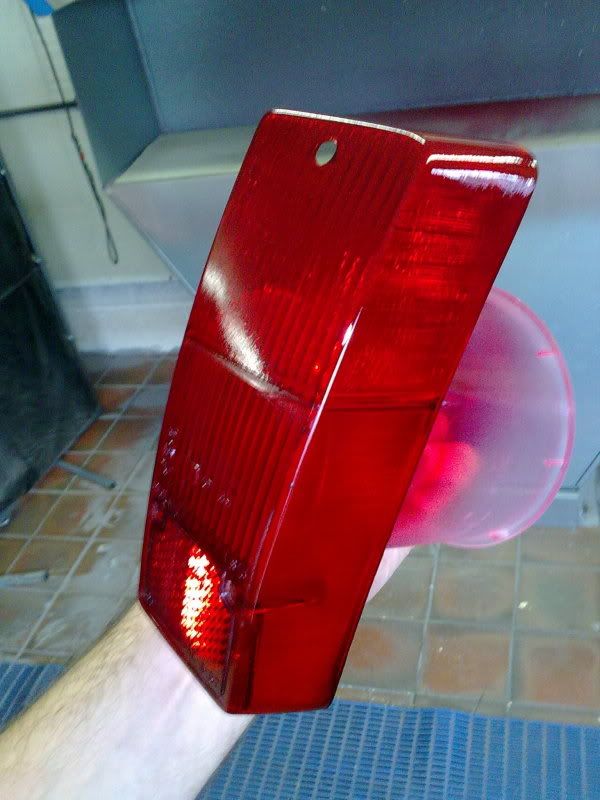
Rear Lights
Being a fan of the Euro Cleaned scene, Rich - Skunkworkz, needed to add some touches such as the 1 off rear lights. Also we wanted the older look of all red rear lights.
So we started with a spare old lens to check that the colour would end up right. After multiple coats all the orange was gone and the colour was even, it worked a treat!
Then some would call it ****, some would call it ingenious, but really its Rich's attention to detail that followed. To be honest these little touches of Rich **** ness is what has made the car what it is (but don’t tell him that).
A brand new set of lights were purchased:
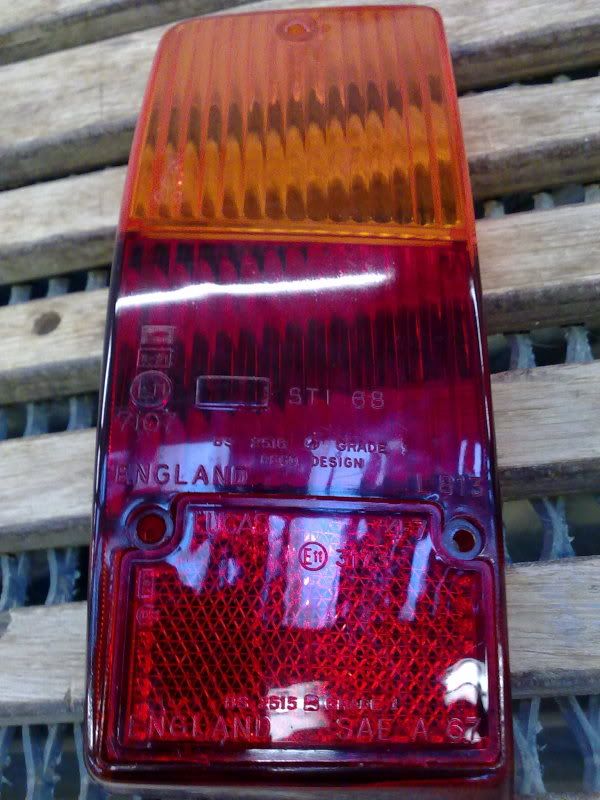
and then totally flattened back with wet and dry to remove all writing including E marks etc..

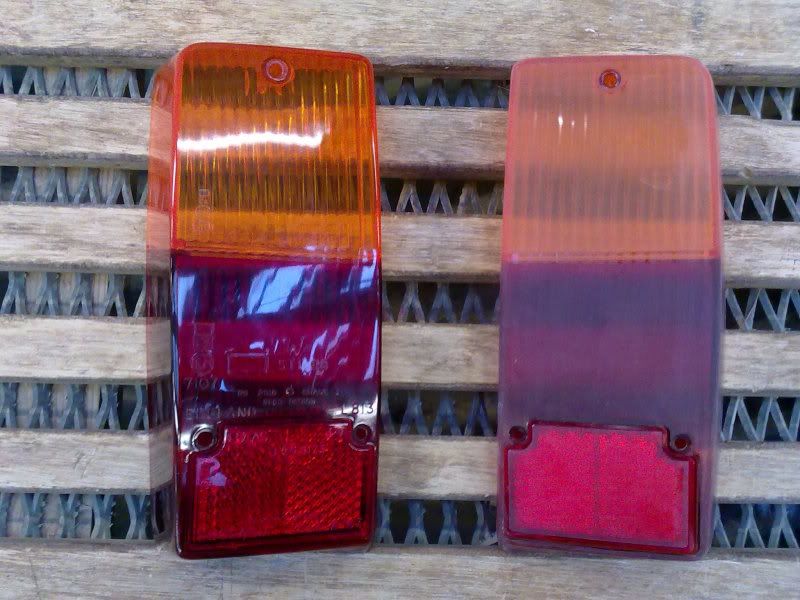
Resulting in these:
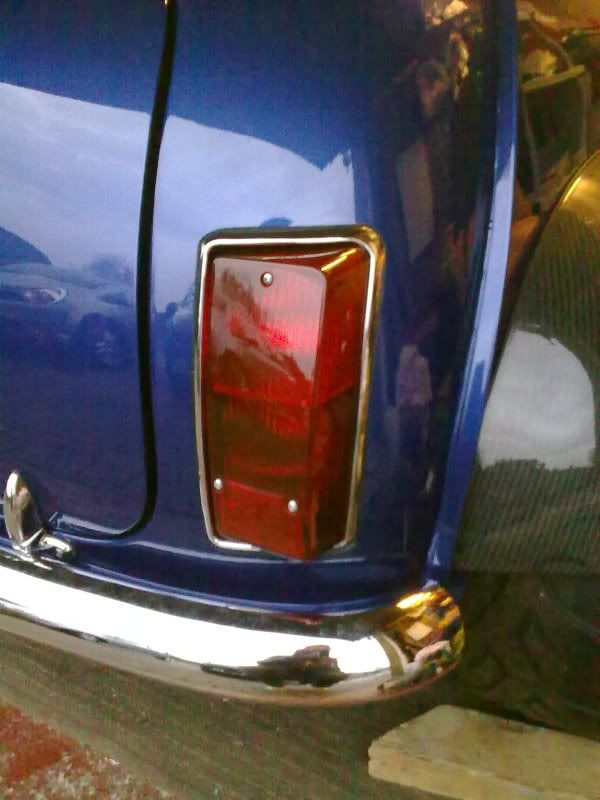
With the addition of LED bulbs for both Stop/Tail/Indicators it really brings the rear end up to date. All colours show through the red lenses perfectly.
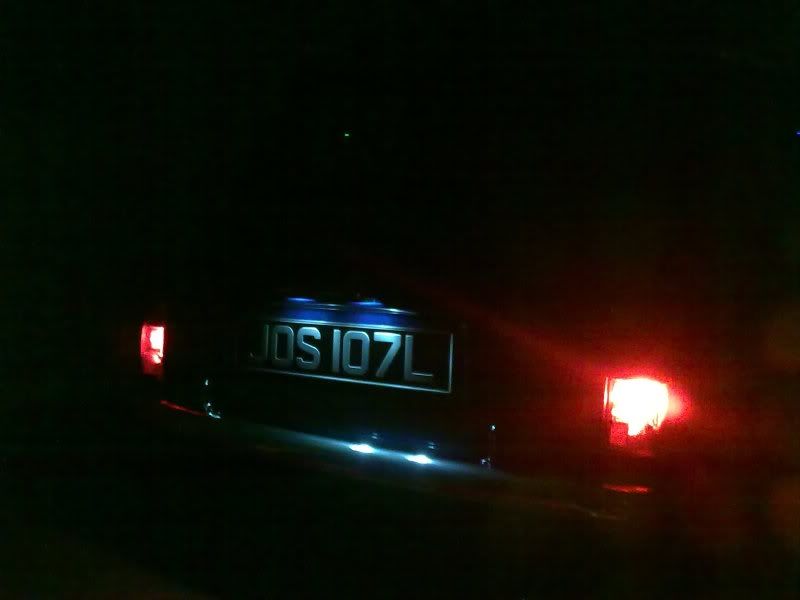
We've had lots of comments about them, such as 'are they Australian spec?'
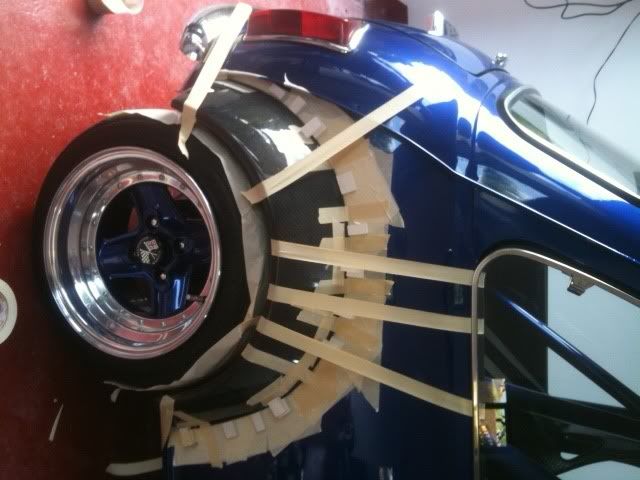
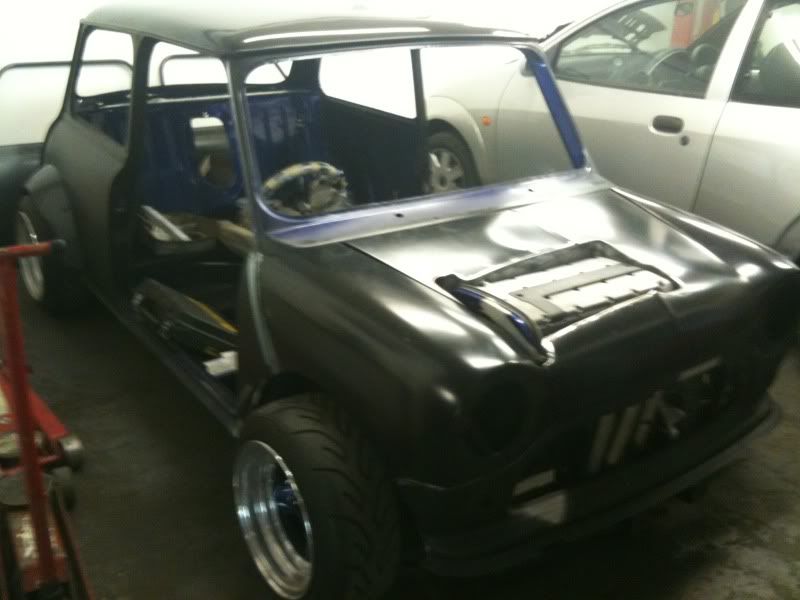
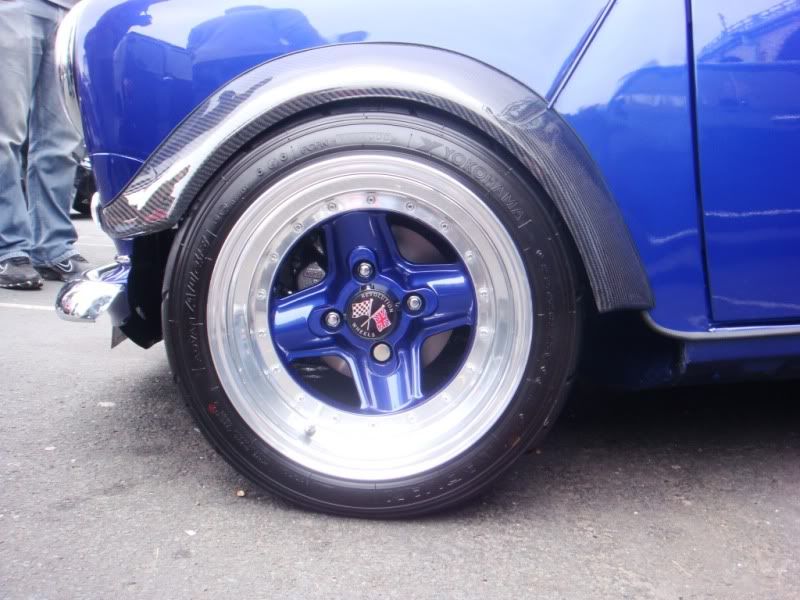
Front Arches
We wanted the car to have a low wide stance, so Miglia Wide Carbon arches were purchased.
We'd seen too many other cars with arches that had been poorly fitted with uneven heights and gaps, visible screws holding them together. We wanted to do something a bit better so a lot of time and attention was spent getting them right. Original, Rich insisted that we fitted the arches with no rubber beading at all, which would have looked great and actually did as the arches were made to have a perfect fit, but knowing the car was going to be used and the car was going to flex and things would move he finally gave in and we sourced a 3mm P strip to sit between the arch and bodywork.
After we'd set the ride height with the 8x13 wheels, we then started trimming, fitting, trimming, fitting.... each arch! It was a never ending task.
We were somewhere near where we wanted to be. So the arches were mocked up as close as possible and taped in place to show us what part of the front wing would need trimming to allow tyre clearance when the wheels turned.
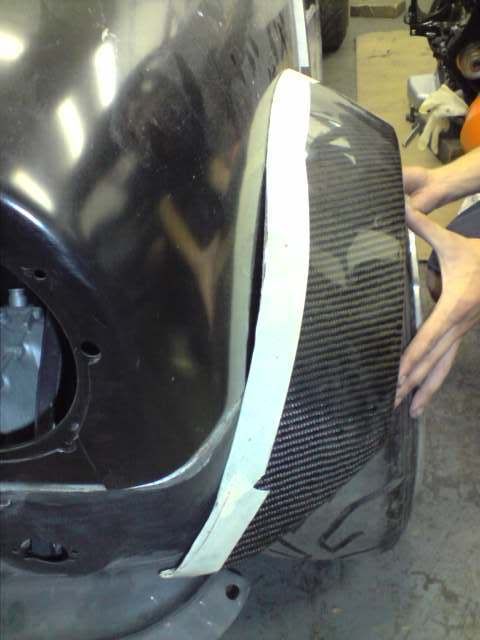
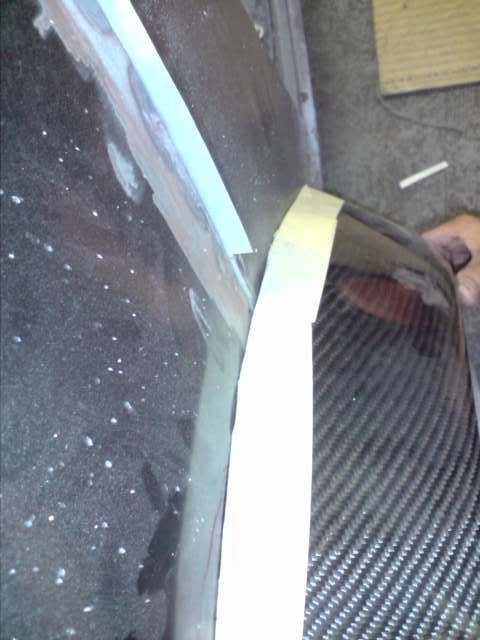
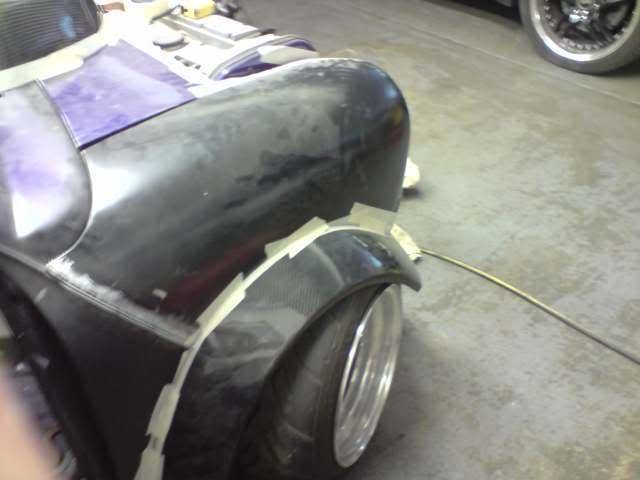
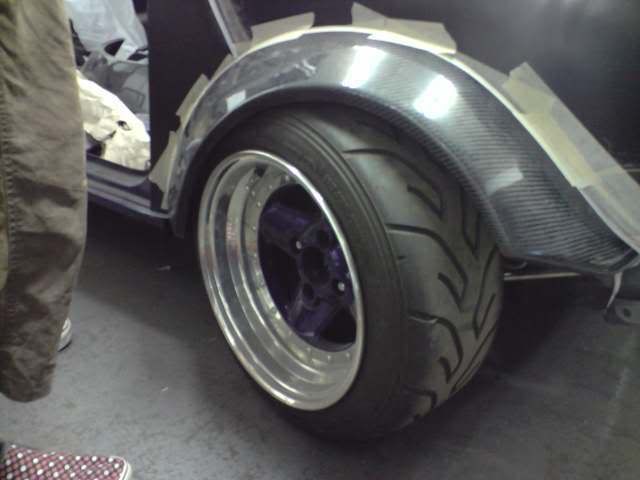
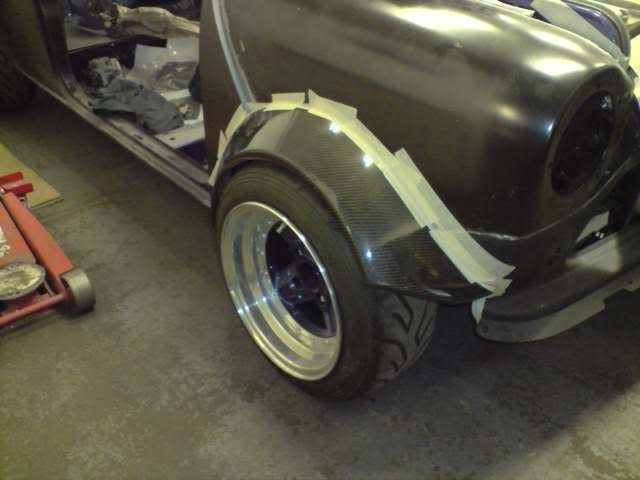
The arches were not going to be finally fitted up with the brackets bonded on until final fit up. And it took a fair amount of taping, clamping and bonding to get them perfect, but after a bit of work it all turned out good.

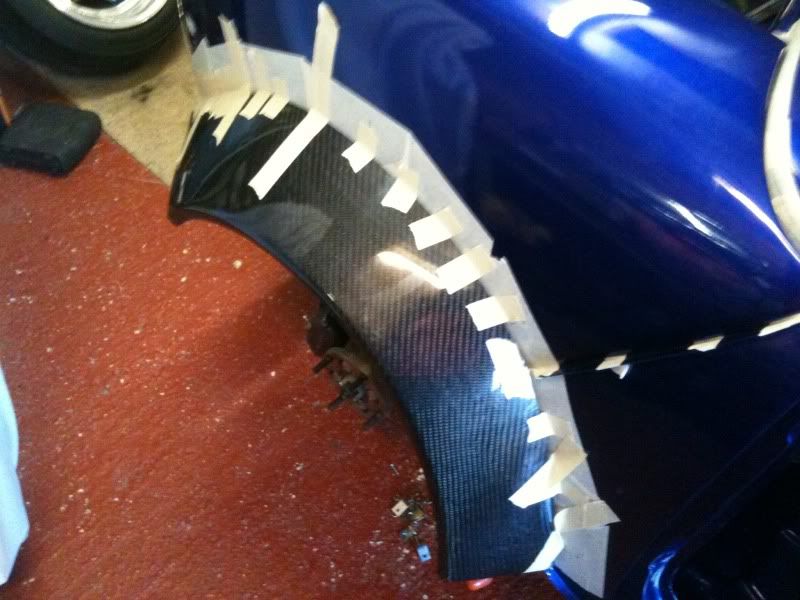
Rear Arches
These were actually done twice. Some of you may have noticed that when the car first came out the rear arches had 'dimples' around them, these were where the brackets were too tight. Also the rear arches went a little cloudy. We lived with them for a bit, then we decided to get some more.
The new ones fit perfectly, after some creative bonding.
Bootlid
Its pretty much a standard bootlid apart from it having no badges and the rear number plate bulbs have been swapped out for crystal white LED ones to enhance the modern feel with all chrome work being new.

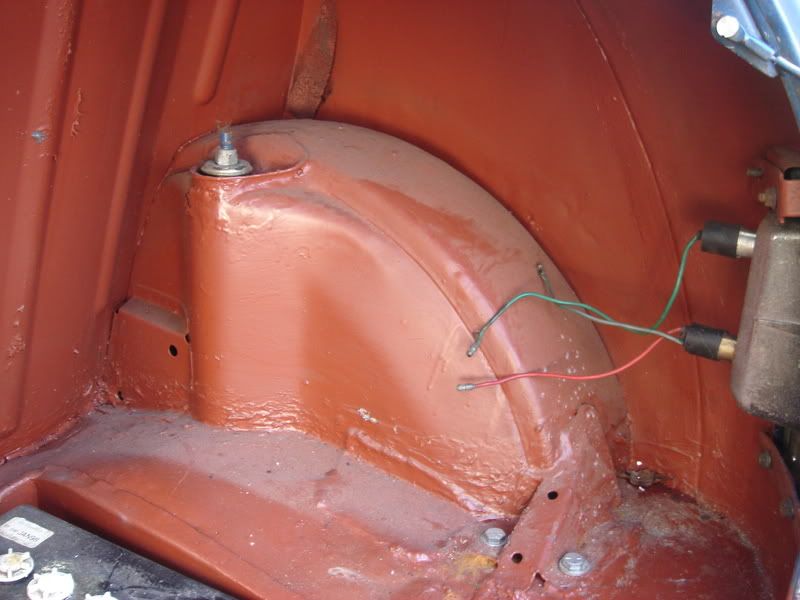
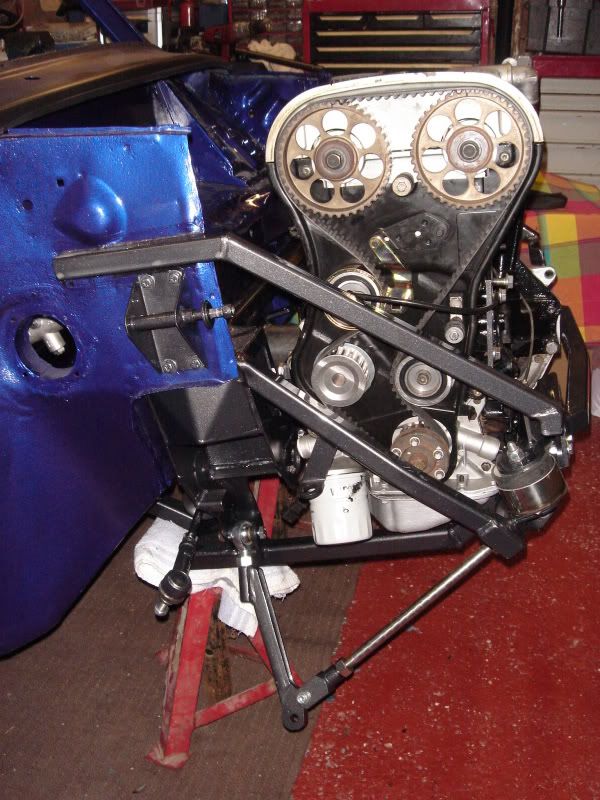
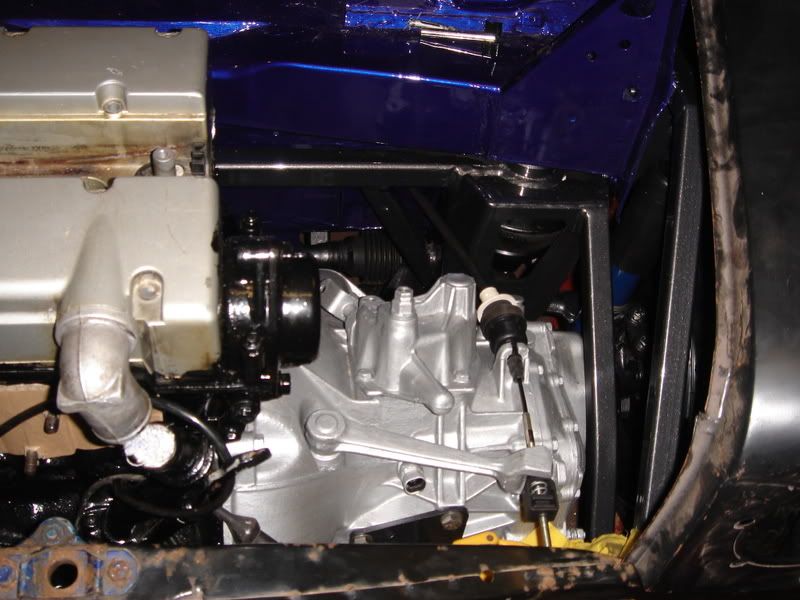
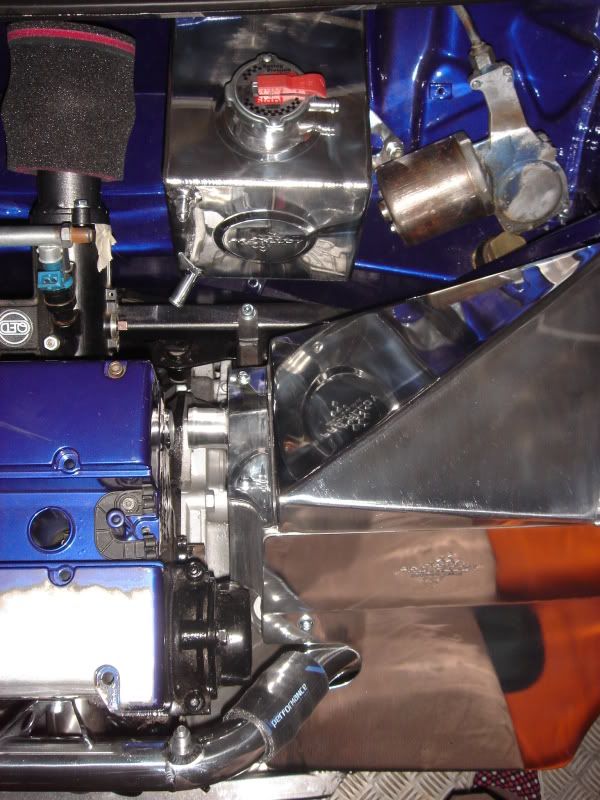
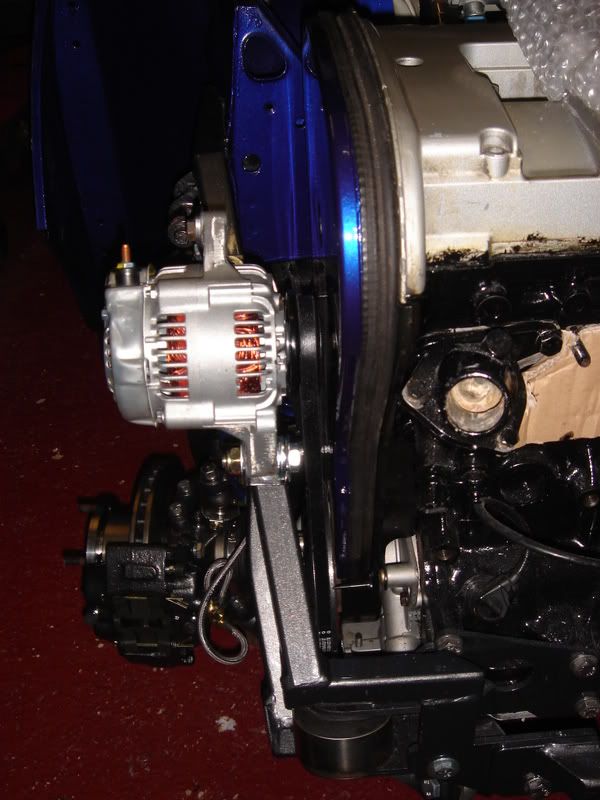
Alternator
With limited space, we had to come up with something different. We originally planned to run the bracket from the Allspeed kit which mounted the alternator on the front of the engine as apposed to the rear on the standard engine. But even with the small Nipon Denso item that was purchased, there just wasn't enough space, but there was space in the inner wing! So with some research done on the alternator running backwards and a couple of brackets knocked up including an adjustable one plus a new belt purchased of the correct length, we mounted it up in its new position. There were a fair few people who said it would never work with the engine moving about, but for us with it being in line with the bottom pulley we had full confidence in it. With 2000 miles under our belt it has been 100% reliable (touch wood) and with a voltmeter on the digidash it shows a constant charging voltage of 14.2v regardless of how the car is being driven!
We wanted a Carbon plug cover to break up the engine, especially as the engine would now be on show. Because of the changes to the rocker cover, there would be no 'off the shelf' cover, so the original one needed to be modified.
With the oil filler cap removed, there would be a small 1/8 of a circle part missing. So Rich filled it. Whilst he was there he filled the back of the cover with carbon fibre & resin. Then flatted the raised letters on the front down until the top face was flush.
Once we'd tested the fit, it was then wrapped in Carbon. Admittedly its not complete Carbon, but it’s definitely not vinyl, so it was the best option available.
Rich also Carboned the plug lead holder that keeps the leads tidy (yes very ****, but attention to detail is everything)
Bonnet Fabrication by Crash Care Centre
Now if you've either come and spoke to us at a show or if you've read one of the magazine features you may know the story behind this one.
When we started looking at a few things such as how we wanted the engine to look with all the original covers, and obviously the engine position which finished above the wing level and how it would have had to be part of the front wing we knew that bulge would have took up half of the bonnet and gone into the wing.
So one night whilst having a 'thinking night' as apposed to a 'doing night' around the car, Chris's wife Karen who's house we were building the house at came out and suggested 'how about just cutting a hole in the bonnet?' At first I looked dubious, but as soon as the others heard it they was sold! After an agreement that we were going to have 2 bonnets, 1 for general use and 1 for show, I was sold! To this day we've never seen a 2nd bonnet, shows how much we all liked the crazy idea!
Luckily we had a spare bonnet, so we chopped a hole in it just to see what it would look like.
We got on the phone to top metal fabricator friend John who was up for making a frame for the bonnet, we dropped him over a spare rocker and some dimensions and days later he'd produced 2 identical frames that were rocker cover shaped with an even 10mm gap all the way around.
Now we had the parts needed we moved the car back to Crash Care Centre and explained the plan to Lee who luckily has a good imagination, and was well up for the challenge. Next thing you know we were cutting up a brand new bonnet and cutting in the edging strips ready for welding. We then handed it over to Lee for some expert welding.
Anyone would think he knew what he was doing [FONT=Wingdings][FONT=Wingdings]J[/FONT][/FONT]
When Lee had the car back for final painting he added some more details to the bonnet including extending the bonnet centreline down the new metalwork on the bonnet.
Rear Lights
Being a fan of the Euro Cleaned scene, Rich - Skunkworkz, needed to add some touches such as the 1 off rear lights. Also we wanted the older look of all red rear lights.
So we started with a spare old lens to check that the colour would end up right. After multiple coats all the orange was gone and the colour was even, it worked a treat!
Then some would call it ****, some would call it ingenious, but really its Rich's attention to detail that followed. To be honest these little touches of Rich **** ness is what has made the car what it is (but don’t tell him that).
A brand new set of lights were purchased:
and then totally flattened back with wet and dry to remove all writing including E marks etc..
Resulting in these:
With the addition of LED bulbs for both Stop/Tail/Indicators it really brings the rear end up to date. All colours show through the red lenses perfectly.
We've had lots of comments about them, such as 'are they Australian spec?'
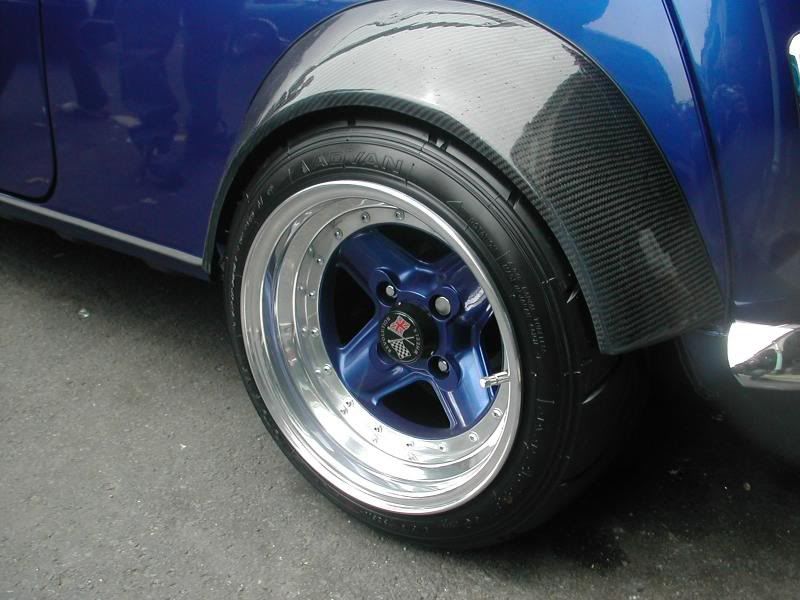
Front Arches
We wanted the car to have a low wide stance, so Miglia Wide Carbon arches were purchased.
We'd seen too many other cars with arches that had been poorly fitted with uneven heights and gaps, visible screws holding them together. We wanted to do something a bit better so a lot of time and attention was spent getting them right. Original, Rich insisted that we fitted the arches with no rubber beading at all, which would have looked great and actually did as the arches were made to have a perfect fit, but knowing the car was going to be used and the car was going to flex and things would move he finally gave in and we sourced a 3mm P strip to sit between the arch and bodywork.
After we'd set the ride height with the 8x13 wheels, we then started trimming, fitting, trimming, fitting.... each arch! It was a never ending task.
We were somewhere near where we wanted to be. So the arches were mocked up as close as possible and taped in place to show us what part of the front wing would need trimming to allow tyre clearance when the wheels turned.
The arches were not going to be finally fitted up with the brackets bonded on until final fit up. And it took a fair amount of taping, clamping and bonding to get them perfect, but after a bit of work it all turned out good.
Rear Arches
These were actually done twice. Some of you may have noticed that when the car first came out the rear arches had 'dimples' around them, these were where the brackets were too tight. Also the rear arches went a little cloudy. We lived with them for a bit, then we decided to get some more.
The new ones fit perfectly, after some creative bonding.
Bootlid
Its pretty much a standard bootlid apart from it having no badges and the rear number plate bulbs have been swapped out for crystal white LED ones to enhance the modern feel with all chrome work being new.
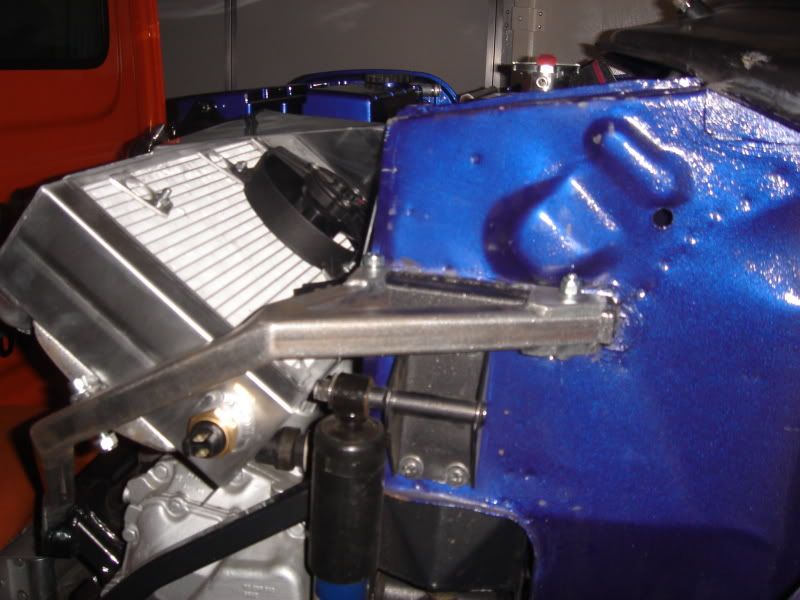
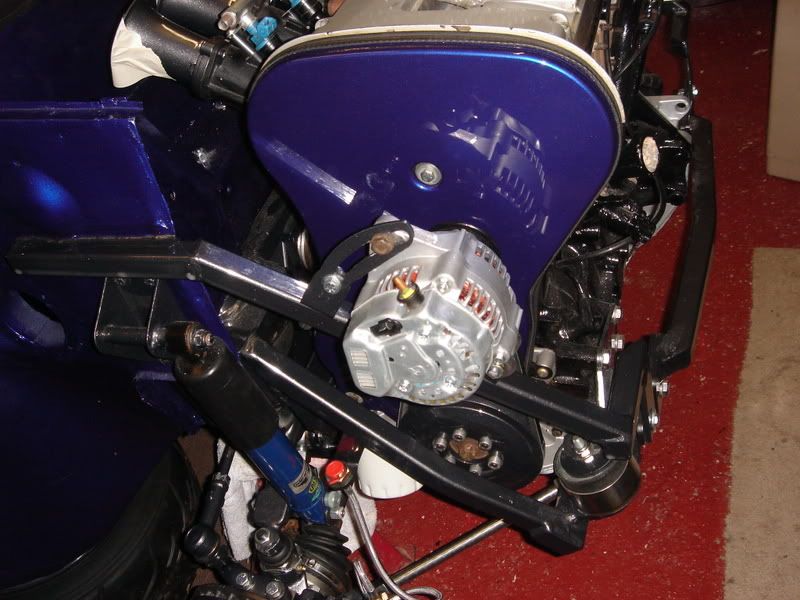
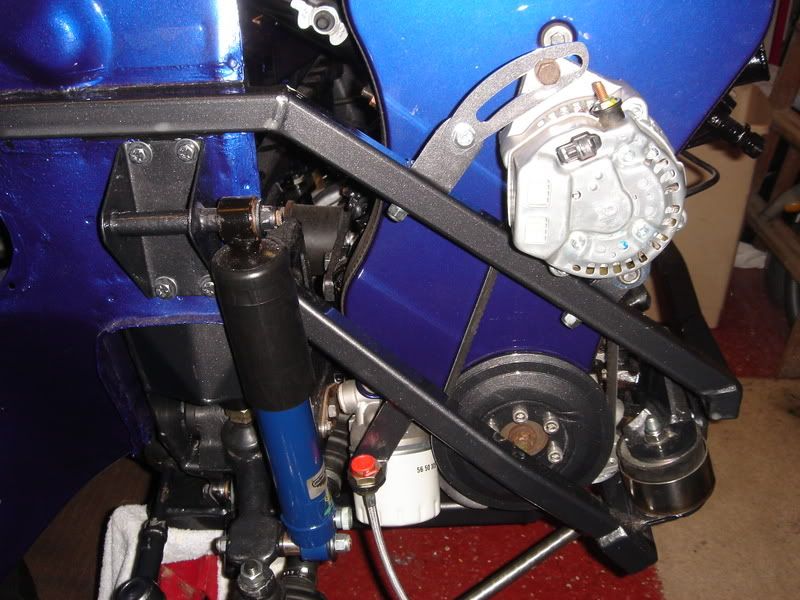
Alternator
With limited space, we had to come up with something different. We originally planned to run the bracket from the Allspeed kit which mounted the alternator on the front of the engine as apposed to the rear on the standard engine. But even with the small Nipon Denso item that was purchased, there just wasn't enough space, but there was space in the inner wing! So with some research done on the alternator running backwards and a couple of brackets knocked up including an adjustable one plus a new belt purchased of the correct length, we mounted it up in its new position. There were a fair few people who said it would never work with the engine moving about, but for us with it being in line with the bottom pulley we had full confidence in it. With 2000 miles under our belt it has been 100% reliable (touch wood) and with a voltmeter on the digidash it shows a constant charging voltage of 14.2v regardless of how the car is being driven!
#6
03-26-2011, 12:20 PM
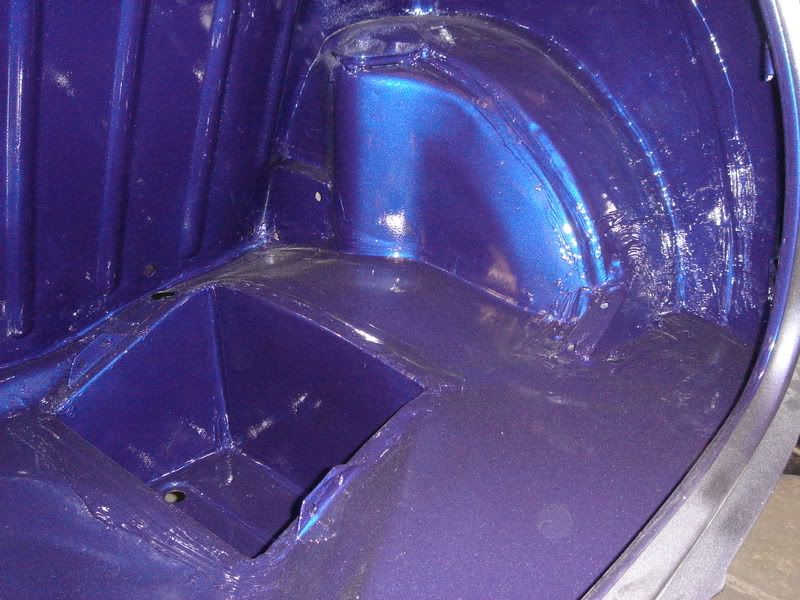
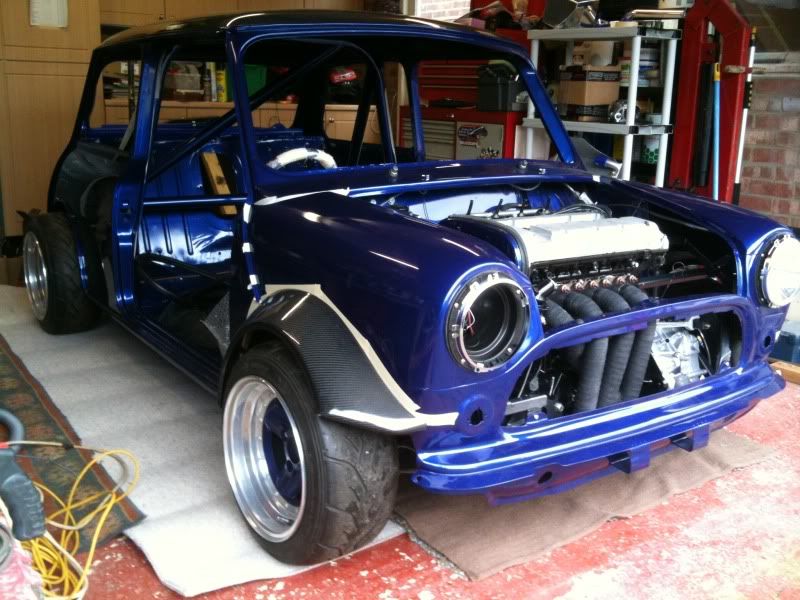
Paint
When it came to the bodywork, we left it to the pro's.
We entrusted in friend and master bodywork guru Lee, who runs Crash Care Centre in Hitchin, Herts.
With the idea of Ford Imperial Blue in contrast with the Carbon parts, we knew we were onto a winner.
The pictures show it all, so enjoy.
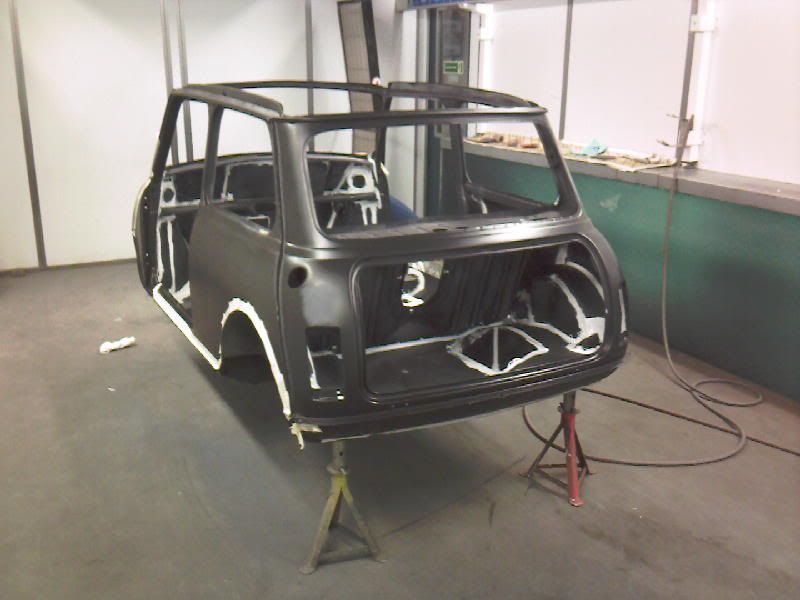
Primer
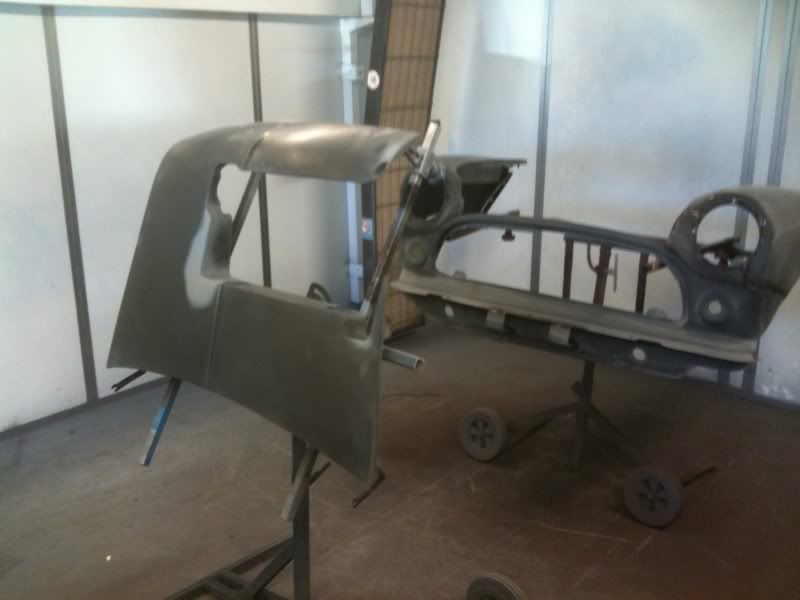
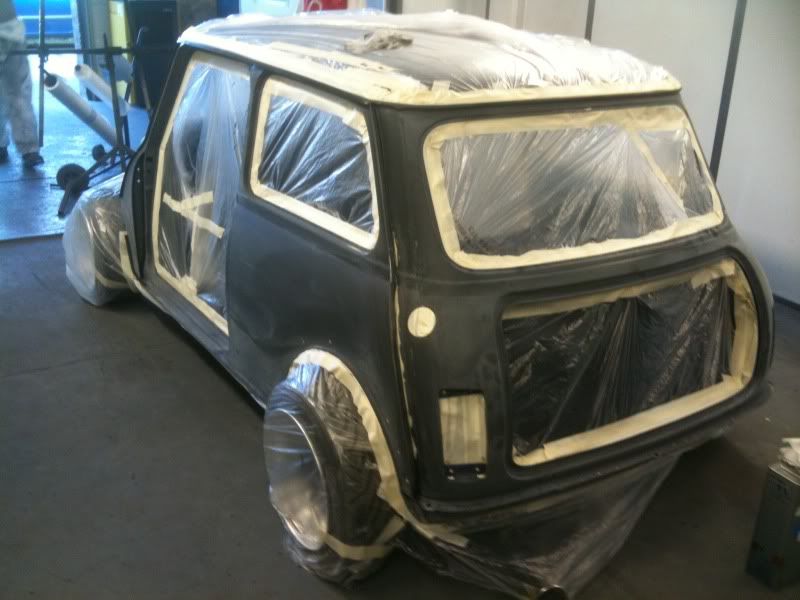
Painting
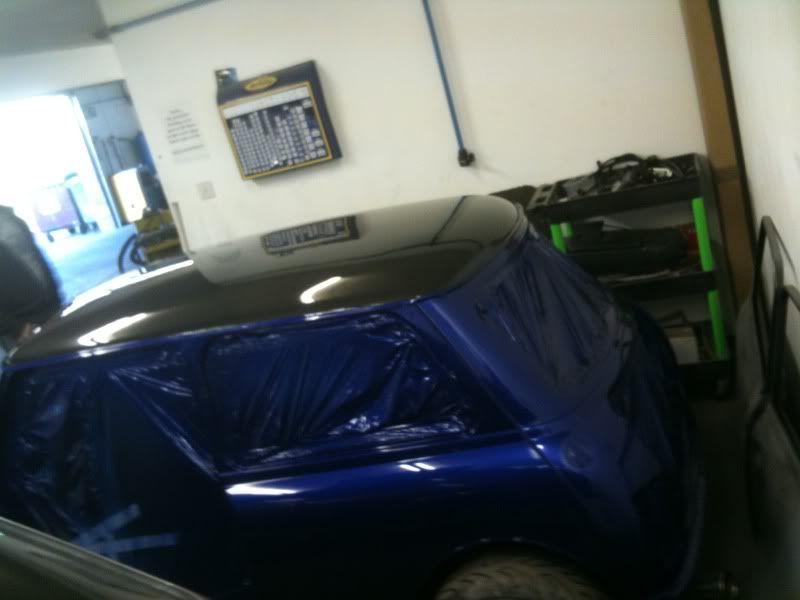
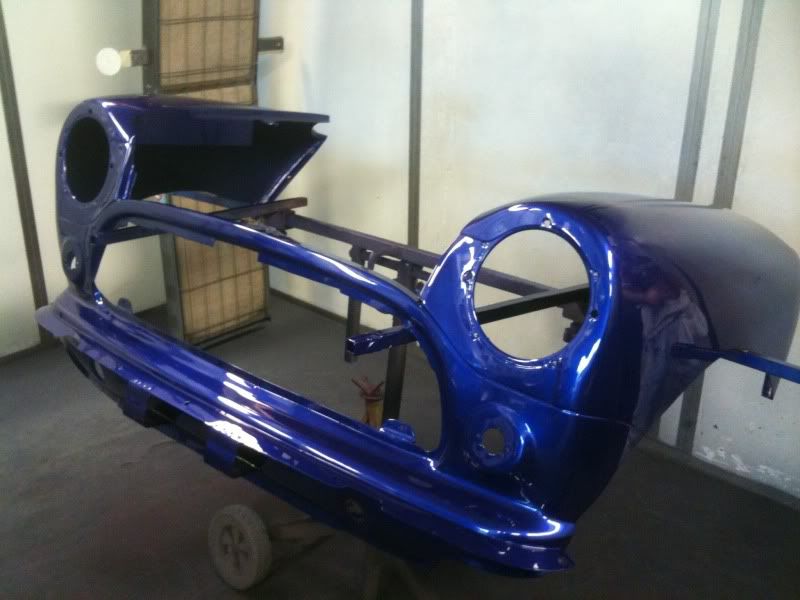
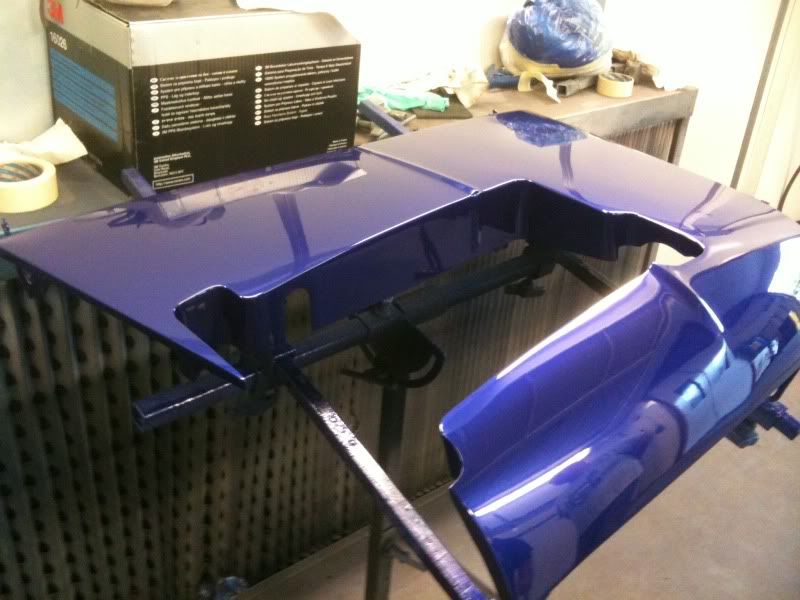
Buffed
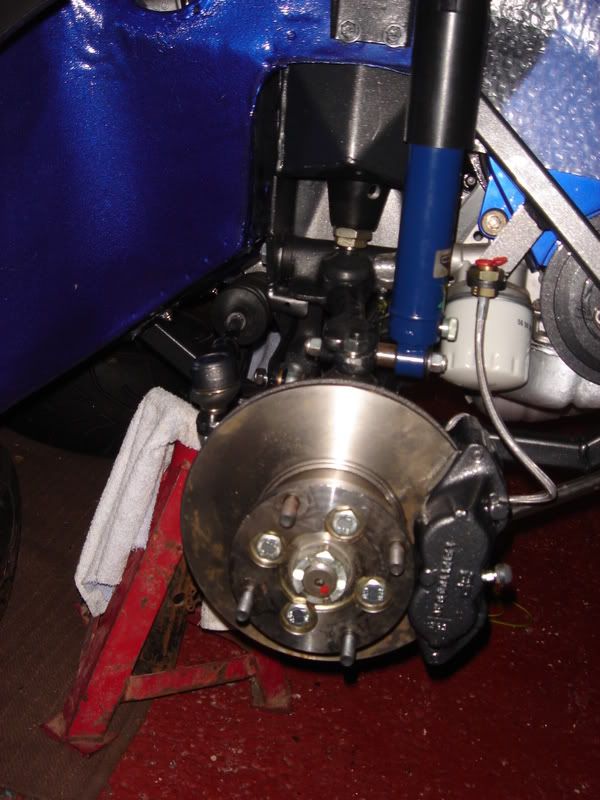
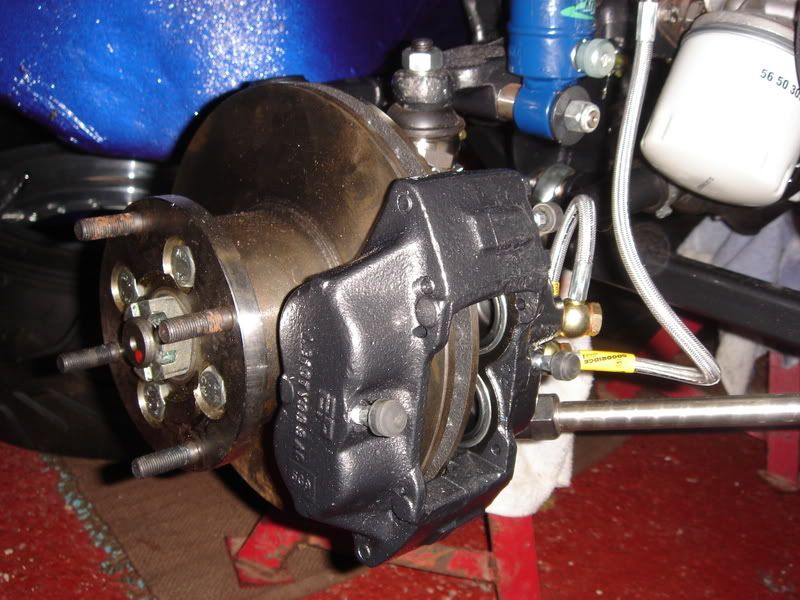
Brakes
When you've got 200+bhp under your right foot, you need something substantial under your left foot. We looked at a lot of the billet conversions that are offered, but had heard mixed reviews on them. We also looked into rear disc conversions, but decided against it for the amount of braking the rear brakes do.
So in the end we decided to go for a Wilwood Dual Master Cylinder / Pedal assembly, along with fully refurbished Metro Turbo 4 Pot Callipers and discs up front with a standard set up in the rear. There is a bias valve installed to aid in distributing the braking power where you want/need it most. The handbrake was also moved back 8 inches due to the gear lever moving back. The car will be getting 'used' more this year so we'll see how the set up holds up under a bit more strain.
The Carbon Fibre....
I've been lucky enough to previously own some nice cars. TVR Chimera, TVR Tuscan and a Porsche 996 Turbo. The Porsche was clad with every piece of optional Carbon Fibre that could be purchased, and when you put the Porsche name on anything things aren't cheap! But the Carbon bug had bitten me!
Luckily for me, Rich works for an Aerospace company that uses lots of different materials including Carbon Fibre & Kevlar, and although he's not officially on the tools anymore, he tells me it’s like riding a bike. So after some persuading we decided it would be good to have some custom pieces on the car, little did he know that it would grow as much as it did.
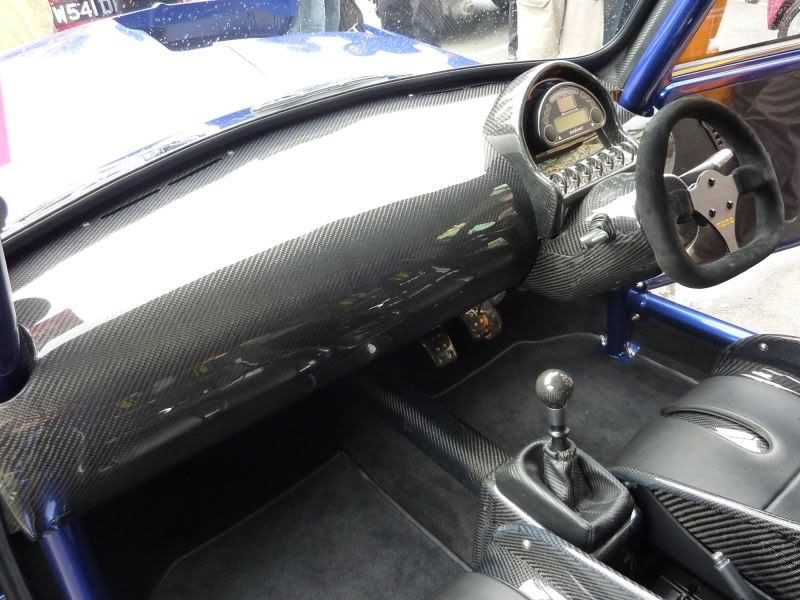
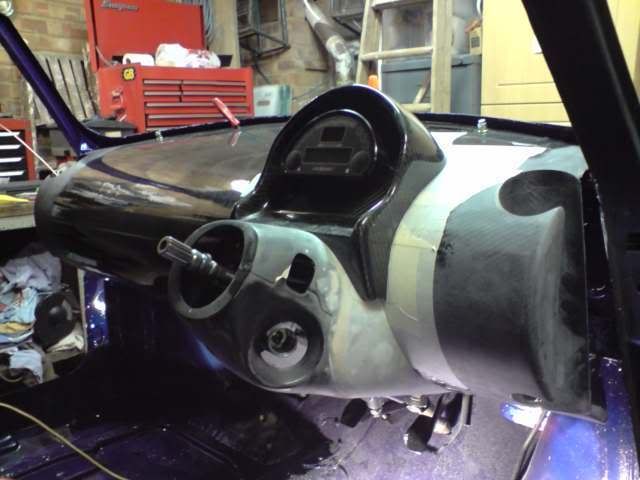
Dash
This started life as an off the shelf item, but its had so many hours spent on it Rich tells me we should have just started from scratch and made our own. It might aswell have been made for a Mk1 escort for how good it fitted. The problem was we wanted it to be functional with the heater, but with the heater hidden, and minimal switches visible.
So again, after a lot of cutting and trimming we had the basic shape fitted.
But this was just the start of things to come...
We then decided to fit Corsa power steering, which meant a bit more of the dash needed trimming to fit snugly.
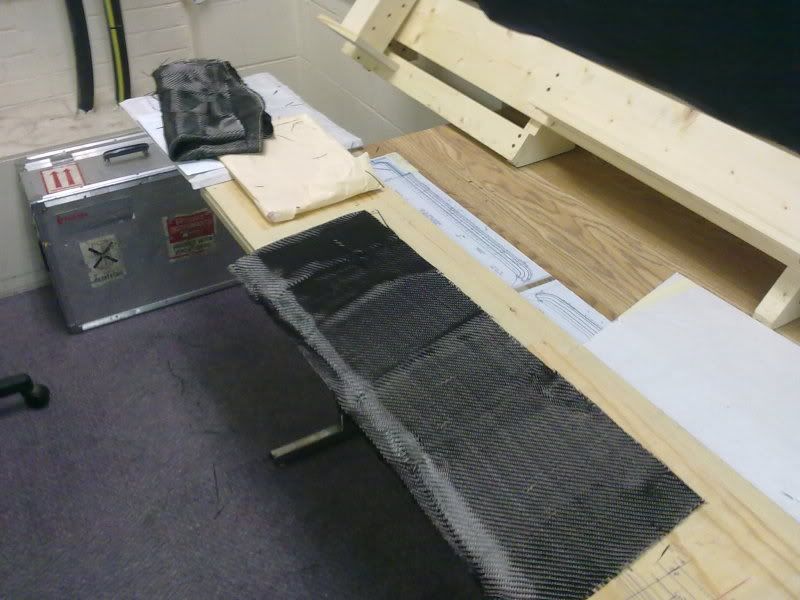
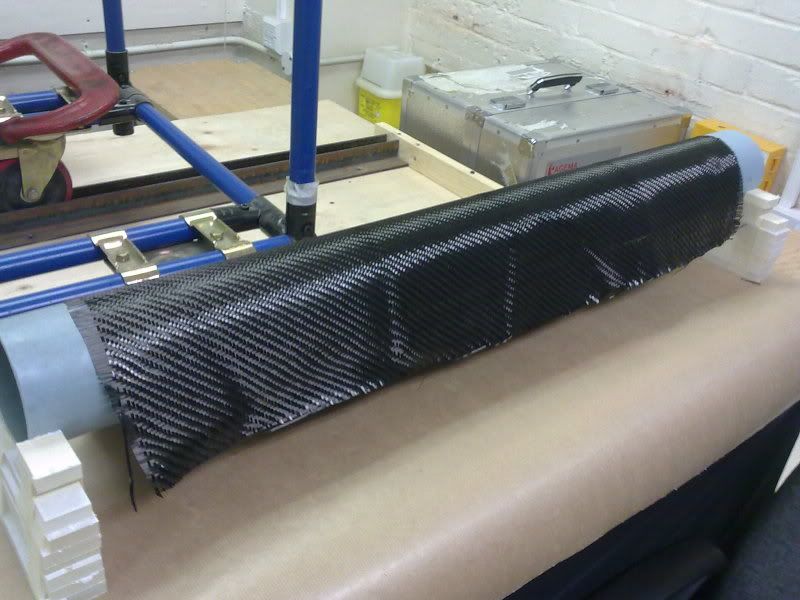
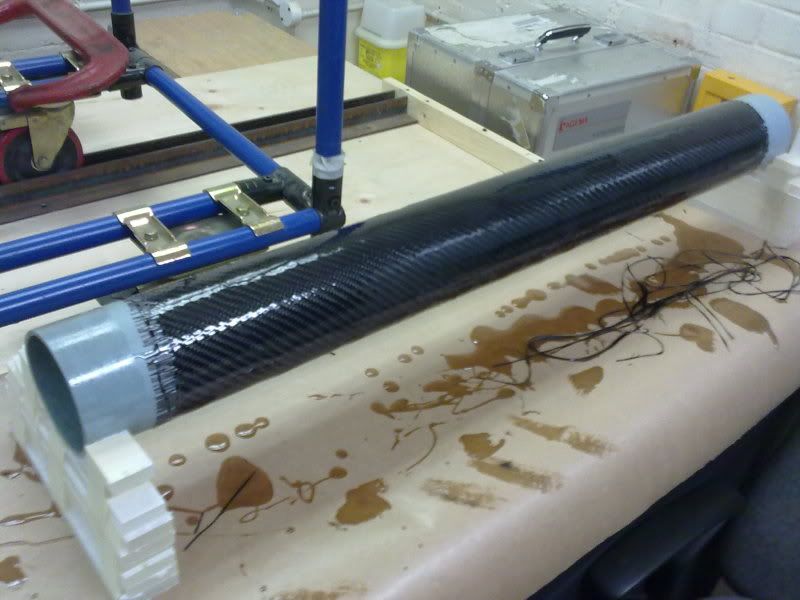
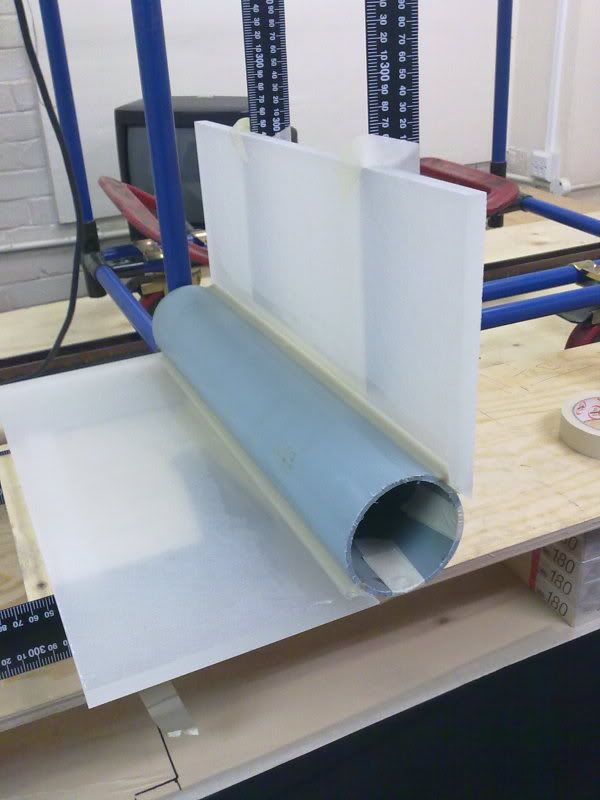
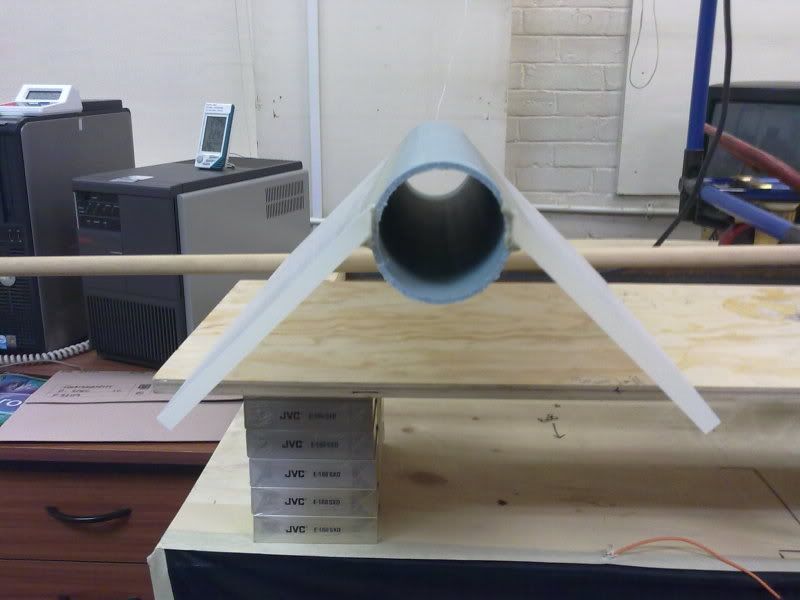
And then I decided I wanted a 6 point rollcage, which sadly for Rich went straight through the freshly fitted dashboard. Again we have seen rollcages through dashboards, but there always crude holes that either don't fit properly or that you can see through to the wiring under the dash. We wouldn't have been happy with this so Rich got to work, making Carbon tubes that were 1" larger diameter than the rollcage giving a 1/2" gap all the way around the rollcage once fitted. These tubes were made on a 3" x 24" aluminium tube fixture that the carbon cloth was wrapped around. Once the resin was cured the inner aluminium tube was removed leaving carbon fibre tube. The dashboard was then cut to receive the tubes. These were then bonded into the dashboard with more Carbon fibre & Resin.
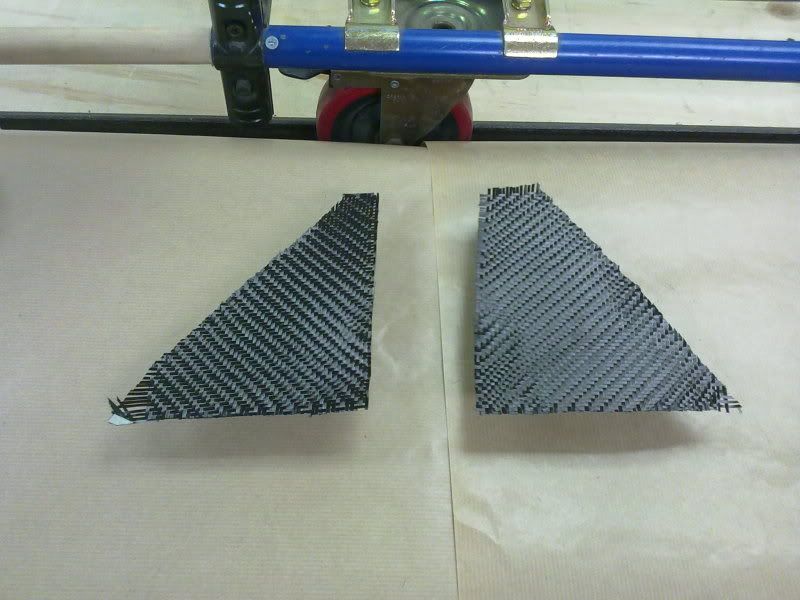
Whilst Rich was making the tubes he also made some Carbon 'L' shape filler strips to fill i the gaps between the dash and A pillar.
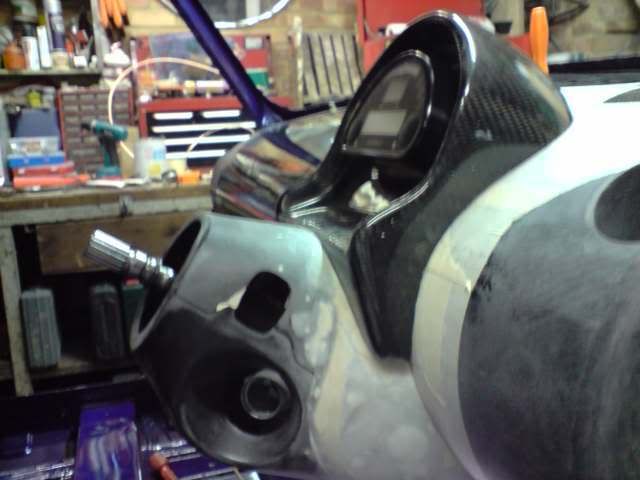
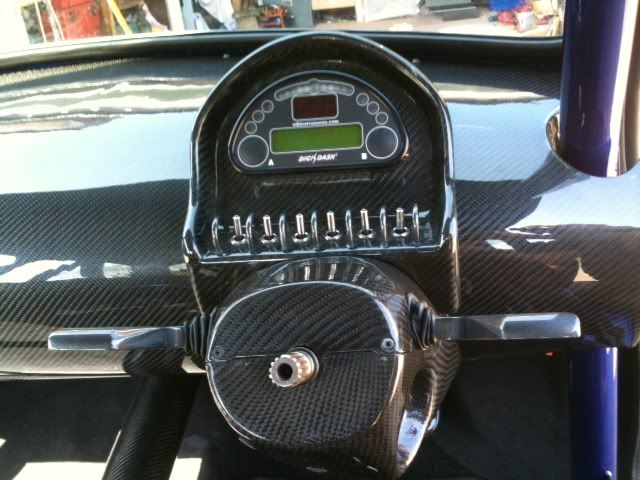
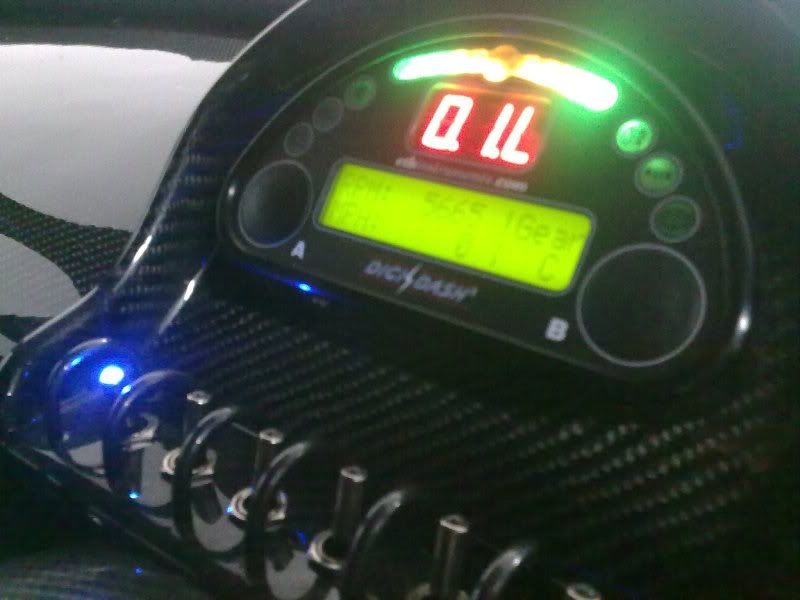
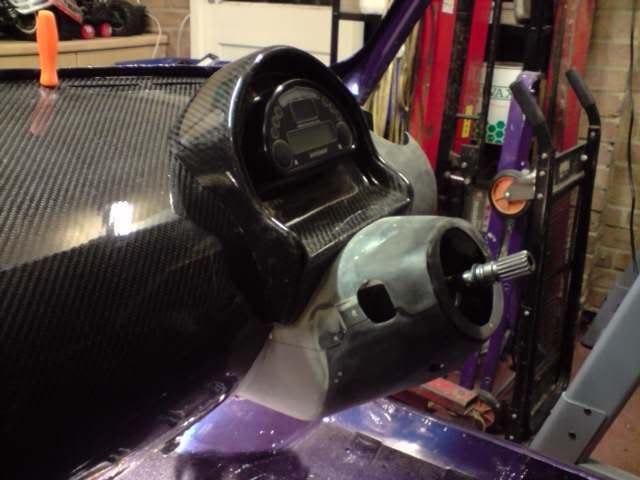
Digi Dash Binnacle/Switch Holder
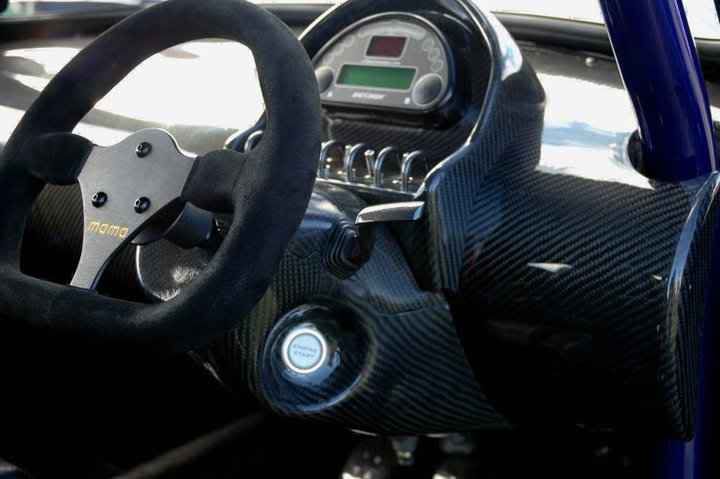
We wanted a modern Digi Dash to give us all the modern accurate readings we needed, plus we still needed switches to activate the electrics, so the ETB digi Dash was chosen, it’s got so much on it you wouldn't believe! From this the carbon binnacle was purchase, it came about twice the size that you see in the pics! We spent a few hours then shrinking it down to size to get it as small as possible, and the key here was to keep it at the same angle as the steering wheel, which we did which worked out perfectly. Again Rich insisted on hidden fixings to keep that modern look.
We then mounted the 7 new style mini hoops that separate the 6 switches that operated the Ignition/Horn/Hazzards/Heater/Side Lights/Main Beam. The wipers, Full Beam and indicators were via the TVR stalks on the column as Vauxhall intended.
When it came to the bodywork, we left it to the pro's.
We entrusted in friend and master bodywork guru Lee, who runs Crash Care Centre in Hitchin, Herts.
With the idea of Ford Imperial Blue in contrast with the Carbon parts, we knew we were onto a winner.
The pictures show it all, so enjoy.
Primer
Painting
Buffed
Brakes
When you've got 200+bhp under your right foot, you need something substantial under your left foot. We looked at a lot of the billet conversions that are offered, but had heard mixed reviews on them. We also looked into rear disc conversions, but decided against it for the amount of braking the rear brakes do.
So in the end we decided to go for a Wilwood Dual Master Cylinder / Pedal assembly, along with fully refurbished Metro Turbo 4 Pot Callipers and discs up front with a standard set up in the rear. There is a bias valve installed to aid in distributing the braking power where you want/need it most. The handbrake was also moved back 8 inches due to the gear lever moving back. The car will be getting 'used' more this year so we'll see how the set up holds up under a bit more strain.
The Carbon Fibre....
I've been lucky enough to previously own some nice cars. TVR Chimera, TVR Tuscan and a Porsche 996 Turbo. The Porsche was clad with every piece of optional Carbon Fibre that could be purchased, and when you put the Porsche name on anything things aren't cheap! But the Carbon bug had bitten me!
Luckily for me, Rich works for an Aerospace company that uses lots of different materials including Carbon Fibre & Kevlar, and although he's not officially on the tools anymore, he tells me it’s like riding a bike. So after some persuading we decided it would be good to have some custom pieces on the car, little did he know that it would grow as much as it did.
Dash
This started life as an off the shelf item, but its had so many hours spent on it Rich tells me we should have just started from scratch and made our own. It might aswell have been made for a Mk1 escort for how good it fitted. The problem was we wanted it to be functional with the heater, but with the heater hidden, and minimal switches visible.
So again, after a lot of cutting and trimming we had the basic shape fitted.
But this was just the start of things to come...
We then decided to fit Corsa power steering, which meant a bit more of the dash needed trimming to fit snugly.
And then I decided I wanted a 6 point rollcage, which sadly for Rich went straight through the freshly fitted dashboard. Again we have seen rollcages through dashboards, but there always crude holes that either don't fit properly or that you can see through to the wiring under the dash. We wouldn't have been happy with this so Rich got to work, making Carbon tubes that were 1" larger diameter than the rollcage giving a 1/2" gap all the way around the rollcage once fitted. These tubes were made on a 3" x 24" aluminium tube fixture that the carbon cloth was wrapped around. Once the resin was cured the inner aluminium tube was removed leaving carbon fibre tube. The dashboard was then cut to receive the tubes. These were then bonded into the dashboard with more Carbon fibre & Resin.
Whilst Rich was making the tubes he also made some Carbon 'L' shape filler strips to fill i the gaps between the dash and A pillar.
Digi Dash Binnacle/Switch Holder
We wanted a modern Digi Dash to give us all the modern accurate readings we needed, plus we still needed switches to activate the electrics, so the ETB digi Dash was chosen, it’s got so much on it you wouldn't believe! From this the carbon binnacle was purchase, it came about twice the size that you see in the pics! We spent a few hours then shrinking it down to size to get it as small as possible, and the key here was to keep it at the same angle as the steering wheel, which we did which worked out perfectly. Again Rich insisted on hidden fixings to keep that modern look.
We then mounted the 7 new style mini hoops that separate the 6 switches that operated the Ignition/Horn/Hazzards/Heater/Side Lights/Main Beam. The wipers, Full Beam and indicators were via the TVR stalks on the column as Vauxhall intended.
#7
03-26-2011, 12:21 PM
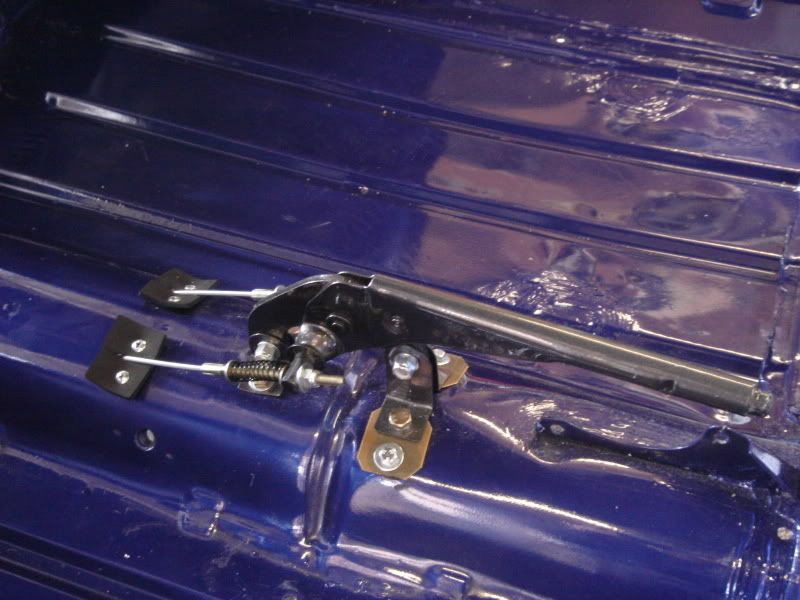
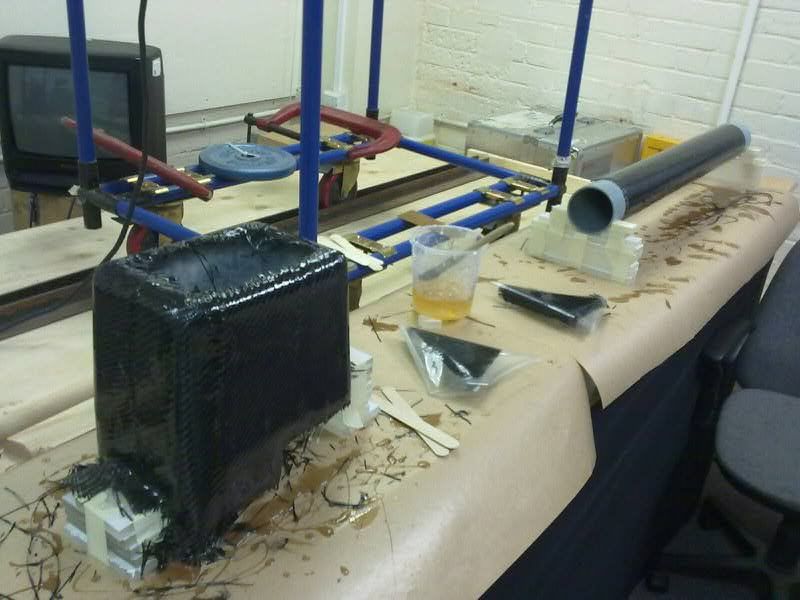
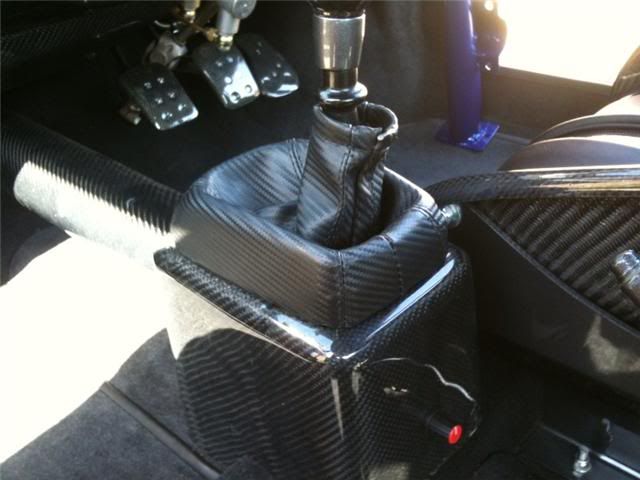
Carbon Gear Lever Surround & Linkage Cover
For those of you that know a little about mini XE conversions you'll know that the Vauxhall gear linkage would normally be visible and bolted to the floor with the shortened linkage joining the gearbox and gear lever just floating in mid air.
We knew we wouldn't be happy with this, so Rich got to work and started knocking up some more 1 off Carbon parts.
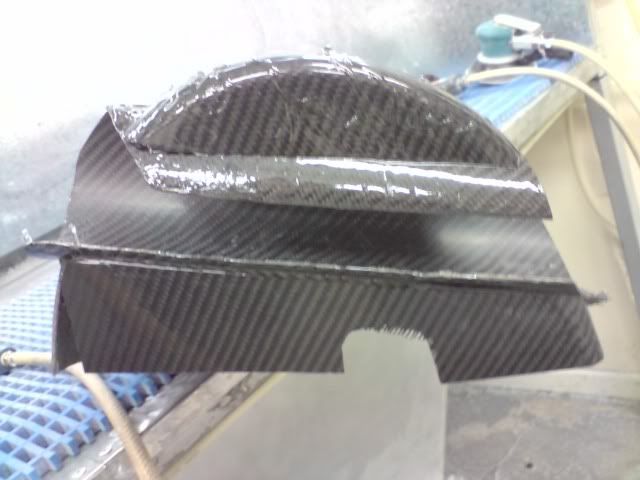
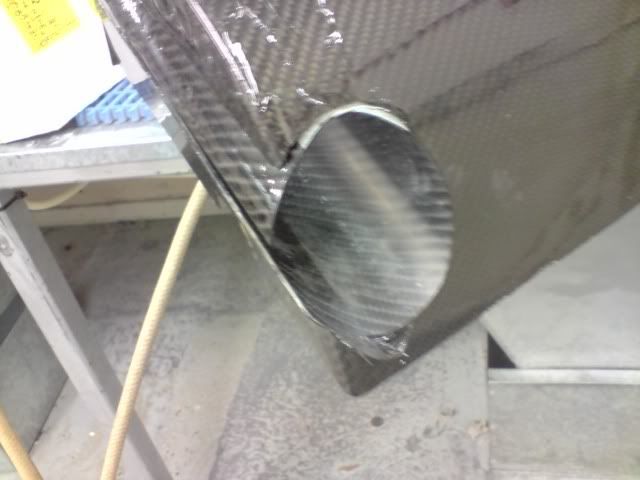
The cover for the gear lever assembly had to fit between the seats, accept the original gear lever gaiter, be a location for the power steering adjuster and have hidden fixings, so this was made from scratch. And the tube that went from this cover to the bulkhead had to sit in mid air with hidden fixings, so Rich used a 80mm pipe as a mould to wrap. Once the resin had cured the pipe was removed. We came up with these.
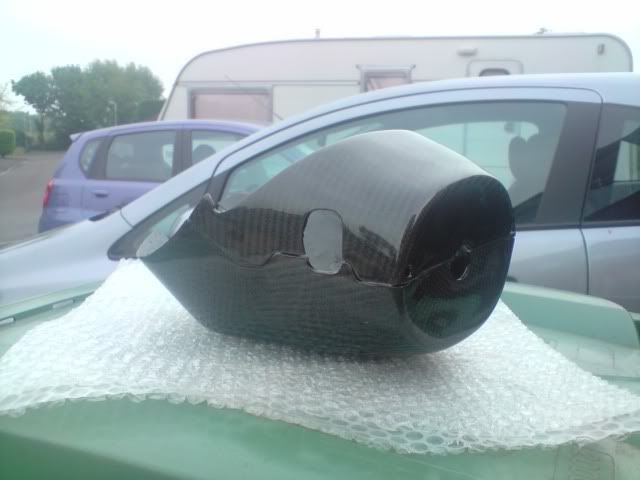
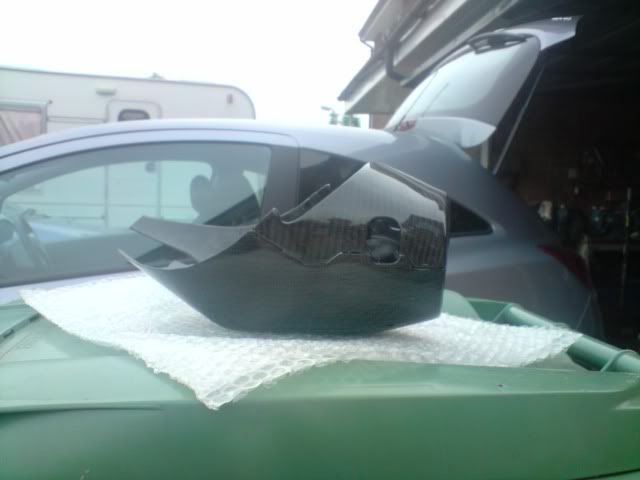
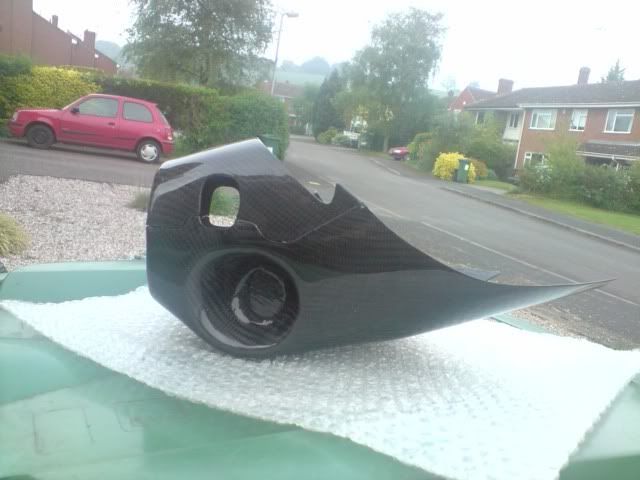
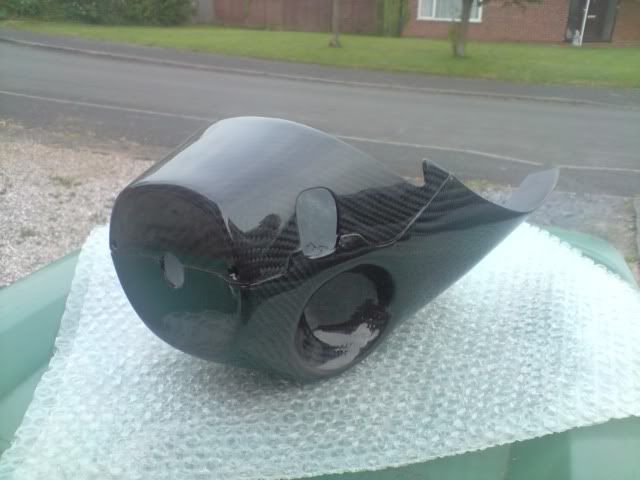
Carbon Steering Column Cover
As we were using Vauxhall Corsa C power steering, it was obvious to start life using the Corsa steering column shroud, but it didn't fit too good.
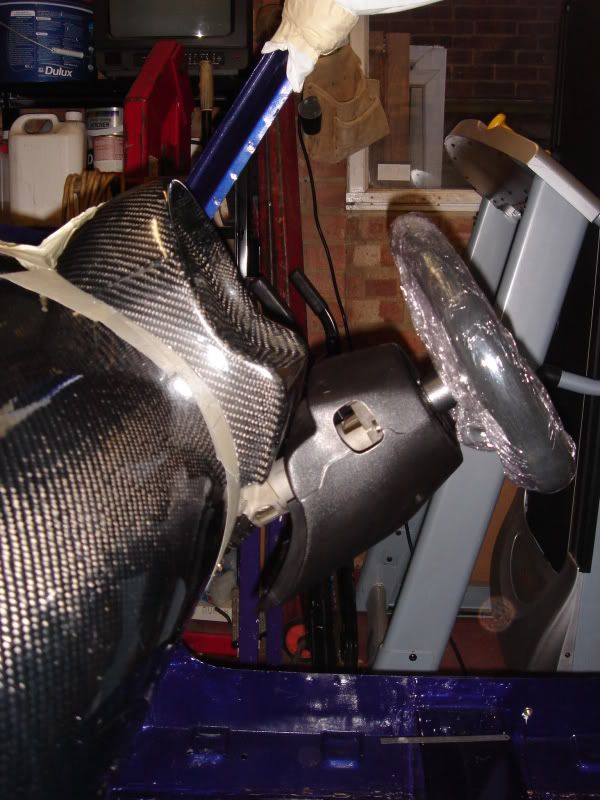
So again, rich had to get creative. So after numerous hours of playing and inventing, he came up with this.
But for us to be able to keep it useable, it had to be able to be removed, so we kept the original fixings and how it splits.
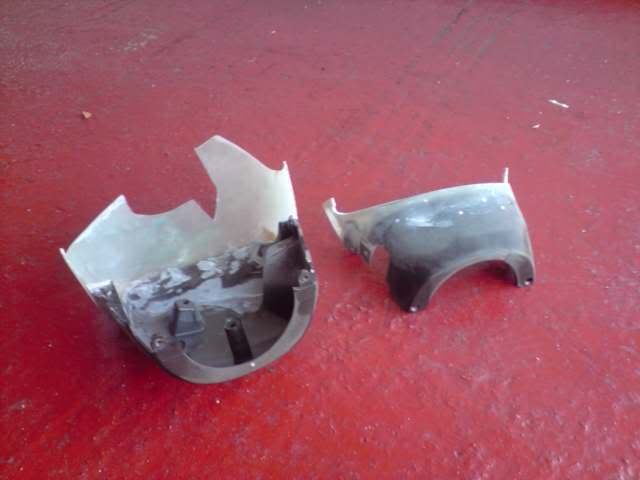
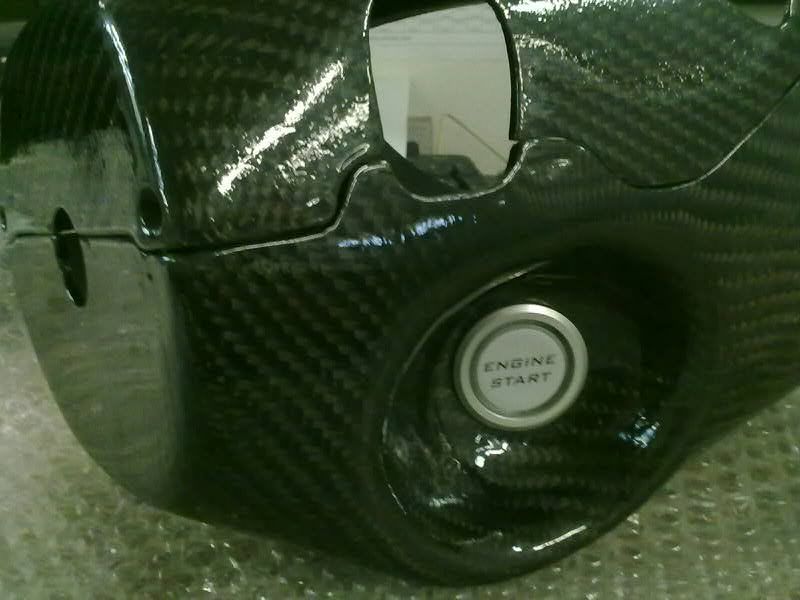
Then the area around the column had to be shrunk down do to the removable steering wheel, and also the addition of the push button start that replaced the key had to be blanked off.
Then the Carbon made another appearance and hey presto.
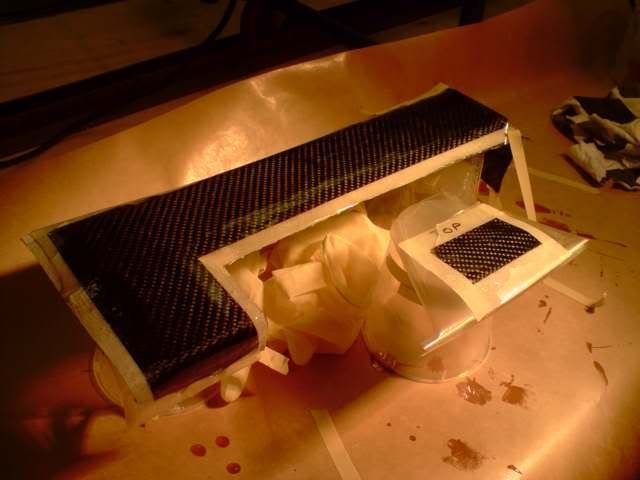
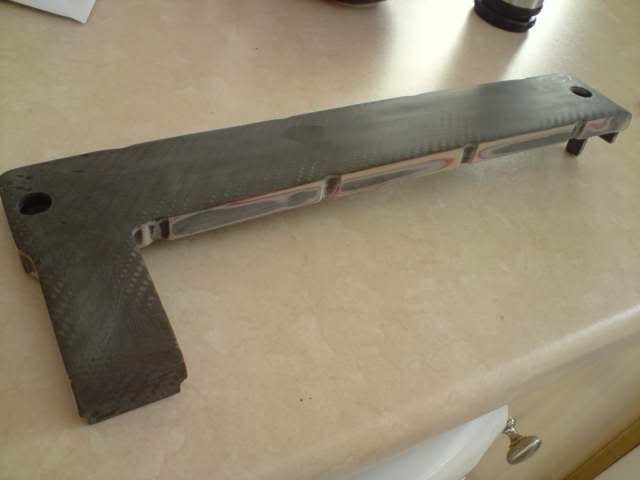
Carbon Heater Cover
With the newly positioned heater, as much as we tried to get it right up under the dash, you could just see the bottom of it, this wasn't acceptable. Also to keep the clutch cable with a smooth operation it looped around in front of the heater, so all this needed hiding. Rich knocked up a cover to sort this out, again out of carbon.
After making a 90deg jig with a radius corner.
This was then wrapped in Carbon.
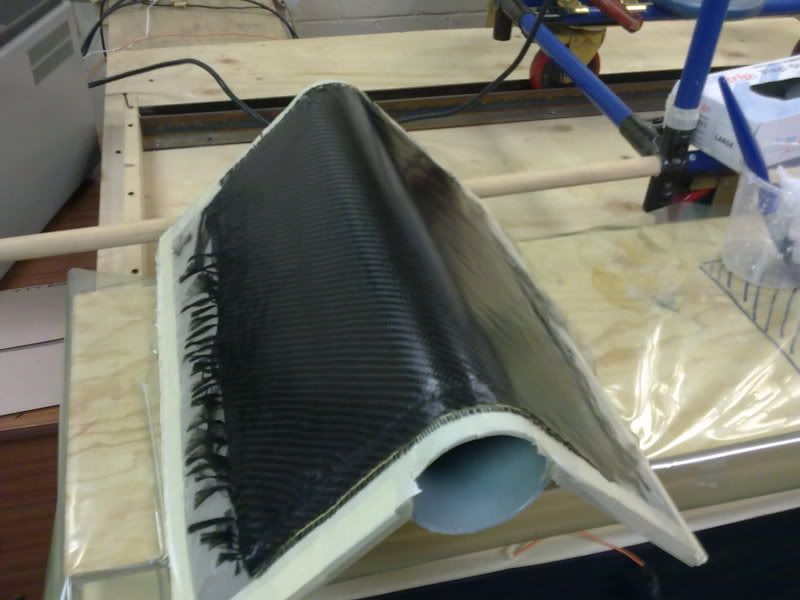
And once cured some sides were made it was then trimmed down, resulting in this.
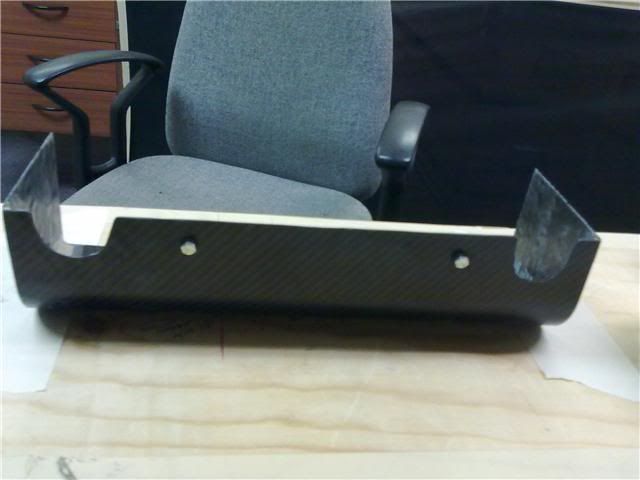
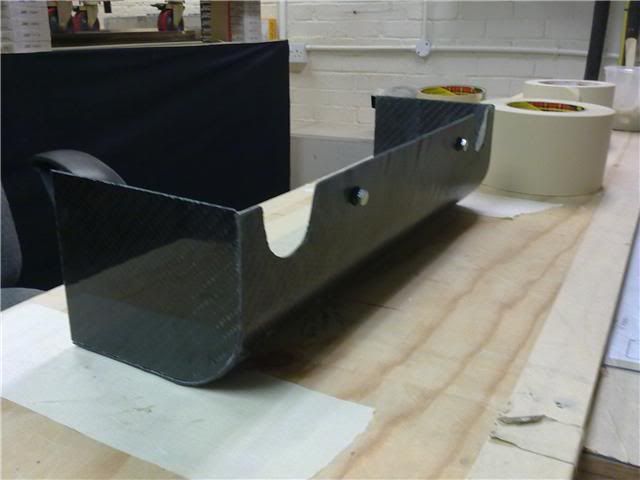
You can just see it under the dash in this picture.
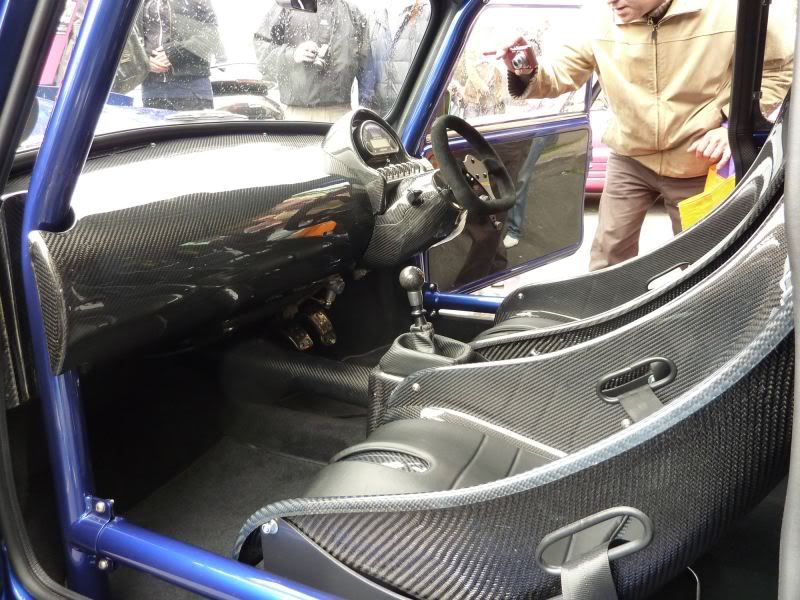
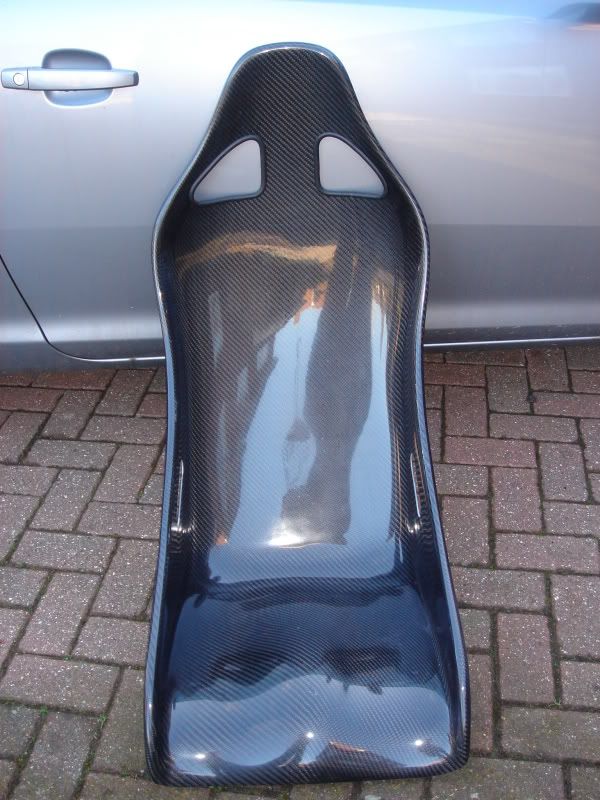
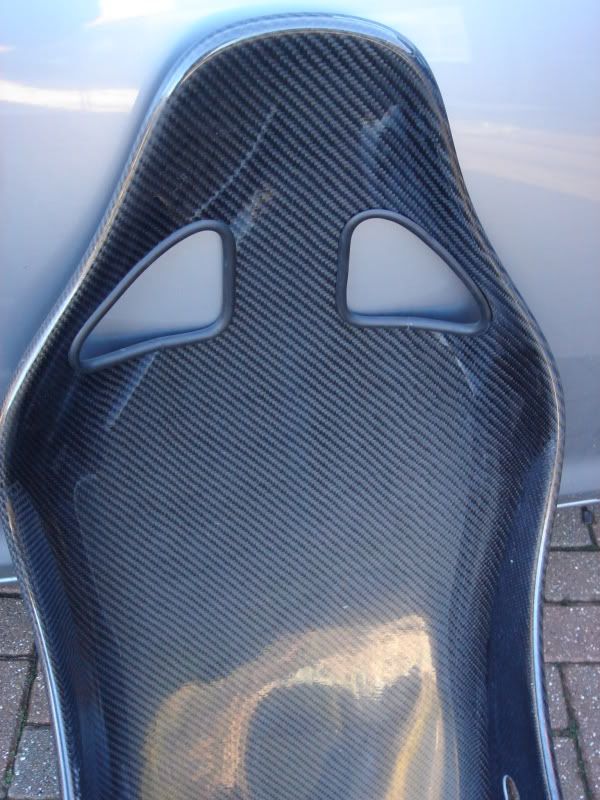
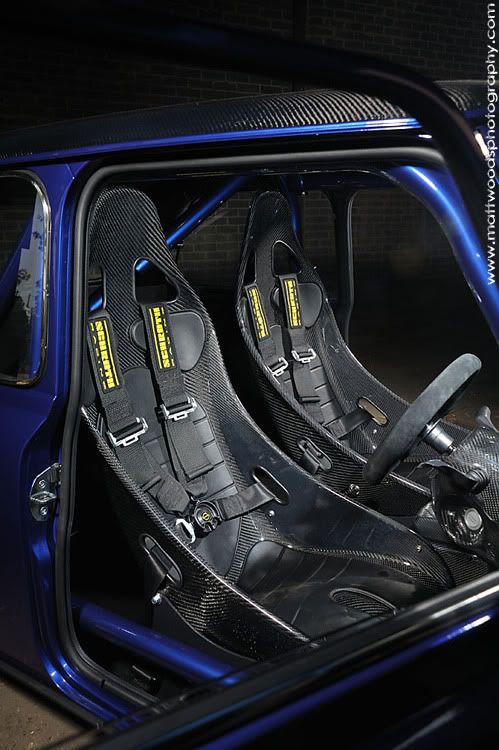
Carbon Seats
With the obvious Carbon theme developing both outside & inside the car, it was only right we tried to source some Carbon seats. This isn't that easy when you look at the size of the car and the space you have to squeeze 2 front seats in. There was never going to be rear seats so the task was on to find 2 front seats.
We came across the chosen seats originally in fibreglass. We loved the style, the size was right, but the finish wasn't. Luckily for Rich, the seats were sourced before the rest of the Carbon work had started so he got away with this particular project! We spoke to people who made the seats if they could do them in Carbon, they said they never had before but they'd be up for giving it a go. The result was stunning.

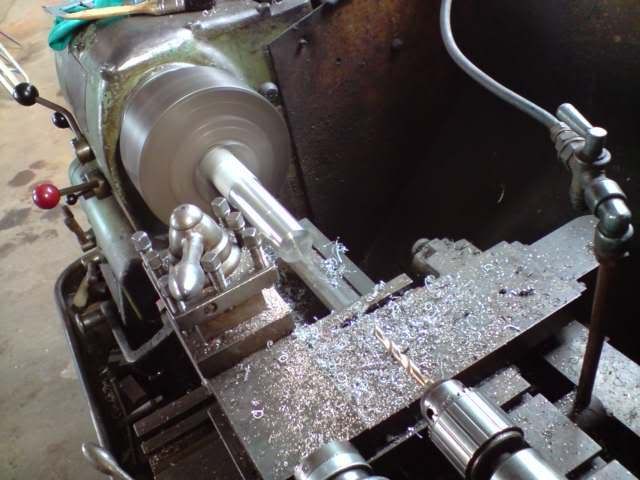
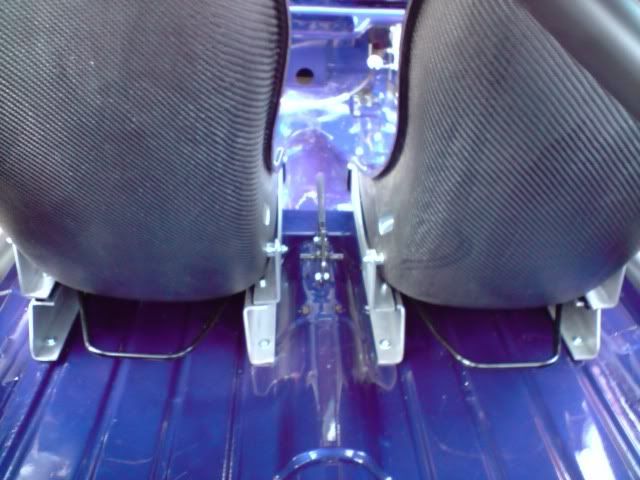
Now the fun was to start to how we'd get them to fit. We bought a set of seat frame supports and a pair of universal runners to get the ball rolling. After 3 of us trying out different seating positions with the new steering and gear lever position and to give rollcage and gear lever cover clearance, we agreed on where they should be. Before we could mount the frames to the seats we needed to make up some small spacers to keep the frames square although the seat tapered off at the back, so Rich done this on a lathe.
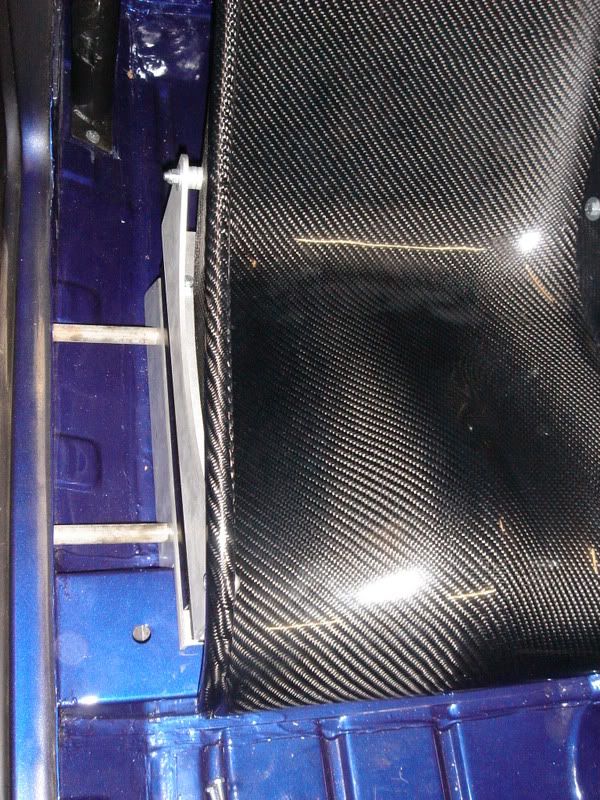
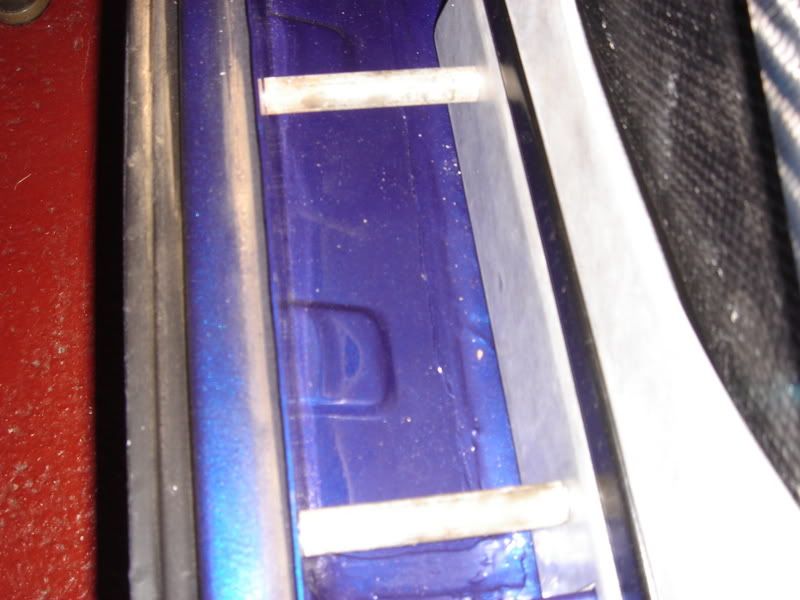
Now these were made we got the frames mounted to the seats, the runners mounted to the frames and then decided the final positions to where they would mount to the floor. Once mounted we noticed they were a little wobbly so made up some seat stiffeners to fix the frames to the inner sills. We then mounted the runner adjusters at the back of the seats to keep them tucked away from sight.

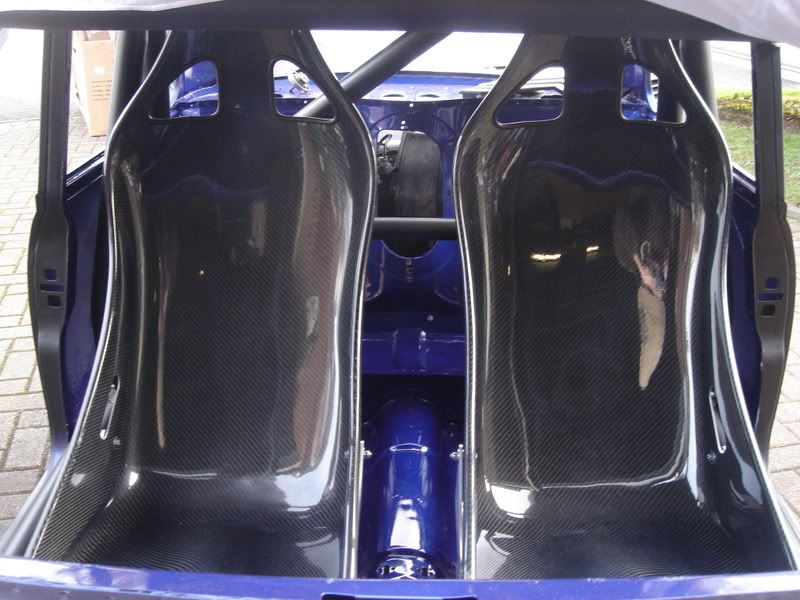
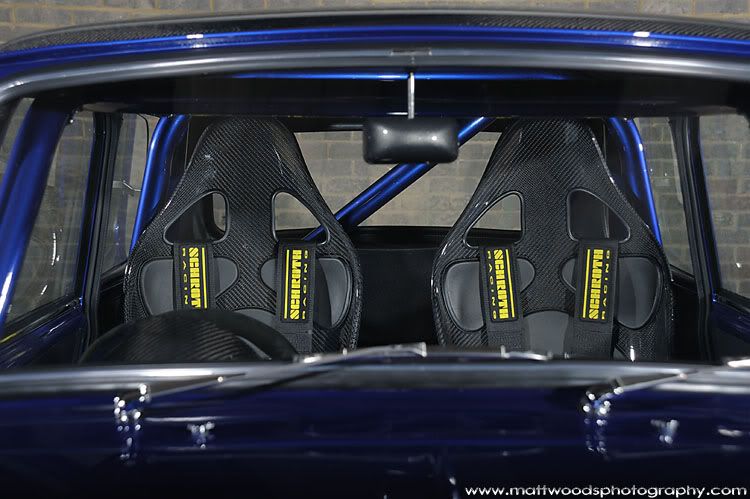
The original thought was to have the seats with no padding on to show off the carbon, but after Lee @ Crash Care Centre had spent a lot of time lacquering both the front and backs of the seats, we decided it was a sensible idea to use the pads provided mainly to stop scratches from clothing but also for comfort. For those who are wondering, the seats are comfy for about an hour, then you start feeling a little numb LOL
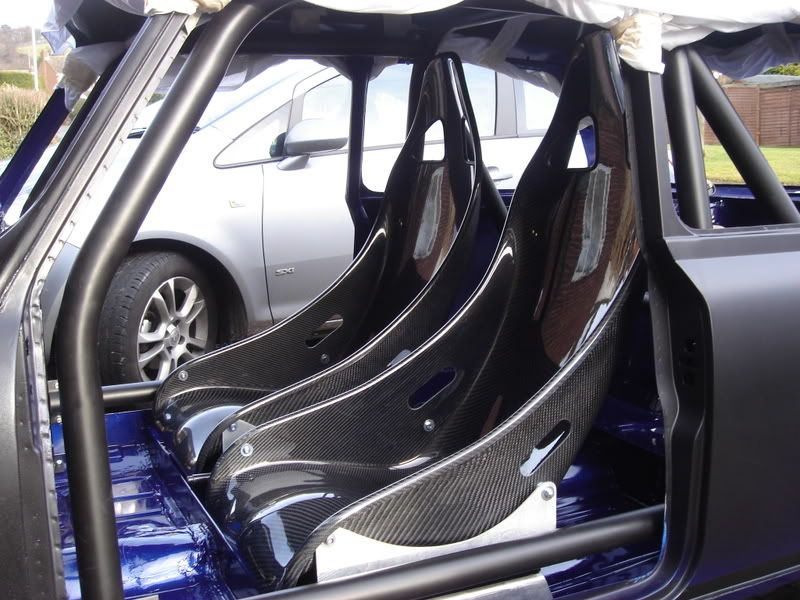
The seat frames were finished in the anthracite colour we used throughout the car.
Here they are in the car with the SCHROTH Racing 4 point harnesses.
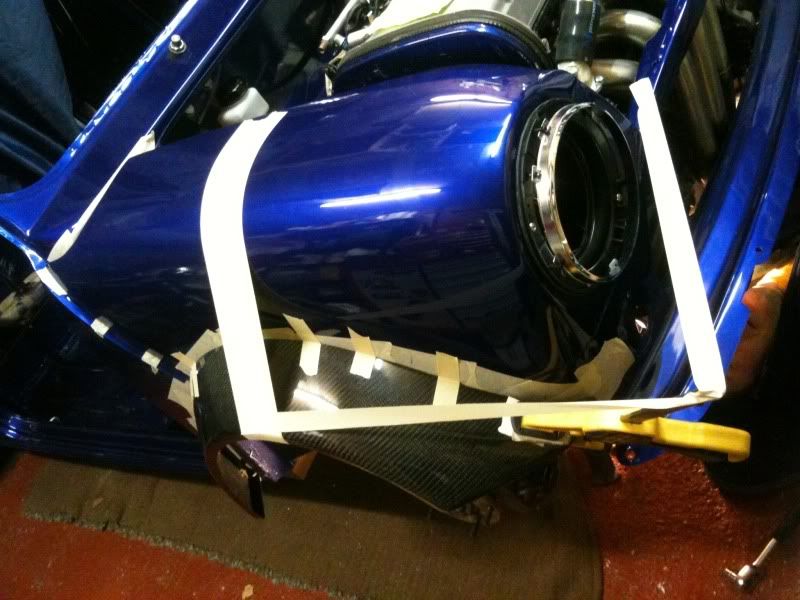
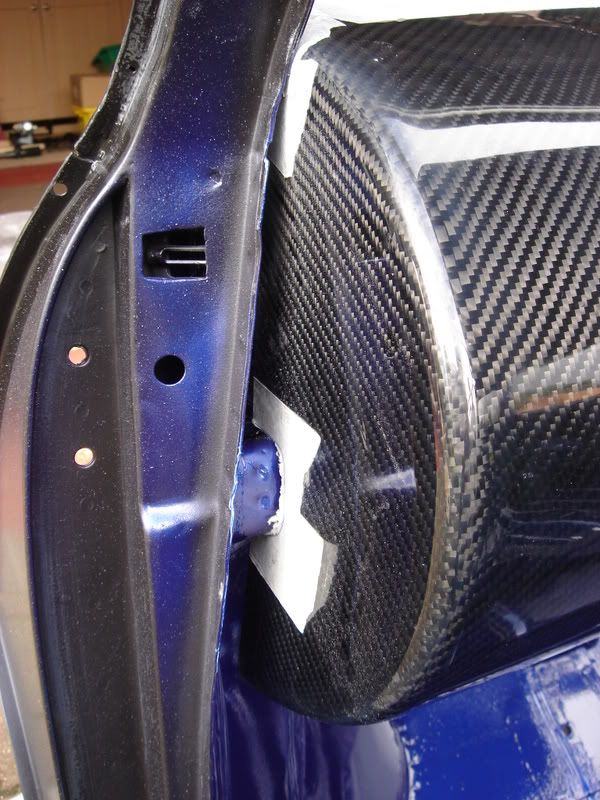
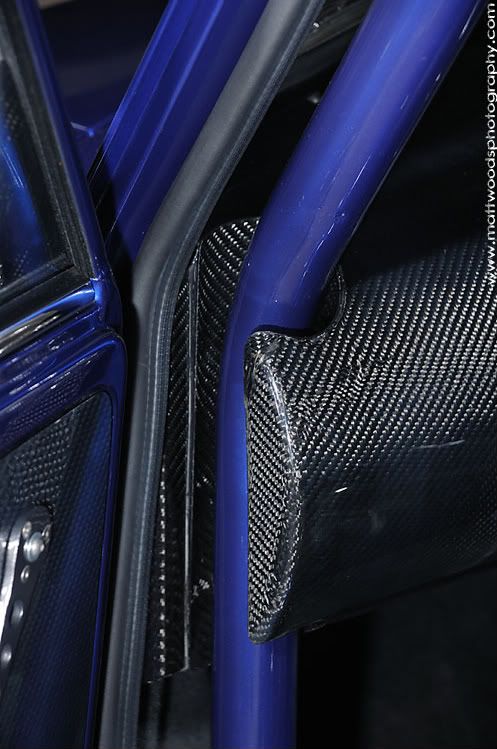
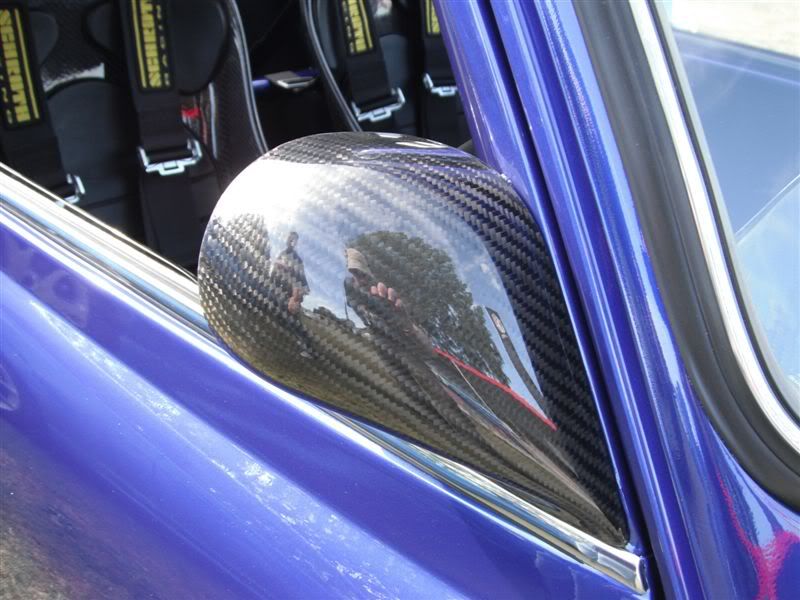
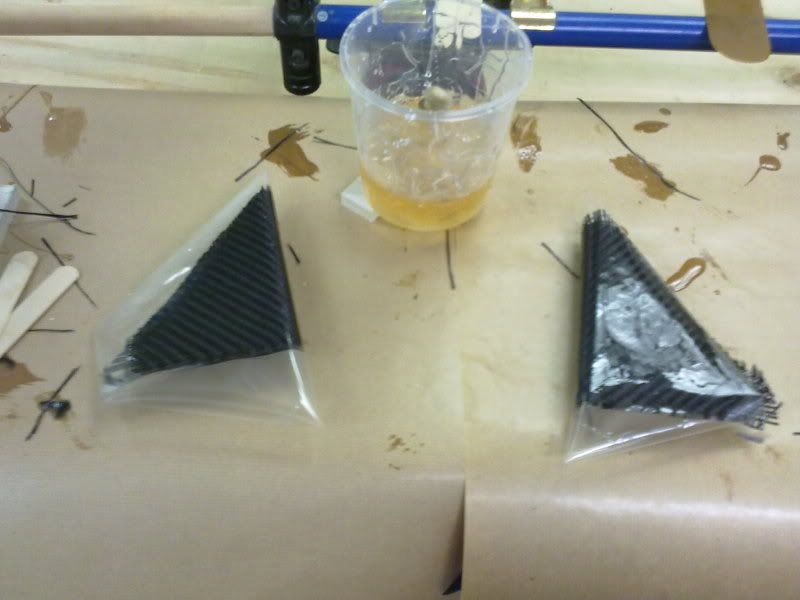
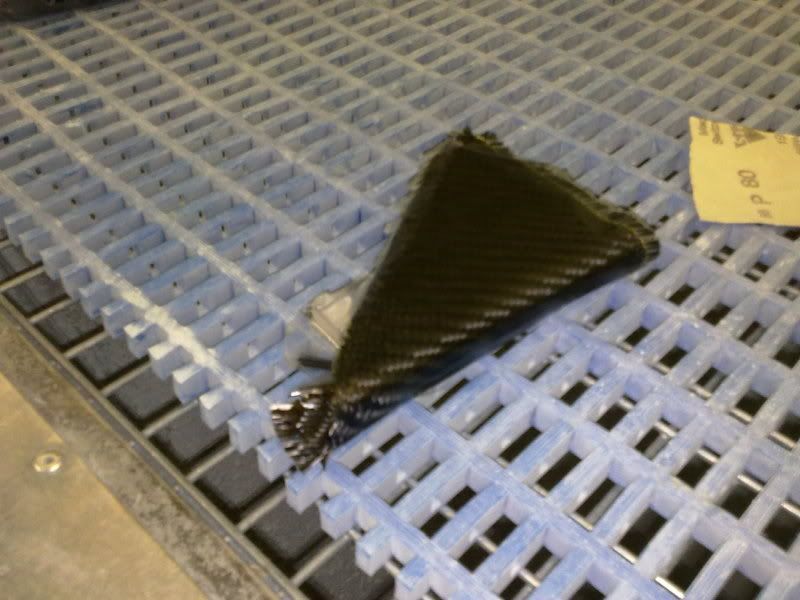
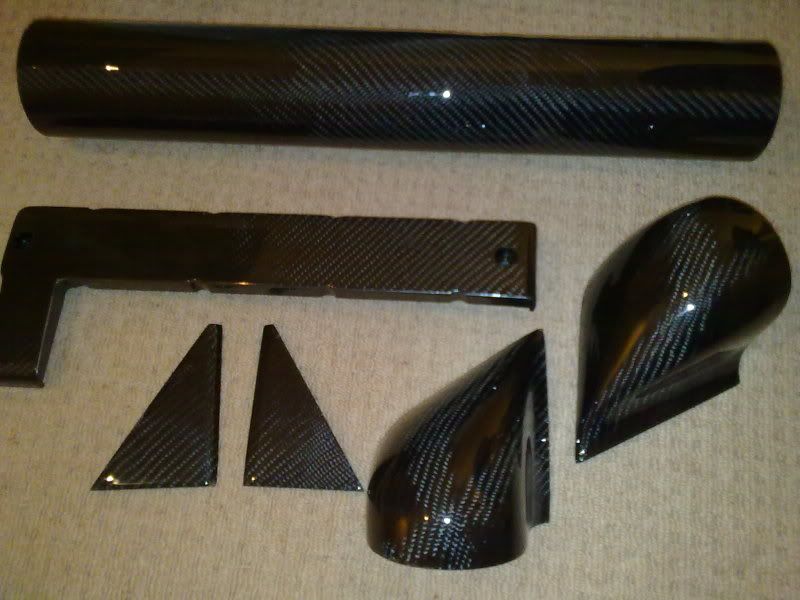
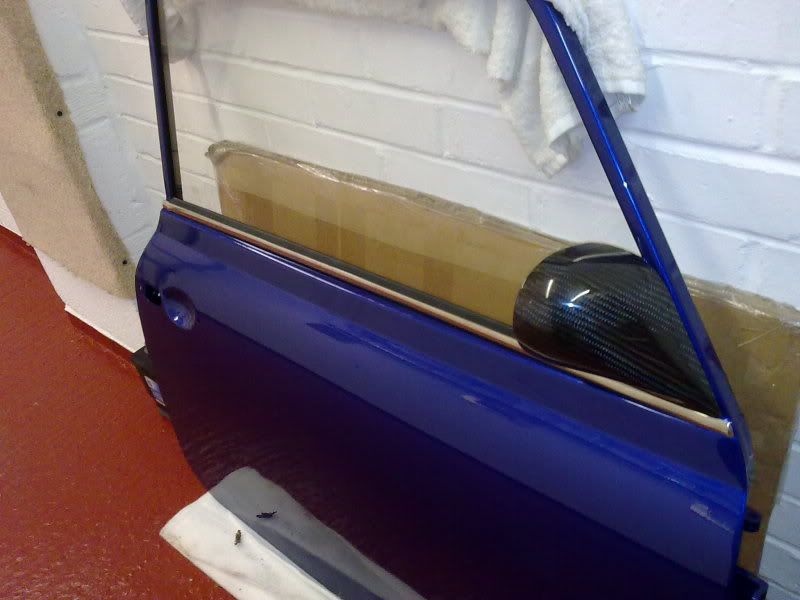
Carbon Mirrors
To continue the Carbon theme outside the car, I wanted some sort of small carbon mirrors. I considered bike or single seater mirrors, but none of them would have looked right. Then i stumbled across these that were designed for mini race cars and knew we could make them work.
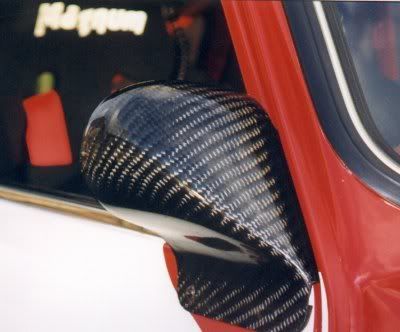
Once we'd had a look at them the questions was asked about the mounting and that there was no way that we'd be screwing them through the door as per the picture. So after a bit of cutting, some new internal hidden fixings and a new panel welded onto the door we ended up with these.
For those of you that know a little about mini XE conversions you'll know that the Vauxhall gear linkage would normally be visible and bolted to the floor with the shortened linkage joining the gearbox and gear lever just floating in mid air.
We knew we wouldn't be happy with this, so Rich got to work and started knocking up some more 1 off Carbon parts.
The cover for the gear lever assembly had to fit between the seats, accept the original gear lever gaiter, be a location for the power steering adjuster and have hidden fixings, so this was made from scratch. And the tube that went from this cover to the bulkhead had to sit in mid air with hidden fixings, so Rich used a 80mm pipe as a mould to wrap. Once the resin had cured the pipe was removed. We came up with these.
Carbon Steering Column Cover
As we were using Vauxhall Corsa C power steering, it was obvious to start life using the Corsa steering column shroud, but it didn't fit too good.
So again, rich had to get creative. So after numerous hours of playing and inventing, he came up with this.
But for us to be able to keep it useable, it had to be able to be removed, so we kept the original fixings and how it splits.
Then the area around the column had to be shrunk down do to the removable steering wheel, and also the addition of the push button start that replaced the key had to be blanked off.
Then the Carbon made another appearance and hey presto.
Carbon Heater Cover
With the newly positioned heater, as much as we tried to get it right up under the dash, you could just see the bottom of it, this wasn't acceptable. Also to keep the clutch cable with a smooth operation it looped around in front of the heater, so all this needed hiding. Rich knocked up a cover to sort this out, again out of carbon.
After making a 90deg jig with a radius corner.
This was then wrapped in Carbon.
And once cured some sides were made it was then trimmed down, resulting in this.
You can just see it under the dash in this picture.
Carbon Seats
With the obvious Carbon theme developing both outside & inside the car, it was only right we tried to source some Carbon seats. This isn't that easy when you look at the size of the car and the space you have to squeeze 2 front seats in. There was never going to be rear seats so the task was on to find 2 front seats.
We came across the chosen seats originally in fibreglass. We loved the style, the size was right, but the finish wasn't. Luckily for Rich, the seats were sourced before the rest of the Carbon work had started so he got away with this particular project! We spoke to people who made the seats if they could do them in Carbon, they said they never had before but they'd be up for giving it a go. The result was stunning.
Now the fun was to start to how we'd get them to fit. We bought a set of seat frame supports and a pair of universal runners to get the ball rolling. After 3 of us trying out different seating positions with the new steering and gear lever position and to give rollcage and gear lever cover clearance, we agreed on where they should be. Before we could mount the frames to the seats we needed to make up some small spacers to keep the frames square although the seat tapered off at the back, so Rich done this on a lathe.
Now these were made we got the frames mounted to the seats, the runners mounted to the frames and then decided the final positions to where they would mount to the floor. Once mounted we noticed they were a little wobbly so made up some seat stiffeners to fix the frames to the inner sills. We then mounted the runner adjusters at the back of the seats to keep them tucked away from sight.
The original thought was to have the seats with no padding on to show off the carbon, but after Lee @ Crash Care Centre had spent a lot of time lacquering both the front and backs of the seats, we decided it was a sensible idea to use the pads provided mainly to stop scratches from clothing but also for comfort. For those who are wondering, the seats are comfy for about an hour, then you start feeling a little numb LOL
The seat frames were finished in the anthracite colour we used throughout the car.
Here they are in the car with the SCHROTH Racing 4 point harnesses.
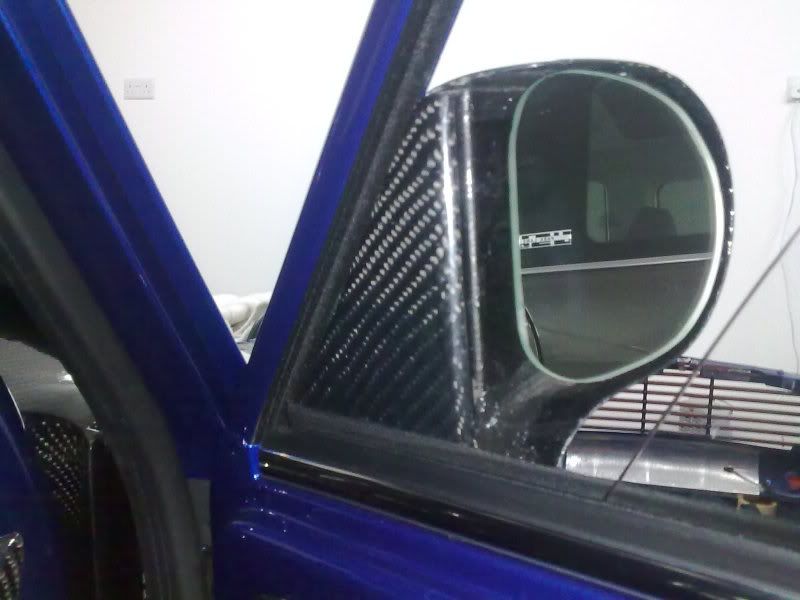
Carbon Mirrors
To continue the Carbon theme outside the car, I wanted some sort of small carbon mirrors. I considered bike or single seater mirrors, but none of them would have looked right. Then i stumbled across these that were designed for mini race cars and knew we could make them work.
Once we'd had a look at them the questions was asked about the mounting and that there was no way that we'd be screwing them through the door as per the picture. So after a bit of cutting, some new internal hidden fixings and a new panel welded onto the door we ended up with these.
Trending Topics
#8
03-26-2011, 12:22 PM
This left the fixings exposed on the inside of the door, so Rich knocked up some Carbon panels as any modern car would have which covered these up.
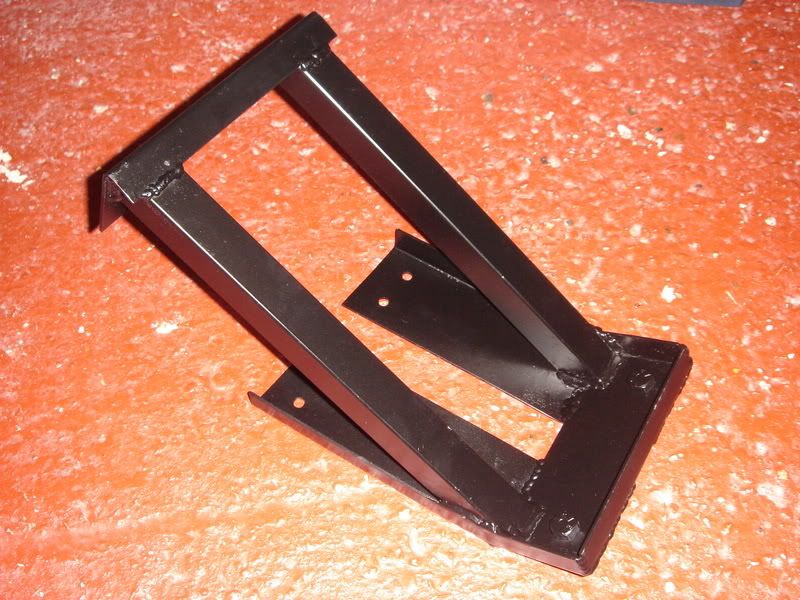
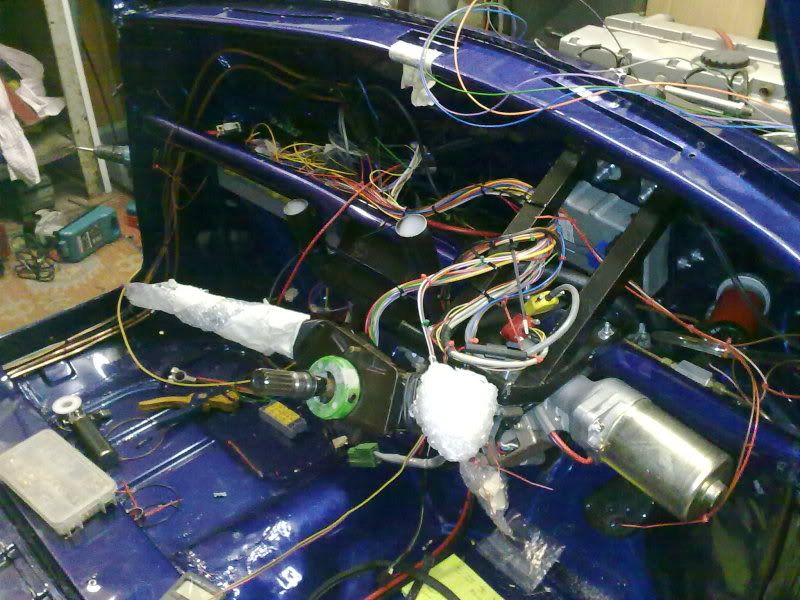
Power Steering
With 8x13 wheels & slammed stance, we knew that the steering was going to be heavy, so from the start we needed a solution. A quick scan across a few forums showed us that people were using a few different power steering options from other vehicles. With the engine being a Vauxhall item we seemed it only right to use the Corsa power steering option, of which we found even then there were a few options. Being Vauxhall boys by trade we knew a little about what was available. Early Corsa B's had pump driven power steering, where as later Corsa B's and all Corsa C's had electric power steering. So after trying both a Corsa B & C item, we opted for the Corsa B as it was lightly shorter which suited our set up better.
We then made a bracket to hold the column that bolted through the bulkhead and onto the standard crossbrace.
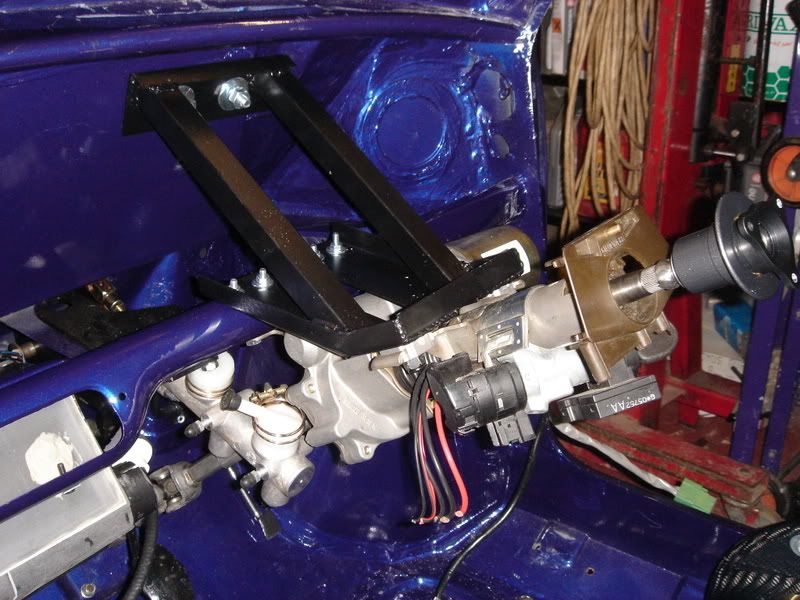
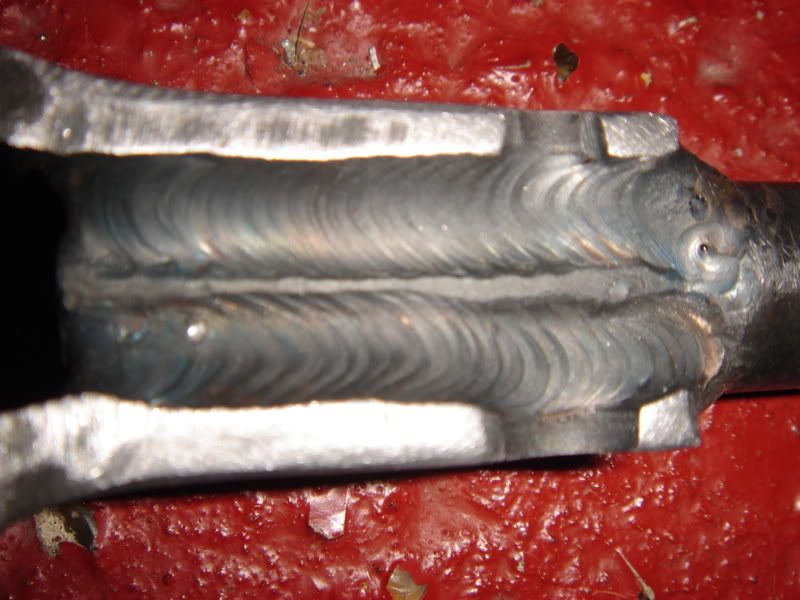
We then had the Corsa end welded onto the mini end that connects to the steering rack.
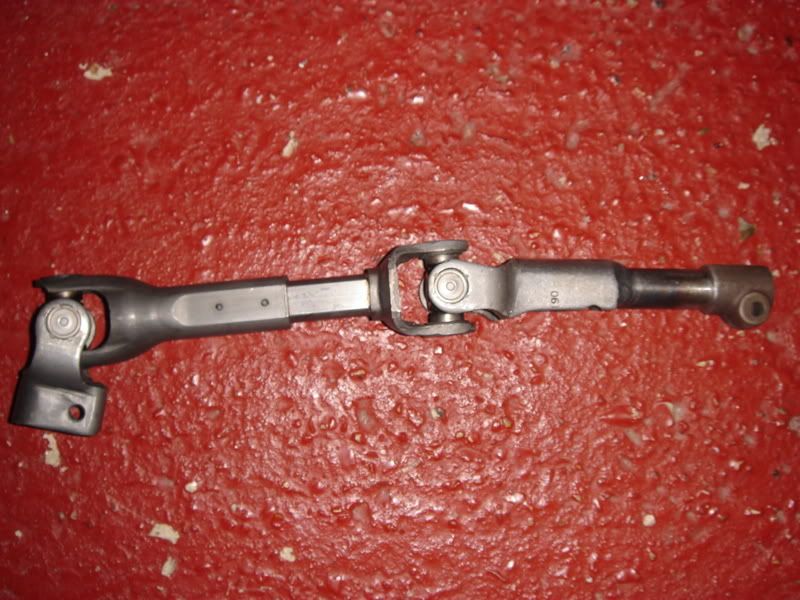
We then added in an adjuster on the back of the gear lever surround to allow us to lighten up the steering for when we were parking.
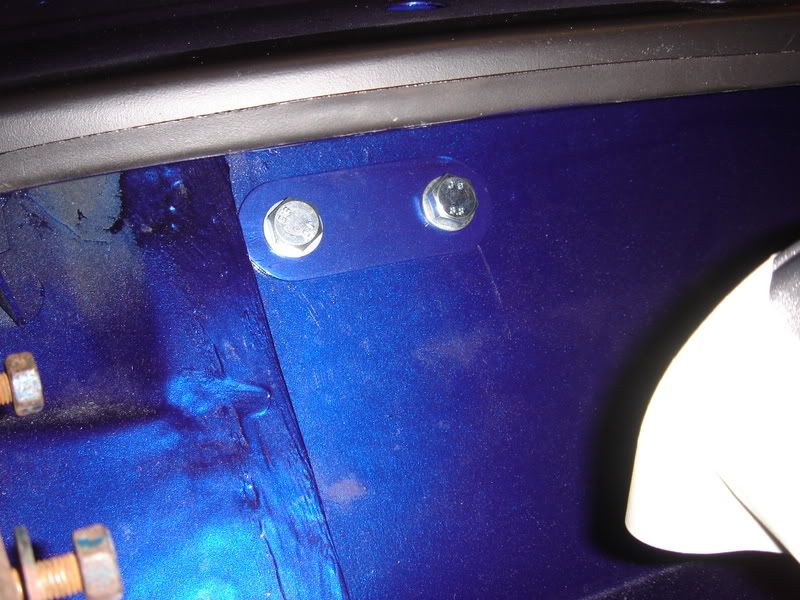
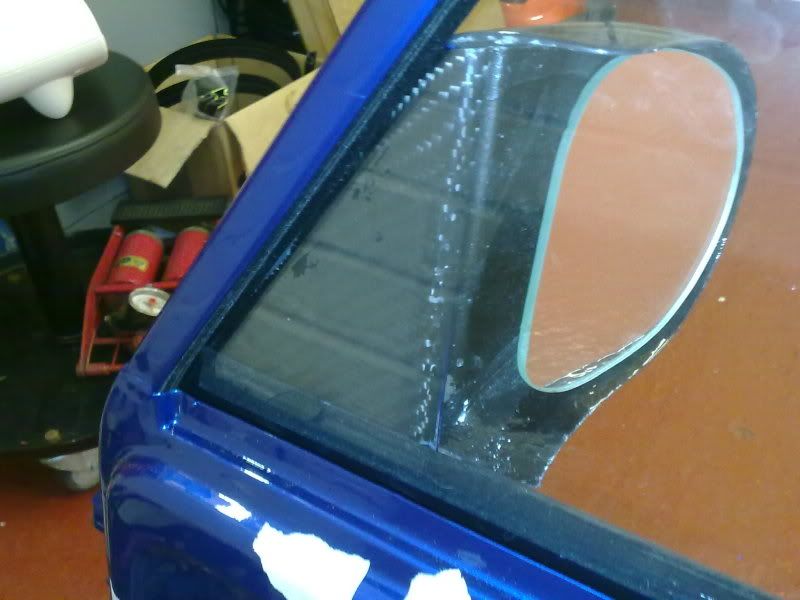
Doors
The doors were new sourced from Minispares. We cut off the upper door card holder on the inside due to the door cards we planned to use, and we had welded in the plates for the mirror mounting, apart from that they were pretty standard.
Once the doors were painted Rich fitted them up at his house away from the madness of the main build, plus he could do them in his own time, or when he came home from helping on the mini!
We decided we wanted minimalistic doors, so no internal door handle or lock, no visible fixings on the door cards, and the window winder and door opener were modified to sit at the same angle (Rich being **** again) and then painted the same anthracite colour as used elsewhere.
New handles, locks, rubbers and chromework were used, the mechanisms are all original but were fully refurbed.
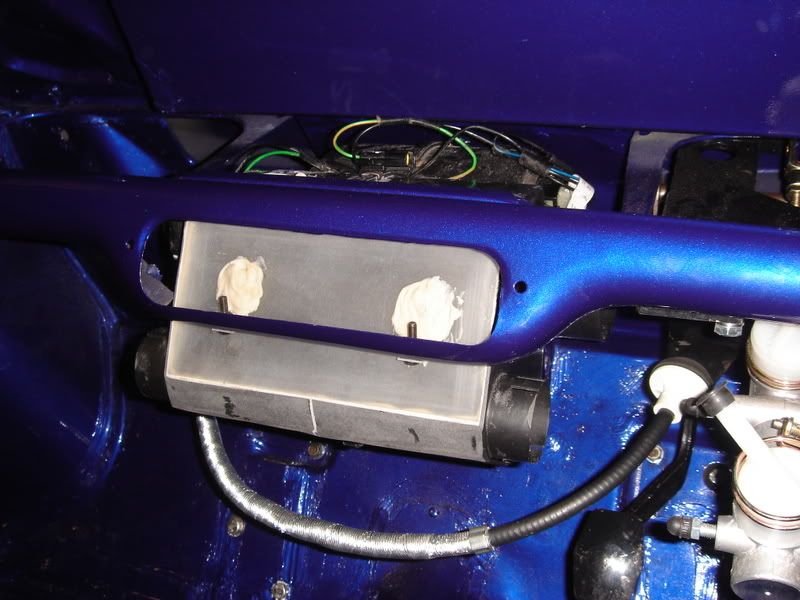
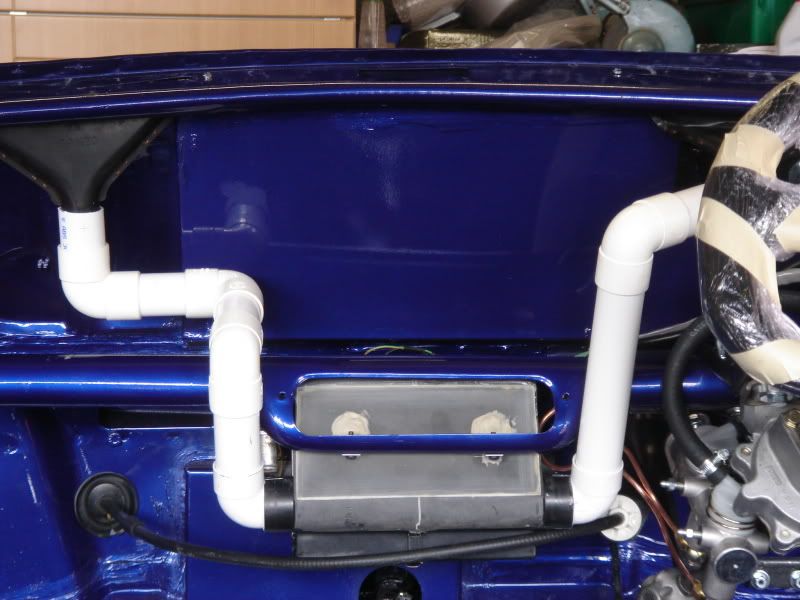
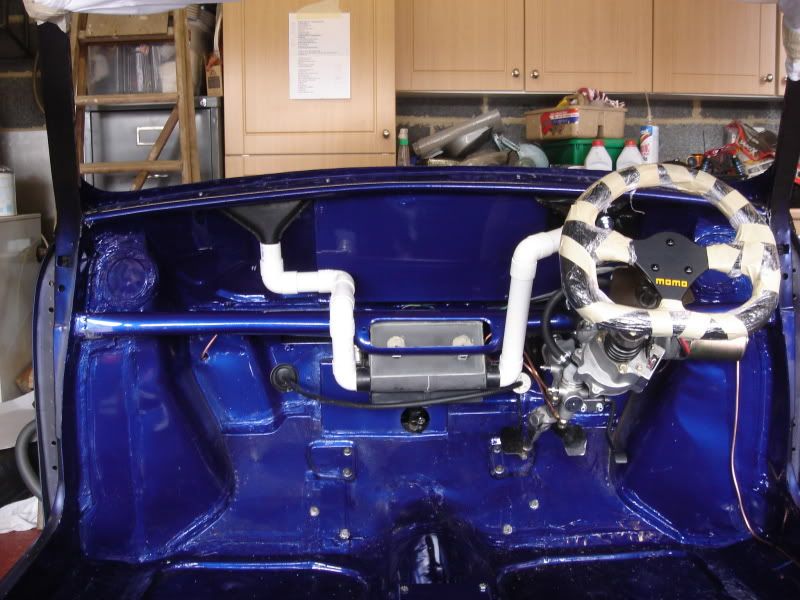
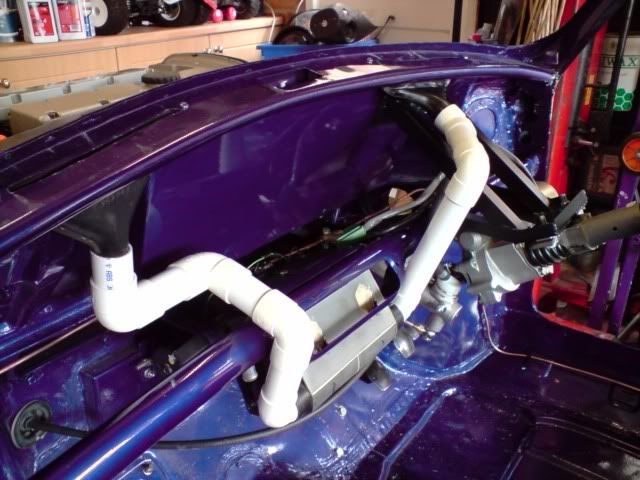
Heater Mods
We knew that the standard heater was never the best. So we worked out if we needed one, and if so how did we want to use it. The conclusion was that yes we wanted one, and a newer 2 speed one at that, we wanted it to be hidden under the dash rather than hanging out the bottom as they are as standard, and it would only ever have to be used to demist the windscreen on a cold morning on the way to a show, or as it turned out in the torrential rain on the way back from L2B!
So we modified the heater so that it only had the blower towards the screen, it was permanently on hot and so that it was either in the 'off' position or 'setting 2'. We also swapped the standard corrugated pipes for a more modern, better sealed system using plumbing pipe, agreed its not the prettiest or most conventional but it allowed us to route the pipes where we wanted, it makes the most of the air available with no leaks, and its all going to be hidden under the dash anyway. This is all controlled from one of the switches on the dash and it works really well.
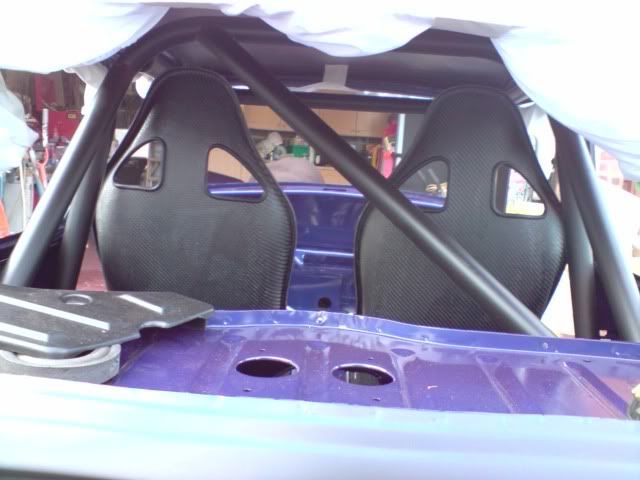
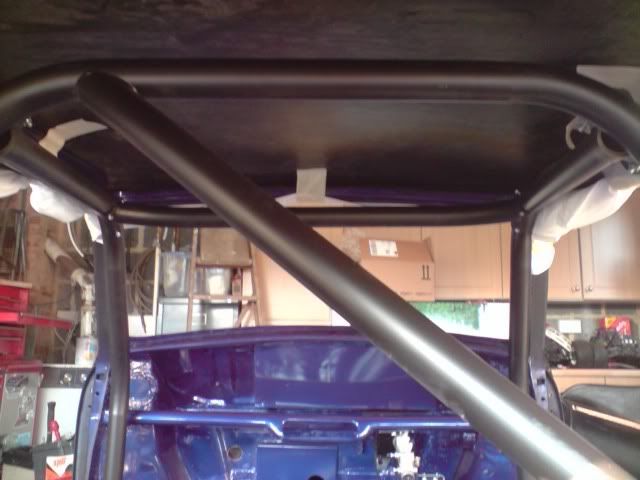
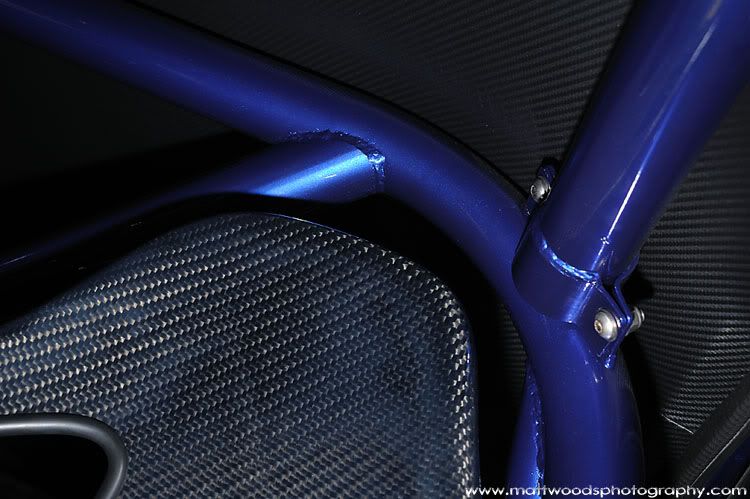
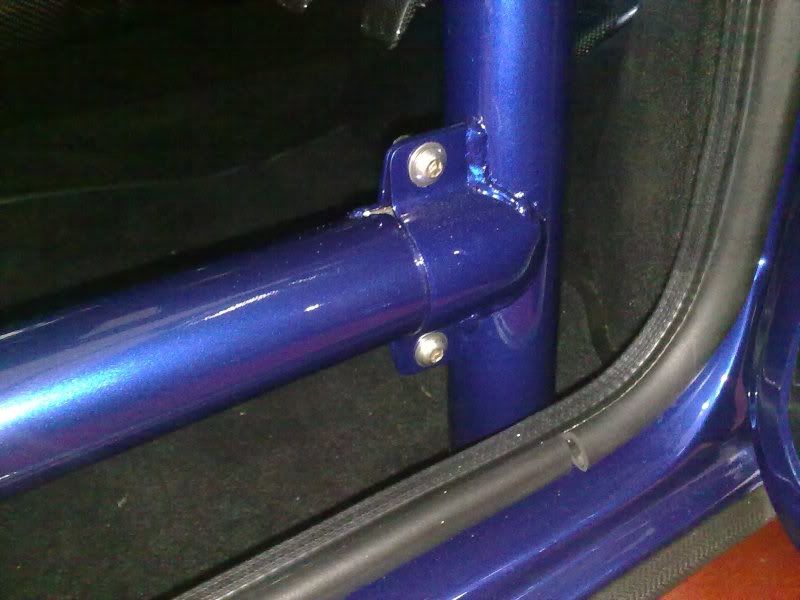
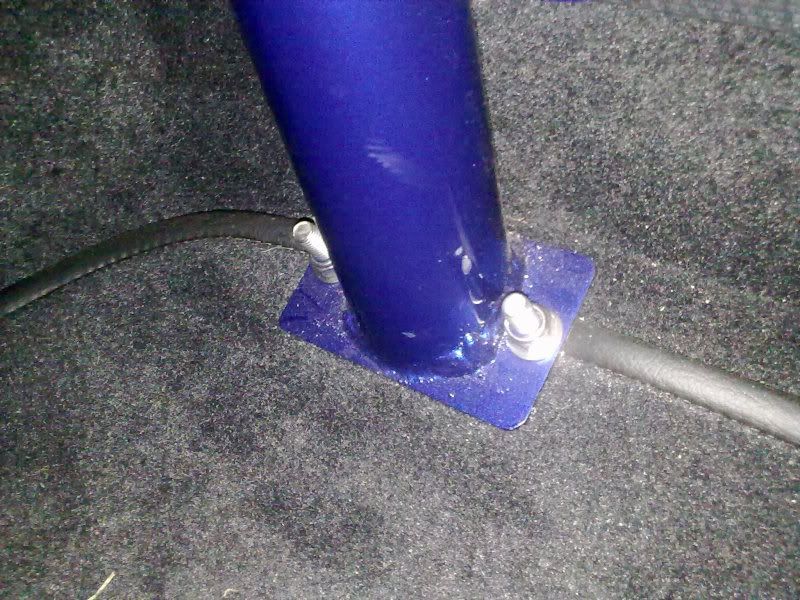
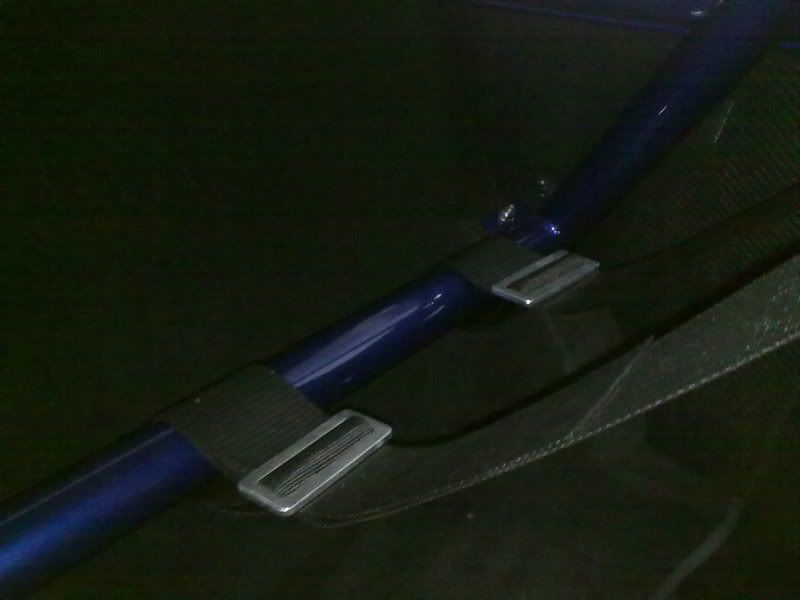
Rollcage
I wanted a rollcage. It would be 6 a point cage with a small amount of safety considered, but really I wanted it for aesthetics. So I knew of MPS from when a friend had a 1/2 cage made for his Nova back in the day. Normally they would make it out of 1.5" tubing, but I wanted it even chunkier so asked if they could do it out of 2" tube, which they could. It’s not a 5minute job to fit it, but once it was in it looks the business. It was also colour coded to bring some of the exterior colour into the car.


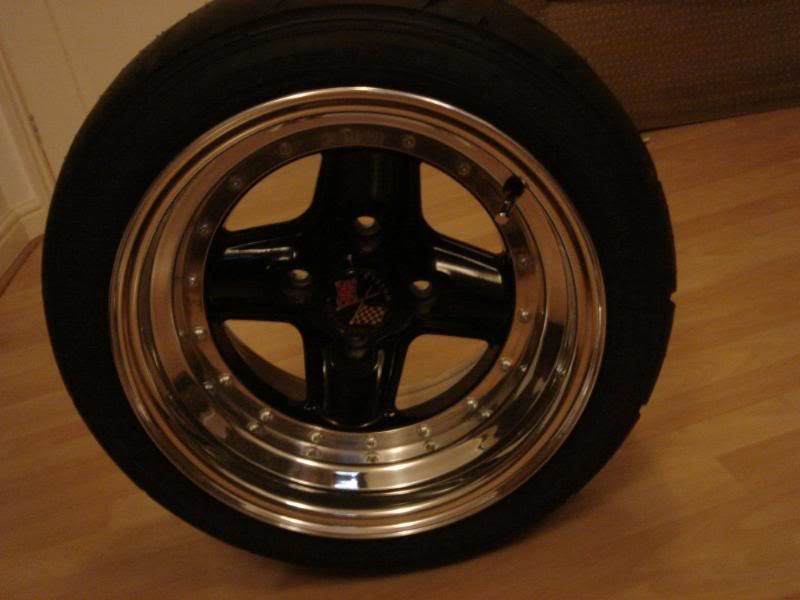
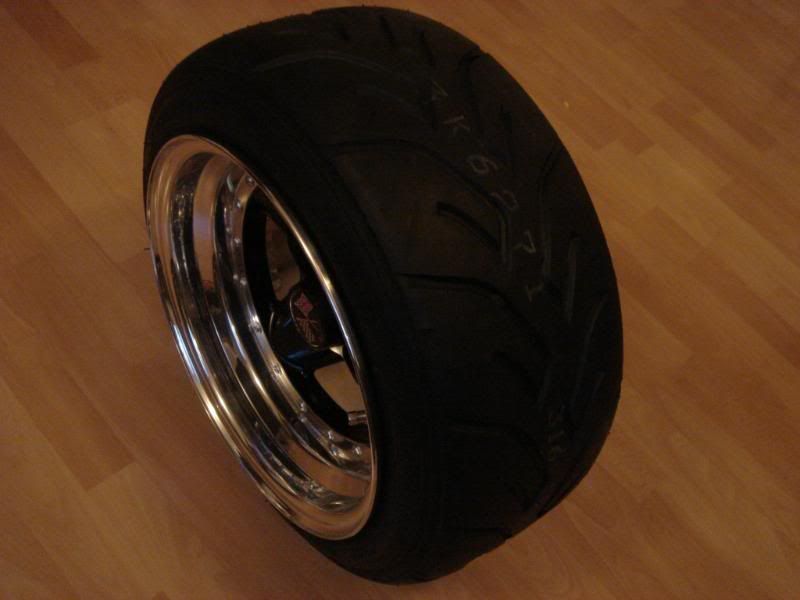
Wheels
When I first owned the car I had 6x10 revolutions on, and if it was solely up to me I'd have had another 6x10 this time round, but Rich & Chris insisted we went for a more modern size giving the car a better stance and allowing a little more ground clearance. So I opted for 8x13 Revolution Split Rims wrapped in Yoko's finest A048 road legal cut slicks. When I bought them they had black centres, but these were soon colour coded.
Power Steering
With 8x13 wheels & slammed stance, we knew that the steering was going to be heavy, so from the start we needed a solution. A quick scan across a few forums showed us that people were using a few different power steering options from other vehicles. With the engine being a Vauxhall item we seemed it only right to use the Corsa power steering option, of which we found even then there were a few options. Being Vauxhall boys by trade we knew a little about what was available. Early Corsa B's had pump driven power steering, where as later Corsa B's and all Corsa C's had electric power steering. So after trying both a Corsa B & C item, we opted for the Corsa B as it was lightly shorter which suited our set up better.
We then made a bracket to hold the column that bolted through the bulkhead and onto the standard crossbrace.
We then had the Corsa end welded onto the mini end that connects to the steering rack.
We then added in an adjuster on the back of the gear lever surround to allow us to lighten up the steering for when we were parking.
Doors
The doors were new sourced from Minispares. We cut off the upper door card holder on the inside due to the door cards we planned to use, and we had welded in the plates for the mirror mounting, apart from that they were pretty standard.
Once the doors were painted Rich fitted them up at his house away from the madness of the main build, plus he could do them in his own time, or when he came home from helping on the mini!
We decided we wanted minimalistic doors, so no internal door handle or lock, no visible fixings on the door cards, and the window winder and door opener were modified to sit at the same angle (Rich being **** again) and then painted the same anthracite colour as used elsewhere.
New handles, locks, rubbers and chromework were used, the mechanisms are all original but were fully refurbed.
Heater Mods
We knew that the standard heater was never the best. So we worked out if we needed one, and if so how did we want to use it. The conclusion was that yes we wanted one, and a newer 2 speed one at that, we wanted it to be hidden under the dash rather than hanging out the bottom as they are as standard, and it would only ever have to be used to demist the windscreen on a cold morning on the way to a show, or as it turned out in the torrential rain on the way back from L2B!
So we modified the heater so that it only had the blower towards the screen, it was permanently on hot and so that it was either in the 'off' position or 'setting 2'. We also swapped the standard corrugated pipes for a more modern, better sealed system using plumbing pipe, agreed its not the prettiest or most conventional but it allowed us to route the pipes where we wanted, it makes the most of the air available with no leaks, and its all going to be hidden under the dash anyway. This is all controlled from one of the switches on the dash and it works really well.
Rollcage
I wanted a rollcage. It would be 6 a point cage with a small amount of safety considered, but really I wanted it for aesthetics. So I knew of MPS from when a friend had a 1/2 cage made for his Nova back in the day. Normally they would make it out of 1.5" tubing, but I wanted it even chunkier so asked if they could do it out of 2" tube, which they could. It’s not a 5minute job to fit it, but once it was in it looks the business. It was also colour coded to bring some of the exterior colour into the car.
Wheels
When I first owned the car I had 6x10 revolutions on, and if it was solely up to me I'd have had another 6x10 this time round, but Rich & Chris insisted we went for a more modern size giving the car a better stance and allowing a little more ground clearance. So I opted for 8x13 Revolution Split Rims wrapped in Yoko's finest A048 road legal cut slicks. When I bought them they had black centres, but these were soon colour coded.
#9
03-26-2011, 12:22 PM
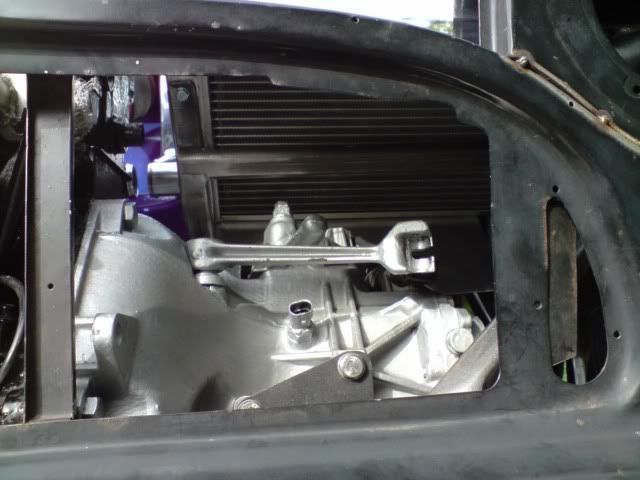
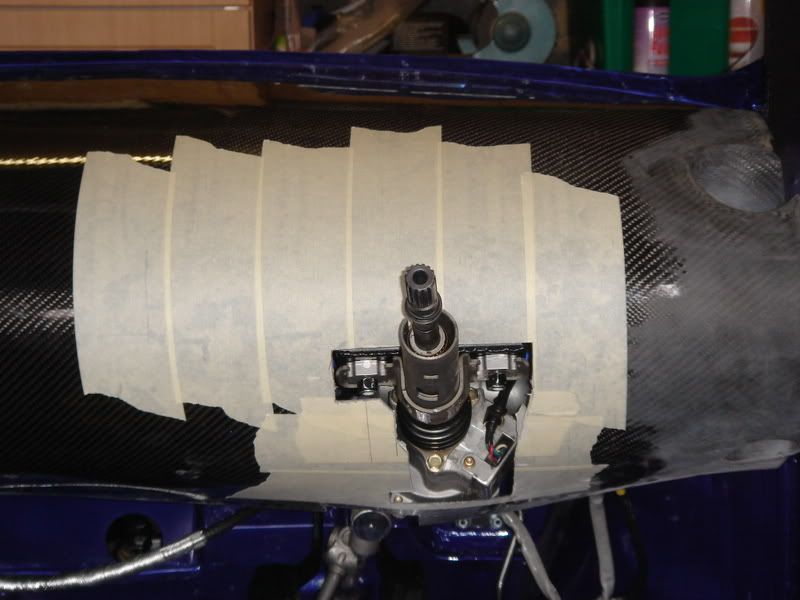
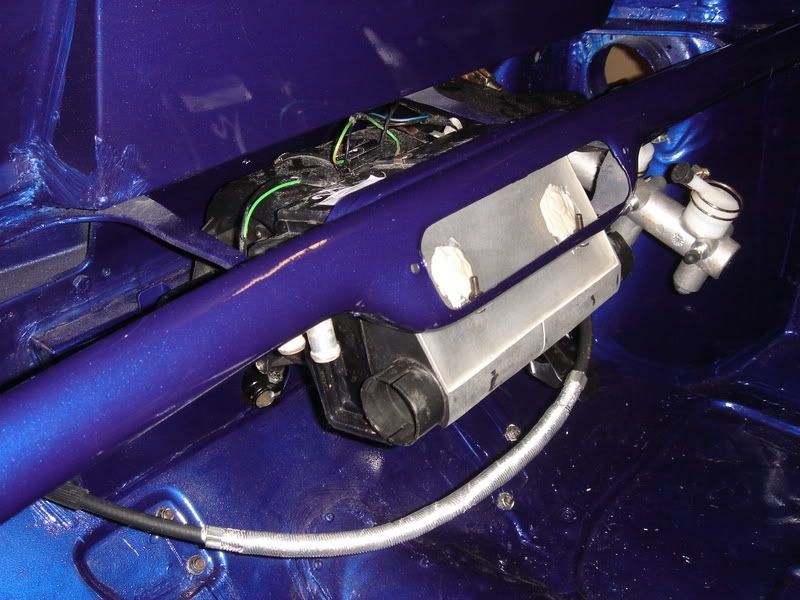
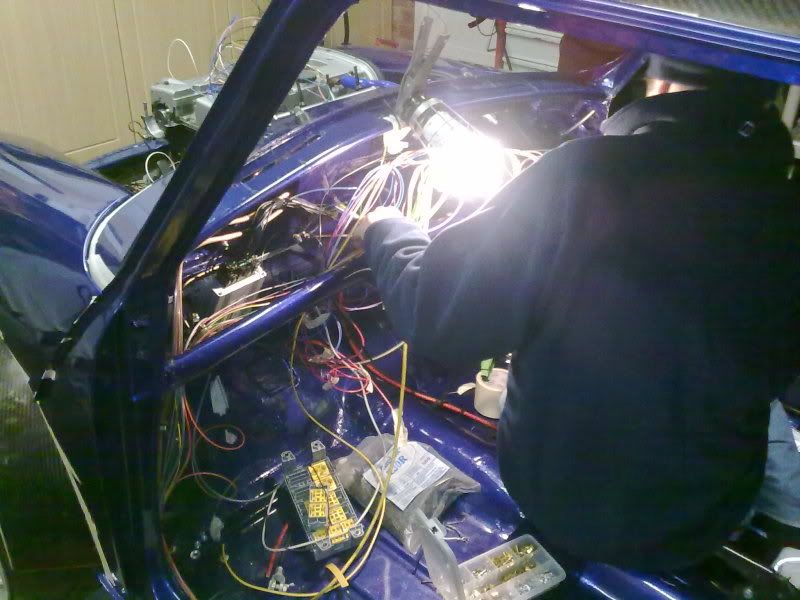
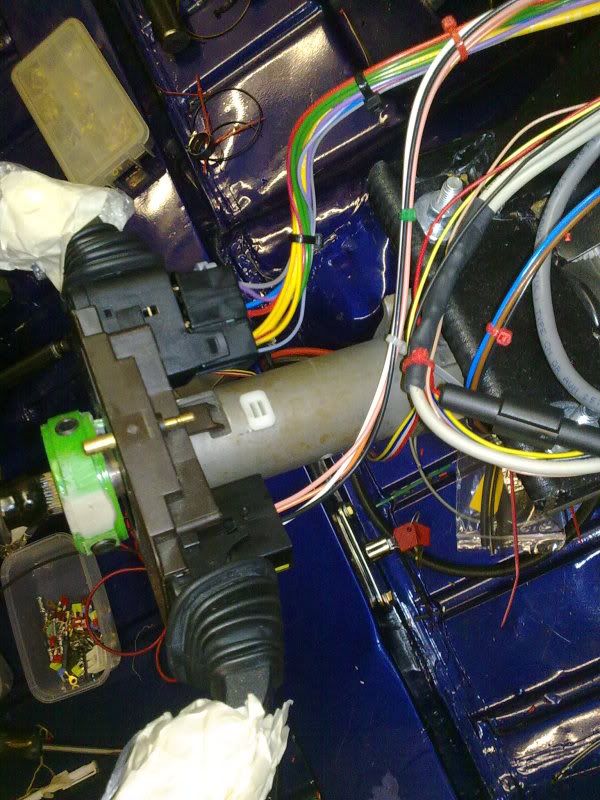
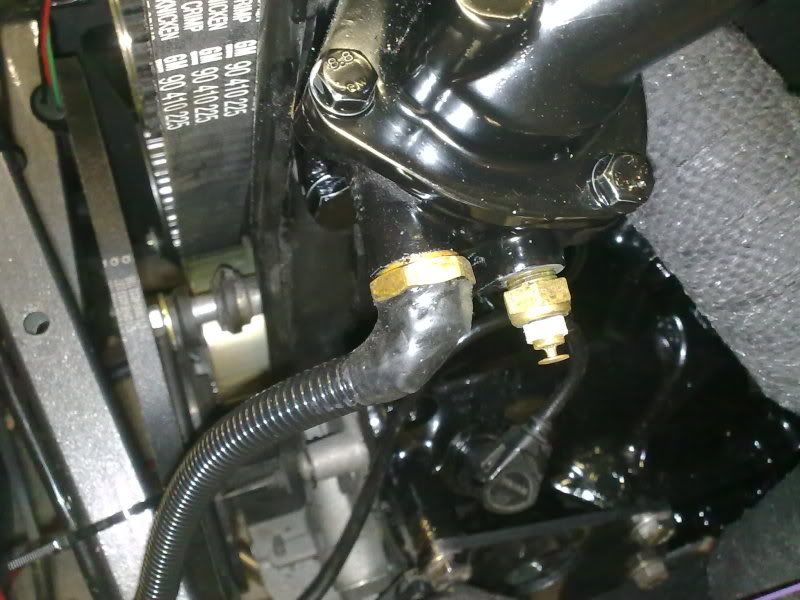
Wiring
Part of our build team were 2 Vauxhall Electrical Technicians, result. So knowledge around anything to do with the wiring was given to them. There plan was to make a 1 off loom from scratch, which they did. Another plan was to hide as much as possible to give a clean look, which they did. Then finally they wanted to give an OEM appearance to all of the wiring, which they did, so i can guarantee that the loom that you can't see is just as good as the bits you can see.
This was no mean feat when we were adding as much modern upgrades as possible.
As with any job there is a middle stage that look messy and unorganised, but we were assured throughout the build that they knew what they were doing and that it would all turn out ok in the end, which it did.
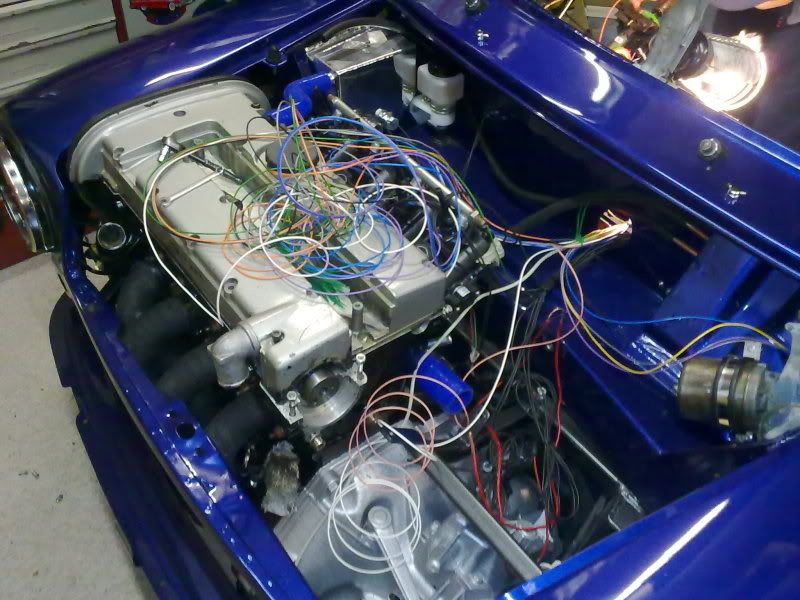
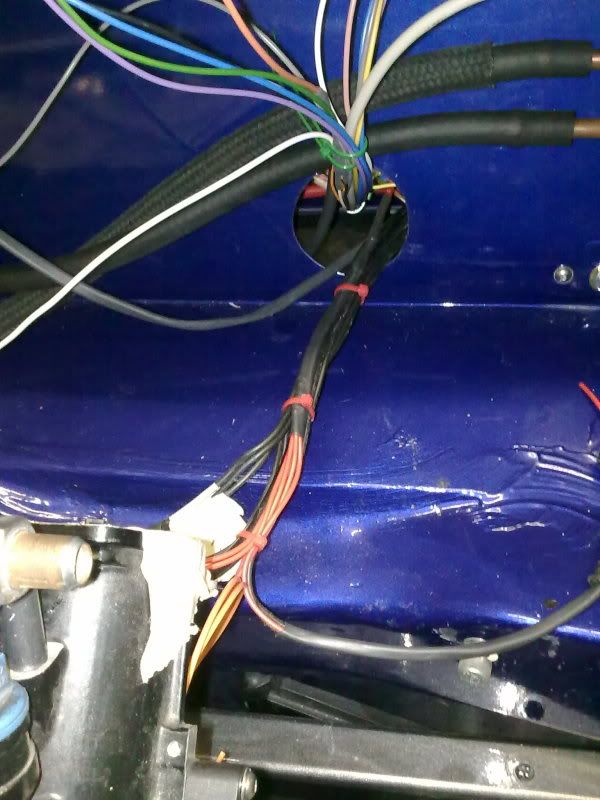
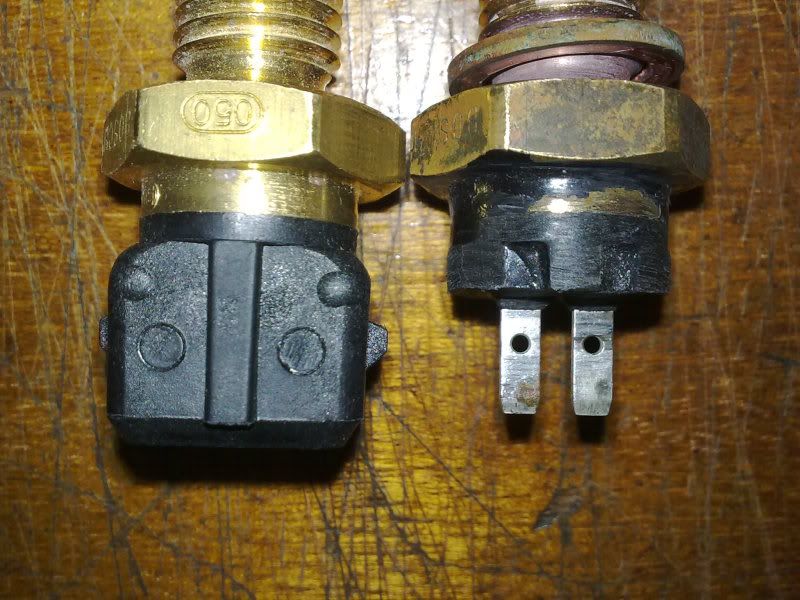
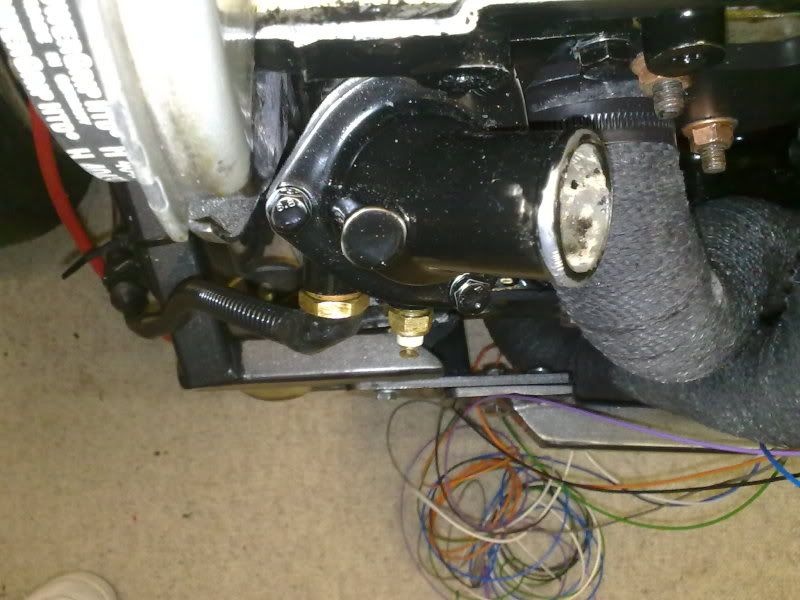
This was where the thermostat plug had to be modified to allow a little more clearance with the standard roundnose, every bit counts!
2010 Show Season
London to Brighton
We only finished the car about 2 weeks before L2B 2010 ( Note we were also booked in for L2B 2009 ( Its always good to have a plan). So we had a few evenings of shakedown time where we put about 150 miles on it. We then went around the whole car checking bolts to make sure everything was still tight. As much as you can check stuff, sometimes you just have to get it on the road and wait for things to go wrong.
Rich and I set off to L2B, we were only at J7 of the M1 when we heard a bang, pulled over, checked the car, the front number plate was missing! Rich went back to get it out of the middle lane of the M1, it was mangled to say the least! We laughed it off and less said about the original plate fixing the better (eh Rich) once we got to Brighton Rich bought me another plate.
We pulled up at Crystal Palace, parked up in the Show and Shine section, and got mobbed! No jokes, we were barely out of the car when the madness started. It was great, just what we wanted after 2 years in the making and without telling anybody! As much as we'd done our best to set up the ride height in our shakedown period, we checked the car over at Crystal Palace and we'd dropped an inch, and for those who saw it, will know we didn't have an inch to drop!
Within no time at all we'd had both Miniworld and Mini Magazine introducing themselves to us and the car.
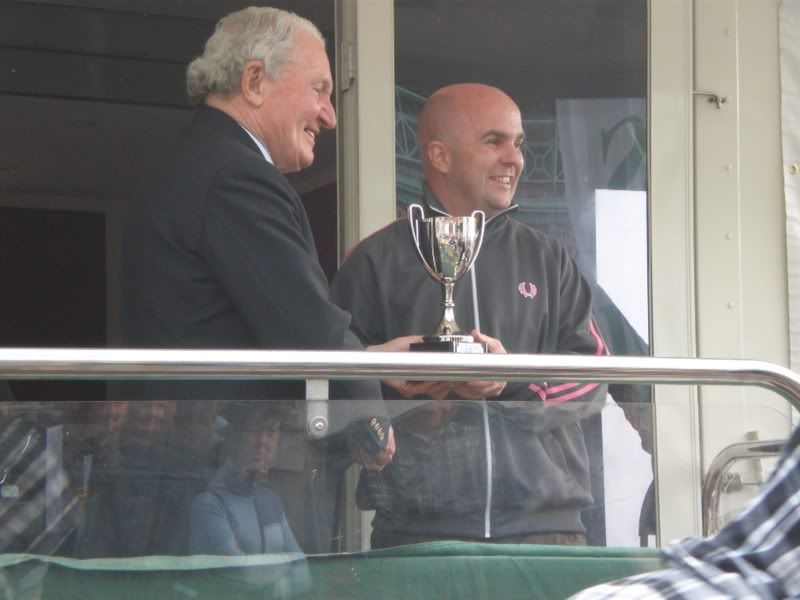
We set off to Brighton with the trip down going perfectly. When we pulled up at Brighton we were given what we thought was a poor parking spot, at the back out of the way of the passers buy, but as it turns out it worked in our favour! (at the time we were cursing the guy who parked us, and maybe he didn't realise what he'd hidden at the back lol). It worked in our favour as we made the most of 2 spaces giving us space to open the doors with clearance of other cars. Plus the word got round pretty quickly that there was something very special at the show and people would come to find the car. For the whole day the people around the car was relentless, we had to leave the car in shifts so that somebody was always there to show people around it and answer those all important questions, it was one of those moments that make all of the late nights, wrapped knuckles and 'will we ever finish it' comments worth while. A lot of our friends and family came down for the day including my Parents from Scotland which it made it a real special occasion bare in mind it was my Fathers Father’s car from new in 1972.
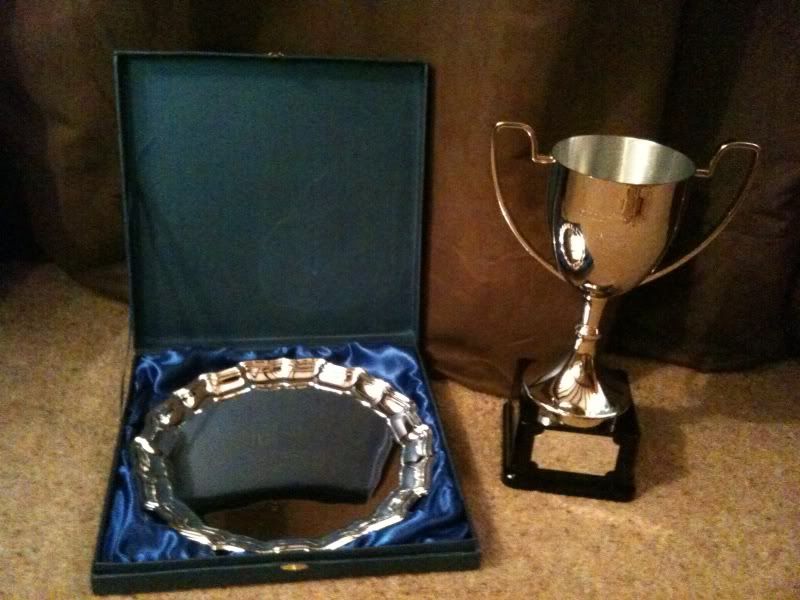
RESULTING IN THESE - Best in Class & Car of the Show!
 [/QUOTE]
Just for the record we drove it back to Bedfordshire 100 miles in torrential rain and it didn't miss a beat! A credit to all involved especially for the first outing out.
Part of our build team were 2 Vauxhall Electrical Technicians, result. So knowledge around anything to do with the wiring was given to them. There plan was to make a 1 off loom from scratch, which they did. Another plan was to hide as much as possible to give a clean look, which they did. Then finally they wanted to give an OEM appearance to all of the wiring, which they did, so i can guarantee that the loom that you can't see is just as good as the bits you can see.
This was no mean feat when we were adding as much modern upgrades as possible.
As with any job there is a middle stage that look messy and unorganised, but we were assured throughout the build that they knew what they were doing and that it would all turn out ok in the end, which it did.
This was where the thermostat plug had to be modified to allow a little more clearance with the standard roundnose, every bit counts!
2010 Show Season
London to Brighton
We only finished the car about 2 weeks before L2B 2010 ( Note we were also booked in for L2B 2009 ( Its always good to have a plan). So we had a few evenings of shakedown time where we put about 150 miles on it. We then went around the whole car checking bolts to make sure everything was still tight. As much as you can check stuff, sometimes you just have to get it on the road and wait for things to go wrong.
Rich and I set off to L2B, we were only at J7 of the M1 when we heard a bang, pulled over, checked the car, the front number plate was missing! Rich went back to get it out of the middle lane of the M1, it was mangled to say the least! We laughed it off and less said about the original plate fixing the better (eh Rich) once we got to Brighton Rich bought me another plate.
We pulled up at Crystal Palace, parked up in the Show and Shine section, and got mobbed! No jokes, we were barely out of the car when the madness started. It was great, just what we wanted after 2 years in the making and without telling anybody! As much as we'd done our best to set up the ride height in our shakedown period, we checked the car over at Crystal Palace and we'd dropped an inch, and for those who saw it, will know we didn't have an inch to drop!
Within no time at all we'd had both Miniworld and Mini Magazine introducing themselves to us and the car.
We set off to Brighton with the trip down going perfectly. When we pulled up at Brighton we were given what we thought was a poor parking spot, at the back out of the way of the passers buy, but as it turns out it worked in our favour! (at the time we were cursing the guy who parked us, and maybe he didn't realise what he'd hidden at the back lol). It worked in our favour as we made the most of 2 spaces giving us space to open the doors with clearance of other cars. Plus the word got round pretty quickly that there was something very special at the show and people would come to find the car. For the whole day the people around the car was relentless, we had to leave the car in shifts so that somebody was always there to show people around it and answer those all important questions, it was one of those moments that make all of the late nights, wrapped knuckles and 'will we ever finish it' comments worth while. A lot of our friends and family came down for the day including my Parents from Scotland which it made it a real special occasion bare in mind it was my Fathers Father’s car from new in 1972.
RESULTING IN THESE - Best in Class & Car of the Show!
[/QUOTE]Just for the record we drove it back to Bedfordshire 100 miles in torrential rain and it didn't miss a beat! A credit to all involved especially for the first outing out.
#10
03-26-2011, 12:23 PM
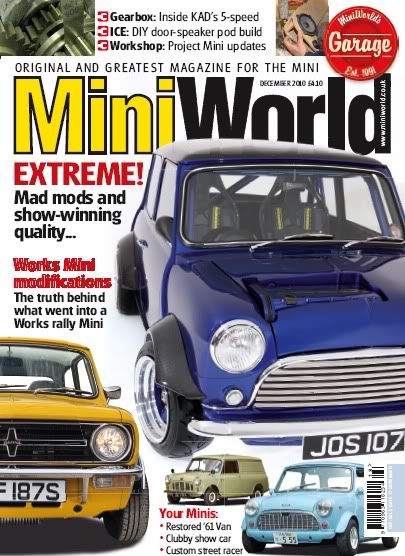
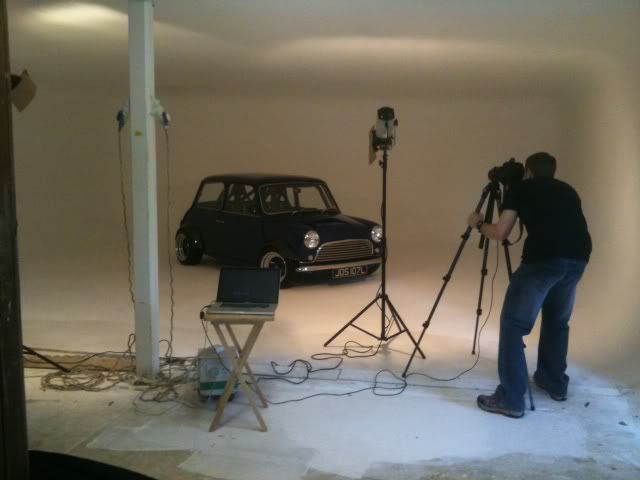
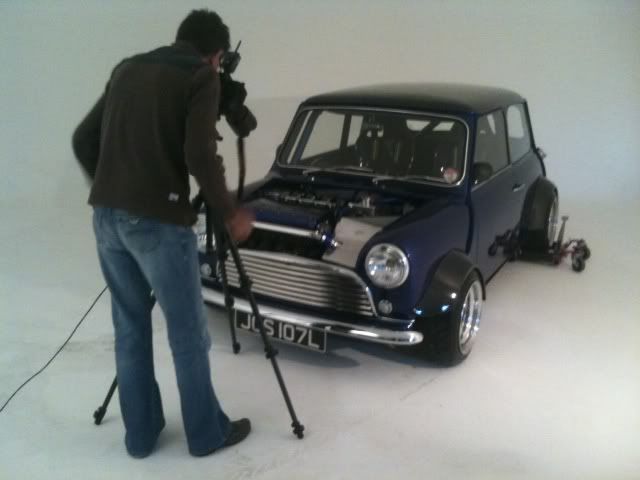
Miniworld
We were lucky to grace the cover of Miniworld in Dec 2010 - Studio Shoot
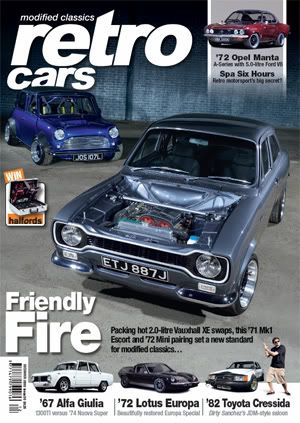
Retro Cars
Also we were on the cover of Retro Cars Dec 2010, along side Lee the boss of Crash Care Centre in his amazing Mk1 Escort.

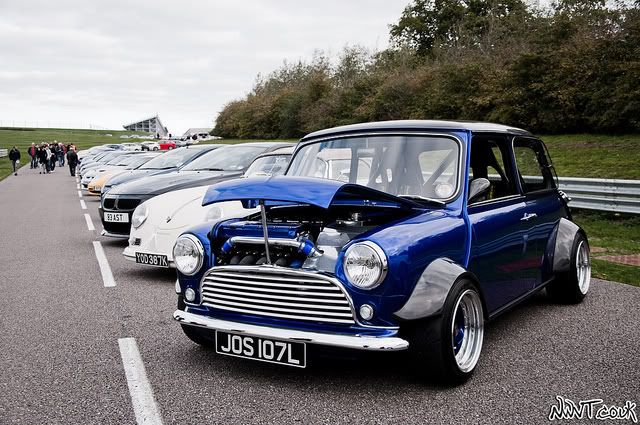
Pistonheads Meet
The car got mobbed, even though there were supercars just along from us.
Now a Year on looking back I must give a special thank you to my wife Marion -for allowing the late nights and weekends to be spent with the Mini, Rich “Skunkworkz” - for just being **** and skilled with all his detail the project wouldn’t have been anywhere near what it has ended up at without it, Chris Woolsey for his awesome mechanical, electrical and everything engineering knowledge, Karen Woolsey -for the use for her Garage space, Teabags and loo for 2 years, Danny for his Electrical knowledge and help, Lee Proctor and the boys at Crash Care Centre for all the bodywork, paint, million coats of lacquer and flatting that they did, Jon Gurney Hotrod guru, Rob Hall at Allspeed, Wayne and Alex at Pro Alloy for all things radiator and cooling, Powerspeed exhausts, Dave and Henyk Franczak at V Tuning, Alex at A.B.S. Blasting and Pete at Delux Interiors.
We are now just looking forward to the 2011 Show season.
Please come and say hello if you see the car around.
We were lucky to grace the cover of Miniworld in Dec 2010 - Studio Shoot
Retro Cars
Also we were on the cover of Retro Cars Dec 2010, along side Lee the boss of Crash Care Centre in his amazing Mk1 Escort.
Pistonheads Meet
The car got mobbed, even though there were supercars just along from us.
Now a Year on looking back I must give a special thank you to my wife Marion -for allowing the late nights and weekends to be spent with the Mini, Rich “Skunkworkz” - for just being **** and skilled with all his detail the project wouldn’t have been anywhere near what it has ended up at without it, Chris Woolsey for his awesome mechanical, electrical and everything engineering knowledge, Karen Woolsey -for the use for her Garage space, Teabags and loo for 2 years, Danny for his Electrical knowledge and help, Lee Proctor and the boys at Crash Care Centre for all the bodywork, paint, million coats of lacquer and flatting that they did, Jon Gurney Hotrod guru, Rob Hall at Allspeed, Wayne and Alex at Pro Alloy for all things radiator and cooling, Powerspeed exhausts, Dave and Henyk Franczak at V Tuning, Alex at A.B.S. Blasting and Pete at Delux Interiors.
We are now just looking forward to the 2011 Show season.
Please come and say hello if you see the car around.
#11
03-26-2011, 01:16 PM

#12
03-26-2011, 01:16 PM

4th Gear
Join Date: Sep 2007
Location: Chandler, AZ
Posts: 542
Likes: 0
Received 0 Likes
on
0 Posts
#13
03-26-2011, 02:15 PM


#16
03-27-2011, 03:26 AM

6th Gear
Join Date: Dec 2005
Location: Germany
Posts: 1,140
Likes: 0
Received 0 Likes
on
0 Posts

#17
03-27-2011, 04:16 AM

2nd Gear
Join Date: Jan 2011
Location: Central Oregon
Posts: 111
Likes: 0
Received 0 Likes
on
0 Posts
#19
03-27-2011, 02:10 PM


#22
03-28-2011, 12:03 PM

5th Gear


#25
03-28-2011, 11:20 PM