When you click on links to various merchants on this site and make a purchase, this can result in this site earning a commission. Affiliate programs and affiliations include, but are not limited to, the eBay Partner Network.
I will try my best to remember the steps to replace this engine mount bushing. Its been a while
Overall, on a scale of 10 (10 being the hardest), Id rank the install a 4. Its a very simple install but could take you 5 minutes or 50. The stock bushing is stubborn to get out!
The purpose of the Powerflex engine support bushing is to help reduce the deflection the engine makes, especially when shifting. Basically, a stiffer bushing = crisper shifts ..... but the potential for increased cabin noise and vibration.
- Raise Mini - I got all 4 wheels off the ground but you can easily get by with just the front up. Lift it pretty high because you are going to be around the middle of the car for the bushing
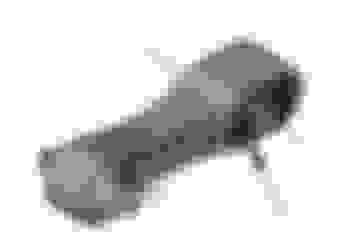
- Remove skid plate - Once you get it off, the bushing is really easy to get to. It's basically right behind the engine and will look something like this:
- Remove star bolt - I apologize but I cant remember the size of the head for the bolt. Once it unscrews, pull it completely out. (This picture is with the PF bushing in, but gives you an idea of the star bolt)
Now, the fun part, getting the stock bushing out..........
- Patience - Like I said, this part could take 5mins or 50. Now that the bolt is out, I pulled on the support and rotated it down then braced it with a screwdriver so I could get to the bushing. There are holes on the stock bushing so I put another screwdriver in the hole and literally started pulling.
The stock bushing is very flimsy so I was able to get it to pull through a little at a time but it is really in there. I tried WD-40, PB Blaster, and good old-fashioned muscle. Finally, after close to giving up hope, I got the stock bushing out! (Mine took about 30mins)
You arent going to reuse this bushing so basically, do what you need to do to get it out; heat, cut, pound etc...
- Installing New Bushing - After the devil made OEM bushing is out, the hard part is done! Installing the new bushing is simple. Grease the bushing with the supplied grease, insert one side with the silver sleeve, insert the other side and squeeze them together. The more grease, the easier it will be to install.
Run the star bolt through and tighten. Reinstall the skid plate, lower the Mini and drive!
DONE
Optional part - The new bushing comes with a black insert that will increase the stiffness so you can put it in or not. It will also add to the potential vibration though. I installed mine and didnt regret it.
Questions, let me know!
Last edited by Mini_Vinnie; 03-08-2018 at 09:22 AM.
Is it recommended to replace all bushings with polyurethane at the same time? I have an F56S with a torn engine mount and was thinking of replacing it with a polyurethane one rather than OEM...thoughts?
Is it recommended to replace all bushings with polyurethane at the same time? I have an F56S with a torn engine mount and was thinking of replacing it with a polyurethane one rather than OEM...thoughts?
If I was in your situation I would definitely use aftermarket ones. They will be a lot better than stock ones, and considering your stock one already ripped, it might be a good indication how flimsy stock parts are
I get the vibrations from installing this but has anyone been getting the shakes? I had my front wheels balanced thinking that was causing the shakes but it didn't stop the shakes. Next I'm going to get a front wheel alignment. I noticed these shakes since its been worse since it's been warmer out.
Just trying to pin point the problem. Been hearing to get your tires balanced, get a wheel alignment, get new front tires. Got the tires back in March of last year (2017). Was told the tires look brand new but they have at least 20K miles on them.
Is it recommended to replace all bushings with polyurethane at the same time? I have an F56S with a torn engine mount and was thinking of replacing it with a polyurethane one rather than OEM...thoughts?
One other thing about Powerflex is they are a very responsive company. Sent a request for product decals to vendors of products I have on my car and within a day Powerflex responded and within a week I had the decals.
Found out what the shaking was. I had the green Slime from that flat tire repair system in the tire. It gooped all up and became hard causing an improper balance in the car.
Found out what the shaking was. I had the green Slime from that flat tire repair system in the tire. It gooped all up and became hard causing an improper balance in the car.
Don't try to use a regular 6 or 12 sided socket on that star bolt. Get a star set, OR something like the crescent x6 socket set.
I got the OEM bushing out easily on a bench vise. Found some hard objects of the right size to support either side, and just squeezed... popped out pretty easily.
Installed this today, all 3 bolts mounting the engine support are e16s, the nut doesn�t come off. Also, pulling the whole thing out and using a gear puller to push out the bushing worked perfectly.
Glad I read your post before doing mine yesterday. I put my wrench on the nut and said..."Wait, this is the one that doesn't come off" so I moved on to the torx part. I also removed it entirely and used a gear puller too.
Vibration: For me, with the two black inserts, the vibration was too much. It only showed up as I decelerated to a stop. So I pulled them out and I feel zero additional vibration from factory.
 03-08-2018, 08:36 AM