Mini Cooper 2001-2006: How to Replace Water Pump
The water pump circulates coolant throughout the engine. Over time it can develop leaks or lose its ability to rotate. Although time-consuming, replacement can be done at home, saving you a large repair bill.
This article applies to the 1st Gen MINI Cooper R50 and R53 (2001-2006).
The water pump uses an impeller to circulate the coolant through the engine. The water pump pulley is turned by the drive belt, making drive belt condition important to the proper operation of the cooling system. Leaking coolant is the most common indicator of a problem with the water pump. Your MINI may also run hotter than usual, or a squeal can develop inside the pump while rotating. If your coolant leak is difficult to find, using a cooling system pressure tester will help you pinpoint the location.

Materials Needed
- Metric socket set 8mm-17mm
- 1/4" and 3/8" ratchet with extension and swivel
- Pry bar
- Phillips and flat head screwdriver
- Floor jack
- Two jack stands
- T30 Torx socket
- Vaseline
- Pliers
- New coolant (if needed)
- New water pump
Note
Before starting this procedure, have your A/C system recovered and vacuumed. On the R50, It may be possible to instead place the A/C condenser to the side with the lines still attached. Be careful not to bend the A/C lines. DO NOT operate your A/C system once recovered, otherwise damage will occur!
The steps for the Mini Cooper (R50) and Mini Cooper-S (R53) are different at times. These differences will be designated by the abbreviations (R50) and (R53).
Step 1 – Get your MINI into Service Mode
Follow Steps 1-4 of the article Mini Cooper 2001 - 2006: How To Replace Radiator. In short:
- Remove the front bumper and crash structure.
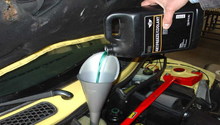
- Drain the radiator coolant.
- Slide the A/C condenser out of place.
Featured Video: How to Get Mini into Front End Service Mode
Step 2 – Disconnect the A/C condenser
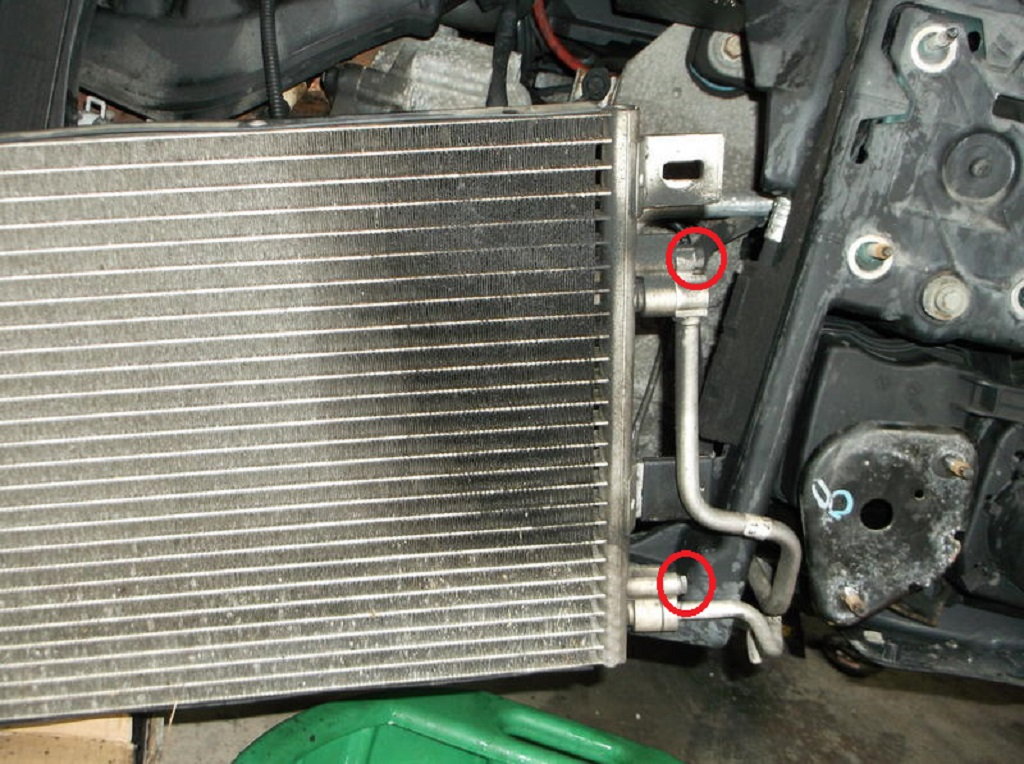
- Remove the two 10mm bolts holding the A/C lines to the condenser. The lines have O-rings on the end and will require a slight pull/twist.
- Remove the two 13mm bolts you loosened in the previous step.
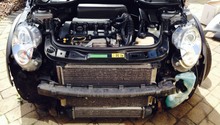
Step 3 – Remove the condenser, cooling fan and radiator
- On the R50, you'll need to remove the bolt holding the valve near the hood latch release.
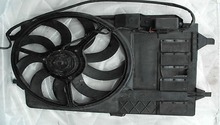
- Lean the radiator forward and disconnect the cooling fan electrical connecter. Remove any clips holding the harness to the fan.
- The radiator/cooling fan should now be free and can be removed.
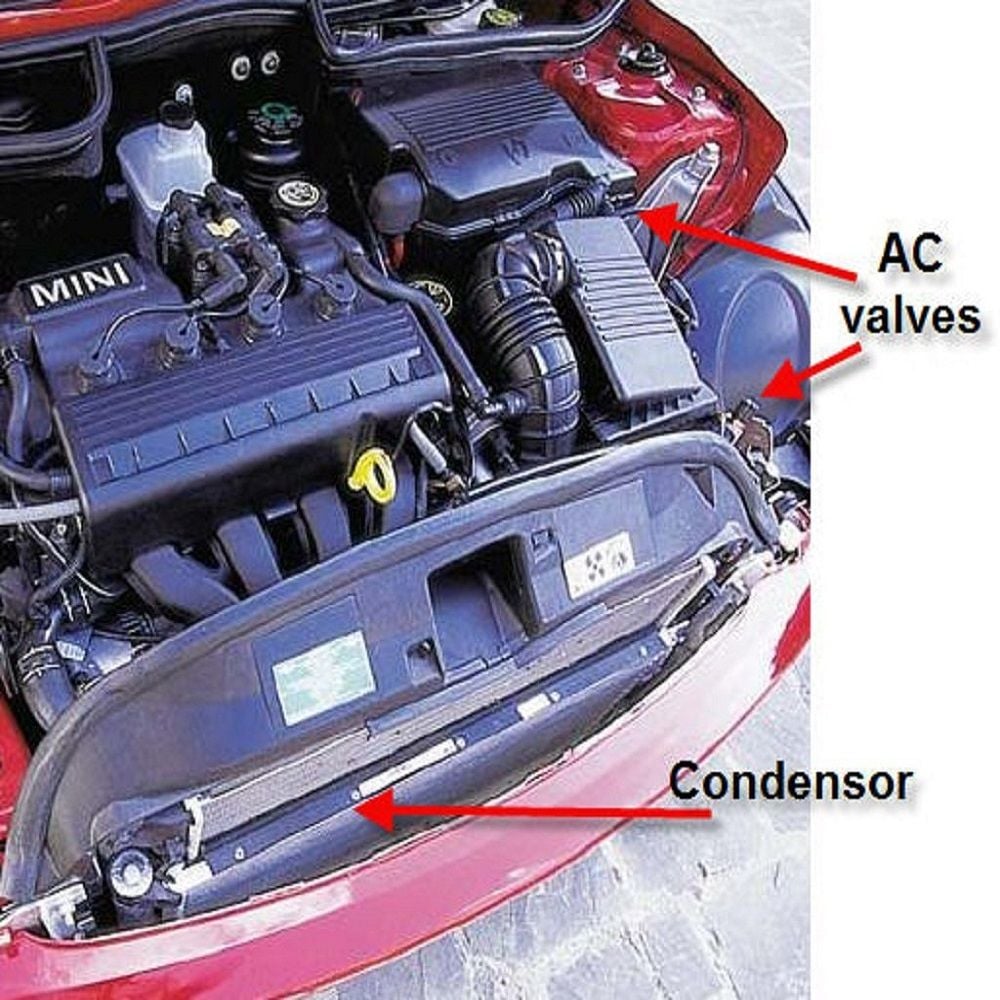
Figure 2. The locations of the A/C valves. 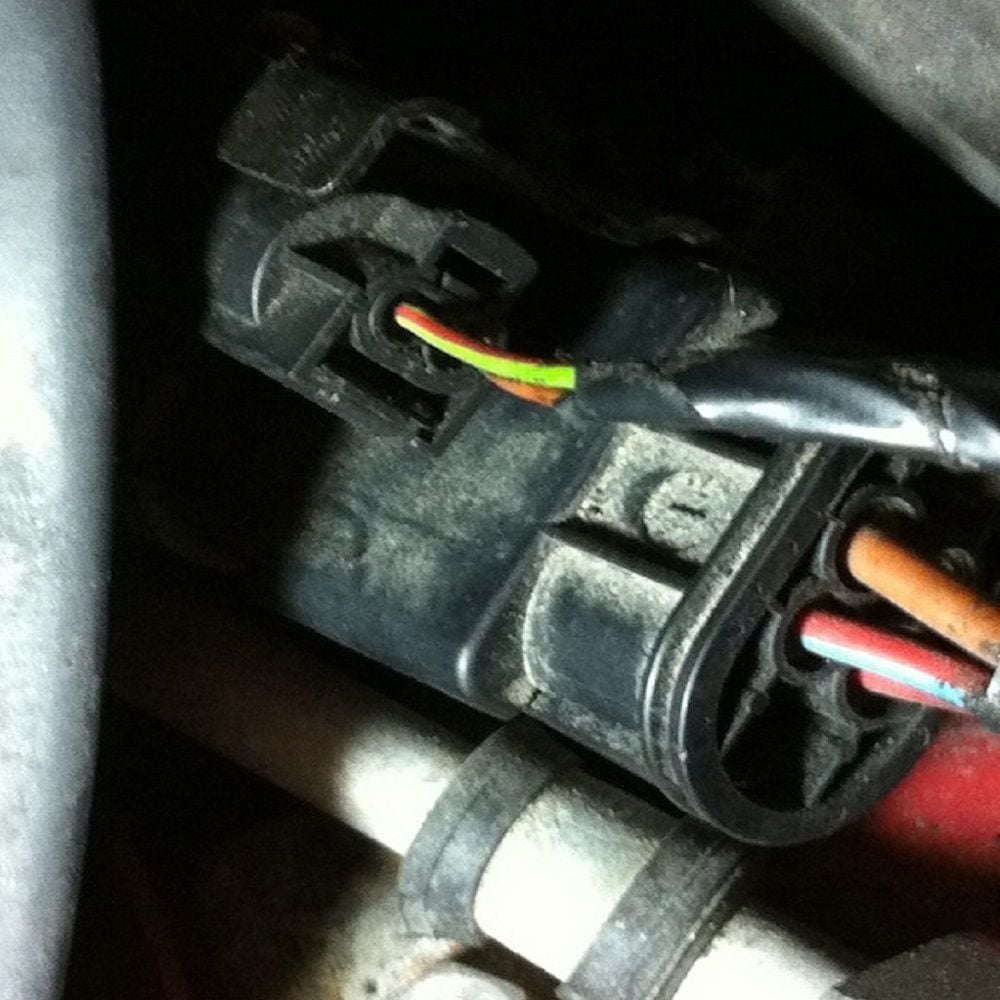
Figure 3. The cooling fan electrical connector.
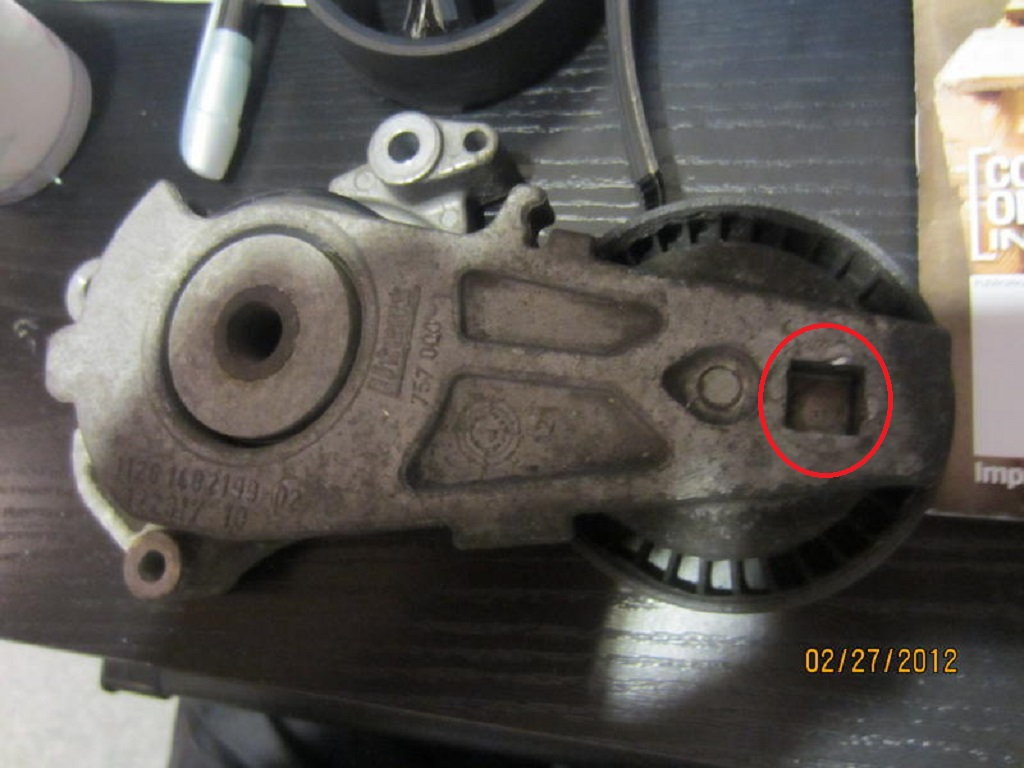
Step 4 – Remove the drive belt (R50)
Locate the square slot on the surface of the drive belt tensioner. Use a 3/8" or 1/2" ratchet to rotate the tensioner towards the top of the engine. Once slack is created in the belt, slide it off the tensioner.
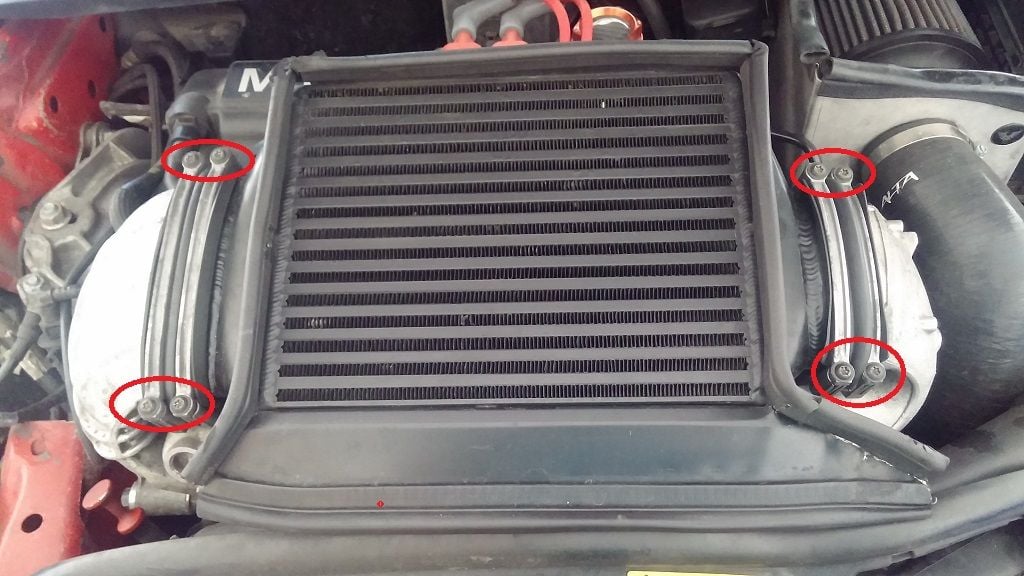
Step 5 – Remove the intercooler (R53)
- Remove the four t30 Torx bolts from the black plastic diverter on top of the intercooler.
- Remove the eight t30 Torx bolts holding the intercooler in place by way of the four clamps.
- While wiggling the intercooler, slide it to the left and raise the right side to create enough space for removal.
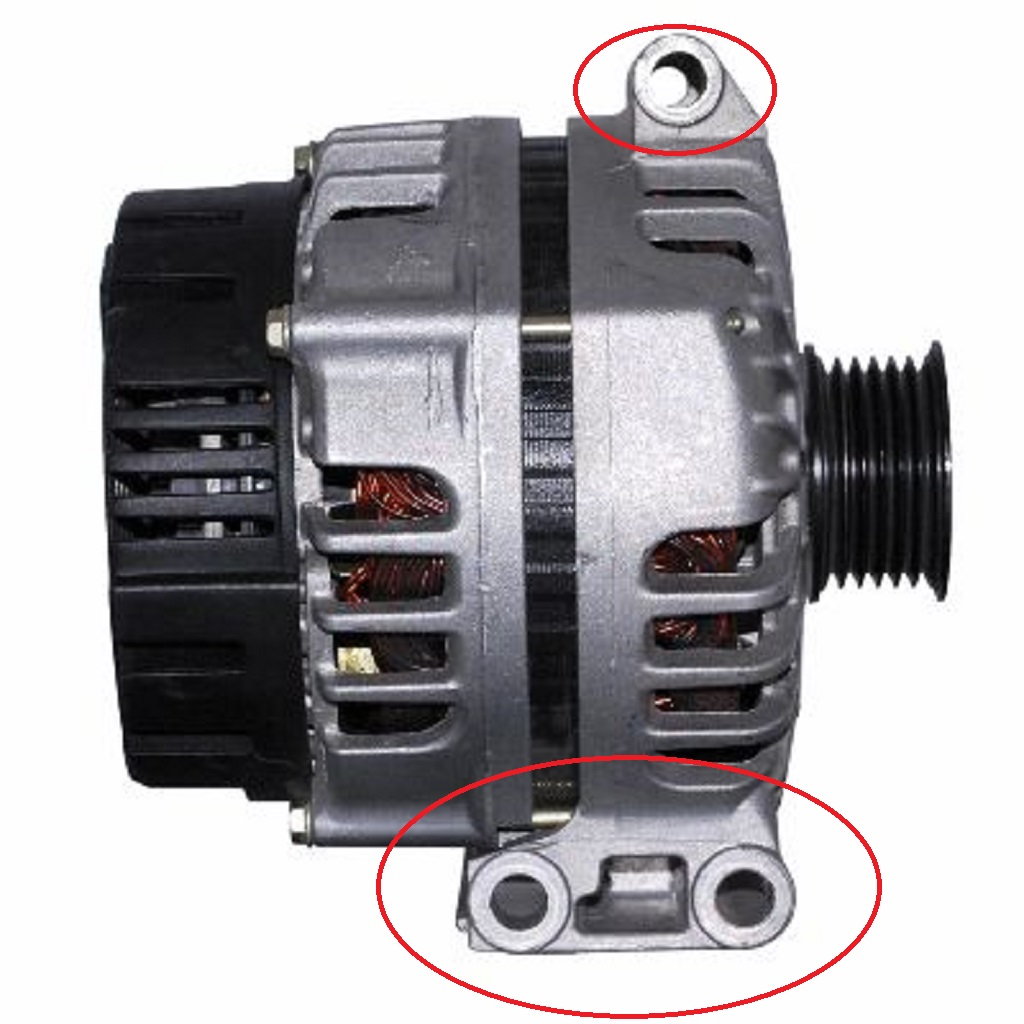
Step 6 – Remove the alternator (R50)
Remove the three bolts from the alternator. Unless you prefer more room, you can leave the electrical connectors attached and set the alternator on top of the upper strut mount.
[Related Article - How to Replace Alternator - NorthAmericanMotoring.com]
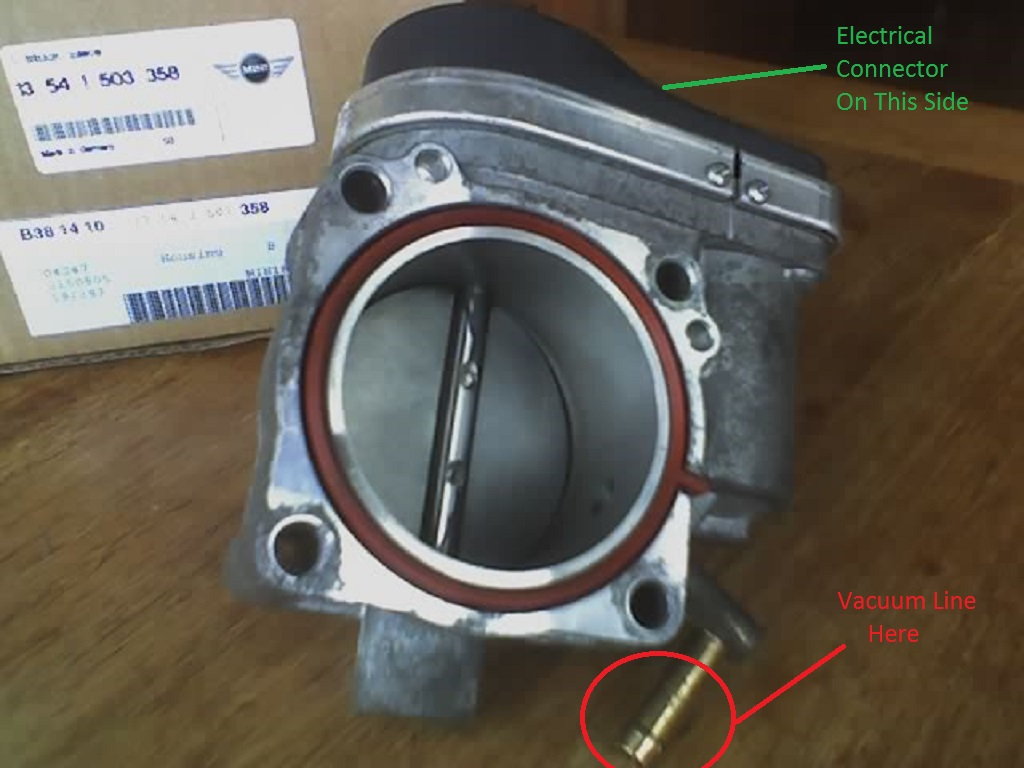
Step 7 – Remove the throttle body (R53)
Loosen the clamp holding the intake tube to the throttle body. Use a 10mm socket with extension and swivel to loosen the four throttle body bolts. Disconnect the electrical connector on the throttle body and remove the vacuum line attached to it.
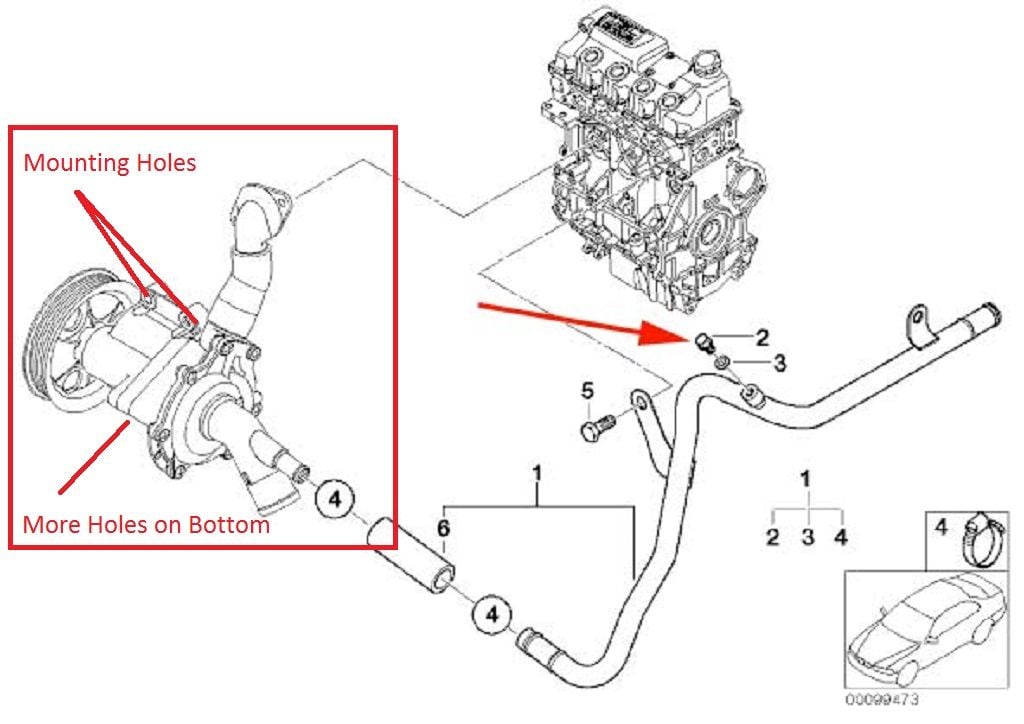
Step 8 – Remove the water pump (R50)
Disconnect the hoses from the water pump and unbolt it from the engine block. If the hoses are stuck to the pump, twist the hoses on the surface of the pump with pliers to break free corrosion.
Step 9 – Remove the supercharger inlet tube (R53)
- Remove the bottom radiator hose from the water pump.
- Remove the two vacuum lines with push lock disconnects attached to the black inlet air tube. Push the locks down and slide the lines off the vacuum ports.
- Remove the 10mm bolt on the body of the supercharger near the supercharger/supercharger inlet tube connection. It is almost directly below the water pump.
- Remove the clamps on the rubber bypass hose connected to the inlet tube.
- Carefully separate the inlet tube from the bypass hose, then wiggle and pull the inlet tube off the supercharger.
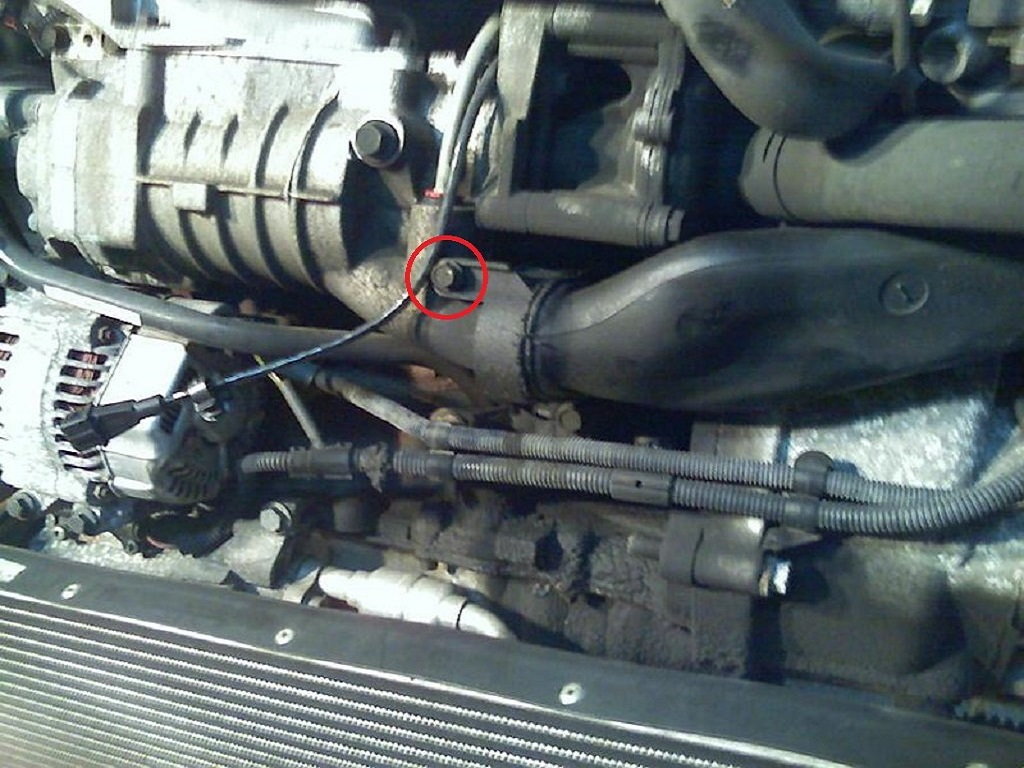
Figure 9. The bolt holding the supercharger inlet to the supercharger. 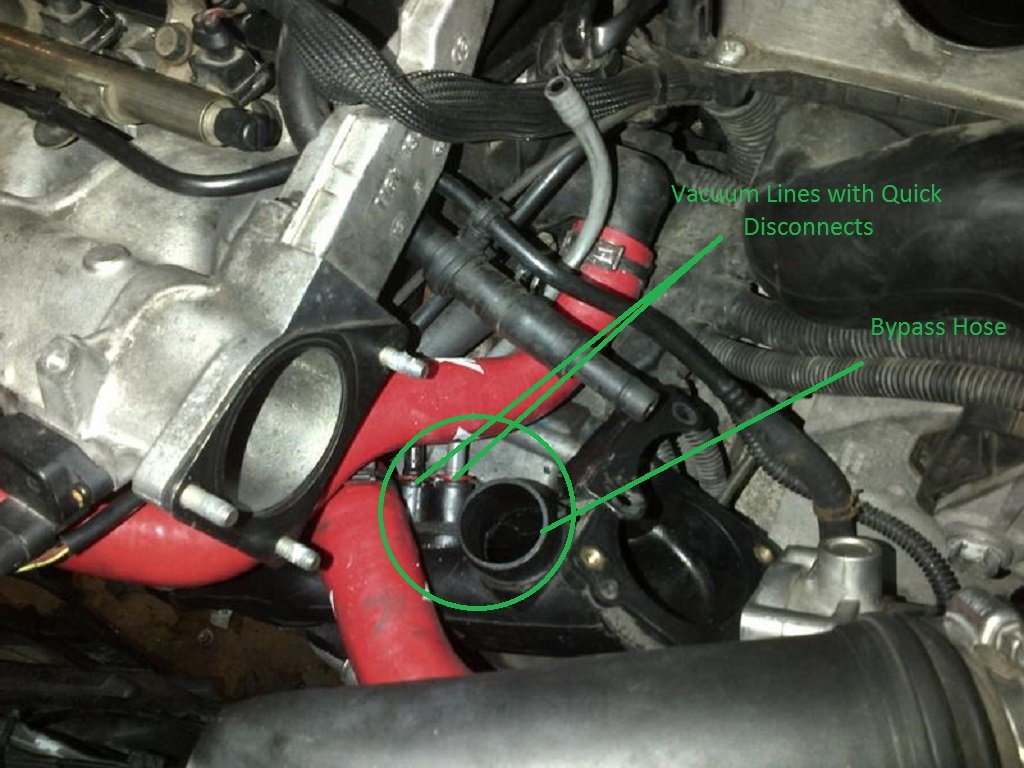
Figure 10. The connections to the inlet tube.
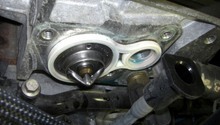
Step 10 – Remove the water pump and flange (R53)
- Remove the three water pump bolts with a 13mm socket, swivel and extension. Start with the lower bolt closest to the front of the vehicle, then move to the one above it.
- You may need to apply some pressure with a pry bar against the water pump to separate the corrosion.
- Remove the two 10mm bolts holding the water pump flange to the engine block.
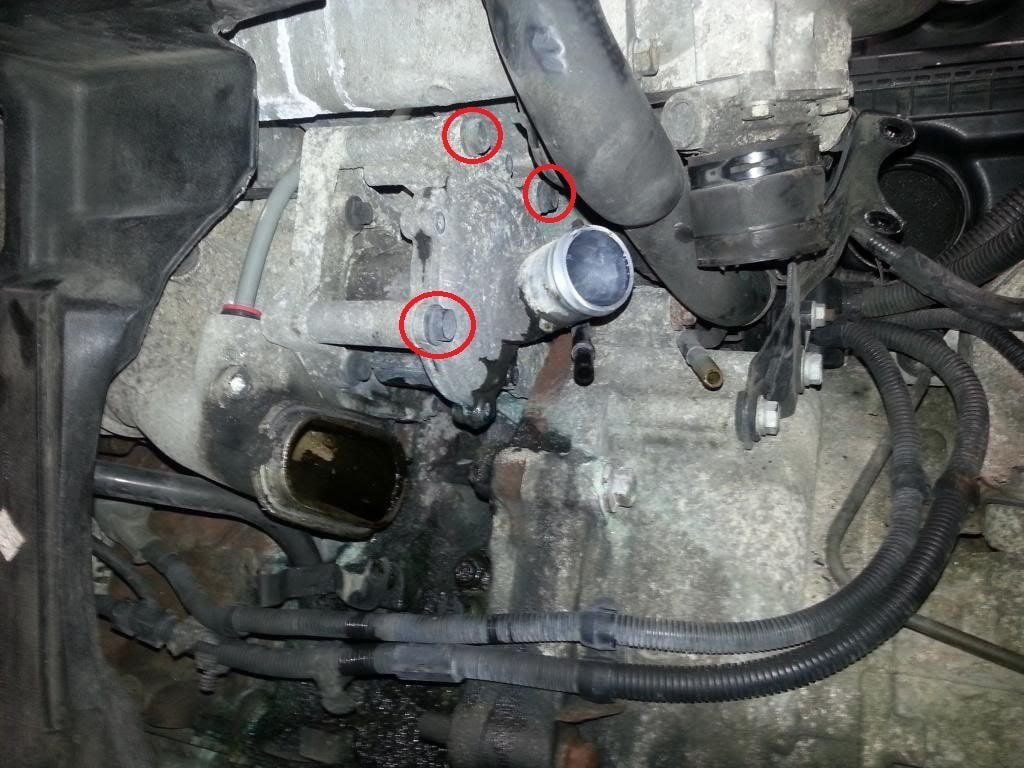
Figure 11. The three water pump bolts. 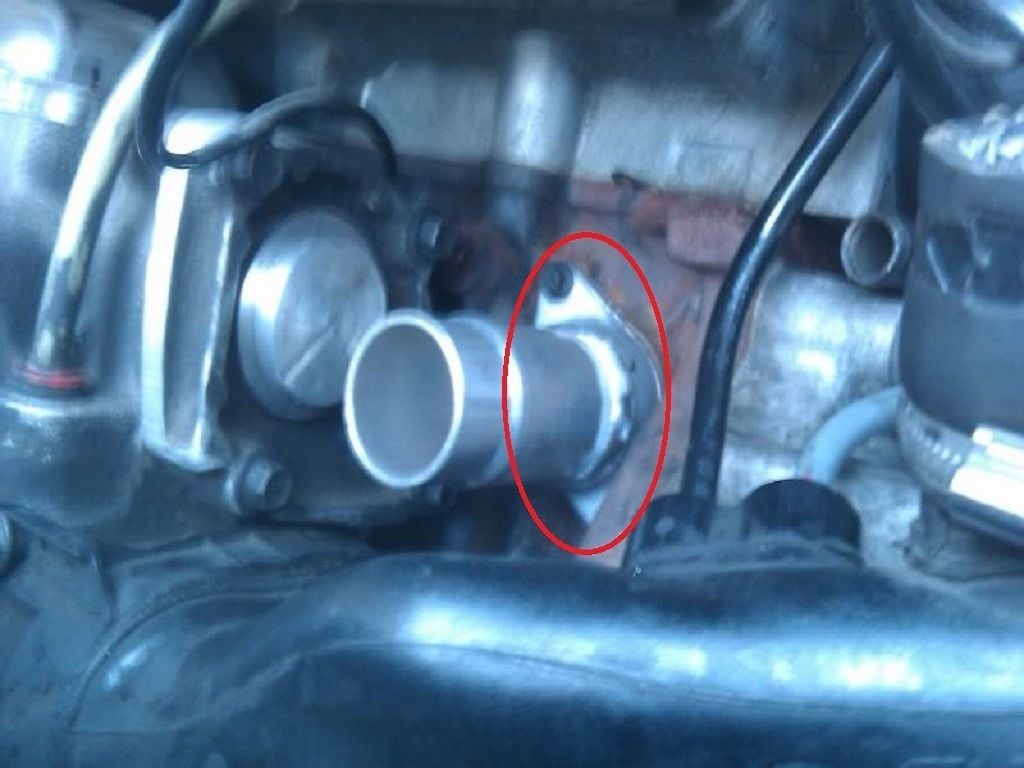
Figure 12. The water pump flange.
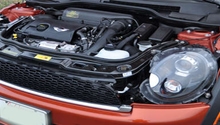
Step 11 – Install the water pump
The R53 uses a gear in the supercharger to rotate the pump. Before installing the pump, make sure the gears in the pump and supercharger are aligned. Apply Vaseline or similar lube to the water pump O-ring for easy installation.
Reverse these steps until you're ready to add engine coolant. Refer to Step 6 of the article: MINI Cooper 2001-2006: How To Replace Radiator.
- Hook in the radiator and A/C condenser.
- Reconnect the radiator hoses to the radiator.
- Reinstall the push pins that secure the radiator to the chassis.
- Reinstall the front bumper crash bar and then the rest of the front bumper assembly.
- Top off the cooling system at the radiator and overflow tank with 50/50 coolant. Loosen the bleed screw at the upper radiator hose and start the engine with the heat on max high. Close the bleed screw once coolant exits through it.
- Allow the engine to warm, keeping a close eye on the temperature. Don't let the temperature rise above 3/4 near the red mark! Adjust your level to the max mark in the overflow tank.
Featured Video: MINI Cooper Water Pump Replacement
Related Discussions
- R50 Water Pump Replacement - NorthAmericanMotoring.com
- Have You Replaced Thermostat Housing - NorthAmericanMotoring.com
- Coolant Leaking at Water Pump - NorthAmericanMotoring.com
- How to Replace Thermostat - NorthAmericanMotoring.com
- OBD Code P0128 and 2F07 - NorthAmericanMotoring.com