Mini Cooper 2001-2006: Fuse Box Diagram
The fuses in your Mini Cooper are responsible for anything electrical, so when one of these components goes awry, you'll know exactly where to look with help from this article.
This article applies to the 1st Gen Mini Cooper (2001-2006).
The Mini Cooper is equipped with two fuse boxes: one is under the hood and one under the dashboard. The two fuse boxes carry fuses that are responsible for all electrical components. People are often shocked when they realize how many parts stop working because of a simple fuse. Before taking your car apart to fix small issues, always go to your fuse boxes to check the simplest solution of all –a blown fuse. Read on to learn some things about the fuse boxes in the Mini Cooper.
Fuse Box Locations
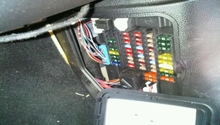
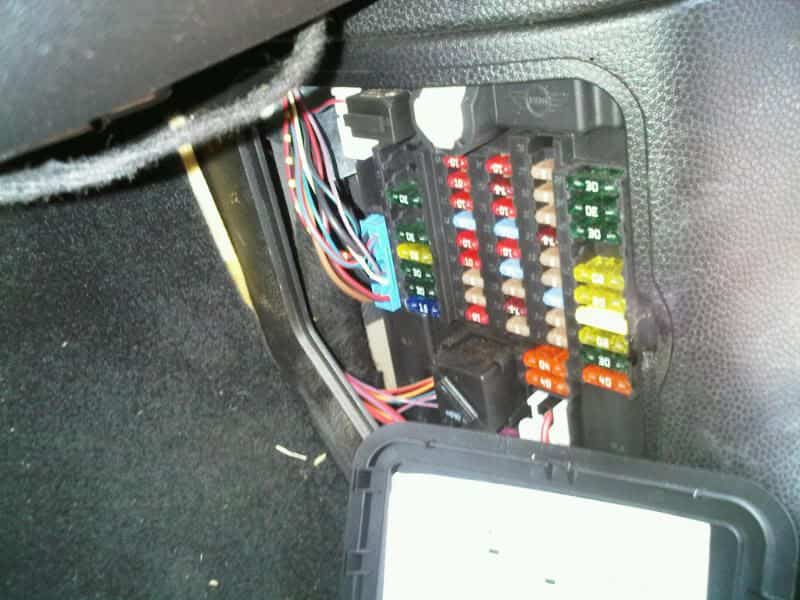
Most cars have two fuse boxes: one under the dashboard and another under the hood, in the engine compartment. The arrangement of fuses are different, however. For instance, the headlight fuse is different from one car to the other. Some could have it in the fuse box that is under the hood, while others could have it in the box that is inside the vehicle. The interior fuse box is located on the driver's side footwell, while the engine compartment's fuse box is right next to the battery.
Locating Fuses
Now that you know where the fuse boxes are located, the next thing is to locate the specific fuse you need to check or replace. For instance, anytime something electrical-related goes bad, whether the dome light stopped working, or the stereo isn't playing anymore, the first thing to do is to check if the fuse is blown, even before checking the bulb itself. The fuses are designed to cut the electrical flow whenever there is too much voltage that can cause electrical overheating.
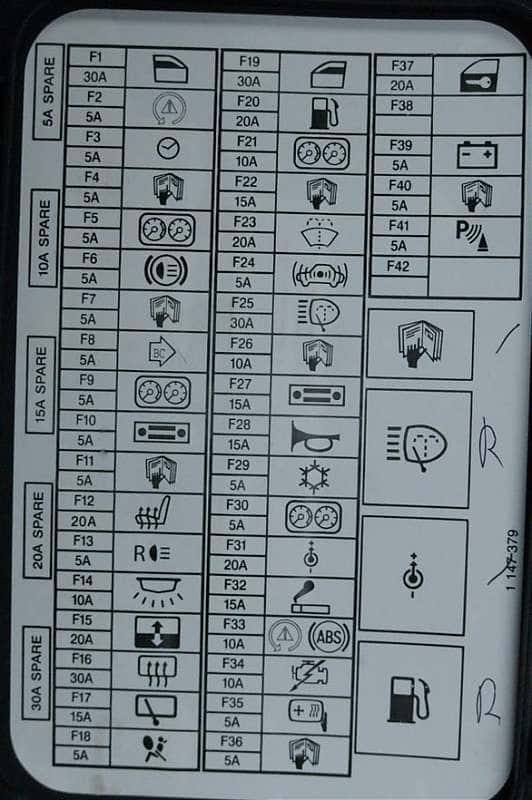
There are two places that will lead you to your desired fuse. The first place is your owner's manual, which has the fuse box diagram that will show you where each fuse is located and what is it responsible for. The second and most common place is on the back cover of the fuse boxes. So, remove the fuse box cover, whether it is the interior box or the engine compartment one, then turn it around to see all the fuses inside.
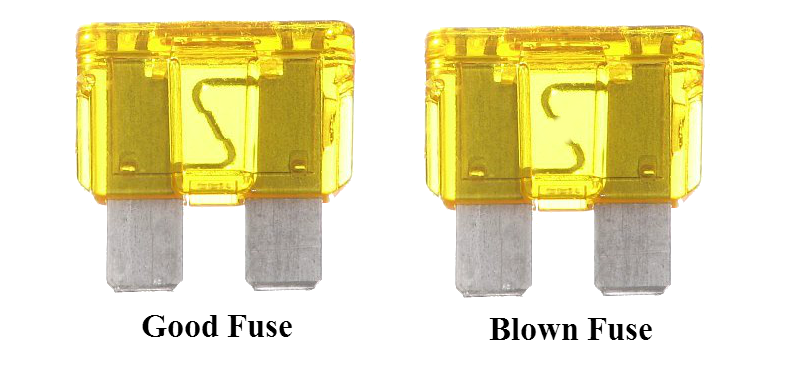
Understanding Fuses
What's the purpose of getting to know the fuses if you don't know how to check them for damage? After you've located the desired fuse, use the plastic fuse removal tool that is inside your fuse box to remove that specific fuse. You can also use your fingers and remove it that way. Once you remove the fuse that you wanted to check, hold it up to a light to get a good visual, and check the tiny wire inside of it. The wire is designed to break when there is too much voltage, which creates a shortage and stops the voltage from flowing through. If the wire is broken, this means you need a new fuse. If the metal bar is one piece, then the fuse is not the culprit.
Related Discussions
- Interior Fuse Box - NorthAmericanMotoring.com
- Exterior Fuse Box - NorthAmericanMotoring.com