Light trifecta: ABS, DSC, tire pressure
#51
 01-01-2011, 11:23 PM


Trifecta Fix: Easy Step by Step instructions...
As I mentioned earlier, I did the driver's side first (supposed to be the most common side to go bad), so I'll show it. This job was EXTREMELY easy. In fact, my dominant arm is broken, so I did the entire thing with a cast. I think anybody can do it... Nobody should have to pay a mechanic more than $50 in labor to do this.
First,
- Raise the front of the vehicle and support it safely.
- Remove the wheel (don't judge me on cleanliness of the car. It's the middle of winter here and I do drive my car)

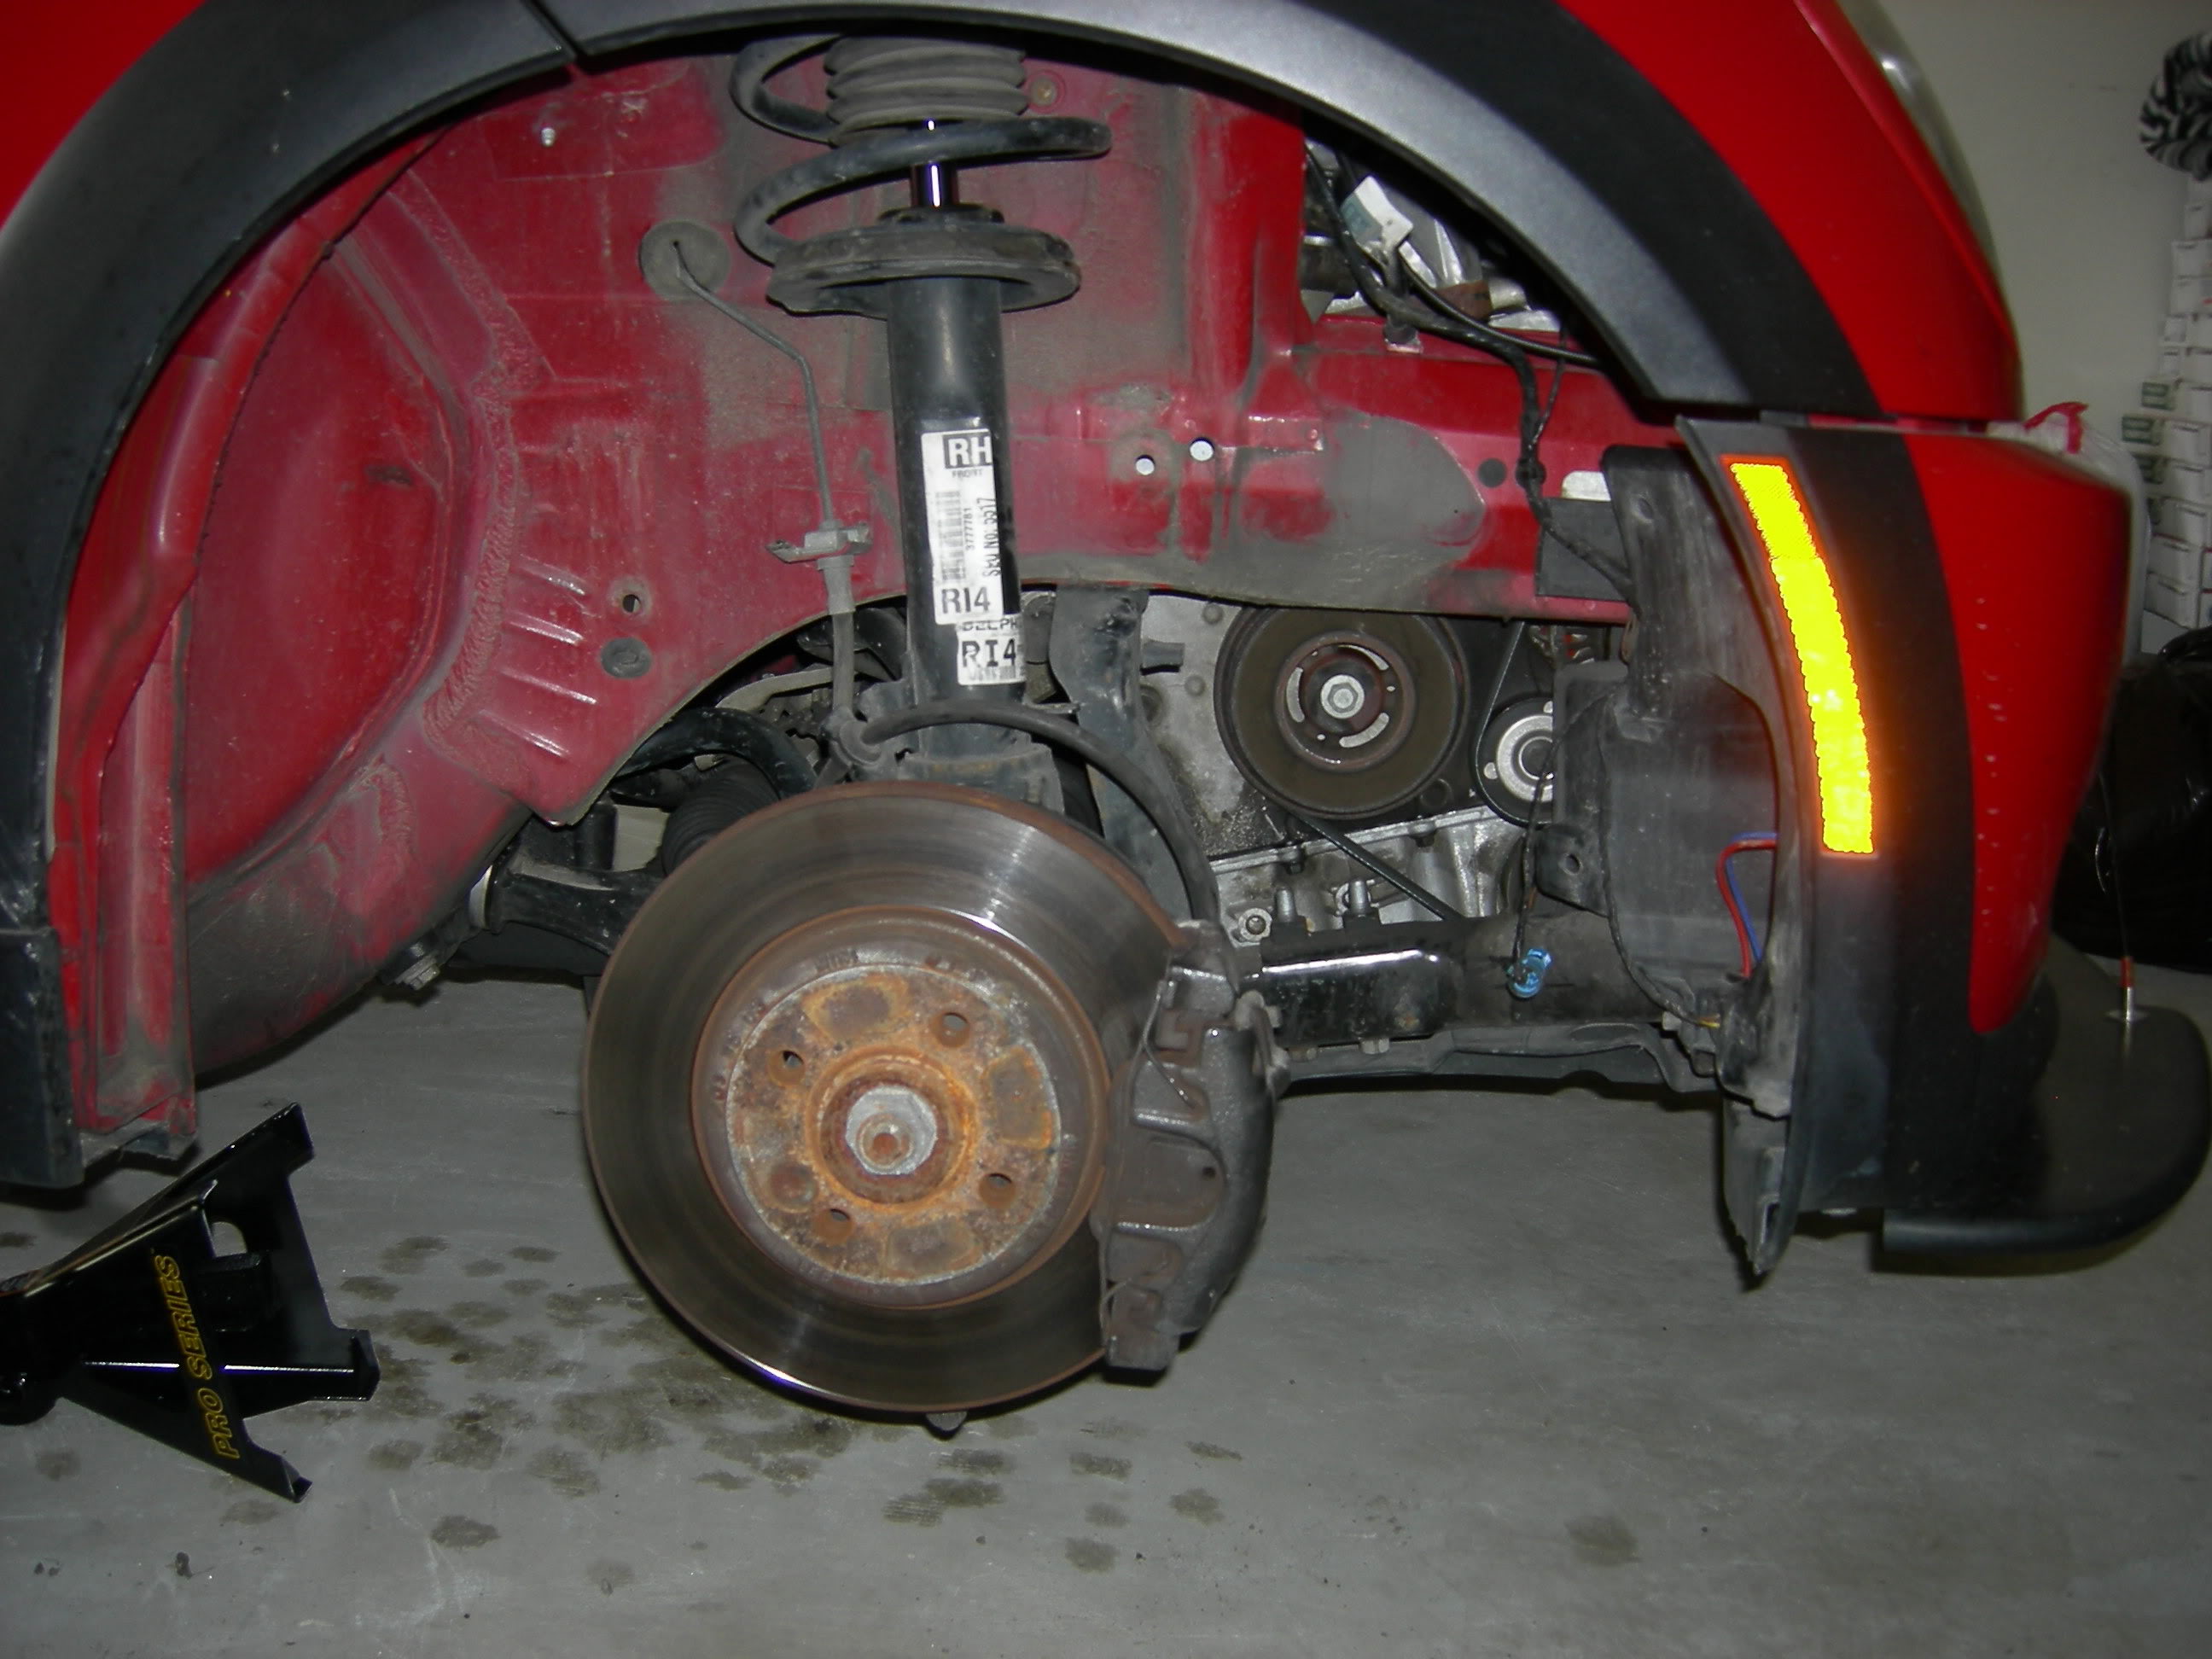
- I then removed the entire inner plastic wheel shroud, although I've heard it's possible to do this job without removing the entire thing. As you can see, by removing the whole shroud you have a pretty open view of the sensor (which is about 18" long):

- Clip the tie wrap that is holding the BLUE sensor plug to the sub-frame and then unplug it. You can insert a new tie wrap right now, if you think you might forget later.
- Gently pull the wire out of the three retaining clips. One of them is hidden from view on the pic above (just behind the red sheet metal). If you pull down gently on the wire, it will come out. You can see that grommet in the pic below if you look where the wire is hanging down from behind the red sheet metal. The wire can then be removed from the other two retaining clips (one on sub-frame and one on the MacPherson Strut) by gently pushing a small flat blade screw driver between the wire grommet and the clip and prying it out, as shown below:


- The wire should now be free from all of the retaining clips as shown:

- Before proceeding to the next step, clean the top of the wheel bearing housing. Remove as much debris as possible to decrease the chances of dirt falling down into the sensor hole once the sensor is removed.
- Next, working at the top of the wheel bearing housing, remove the wheel speed sensor mounting screw. The first pic below, shows using an allen wrench to get to the screw. The second is a better view of the top of the wheel bearing housing and the screw itself.


- After removing the screw, gently pull straight up on the sensor to remove it from the wheel bearing housing.

- Clean the wheel speed sensor mounting pad and hole (on top of the wheel bearing housing). Apply a coating of grease or anti-seize compound.
- Installation is reverse of removal. A new tie wrap can be inserted into the retaining clip that holds the blue plug (orange in the pic below):

- Per Bentley manual, the screw that holds the wheel speed sensor to the wheel bearing housing is torqued to 8Nm (6 ft-lb)
- Prior to reinstalling the inner plastic wheel shroud, you might be able to convince one of your kids to come down and clean it for you...
Anyway, that's the write up. If nothing else, I hope it shows you just how easy this job is, so you'll do it yourself instead of paying somebody.
First,
- Raise the front of the vehicle and support it safely.
- Remove the wheel (don't judge me on cleanliness of the car. It's the middle of winter here and I do drive my car)
- I then removed the entire inner plastic wheel shroud, although I've heard it's possible to do this job without removing the entire thing. As you can see, by removing the whole shroud you have a pretty open view of the sensor (which is about 18" long):
- Clip the tie wrap that is holding the BLUE sensor plug to the sub-frame and then unplug it. You can insert a new tie wrap right now, if you think you might forget later.
- Gently pull the wire out of the three retaining clips. One of them is hidden from view on the pic above (just behind the red sheet metal). If you pull down gently on the wire, it will come out. You can see that grommet in the pic below if you look where the wire is hanging down from behind the red sheet metal. The wire can then be removed from the other two retaining clips (one on sub-frame and one on the MacPherson Strut) by gently pushing a small flat blade screw driver between the wire grommet and the clip and prying it out, as shown below:
- The wire should now be free from all of the retaining clips as shown:
- Before proceeding to the next step, clean the top of the wheel bearing housing. Remove as much debris as possible to decrease the chances of dirt falling down into the sensor hole once the sensor is removed.
- Next, working at the top of the wheel bearing housing, remove the wheel speed sensor mounting screw. The first pic below, shows using an allen wrench to get to the screw. The second is a better view of the top of the wheel bearing housing and the screw itself.
- After removing the screw, gently pull straight up on the sensor to remove it from the wheel bearing housing.
- Clean the wheel speed sensor mounting pad and hole (on top of the wheel bearing housing). Apply a coating of grease or anti-seize compound.
- Installation is reverse of removal. A new tie wrap can be inserted into the retaining clip that holds the blue plug (orange in the pic below):
- Per Bentley manual, the screw that holds the wheel speed sensor to the wheel bearing housing is torqued to 8Nm (6 ft-lb)
- Prior to reinstalling the inner plastic wheel shroud, you might be able to convince one of your kids to come down and clean it for you...
Anyway, that's the write up. If nothing else, I hope it shows you just how easy this job is, so you'll do it yourself instead of paying somebody.

#54
05-15-2011, 06:18 PM
#55
05-15-2011, 07:16 PM
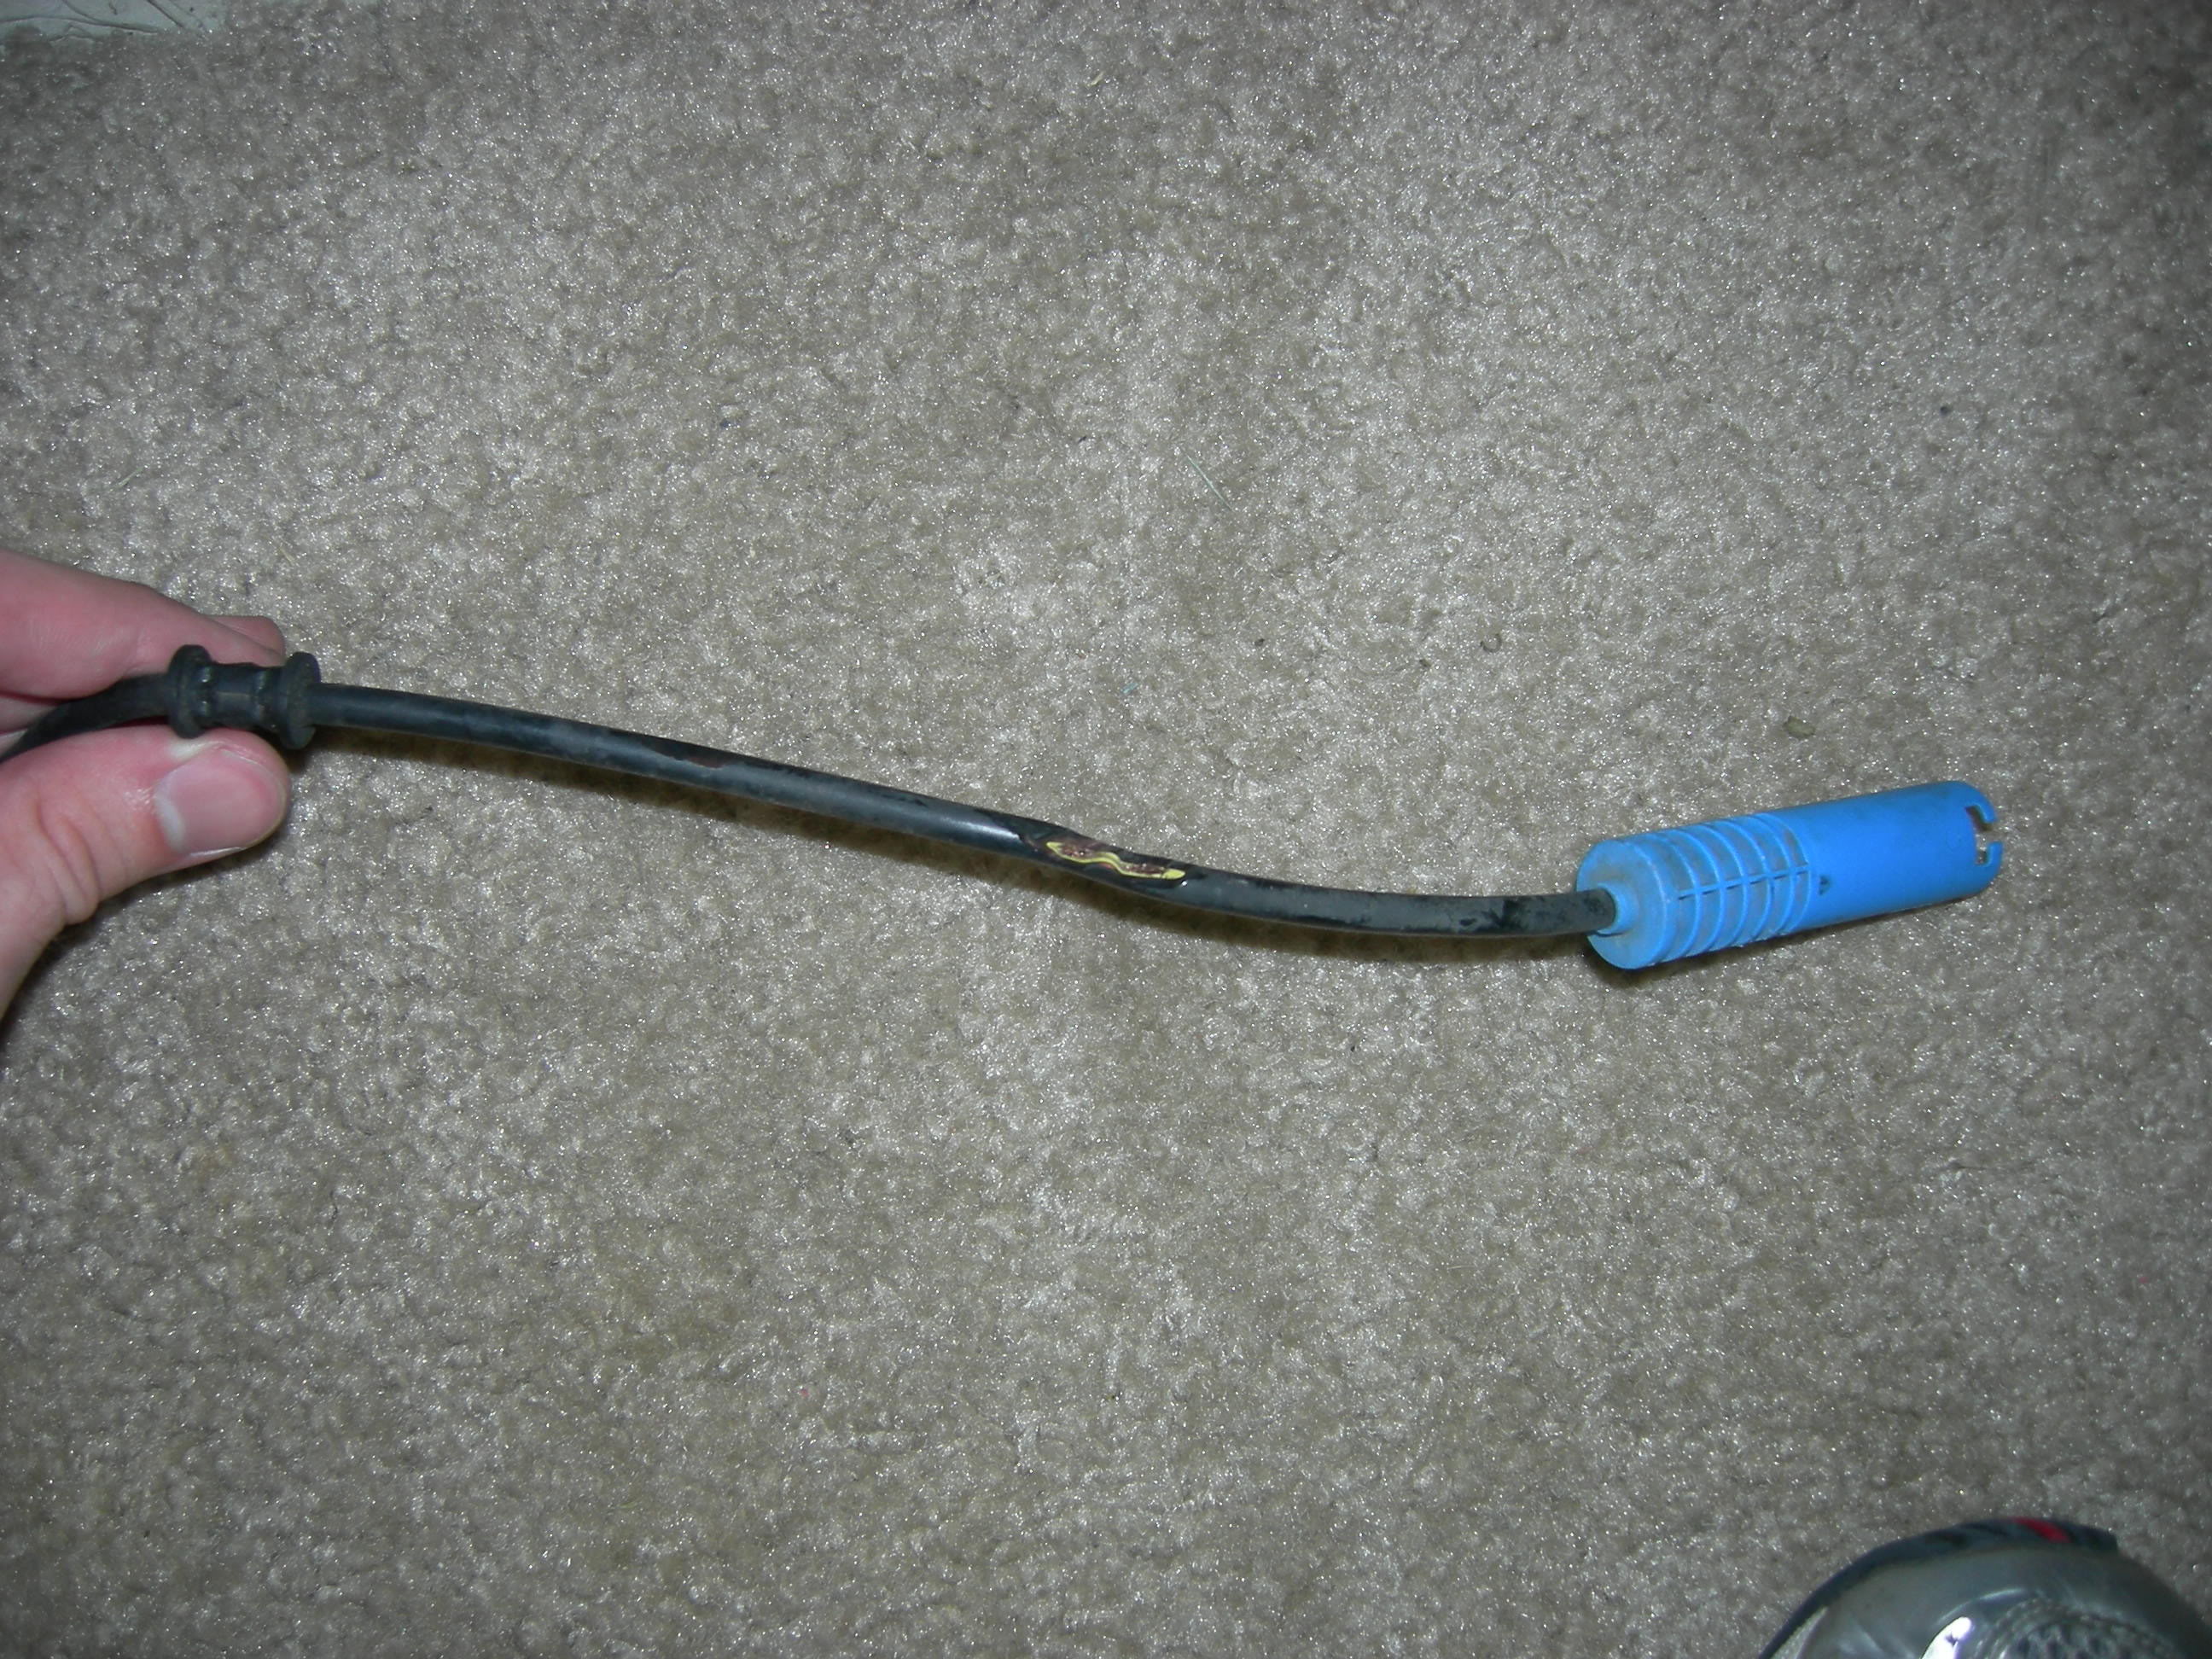
It's usually the drivers side, but in my case it was the passengers side. I had bought both, because I wanted to make sure I killed the problem the first time. I did the drivers side first and it didn't fix the problem. As soon as I got the passengers side wheel off, I could see that the cable on the sensor was clearly damaged. And as soon as I replaced it, it worked fine. If you can afford, I suggest just buying both and doing it yourself. The money you save by doing it yourself will more than pay for the extra sensor you bought.
#56
05-15-2011, 10:41 PM

2nd Gear
Join Date: Jan 2010
Location: AR, USA
Posts: 97
Likes: 0
Received 0 Likes
on
0 Posts
#57
05-19-2011, 07:58 PM
A good enough OBDII scanner should tell you which one is bad. I found a good deal on them, so I went ahead and replaced both of my front sensors, like anitan1 suggested. Also, check your fuses. I think fuse F33 is the one that may blow out when the trifecta makes an appearance.
#59
05-20-2011, 03:32 AM
Angrydave is right. And by the way, it's not always because the cable rubs and wears through (although it was in my case). I think sometimes the sensor itself becomes defective or corroded. If you research the topic deep enough (there are several threads that deal with the subject, although this thread is the best one), you'll find that guys have tried to remove the sensor and clean it. The problem may go away briefly, but it comes back.
#60
05-20-2011, 07:26 AM

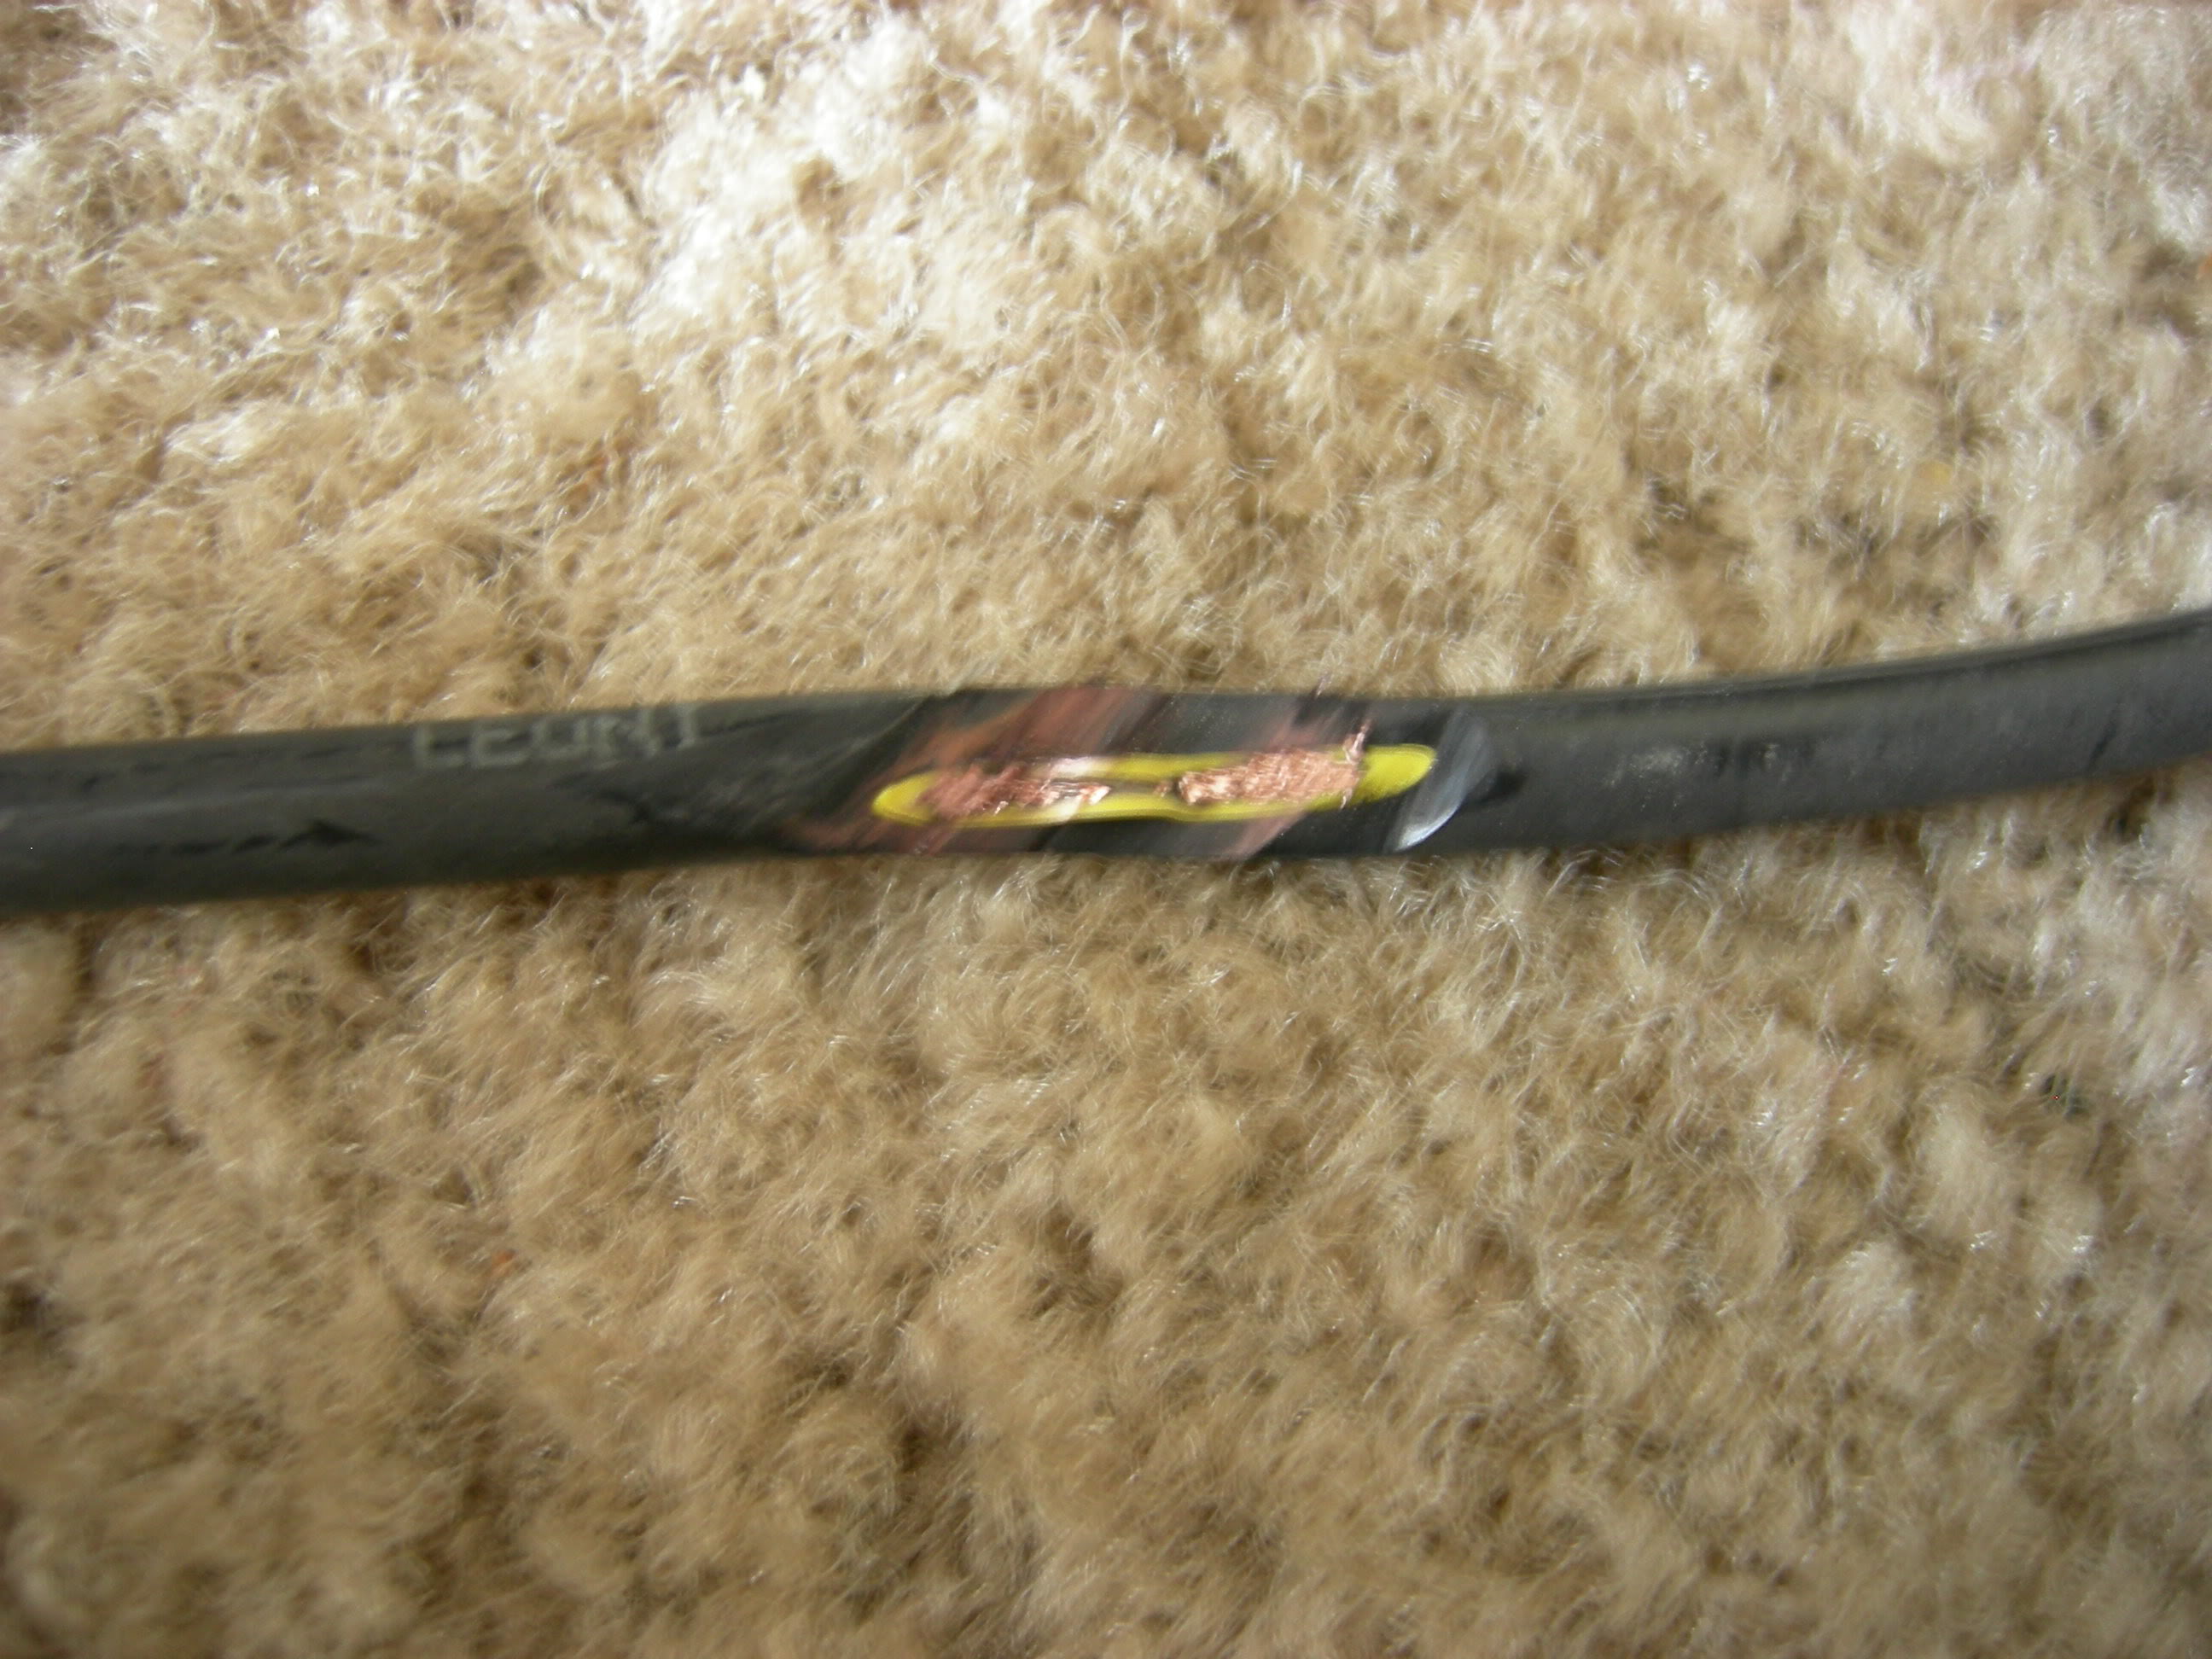
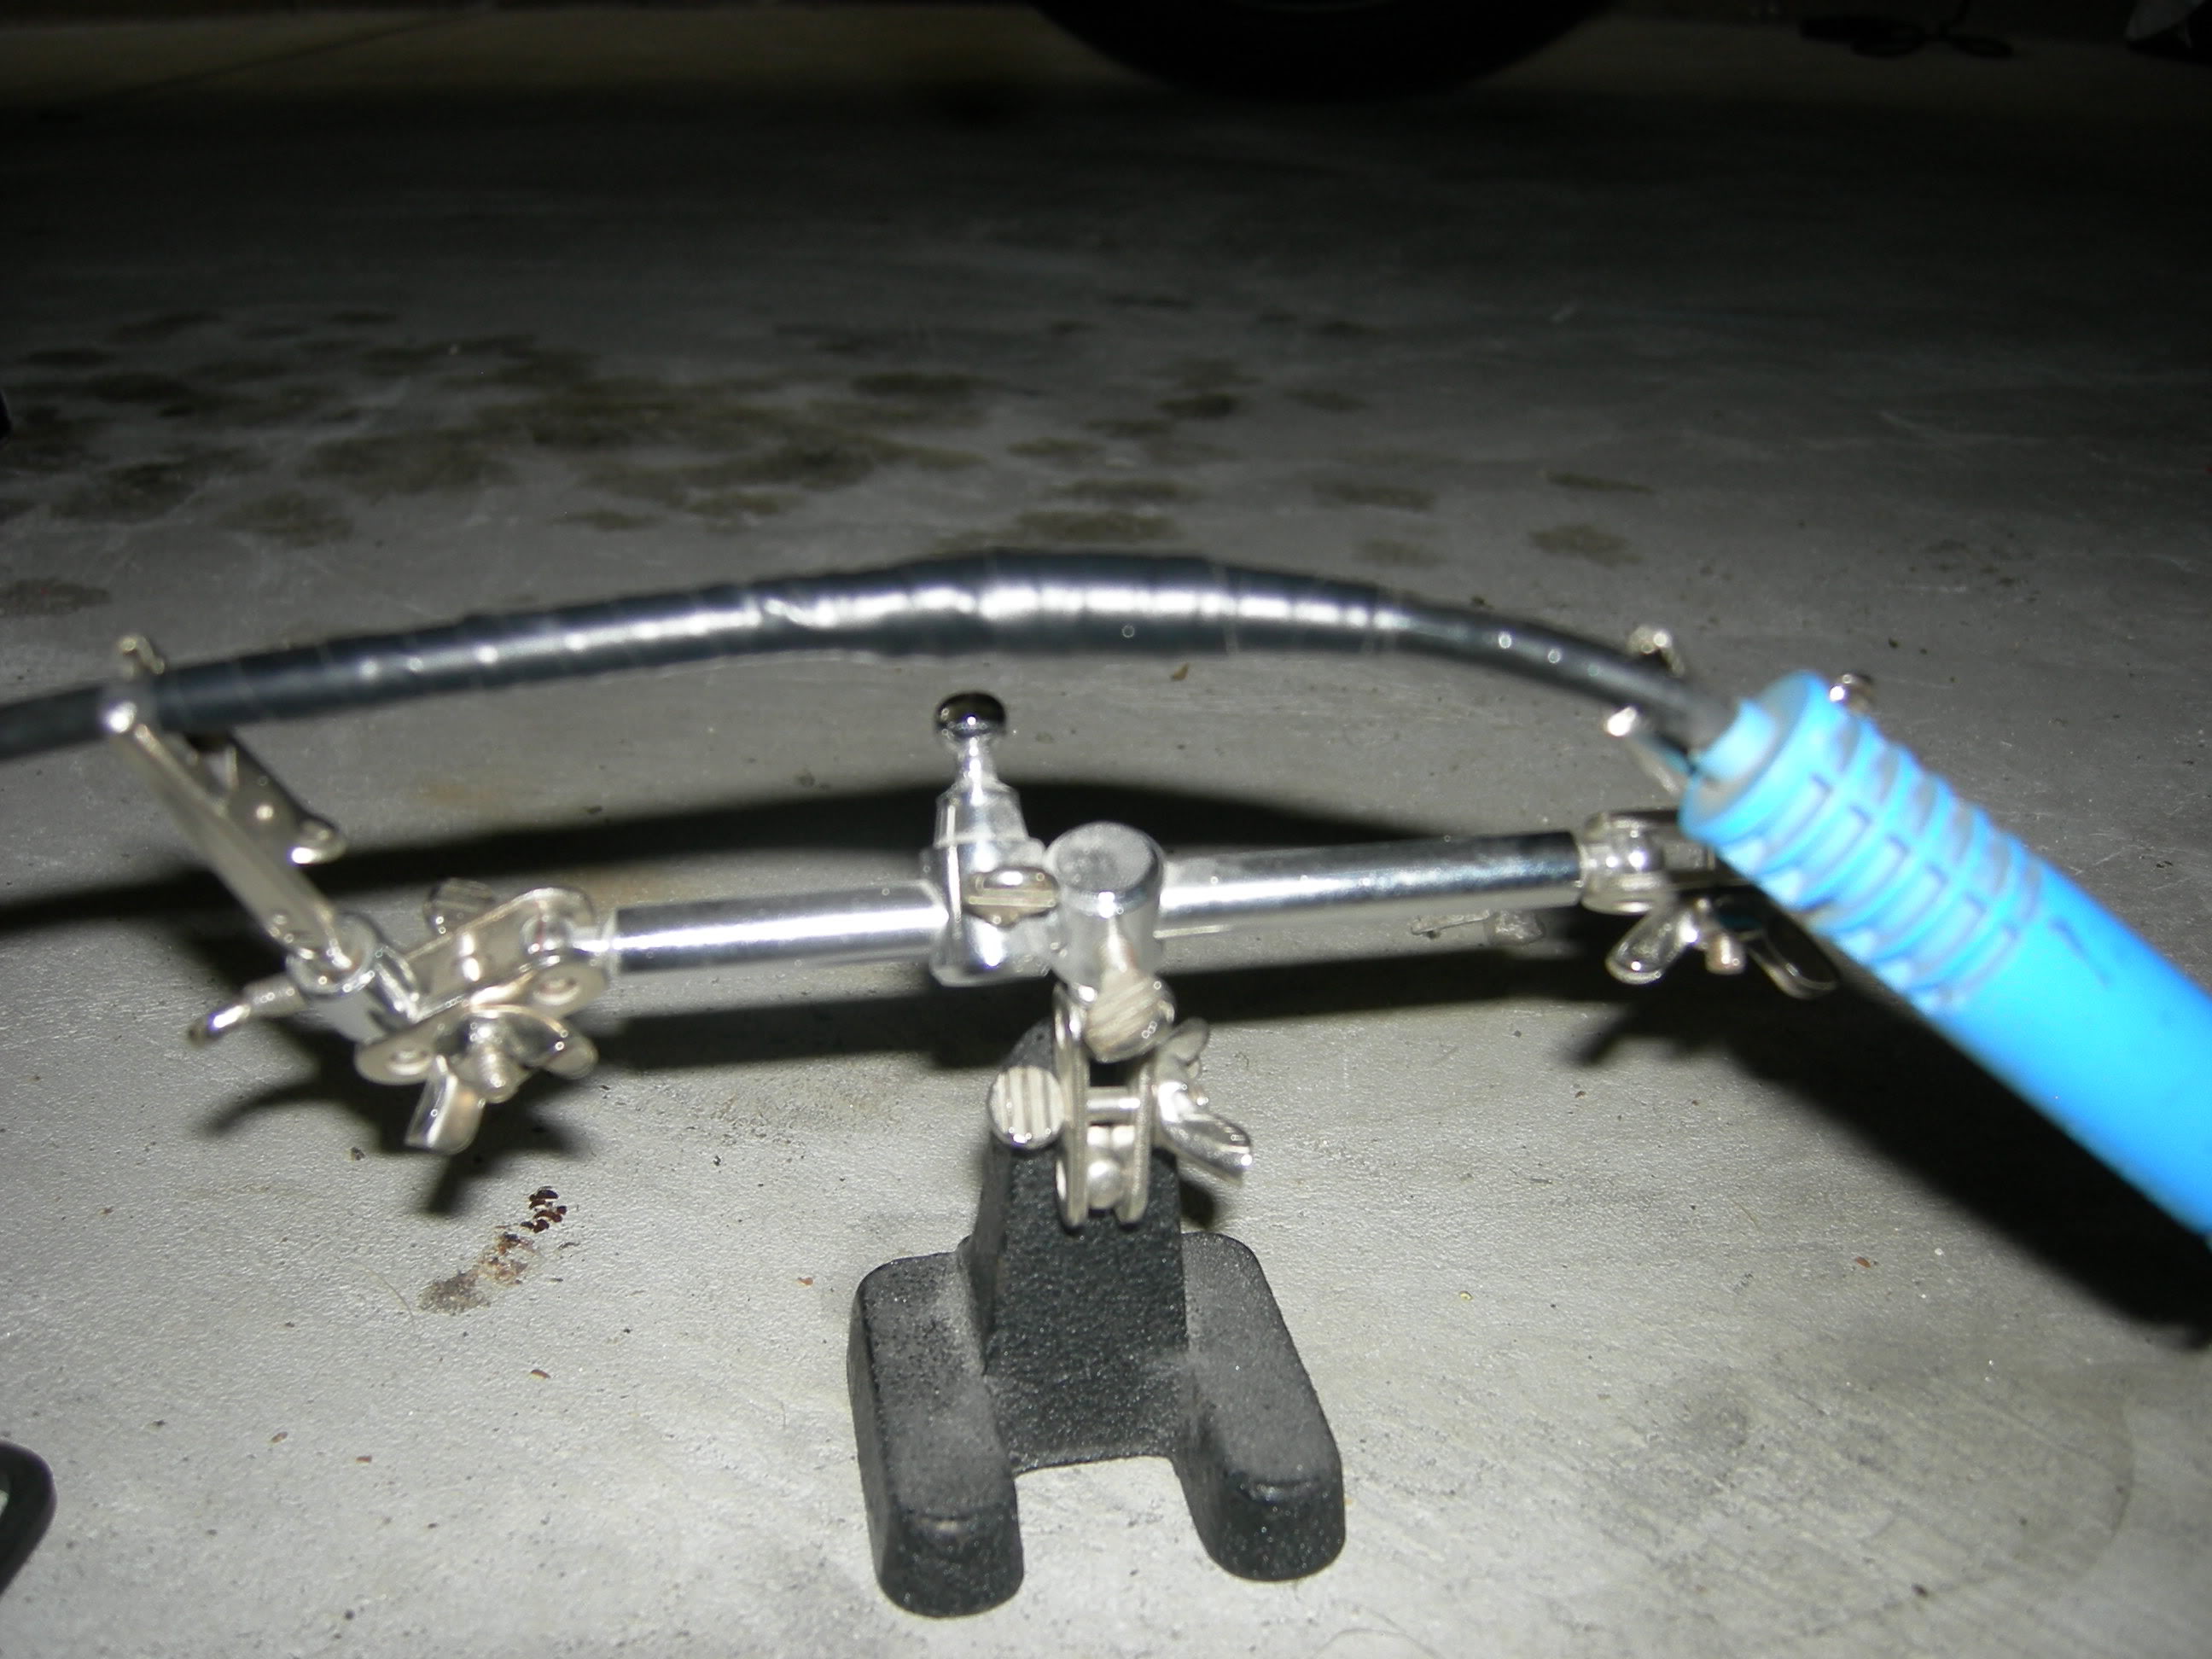
I'm not sure re-inforcement is needed, but the same thing happened to me. Passenger side (left-hand drive) wheels speed sensor wire frayed due to contact with the crank pulley/belt. Seemed the stock mounting position for the wire was crap and pushed the wire straight towards the moving parts. Can be fixed for a couple bucks and about 30 minutes work. Cut the wire at the fray point, strip wire, wind together and solder, wrap with heat shrink or electrical tape, claim victory...
Wide shot where you can see the wire (the one attached to the blue plastic piece):
Zoomed in on the problem pulley:
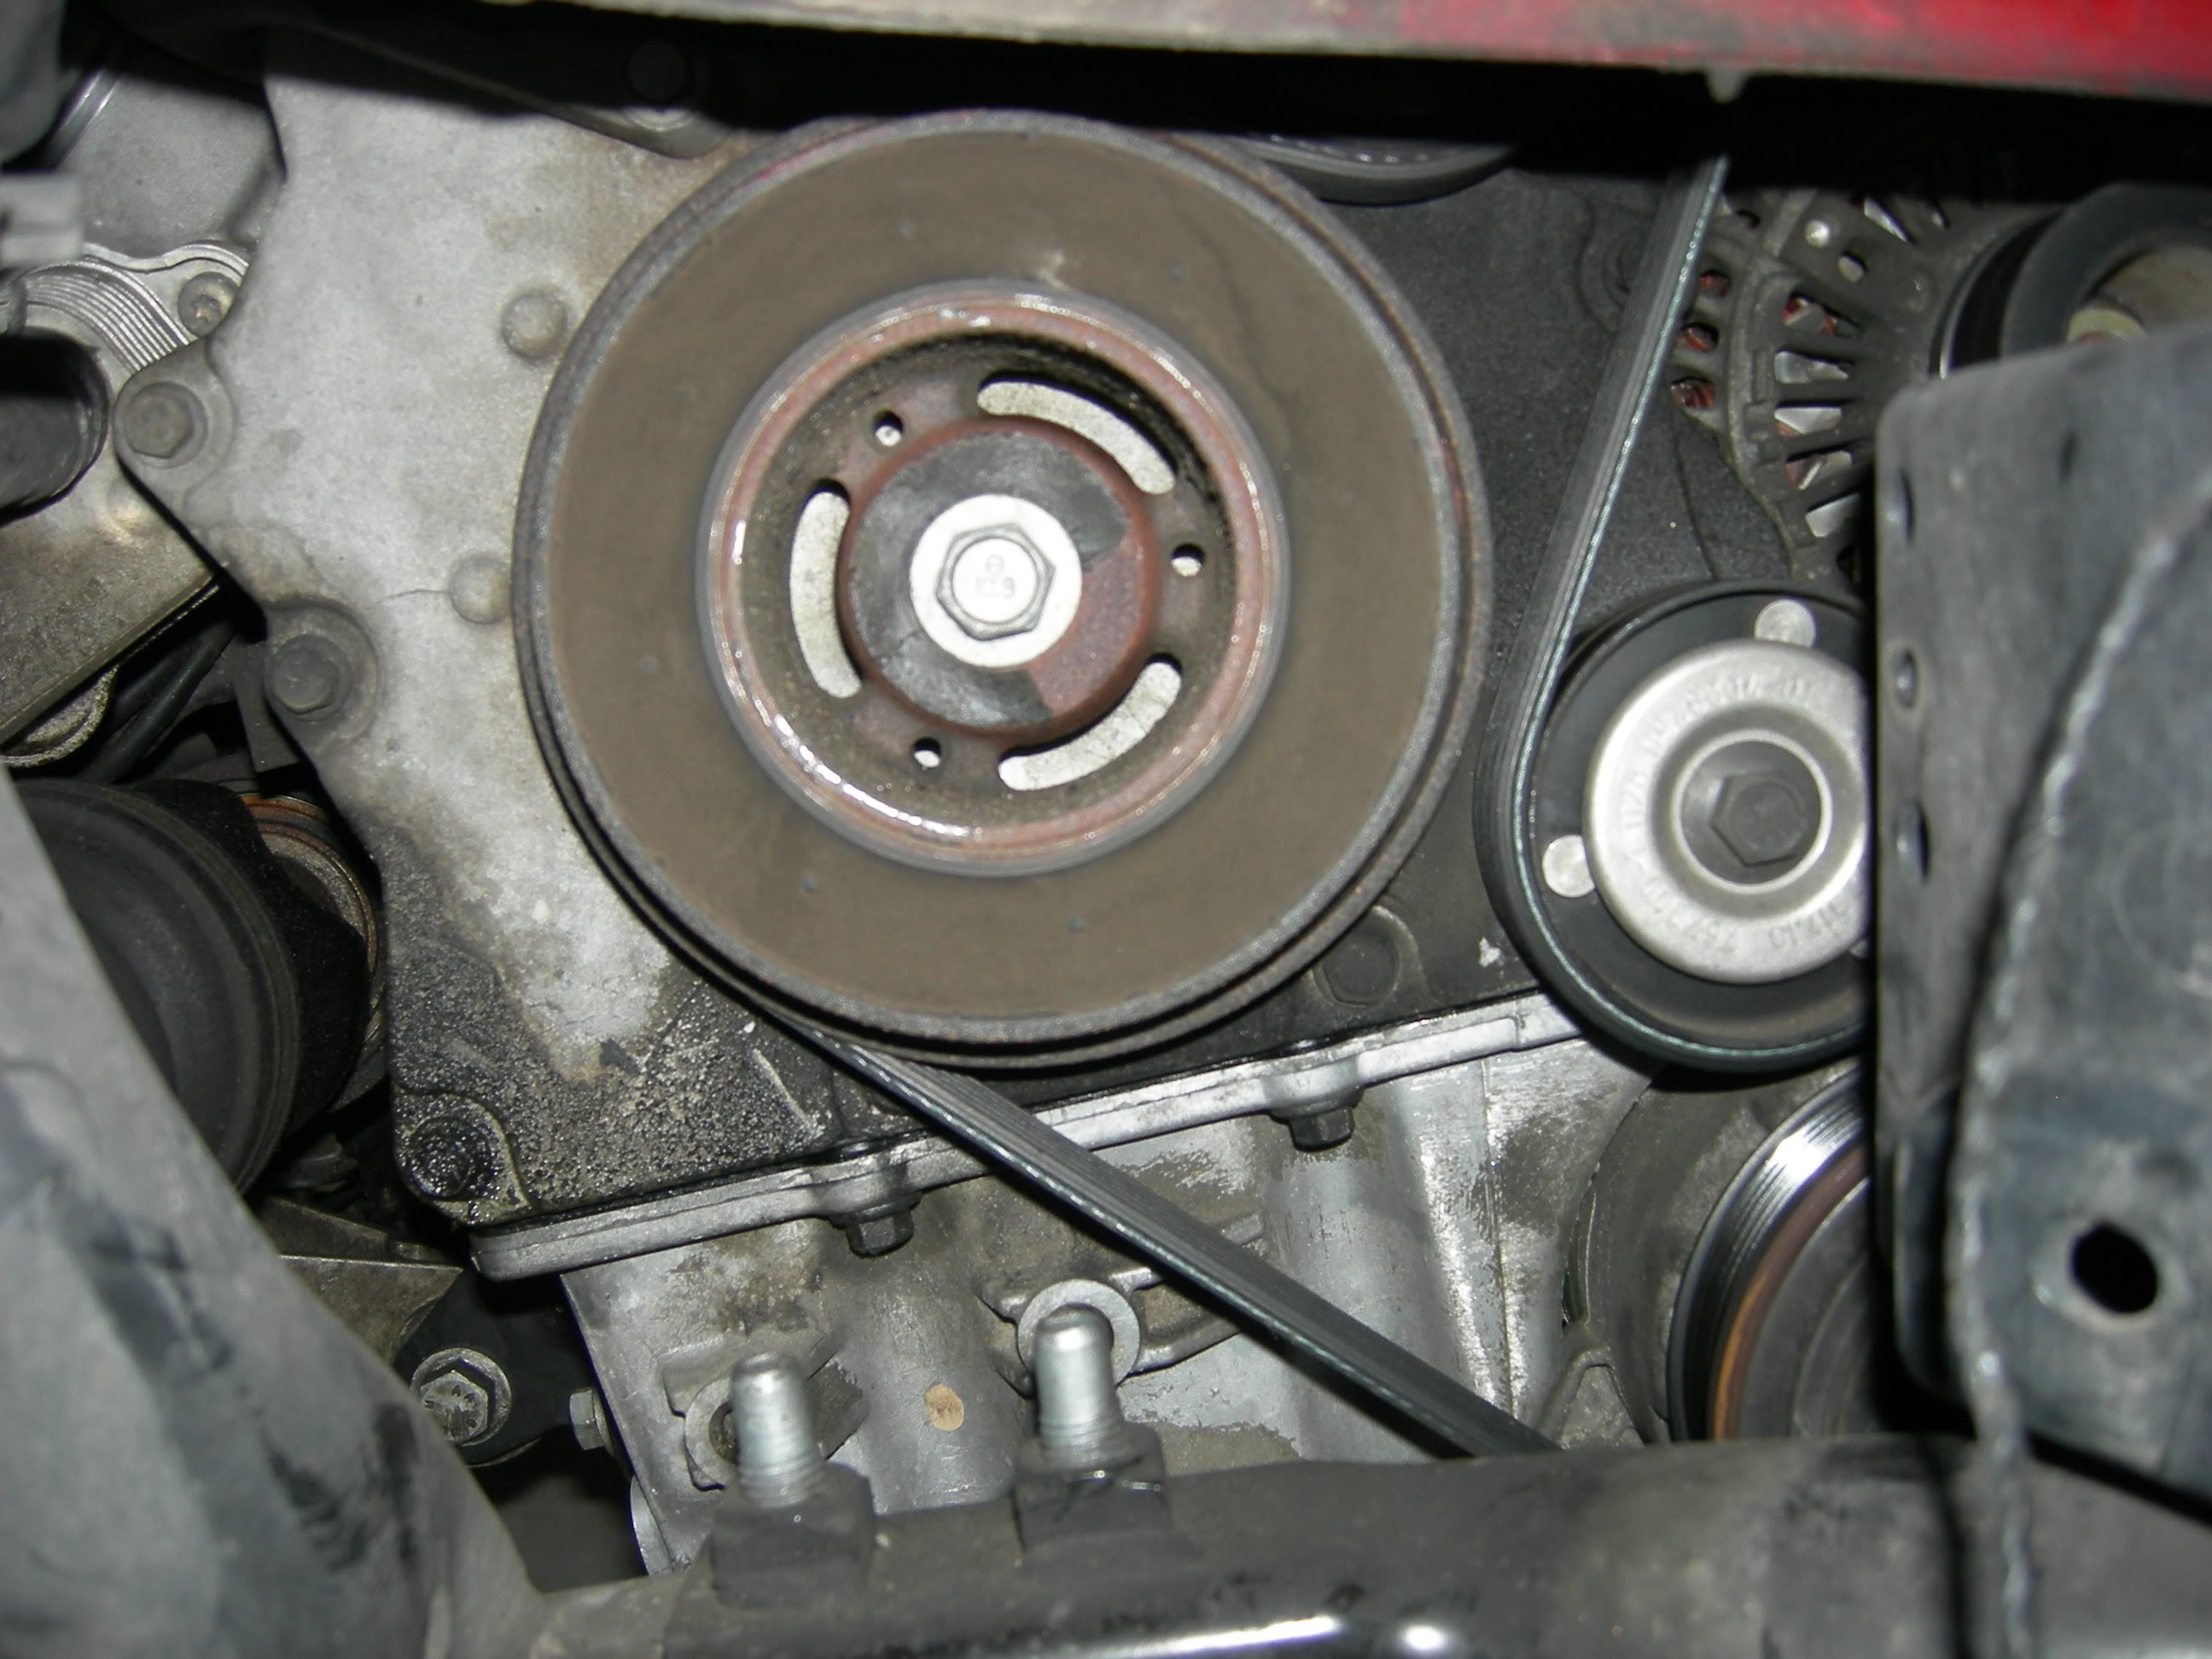
Anyway, it seems the stock mounting point of this wire is very close to the pulley/belt. This is the result:
So I fixed it with the help of Mr. Handy, extra wire, and solder.
Then I mounted it in place so it wouldn’t happen again.
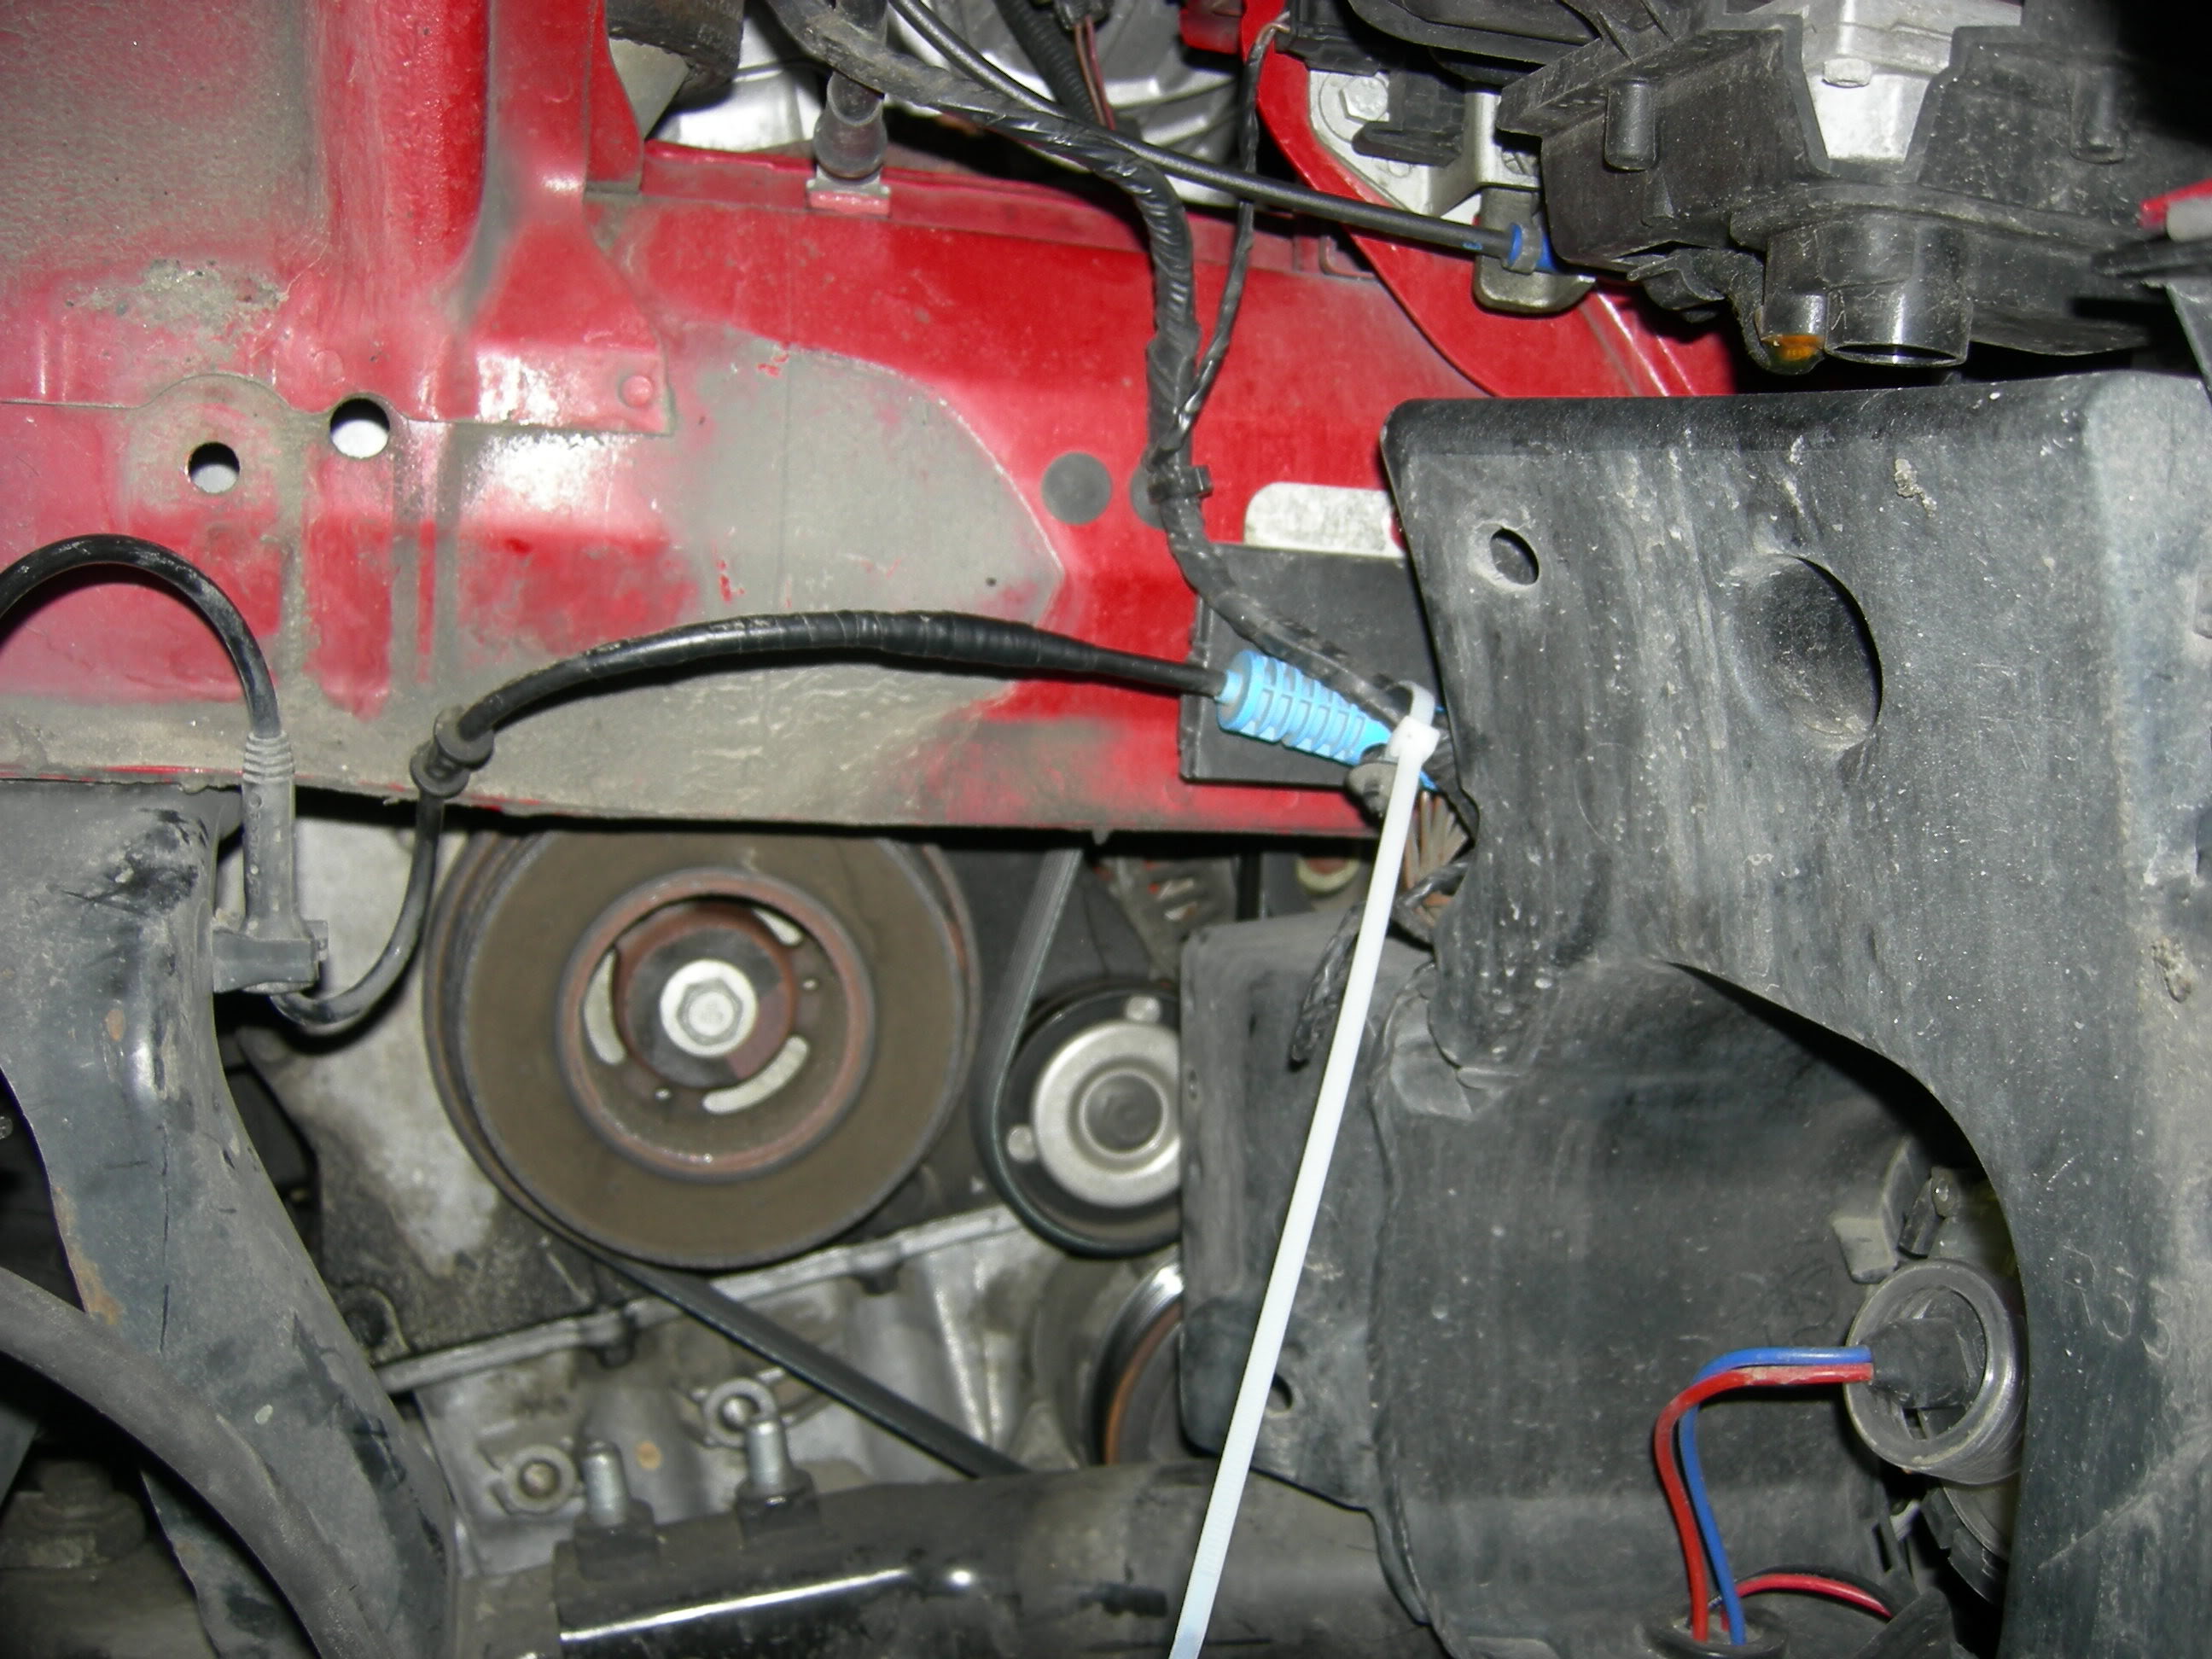
Wide shot where you can see the wire (the one attached to the blue plastic piece):
Zoomed in on the problem pulley:
Anyway, it seems the stock mounting point of this wire is very close to the pulley/belt. This is the result:
So I fixed it with the help of Mr. Handy, extra wire, and solder.
Then I mounted it in place so it wouldn’t happen again.
#61
05-25-2011, 07:03 PM


#62
06-17-2011, 04:12 PM

abs problem
this site has been really helpful. I drive 1986 corolla and my girlfriend drives a mini which i just took to a dealer to chk for the abs light problem. For the left front "wheel speed sensor" to be replace, with labor, would cost $300. Good thing I read your site before hand and I'm trying to see if I could find a mini cooper haynes manual so I could just do everything myself. thanks
#63
06-17-2011, 05:23 PM
#64
06-28-2011, 10:46 AM

Question folks: When the defective sensor is replaced, should the lights go off upon turning on the engine, or does one have to drive around a bit before the lights go off. Thanks.
(I am doing this now and hope I do not have to put the wheel back on and go for a drive to find out if it is the correct one. )
)
(I am doing this now and hope I do not have to put the wheel back on and go for a drive to find out if it is the correct one.
)
#66
06-28-2011, 10:57 AM
#67
06-28-2011, 11:17 AM

#68
06-28-2011, 08:58 PM
All is well now. It was the driver's side sensor that was bad.
In may case, only the flat tire light went out when I fired up the engine. The other two lights only went out after driving about 50 yards. Anyway, it appears that the problem is solved.
Thanks for the tips/instructions, folks.
In may case, only the flat tire light went out when I fired up the engine. The other two lights only went out after driving about 50 yards.
Anyway, it appears that the problem is solved.Thanks for the tips/instructions, folks.
#70
07-08-2011, 09:14 AM
Ugh. The trifecta came on when I was pulling out of the parking lot at work last night.
If I shut off the vehicle and start it back up, only the ABS and DSC lights remain on. And if I am able to just drive straight, the ABS/DSC lights shut off. The moment I turn the steering wheel, the trifecta pops back on again.
In my case, it's the !@#$%^^& left front sensor AGAIN. Figured this one out by getting the lights to shut off as described above, then going out and shaking the ABS wires at each wheel. The lights reliably pop back on any time the wiring at the left front wheel is disturbed, and I've even got it narrowed down to the point where the loom is molded into the sensor itself...
#71
07-08-2011, 09:43 AM

#72
07-08-2011, 10:30 AM
Sorry, I typed that up before I had my morning cup of coffee.
Basically, I figured out exactly where the sensor is having the issue. It seems that there's a break in the wire, and that break seems to be right at the point where the wires go into the sensor. If I jiggle the cable at that point, the trifecta shows up every time. If I hold that point stationary and have a helper jiggle the cable at any other point, the lights remain off.
Hope that makes a little more sense.
#73
07-08-2011, 10:43 AM
Sorry, I typed that up before I had my morning cup of coffee.
Basically, I figured out exactly where the sensor is having the issue. It seems that there's a break in the wire, and that break seems to be right at the point where the wires go into the sensor. If I jiggle the cable at that point, the trifecta shows up every time. If I hold that point stationary and have a helper jiggle the cable at any other point, the lights remain off.
Hope that makes a little more sense.
Basically, I figured out exactly where the sensor is having the issue. It seems that there's a break in the wire, and that break seems to be right at the point where the wires go into the sensor. If I jiggle the cable at that point, the trifecta shows up every time. If I hold that point stationary and have a helper jiggle the cable at any other point, the lights remain off.
Hope that makes a little more sense.


#75
07-24-2011, 06:34 PM
I finally got around to replacing the LF wheel speed sensor on my '04 MCS. This is the 2nd time I've had to replace it - the last one made it just over 3 years before it failed. I went ahead and bought one from NAPA this time - it was cheaper than from the dealership, and was an ATE-branded part. Hopefully this one lasts a bit longer than 3 years...