When you click on links to various merchants on this site and make a purchase, this can result in this site earning a commission. Affiliate programs and affiliations include, but are not limited to, the eBay Partner Network.
I had the front brake pads and rotors replaced this past summer. They changed the all thing, though I'm not certain what they did for the sensor.
Now I have the rear due soon. Considering the cost they charged me, does anyone have any pointers where I can find all the information I need to do the rear brakes myself? I've done brakes on my other car. This would be the first one I do on the MINI. Is the rotor replacement really necessary? That's the first car I've had where they changed the rotors with the pads I'm a little suspicious...
What is the brake sensor on these cars. It's actually my first car with brake sensors so I'm not familiar with what's involved here...
poke around the general BRAKE forum above .... you'll find many answers and more opinions. The 59 is a GEN2 MINI so keep that in mind. If you know how to do a disk brake system you can handle the MINI. I find 'em on the easy side of the cars I've worked on. On the rears the e-brake system DOES require that the piston be turned as it is pushed back into the caliper for the new pads. This is not unique to MINI however and is found on MANY makes ... which is why a kit for this task typically includes a slew of adapters .... to fit the many different systems like this. http://www.harborfreight.com/disc-br...-pc-63264.html
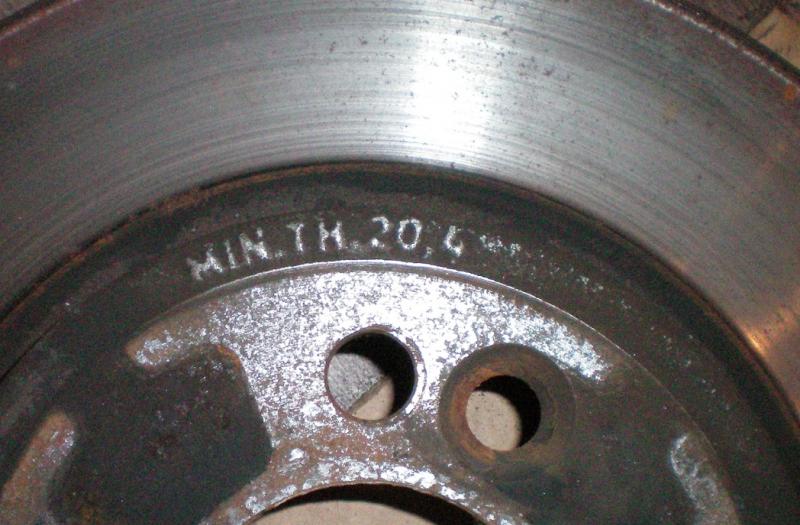
IME you'll ALWAYS find a lip on the rotors if a MINI needs pads! The rotors are soft. For a long time MINI said ALWAYS replace rotor when you replace pads .... in later years they softened this opinion ... that is: when they changed pads under pre-paid maint' they no longer automatically replaced the rotors. They measure 'em. On stock rotors the minimum thickness is cast in ....
example: (don't use this number, it is NOT a GEN2 rear rotor ....)
IME (owner of 3 since 2002) I get 2 sets of pads to a set of rotors. I do not autocross or track .... and live in central FL where the roads tend to be flat and straight. I recommend you DO NOT "turn" or resurface the rotors ... they are thin to begin with ..... if you 'skim' them you loose TOO much thickness. If they are heavily grooved, replace 'em ... basic rotors are not expensive and the extra time is a couple of minutes (if you can get the retaining bolt out!)
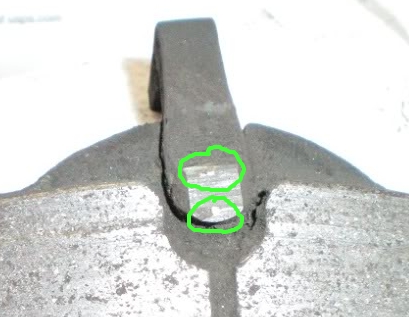
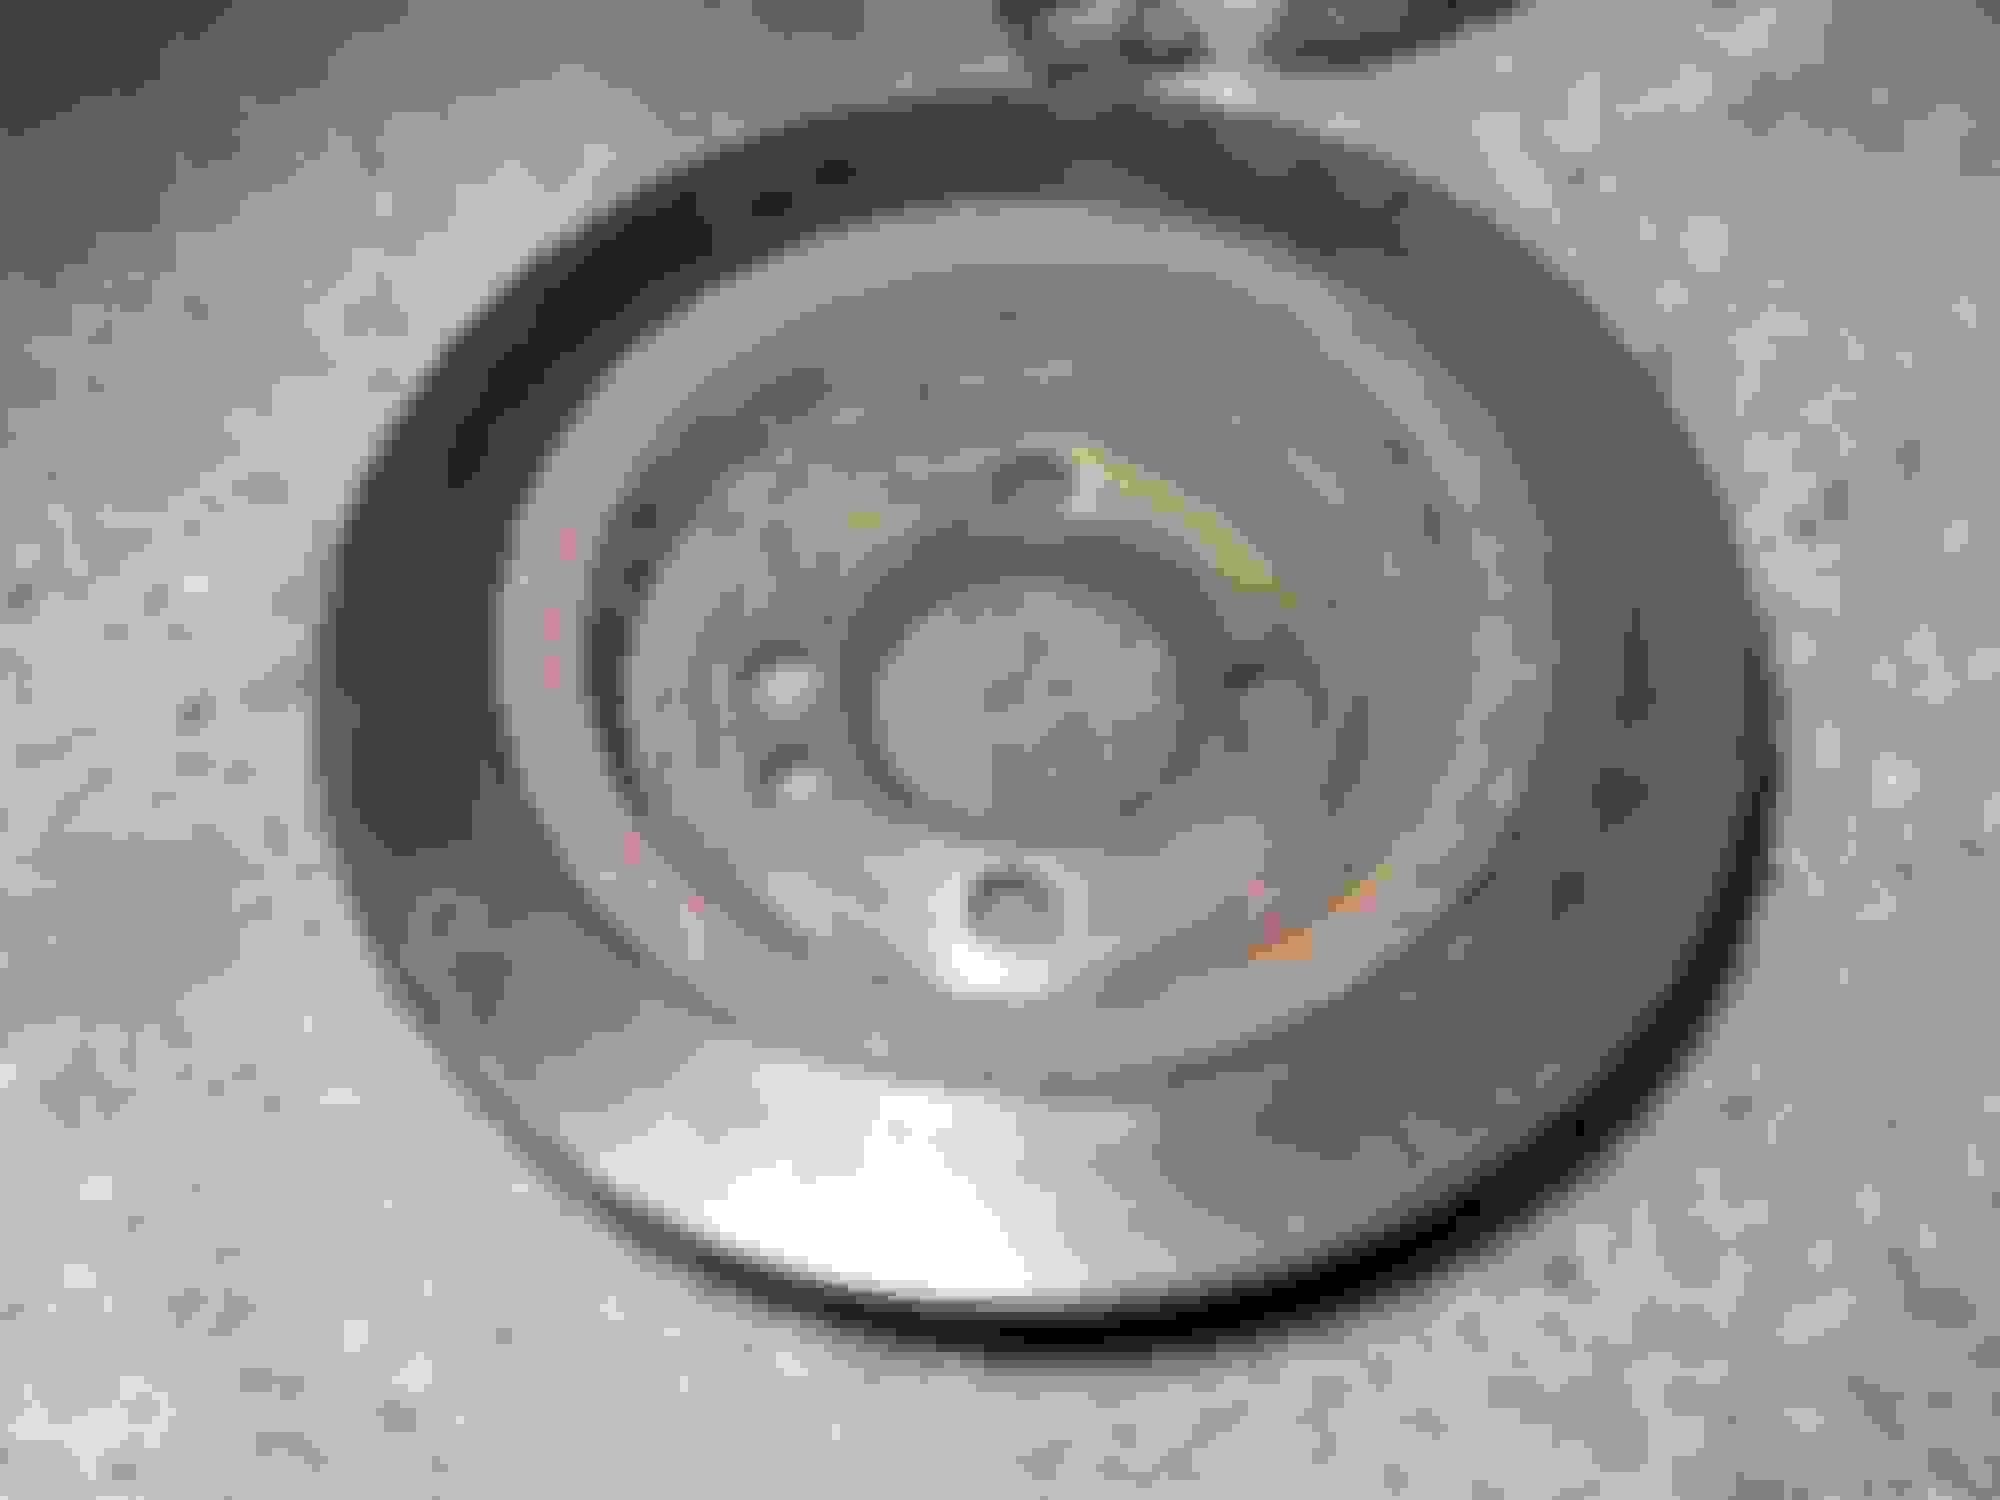
On a GEN2 MINI there are two wear sensors, left front and right rear wheels. It is a plastic gizmo that has an embedded loop of wire and gets held in position in a slot of the inner pad. As the pad wears the plastic comes into contact with the rotor and begins to wear away. Eventually the wire wears away breaking a circuit. Wire gone = thin pads = time for new .... Here's a worn pad with the sensor in place, you can see the wire stubbs ...
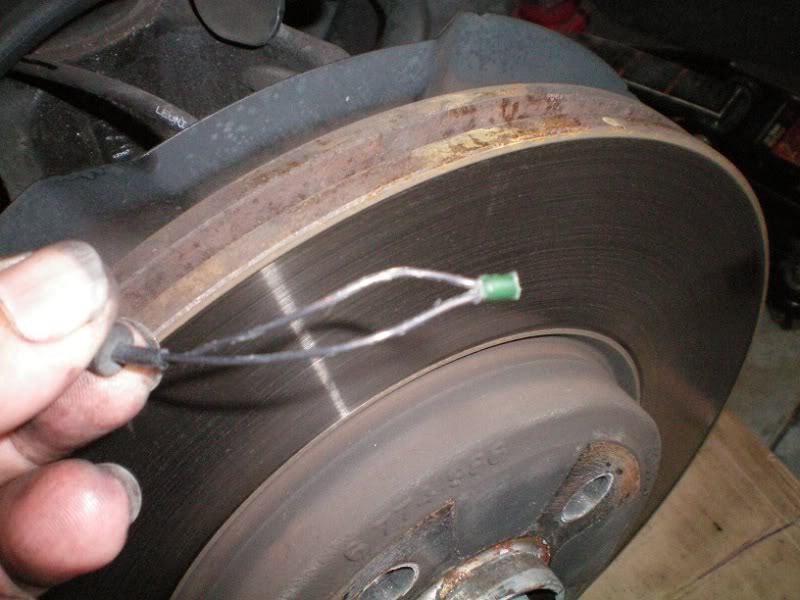
a worn sensor is no good anymore and must be replaced. It slides into a slot in the rotor as I mentioned and plugs into a connector above the hub .... if you do not replace a used sensor the 'alert' stays on.
{personally I find the sensors worthless as I can visually check my pad wear easily. When they go out the first time I cut the sensor off and tie the two ends of the wire together. The computer sees a completed circuit and the light goes away ....}
Thank you BJ, That's just the quite of information I was looking for!
Yes, I have the tool to push the piston back so that won't be a problem.
I'll have to see what I do with the rotors... it's the rear brakes so I usually don't expect a lot of wear on the rotors but will see...
I finally was able to do the rear brake for the first time on the MINI.
Overall it wasn't too bad until I struggled with putting back the rear caliper.
The tool I have spins the piston back. Near the end it was starting to twist the rubber so I was starting to get really frustrated trying to fit it over the pads and rotor. After a bit of swearing I took the tool by hand and some how was able to push the piston back by rotating it back and forth...
Mini replaced the rotor and pads in the front last summer. Cost me $1,200. I thought that was quite excessive. So I change both rear pads and rear rotors.
Honestly I think changing the rotors with the pads is a waste of money. Most likely it's to simplify new pad installation. So there is no need to do couple of hard brakes to get them to conform to the old rotors. But the rear rotors where not worn much at all (granted it's the rear brakes and not the front, I know).
The rotor screw was actually a pain. First I had to realize that I needed to losen both side at the same time if I wanted to be able to use the hand break to prevent the rotor from spinning. Secondly they are hard to screw back on. Almost too tight. I don't know what people do in the front if they lift the whole car as I did.
The brake sensor wasn't all that easy to get to either. They could have provided a much better access. I was able to get to it without removing the trim (which was still faster) but it wasn't much fun.
Lastly the wheel bearing rotor mounting surface was badly rusted for only about 34k miles. I had to clean the rotor mounting surface on the wheel bearing plate quite a bit. That took me a bit of extra time. it makes me wonder two things:
- Does MINI clean them up if they change rotors every time?
- And if they do clean it, what do they use to speed-up the process?
a bit of anti-seize on those surfaces, and on the rotor retention bolt makes the job much easier next time ....
my trick for the rotor bolt removal is to thread two lug studs back in and use a length to rebar to wedge against the bolts and the garage floor (no lift, work on jack stands) .... like this % .... done correctly the wheel won't turn and you can crank away. An 18" breaker bar has always gotten the bolts out for me with a lil soak of PB Blaster and slow steady pressure. I use one hand on the end of the bar and the other pressing the socket into the bolt as it is not very deep and wants to slip out tearing up the bolt head and complicating life. I have a good impact wrench but IMO this is a case where slow and steady works better. Have done dozens of MINI brake jobs - I do them for free when friends ask.
Yeah, it's not that the rotor bolt was rusted here. It's more that by the time I removed the pads on one side I realized, wait I won't be able to hold the rotor in place. I had to remount, loosen the bolts on both sides. To add to the issue the tolerance on those bolts are pretty tight compared to wheel bolts for something that doesn't really hold much. They could have chose a looser thread. Maybe to avoid excessive rust issue...
But good advice. I should have thought of that, using two lug bolts as a leverage mechanism... And I do use anti seize in certain area like the rotor mounting surface (though there I do wipe most of it off so not to create un-even build-up). I'v had very good success with that over the years. One just has to be very attentive and think hard enough that rotor spins and any excess grease in those areas could potentially contaminate the braking surface. So it must be done carefully.
I din't use anti-seize on those rotor bolts and should have. Next time. I was so frustrated with that piston near the end that I just wanted to be done with it
I've used PB blaster many times in the past. Great stuff, but I don't know how I feel about it near braking surface area since it wicks easily.
Last note on this...
After a few days of checking, everything seems in order with the brakes. I'm glad I did it. I wouldn't do this every day but it's nice to get to know our mini a little more intimately . . . plus I'll take the $ savings as well
 11-27-2016, 03:48 PM


 I'm a little suspicious...


 . . . plus I'll take the $ savings as well
