R59 Black Toffee


#478
 05-18-2013, 08:07 AM


#481
05-20-2013, 05:24 PM
#482
05-20-2013, 06:09 PM

Hi All,
I took the catch can off to check it after about 800 miles or so...here's a look.

As you can see, about a quarter cup of water vapor/oil mix. This would have been fed back into the engine and burned off...messing up the intake port in the process. Pretty happy it's on there
-Steven
I took the catch can off to check it after about 800 miles or so...here's a look.
As you can see, about a quarter cup of water vapor/oil mix. This would have been fed back into the engine and burned off...messing up the intake port in the process. Pretty happy it's on there
-Steven

#483
05-21-2013, 07:00 AM

#485
05-21-2013, 01:04 PM


#486
05-21-2013, 01:17 PM
You have it right, stock to JCW Carbon Fiber to GP2 diffuser. I still have the JCW C. F. which I will be selling soon.
-Steven
#487
05-27-2013, 04:28 PM

Steven, Just wanted to let you know that the side under panels fit the roadster. I installed them with the rear diffuser this weekend. Also ordered the GP2 underpanel from ECS tuning. The side underpanels just need trimming in two spots. The rear **** where the braces mount need to be removed and the area near the center needs to be trimmed

#488
05-27-2013, 05:32 PM
Steven, Just wanted to let you know that the side under panels fit the roadster. I installed them with the rear diffuser this weekend. Also ordered the GP2 underpanel from ECS tuning. The side underpanels just need trimming in two spots. The rear **** where the braces mount need to be removed and the area near the center needs to be trimmed


Thanks so much for the post...this is great news
 I was very curious to see how the braces fit in, you didn't have to do any shimming correct? I'm hoping to get time at IND if they have a lift available this week. I also ordered the front undertray from ECS last week
-Steven
#489
05-27-2013, 07:28 PM
#490
05-28-2013, 08:19 AM

Platinum Sponsor
Great news jkapinos, knew a little trimming and it would work based off the bluetoy pics.
https://www.northamericanmotoring.co...g-install.html
Looks good and now you have smooth under body, nice work.
https://www.northamericanmotoring.co...g-install.html
Looks good and now you have smooth under body, nice work.
__________________

MINI Guru/ MINI Owner Since 2004 | NEW Lifetime Part Replacement | Local Pickup
Milltek | Genuine MINI | Forge Motorsport | NM Engineering | ECS Performance | M7 Speed
Customer Service Hours: 8am-8pm EST|Sales Team Hours: 8am-11pm | SAT 10am-7pm 800.924.5172
MINI Guru/ MINI Owner Since 2004 | NEW Lifetime Part Replacement | Local Pickup
Milltek | Genuine MINI | Forge Motorsport | NM Engineering | ECS Performance | M7 Speed
Customer Service Hours: 8am-8pm EST|Sales Team Hours: 8am-11pm | SAT 10am-7pm 800.924.5172
#491
06-03-2013, 07:38 PM
Full Aero Underbody
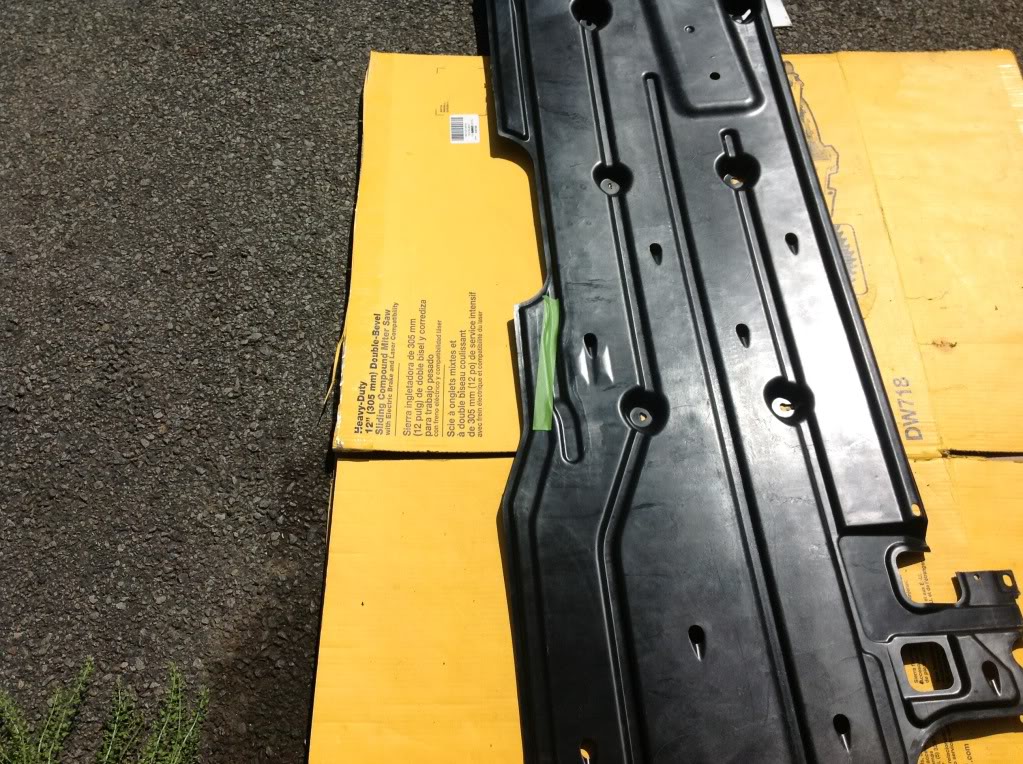
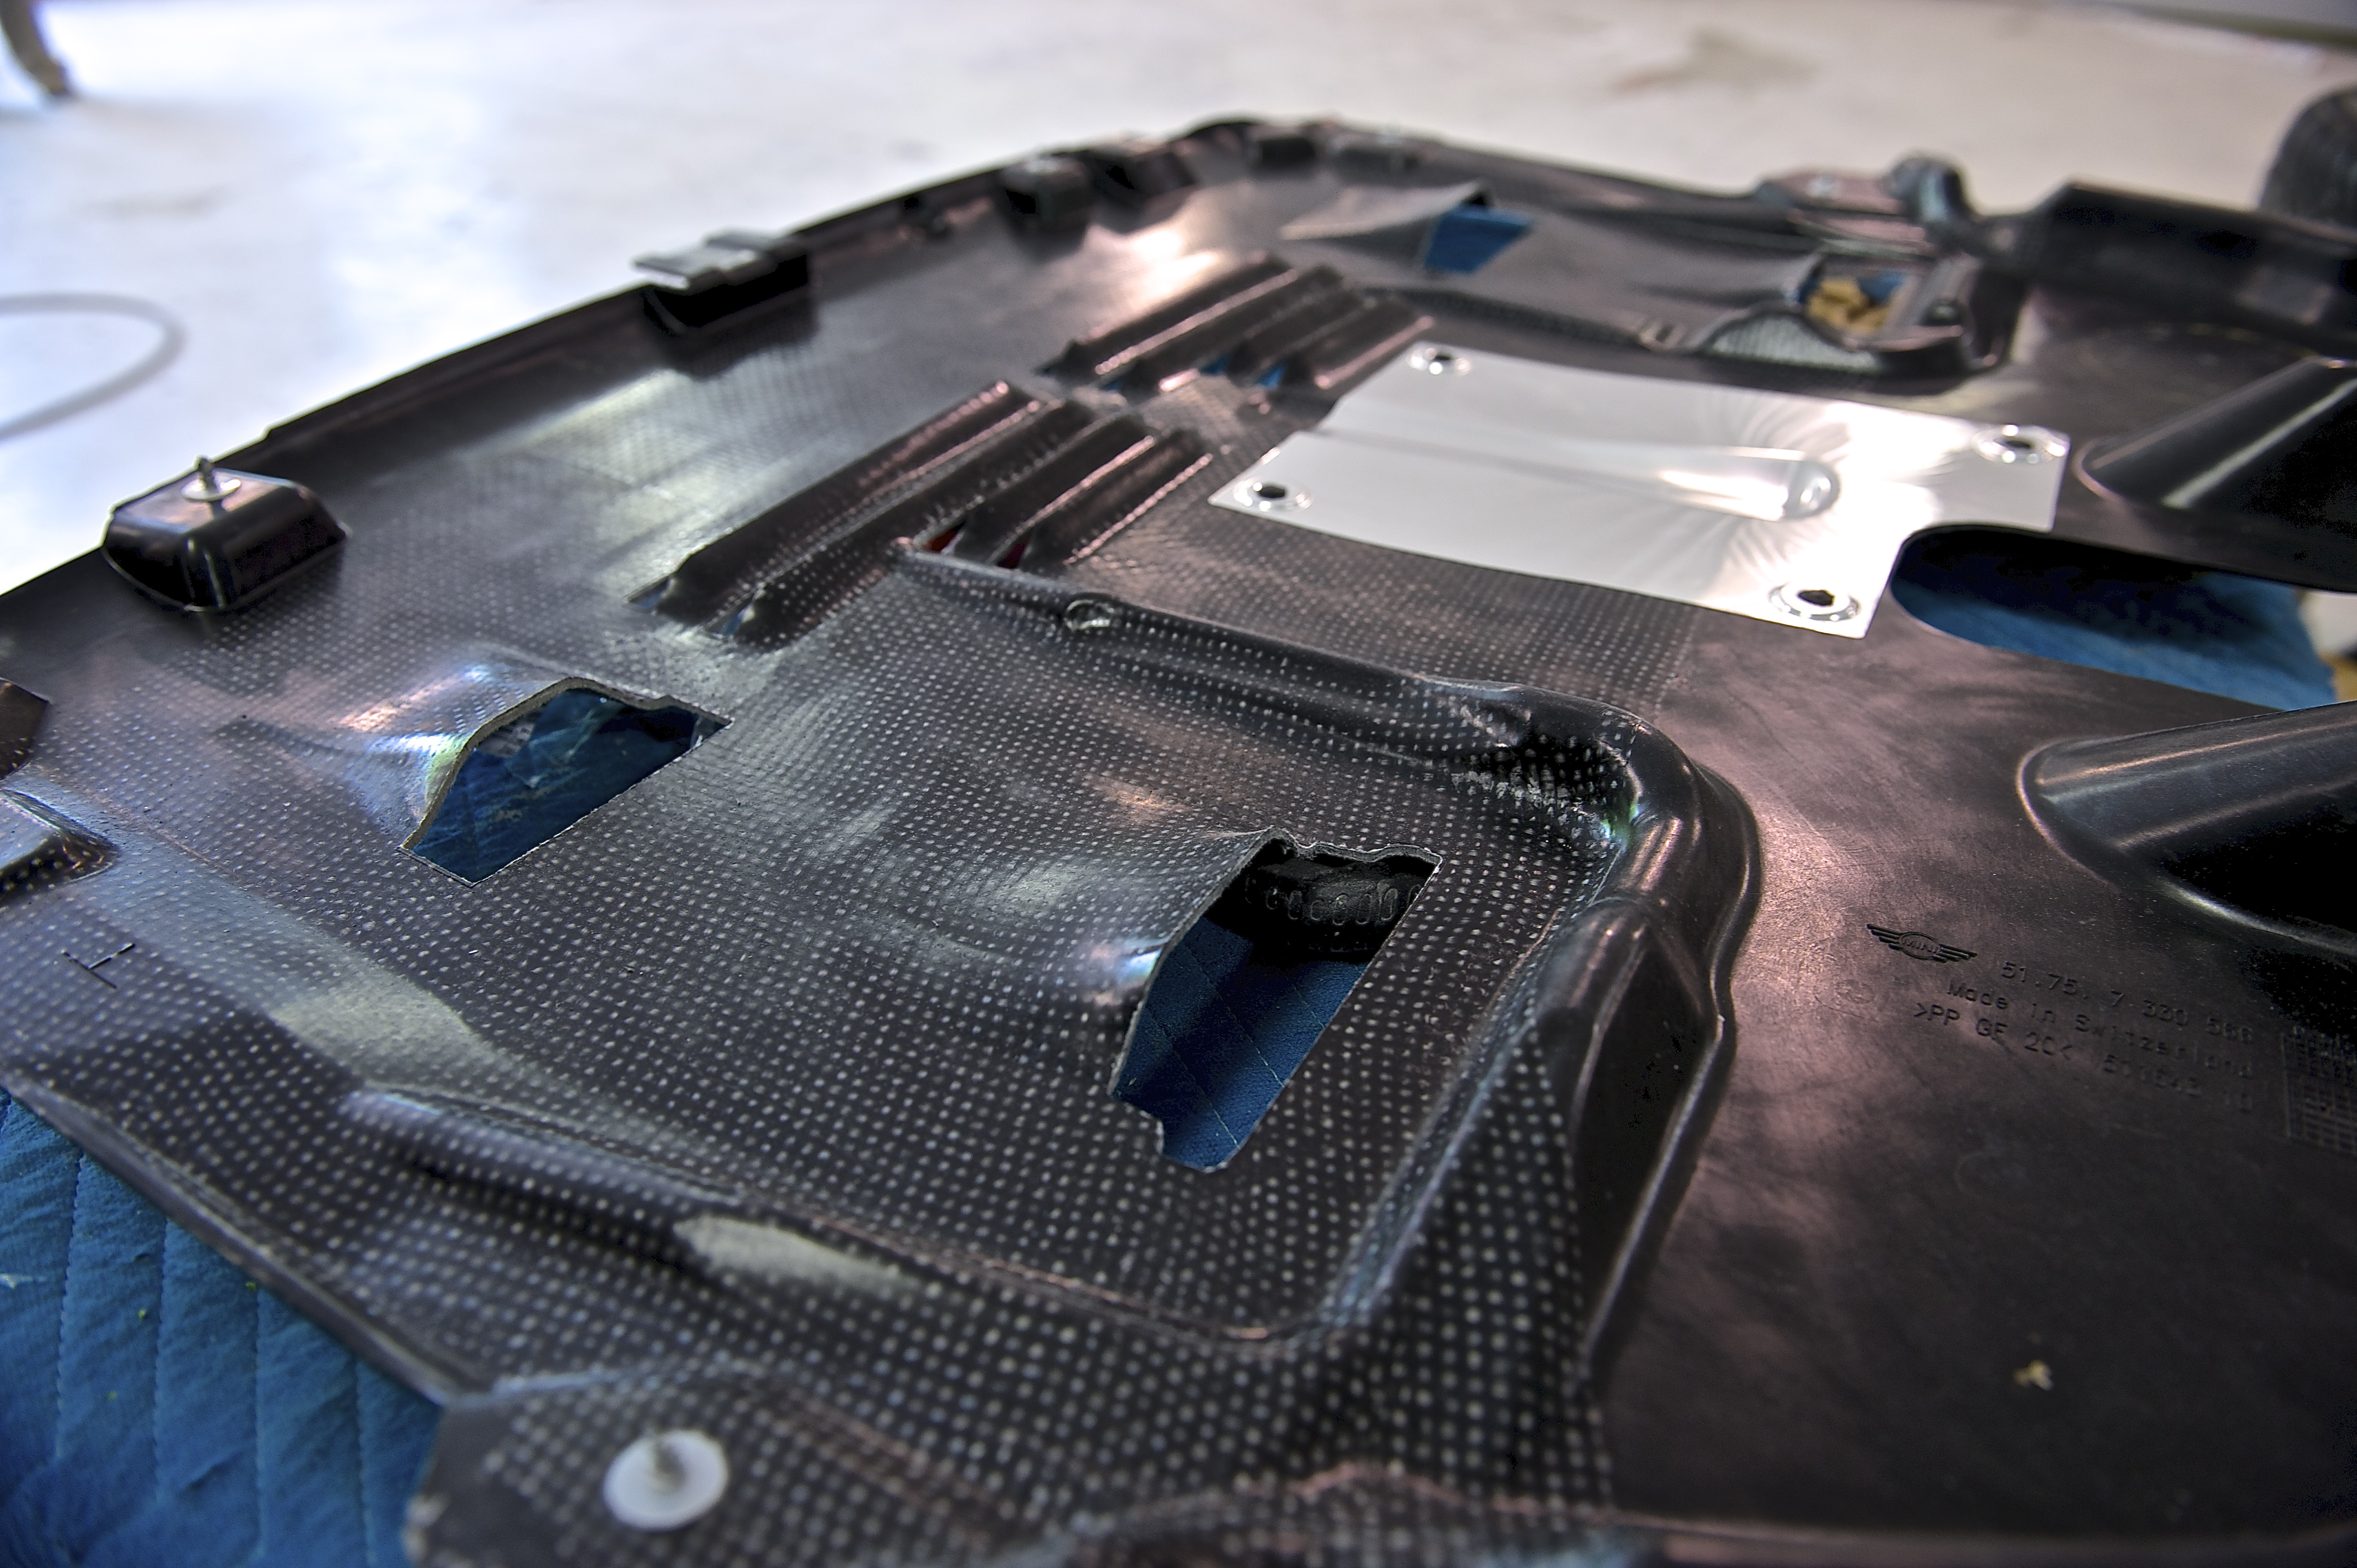
I finally got around to installing the JCW underbody panels and the new GP2 front under tray. Having already installed the GP2 rear diffuser, the Roadster now has complete underbody aero. I ordered the two side panels and front tray from ECSTuning.com they also included all the necessary hardware. Here's a look at the install...
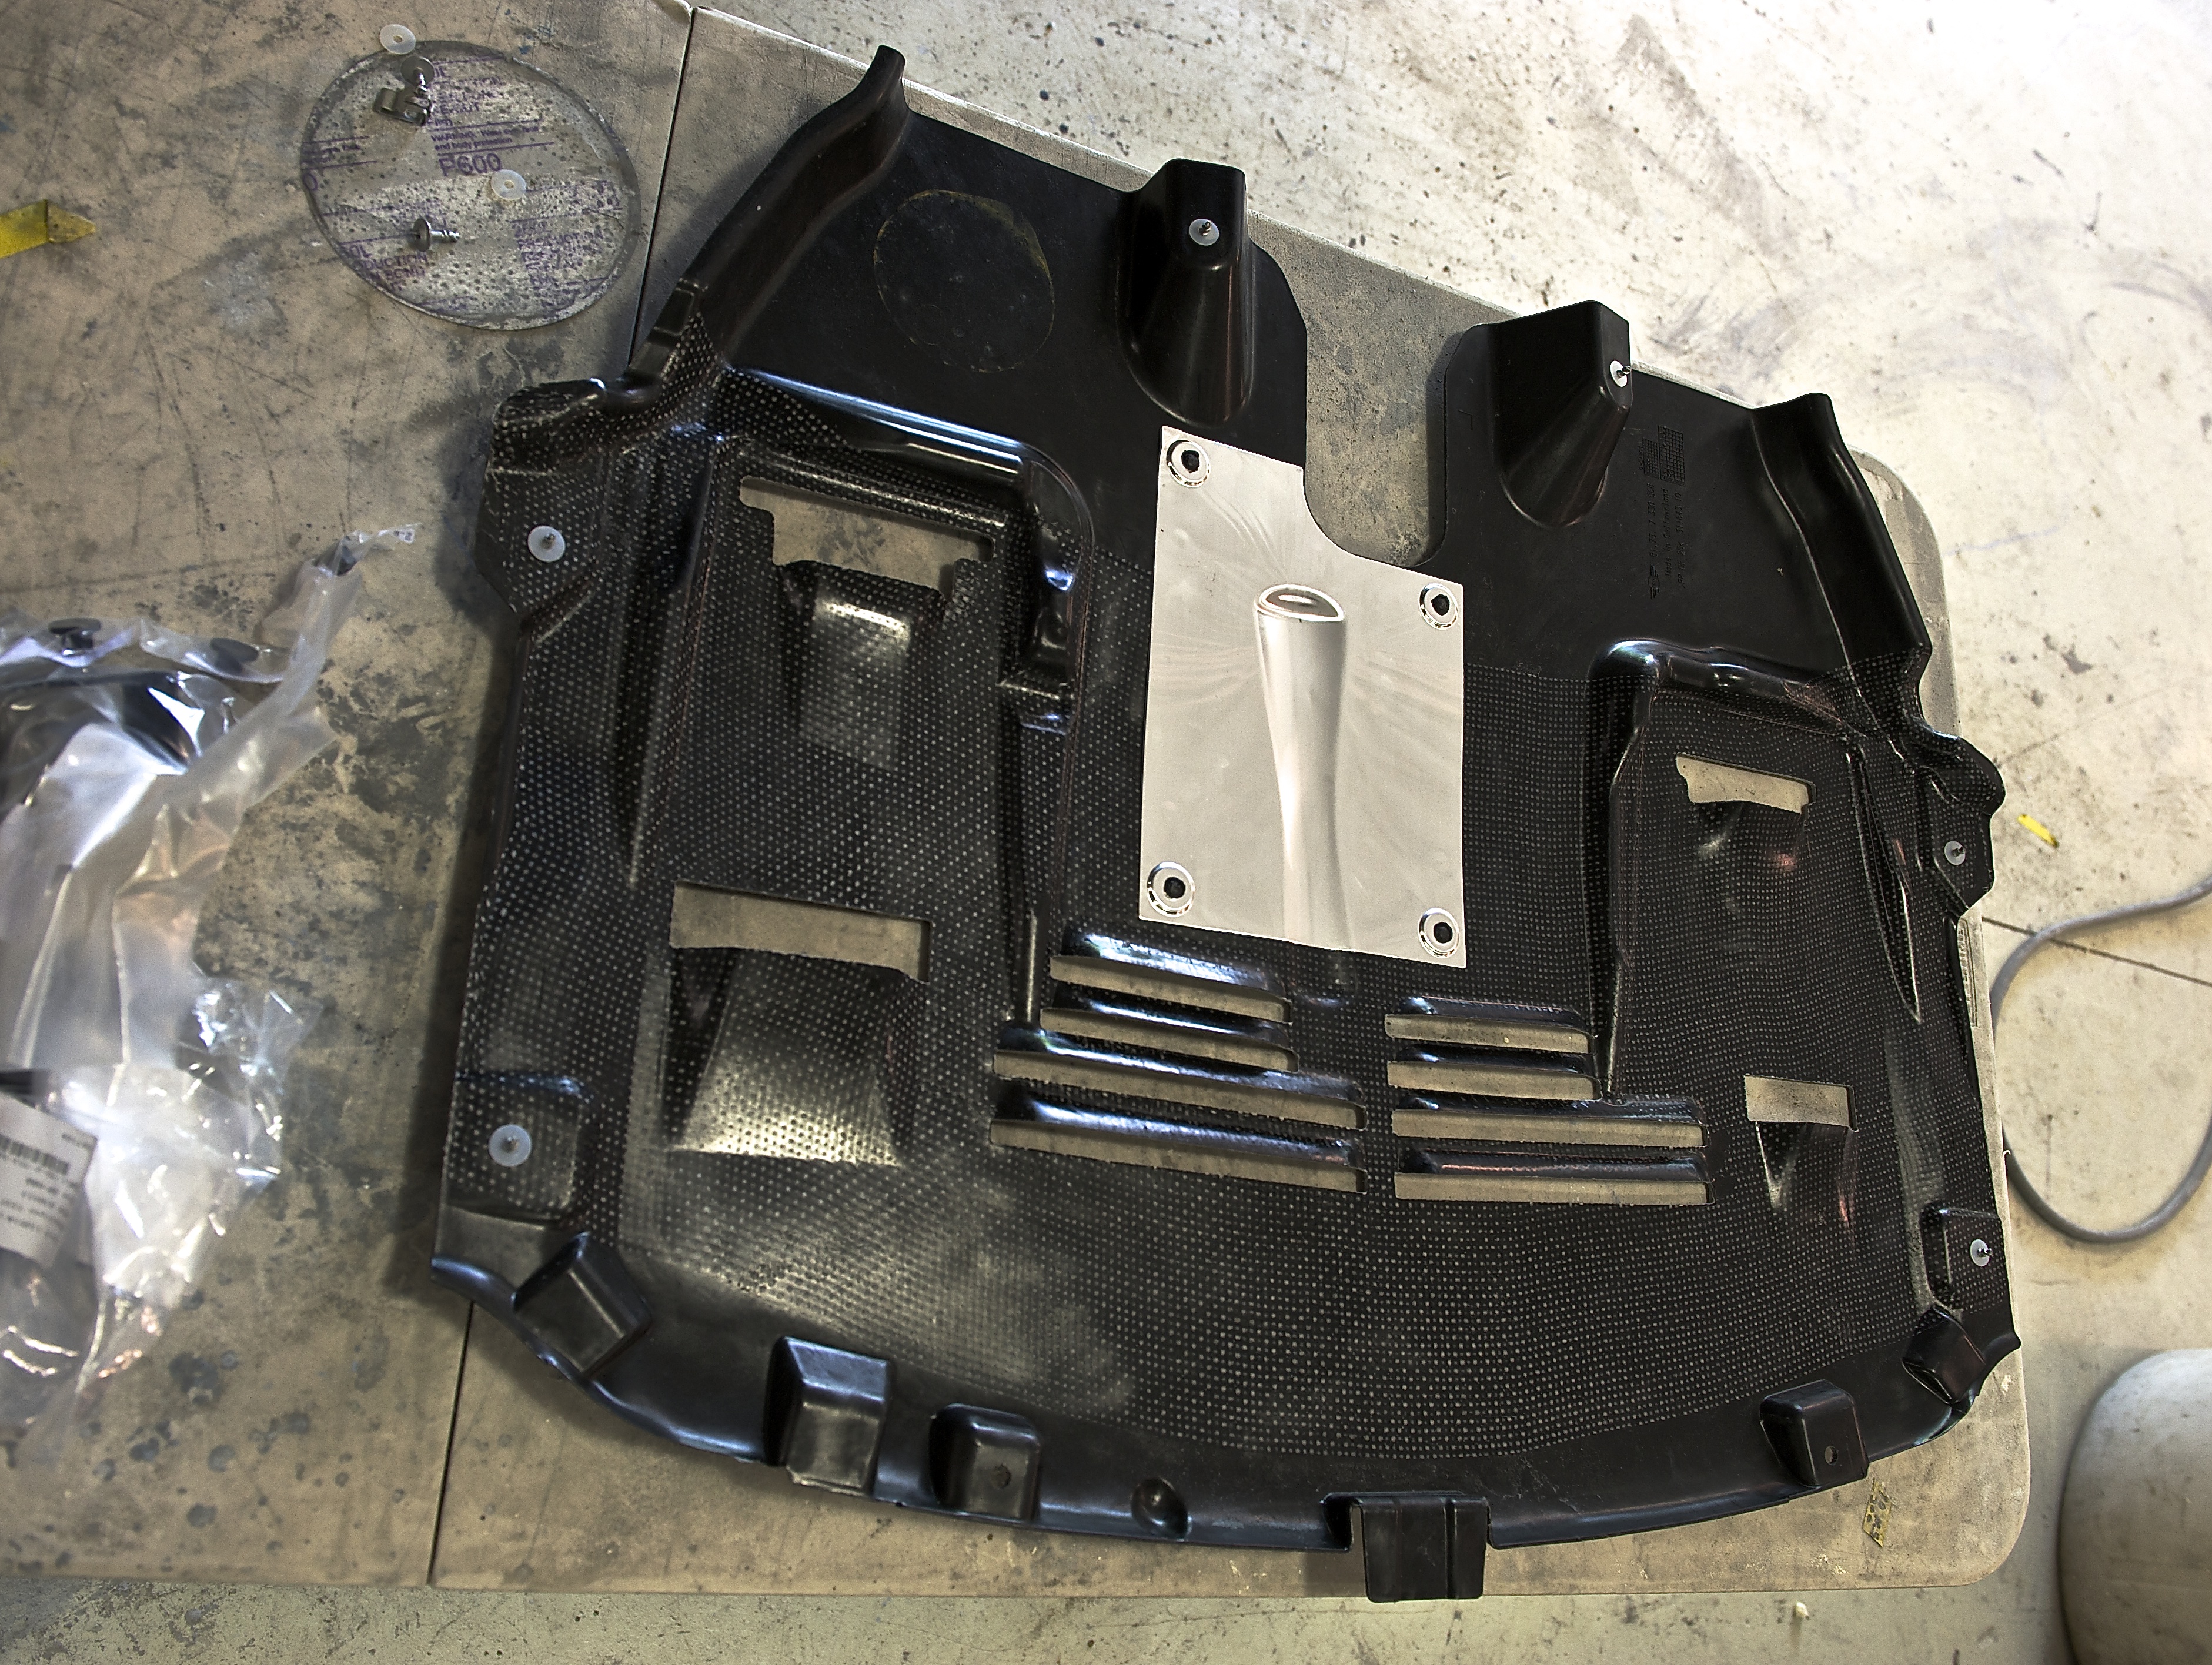
The front tray is well made, with a heat shield and what looks like a reinforcing material through the middle. I know Mini engineers spent a lot of time "tuning" this piece to reduce drag as well as vent/draw hot air out of the engine bay. Lots of vents...
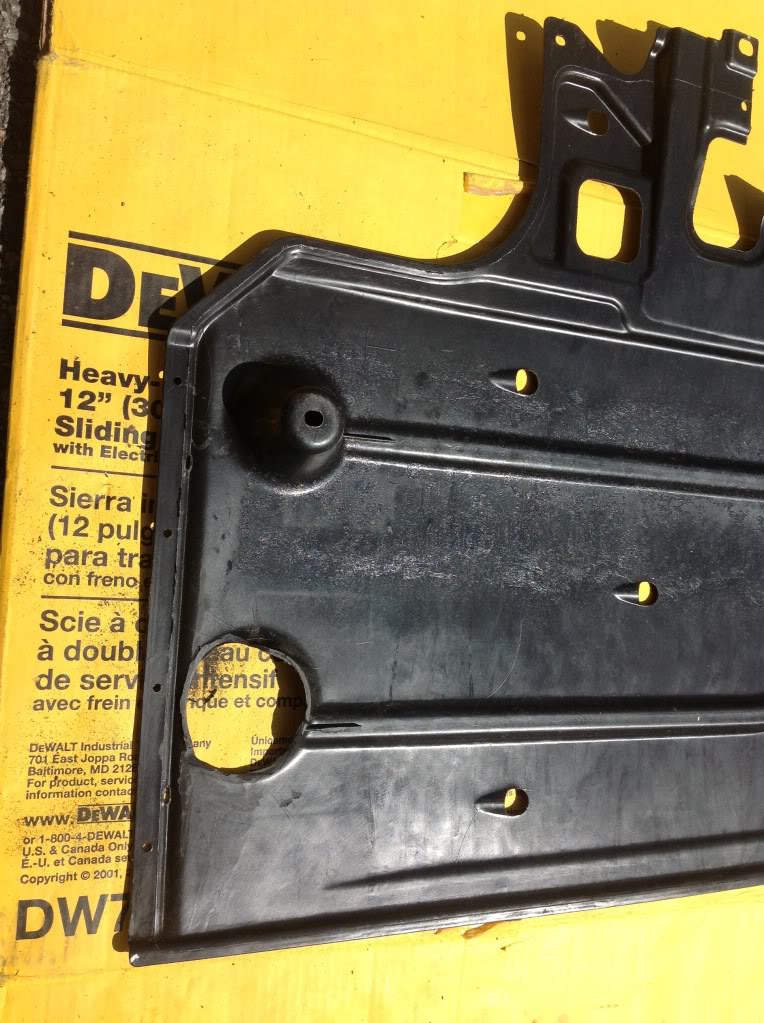
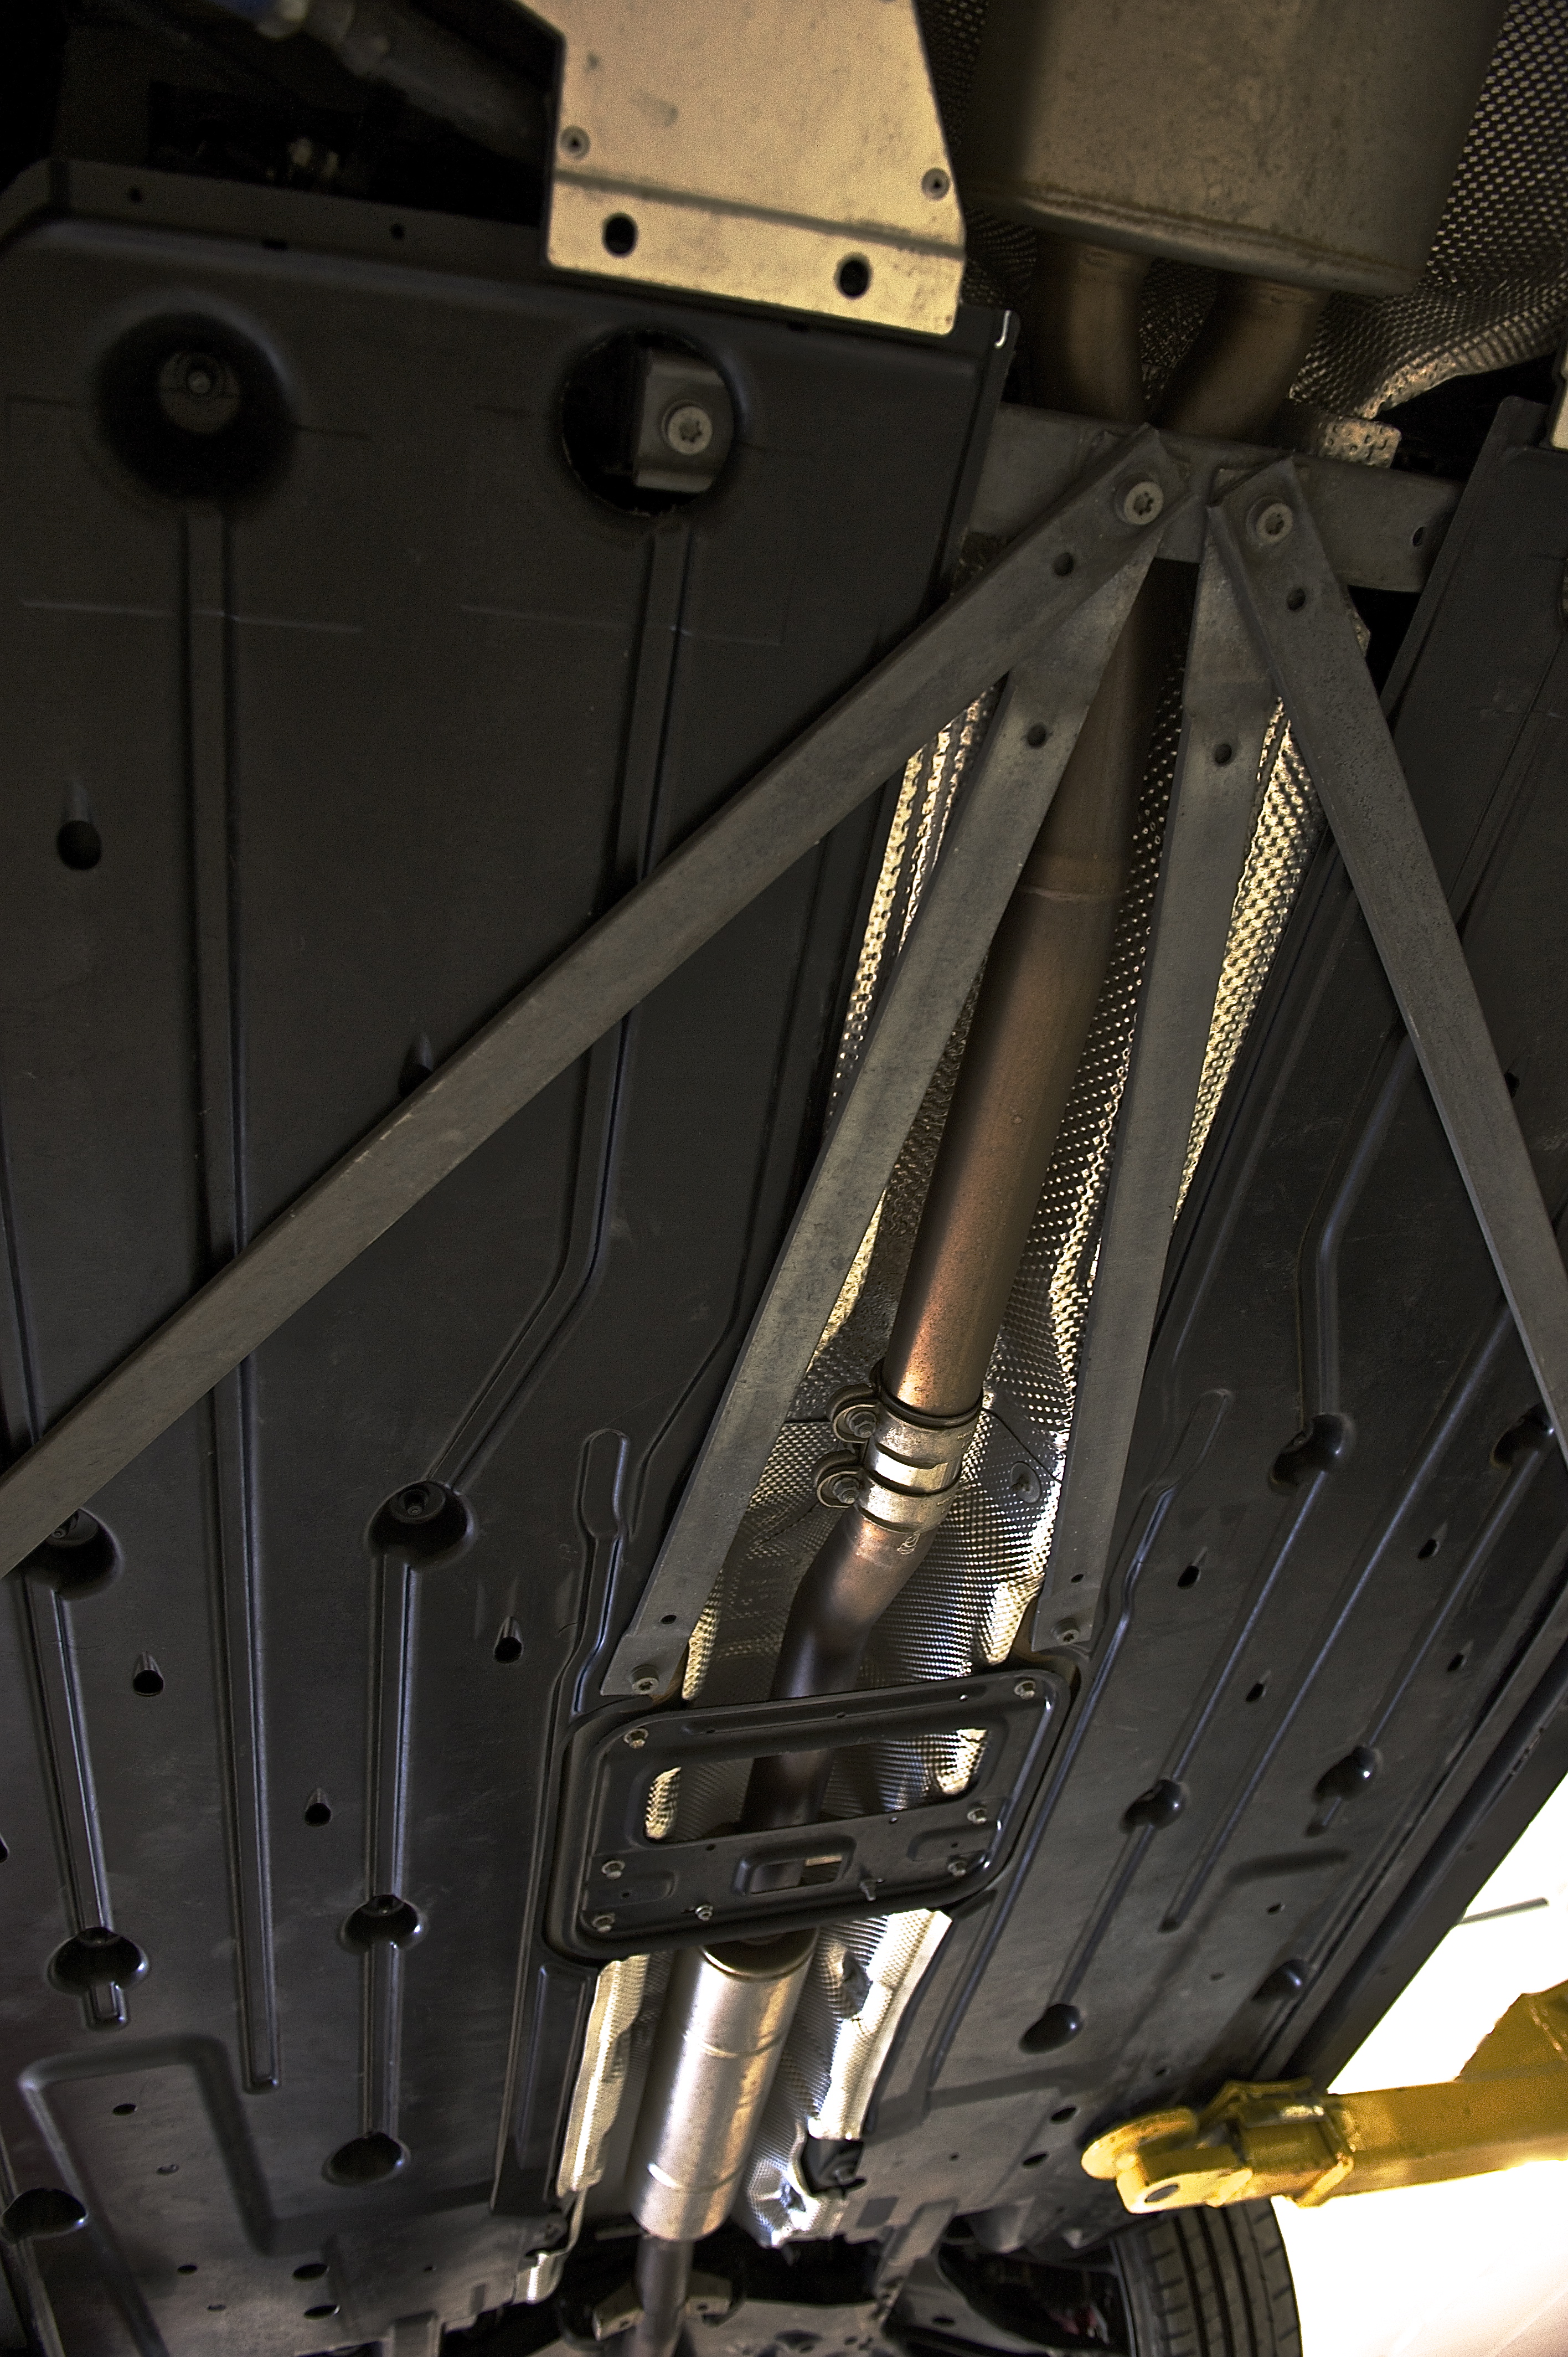
For the side panels, the rear molded in support on the inside needs to be removed so it will lay flat against the cross brace.
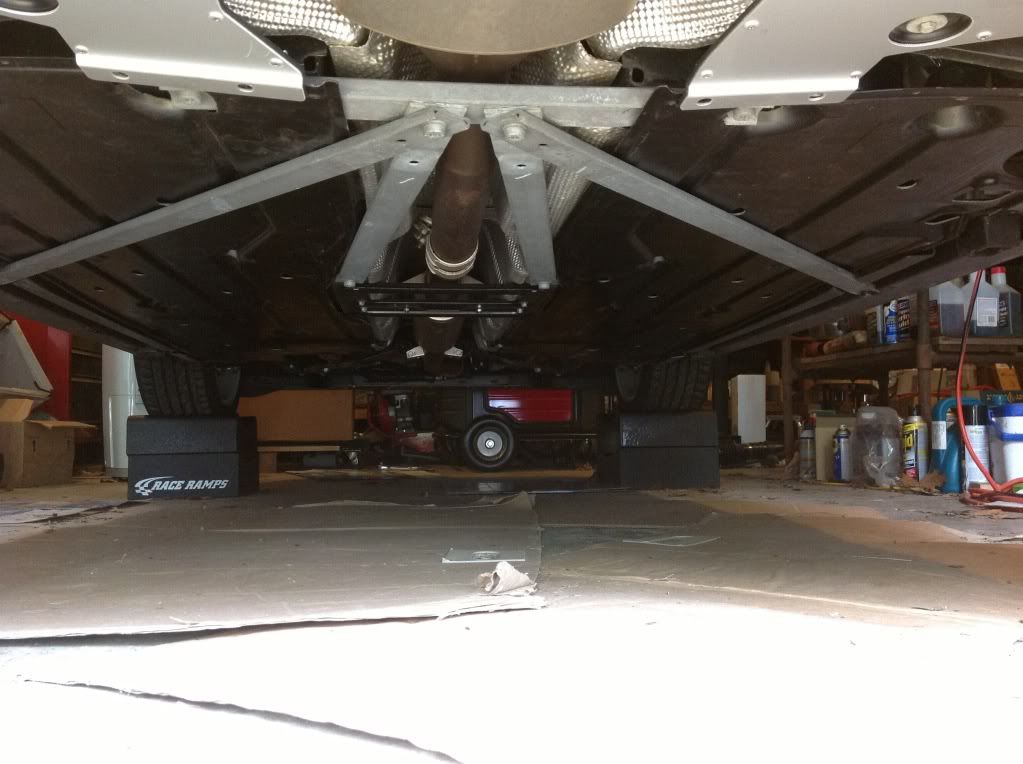
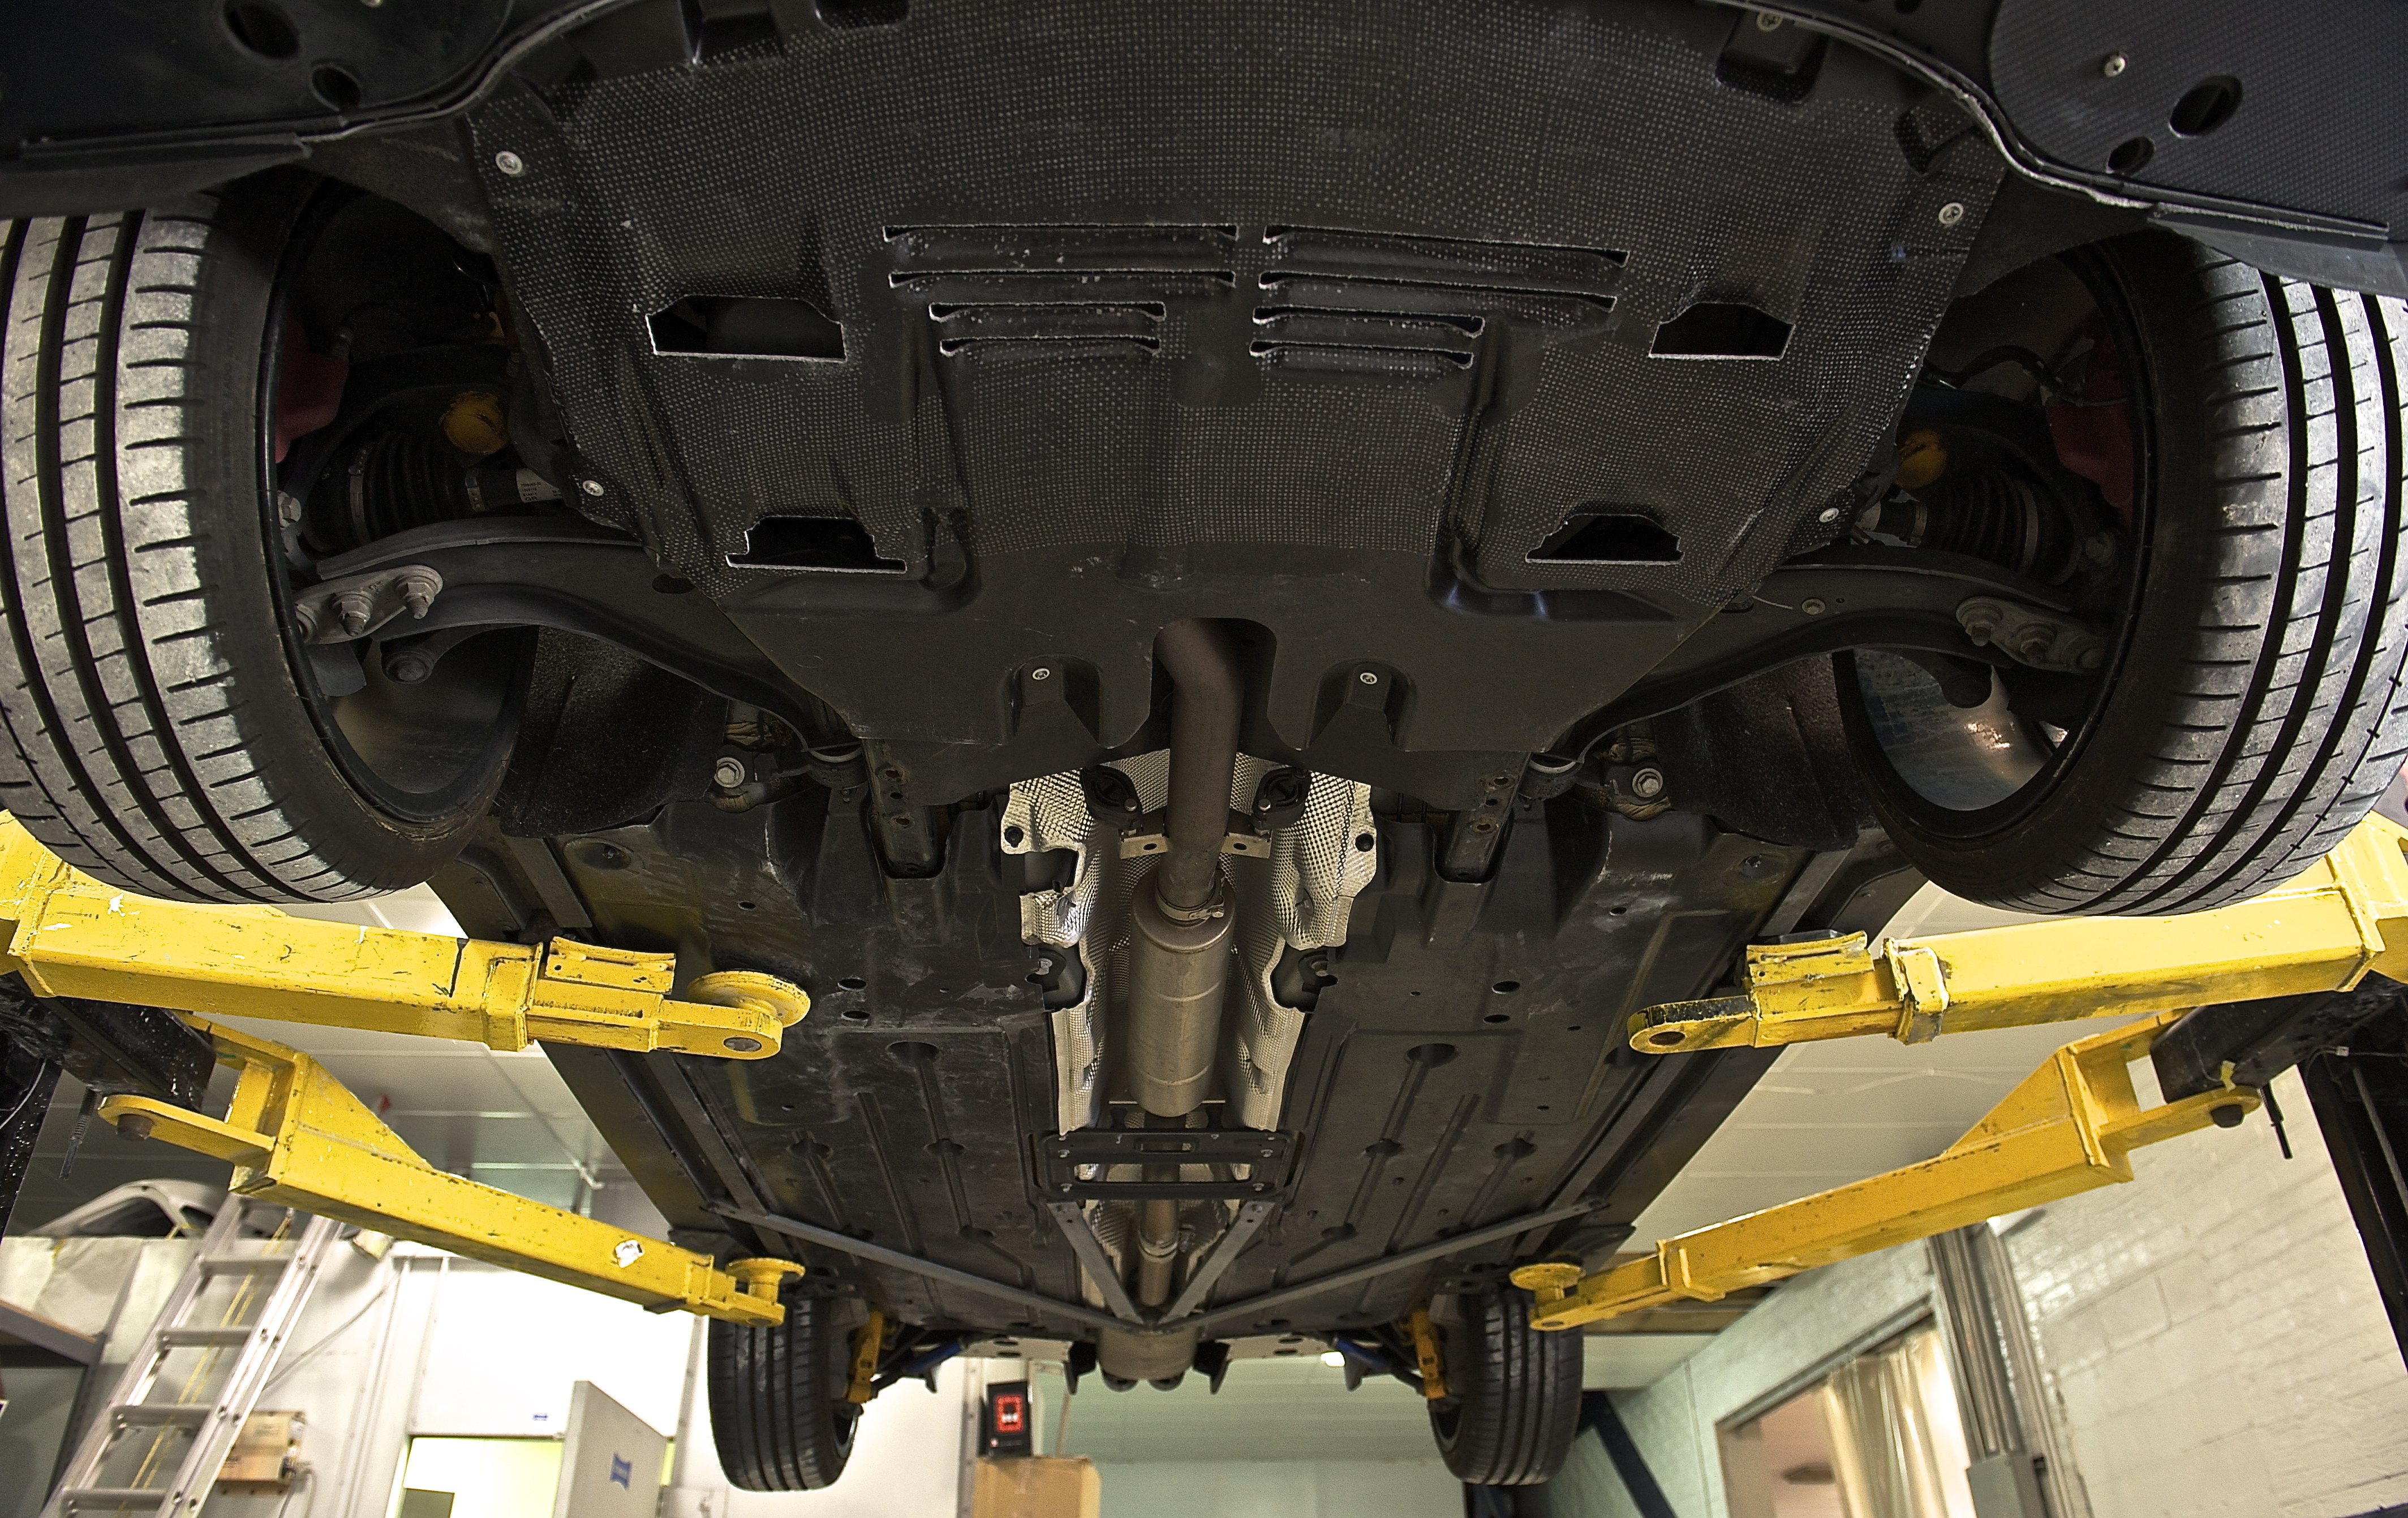
Front to back finished up...
Rear view...
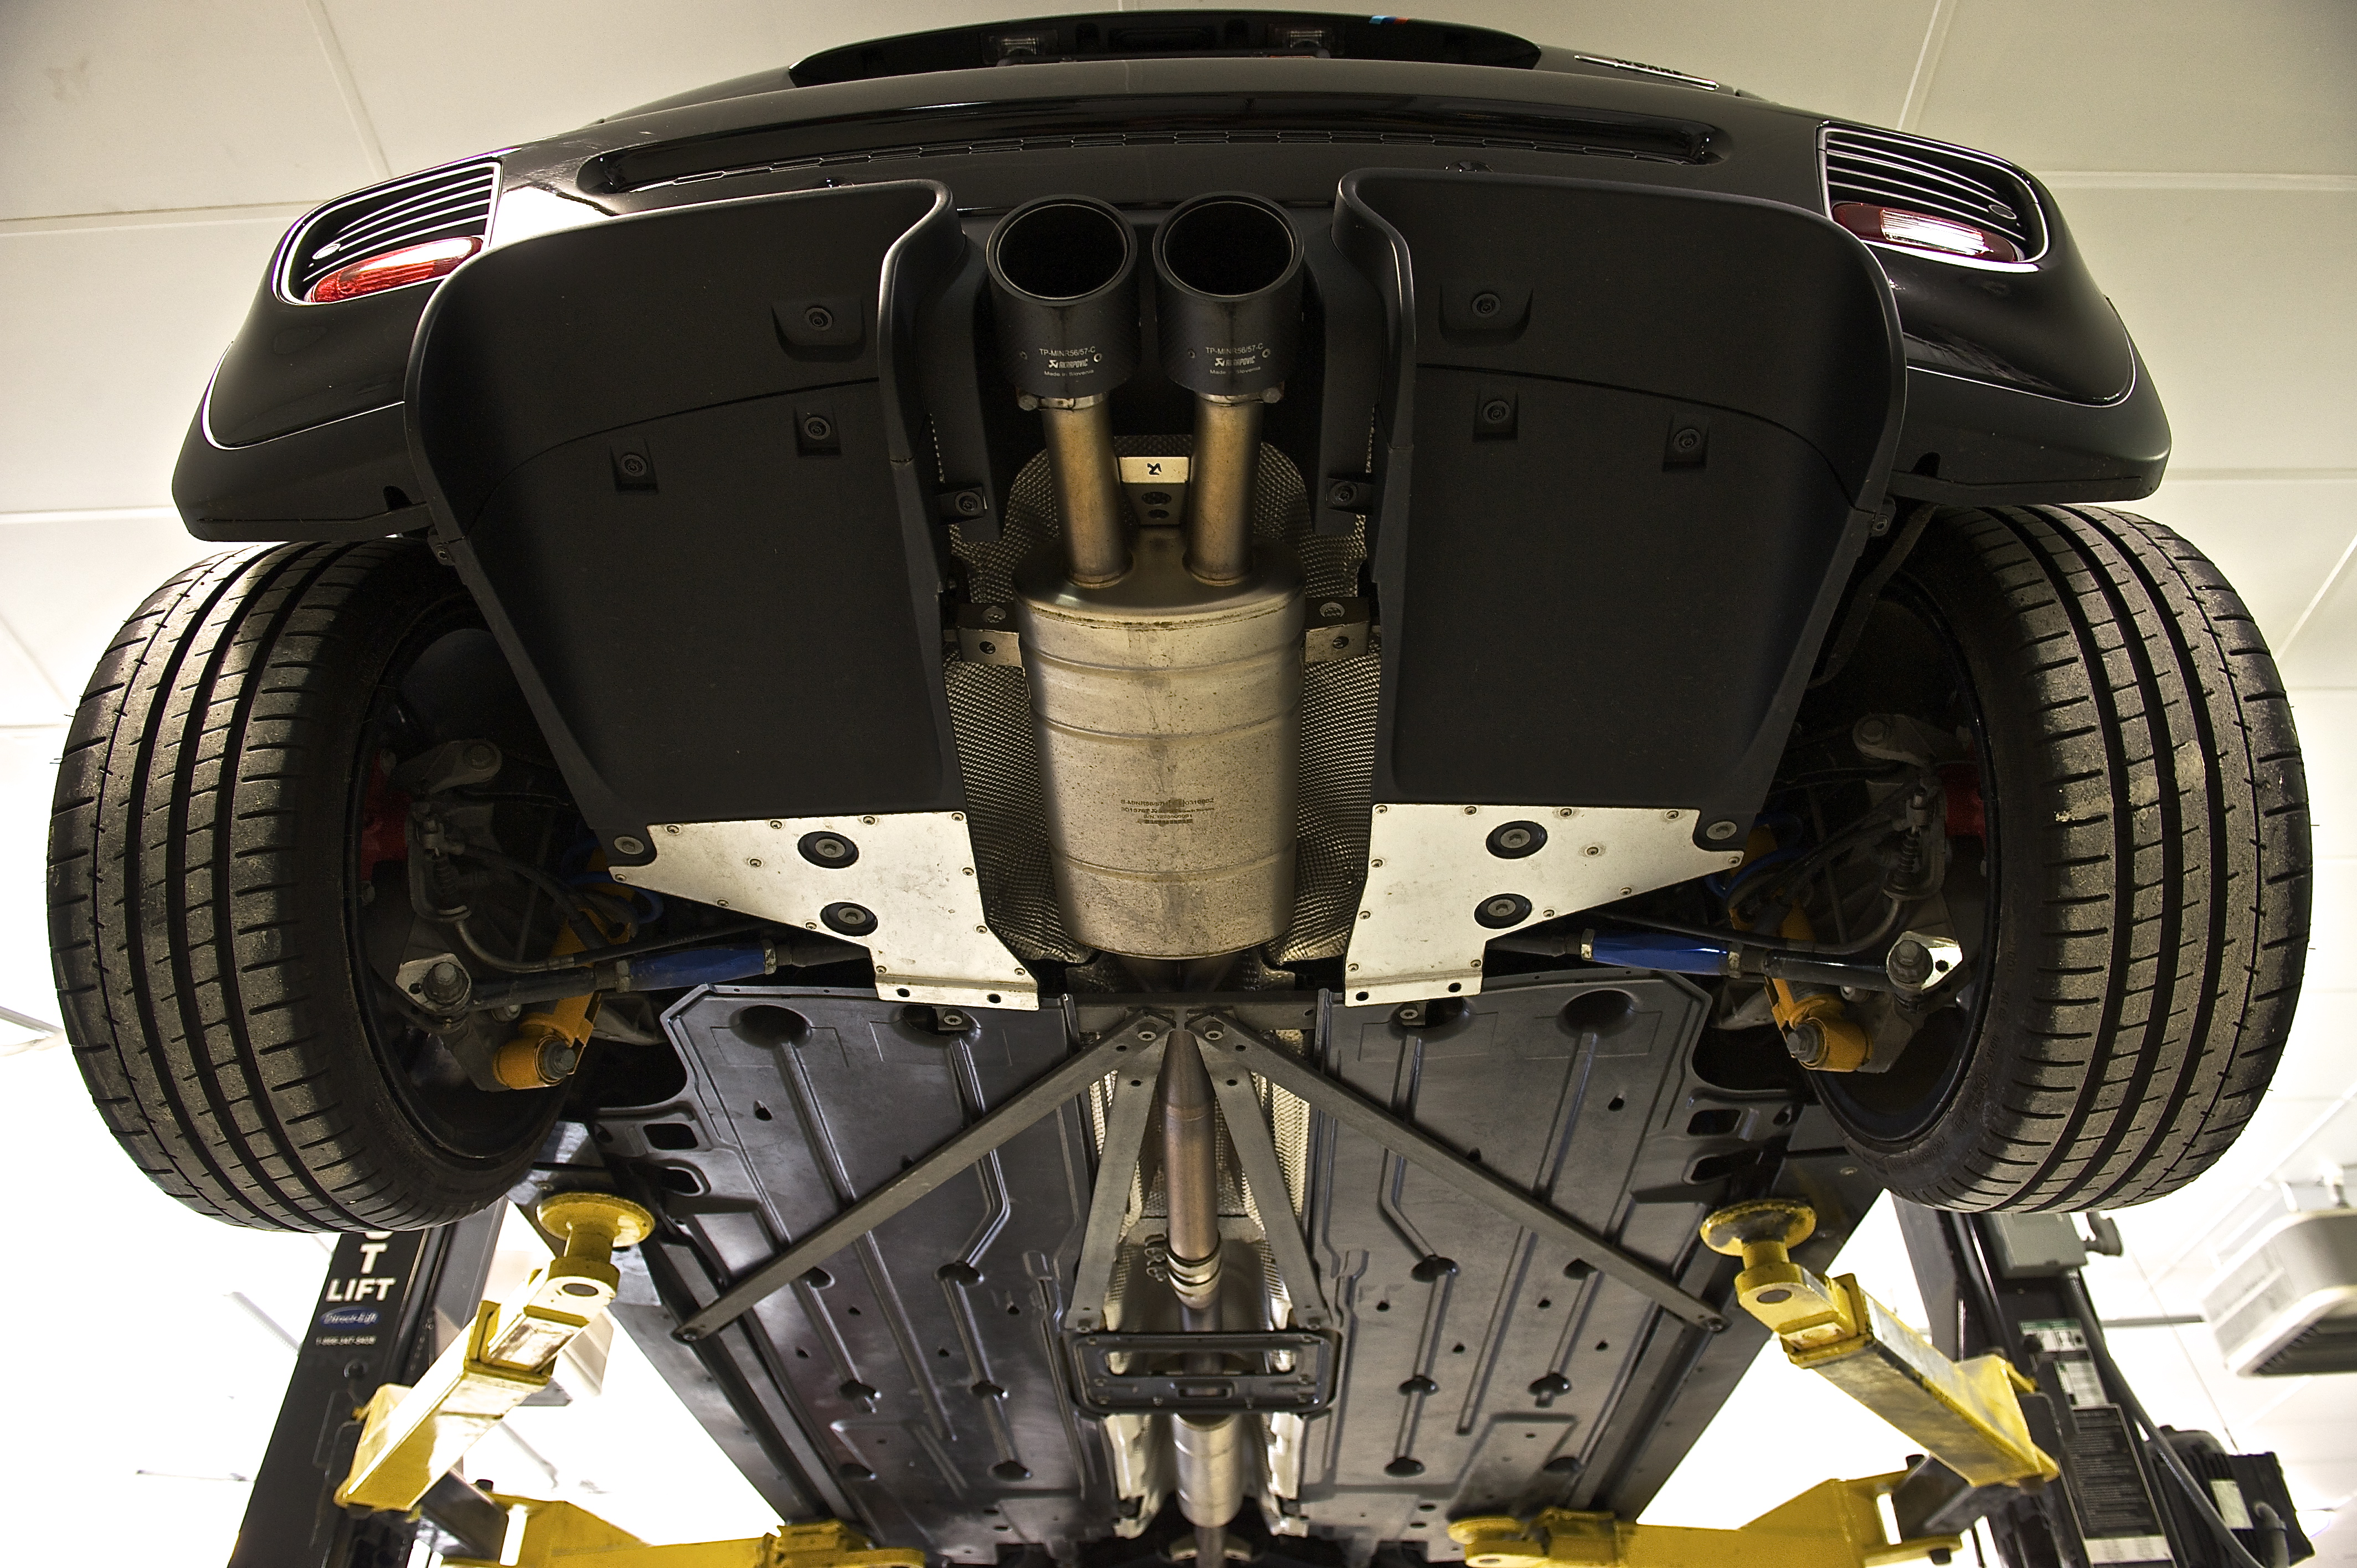
Driving home from the shop I noticed the Roadster is a few decibels quieter after the install...which was a really pleasant surprise
-Steven
The front tray is well made, with a heat shield and what looks like a reinforcing material through the middle. I know Mini engineers spent a lot of time "tuning" this piece to reduce drag as well as vent/draw hot air out of the engine bay. Lots of vents...


For the side panels, the rear molded in support on the inside needs to be removed so it will lay flat against the cross brace.


Front to back finished up...

Rear view...

Driving home from the shop I noticed the Roadster is a few decibels quieter after the install...which was a really pleasant surprise
-Steven
#493
06-04-2013, 04:29 AM
#494
06-04-2013, 04:35 AM
-Steven
#496
06-04-2013, 01:47 PM
Platinum Sponsor
jkapinos - great job again.
Steven - Great, glad it worked for you also, I glad my R58 under-body panels on a R59 theory came to work and the front GP2 Belly Pan kit pan looks great ! Very smooth underneath. Great job on the install and your MINI is looking very good as always.
Steven - Great, glad it worked for you also, I glad my R58 under-body panels on a R59 theory came to work and the front GP2 Belly Pan kit pan looks great ! Very smooth underneath. Great job on the install and your MINI is looking very good as always.
__________________
MINI Guru/ MINI Owner Since 2004 | NEW Lifetime Part Replacement | Local Pickup
Milltek | Genuine MINI | Forge Motorsport | NM Engineering | ECS Performance | M7 Speed
Customer Service Hours: 8am-8pm EST|Sales Team Hours: 8am-11pm | SAT 10am-7pm 800.924.5172
MINI Guru/ MINI Owner Since 2004 | NEW Lifetime Part Replacement | Local Pickup
Milltek | Genuine MINI | Forge Motorsport | NM Engineering | ECS Performance | M7 Speed
Customer Service Hours: 8am-8pm EST|Sales Team Hours: 8am-11pm | SAT 10am-7pm 800.924.5172
Last edited by ECSTuning; 06-04-2013 at 01:56 PM.
#497
06-07-2013, 06:20 AM
Yeah, that needs some explaining. In the left cup hold is my change holder I grabbed out of my R52(it won't stay there). The one in the right cup holder is the ashtray/coin holder designed for the car my MA handed me before I left the dealership. You can also see the JCW temp gauge I had them install, really happy with that.

#498
06-07-2013, 04:46 PM
I cannot believe an enthusiast car like the Mini is so lacking in gauges. I had the JCW cluster installed on mine too - temp and lateral G force (Countryman so I got to pick 2), which is dumb. Why don't they have some more useful gauges, like oil pressure, oil temp, boost pressure, etc. Lateral Gs and "relative torque"? Might as well just have a gauge with Spongebob Squarepants and those bead-eyes that roll around as you take corners.
-Steven
#499
06-07-2013, 05:16 PM

3rd Gear
#500
06-07-2013, 10:11 PM
O.K., so I get this "just for fun" concept MINI has about their product. The Openometer is meant to encourage top down motoring, but as already mentioned, there are a few more useful gauges that are missing as a result. Why aren't gauge choices one of MINI's "10 millions possible combinations?"