
R56 R56 Vacuum Pump Replacement DIY
#1
 03-14-2015, 01:55 PM


R56 Vacuum Pump Replacement DIY
MINI of Dallas called my wife in for a "complimentary recall inspection" and though I knew it was a money grab I decided to let her go in considering it was free. Might as well let them point the problems out for me, right?
They came back with a $5400 bill which included a "badly leaking vacuum pump". I'll let you decide on whether or not it was "badly leaking" later in the thread. After reading horror stories about vacuum pumps seizing and shearing off cam gears we decided it would be safer to just replace the whole thing @ 50,000 miles.
I saw a couple threads on this but never saw anyone actually document the process so I pulled out my tripod and my dslr and took a few pictures. This should take you an hour or less. Do it on a cold motor because ideally you will need to remove a turbo water line to get at the bottom bolt on the pump.

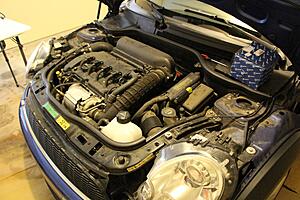
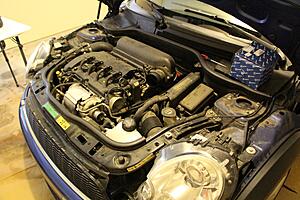
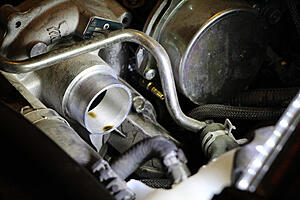
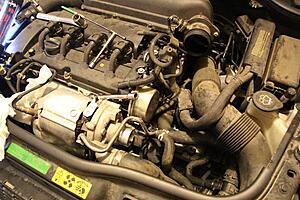
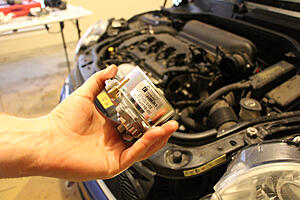
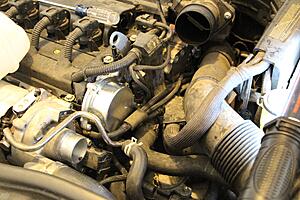
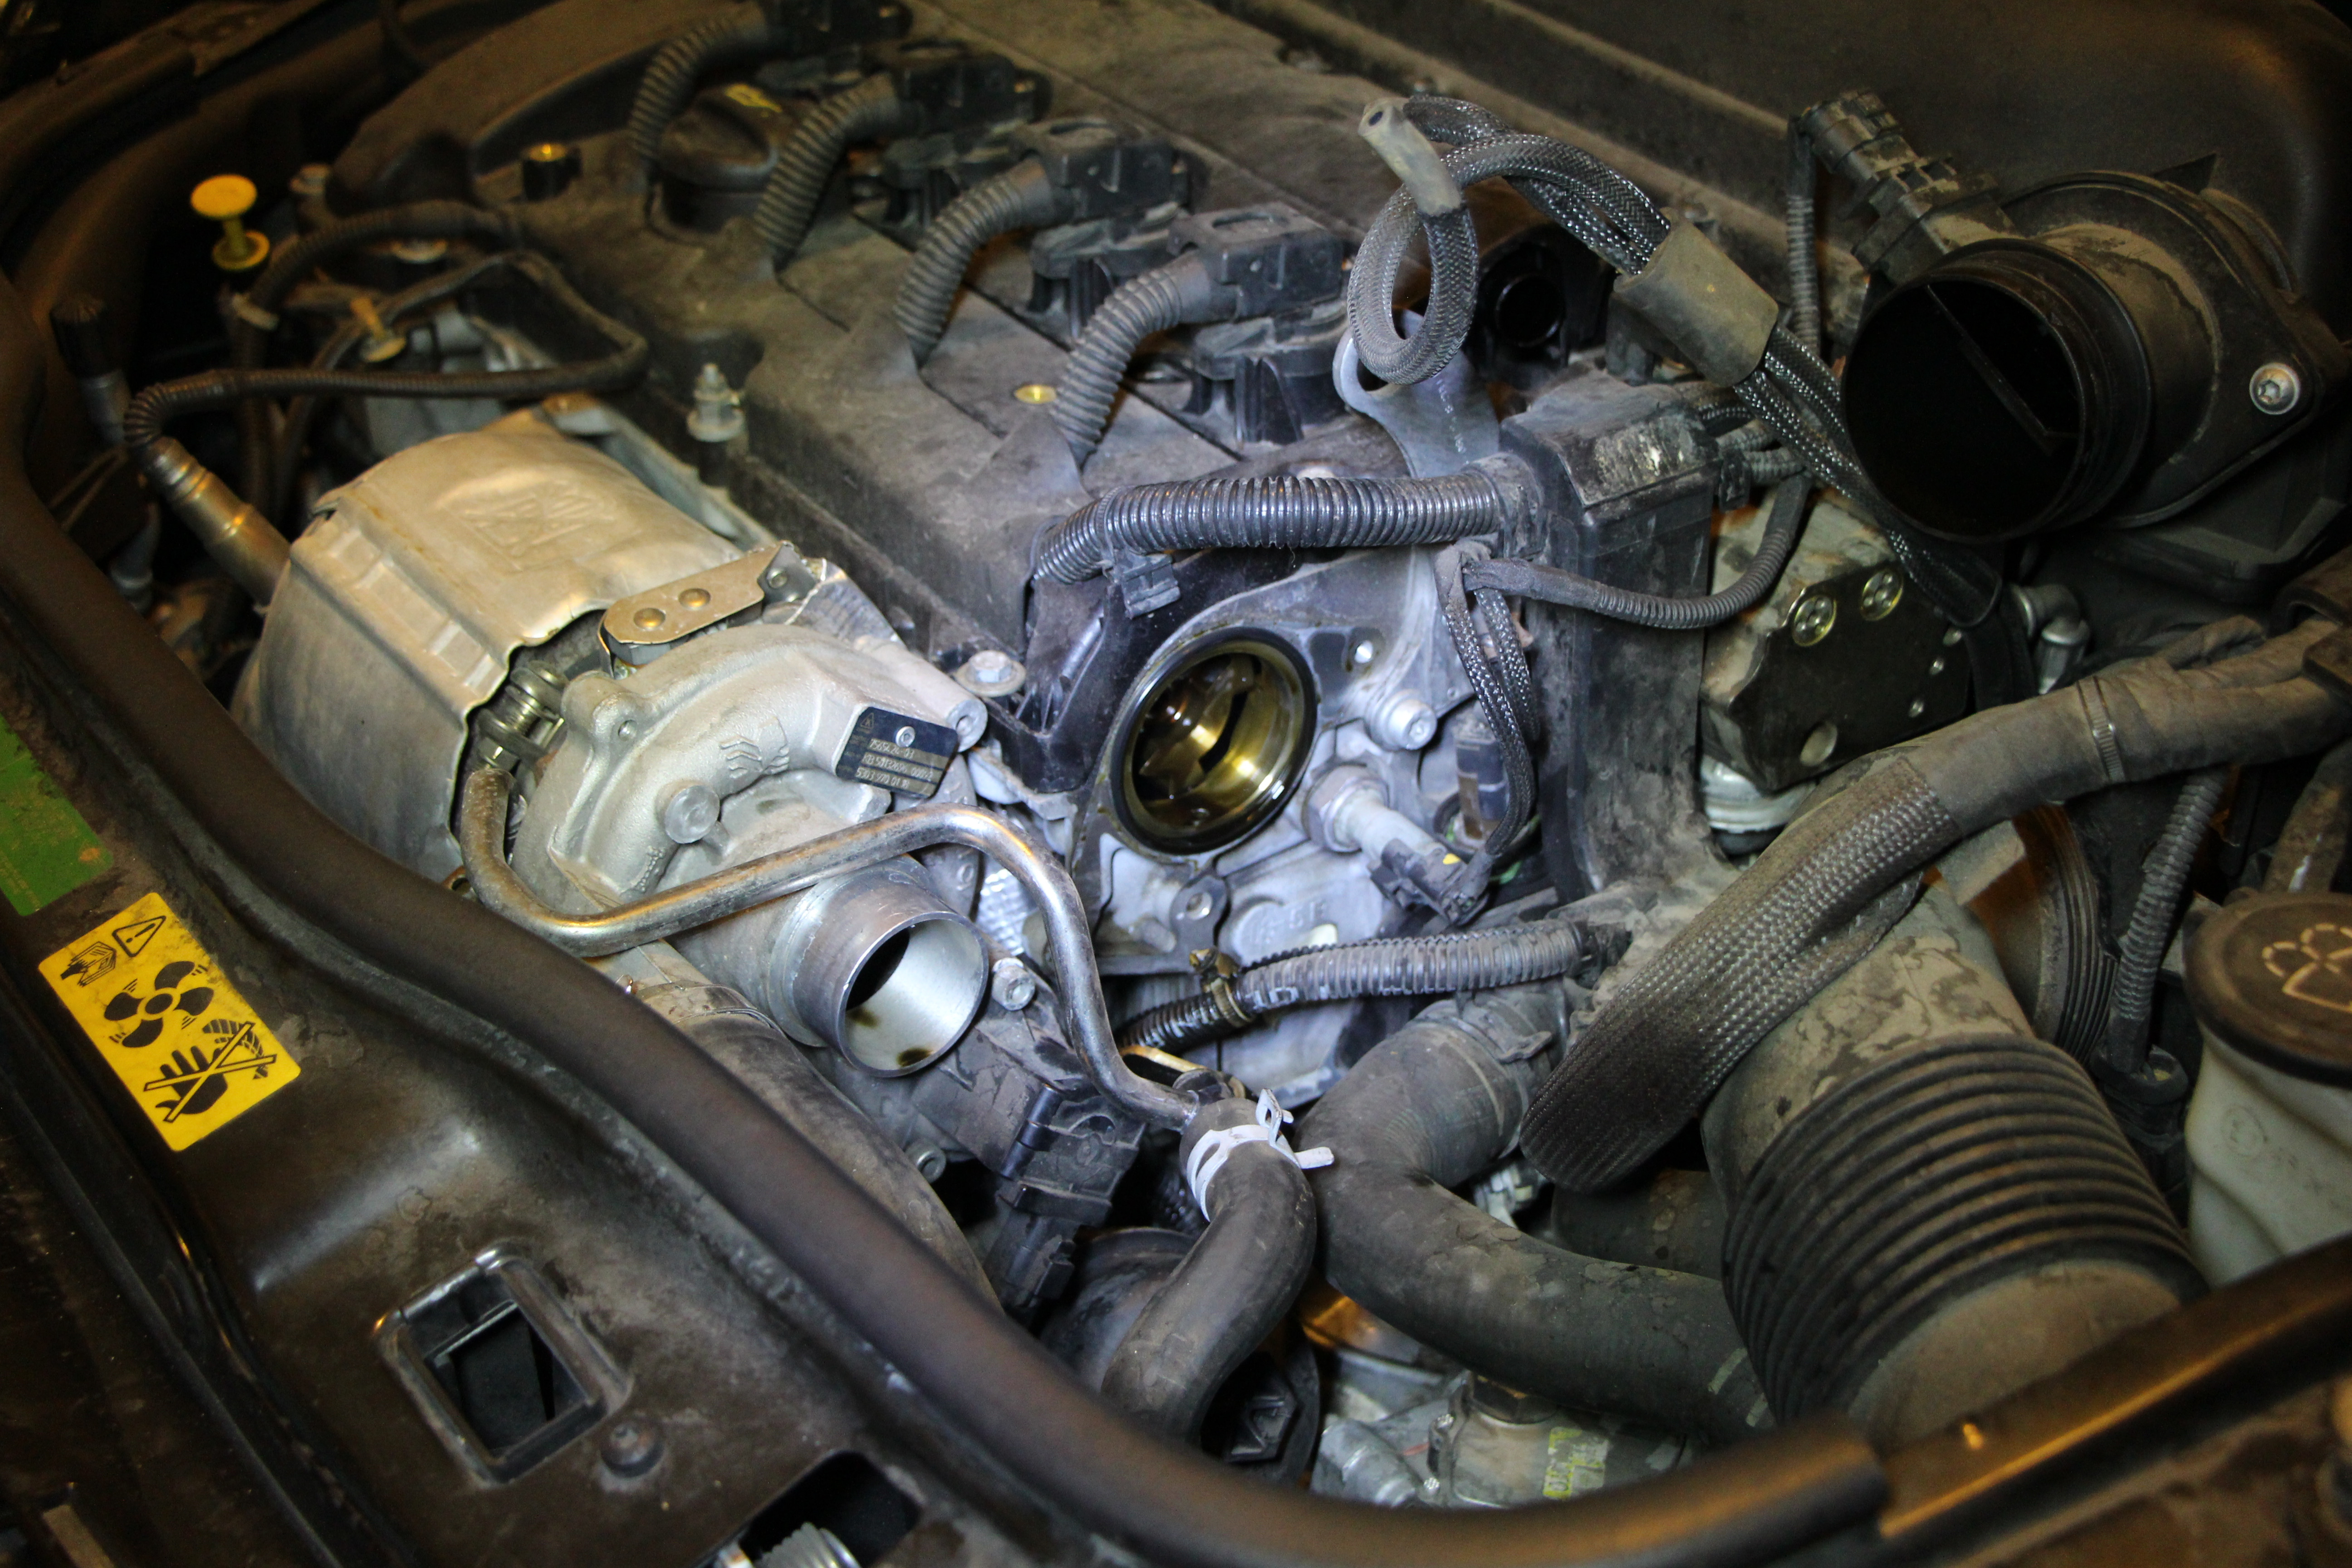
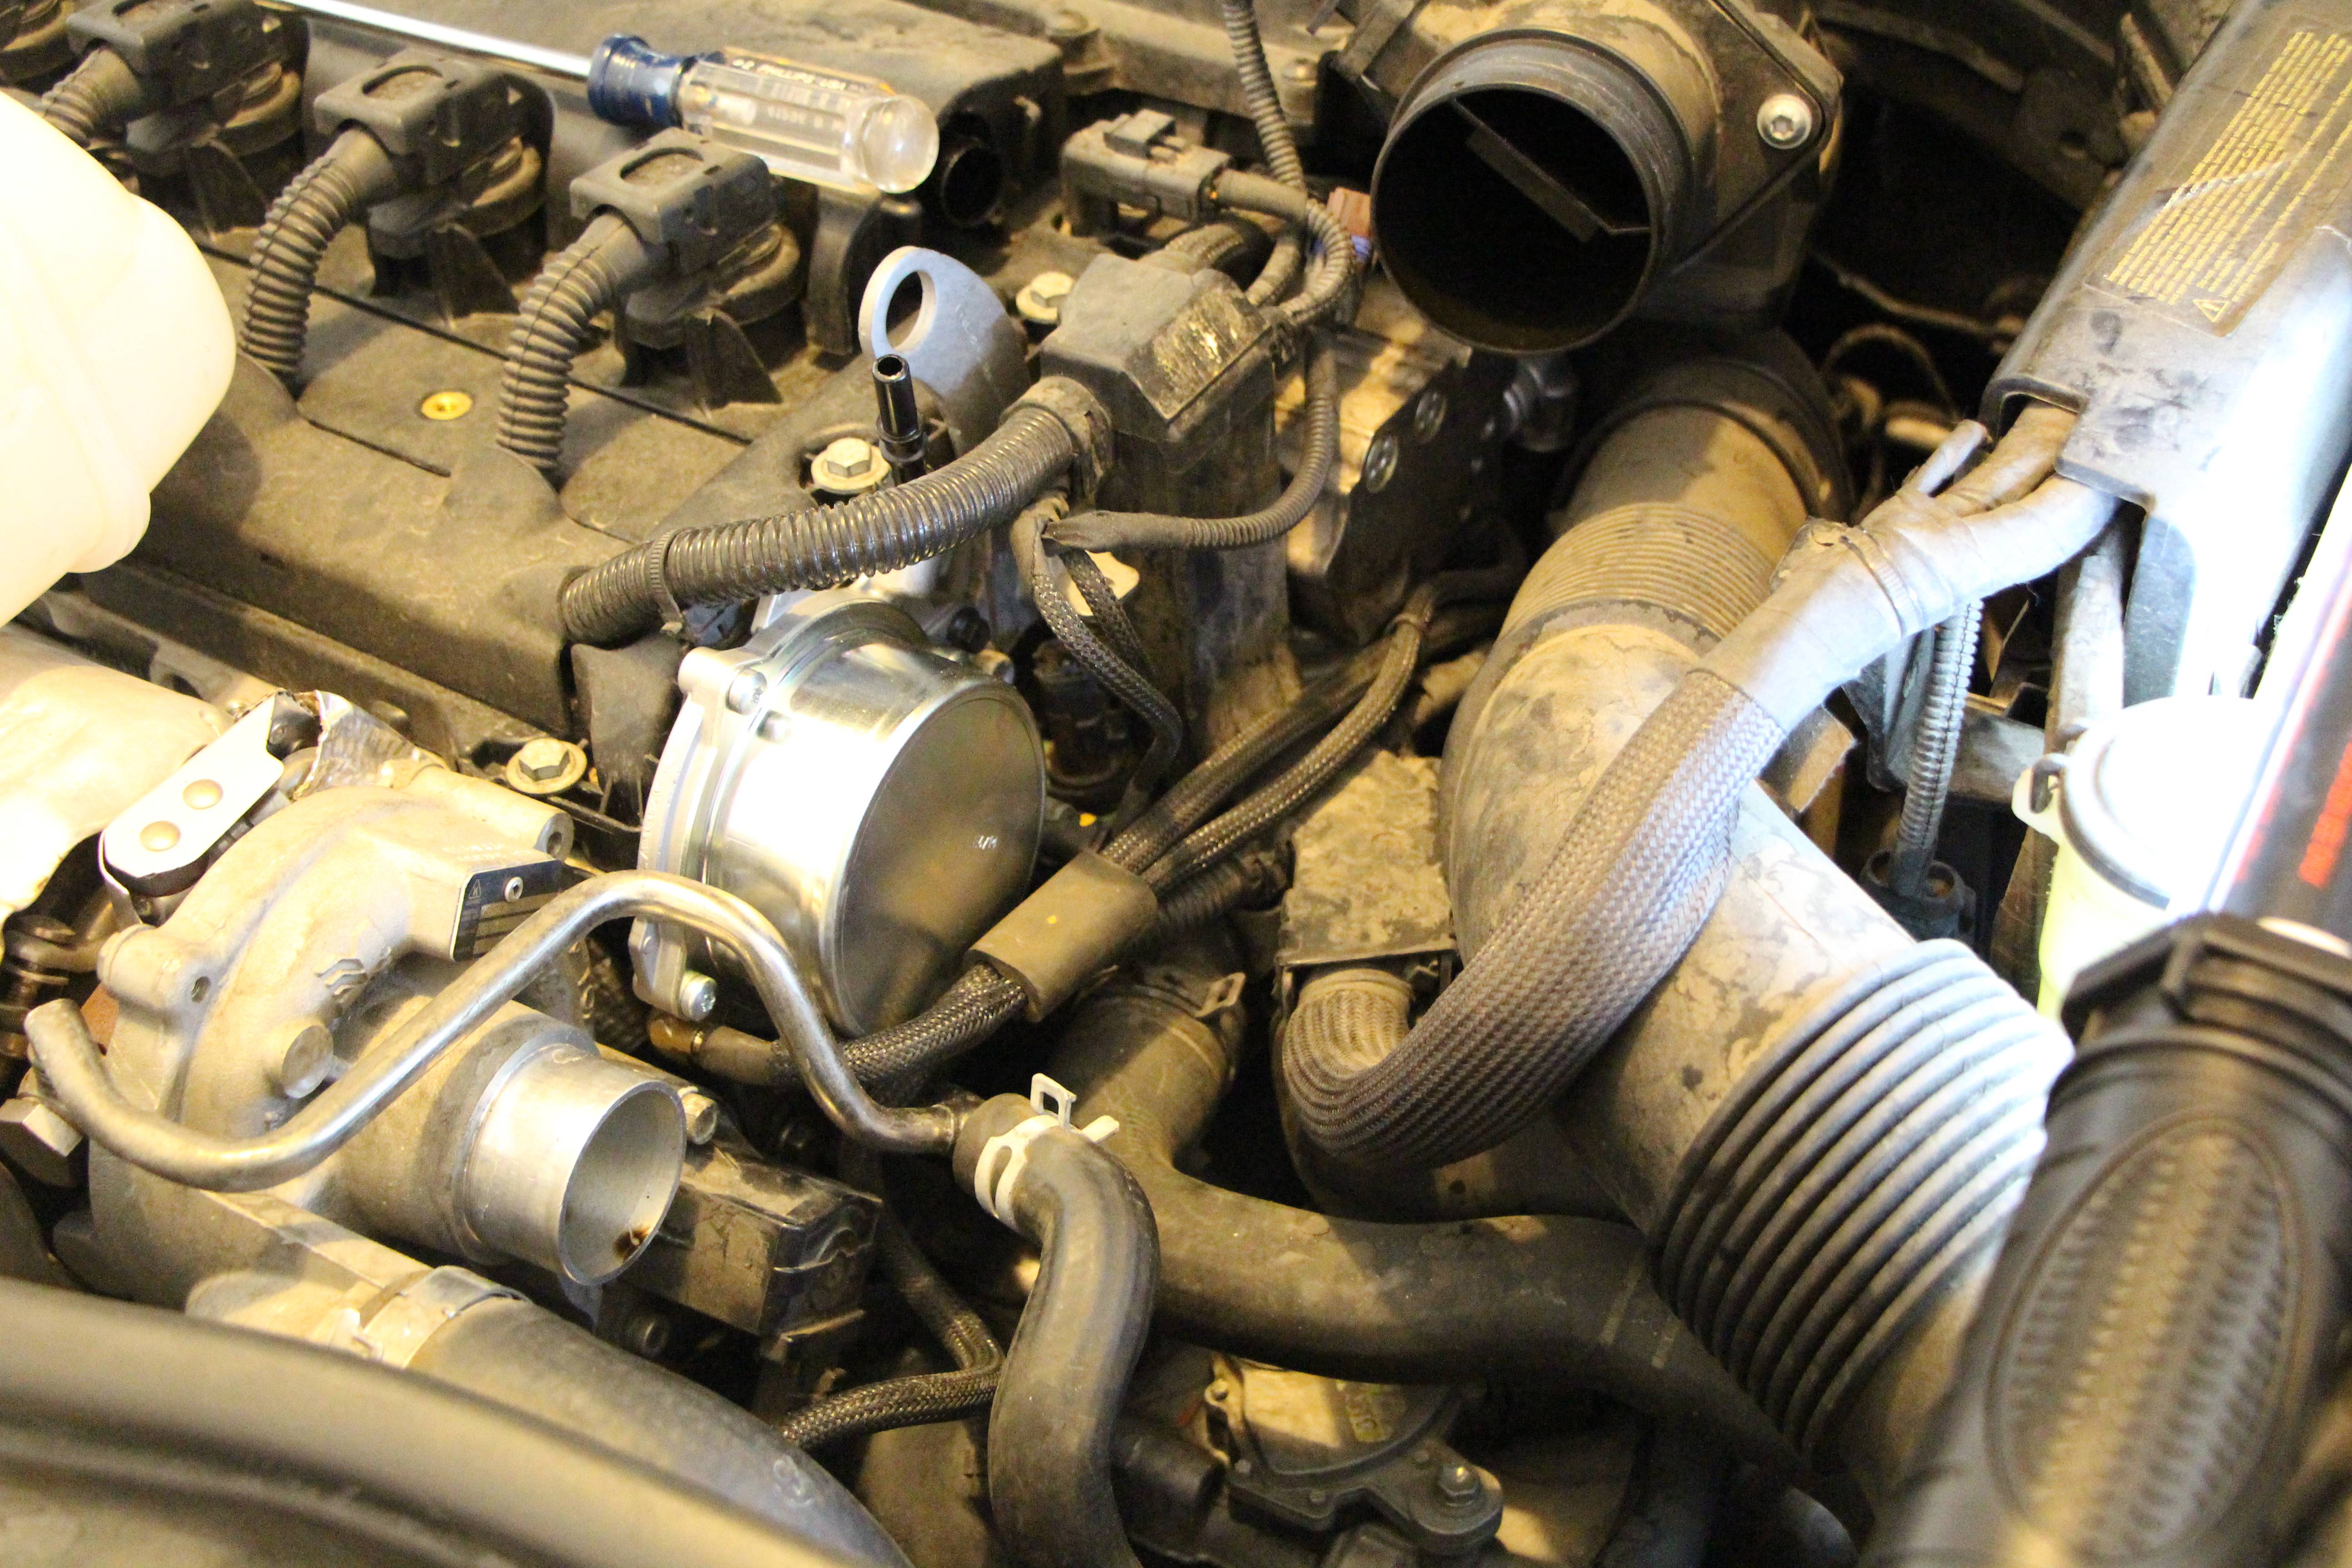
pump stage left, OEM pierburg from rmeuropean.com for a good price. I have already removed the vacuum line from the vacuum pump, you can see the empty nozzle right near the engine lifting hook in the middle of the picture. follow it back to the firewall and remove it from the brake booster line as well.
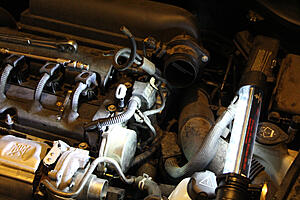
intake tube is our second casualty. first remove the plug. i found it easier to remove the clip on the valve cover (there are two tangs on each side to press before lifting) instead of try to pull the sensor out of the tube.
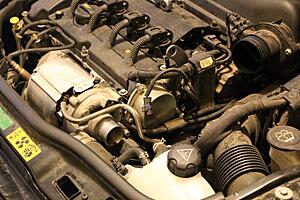
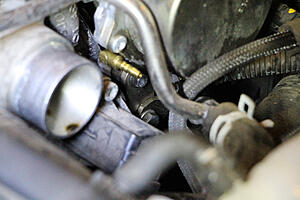
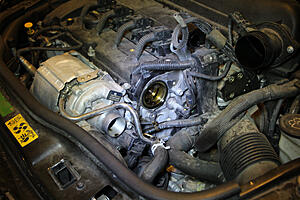
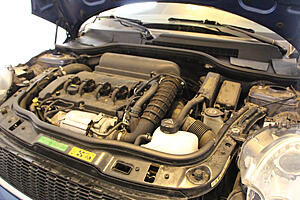
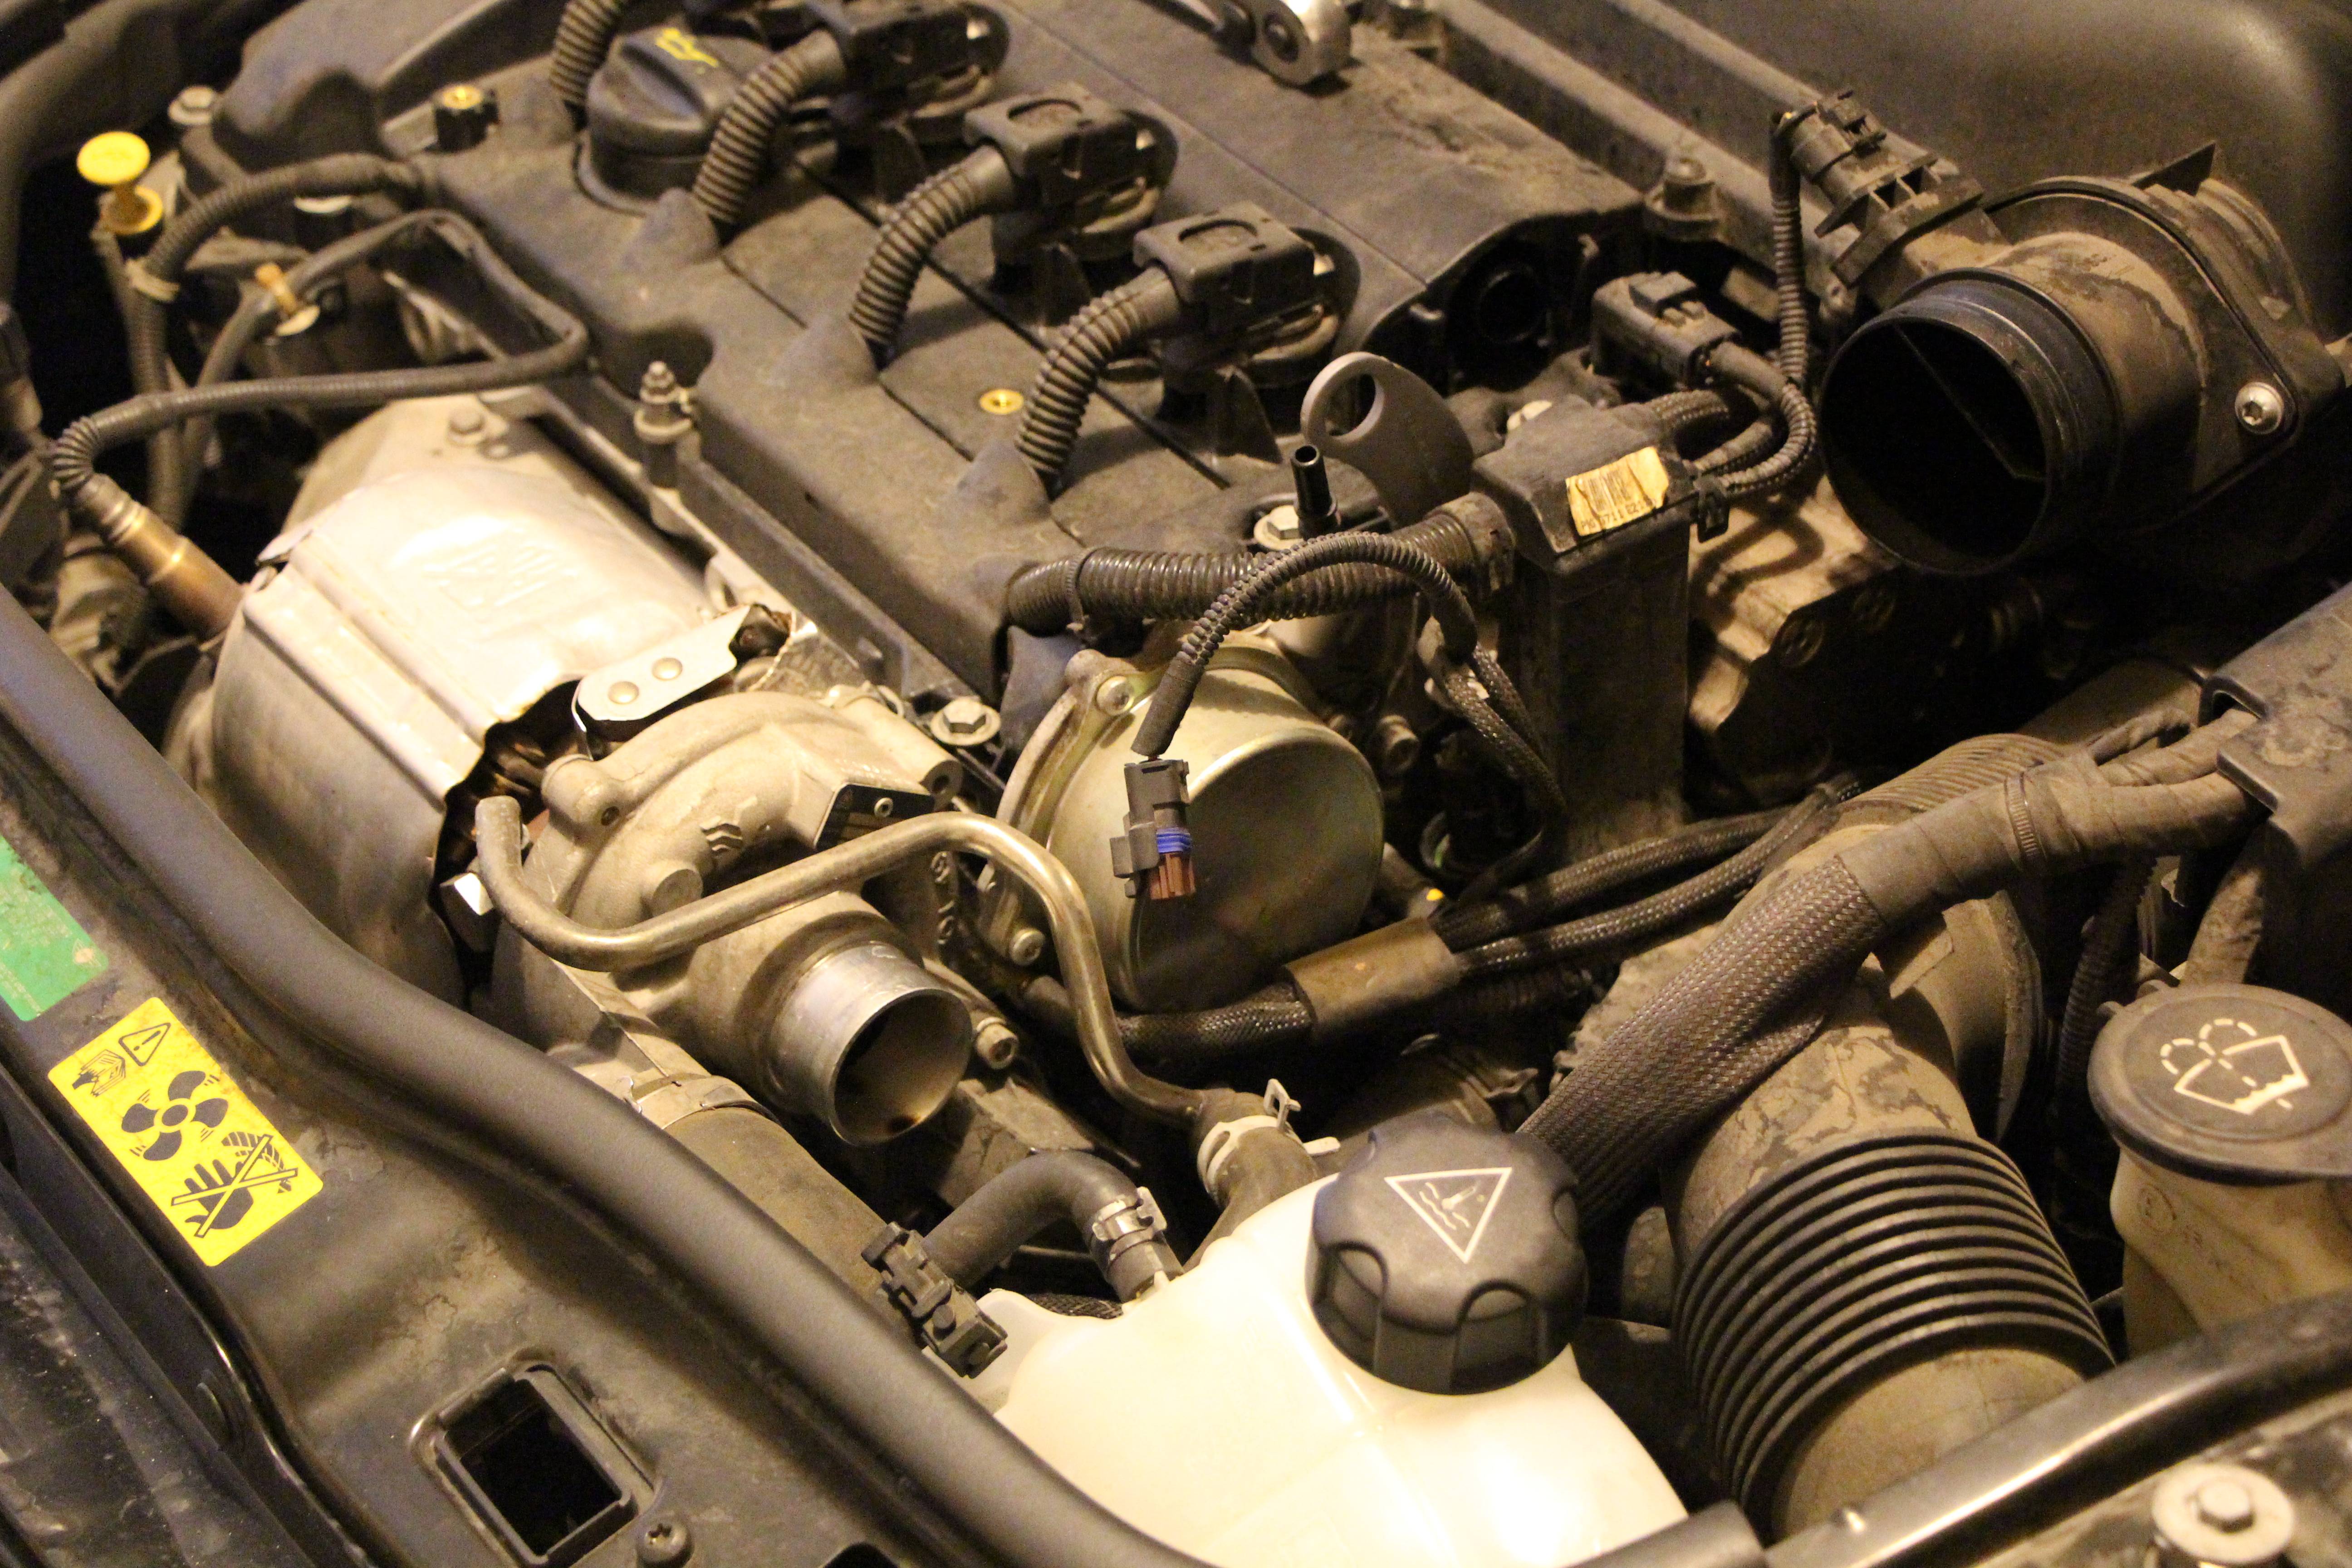
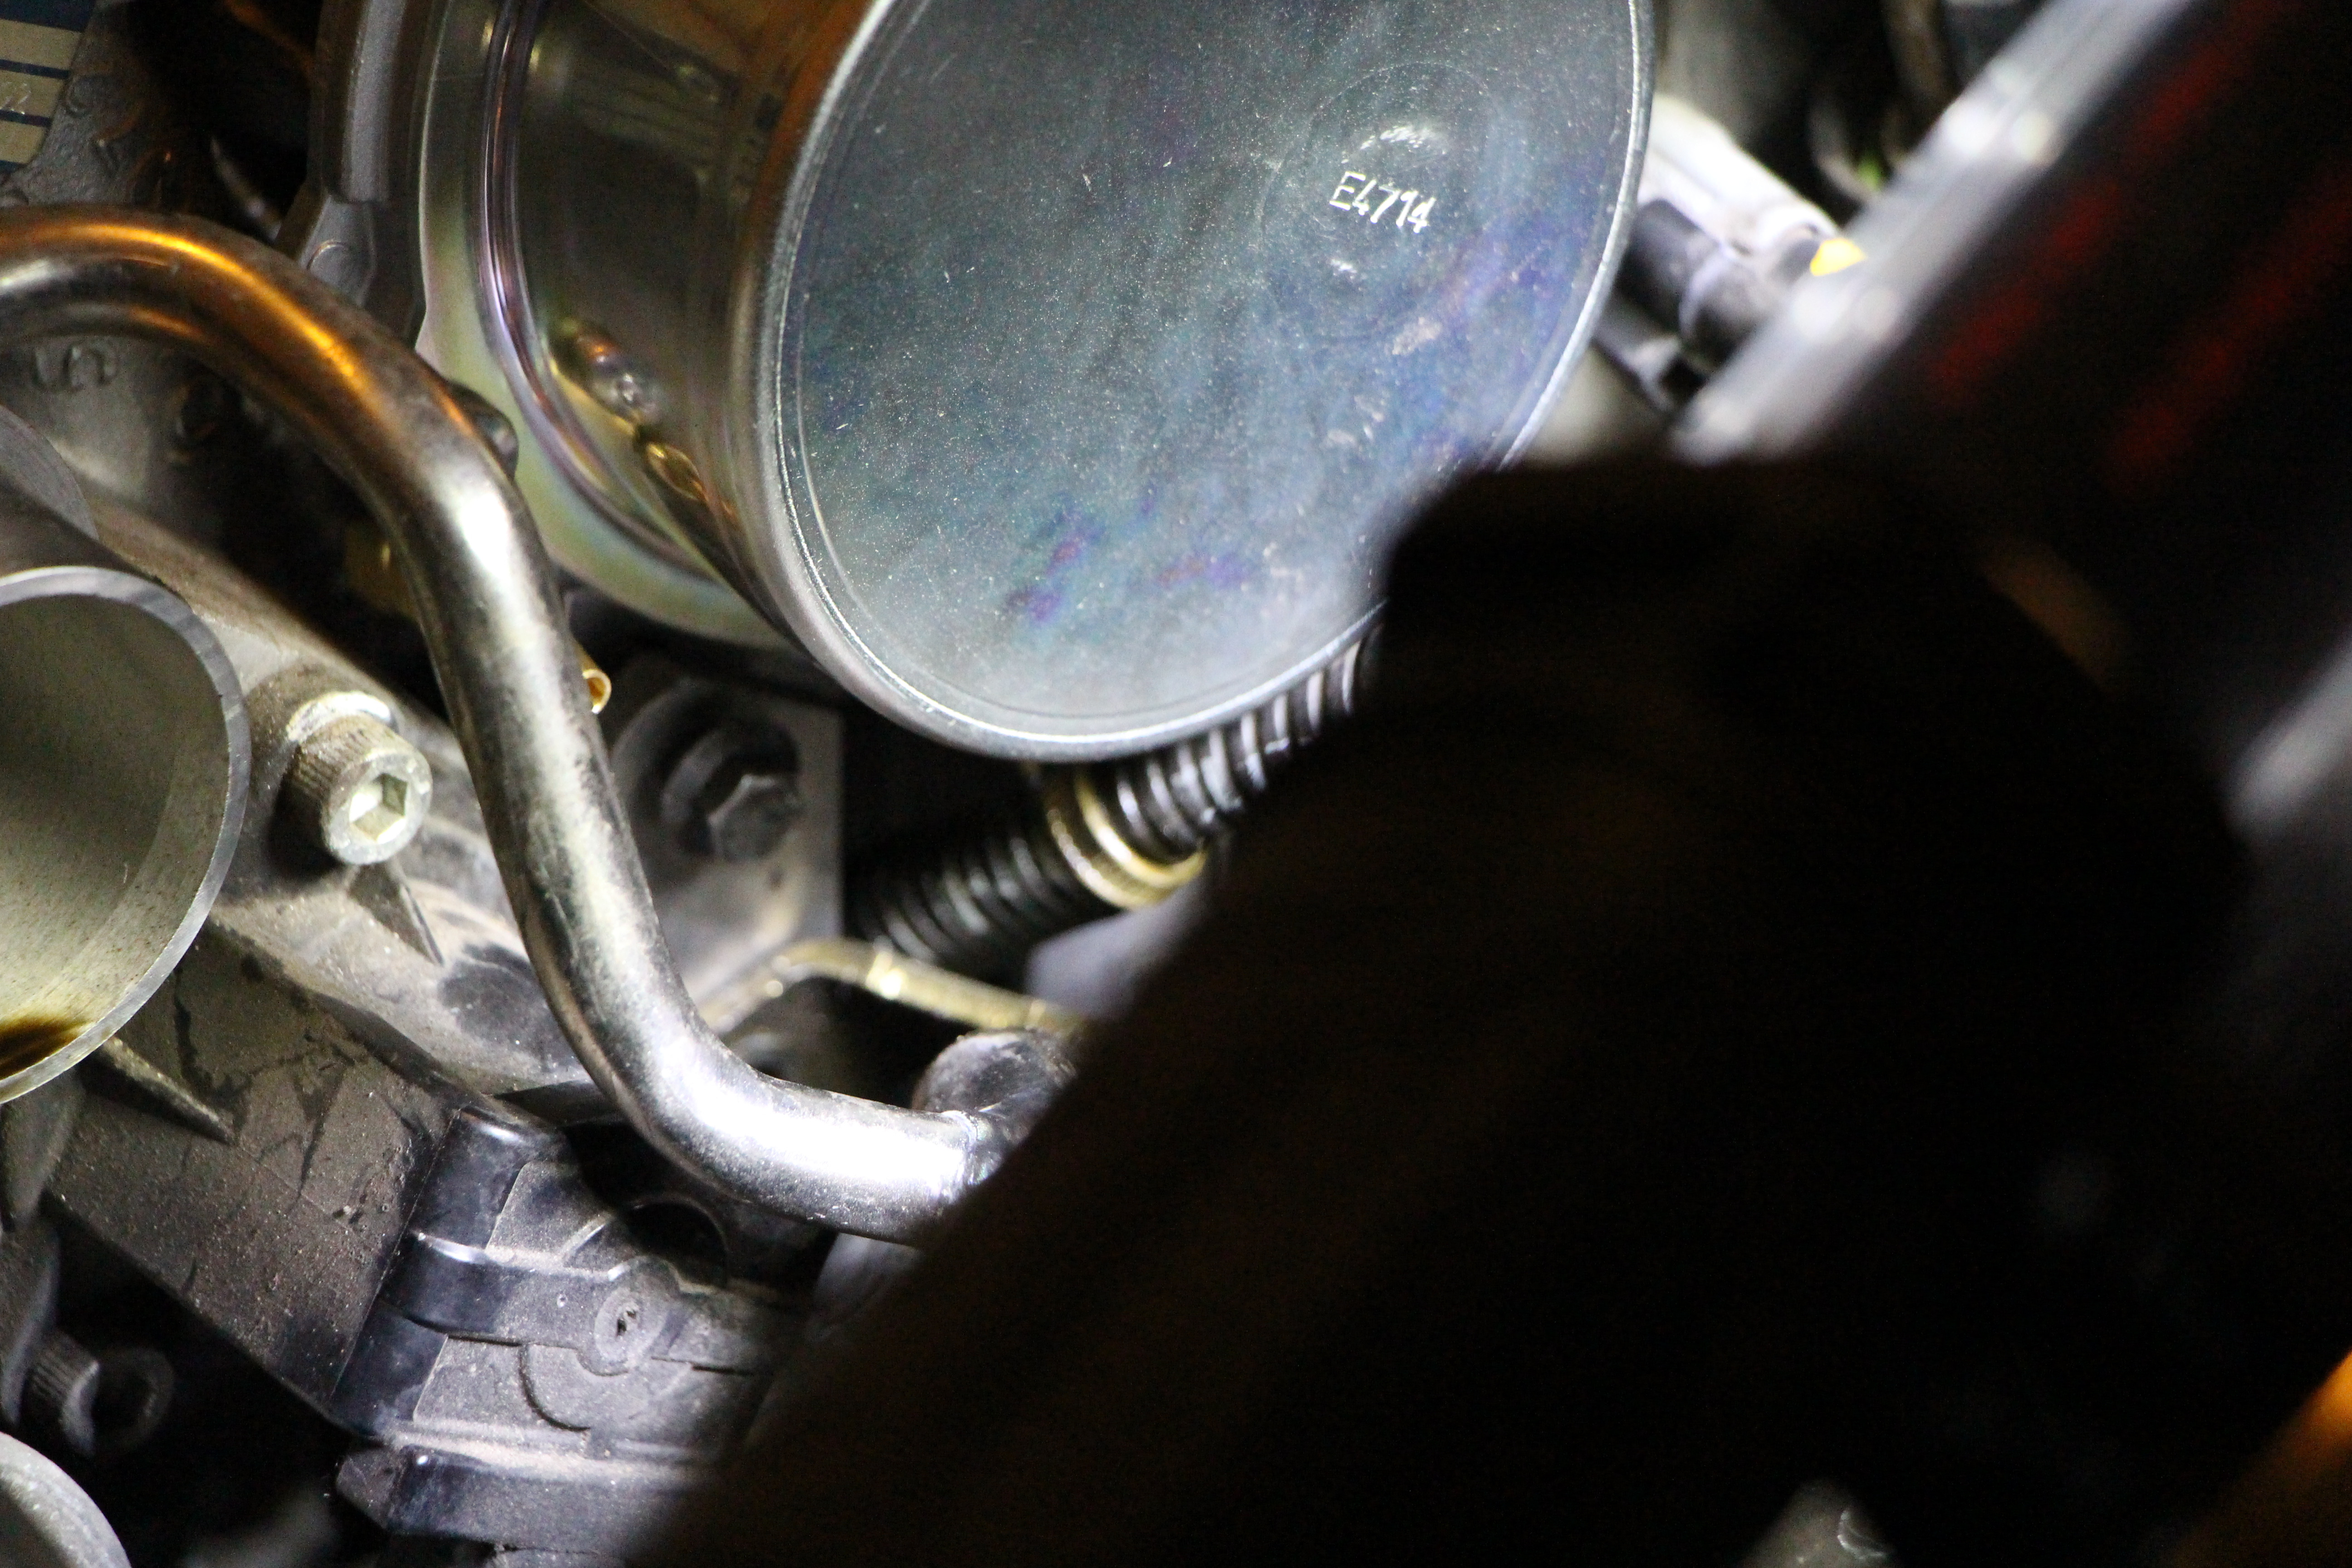
in the center of this is the pump. it is relatively easy to get to. you can get to the top bolt here with an 8mm socket easily, but the bottom bolt will need a bit of work to get to.
remove this vacuum line with the braided protection first.
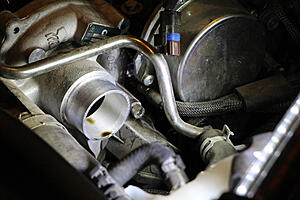
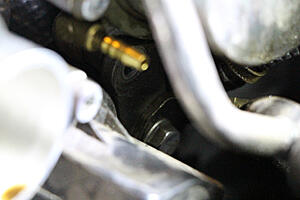
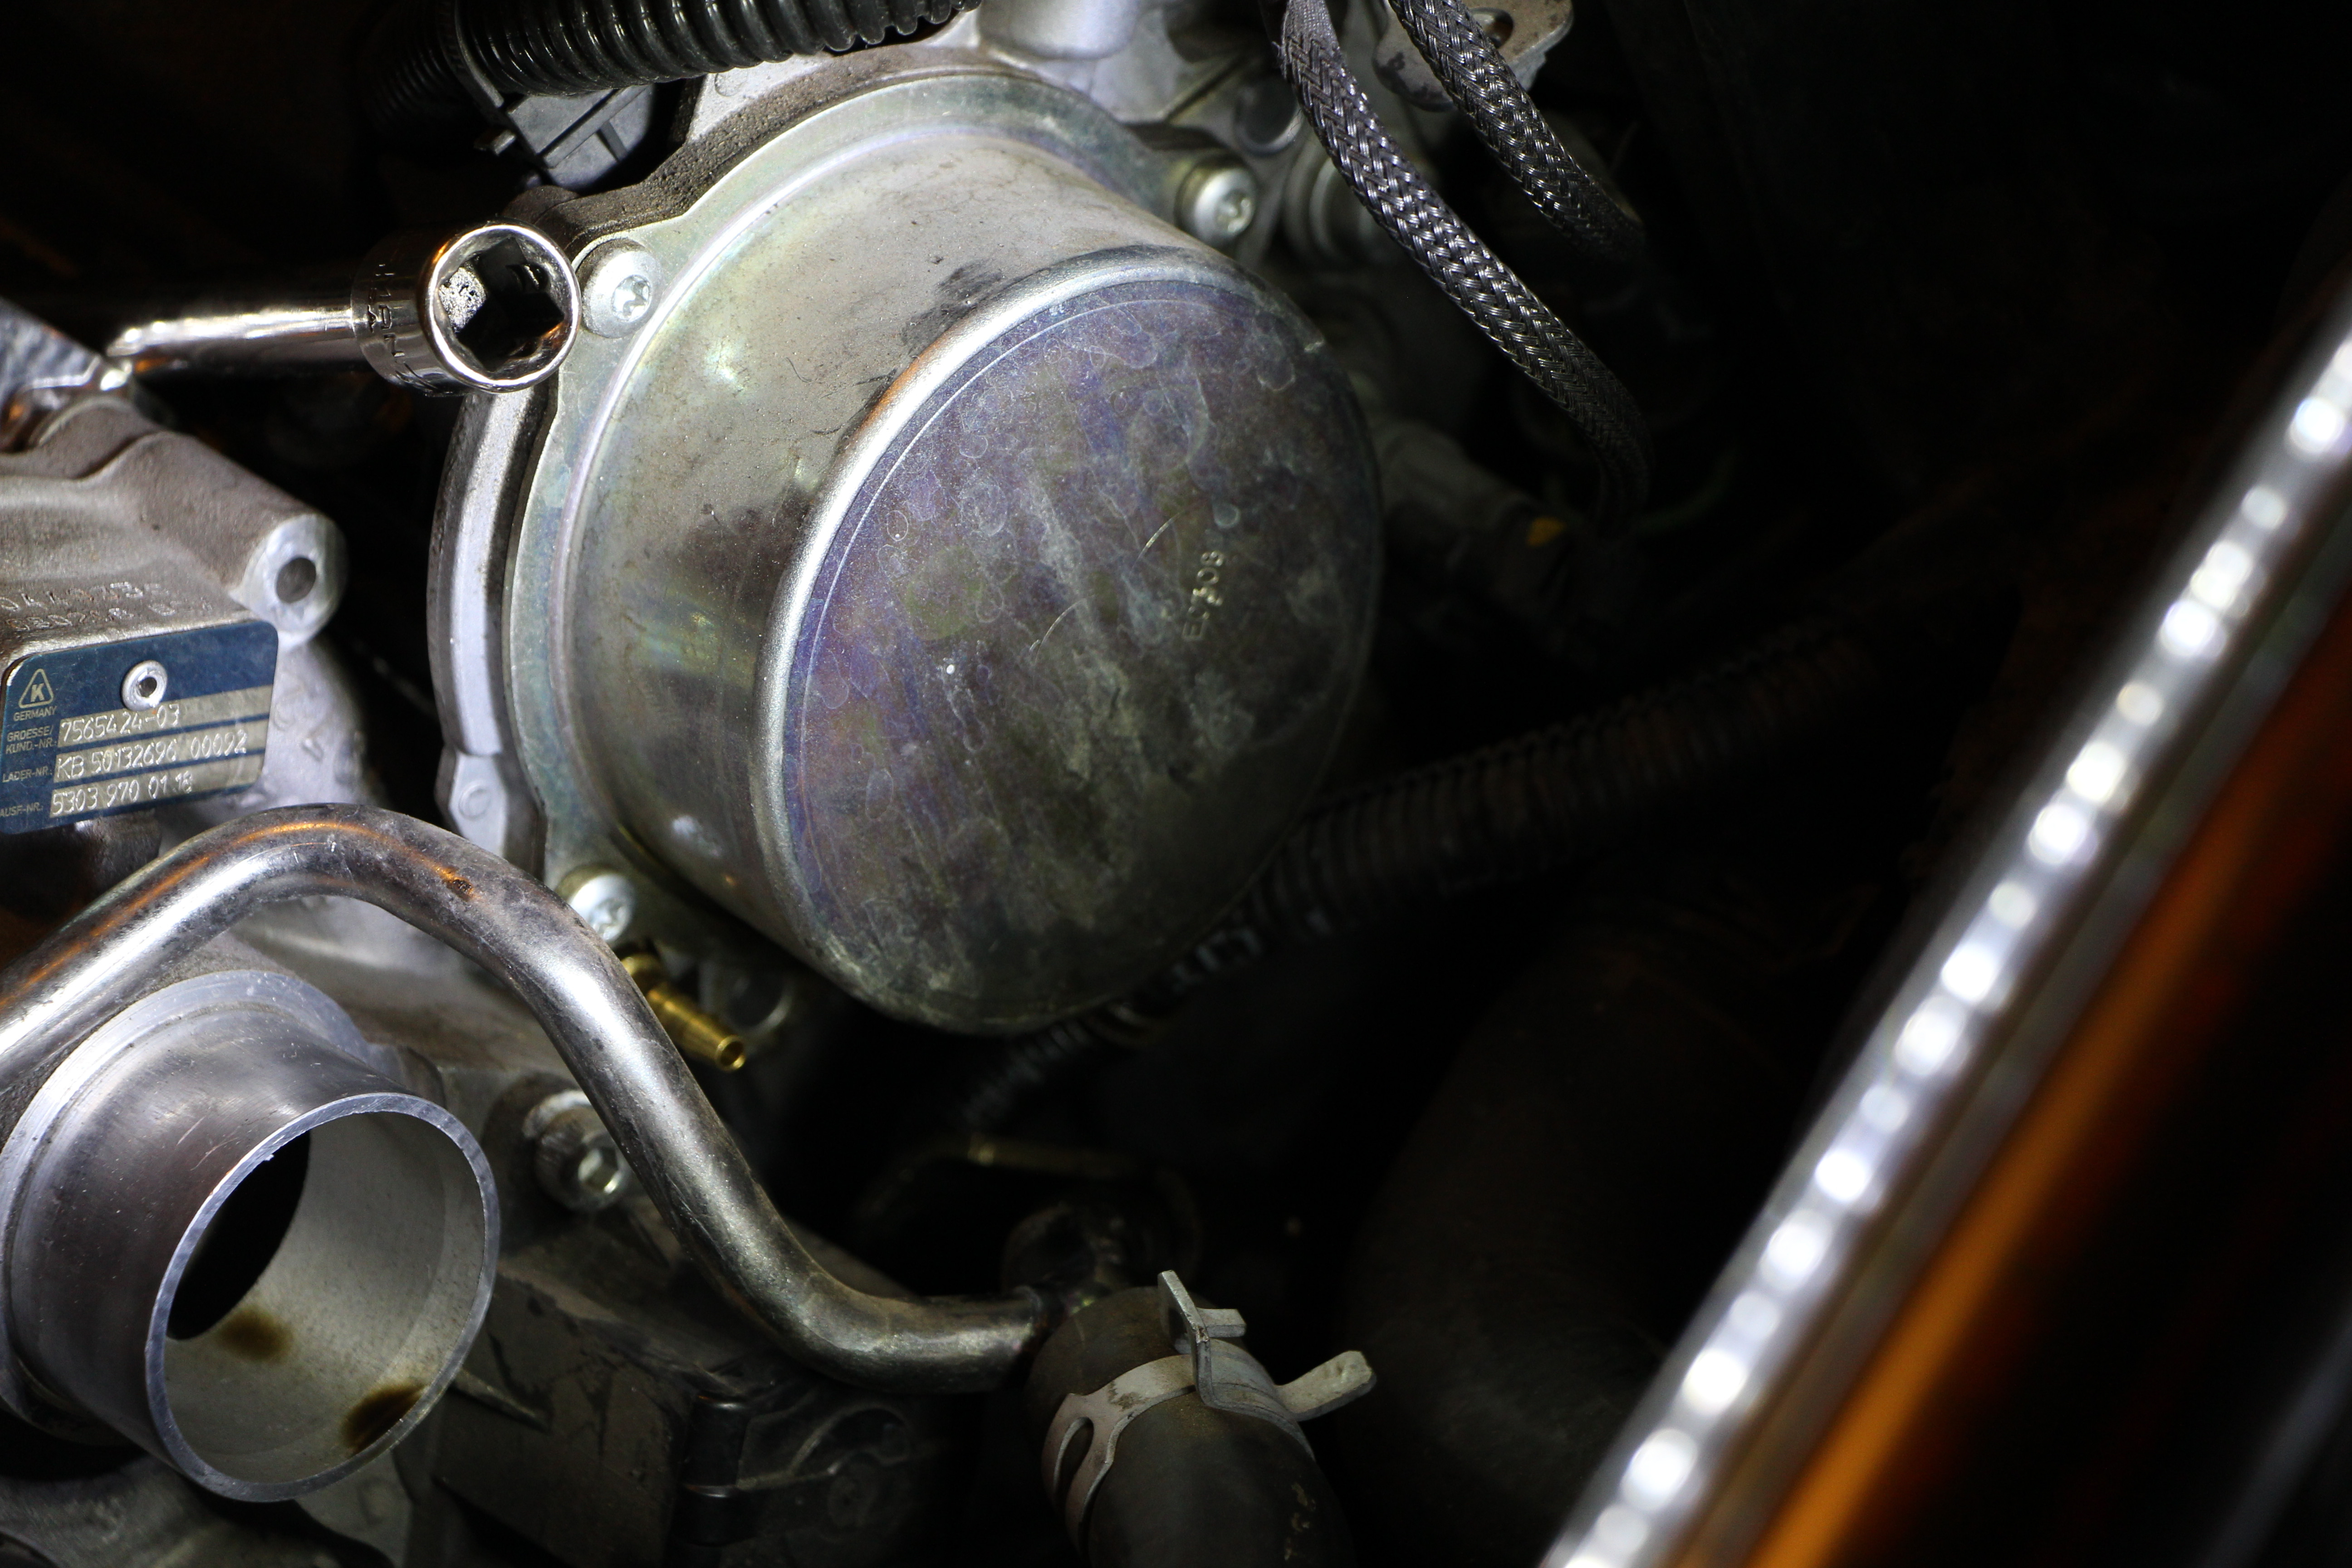
here are the two bottom bolts under the brass nipple. the 8mm on on the top actually holds the pump to the block but the 10mm bottom bolt is a support bracket for the turbo water line.
remove the other braided plastic protected vacuum line from the wastegate. i didn't get a good picture of it but it should be obvious as there are only two lines leading into this area and they are tied together.
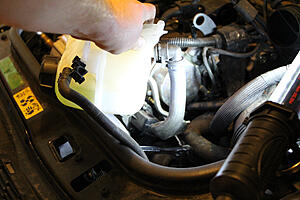
we'll fib a little here as i tried to do this without yanking the coolant tank before realizing it was easier to just get it out of the way. there is one small bolt holding it to the core support and you can rotate it up and flip it over. use a screwdriver to remove this clip and pliers to remove the other hose. coolant could make a mess so be prepared.
i have removed the bottom bolt. i would suggest you get a magnet extension in there to be safe and not have to go bolt hunting if you drop it. i used combinations of 1/4 inch drive sockets, deep sockets and extensions to get to this bolt. This is where i realized the turbo water line bracket is in the way.
the bracket in the picture above is threaded but does not go into the block. to get clearance i loosened the turbo water line at the turbo. be careful as there are two copper washers. one between the bolt and the line and one between the line and the turbo. it would be very easy to drop the one between the line and the turbo because there is not a lot of clearance.
a 10mm 1/4 in drive with an extension and the bracket is free. again i suggest getting your magnetic pickup tool so you dont drop the bolt or the bracket.

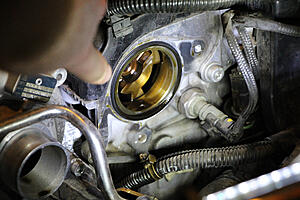
you should be able to wiggle the pump free at this point.
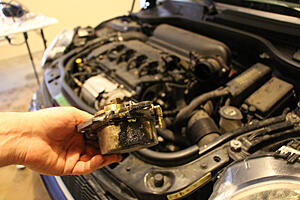
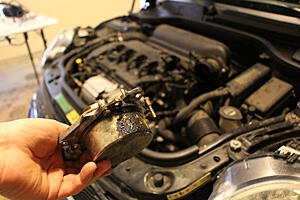
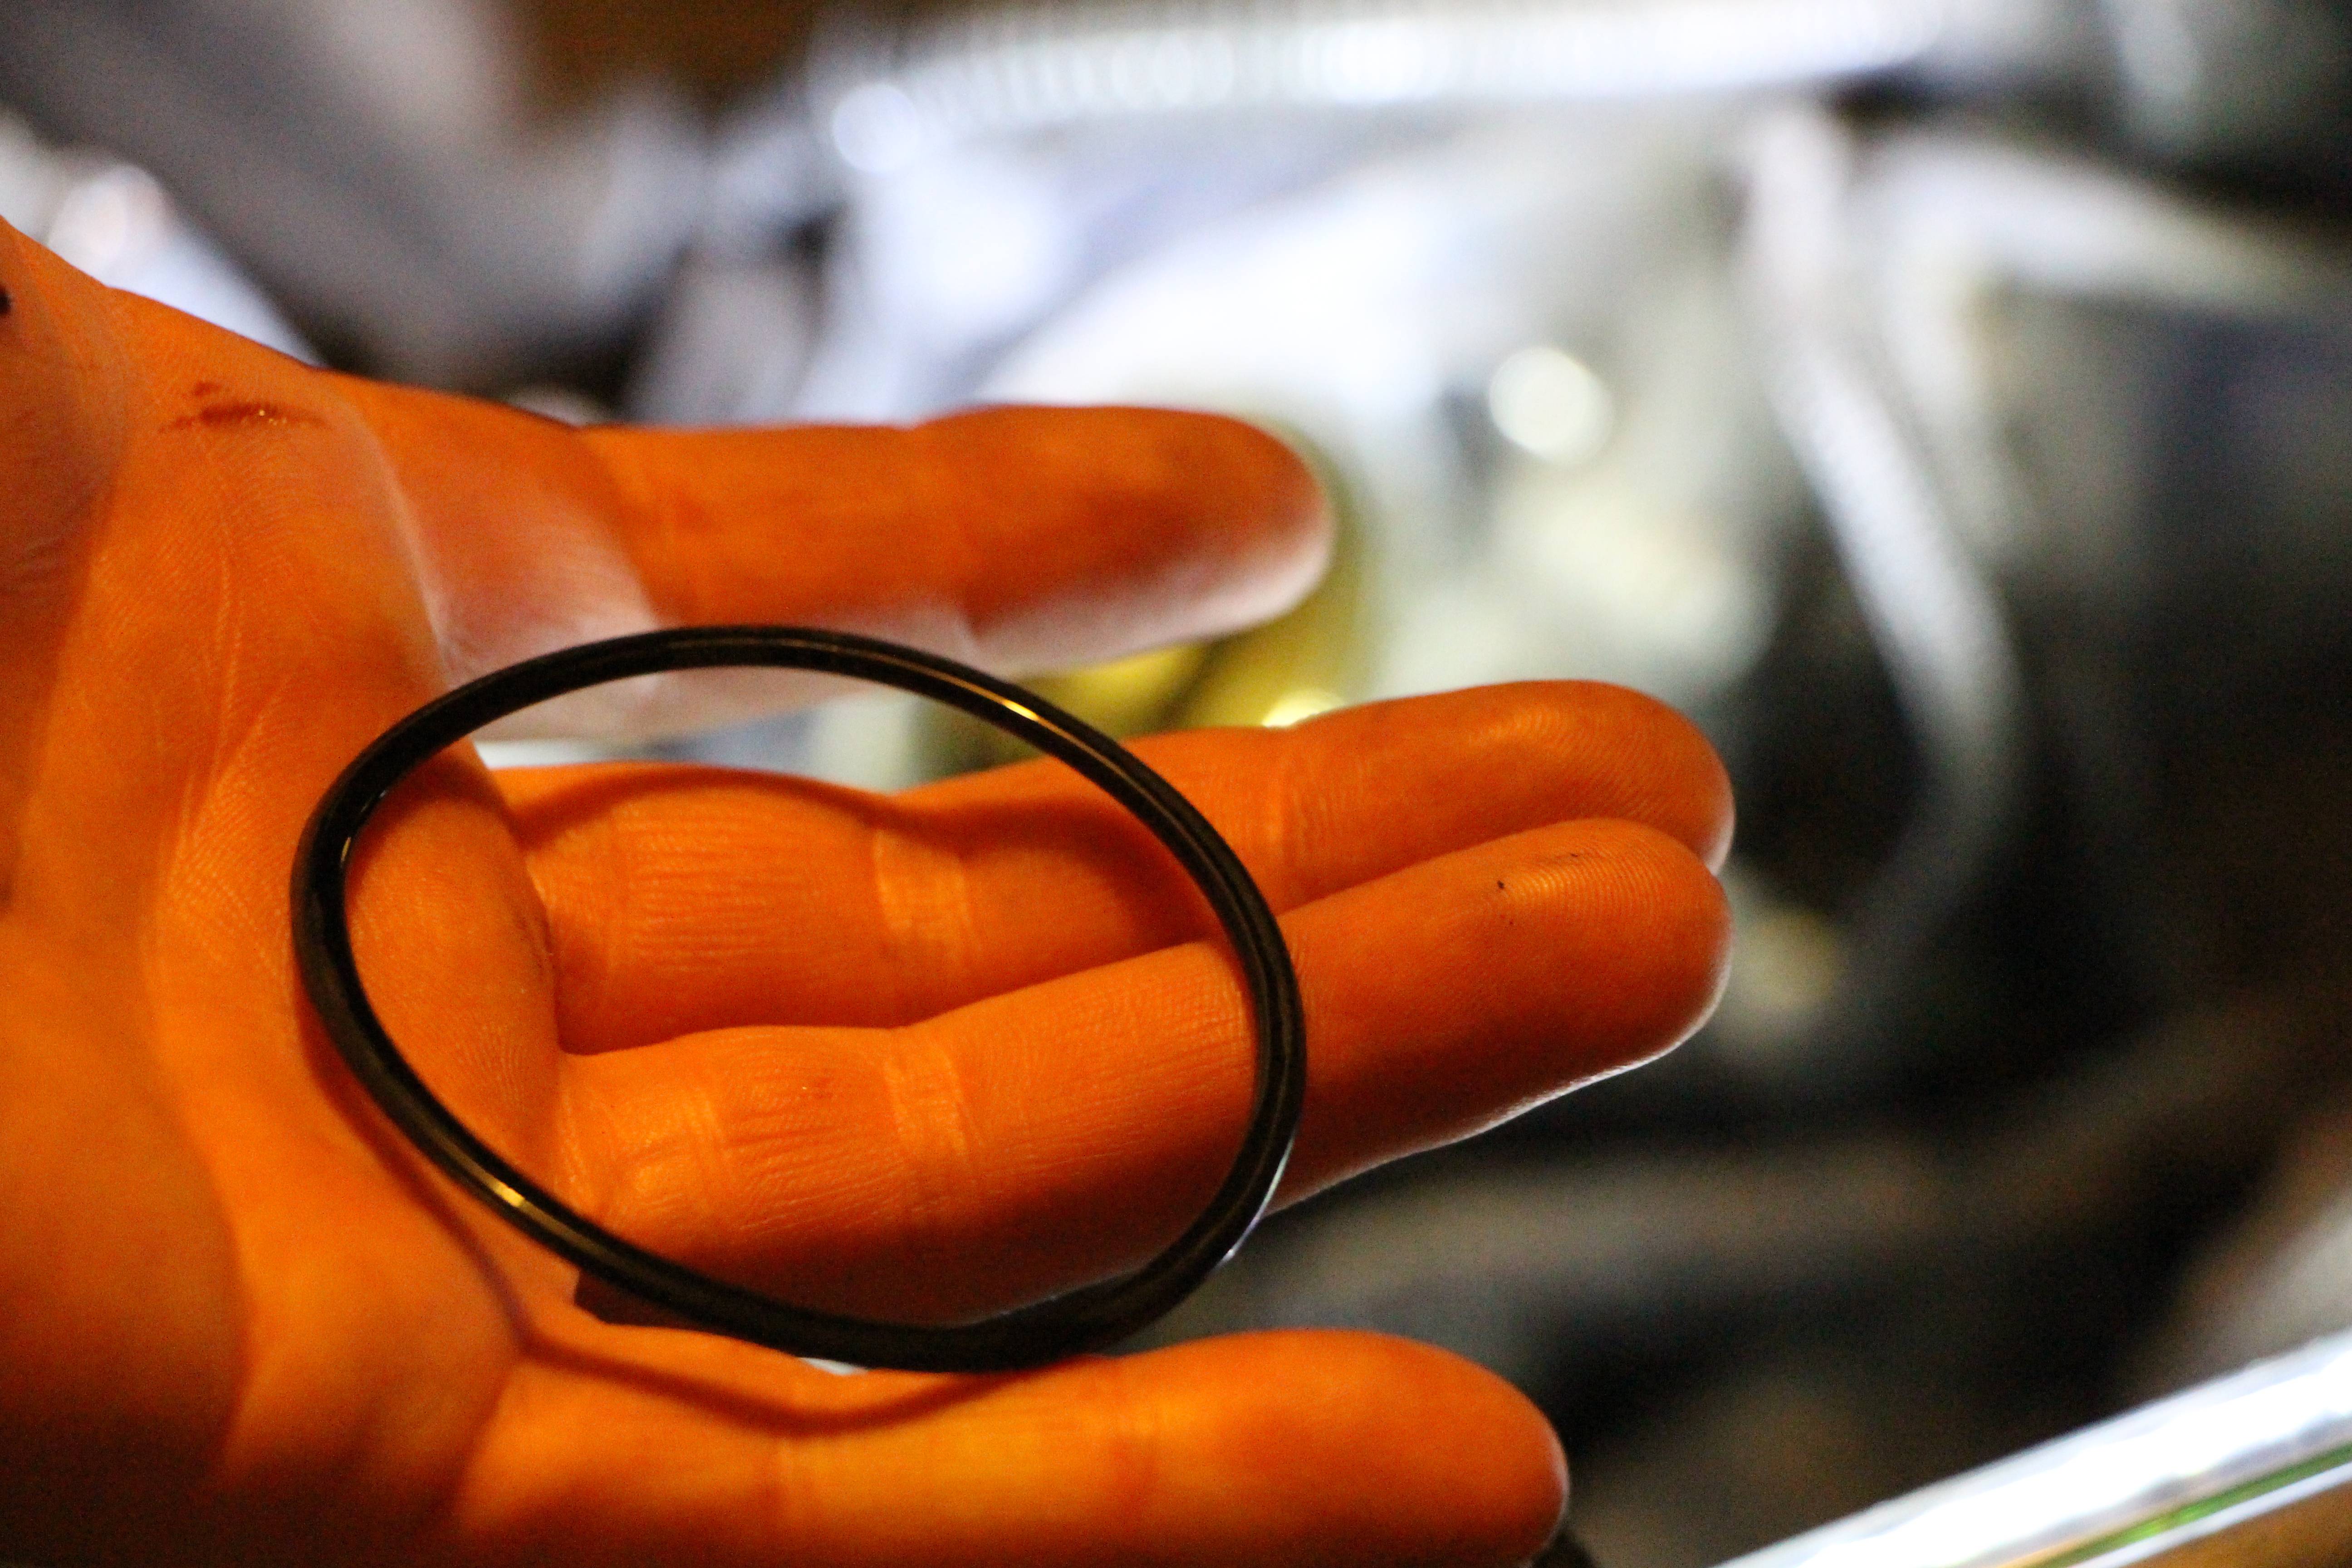
...but wait. don't make a rookie mistake. make sure the gasket is not still stuck to the block. also take note that it doesn't look like the pump was leaking between the block and the pump. this oring was not the problem.

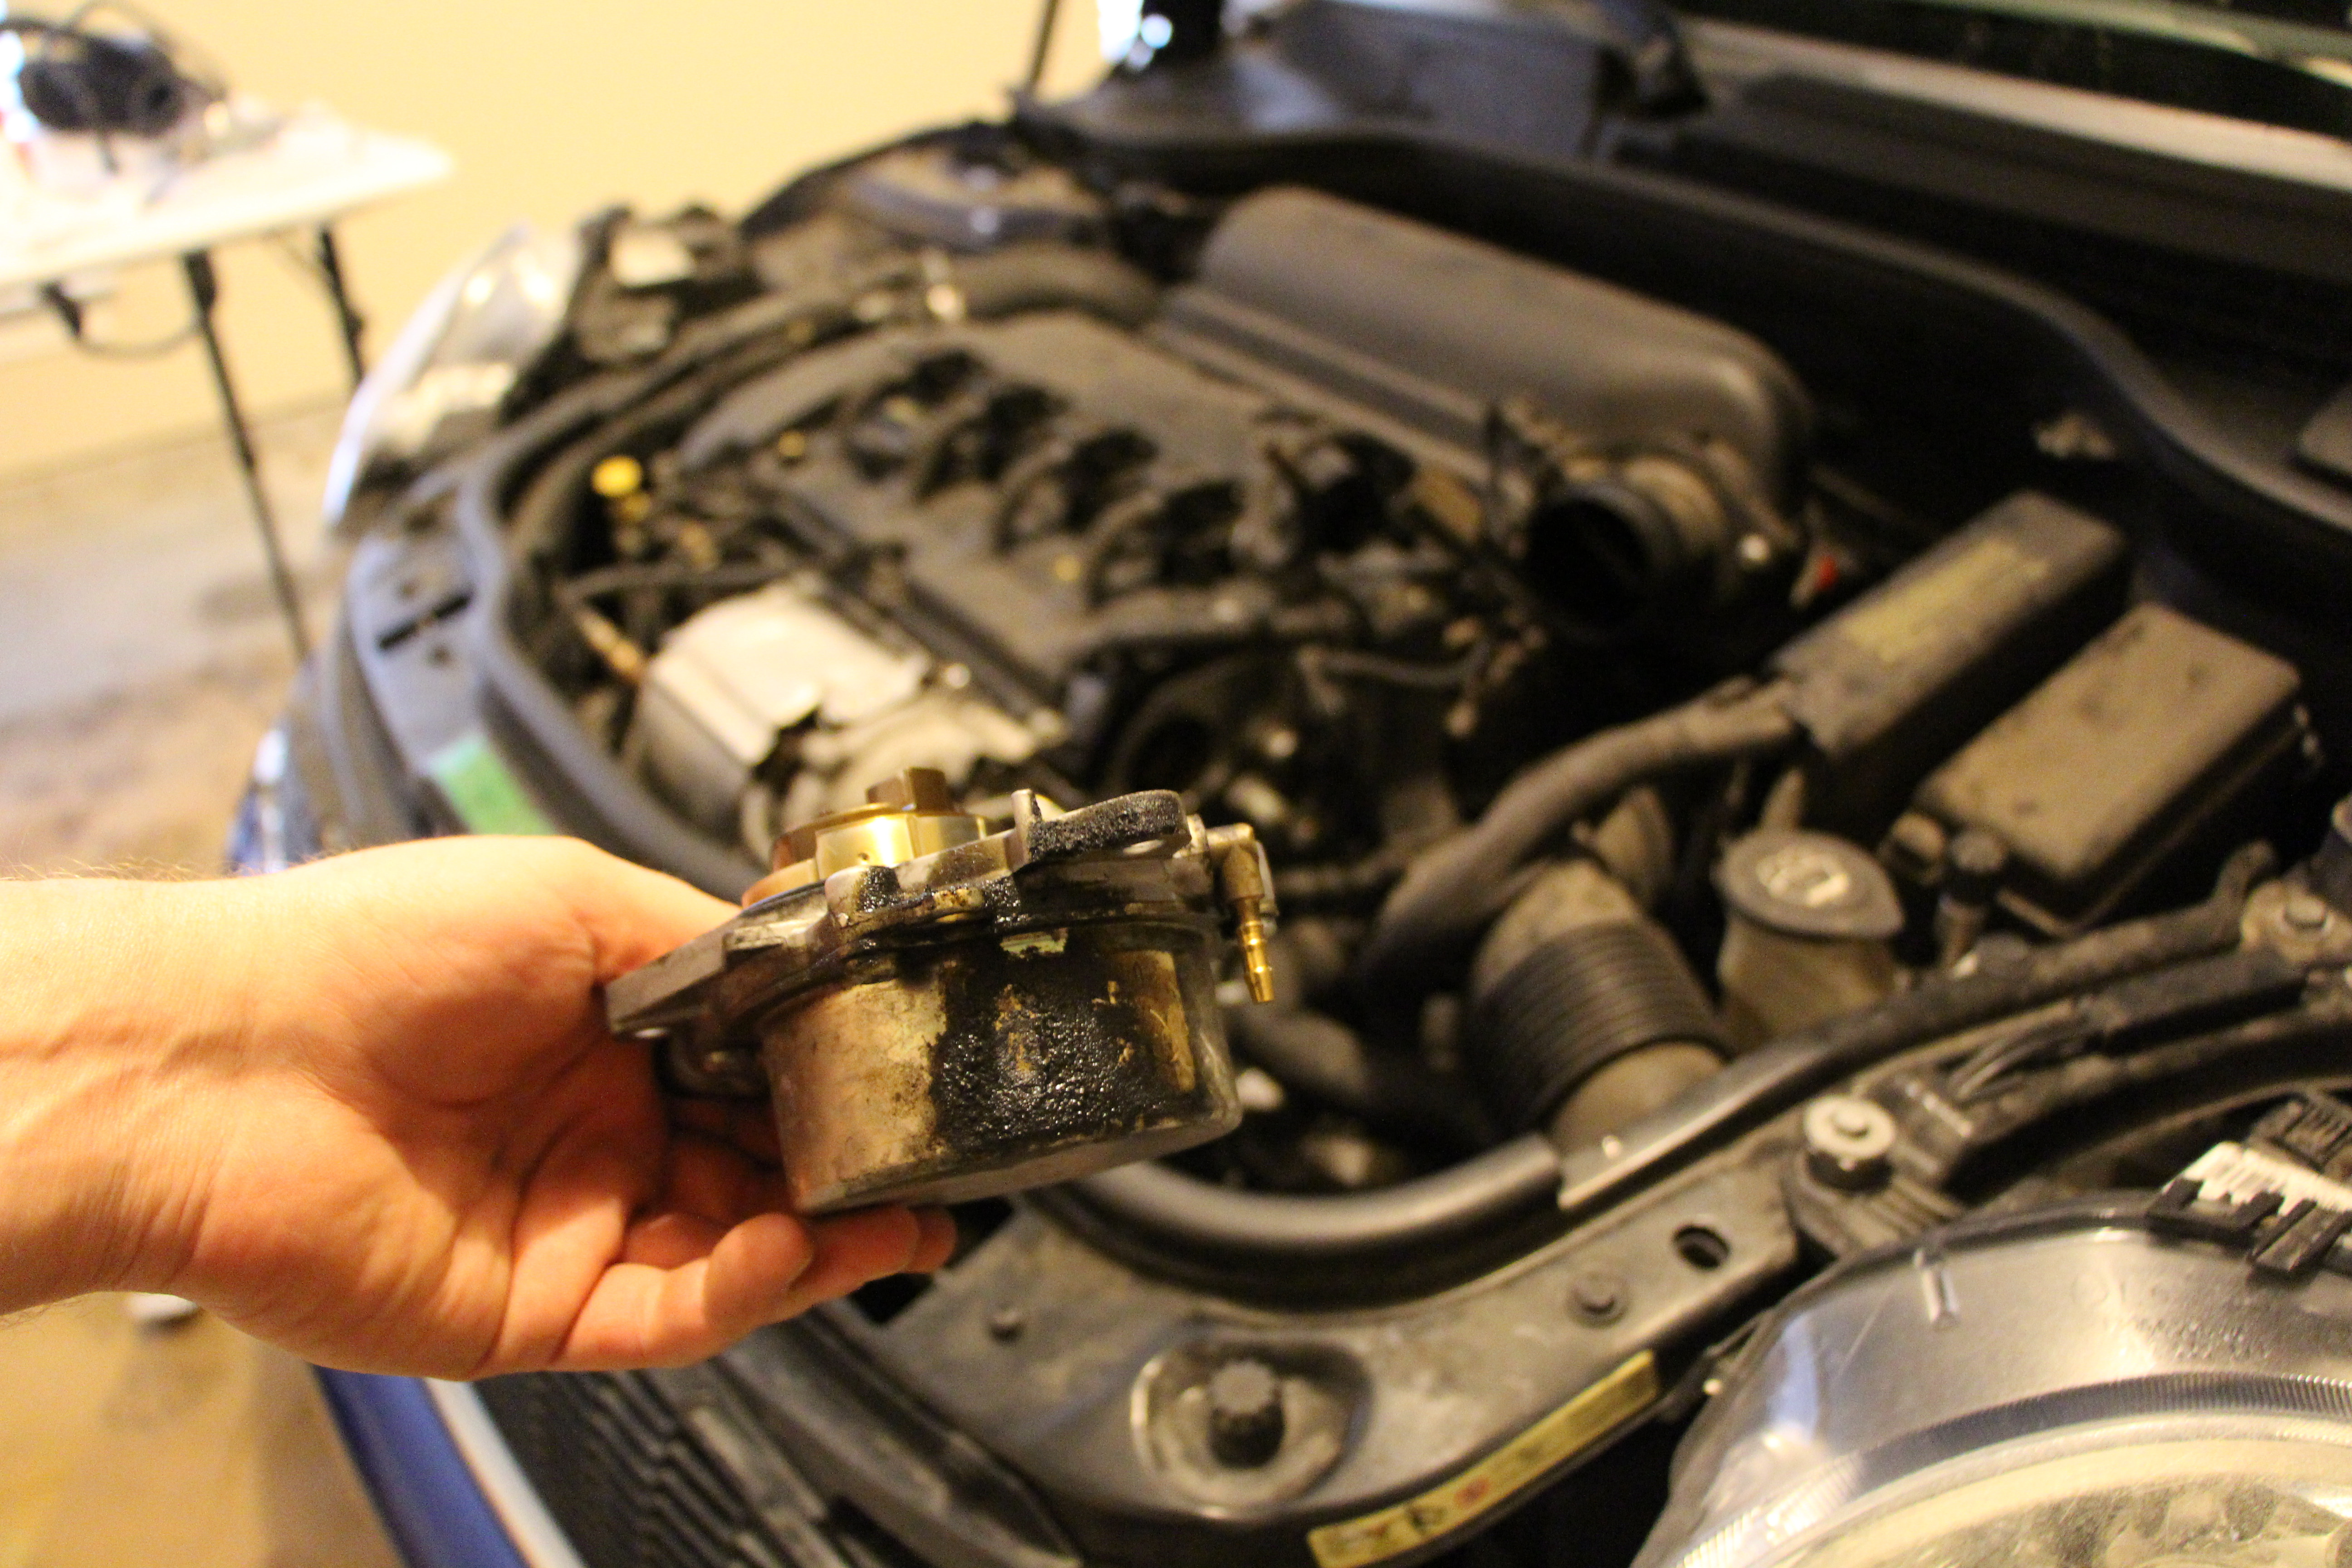
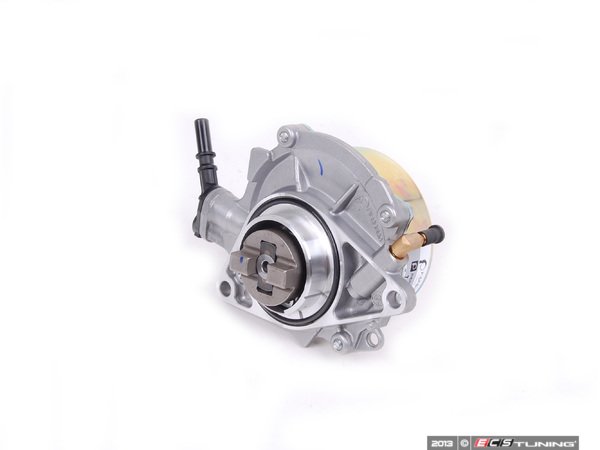
set the old pump down next to the new pump and clock them to match so you dont have to struggle to get the pump to engage with the cam.
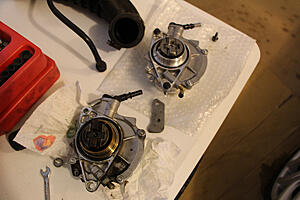
old old and new. you can see the pump was leaking internally so the $5.00 oring would not have done any good in this case. but was it leaking "badly"?
here is the turbo water line support bracket. it only goes on one way so make sure you pay attention then you remove it. the side with the writing faces the block and the top angled edge fits snug against the vacuum pump. the bolt goes through the bracket itself and the bottom hole is threaded. you will want to leave the bottom bolt of the pump a little loose so you can get the water line bolt started.

remember, the support bracket goes is sandwiched between the pump and the bolt. you can see the orientation here.

everyone knows the paper towel trick to keep bolts in sockets, right? once you get this thing started tighten the pump bolt first.

i did not take a picture of this but now is the time to tighten the water line back into the turbo. do this before finally tightening the water line support bracket.
remember to hook the pump and the wastegate back up. here's a reminder of how the vacuum lines are routed.
intake tube back on, PCV tube clipped in, sensor plugged in and remember to press the button on the vacuum tube to slip it over the pump fitting and also the fitting at the firewall. the line coming out of the firewall will push into it if you do not hold it so use two hands.
and you're done. i am not sure if i need to bleed any coolant since i didn't lose any except out of the overflow tank. we'll see how that goes. if i do end up needing to so that i will come back and update the thread.
They came back with a $5400 bill which included a "badly leaking vacuum pump". I'll let you decide on whether or not it was "badly leaking" later in the thread. After reading horror stories about vacuum pumps seizing and shearing off cam gears we decided it would be safer to just replace the whole thing @ 50,000 miles.
I saw a couple threads on this but never saw anyone actually document the process so I pulled out my tripod and my dslr and took a few pictures. This should take you an hour or less. Do it on a cold motor because ideally you will need to remove a turbo water line to get at the bottom bolt on the pump.
pump stage left, OEM pierburg from rmeuropean.com for a good price. I have already removed the vacuum line from the vacuum pump, you can see the empty nozzle right near the engine lifting hook in the middle of the picture. follow it back to the firewall and remove it from the brake booster line as well.

intake tube is our second casualty. first remove the plug. i found it easier to remove the clip on the valve cover (there are two tangs on each side to press before lifting) instead of try to pull the sensor out of the tube.

in the center of this is the pump. it is relatively easy to get to. you can get to the top bolt here with an 8mm socket easily, but the bottom bolt will need a bit of work to get to.
remove this vacuum line with the braided protection first.


here are the two bottom bolts under the brass nipple. the 8mm on on the top actually holds the pump to the block but the 10mm bottom bolt is a support bracket for the turbo water line.

remove the other braided plastic protected vacuum line from the wastegate. i didn't get a good picture of it but it should be obvious as there are only two lines leading into this area and they are tied together.

we'll fib a little here as i tried to do this without yanking the coolant tank before realizing it was easier to just get it out of the way. there is one small bolt holding it to the core support and you can rotate it up and flip it over. use a screwdriver to remove this clip and pliers to remove the other hose. coolant could make a mess so be prepared.

i have removed the bottom bolt. i would suggest you get a magnet extension in there to be safe and not have to go bolt hunting if you drop it. i used combinations of 1/4 inch drive sockets, deep sockets and extensions to get to this bolt. This is where i realized the turbo water line bracket is in the way.

the bracket in the picture above is threaded but does not go into the block. to get clearance i loosened the turbo water line at the turbo. be careful as there are two copper washers. one between the bolt and the line and one between the line and the turbo. it would be very easy to drop the one between the line and the turbo because there is not a lot of clearance.

a 10mm 1/4 in drive with an extension and the bracket is free. again i suggest getting your magnetic pickup tool so you dont drop the bolt or the bracket.
you should be able to wiggle the pump free at this point.
...but wait. don't make a rookie mistake. make sure the gasket is not still stuck to the block. also take note that it doesn't look like the pump was leaking between the block and the pump. this oring was not the problem.

set the old pump down next to the new pump and clock them to match so you dont have to struggle to get the pump to engage with the cam.

old old and new. you can see the pump was leaking internally so the $5.00 oring would not have done any good in this case. but was it leaking "badly"?


here is the turbo water line support bracket. it only goes on one way so make sure you pay attention then you remove it. the side with the writing faces the block and the top angled edge fits snug against the vacuum pump. the bolt goes through the bracket itself and the bottom hole is threaded. you will want to leave the bottom bolt of the pump a little loose so you can get the water line bolt started.
remember, the support bracket goes is sandwiched between the pump and the bolt. you can see the orientation here.
everyone knows the paper towel trick to keep bolts in sockets, right? once you get this thing started tighten the pump bolt first.

i did not take a picture of this but now is the time to tighten the water line back into the turbo. do this before finally tightening the water line support bracket.
remember to hook the pump and the wastegate back up. here's a reminder of how the vacuum lines are routed.
intake tube back on, PCV tube clipped in, sensor plugged in and remember to press the button on the vacuum tube to slip it over the pump fitting and also the fitting at the firewall. the line coming out of the firewall will push into it if you do not hold it so use two hands.
and you're done. i am not sure if i need to bleed any coolant since i didn't lose any except out of the overflow tank. we'll see how that goes. if i do end up needing to so that i will come back and update the thread.
Last edited by turbosix; 03-15-2015 at 07:40 AM.
#2
03-14-2015, 10:00 PM

6th Gear
Great tutorial for replacing the vacuum pump, thank you! 
Wow, $5400 dollars for a vacuum pump replacement!
Mini of Dallas by diagnosing your leaking vacuum pump, they probably saved your engine from becoming a complete disaster, it's nice to see it only cost you for the part. You should reach out to that dealer and ask them how they came up with $5400?
Now that you have a clean spot you might as well detail your engine bay.

#4
03-14-2015, 11:23 PM
I think the part is under $200 and can replaced in 90 minutes, with out a lift
mQubed Motorsport, Manic Tuning Dealer
mQubed Motorsport, Manic Tuning Dealer
__________________
2013 GP2 #295, 270whp/310wtq, KO4 47mm Turbo, 18" NM Wheels, Alta intake, Manic Stage III+, HFS-3 Meth, 30% E85 Blend, Forged IC, Alta Hot Pipe, P&P/Ceramic Exhaust Manifold, m3 Extreme Ceramic DP, Vibrant mid res, 4" Double walled Tips, WMW/KW V3 CO, Alta Rear CA, CREE Fogs, Black out F/R Rings and Gas Cap, M7 CF Front Splitter, and No Stickers. MORE TO COME!! Previous 04Triple Black 17% Alta, MM Air/H2O, CAI, OBX Header, FBT Head, Shrick Cam, 234whp
2013 GP2 #295, 270whp/310wtq, KO4 47mm Turbo, 18" NM Wheels, Alta intake, Manic Stage III+, HFS-3 Meth, 30% E85 Blend, Forged IC, Alta Hot Pipe, P&P/Ceramic Exhaust Manifold, m3 Extreme Ceramic DP, Vibrant mid res, 4" Double walled Tips, WMW/KW V3 CO, Alta Rear CA, CREE Fogs, Black out F/R Rings and Gas Cap, M7 CF Front Splitter, and No Stickers. MORE TO COME!! Previous 04Triple Black 17% Alta, MM Air/H2O, CAI, OBX Header, FBT Head, Shrick Cam, 234whp
#5
03-15-2015, 07:38 AM
The vacuum pump was a little over $800 by itself. The other things they quoted all added up to $5400 which included things I already had bought (water pump, rear brake pads, oil and filter) and things like an entirely new oil filter housing for $1100 when $40 worth of gaskets are probably going to fix the problem.
I'll try to take pictures of the oil filter housing and crank seal jobs if I don't find any other threads showing the process.
I'll try to take pictures of the oil filter housing and crank seal jobs if I don't find any other threads showing the process.
#6
03-15-2015, 01:04 PM
6th Gear
The vacuum pump was a little over $800 by itself. The other things they quoted all added up to $5400 which included things I already had bought (water pump, rear brake pads, oil and filter) and things like an entirely new oil filter housing for $1100 when $40 worth of gaskets are probably going to fix the problem.
I'll try to take pictures of the oil filter housing and crank seal jobs if I don't find any other threads showing the process.
I'll try to take pictures of the oil filter housing and crank seal jobs if I don't find any other threads showing the process.

#7
03-15-2015, 02:19 PM

Trending Topics
#8
03-15-2015, 04:04 PM
I am not sure why the ECS vacuum pump costs more than rmeuropean. I have purchased everything else for this car from ecs so I am not knocking them, I just happened to see rm in another thread here on NAM related to vacuum pump replacement. It seems to depend on the part as to who is cheaper.
#9
03-15-2015, 09:00 PM

#11
03-15-2015, 09:30 PM
6th Gear

#12
03-16-2015, 07:39 AM

I am not sure why the ECS vacuum pump costs more than rmeuropean. I have purchased everything else for this car from ecs so I am not knocking them, I just happened to see rm in another thread here on NAM related to vacuum pump replacement. It seems to depend on the part as to who is cheaper.
#13
03-16-2015, 08:35 AM

#15
03-18-2015, 08:23 PM

2nd Gear
Join Date: Mar 2011
Location: Maryland, USA
Posts: 130
Likes: 0
Received 0 Likes
on
0 Posts
#16
03-18-2015, 09:26 PM
i am not sure there is other than looking for a leak there.
the leak can either be between the pump and the block which is a <$10 oring or an internally failed vacuum pump which they do not sell parts to replace.
considering if this pump locks up it shears the cam gear and you end up with valves hitting pistons the $200 it cost to replace is worth the peace of mind.
The following users liked this post:
Maverick2883 (10-08-2020)
#17
03-20-2015, 01:44 AM

1st Gear
Join Date: Feb 2014
Location: So Cal
Posts: 31
Likes: 0
Received 0 Likes
on
0 Posts
#18
03-20-2015, 07:39 AM
My pump is leaking between the pump and the block and from the pump. I removed it and took it apart. The Oring between the pump and block was hard and flat. I had bought one from the Mini dealer for $4. The internal oring is also leaking, but the inside of the pump looks fine and was full of oil. It is disappointing that just because the internal oring is leaking the pump has to be replaced.
#19
04-17-2015, 09:21 PM

Good post!
I just brought my 07 MCS in today for new tie rods and an alignment after I hit a pothole, and they did a diagnostic and told me the vacuum pump was making a ticking sound and that the intake manifold was shot. I'm not sure if I have enough tools and expertise to replace a whole intake manifold, but the vacuum pump looks accessible enough for me to work on myself. Dealer quoted the pump at $545 for the part itself, though I can probably find it for cheaper online. Real question is how much am I going to have to spend on tools to add to my box...
#20
04-18-2015, 09:22 AM
I just brought my 07 MCS in today for new tie rods and an alignment after I hit a pothole, and they did a diagnostic and told me the vacuum pump was making a ticking sound and that the intake manifold was shot. I'm not sure if I have enough tools and expertise to replace a whole intake manifold, but the vacuum pump looks accessible enough for me to work on myself. Dealer quoted the pump at $545 for the part itself, though I can probably find it for cheaper online. Real question is how much am I going to have to spend on tools to add to my box...
#21
04-18-2015, 10:34 AM
I was able to remove and install the vacuum pump with out removing any coolant hoses. You do have to take the coolant tank loose so you can move out of the way for more room to get to the pump bolts. I used a 1/4" drive 8mm and 10mm socket, extension and ratchet. The Irving at the head was leaking and the pump housing boring was leaking. I took my pump apart and the internals showed no excessive wear and it had not been making any noises. I a small bead of RTV the oring and reinstalled. About 500 miles later still no leaks and pump sounds normal.
#22
04-19-2015, 02:01 PM
@turbosix
"Ports on intake manifold for PCV are becoming brittle and breaking. Cylinder 1 and 2 are broken and hose on port is wet with oil. Performed vehicle test and found no faults relating to DME. Vehicle seems to run fine with an intermittent stumble in idle. Inspected and tested for vacuum leaks. Found vacuum leak at updated manifold ports. Listened for noises from customer concern (Ticking sounds, which is where the vacuum pump was diagnosed). Found no chain noise. No poor engine noise except for noise from the vacuum pump. Recommend replacement of intake manifold. Plugged leaks for now, but this is only a band-aid on the manifold, issue will still persist due to mileage and history of vehicle. intake port cleaning is recommended when replacing the manifold."
I'm essentially guessing that they want the whole manifold to be replaced because the ports themselves are something that either can't be replaced or isn't worth it unless you just replace the whole manifold itself. The manifold itself definitely need cleaning done as carbon buildup is all but certain (The previous owners were just casual owners and did no personal maintenance, only let the dealer do it under the 100,000 mile warranty), but is it really worth it if the whole manifold has to come out anyway? I don't think it's a valve cover, but I could be wrong there.
#23
04-19-2015, 02:35 PM
Here's the description on the invoice MINI gave to me...
"Ports on intake manifold for PCV are becoming brittle and breaking. Cylinder 1 and 2 are broken and hose on port is wet with oil. Performed vehicle test and found no faults relating to DME. Vehicle seems to run fine with an intermittent stumble in idle. Inspected and tested for vacuum leaks. Found vacuum leak at updated manifold ports. Listened for noises from customer concern (Ticking sounds, which is where the vacuum pump was diagnosed). Found no chain noise. No poor engine noise except for noise from the vacuum pump. Recommend replacement of intake manifold. Plugged leaks for now, but this is only a band-aid on the manifold, issue will still persist due to mileage and history of vehicle. intake port cleaning is recommended when replacing the manifold."
I'm essentially guessing that they want the whole manifold to be replaced because the ports themselves are something that either can't be replaced or isn't worth it unless you just replace the whole manifold itself. The manifold itself definitely need cleaning done as carbon buildup is all but certain (The previous owners were just casual owners and did no personal maintenance, only let the dealer do it under the 100,000 mile warranty), but is it really worth it if the whole manifold has to come out anyway? I don't think it's a valve cover, but I could be wrong there.
#24
04-19-2015, 03:04 PM
Yeah, that's what I'm thinking too, if you're going to go all out on the manifold, might as well clean out the areas that are exposed while you can.
#25
04-20-2015, 08:55 AM

Platinum Sponsor
Yep , one is from MINI and the other is from Pierburg.
http://www.ecstuning.com/Search/SiteSearch/11667556919/
__________________

MINI Guru/ MINI Owner Since 2004 | NEW Lifetime Part Replacement | Local Pickup
Milltek | Genuine MINI | Forge Motorsport | NM Engineering | ECS Performance | M7 Speed
Customer Service Hours: 8am-8pm EST|Sales Team Hours: 8am-11pm | SAT 10am-7pm 800.924.5172
MINI Guru/ MINI Owner Since 2004 | NEW Lifetime Part Replacement | Local Pickup
Milltek | Genuine MINI | Forge Motorsport | NM Engineering | ECS Performance | M7 Speed
Customer Service Hours: 8am-8pm EST|Sales Team Hours: 8am-11pm | SAT 10am-7pm 800.924.5172