
R56 R56 Pepper White Street/Autocross Build Thread
#1
 04-23-2014, 08:52 PM


Join Date: Jun 2013
Location: San Diego
Posts: 104
Likes: 0
Received 0 Likes
on
0 Posts
R56 Pepper White Street/Autocross Build Thread
Hey all,
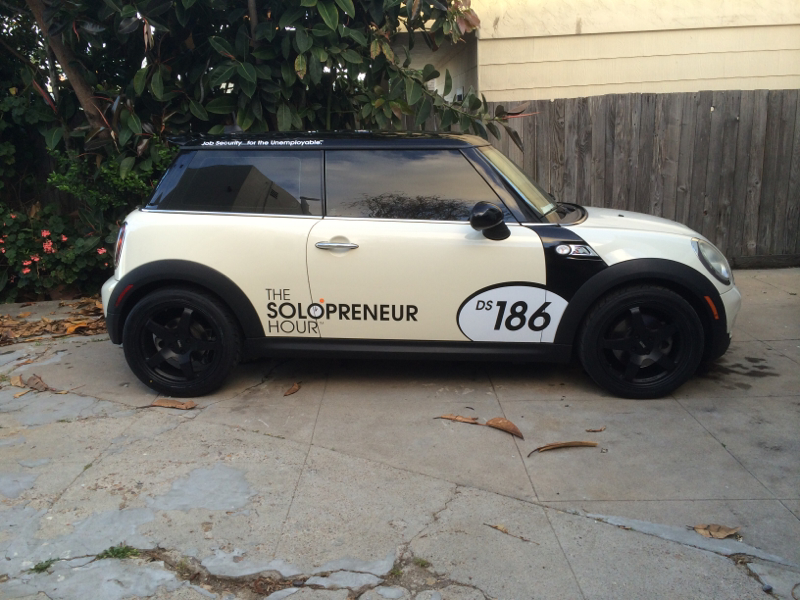
Brand new to minis. Just bought this 2007 MCS to build up as an SCCA STX autocross car. But I thought I'd update you as this build progressed. Here's the car in virgin form. Don't get used to it looking like this.

Top 3/4. The red interior is great.


Gratuitous "sunday drive" shot. We have great twisties in San Diego.

And, the first of the new parts have arrived:
Neuspeed RSe05's, 17 x 7.5.

Waiting on this week:
Hotchkis H-Sport competition rear 25.5 hollow rear sway bar
Dunlop Direzza DZII 215-45-17. I went with the 45 vs. the 40 for a slightly taller 2nd gear, which will give a slightly higher top end in autocross. (and be a bit better with gas mileage too.)
Stay tuned.
Brand new to minis. Just bought this 2007 MCS to build up as an SCCA STX autocross car. But I thought I'd update you as this build progressed. Here's the car in virgin form. Don't get used to it looking like this.
Top 3/4. The red interior is great.
Gratuitous "sunday drive" shot. We have great twisties in San Diego.
And, the first of the new parts have arrived:
Neuspeed RSe05's, 17 x 7.5.
Waiting on this week:
Hotchkis H-Sport competition rear 25.5 hollow rear sway bar
Dunlop Direzza DZII 215-45-17. I went with the 45 vs. the 40 for a slightly taller 2nd gear, which will give a slightly higher top end in autocross. (and be a bit better with gas mileage too.)
Stay tuned.
#2
04-23-2014, 09:32 PM

#6
04-25-2014, 03:57 PM
Join Date: Jun 2013
Location: San Diego
Posts: 104
Likes: 0
Received 0 Likes
on
0 Posts
Wheels & Tires Installed.
Wow. What grip those Dunlop Direzza DII's have. It's ridiculous.
Here they are on the car:

I think they look phenomenal...but now I need some big brakes! Those rears look funny!
Wheels: Neuspeed RSe05. Ordered them on Tuesday, had them Wednesday!
Tires: Dunlop Direzza DII 215/45-17. Only available at Tirerack.com. I opted for 45 versus 40 for slightly taller gearing while autocrossing.
Here they are on the car:
I think they look phenomenal...but now I need some big brakes! Those rears look funny!
Wheels: Neuspeed RSe05. Ordered them on Tuesday, had them Wednesday!
Tires: Dunlop Direzza DII 215/45-17. Only available at Tirerack.com. I opted for 45 versus 40 for slightly taller gearing while autocrossing.
Last edited by emptyo; 06-02-2014 at 08:53 PM.
#7
04-25-2014, 04:08 PM
Join Date: Jun 2013
Location: San Diego
Posts: 104
Likes: 0
Received 0 Likes
on
0 Posts
Vinyl Graphics How-To
Thought I'd document the process of installing my podcast's graphics in case you ever want to install any.
First, lay out and measure your placement, and secure with blue tape. Use a tape measure to be precise about it. Once you get it where you want it, use a long strip of tape to "split it in half", like this:

Now, pull one side off, leaving the tape in the middle of the vinyl. Peel off the backing, and cut it off with a razor blade. I taped mine in the right upper corder to temporarily hold it while I cut the backing off:

1/2 the backing cut off, with the blue tape securing it's place on the car:

Now, starting from the middle (near the blue tape) gently work your way from the inside to the outside, adhering the graphic as you go along. You want to "roll" inch by inch, so that you don't inadvertently adhere the graphic and cause a big crease. I hold the graphic taut with my left hand while my right hand works it's way down. Then, half is on. Since that half is holding the graphic in place, you can remove the tape, peel back the other backing, and repeat the process from inside out. You'll be left with this:

If you have letters that span the door gap, gently push the graphics so you can see the crease of the door, then cut with a razor blade. Open the door and stick the vinyl.

Now that it's on, your car DEFINITELY has at least 5 more HP. Go enjoy your notoriety as a famous race car driver (Or Podcaster):


First, lay out and measure your placement, and secure with blue tape. Use a tape measure to be precise about it. Once you get it where you want it, use a long strip of tape to "split it in half", like this:
Now, pull one side off, leaving the tape in the middle of the vinyl. Peel off the backing, and cut it off with a razor blade. I taped mine in the right upper corder to temporarily hold it while I cut the backing off:
1/2 the backing cut off, with the blue tape securing it's place on the car:
Now, starting from the middle (near the blue tape) gently work your way from the inside to the outside, adhering the graphic as you go along. You want to "roll" inch by inch, so that you don't inadvertently adhere the graphic and cause a big crease. I hold the graphic taut with my left hand while my right hand works it's way down. Then, half is on. Since that half is holding the graphic in place, you can remove the tape, peel back the other backing, and repeat the process from inside out. You'll be left with this:
If you have letters that span the door gap, gently push the graphics so you can see the crease of the door, then cut with a razor blade. Open the door and stick the vinyl.
Now that it's on, your car DEFINITELY has at least 5 more HP. Go enjoy your notoriety as a famous race car driver (Or Podcaster):
Trending Topics

#10
05-12-2014, 11:23 AM
Join Date: Jun 2013
Location: San Diego
Posts: 104
Likes: 0
Received 0 Likes
on
0 Posts
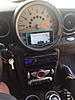
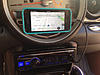
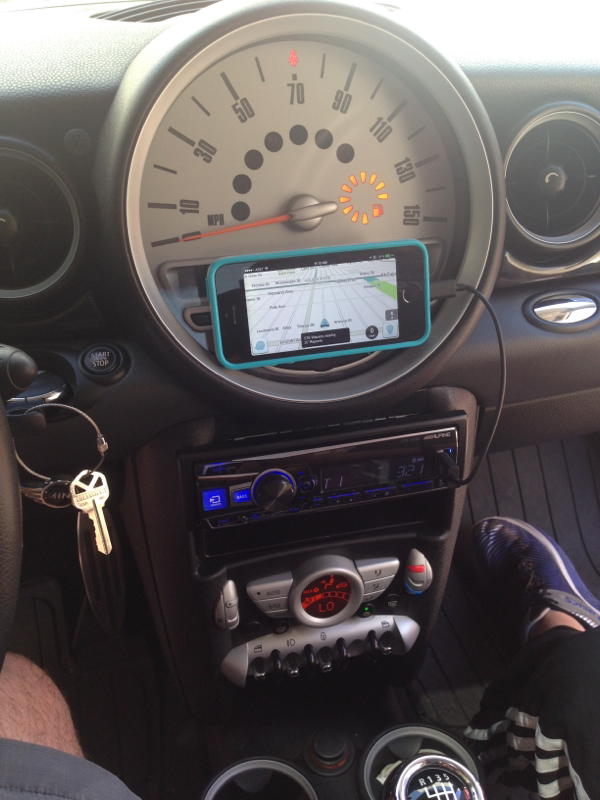
Just a quick solution today. After my new head unit install, the bottom half of my speedo was blanked out. A new iPhone case from Marshall's and some industrial strength Velcro makes a perfect iPhone mount. Pair that with a short USB to lightning connector, and it becomes "built in navigation". 
I picked up Harry's Lap Timer Pro the other day. Waiting on the Bluetooth ODBii adapter to come in to capture race data.
I picked up Harry's Lap Timer Pro the other day. Waiting on the Bluetooth ODBii adapter to come in to capture race data.


#13
05-12-2014, 02:08 PM
decided to stay on stock pads - supposedly that's all MINIs need, though I don't think the same holds for MCS's. EBC reds should be pretty good though, if it were me I'd look into carbotechs

#16
05-12-2014, 08:13 PM
Join Date: Jun 2013
Location: San Diego
Posts: 104
Likes: 0
Received 0 Likes
on
0 Posts
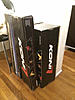
The Brown Santa arrived with my Koni yellows. Super inexpensive (and free shipping) from Tire Rack. Swift Spec R springs will arrive tomorrow or Wednesday. They'll be a perfect first year/phase 1 suspension while I get to know the car. I knew this combo would get me 80% of the way there, and allow me to budget for the ever important LSD. A set of camber plates and a brake pad upgrade, and I should ruffle the feathers of some local STX guys.

#17
05-16-2014, 04:45 PM
Join Date: Jun 2013
Location: San Diego
Posts: 104
Likes: 0
Received 0 Likes
on
0 Posts
The Wheel Gap Had To Go...
If I was to be competitive in STX (Where the Mini is an underdog), the car needed to get lower, more adjustable, and stiffer in the rear. As a "phase 1" suspension upgrade, I called on the old autocross standby, Koni yellows. After much research, I decided a set of Swift Spec R Race springs would mate up perfectly, and give me the lower CG and responsiveness I needed. One great thing about this journey is how I learn something new about this car every single time I work on it. I've now messed with suspension, electronics, exhaust, and wheels/tires, and I've had it for exactly one month.
Here was the previous wheel gap. Three fingers (for her pleasure):

Out with the old, in with the new. (anyone need an R56 suspension?):

Midway through. The yellow looks nice poking out of there:

I can't quite get a finger in there now without angling it up. Here's the before and after. It's actually sitting at a weird angle in my driveway, so it's actually a bit lower than it looks in this pic:

And the final shot. I have to say...the preliminary drive was SURPRISING to say the least. Despite being about 4x stiffer, it's MUCH smoother than the factory ride. I can't say enough about these Koni dampers. They are SO much better than the asian aftermarket cheapo stuff. It's these, THEN you step up to JRZ or something fancier when you reach that level.

My next steps are to fix my crummy exhaust (long story) and get a set of F + R EBC red pads...my warning light is on, so I don't have long before I've got to replace them. And I'm racing next weekend, so time is of the essence.
At this point, I'll have to replace that "DS" with "STX", cause there's no going back.
Stay tuned!
Here was the previous wheel gap. Three fingers (for her pleasure):
Out with the old, in with the new. (anyone need an R56 suspension?):
Midway through. The yellow looks nice poking out of there:
I can't quite get a finger in there now without angling it up. Here's the before and after. It's actually sitting at a weird angle in my driveway, so it's actually a bit lower than it looks in this pic:
And the final shot. I have to say...the preliminary drive was SURPRISING to say the least. Despite being about 4x stiffer, it's MUCH smoother than the factory ride. I can't say enough about these Koni dampers. They are SO much better than the asian aftermarket cheapo stuff. It's these, THEN you step up to JRZ or something fancier when you reach that level.
My next steps are to fix my crummy exhaust (long story) and get a set of F + R EBC red pads...my warning light is on, so I don't have long before I've got to replace them. And I'm racing next weekend, so time is of the essence.
At this point, I'll have to replace that "DS" with "STX", cause there's no going back.
Stay tuned!

#19
05-19-2014, 12:02 PM
Join Date: Jun 2013
Location: San Diego
Posts: 104
Likes: 0
Received 0 Likes
on
0 Posts
300 Miles of twisty, mountain, San Diego roads with the West Coast Mini club. The car was flawless, and the suspension felt fantastic. I was worried it would be too harsh on the roads, but I don't feel much of a comfort difference from stock. Maybe I just like stiff cars.
Current settings are H-Sport rear sway bar set to "middle" (3 stiffness options available), from Koni shocks FULL soft, and rear Konis set to 3/4 of a turn from stiff. (2 1/2 full rotations from soft to stiff. I sure wish they would index them.)
Here's a shot from the run yesterday. Tough place I live in.

3 autocrosses (PCA, BMWCCA, SCCA) in the next two weekends, so the real test begins soon.
Current settings are H-Sport rear sway bar set to "middle" (3 stiffness options available), from Koni shocks FULL soft, and rear Konis set to 3/4 of a turn from stiff. (2 1/2 full rotations from soft to stiff. I sure wish they would index them.)
Here's a shot from the run yesterday. Tough place I live in.
3 autocrosses (PCA, BMWCCA, SCCA) in the next two weekends, so the real test begins soon.
#20
05-24-2014, 09:54 PM
Join Date: Jun 2013
Location: San Diego
Posts: 104
Likes: 0
Received 0 Likes
on
0 Posts
Got everything I needed from JC Whitney. Crazy great prices on the pads. They have a button named "make offer", so I just offered $75 for each set, and that reduced the price significantly. The downside, they didn't have the upgraded rear discs that had the hats and interiors powdercoated. While I was in there, I decided to paint the calipers the same orange as the orange dot in my logo:

The devil is in the details.
Here's the layout:

The rear discs needed to be painted. So, I masked them with blue tape and sprayed them up. I used High Heat Engine enamel.

Much better:

In the meantime, it was time to clean and refurb the front calipers. This is where I started:

Calipers pulled, bungee corded out of the way, cleaned, and flipped over. The painting begins:

Rears ready for pad install:

3 coats of orange, 3 coats of clear later, all buttoned up and installed. The orange looks pretty fluorescent in this picture, but it's not quite that neon in real life:

Hiding behind the wheel:

EBC Warning...

...which I promptly ignored and raced the next day at a local PCA event. EBC brakes have a special coating which scores and beds the new discs. Because of that, they heat up VERY quickly. So, my new rotors are a bit blue now. But that just makes them faster. I'll report back on the pads when they are properly bedded.

The devil is in the details.
Here's the layout:
The rear discs needed to be painted. So, I masked them with blue tape and sprayed them up. I used High Heat Engine enamel.
Much better:
In the meantime, it was time to clean and refurb the front calipers. This is where I started:
Calipers pulled, bungee corded out of the way, cleaned, and flipped over. The painting begins:
Rears ready for pad install:
3 coats of orange, 3 coats of clear later, all buttoned up and installed. The orange looks pretty fluorescent in this picture, but it's not quite that neon in real life:
Hiding behind the wheel:
EBC Warning...
...which I promptly ignored and raced the next day at a local PCA event.
EBC brakes have a special coating which scores and beds the new discs. Because of that, they heat up VERY quickly. So, my new rotors are a bit blue now. But that just makes them faster. I'll report back on the pads when they are properly bedded.
#21
05-24-2014, 11:28 PM

6th Gear

Thread
Thread Starter
Forum
Replies
Last Post