R55 Installing OEM Roof Rails
#1
 04-30-2011, 04:19 PM


Installing OEM Roof Rails
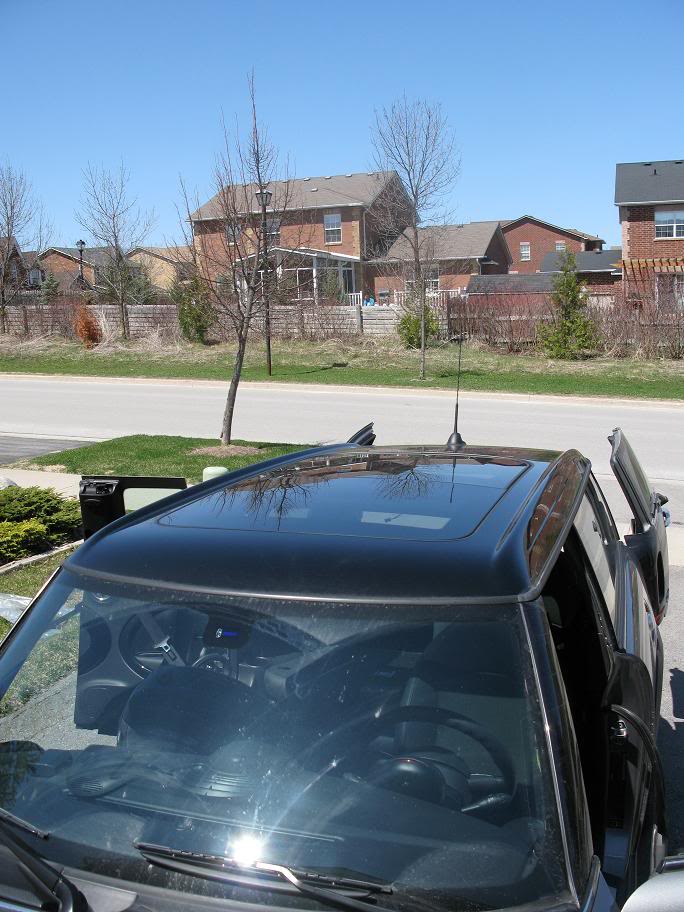
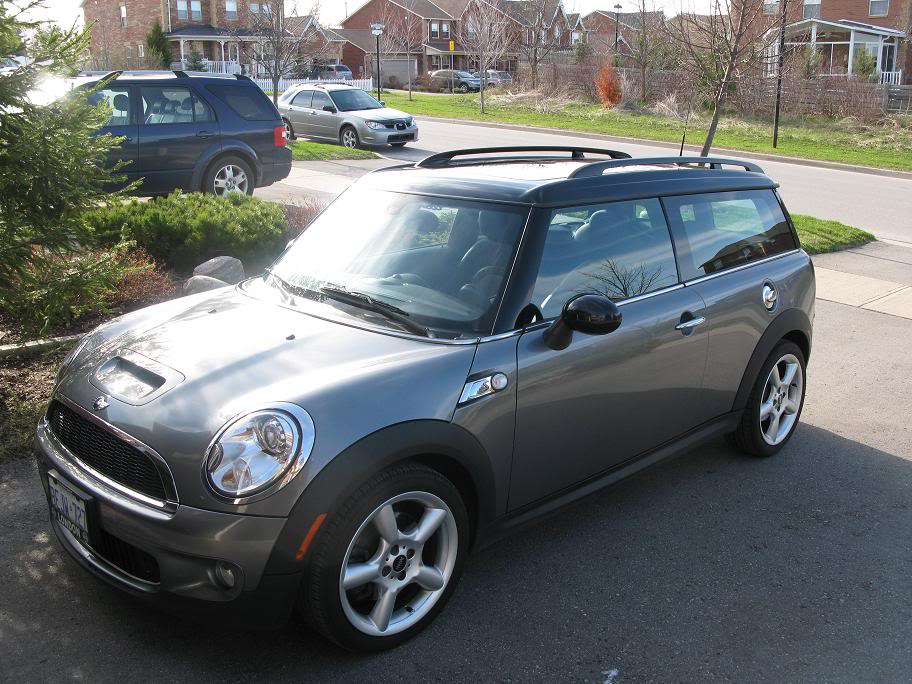
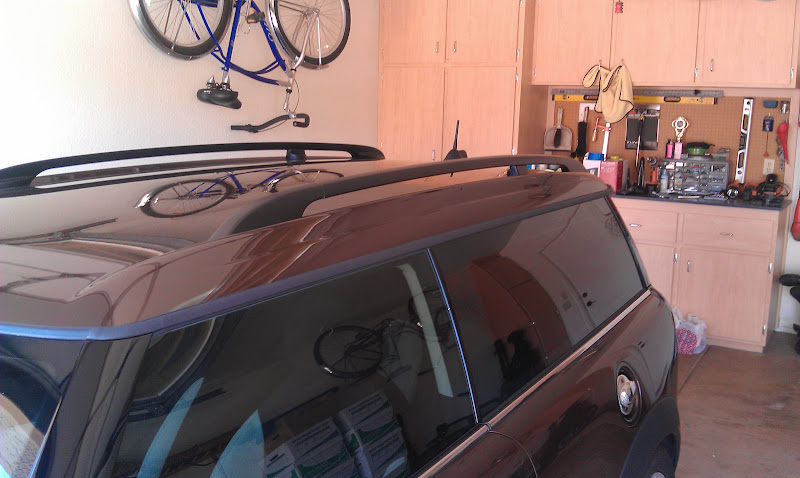
After much debate I decided to install roof rails on my Clubman for mounting my Thule rack rather than using the rain tray style roof rack.
Before...
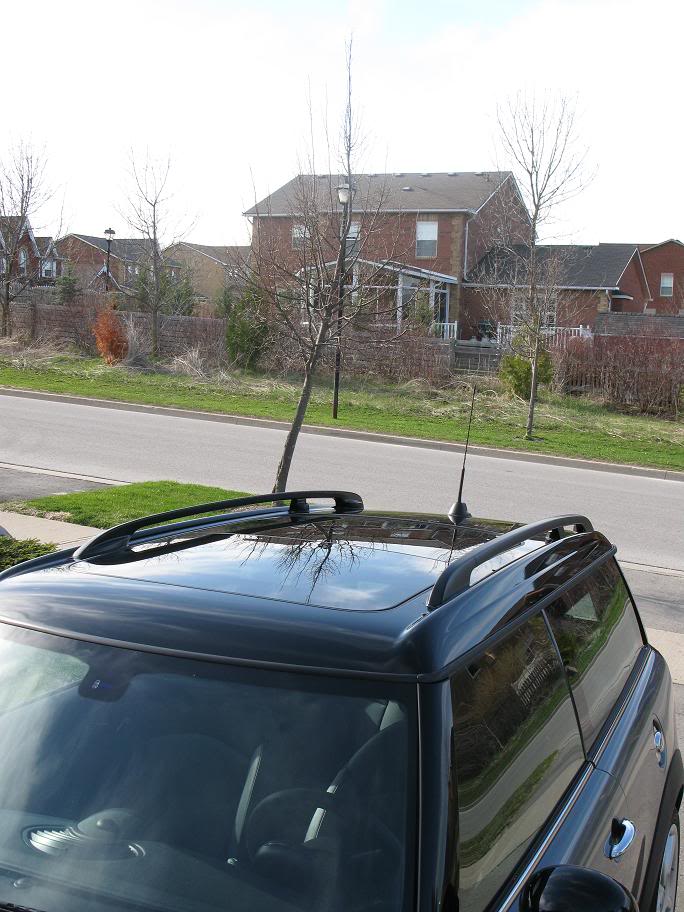
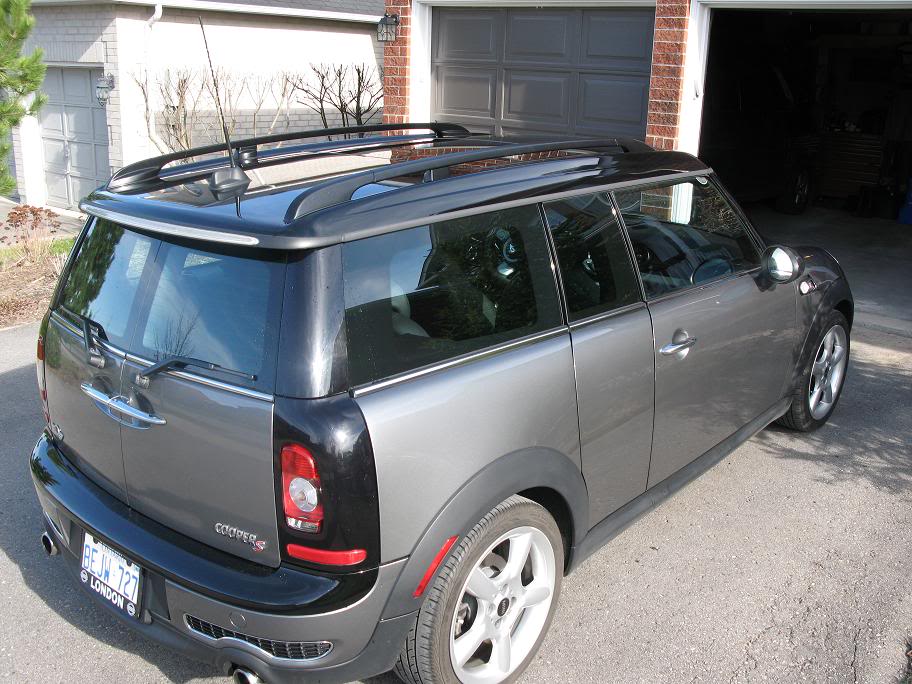
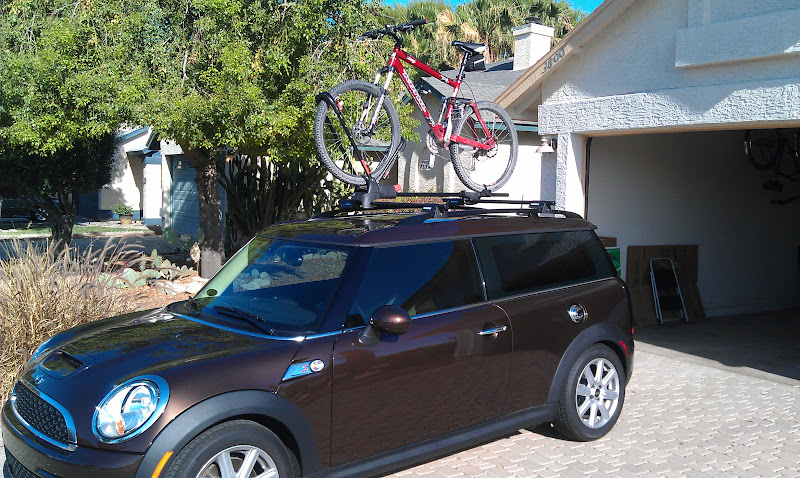
After...
As mentioned by one of the other rail install threads, it wasn’t difficult, but it was definitely scary drilling through the top of the roof. So here’s a step by step installation guide
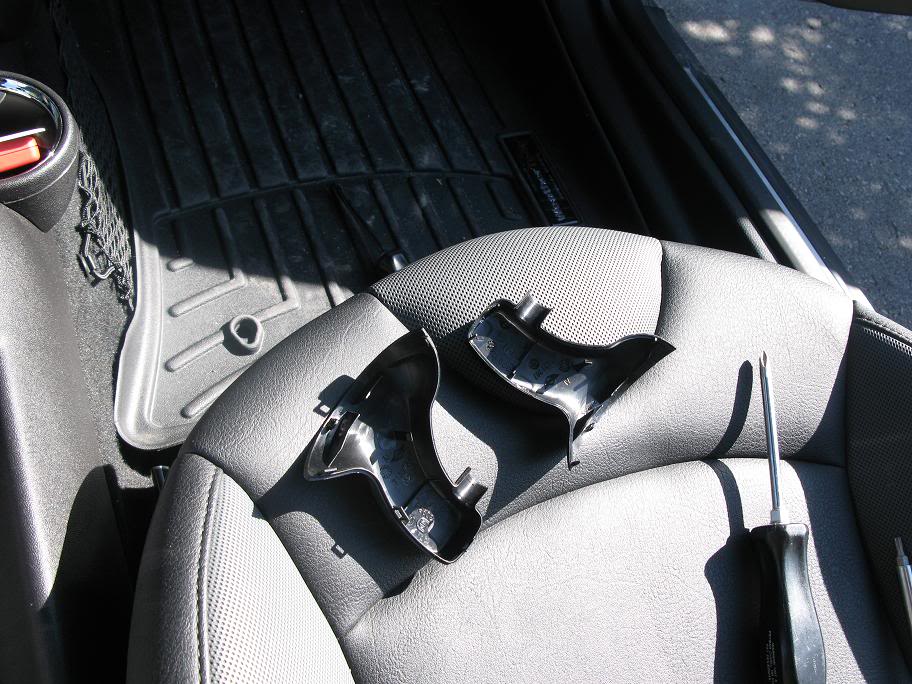
1. Remove all of the sunvisor mounts, they are all Phillips, which is odd because all the others are torx

2. Remove the driver’s side sunvisor and the passenger holy poop handle, all torx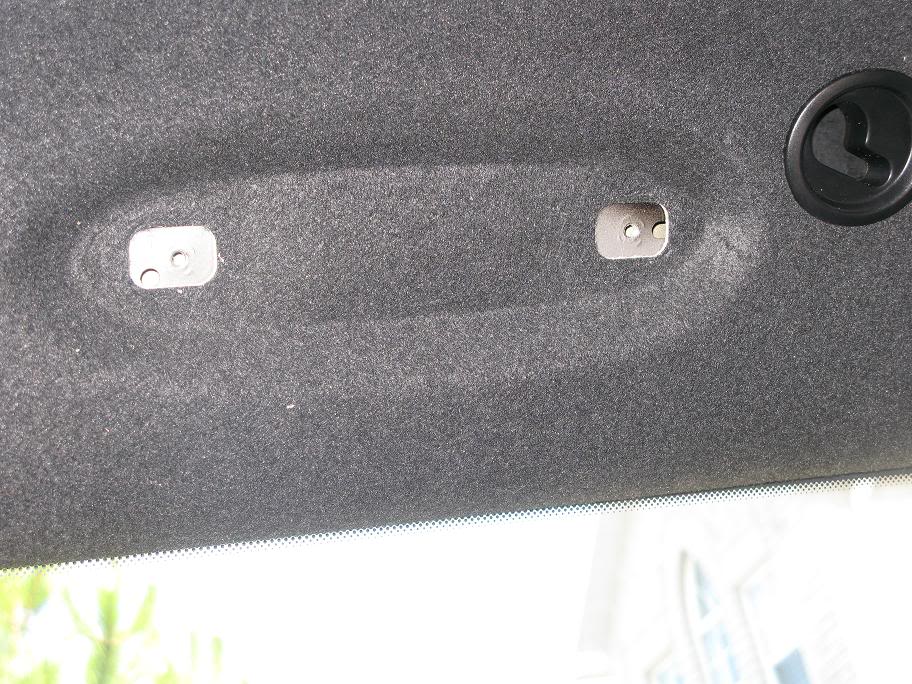
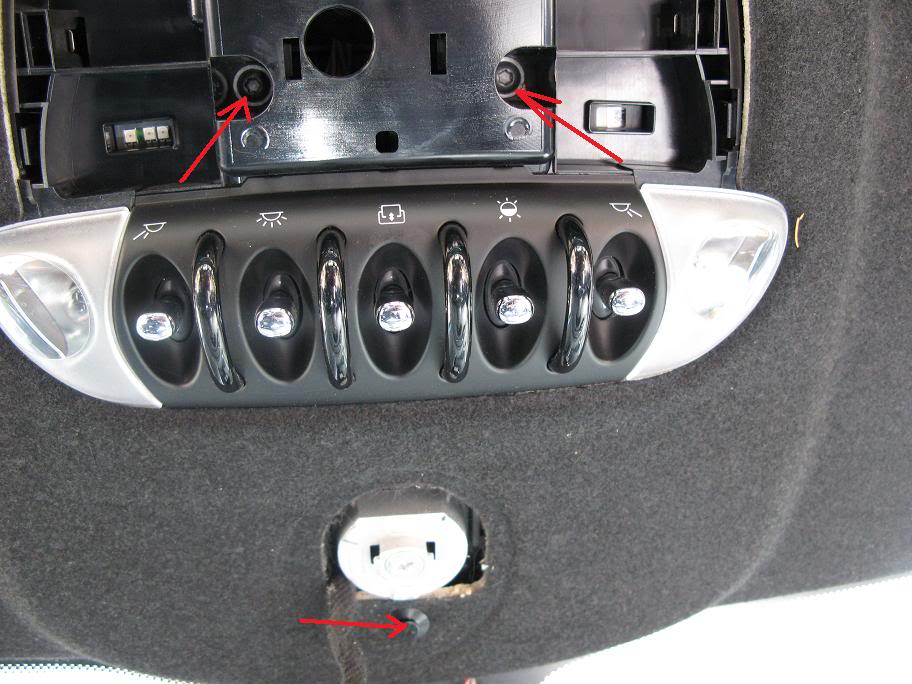
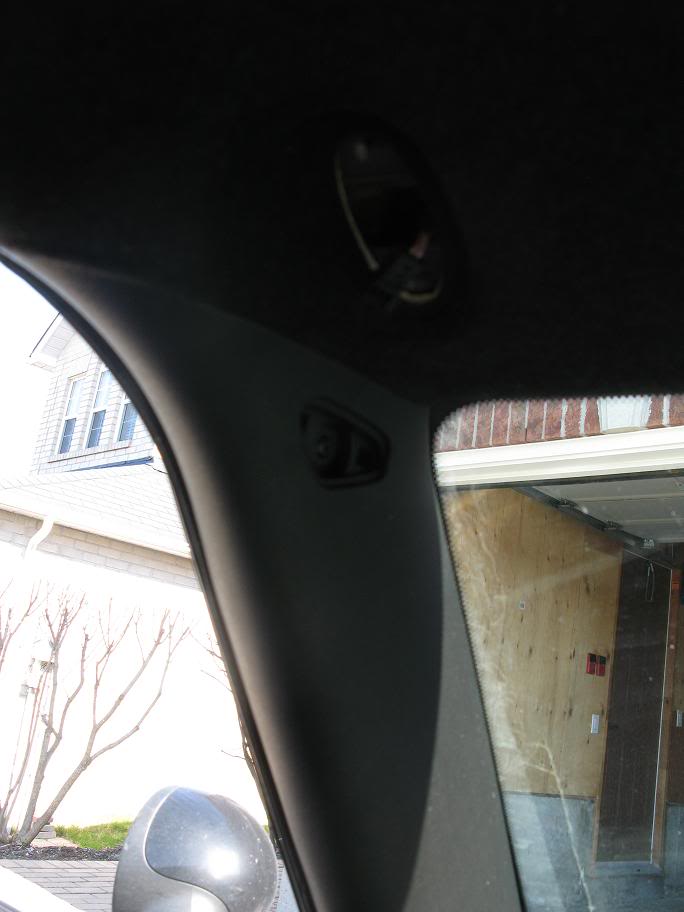
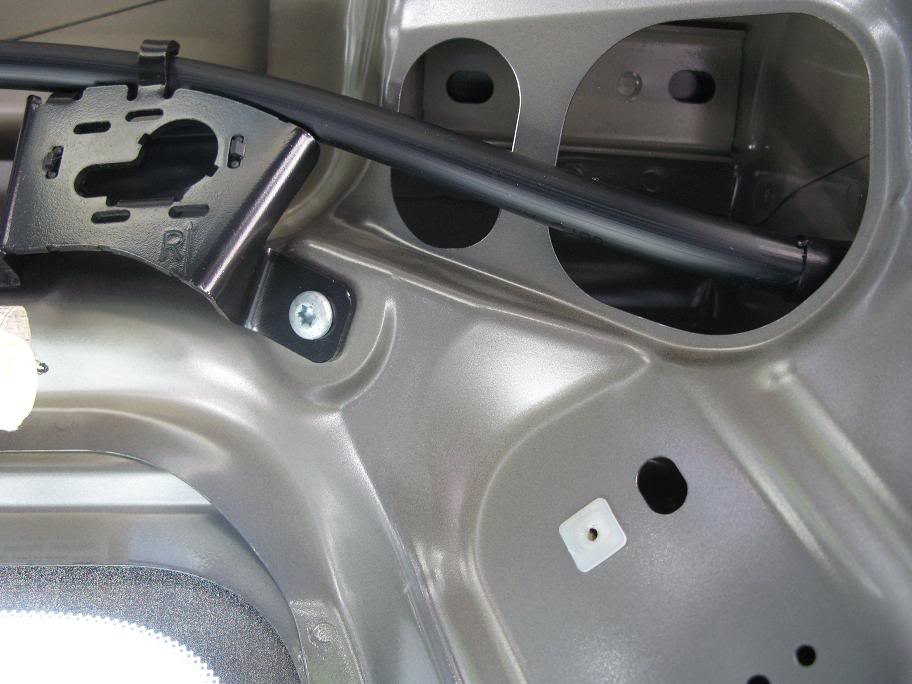
3. Ahead of all the switches overhead, remove the cover, it just pops off and remove the torx screws and the plastic clip, see red arrows
4. For the rear view mirror, the cover splits in half, then grab the mirror and twist it counter clockwise, then unplug the molex for the self dimming mirror
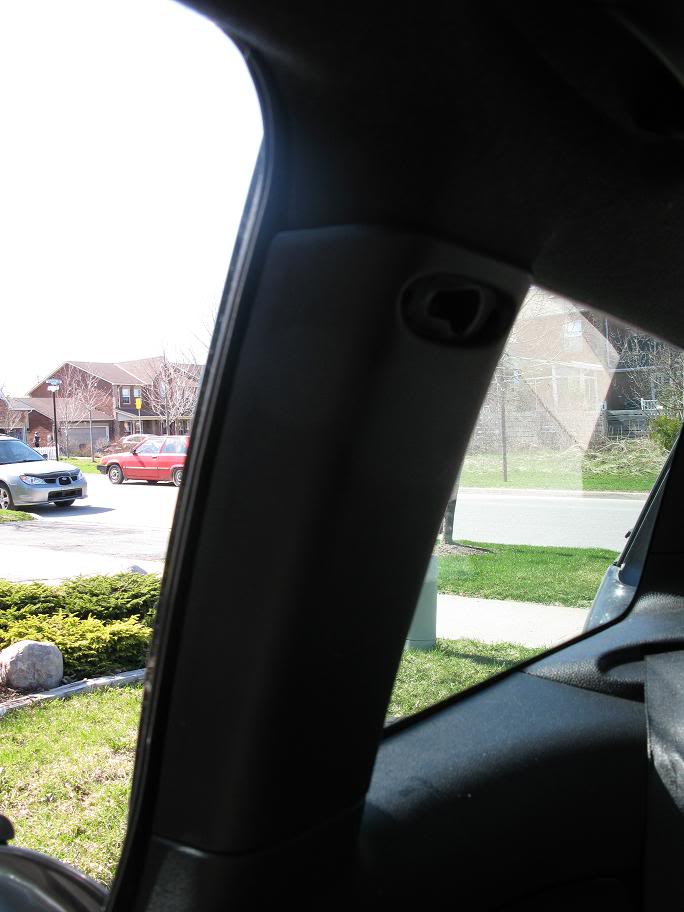
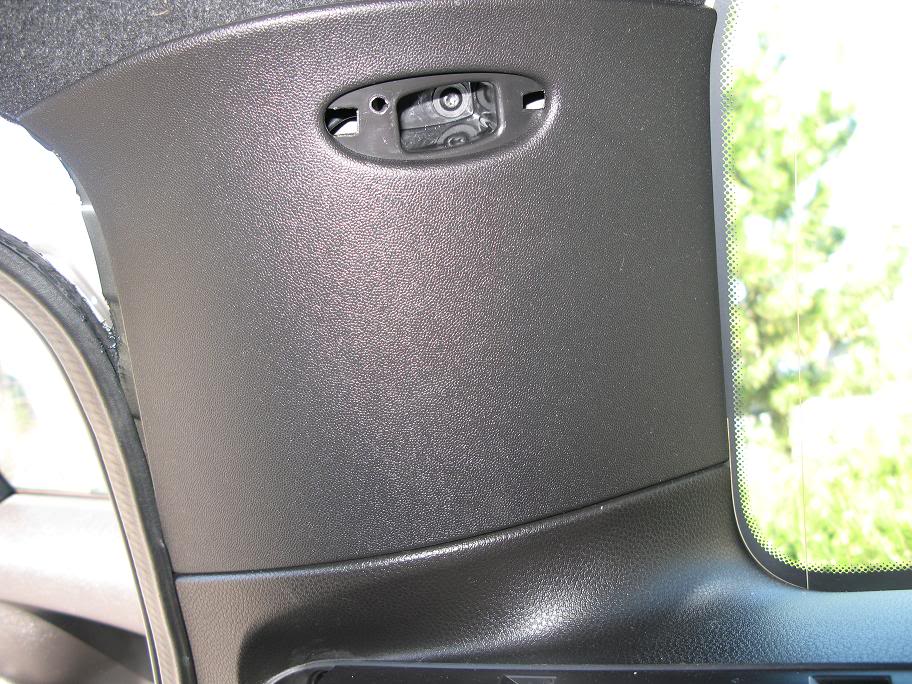
5. Remove the rear passengers holly poop handles, overhead light, and the trim around the upper side door latch
6. Next you have to remove all of the side pillar covers. Two pillar at the front, two at the side and two in the rear. There is a screw behind each airbag symbol. These just pop out and there is a torx behind
7. Pull down the weatherstripping around both doors and rear doors. There is one plastic plug in the center of the headliner in the rear
8. Lastly there are the sunroof surround trims. These are what hold up the headliner so once you remove these the headliner will drop. Start at the sides, pull them in. Then you have to twist either the front or back. There are two points where these clip, and they’re a bugger to remove.....but even worst to get back in..grrrrr.
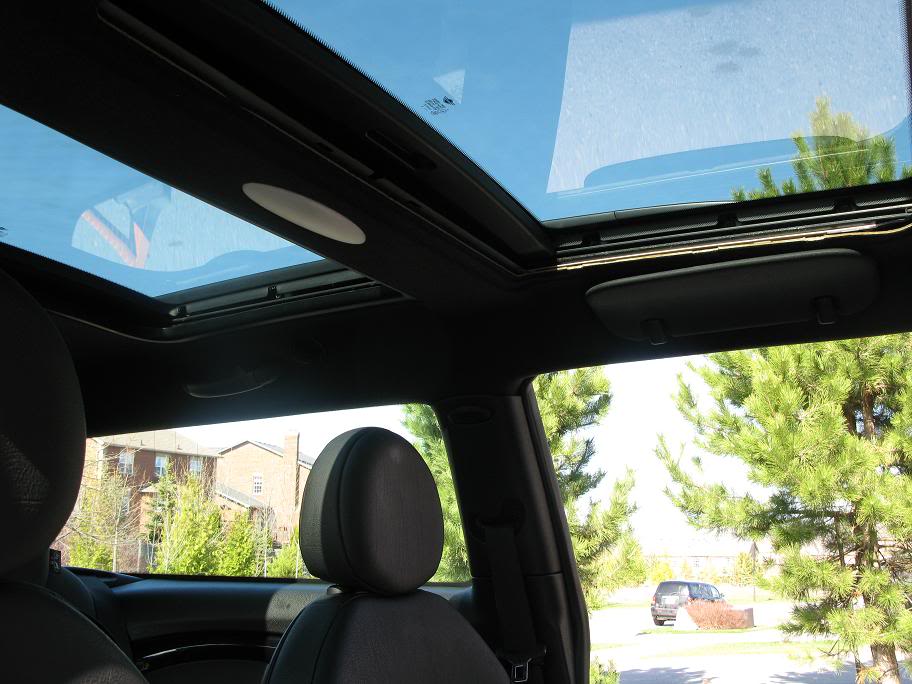
9. Now unclip the two molexes plugging into the sunroof switches
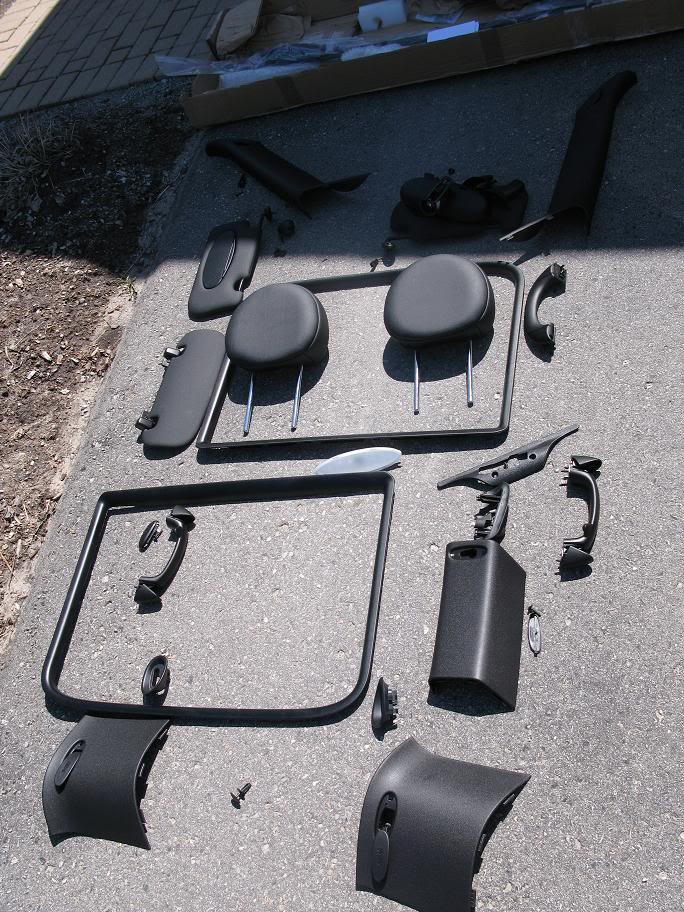
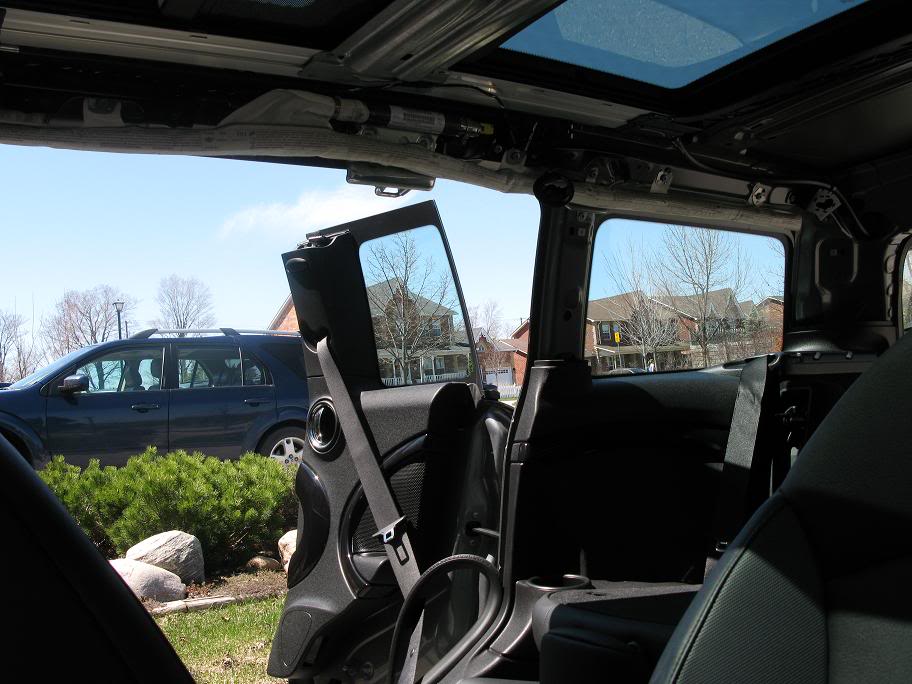
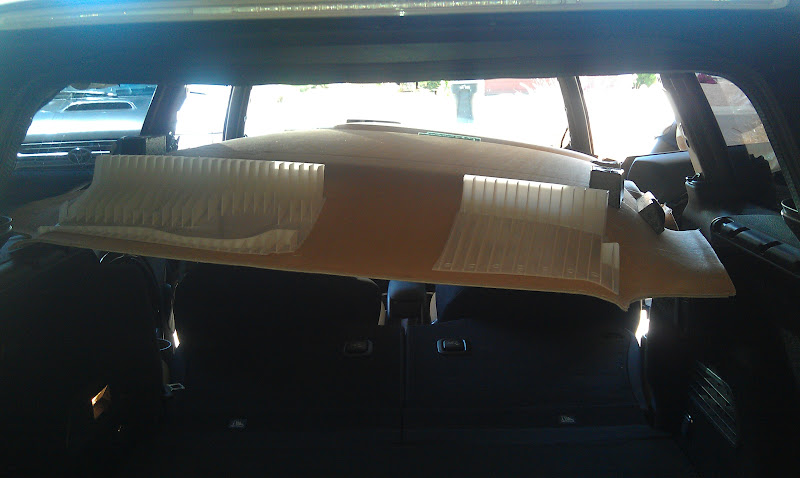
10. Now remove the headliner. To help, take out the front headrests, no need to pull the seats. Be thankful for the third door, it comes out easier than what you would think. Here are all the pieces removed
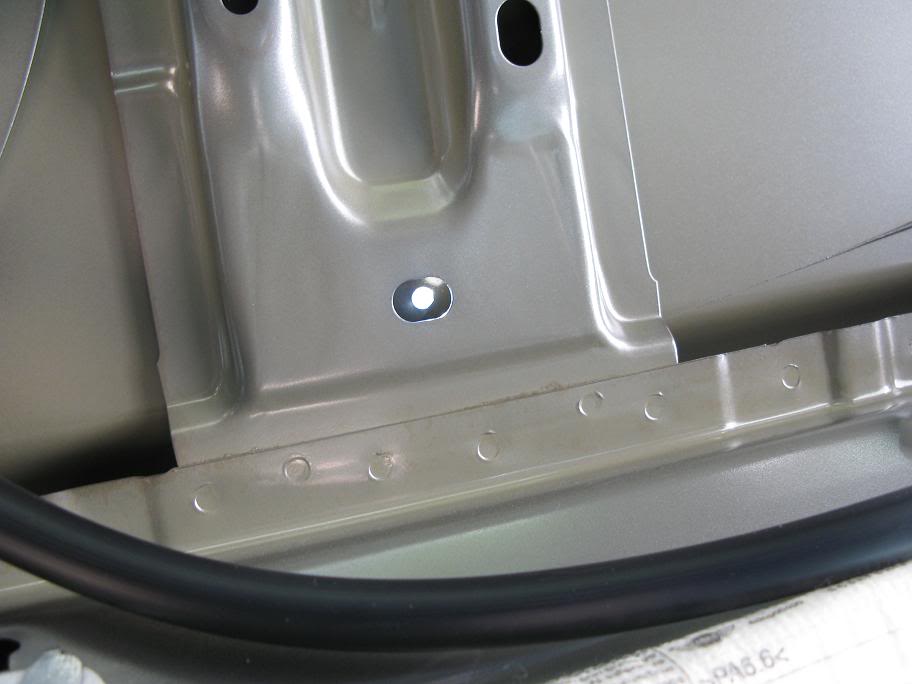
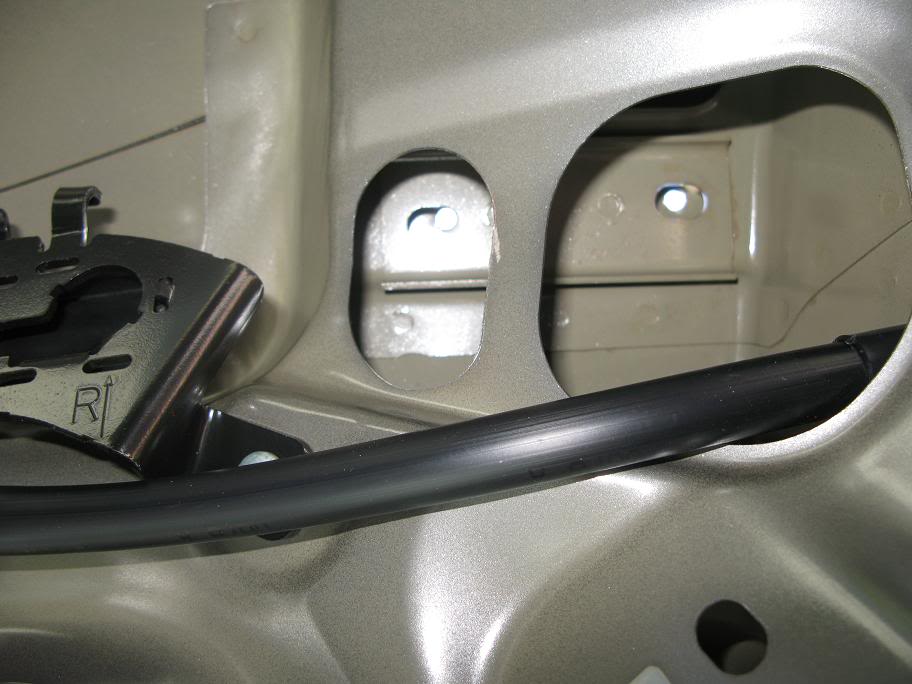
11. There is no template for this. The best way is to use the holes from the inside to guide you. This is the front, middle and rear
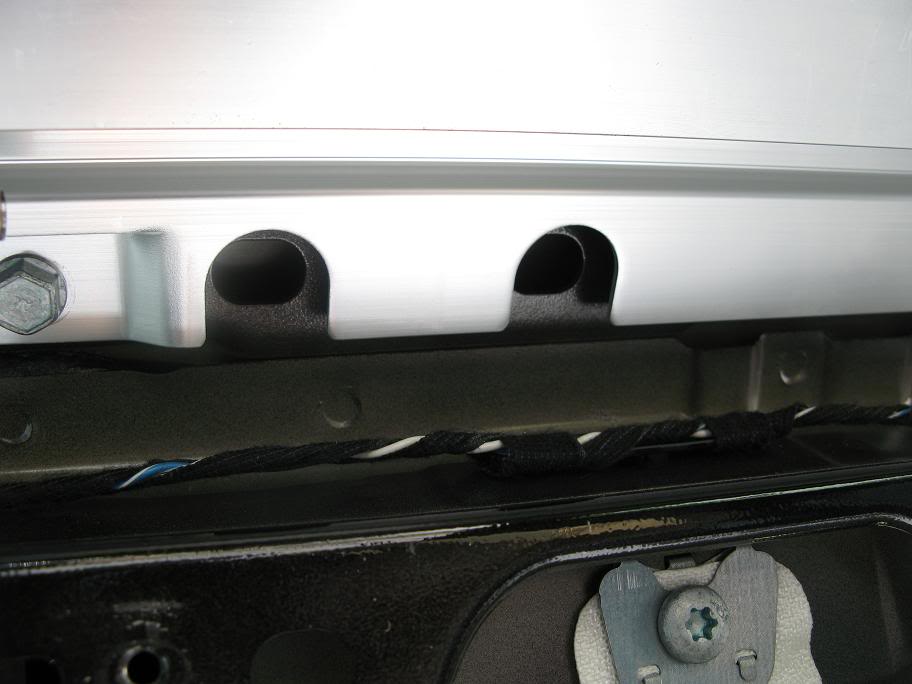
12. Here’s a shot of the side airbag. You drill nowhere near this so don’t worry about it
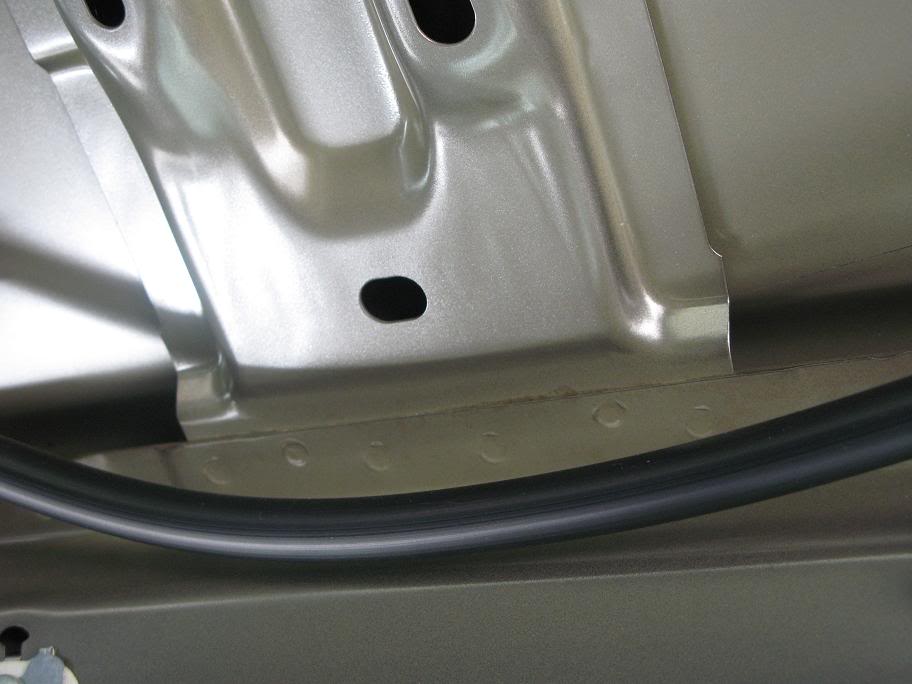
13. Scary part number one, drilling the �” pilot holes
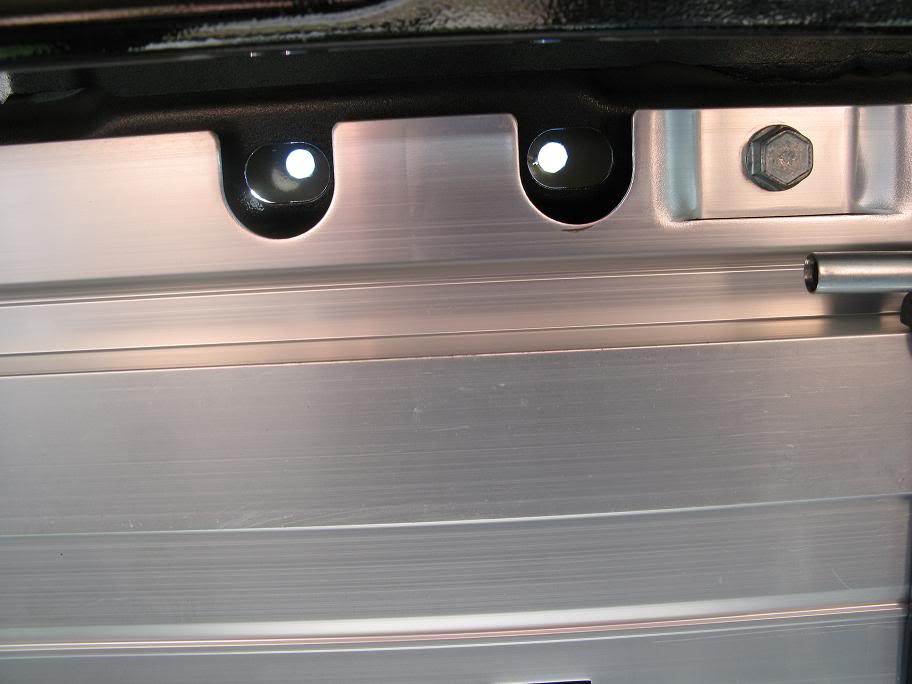
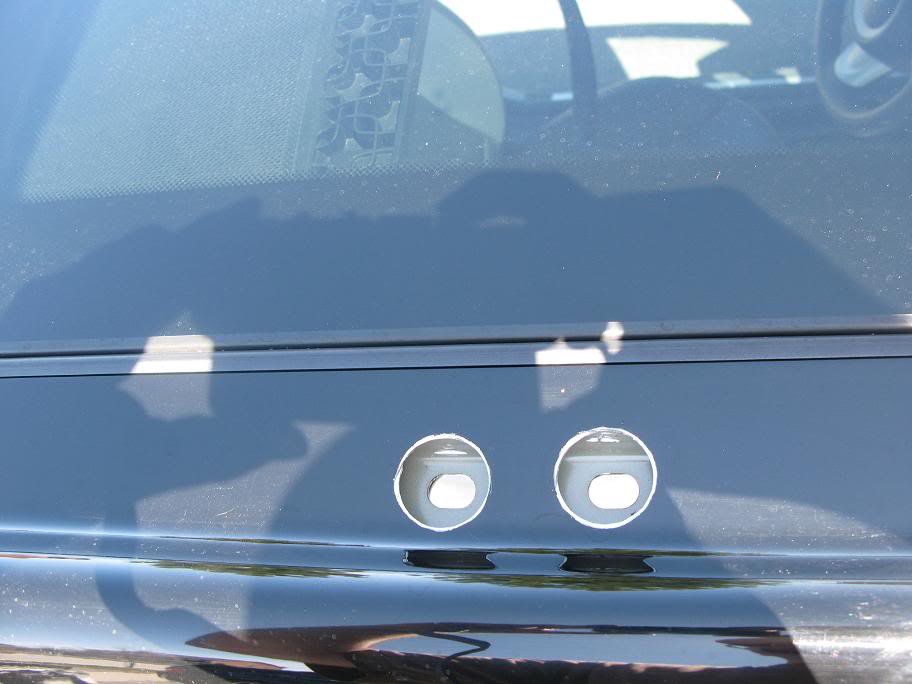
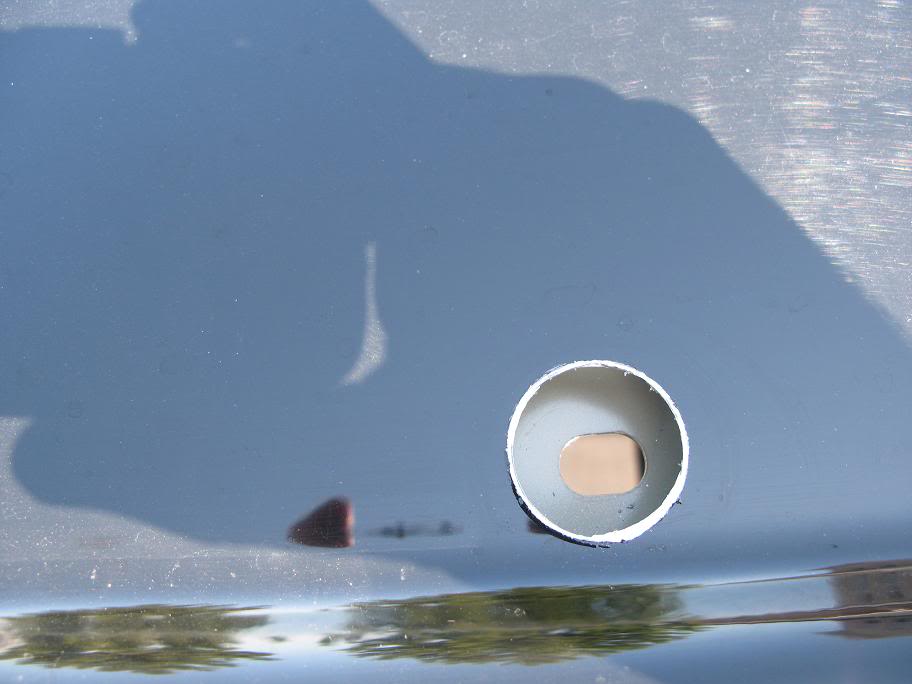
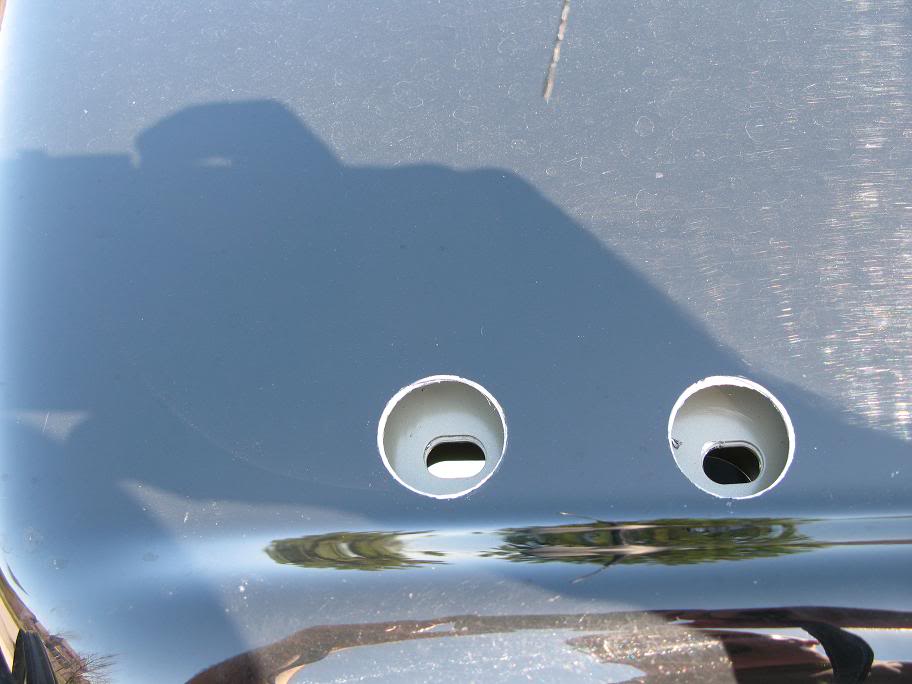
14. Tape off near the holes on the roof. I used a 1-1/8 hole saw. Because you don’t want to enlarge the mounting holes I wouldn’t recommend a stepper bit. This size of hole saw just gives a little more wiggle room. Here’s the front, middle and rear. I then painted all bare metal to avoid rust
15. I was going to silicone the roof rails, but after looking them, I decided against it. There are two rubber seals and some closed cell foam

16. Luckily the test fit went just fine.....whewwwwwwww!
17. Now comes the time the mount the rails permanently. FYI, the nuts they provide thread easily at the beginning, but then require some strength to finish tightening them up. This is good because there are no lock nuts.
18. Another FYI, make sure you do not knock off the sunroof drain tubes, they come off easy
19. Start reinstalling everything , but start with the holly poop handles. The sunroof trim pieces are a pain in the butt to get in correct, so by using the handles you don’t have to balance the headliner on your head
20. Start putting the pieces back in the reverse order
The results...
Before...
After...
As mentioned by one of the other rail install threads, it wasn’t difficult, but it was definitely scary drilling through the top of the roof. So here’s a step by step installation guide
1. Remove all of the sunvisor mounts, they are all Phillips, which is odd because all the others are torx
2. Remove the driver’s side sunvisor and the passenger holy poop handle, all torx
3. Ahead of all the switches overhead, remove the cover, it just pops off and remove the torx screws and the plastic clip, see red arrows
4. For the rear view mirror, the cover splits in half, then grab the mirror and twist it counter clockwise, then unplug the molex for the self dimming mirror
5. Remove the rear passengers holly poop handles, overhead light, and the trim around the upper side door latch
6. Next you have to remove all of the side pillar covers. Two pillar at the front, two at the side and two in the rear. There is a screw behind each airbag symbol. These just pop out and there is a torx behind
7. Pull down the weatherstripping around both doors and rear doors. There is one plastic plug in the center of the headliner in the rear
8. Lastly there are the sunroof surround trims. These are what hold up the headliner so once you remove these the headliner will drop. Start at the sides, pull them in. Then you have to twist either the front or back. There are two points where these clip, and they’re a bugger to remove.....but even worst to get back in..grrrrr.
9. Now unclip the two molexes plugging into the sunroof switches
10. Now remove the headliner. To help, take out the front headrests, no need to pull the seats. Be thankful for the third door, it comes out easier than what you would think. Here are all the pieces removed
11. There is no template for this. The best way is to use the holes from the inside to guide you. This is the front, middle and rear
12. Here’s a shot of the side airbag. You drill nowhere near this so don’t worry about it
13. Scary part number one, drilling the �” pilot holes
14. Tape off near the holes on the roof. I used a 1-1/8 hole saw. Because you don’t want to enlarge the mounting holes I wouldn’t recommend a stepper bit. This size of hole saw just gives a little more wiggle room. Here’s the front, middle and rear. I then painted all bare metal to avoid rust
15. I was going to silicone the roof rails, but after looking them, I decided against it. There are two rubber seals and some closed cell foam
16. Luckily the test fit went just fine.....whewwwwwwww!
17. Now comes the time the mount the rails permanently. FYI, the nuts they provide thread easily at the beginning, but then require some strength to finish tightening them up. This is good because there are no lock nuts.
18. Another FYI, make sure you do not knock off the sunroof drain tubes, they come off easy
19. Start reinstalling everything , but start with the holly poop handles. The sunroof trim pieces are a pain in the butt to get in correct, so by using the handles you don’t have to balance the headliner on your head
20. Start putting the pieces back in the reverse order
The results...
Last edited by Bubbleboy; 01-16-2012 at 07:54 PM. Reason: sold Mini, not hosting pics
#2
04-30-2011, 05:04 PM
Bubbleboy,
Thanks for the detailed writeup...This is something I want to do very soon. Where did you order the rails from? It seems there are quite a few dealerships that will not sell them. Did you just measure center to center on the rail bolts to mark the roof for drilling or was there some sort of marking from the factory where to drill pilot holes? Did the rails come with all the hardware needed for install or did you have to buy flange nuts separately? Do you happen to have any photos of interior with nuts installed prior to headliner reinstall?
Thanks again!
Last edited by Gonetoshoot; 04-30-2011 at 05:14 PM.
#3
04-30-2011, 05:27 PM

4th Gear
#4
04-30-2011, 05:49 PM
I had to get them from the U.S. from Atlanta Mini, great guys to deal with and a great price, http://parts.miniofsouthatlanta.com/.
You can see by the brackets in the pics where you should drill up through the roof.
You have to buy the 10 flange nuts seperately, but they all came in one bag. Atlanta Mini also checks your order against your VIN to make sure you're getting the right parts.
http://www.realoem.com/bmw/showparts...99&hg=51&fg=20
I didn't take any pics of the nuts afterwards, sorry. The best way to guage if you have the rails spaced properly is to look at the middle mount and compare the gap between the flage nut and the oval mount hole. You can them move the rails forward or backward to match each other.
Hope this helps
#5
04-30-2011, 06:05 PM

#6
04-30-2011, 06:09 PM
Drilling from the inside out pretty much makes it dummy proof. When using the holesaw make sure you have about and inch of the drill bit sticking out. That way it will limit the chances of the hole saw getting away on you. It wondered a bit on me on one of the rear holes, but the rail's feet area is big enough that even with a bit of error no one will see.
The whole job took about 5 hours to do.
The whole job took about 5 hours to do.
#7
04-30-2011, 07:03 PM

Trending Topics
#8
05-01-2011, 06:01 AM


#12
05-13-2011, 06:33 PM
#13
05-14-2011, 12:35 AM

4th Gear
Join Date: Mar 2008
Location: Tarpon Springs FL
Posts: 323
Likes: 0
Received 0 Likes
on
0 Posts
It's interesting to hear the earth shattering silence from all the naysayers on this mod.


#16
05-25-2011, 12:58 PM
First off I have to give props to Bubbleboy for making this install super easy for me. I used his write up and with the help of my wife had the rails installed in 4 hours. I do not have a sunroof, but all the interior trim came out the same. It took me 45 min to pull the trim and drop the headliner. I did not remove the headliner from inside my Clubbie because I was afraid I would permanently crease it with the bend I would have had to put in it. I'm sure I could have got it out but I didn't want to chance it. Also, I was able to drop the headliner without removing any of the door seal. I started to pull off he rear boot seal and it had that sticky, black tar sealant in it that gets all over everything so I worked around it. So I really don't have a whole lot to add if you are going to take on this project, Bubbleboy's instructions were great. I did read another post where a 13/16" hole was recommended and Bubbleboy used a 1 1/8". I opted for a 1" holesaw bit which worked perfectly. I primed the exposed metal and used an outdoor clear silicone sealant on each hole. I also used Loctite on all 10 bolts. Here are some pics!
Here she is all naked first thing in the morning.

Headliner dropped...
Check out the high quality cardboard sound deadening material

First set of 1/4" pilot holes.
1" Holes from the top!
Here are some of the finished product

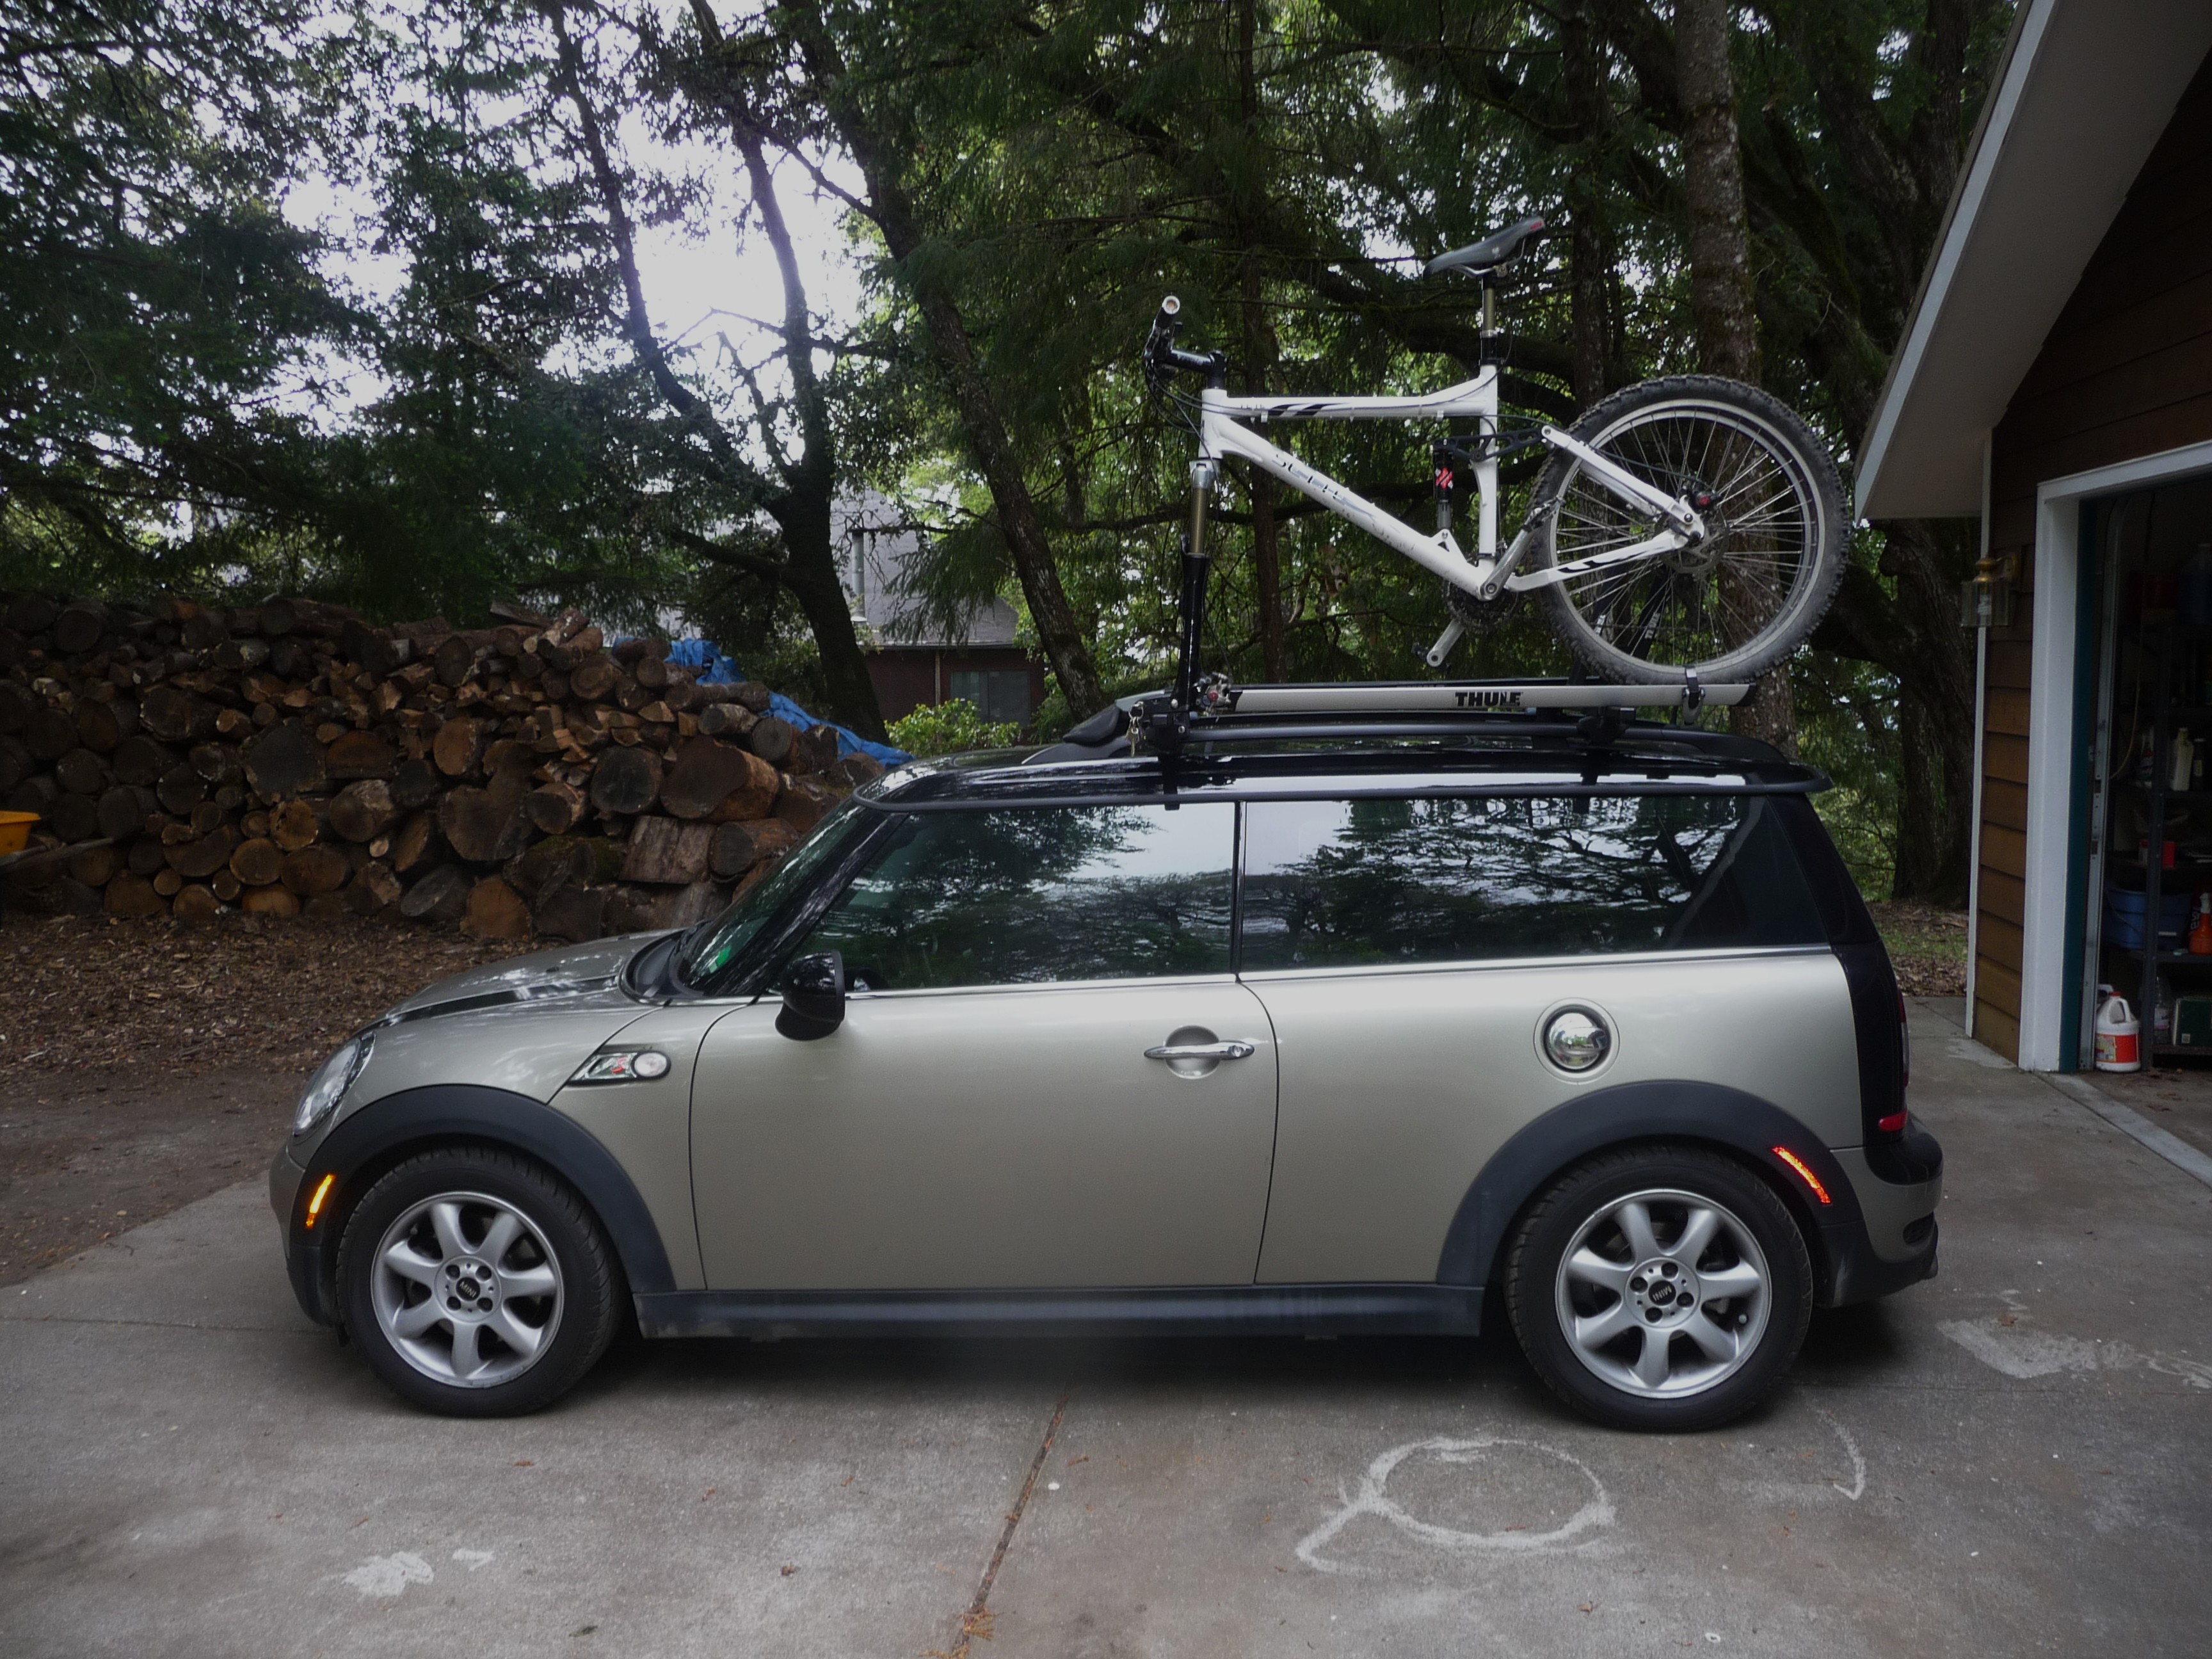
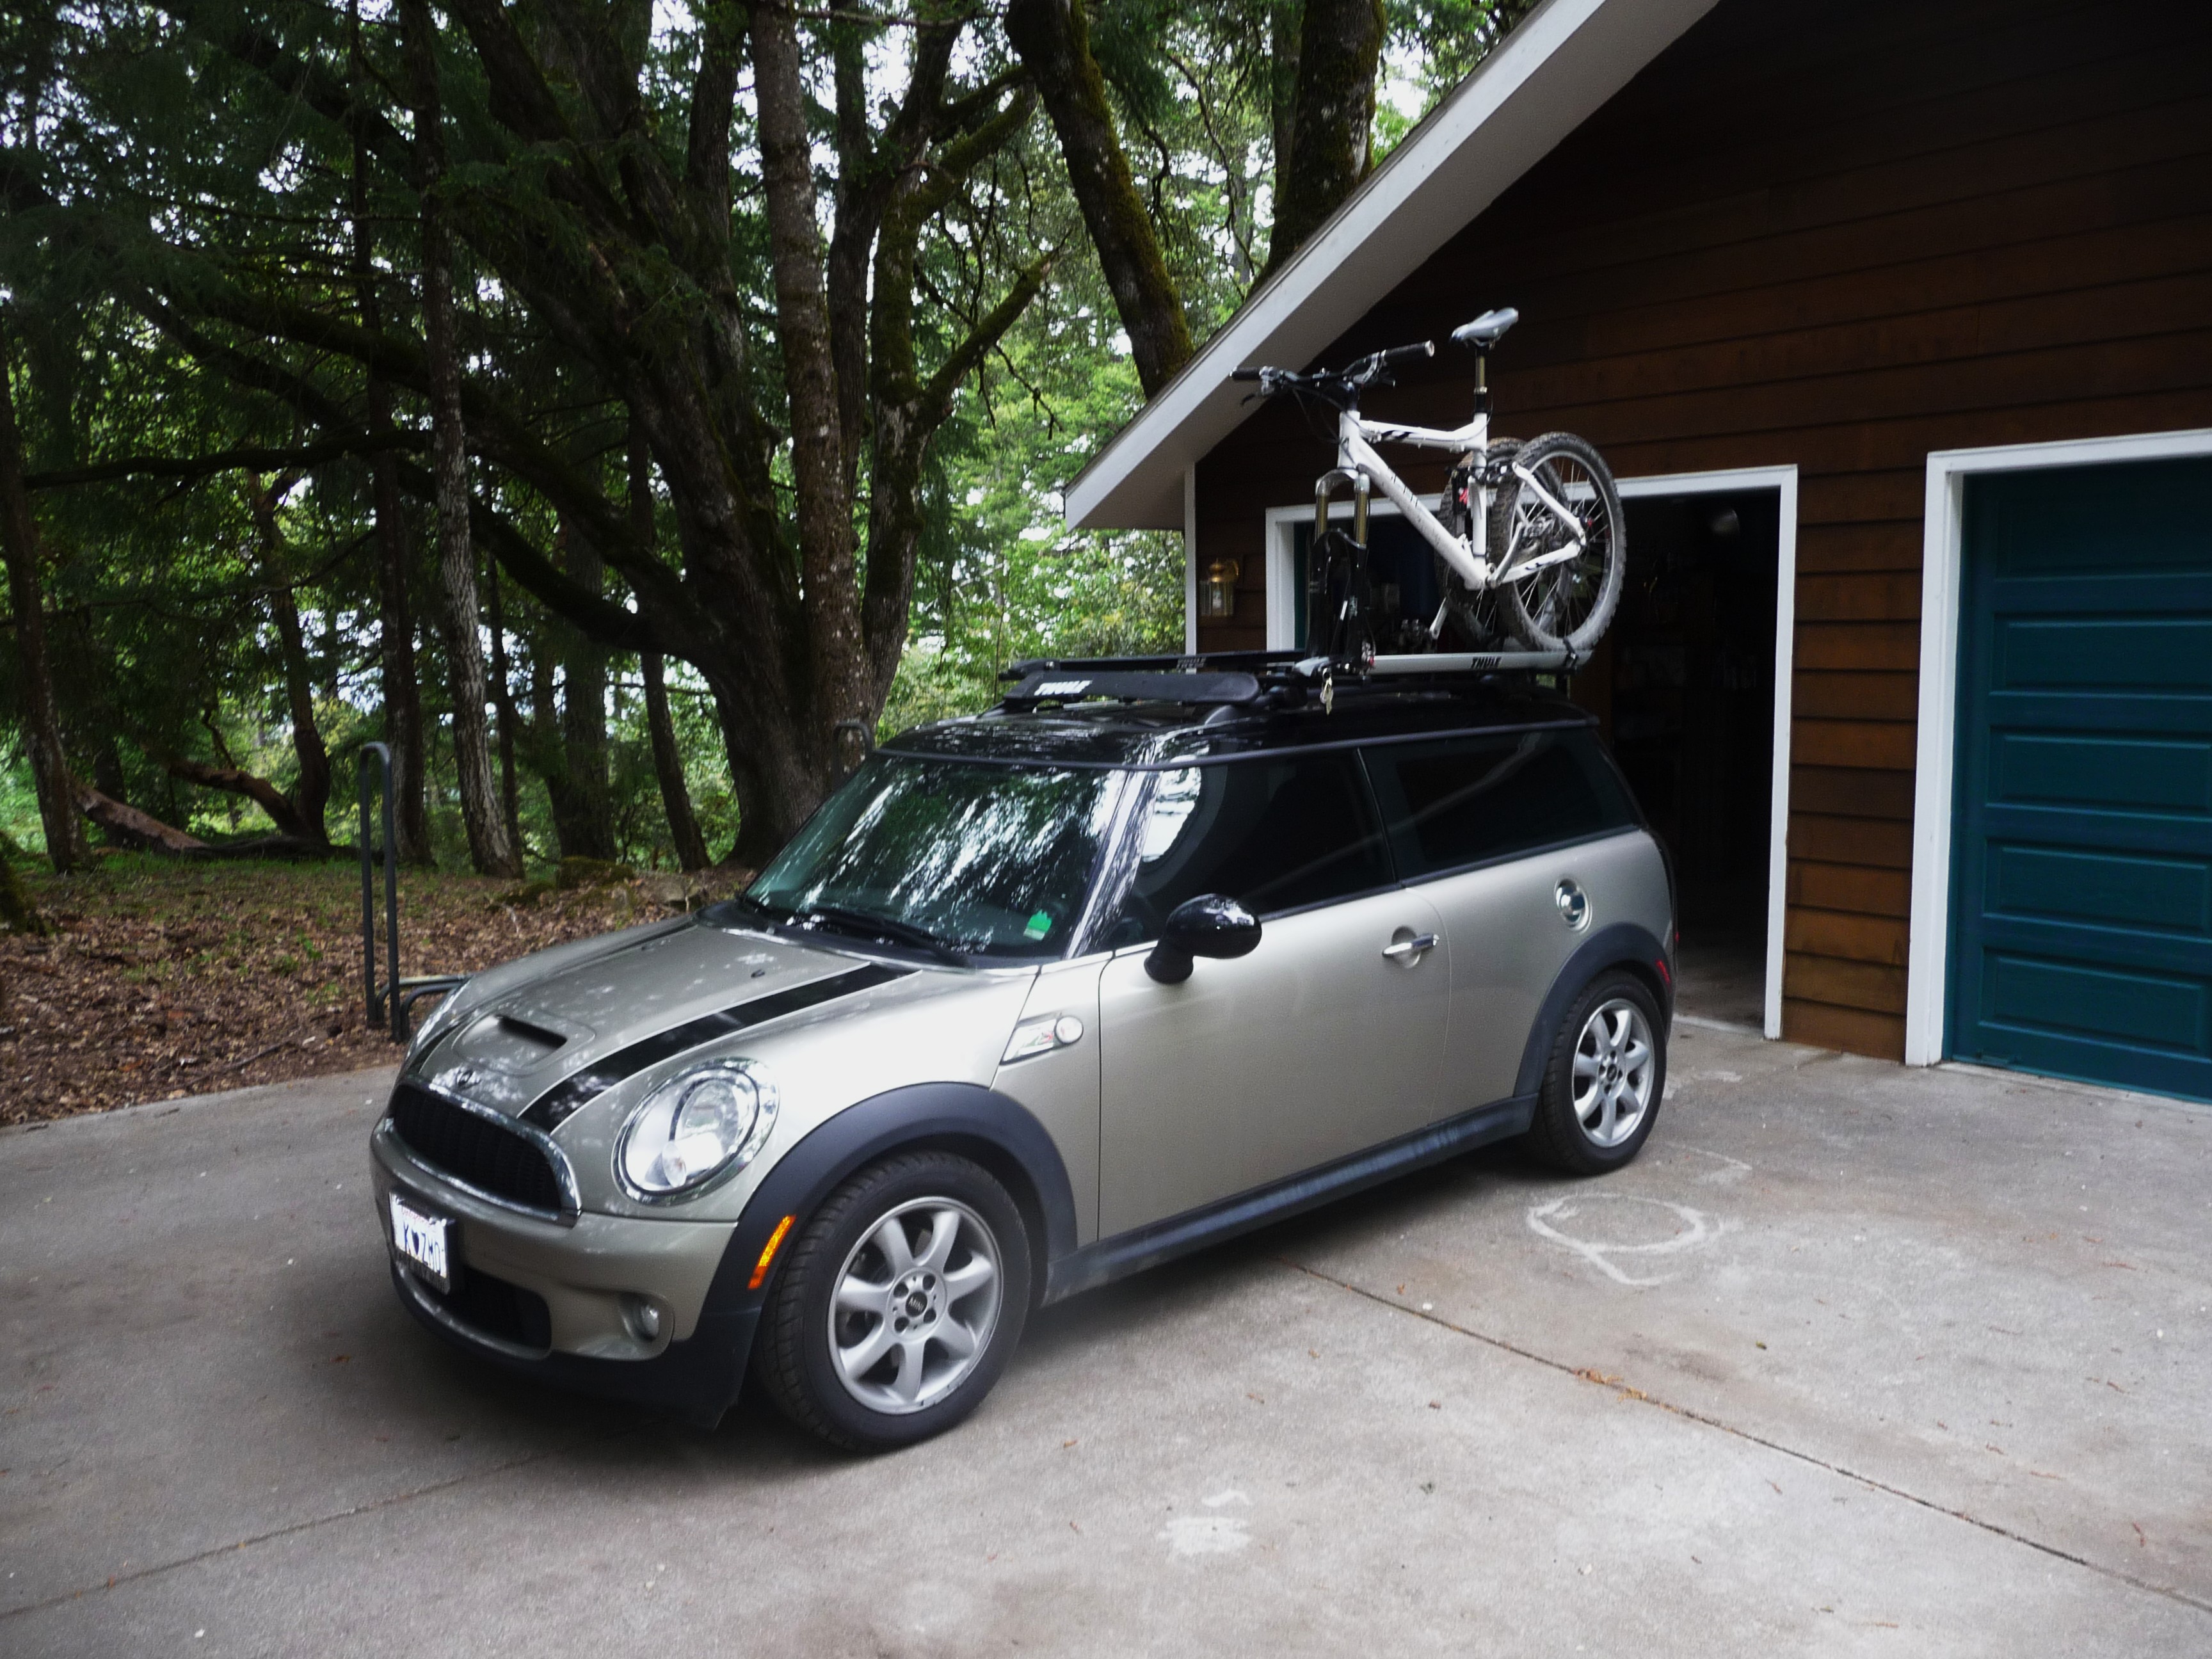
With Yakima Railgrab system.
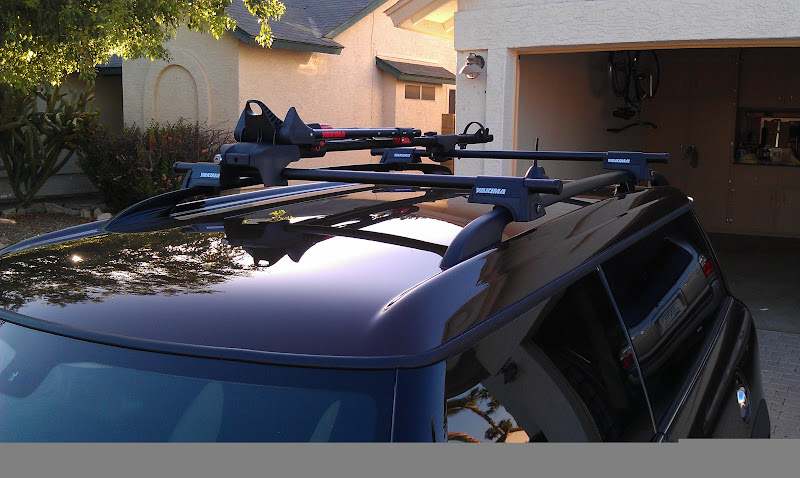
Took her out this morning and the rack worked like a charm.
Here she is all naked first thing in the morning.
Headliner dropped...
Check out the high quality cardboard sound deadening material
First set of 1/4" pilot holes.
1" Holes from the top!
Here are some of the finished product
With Yakima Railgrab system.
Took her out this morning and the rack worked like a charm.
The following users liked this post:
dkdzyn (12-12-2017)
#18
05-27-2011, 11:42 AM

#19
05-27-2011, 12:31 PM
#20
05-29-2011, 03:28 PM

#21
05-29-2011, 05:28 PM

2nd Gear
Join Date: Oct 2009
Location: Ontario, Canada
Posts: 129
Likes: 0
Received 0 Likes
on
0 Posts


#24
06-12-2011, 09:56 AM
#25
06-25-2011, 05:56 PM
