R50/53 Racing Turtel
#1
 04-26-2016, 08:31 PM


Racing Turtel

I currently DD a 2011 R56 MCS with an N18 100% Stock and recently purchase a 2003 R53 to use as a track car with 89k on the engine and 163k on the body. My track car before was 2014 Genesis Coupe 2.0 R-Spec making 308whp and 327wtq, had 3" Turbo back exhaust (no Cats), AEM WMI, SRI, IC Pipe, Synapses DV and a Custom tune. Great Track car, but unfortunately it got totaled by insurance company. So i got the R53 to replace it. I'm a DIY type of guy and love working on my car. Not scared to mod anything if need be, but like to know the total cost before i get into a project.
Yin and yang
R56 Light/R53 Darkness

This R53 Came with the following.
---Engine---
Cometic Headgasket
Ported Head
Bigger Exhaust Valve 2mm
Schrick Camshalf
Alta Intake
Alta Catback Exhaust
Alta Supercharger Pulley 17%
Alta lightened Crank Pulley 2%
Megan Racing Headers (wrapped).
---Suspension---
01. 15" OZ Racing Crono HT
02. BC Coilover
03. Poly Bushings everywhere
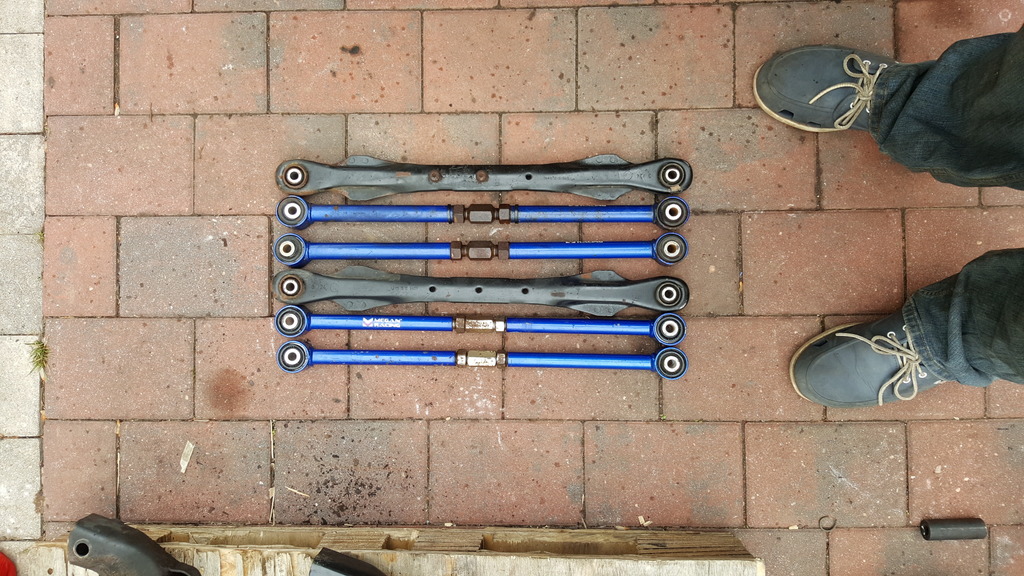
04. Megan rear lower control arm, also have top rear control arm need to put them in.
05. Tower defender
06. Rear Strut Tower Bar
07. New Brake pads (unknown brand F&R)
08. CUT FRONT SWAY BAR
09. Torque Solutions lower Engine mount (Dog bone)
So after lots of reading here and other places I finally made a list of parts, Some i already ordered and some i will be ordering soon. Here is he list
Ready to get install
Suspension
- K-Brace
- WMW Strut Tower Brace
- Rear H-Sport Competition Sway bar
- Cabrio Cross Brace
- Super Pro F&R Adjustable Endlinks
- Super Pro Front Sway bar Bushings
- Super Pro Trasmission mount bushing
- Super Pro Passenger side top bushings
- Subframe
- Passenger side axle
- Rear Crossmember
- R&L Trailing arm
- R&L Trailing arm Bracket
- R&L Inner/Outer Ball joint
- R&L Front Control Arms
- R&L Inner/Outer Tie Rod
Innovate MS PSB-1 AFR/Boost Gauge/Shifter light
Innovate 3913 Temp/Pressure Oil Gauge
Craven Oil Pressure adapter
AMS remote oil pressure sender
Auto Meter 2267 Oil Temp Oil plug adapter
IJDMTOY LED License Plate Lamp
Small Antenna
BMW Aux Cable
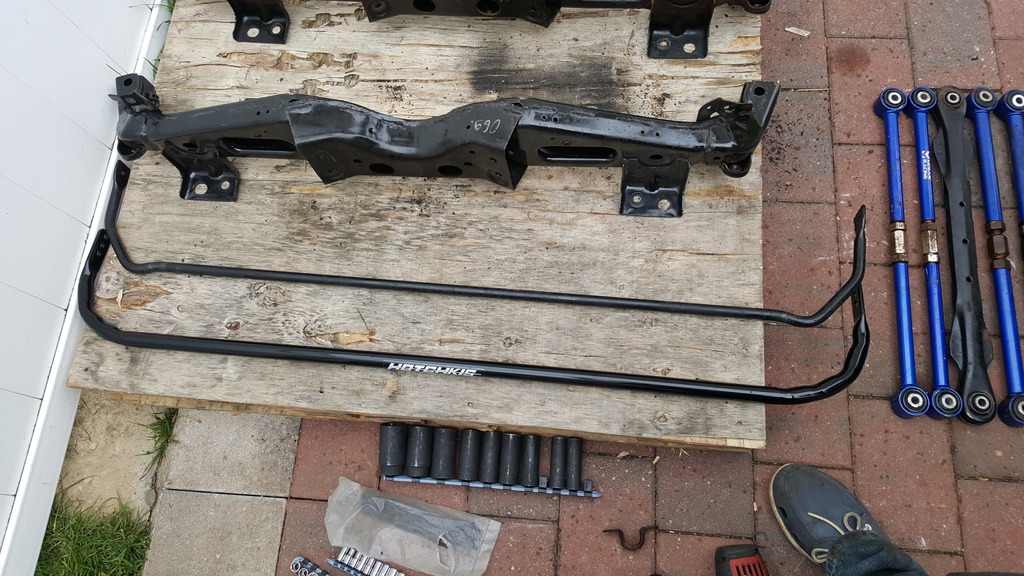
Some pics of the Parts


Last edited by HaveATank; 07-31-2016 at 06:14 PM.


#3
04-26-2016, 08:39 PM


#4
04-26-2016, 08:48 PM
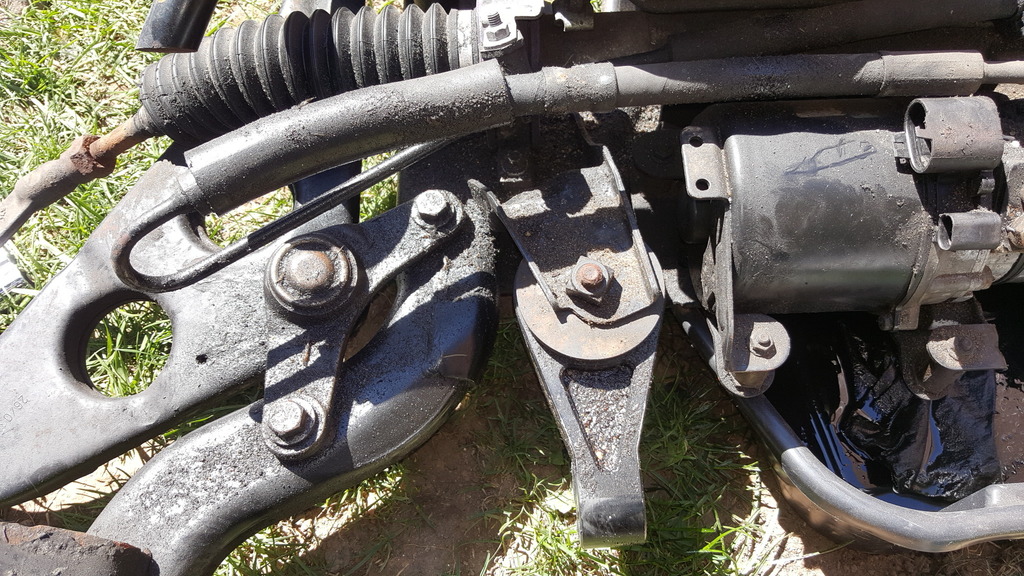
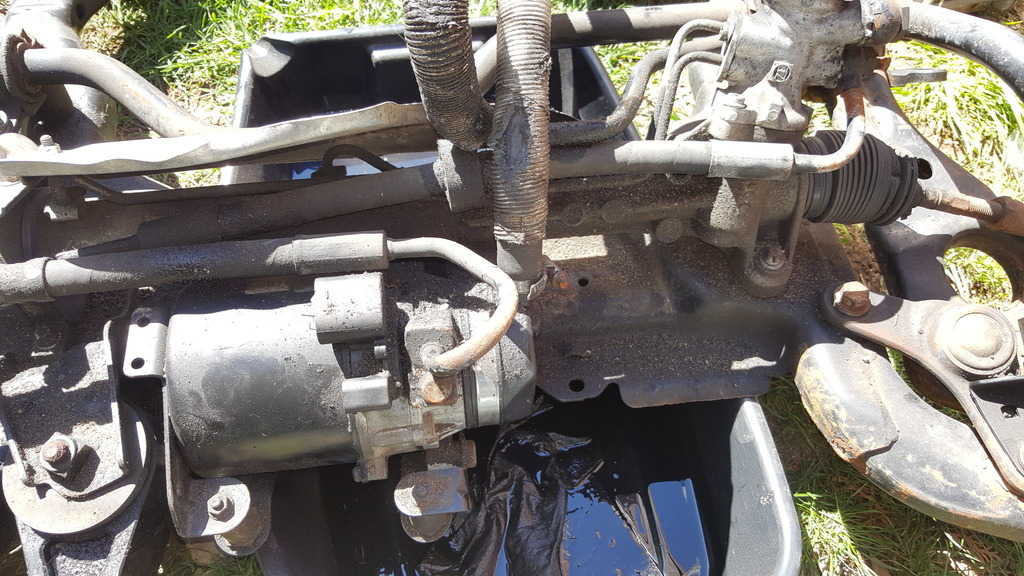
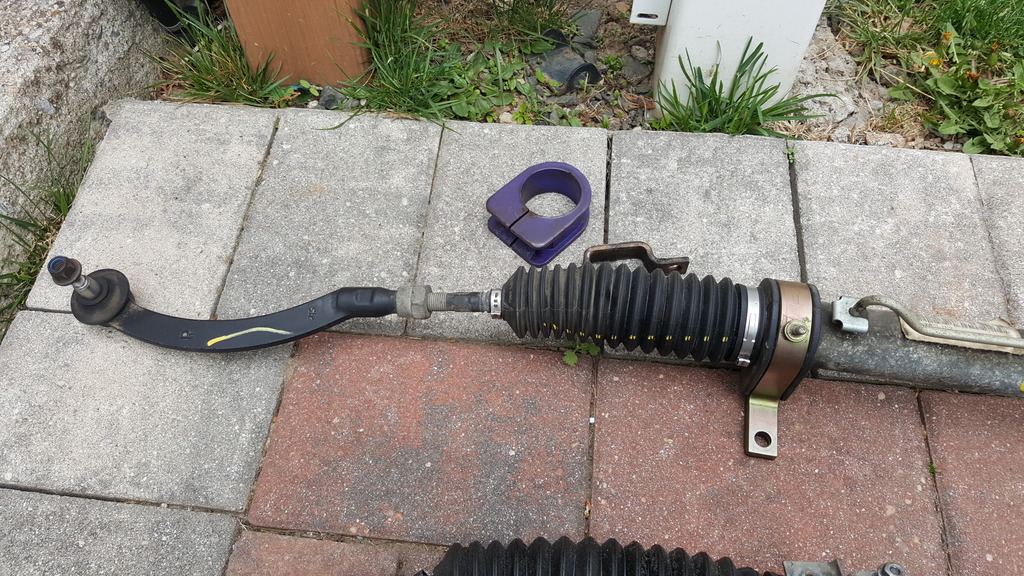
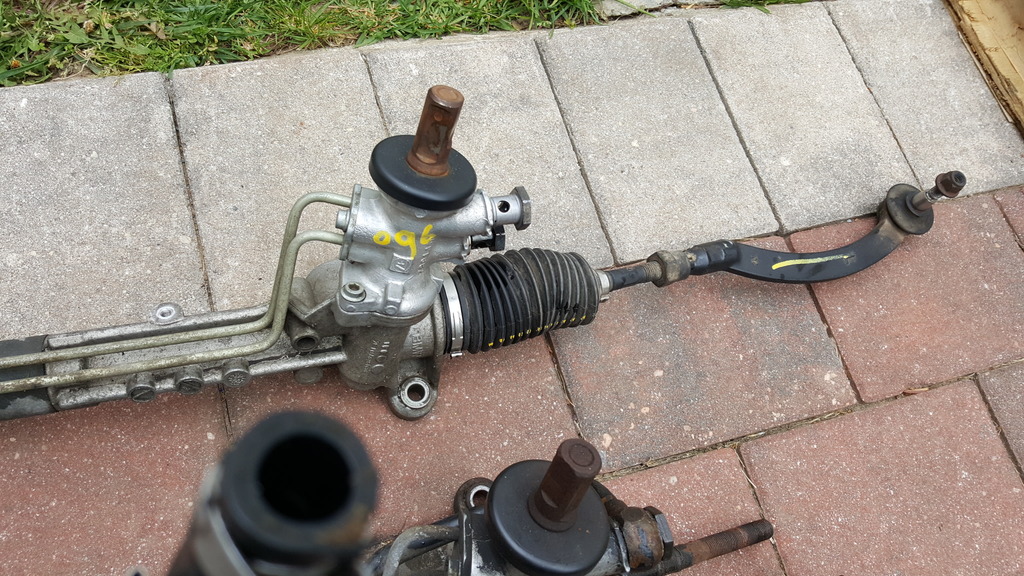
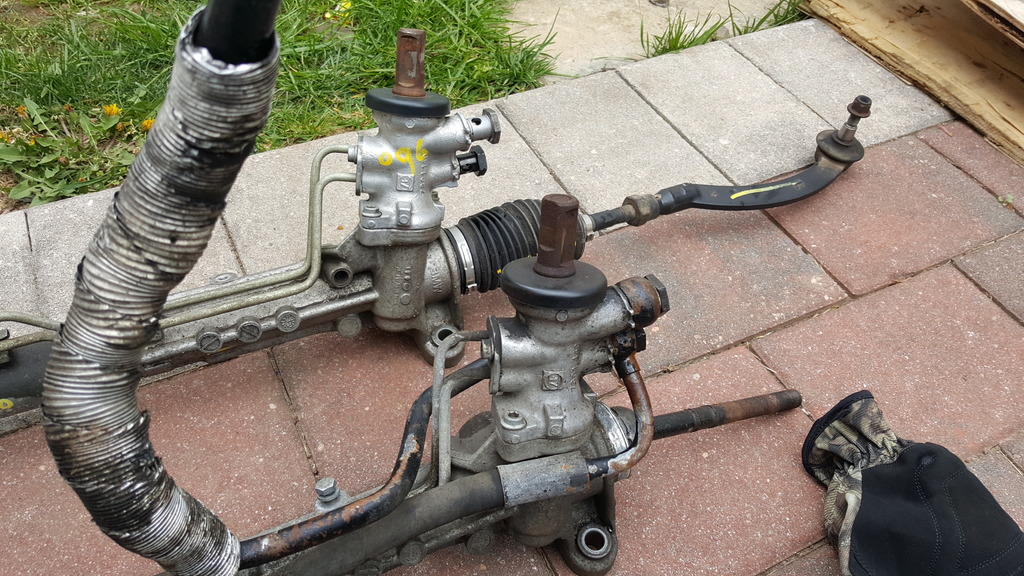
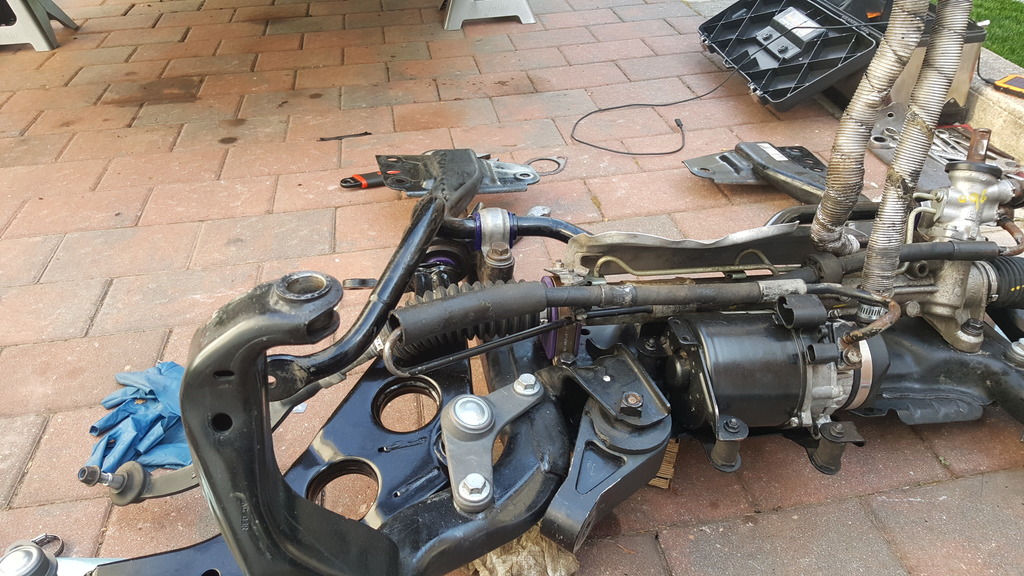
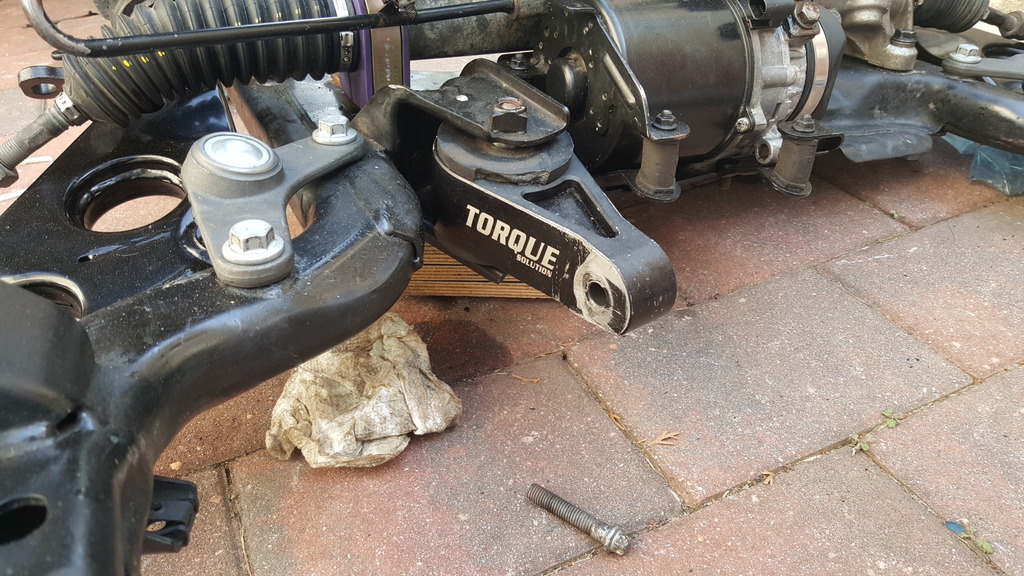
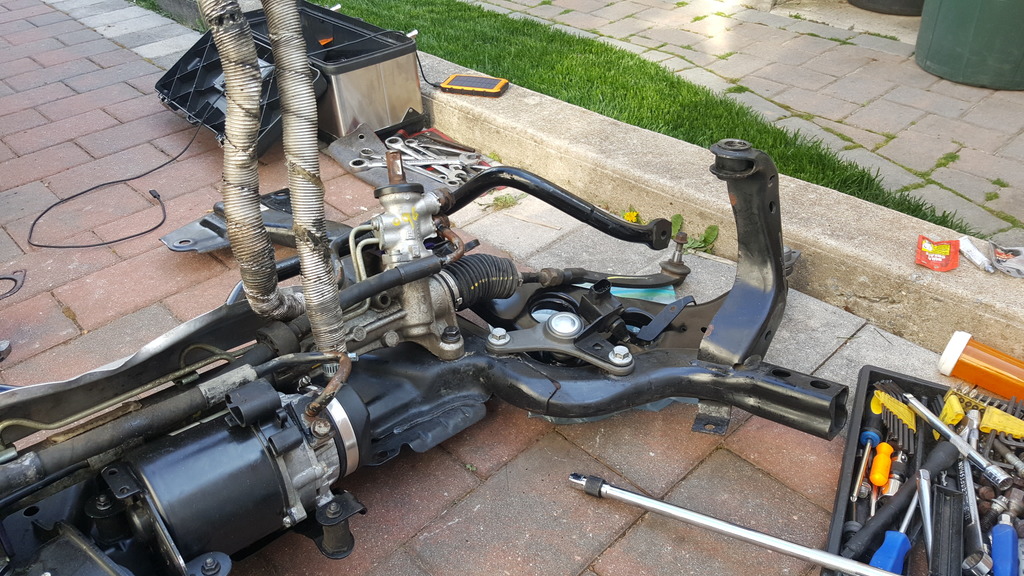
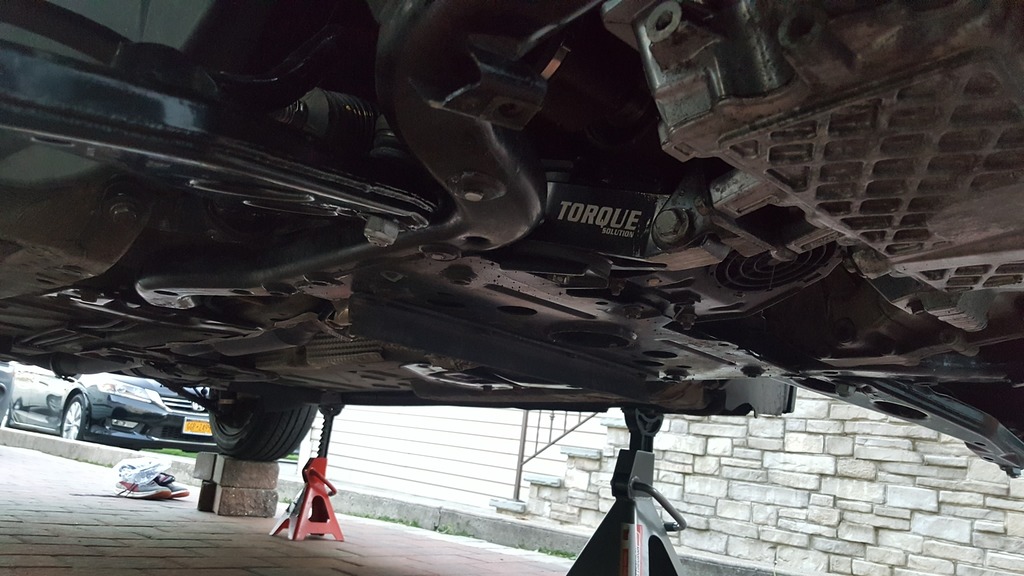
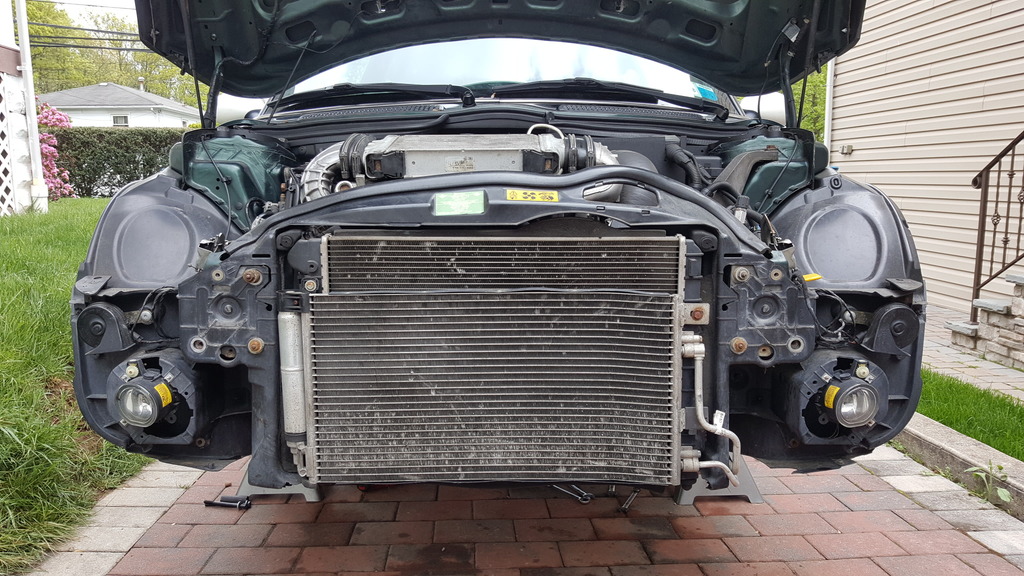
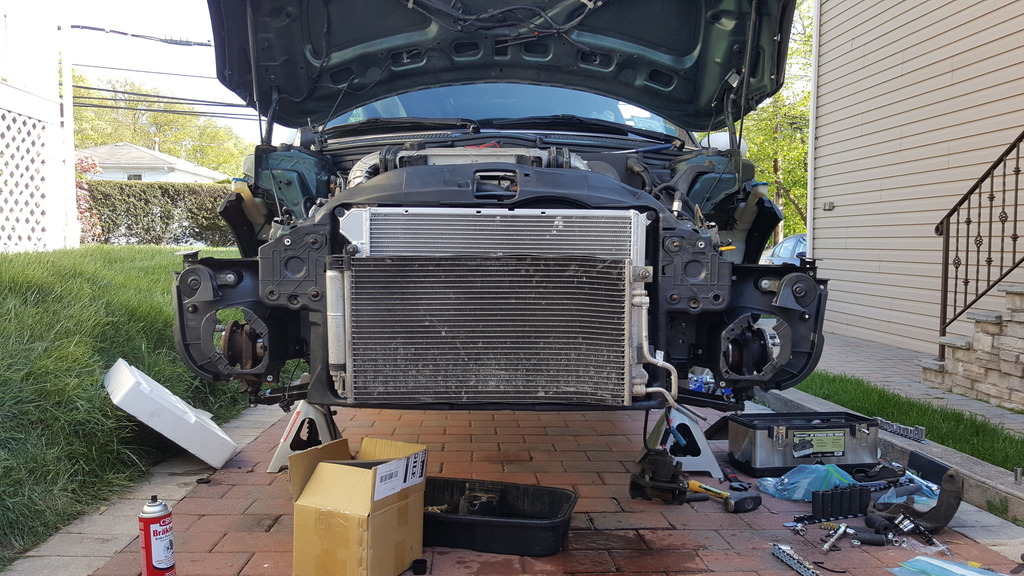
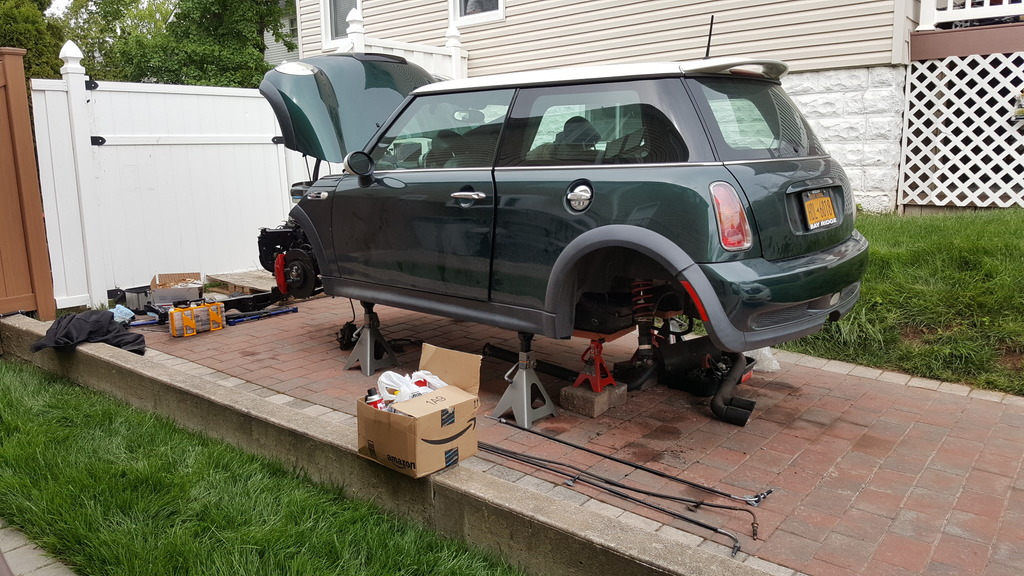
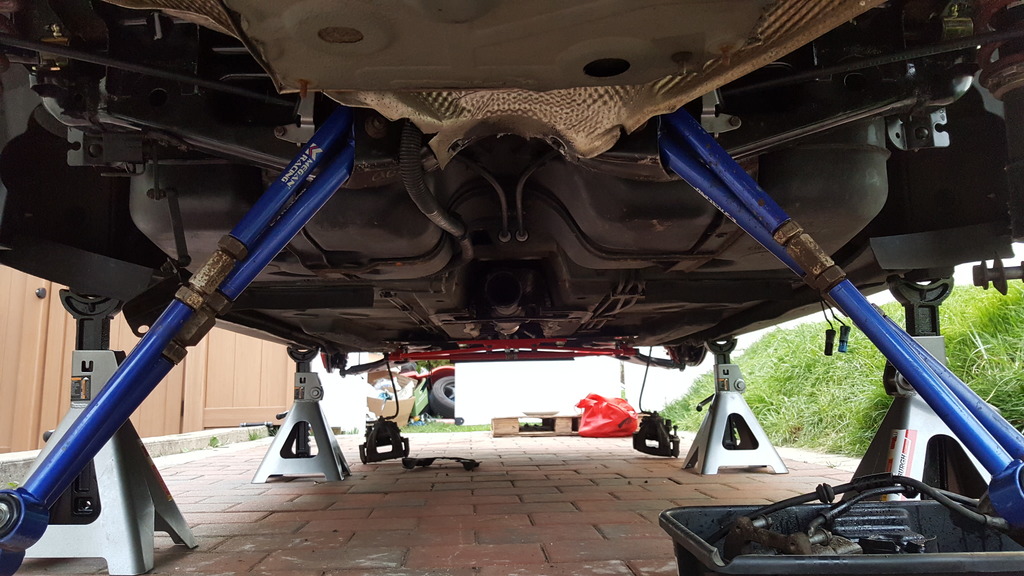
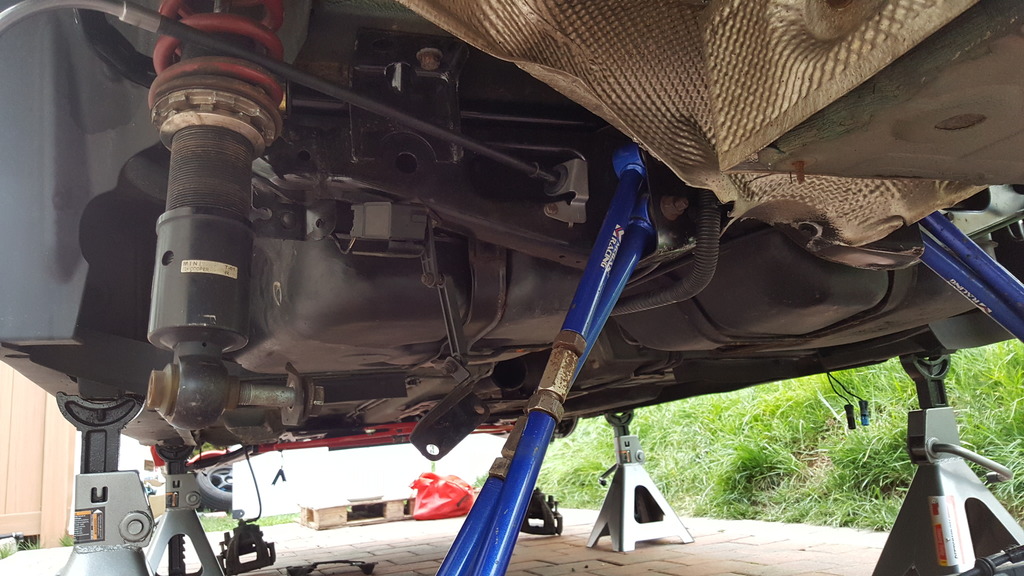
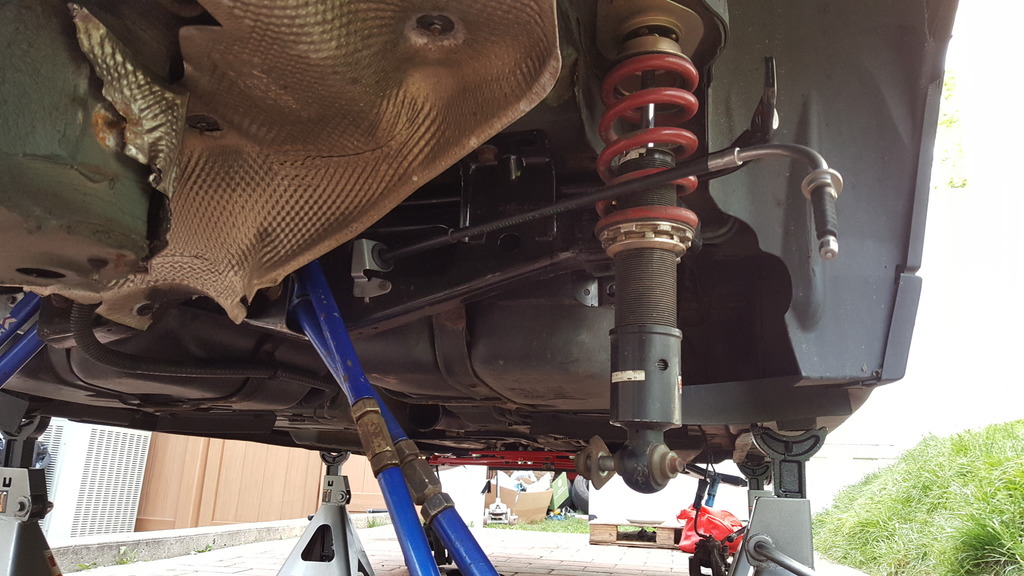
Transplant started
Need
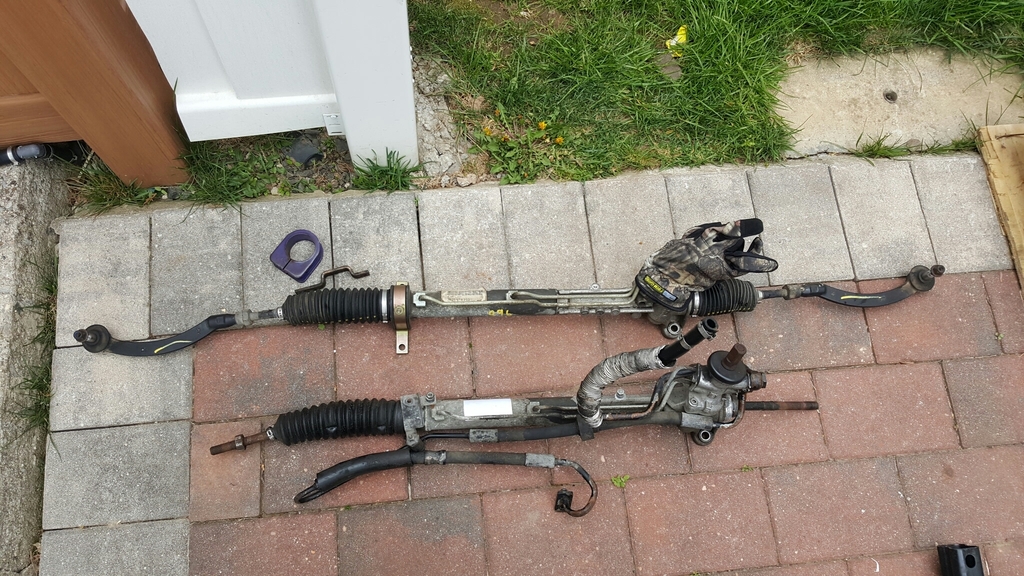
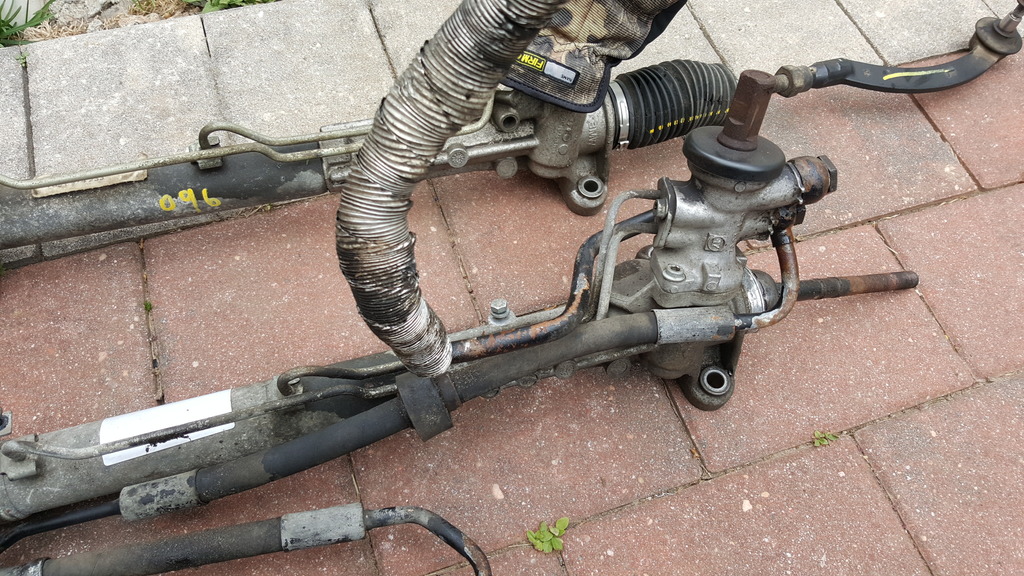
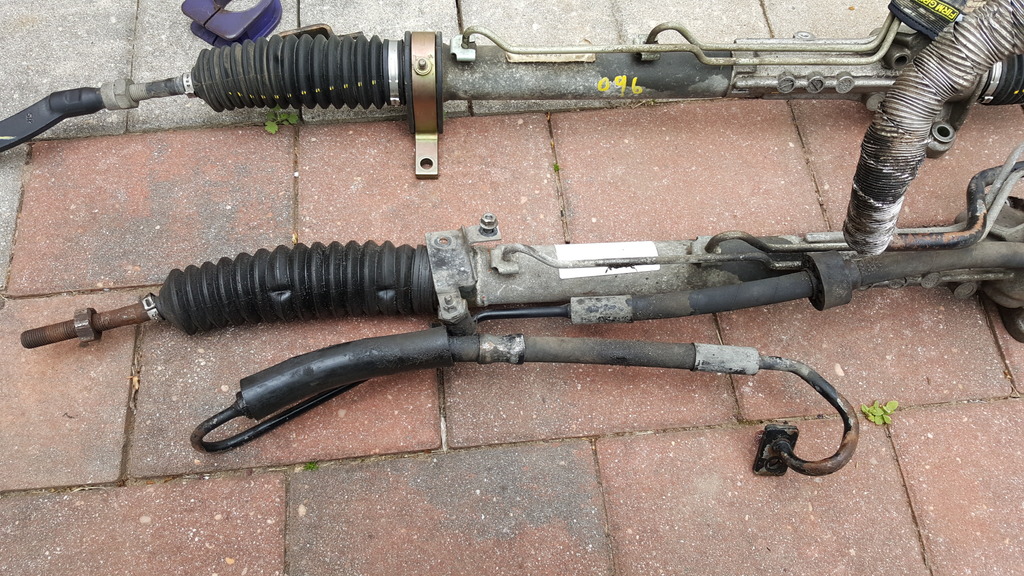
- Steering rack
- Dog bone
- PS Tank hoses and lines
- Headlight leveling sensor (or at least that is what i think it is)
- Remove the Tie rods inner and outer
- Bolts from Control arm Brackets
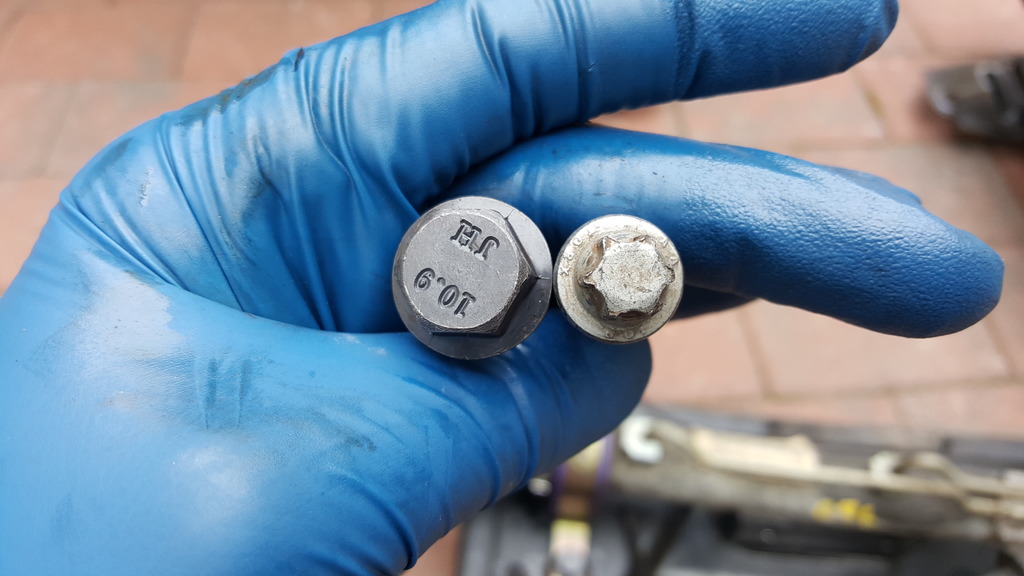
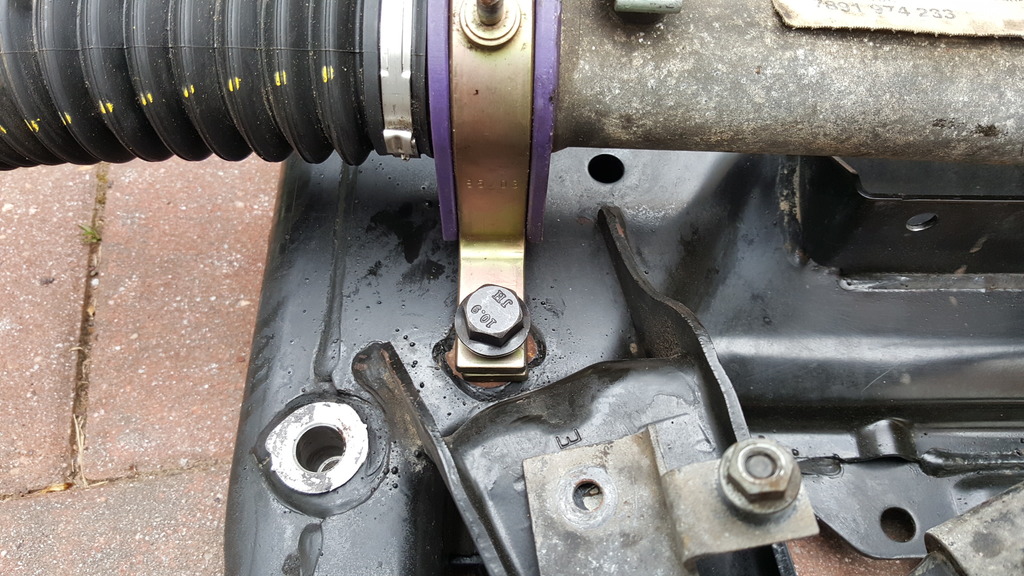
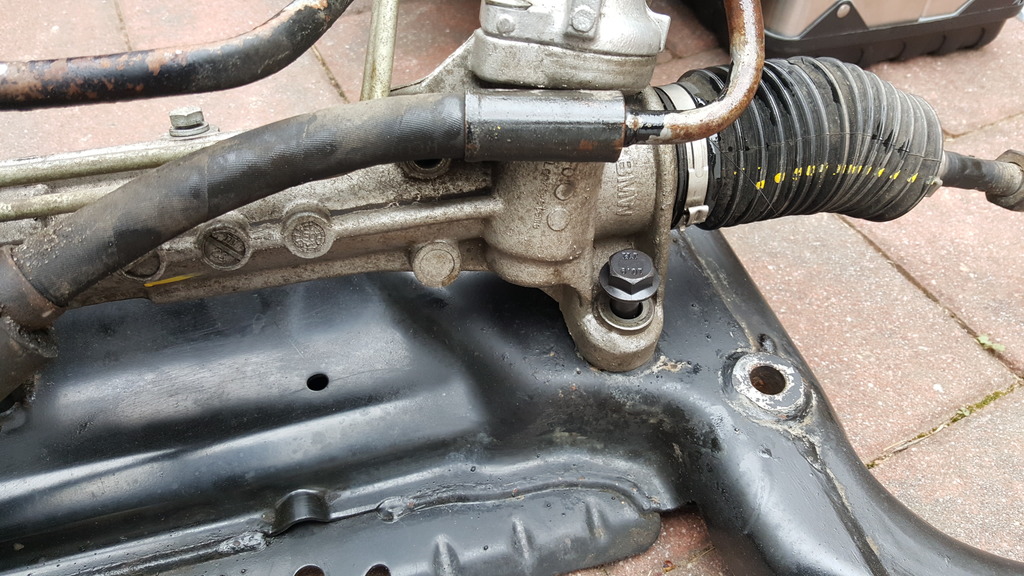
Had so much trouble getting the rack off due to the star socket, which i didn't have. Also had so much trouble getting the Tie rod ends to come off since it was all rusted and stuck together, was trying to save at least one Bellows boot.
Need
- Steering rack
- Dog bone
- PS Tank hoses and lines
- Headlight leveling sensor (or at least that is what i think it is)
- Remove the Tie rods inner and outer
- Bolts from Control arm Brackets
Had so much trouble getting the rack off due to the star socket, which i didn't have. Also had so much trouble getting the Tie rod ends to come off since it was all rusted and stuck together, was trying to save at least one Bellows boot.


Last edited by HaveATank; 04-28-2016 at 04:33 PM.

#6
04-27-2016, 07:49 AM
Vendor
The Turtle reminds me of mini_aaron's R56 racing build. https://www.northamericanmotoring.co...e-pacific.html Looks like a very fun project though. Looking forward to watching it progress. 
__________________
Your Trusted Source For DIY and Parts
FREE SHIPPING over $99 click here
MINI Parts | DIY Help | Facebook | Twitter | Instagram | YouTube | Promos
888.280.7799 | 6am - 5pm PST

FREE SHIPPING over $99 click here
MINI Parts | DIY Help | Facebook | Twitter | Instagram | YouTube | Promos
888.280.7799 | 6am - 5pm PST
#7
04-28-2016, 04:32 PM
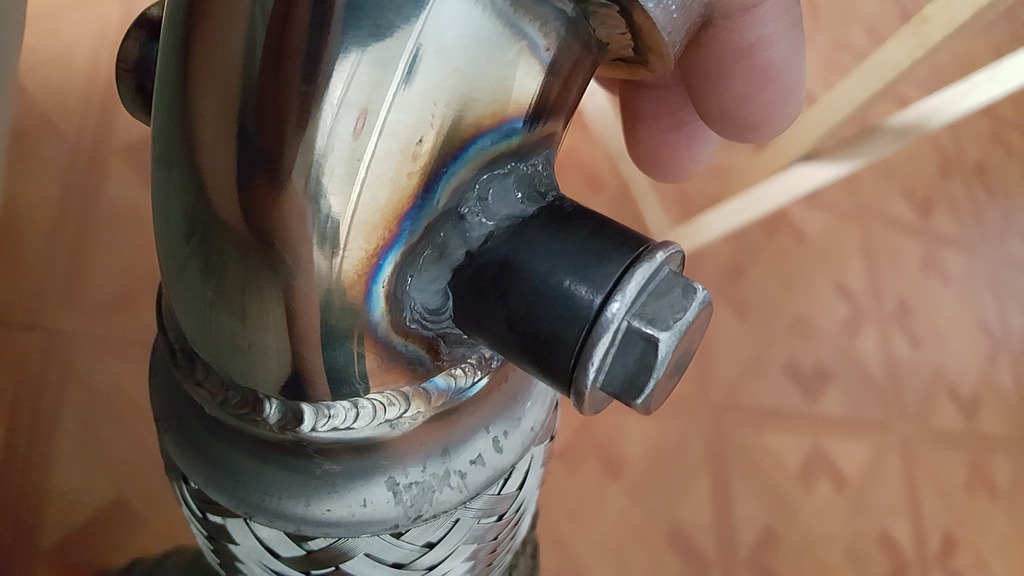
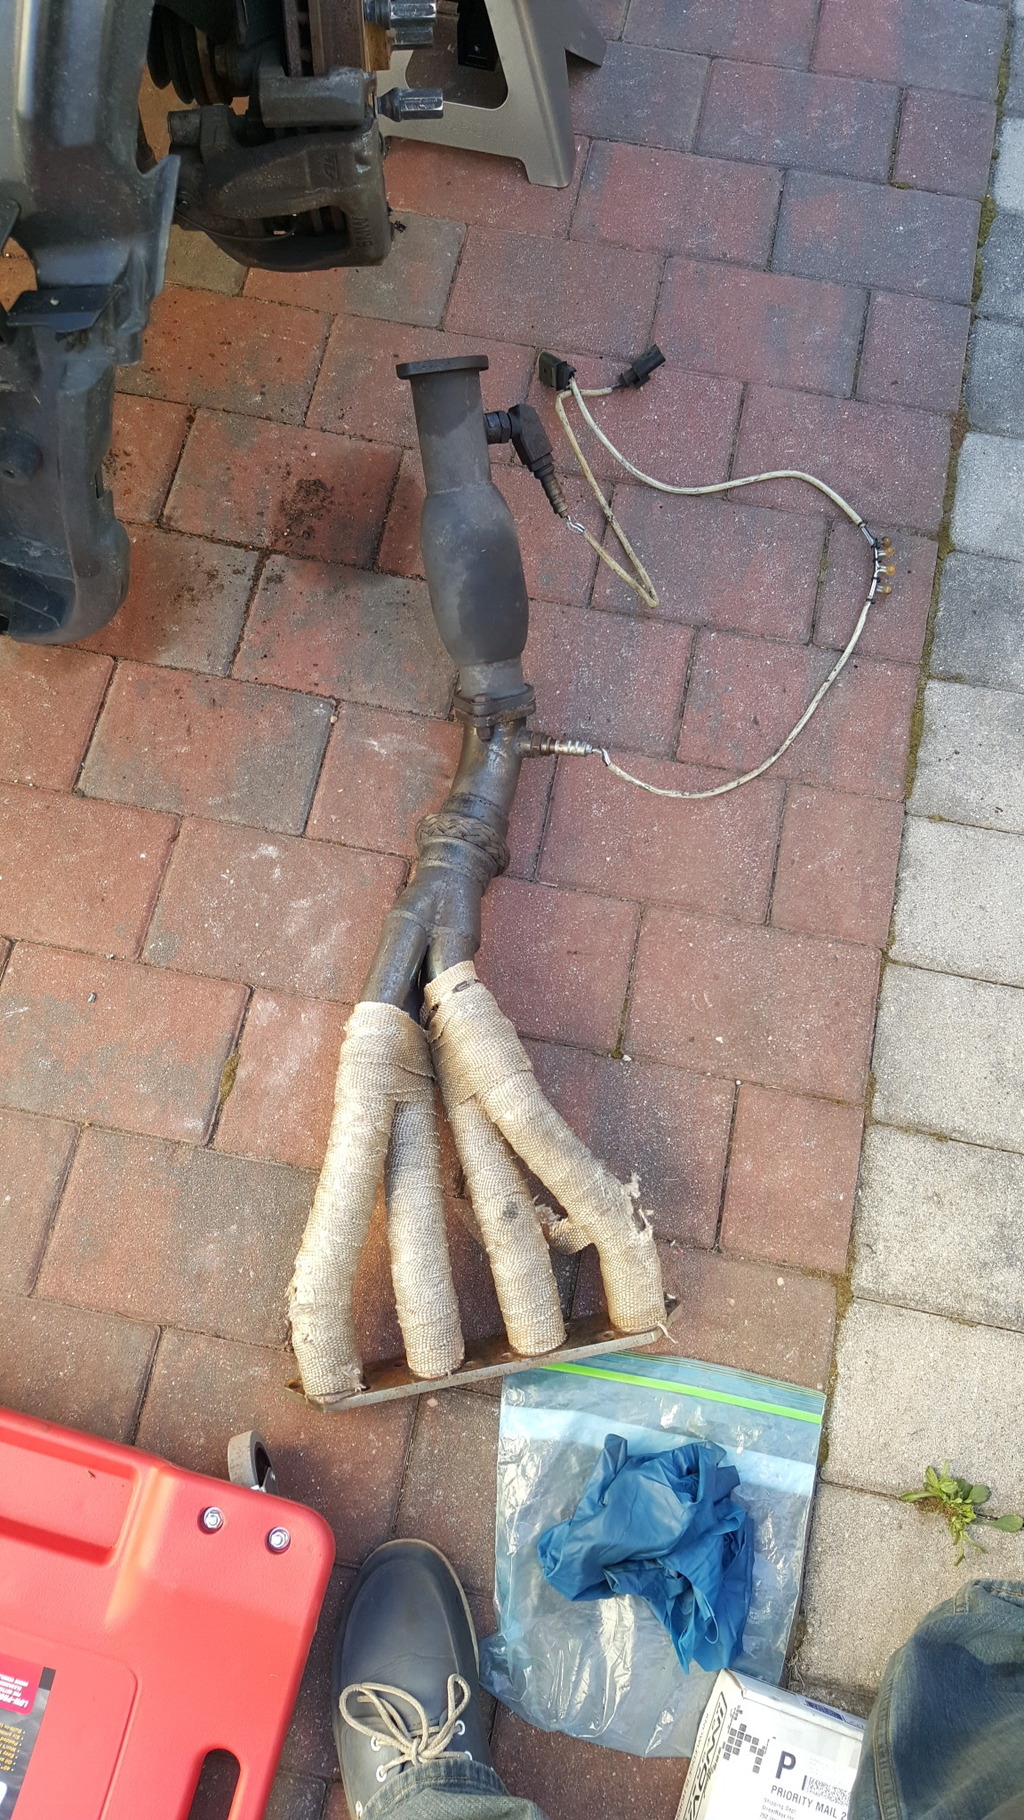
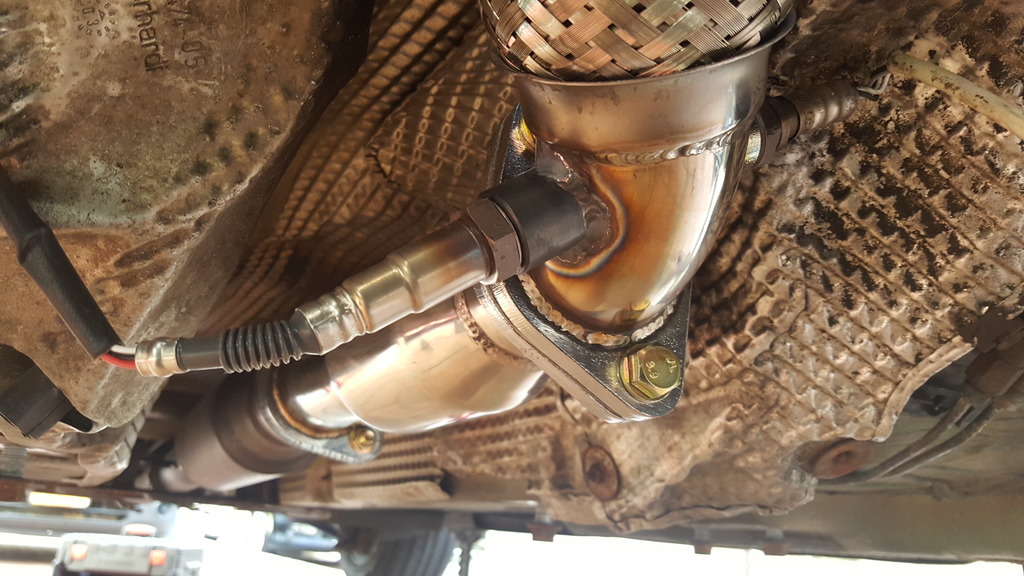
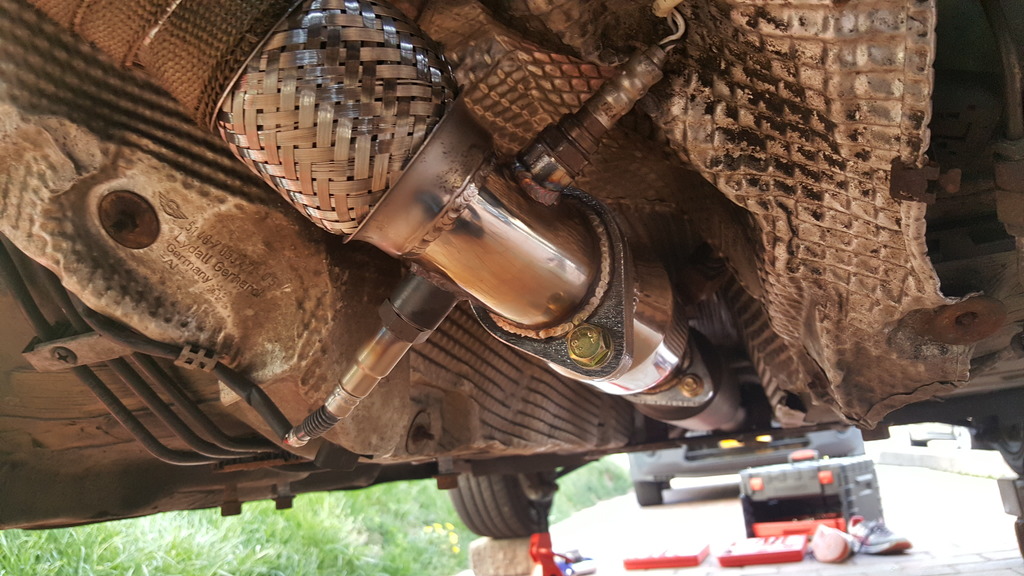
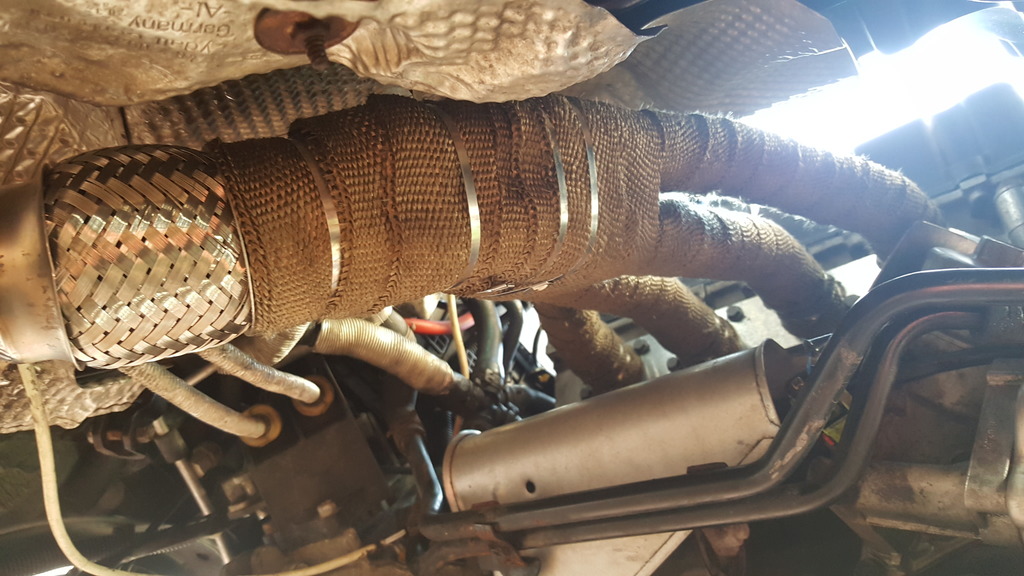
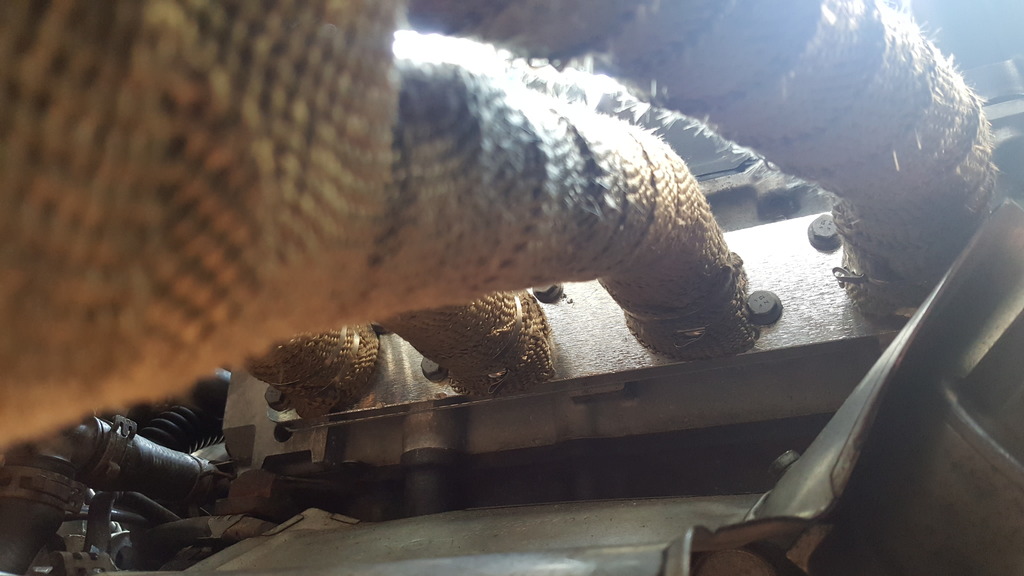
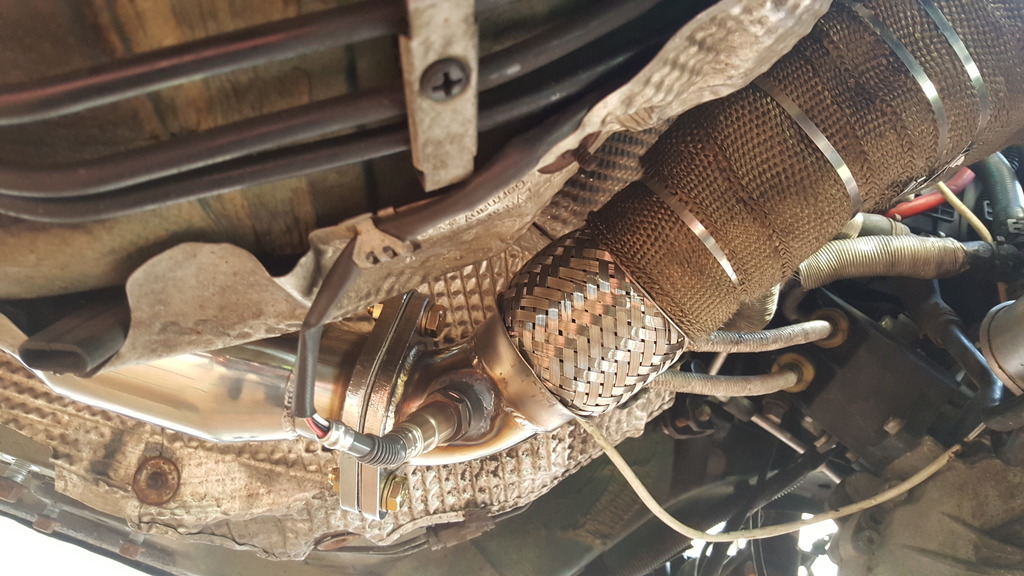
Exhaust
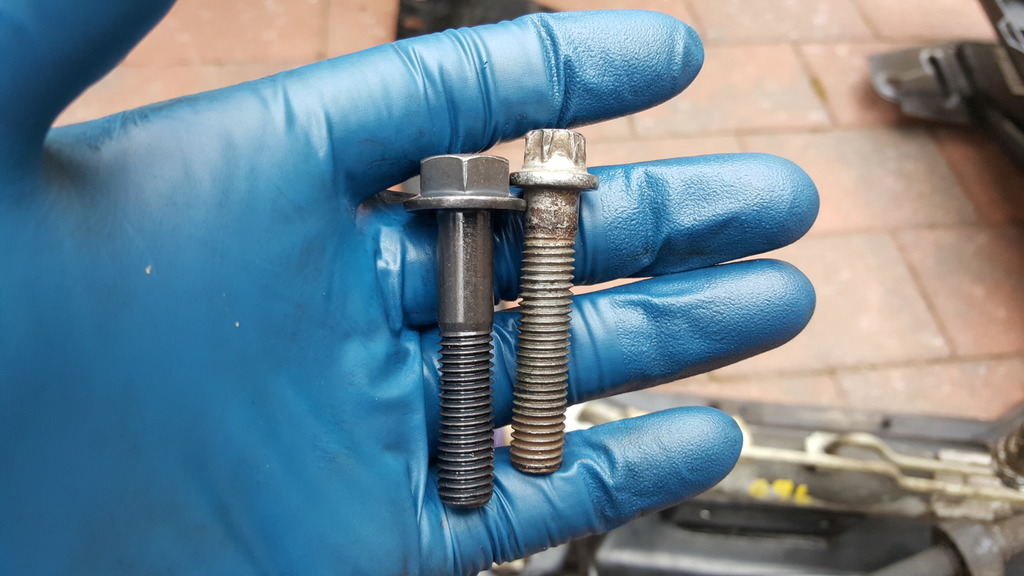
Exhaust is all Wrapped up and wide band bung welded on. Install was pretty easy after you get the bolts to line up with the Gasket and the holes on the head. My God i think i spend about 30 mins on that alone and about 10 mins on the rest. I got all new bolts because i thought the old one's would be all rusted, but to my surprise they came out very easy and are in really good condition. I'm going to thru them in the tumbler to get them nice and clean.
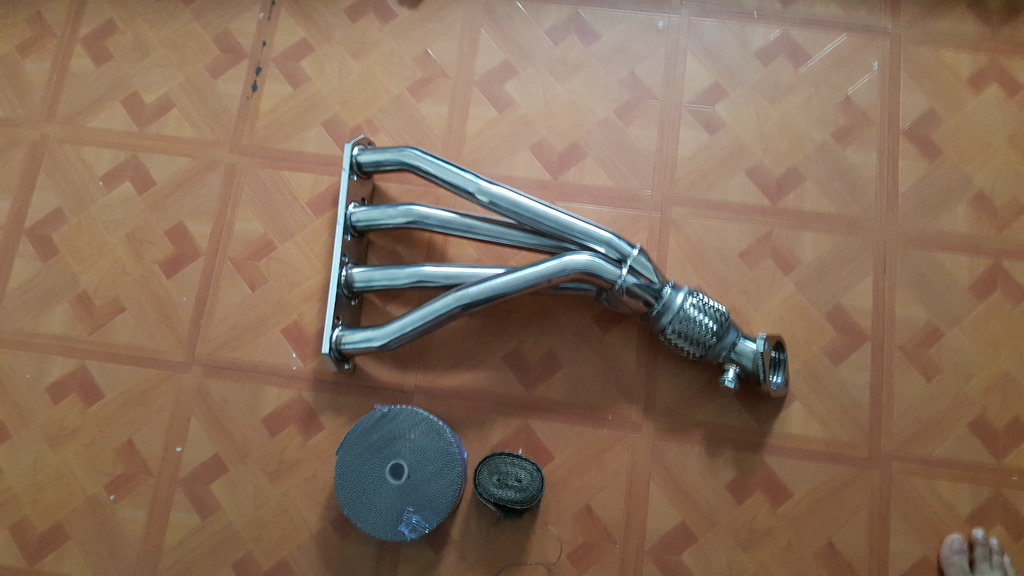

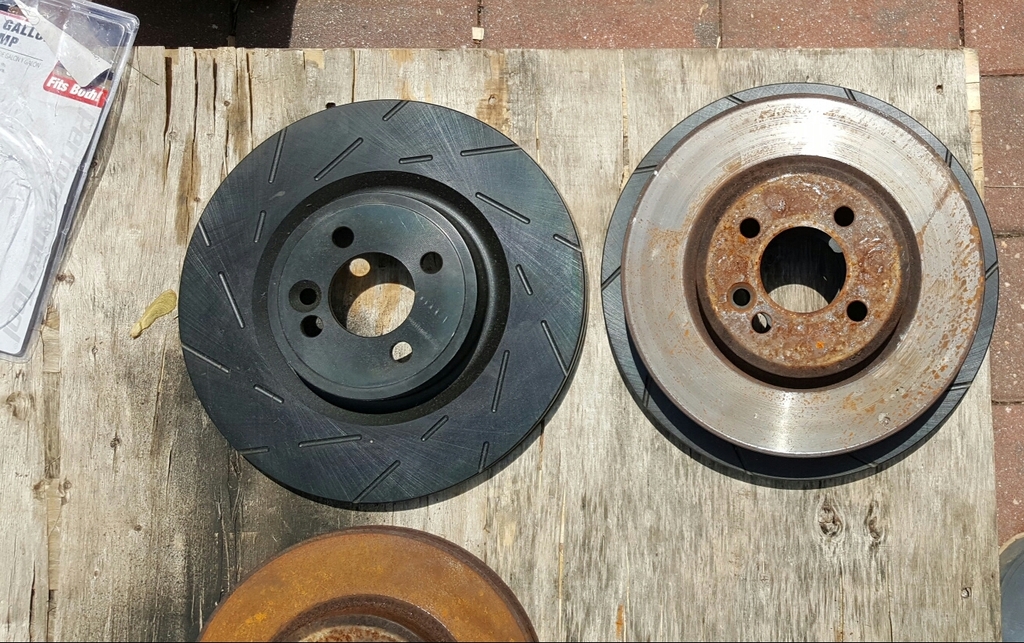
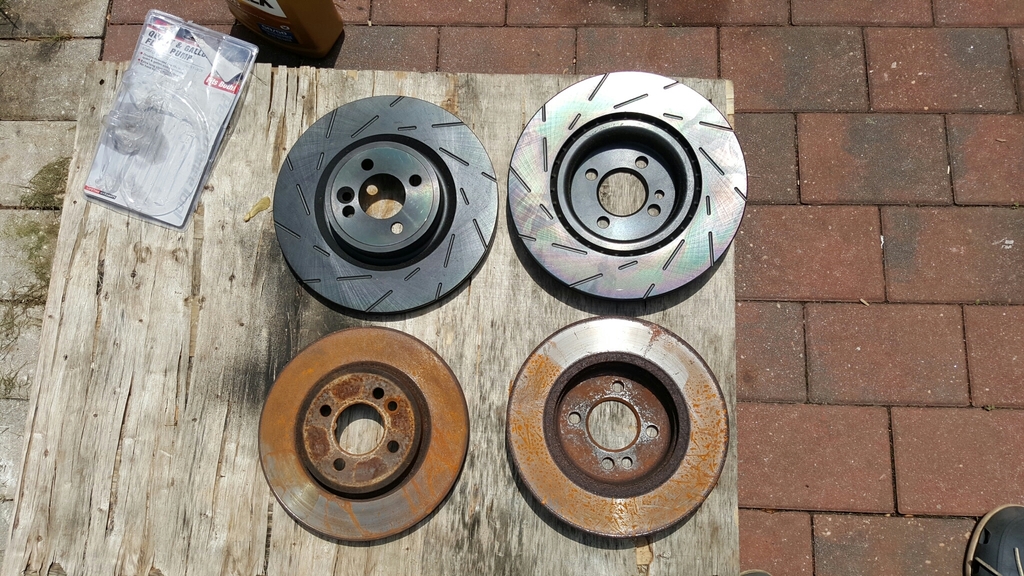
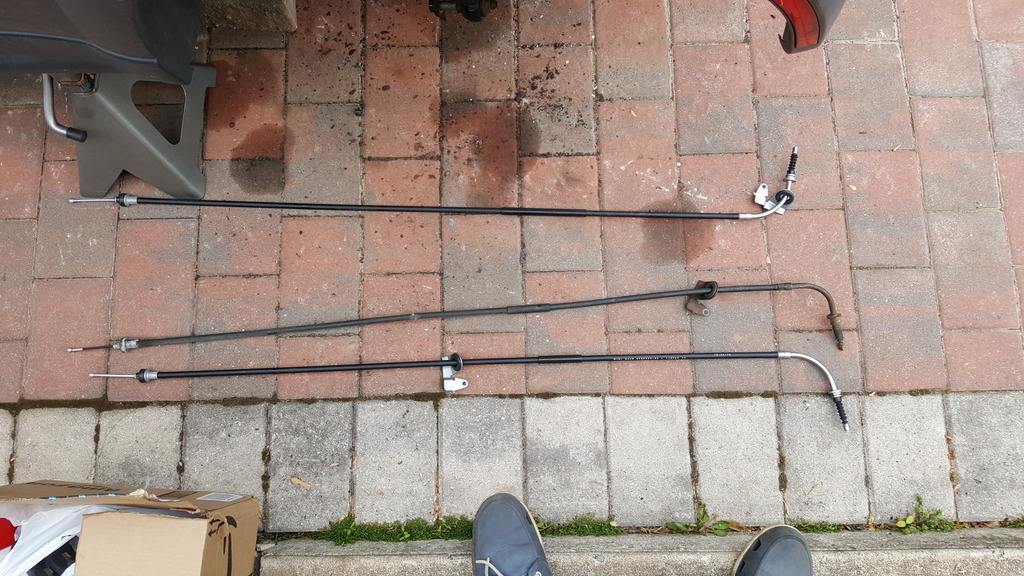
Out with the old and in with the new
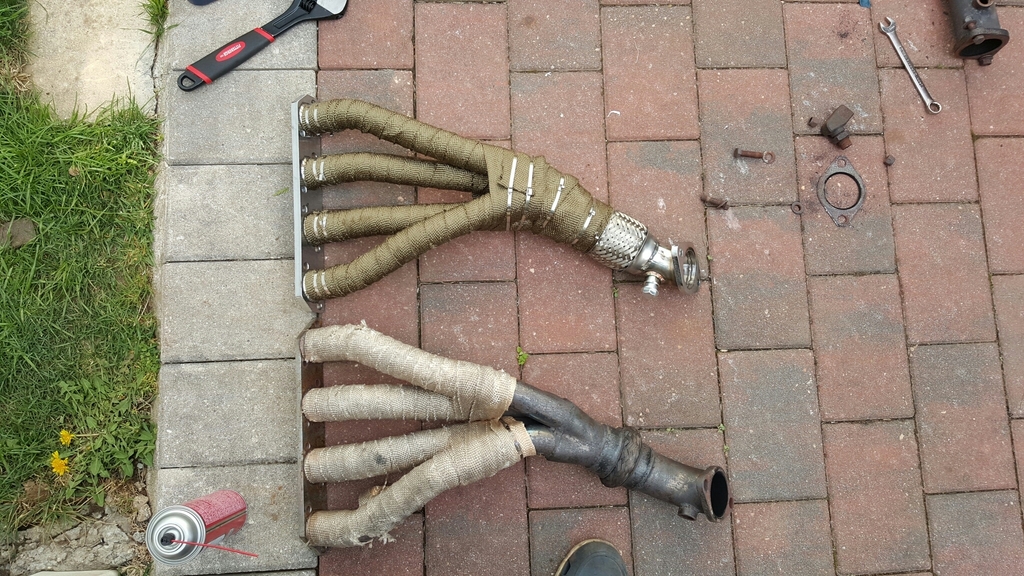


Out with the old and in with the new


Trending Topics
#8
04-28-2016, 05:27 PM
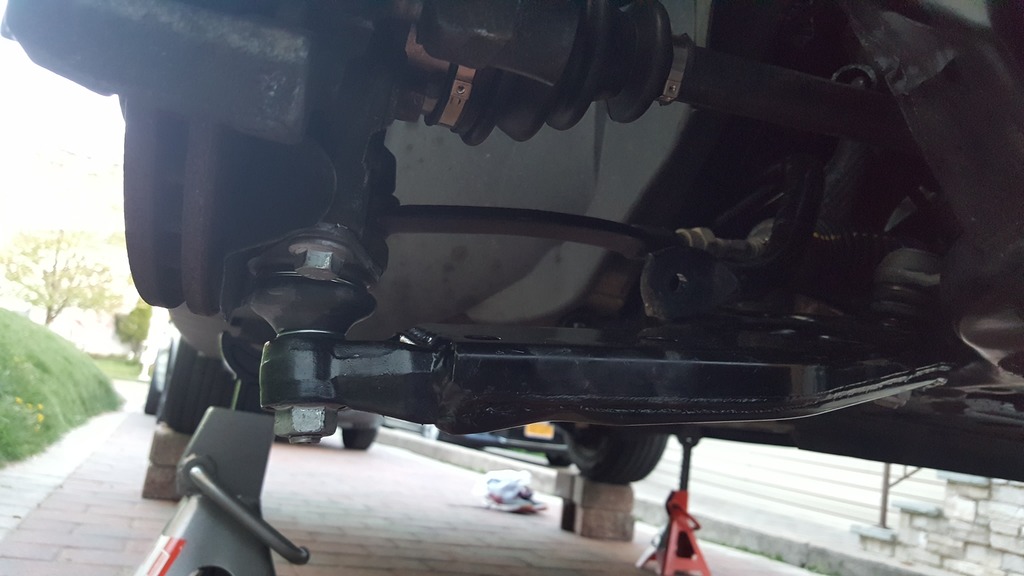
OK so after fighting with everything, i was able to get the rack off, but a friend called and said they had one available, so i just got a new to me-used one. It was in pretty good condition tie rod inner and outer was in great condition. Bushing was also good. So i returned the new inner/outer R&L tie rods back. Cleaned everything and transplant started.
New Control arms/Control Arm Brackets with Powerflex Bushings which was pressed in the wrong way. A quick trip to my buddies shop to un-press and re-press in the right way. New Inner/outer ball joint.
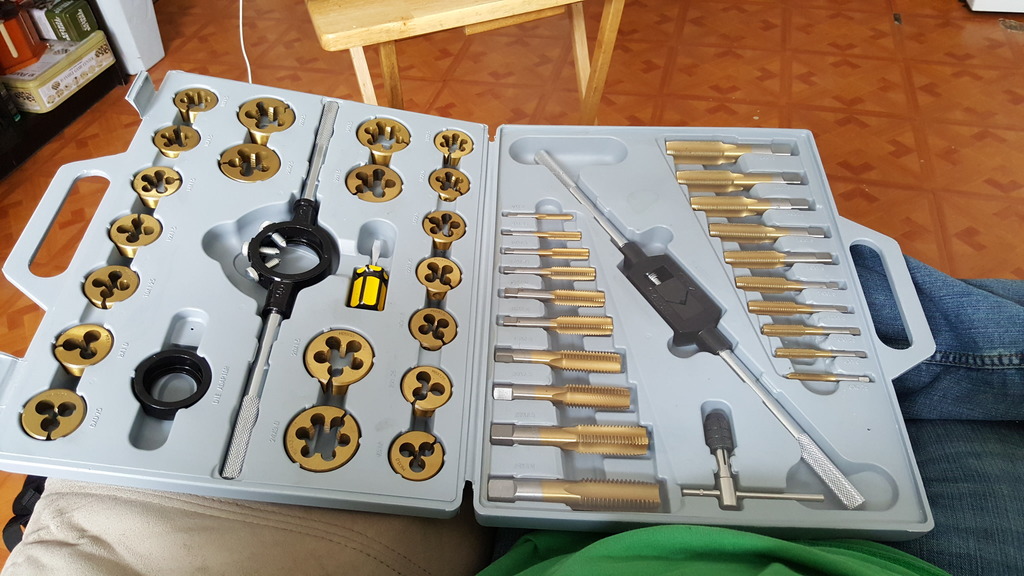
While putting in the Driver side outer ball join i crossed thread the Spindle, so i ordered one will be replacing when i get it. Also got a Tap and Die set since it like the first 2-3 threads, but just cant get the bolt to pass that.

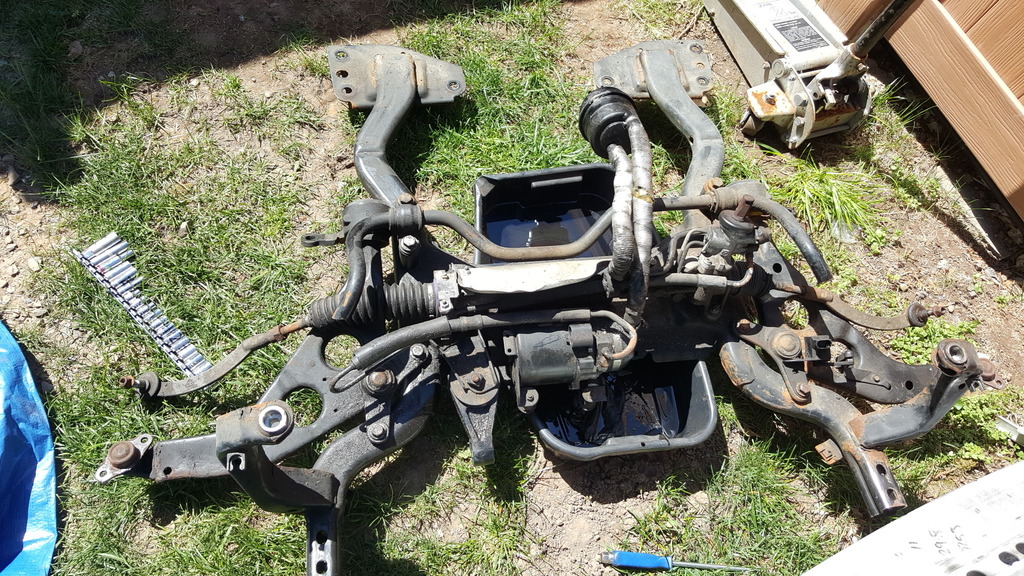
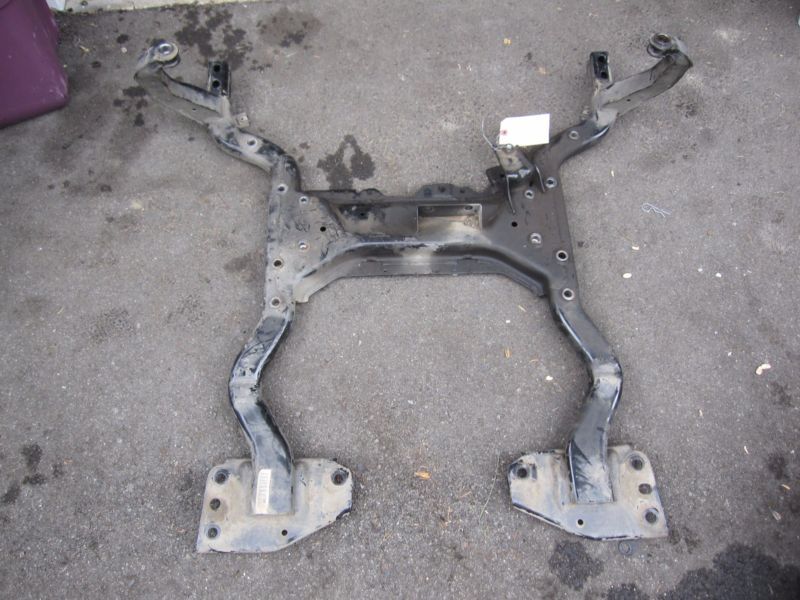
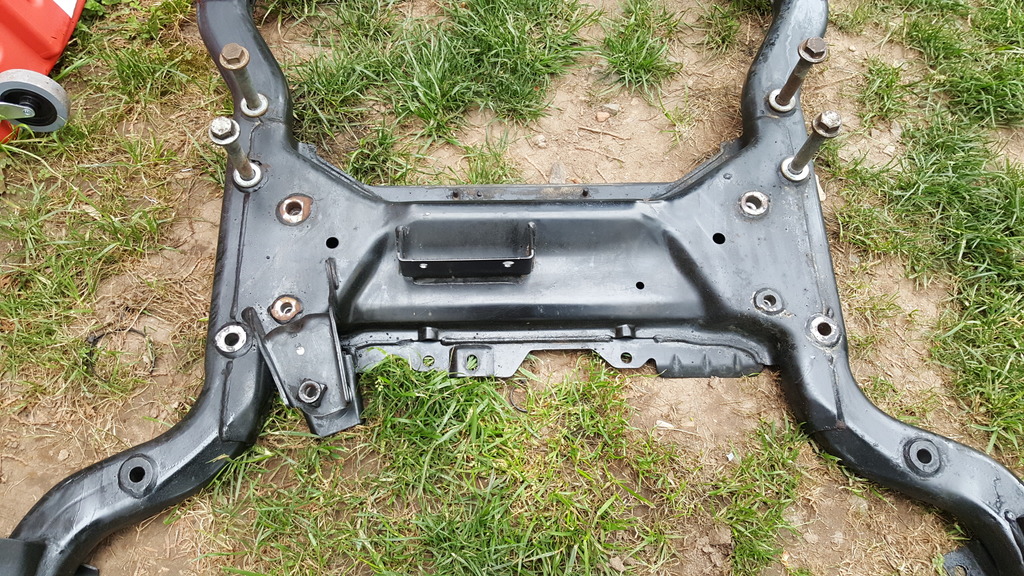
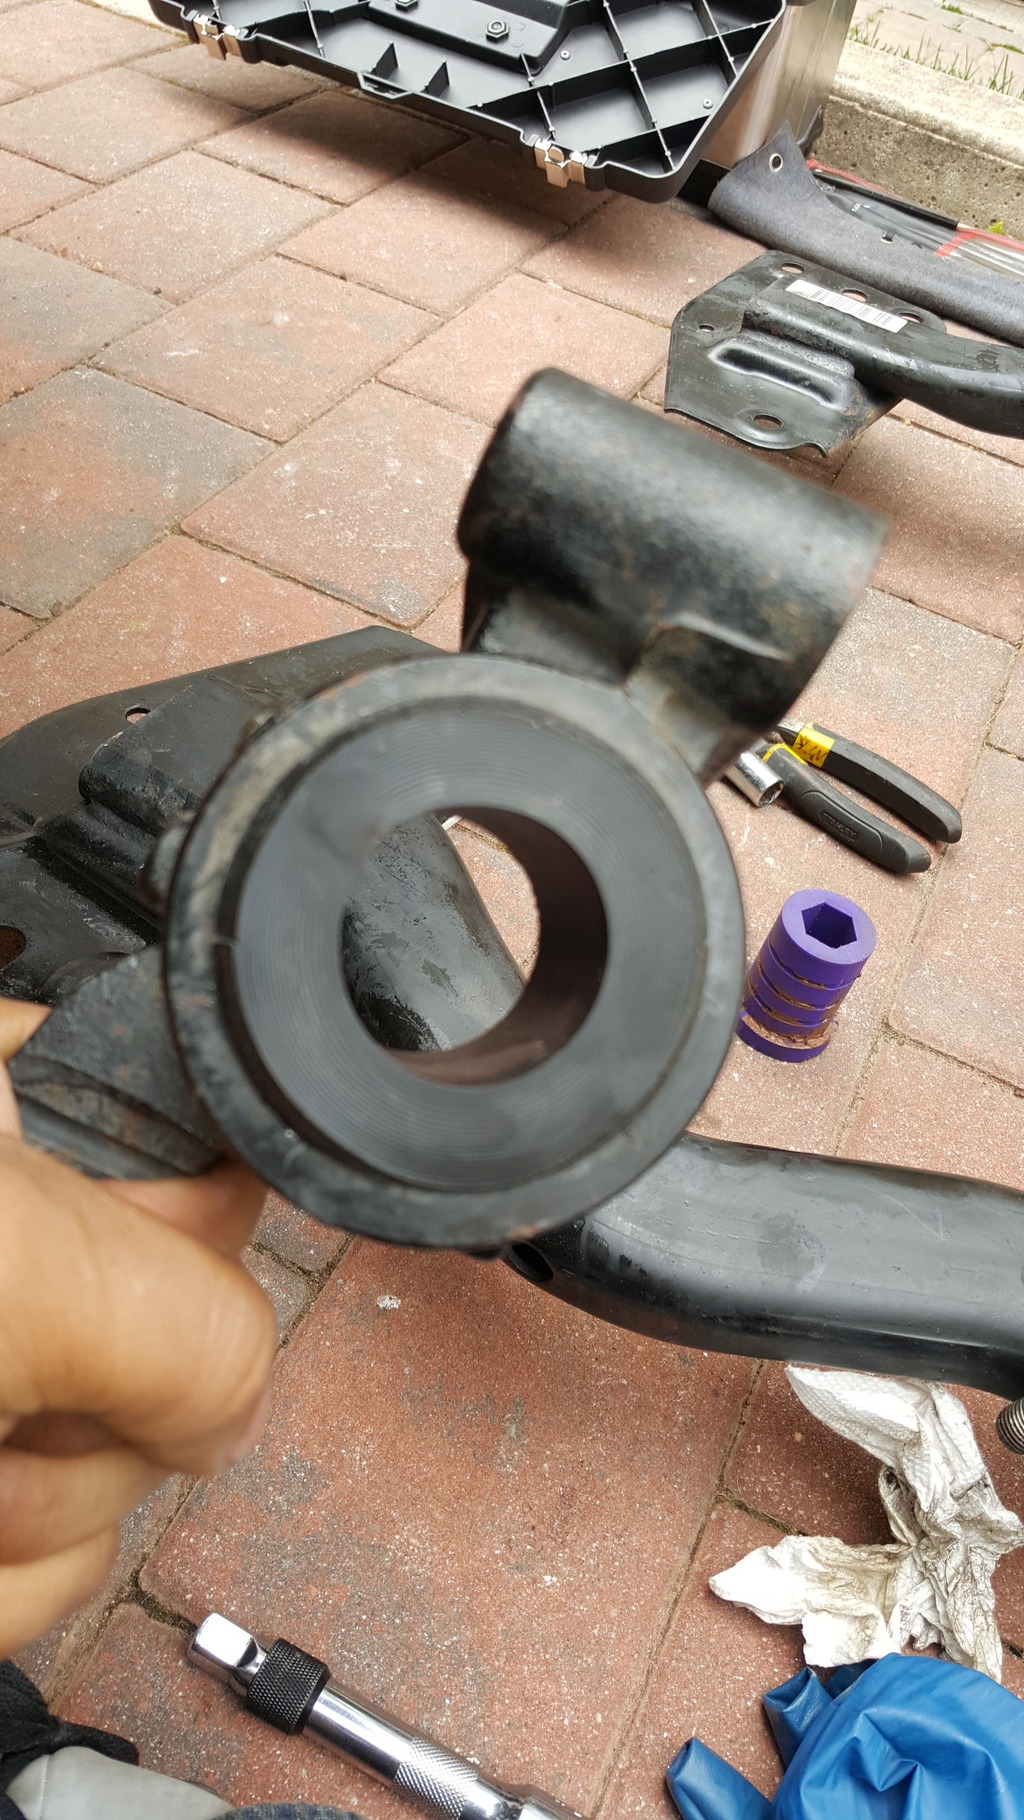
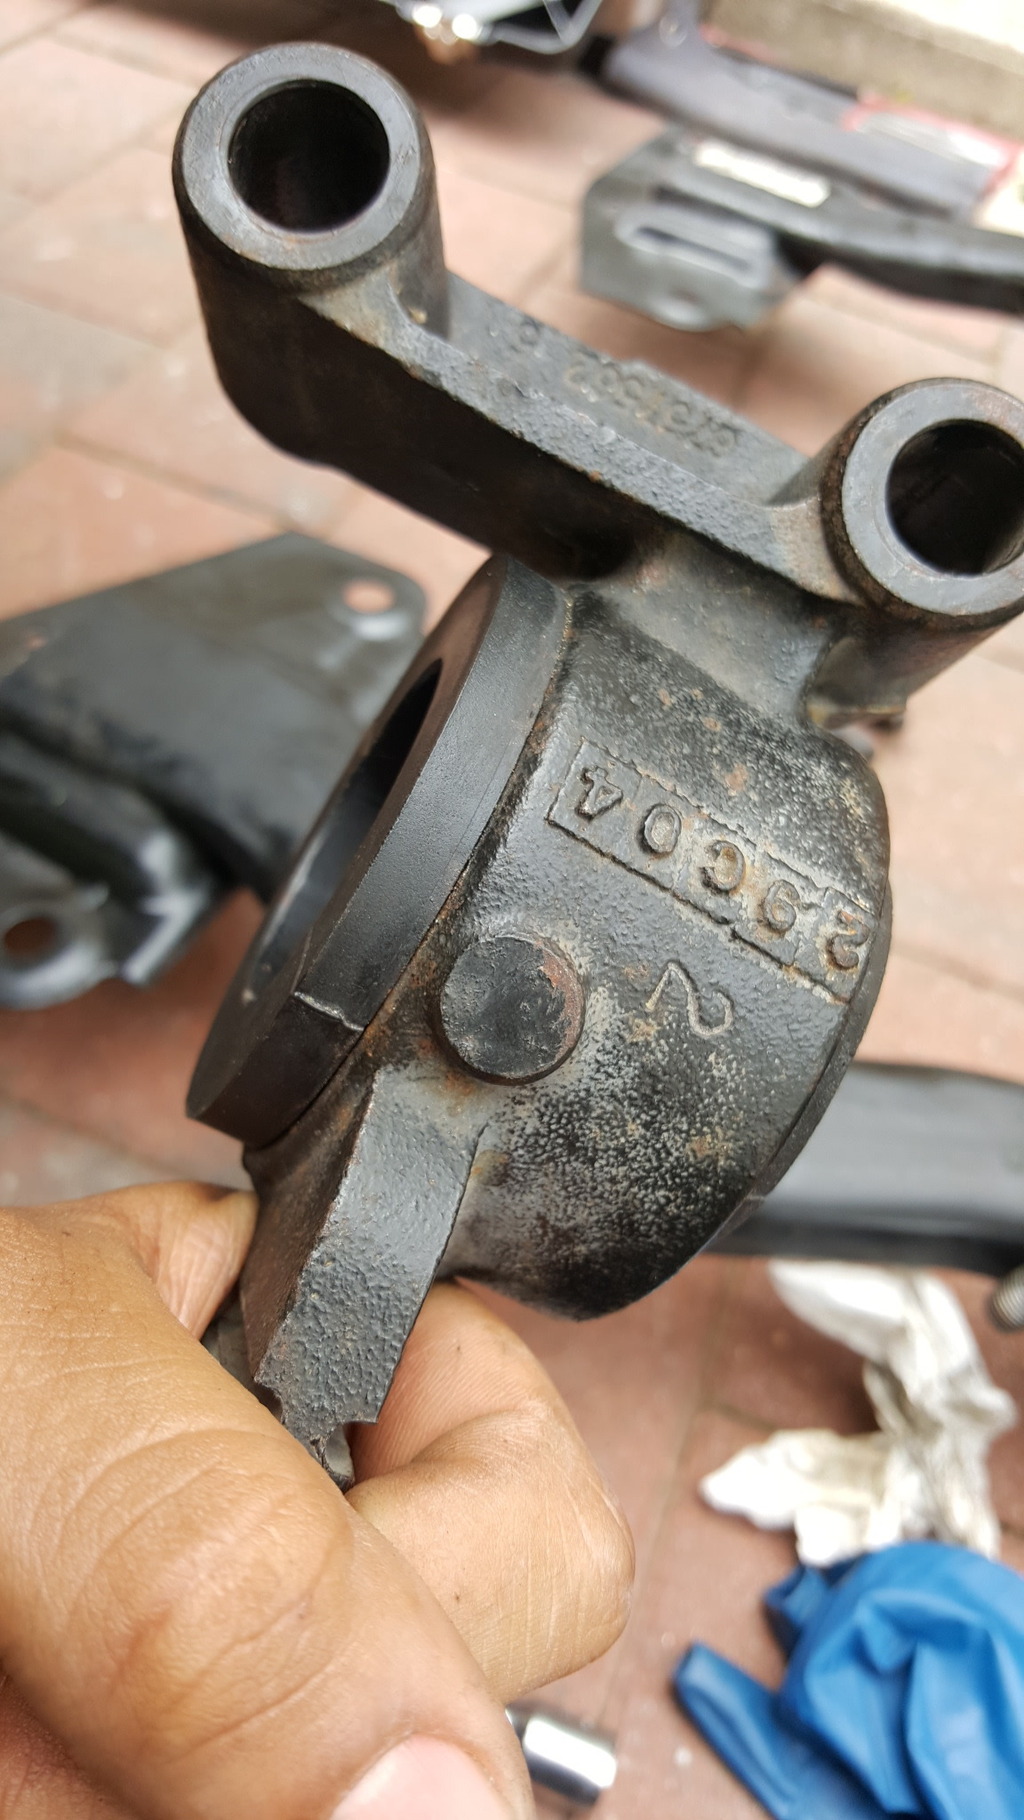
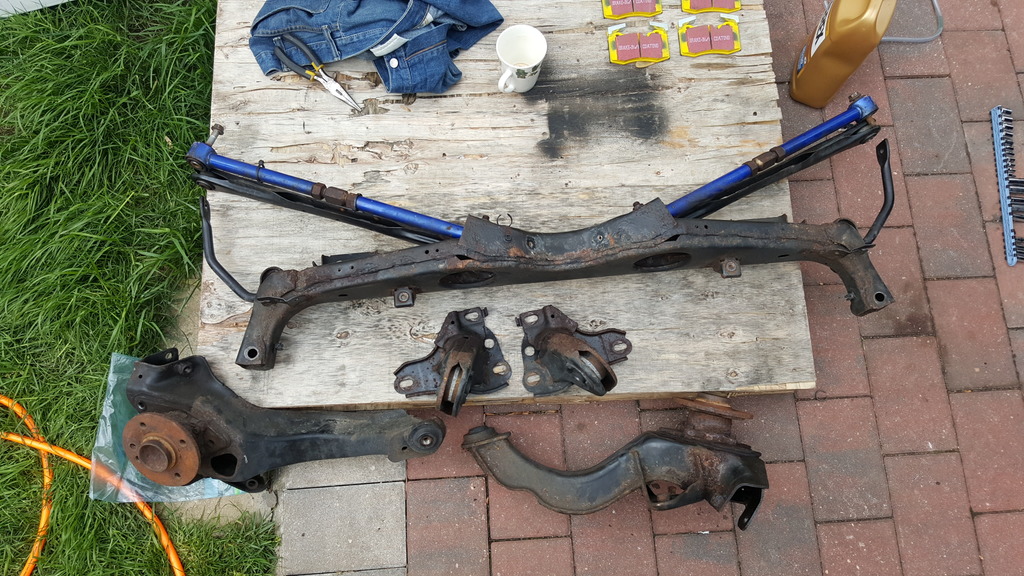
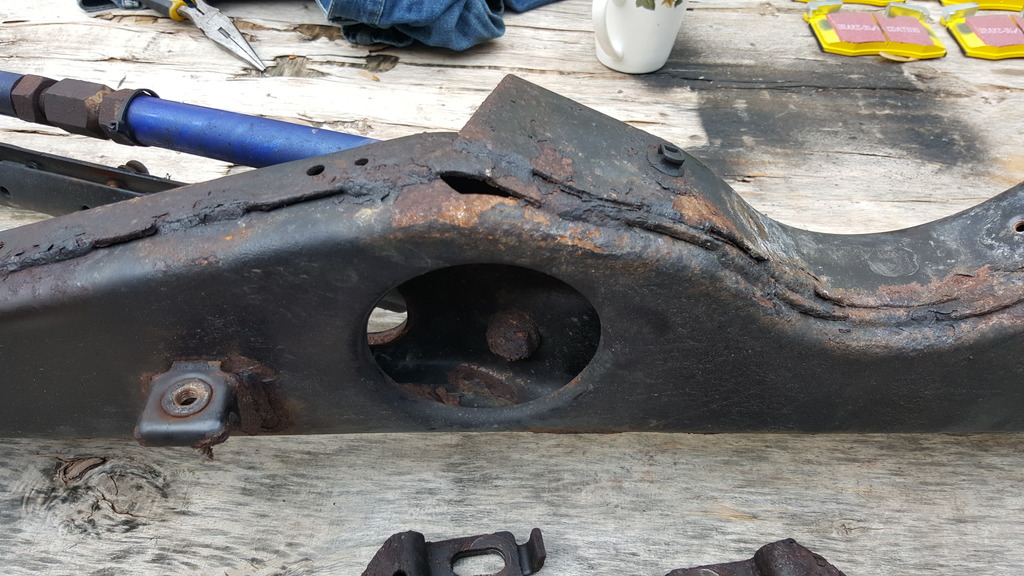
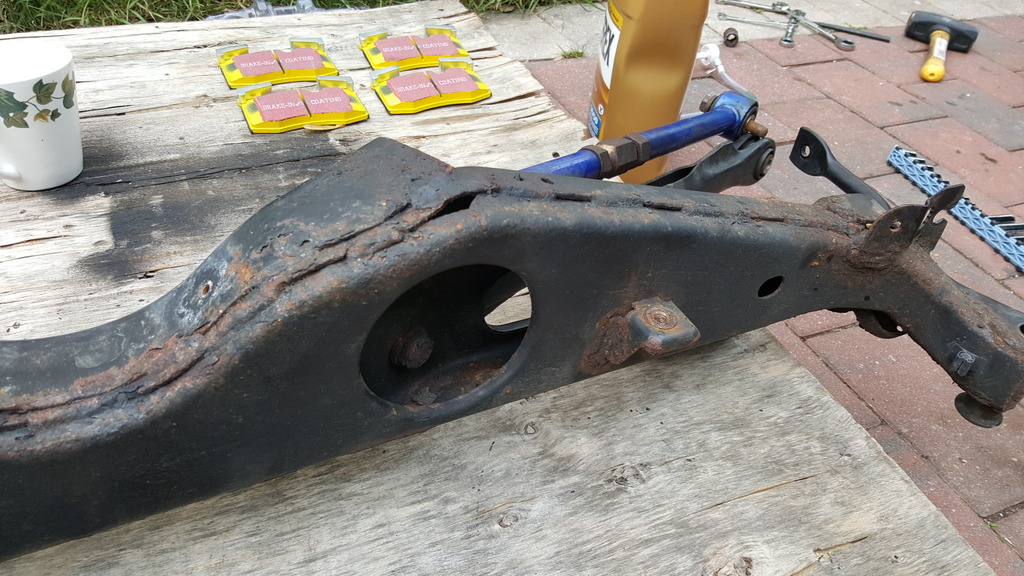
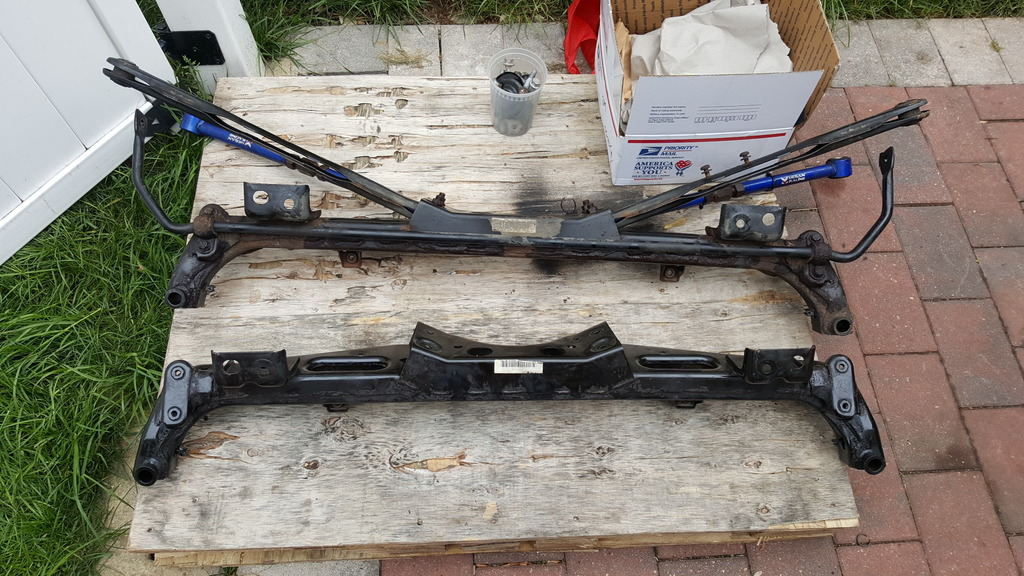
OLD Sub-Frame Stripped
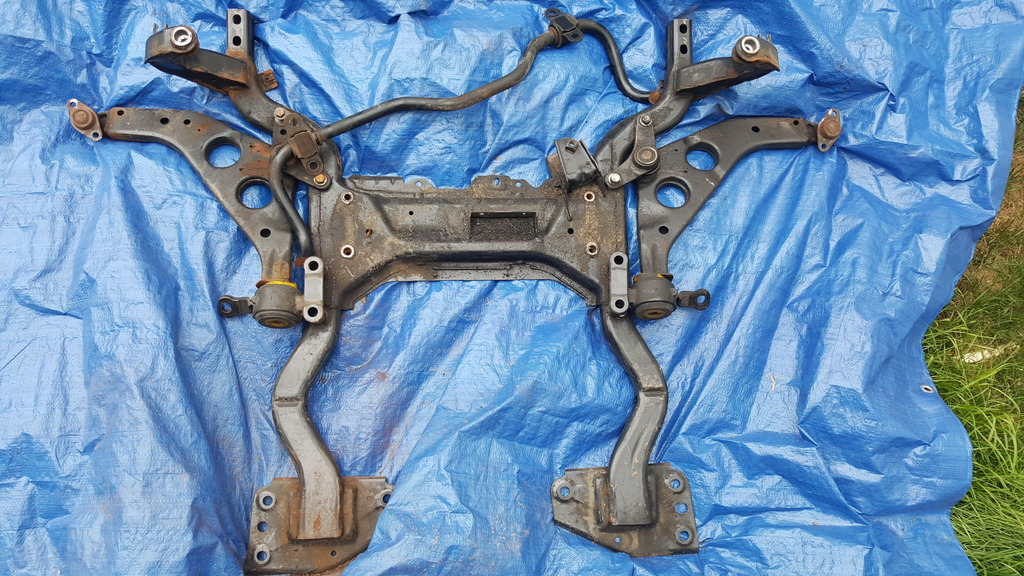
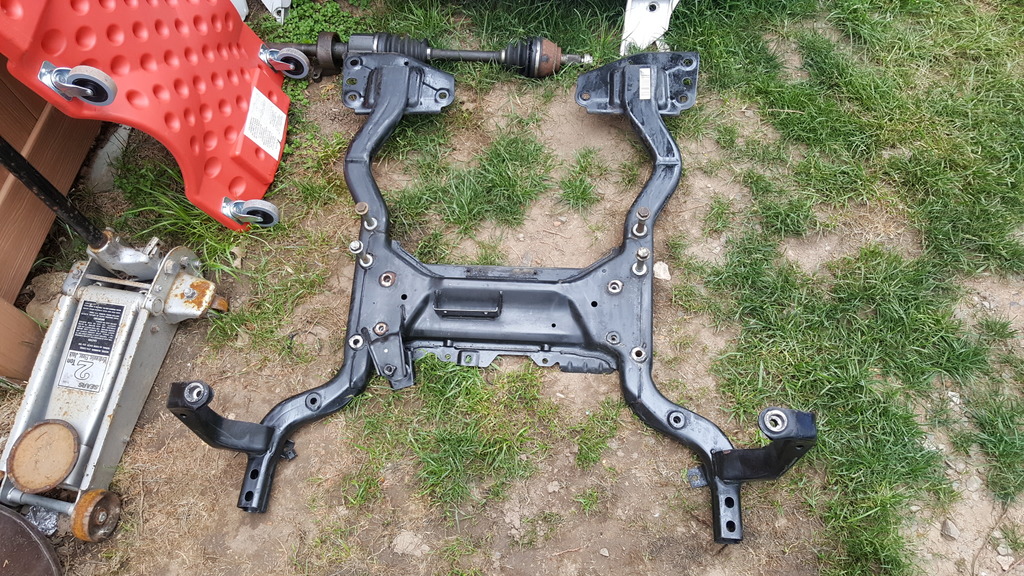
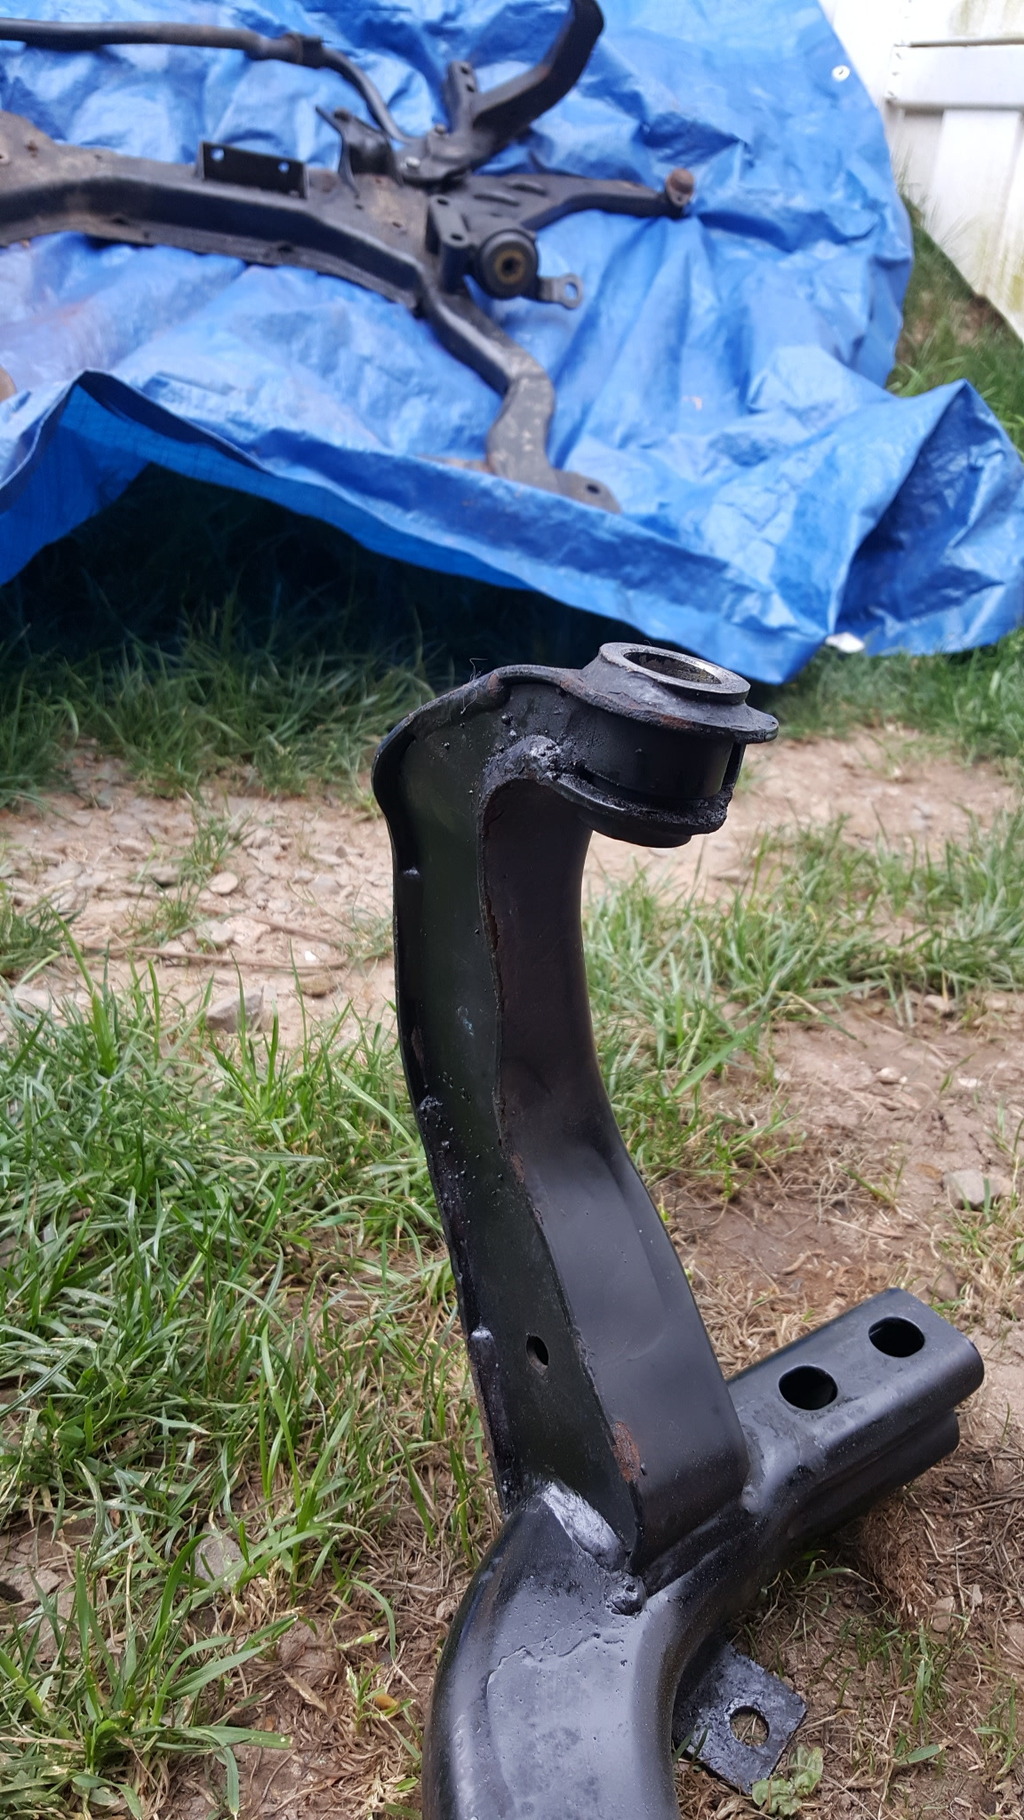
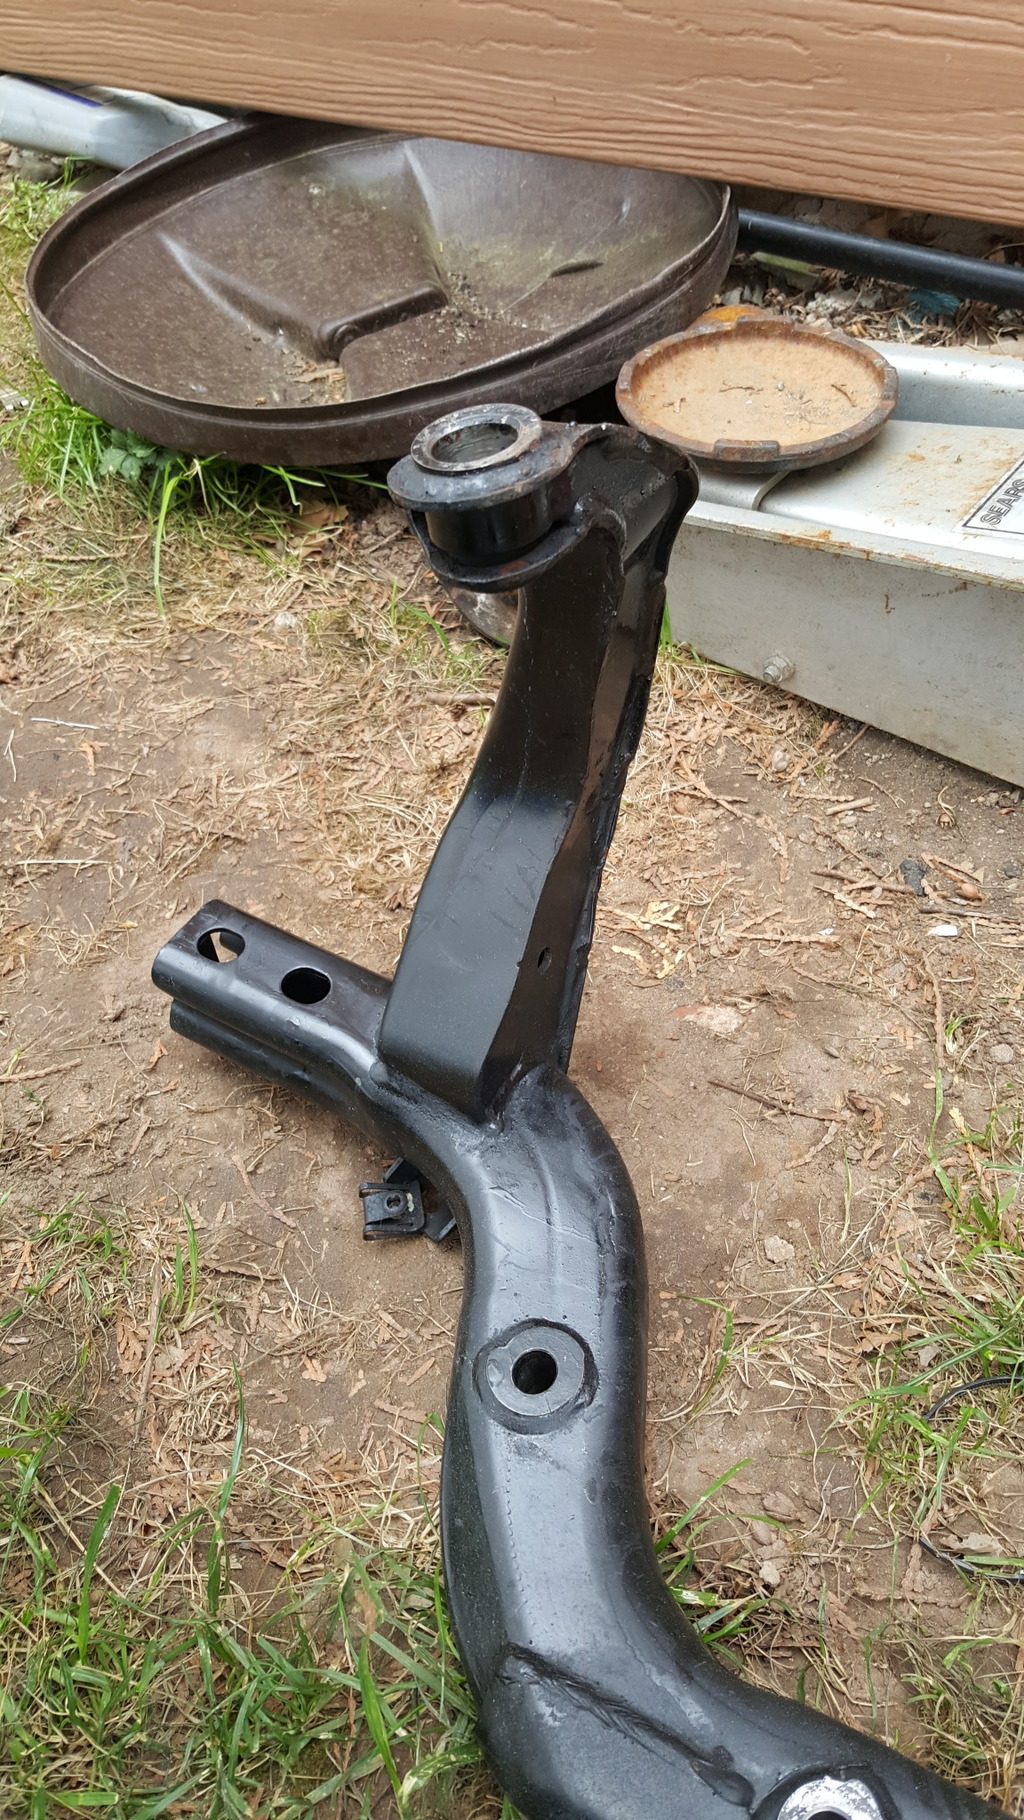
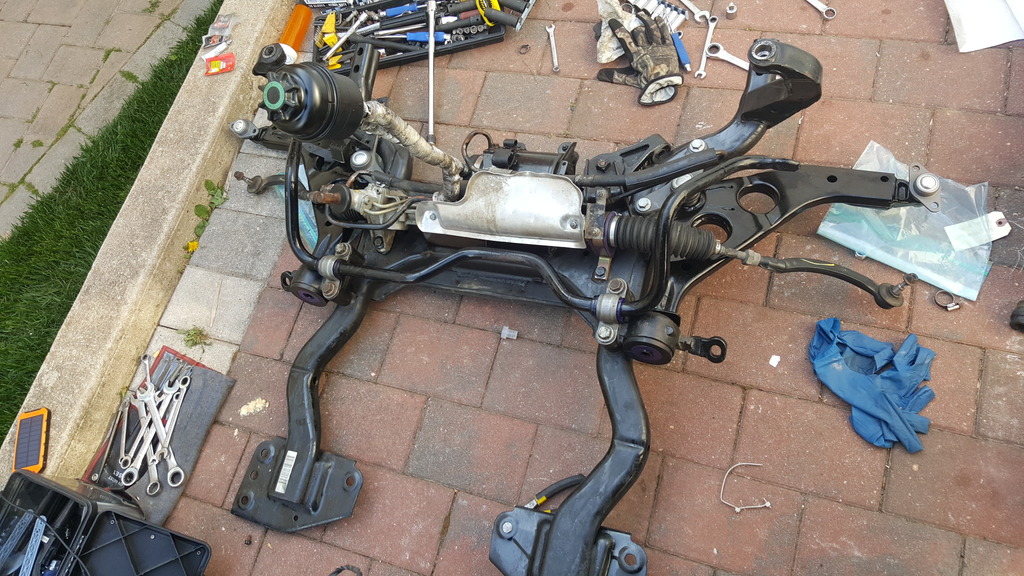
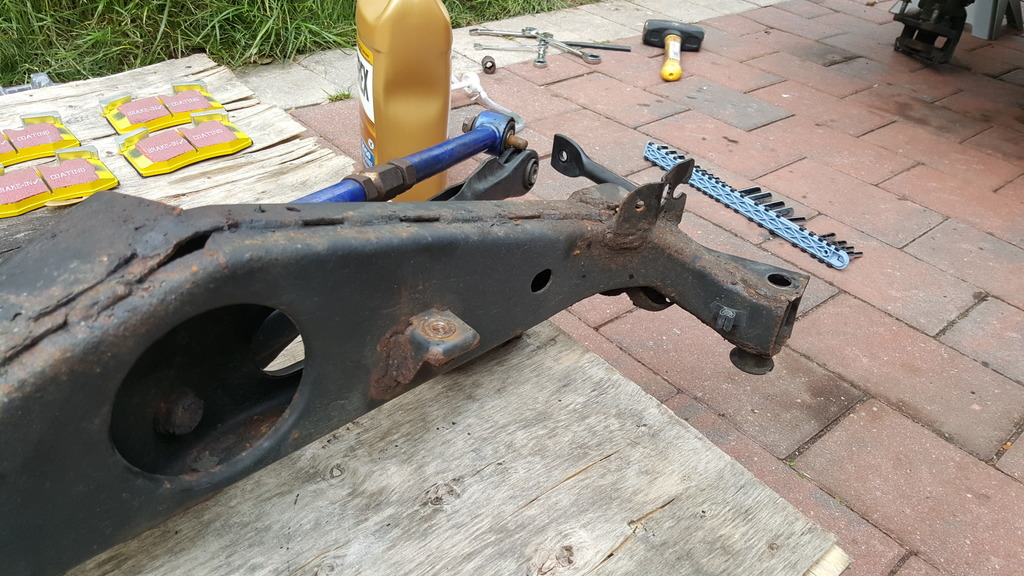
New to me - Used sub-frame
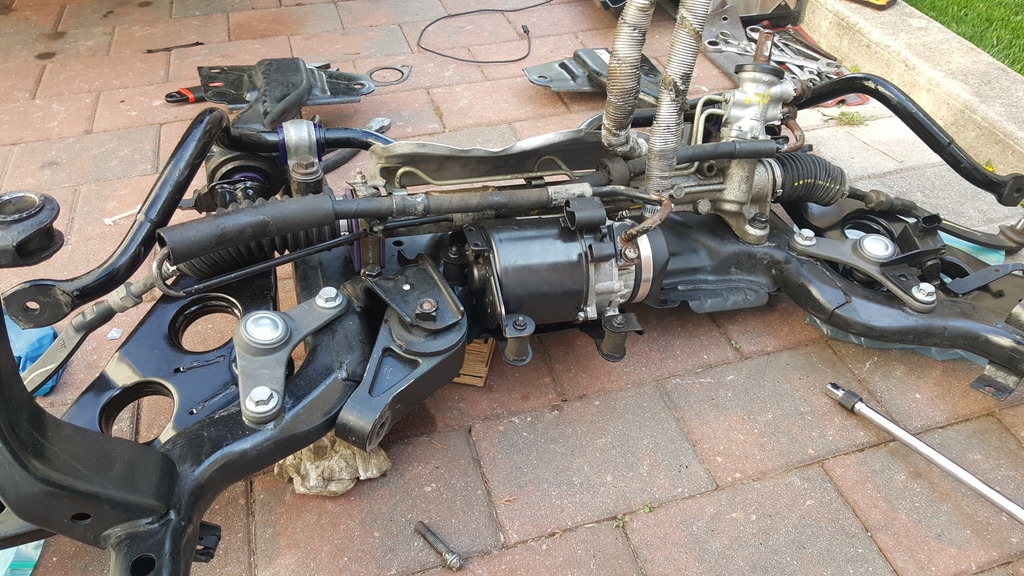
Cleaned and ready for all it accessories
I HAVE A BUNCH OF THIS LEFT. 21 to be exact LOL. I could only find 25pks M10x1.5x50 Grade 10.9 like the stock
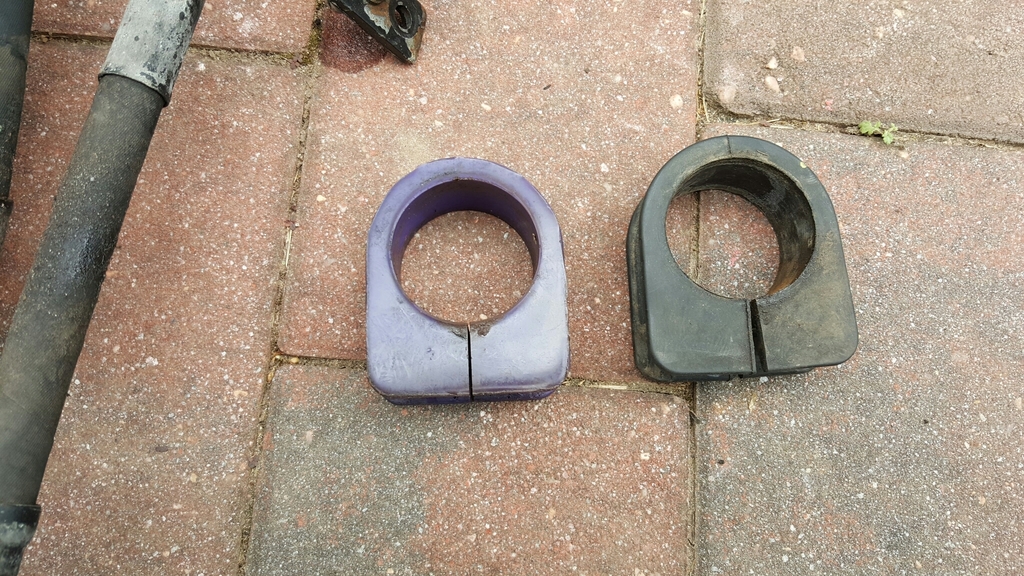
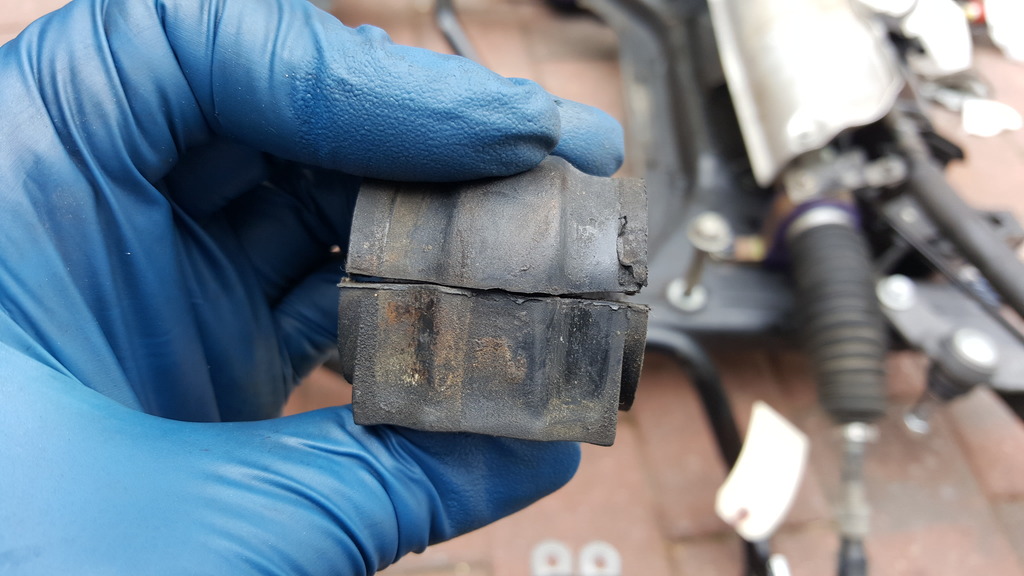
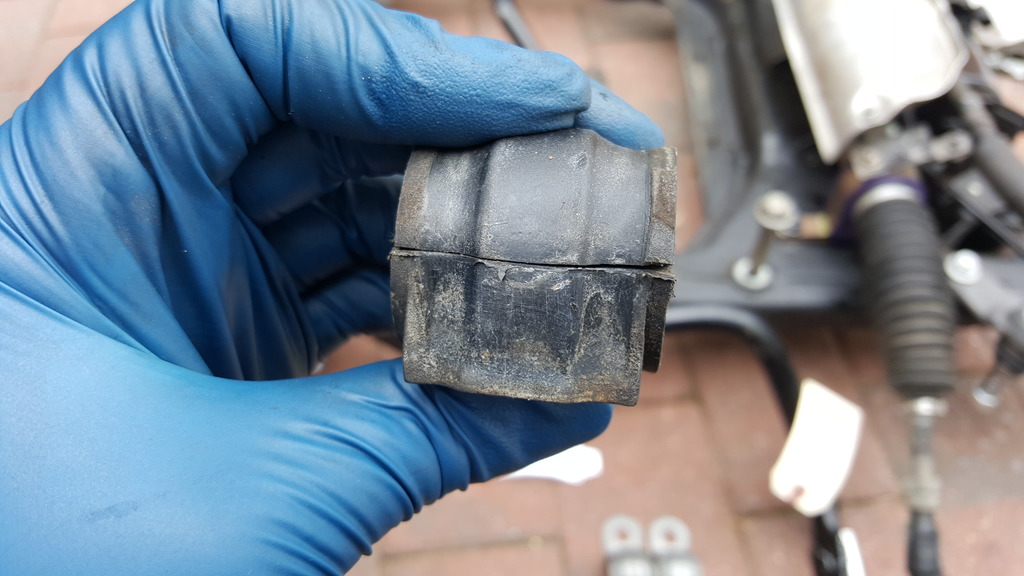
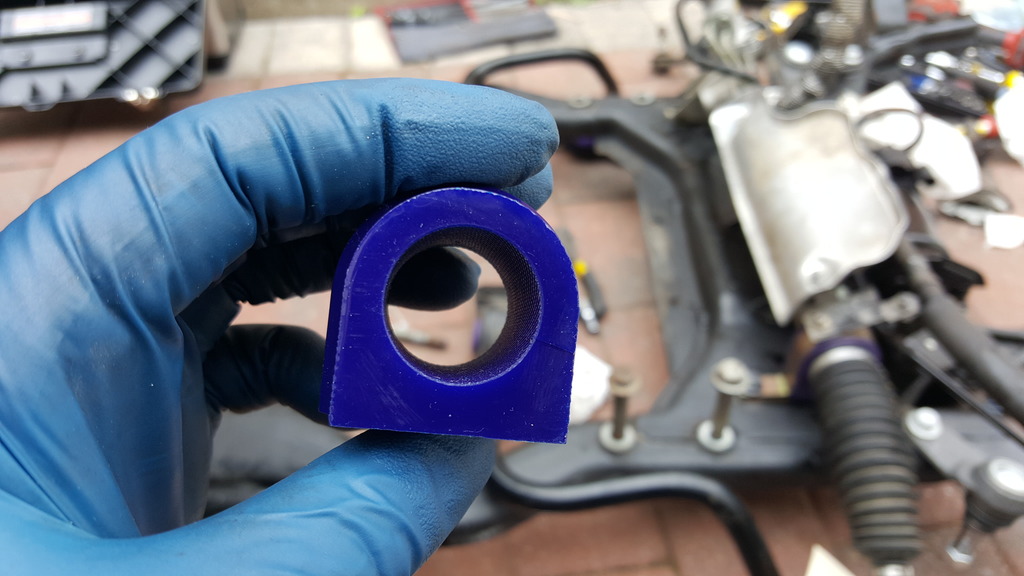
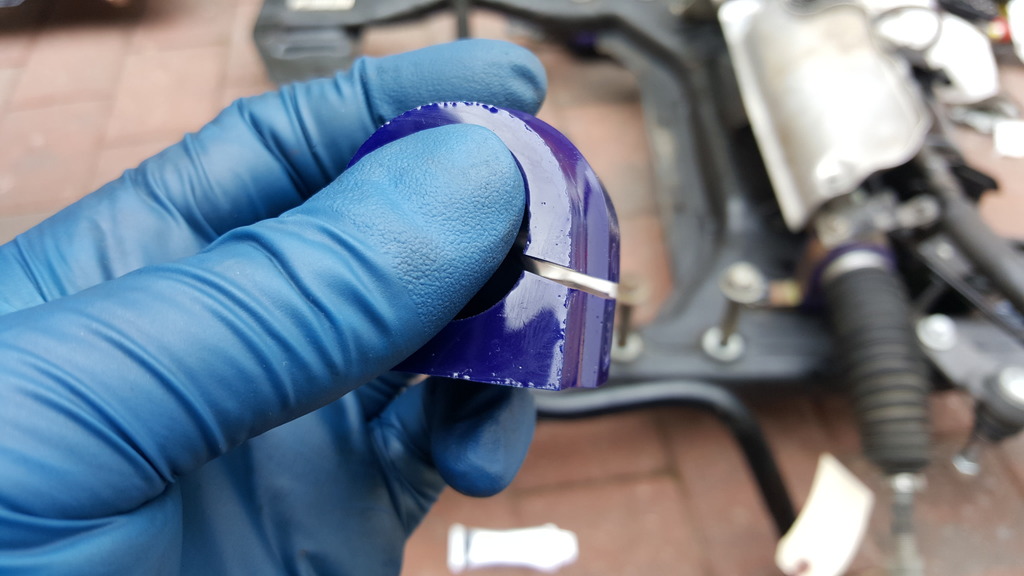
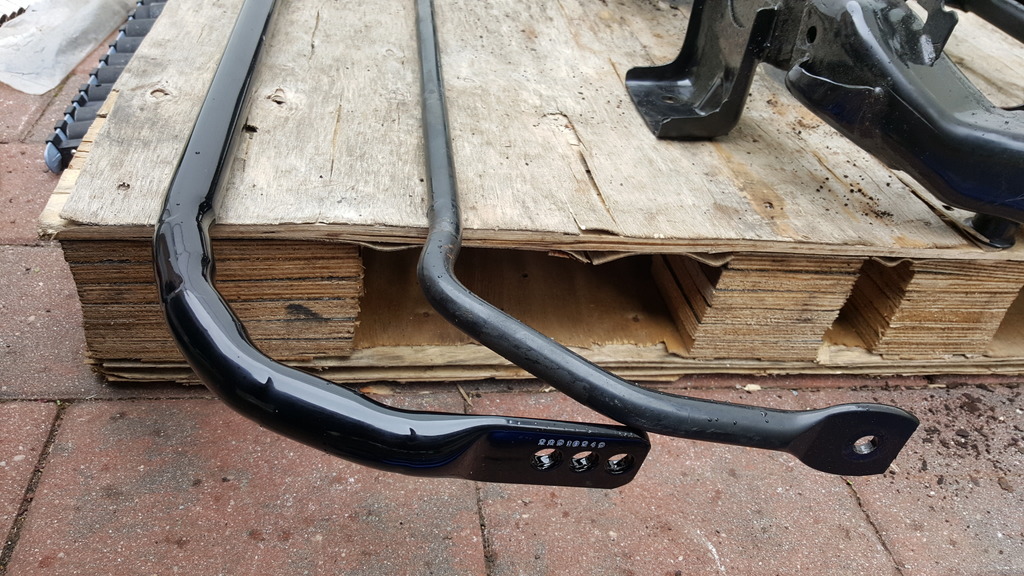
Super Pro Bushings Front Sway bar Old one was cut Old VS New

NEED TO GET THIS FOR THE ABS SENSOR BUT NOT WILLING TO PAY $6 FOR SHIPPING WHEN THEY COST $1. WILL TRY A LOCAL DEALER
ALL BOLTED UP AGAIN
Tap and die set Metric
New Control arms/Control Arm Brackets with Powerflex Bushings which was pressed in the wrong way. A quick trip to my buddies shop to un-press and re-press in the right way. New Inner/outer ball joint.
While putting in the Driver side outer ball join i crossed thread the Spindle, so i ordered one will be replacing when i get it. Also got a Tap and Die set since it like the first 2-3 threads, but just cant get the bolt to pass that.


OLD Sub-Frame Stripped


New to me - Used sub-frame
Cleaned and ready for all it accessories


I HAVE A BUNCH OF THIS LEFT. 21 to be exact LOL. I could only find 25pks M10x1.5x50 Grade 10.9 like the stock


Super Pro Bushings Front Sway bar Old one was cut Old VS New


NEED TO GET THIS FOR THE ABS SENSOR BUT NOT WILLING TO PAY $6 FOR SHIPPING WHEN THEY COST $1. WILL TRY A LOCAL DEALER

ALL BOLTED UP AGAIN


Tap and die set Metric

#9
04-28-2016, 06:22 PM


#10
04-28-2016, 08:57 PM

Banned

#11
05-02-2016, 07:27 AM
I'm thinking of getting a Oil Temp/Pressure gauge. Found where to get pressure reading from, but haven't found where to get oil temperature from. I mean i guess i can use an adapter on the adapter lol. Where do people get the temp on this car. Also need a way to get my oil accumulator installed. It easy on an engine with a screw on filter.
Saw this oil Cooler (Link bellow), but i would more then anything be interested in getting the plate and i prefer Water cooling better then air cooling, so this plate would need to also adapt back to the coolant, but the options seem to be very limited and the solutions I have found are dumb expensive (not made for this car, but seem to be easily adaptable, if i can find where to tap into after oil).
A baffled oil plan not hard to do either, but a dry sump would be optimal but not willing to spend $3k on this (RMW) has one.
http://www.madnessmotorworks.com/mad...ne-oil-cooler/
#12
05-08-2016, 07:31 AM
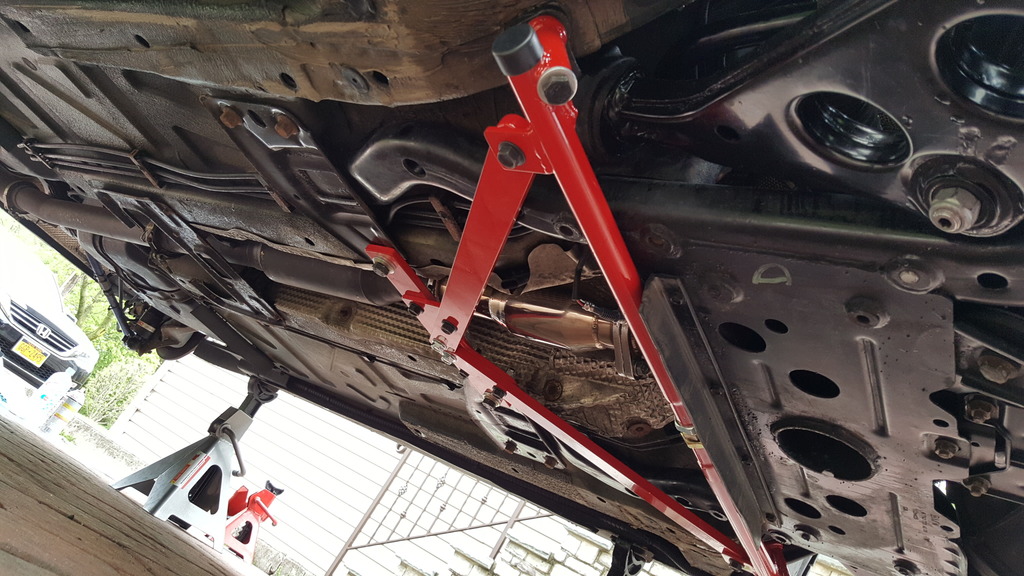
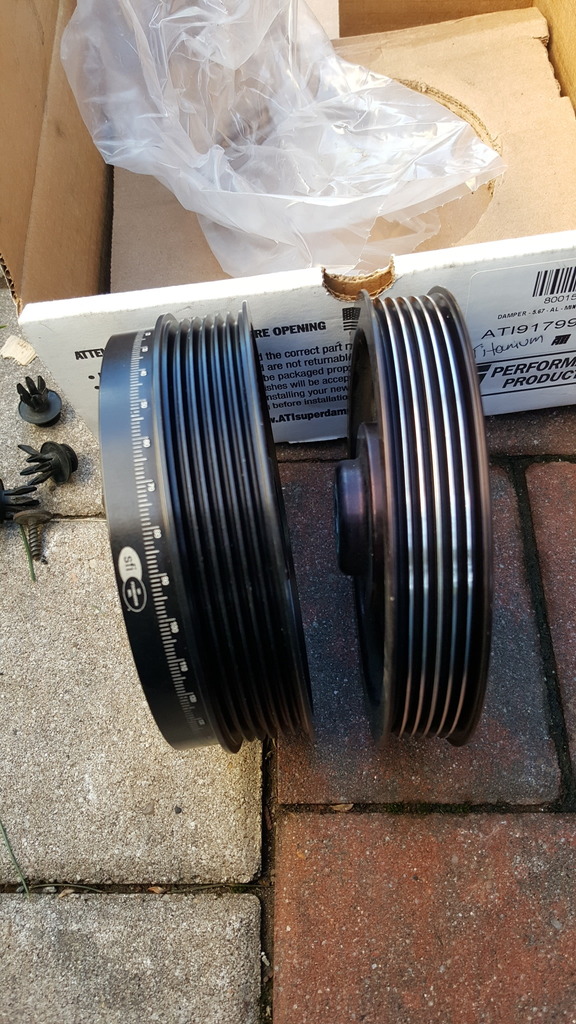
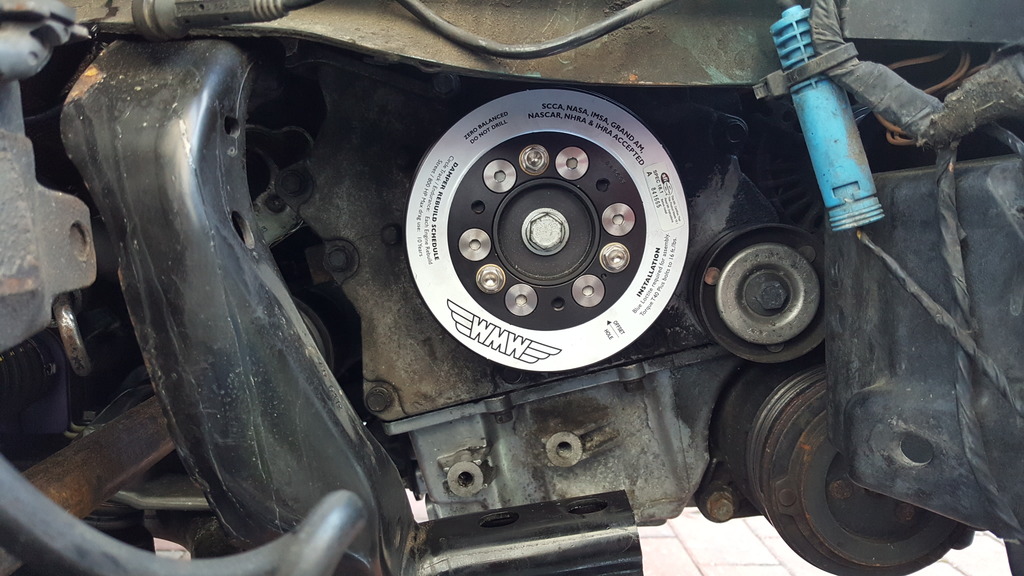
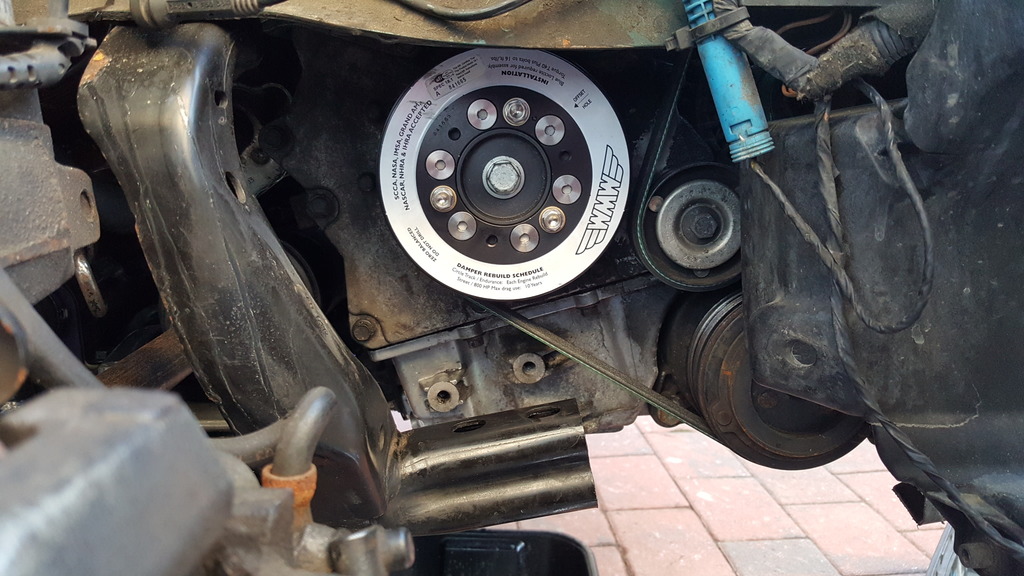
ATI Damper and K-Brace
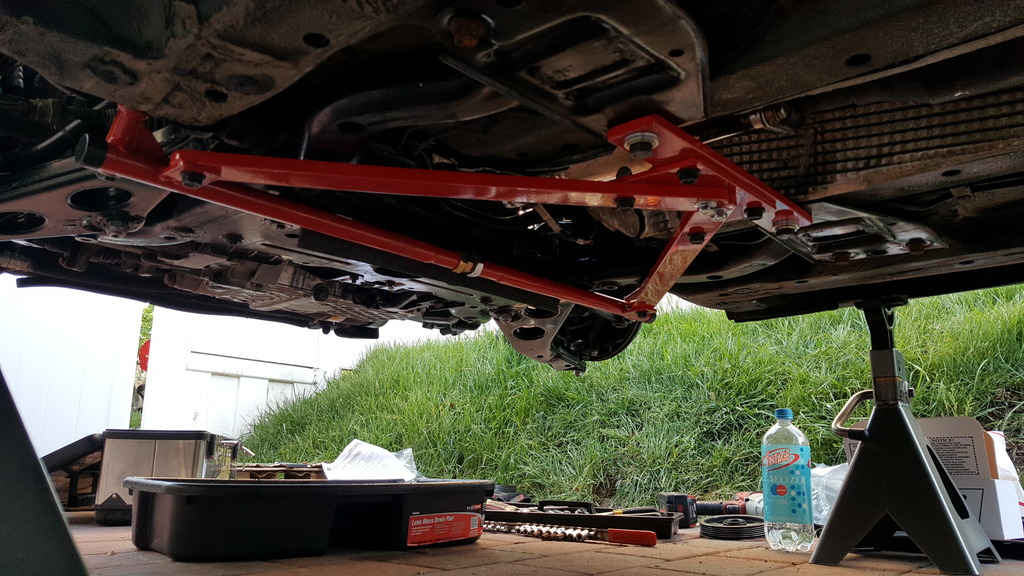
So Yesterday has been the best day. didn't want to get in too deep since the skys still look like it could rain any moment. So i installed the the K-Brace and the ATI Damper.
K-Brace installed
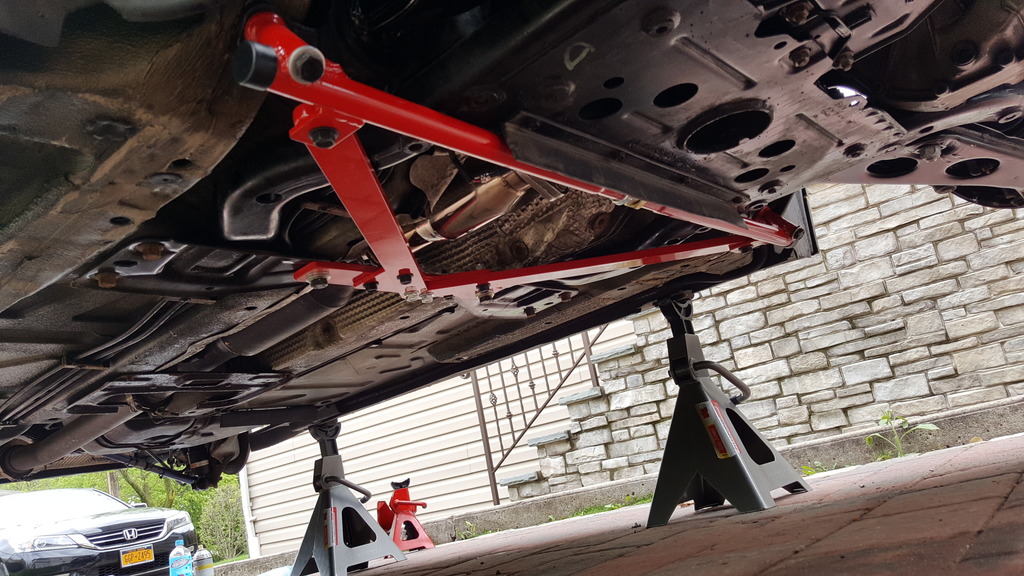
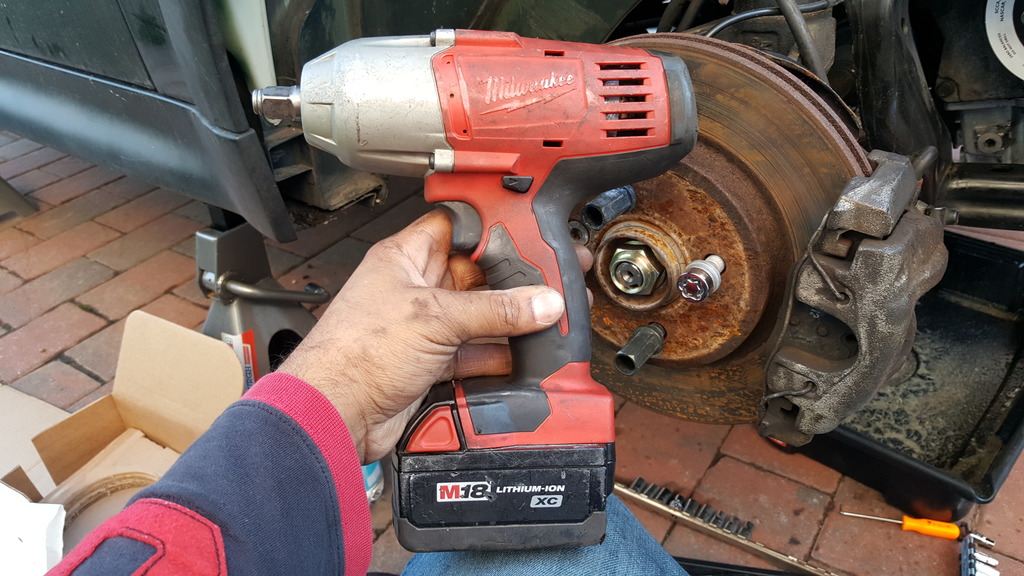
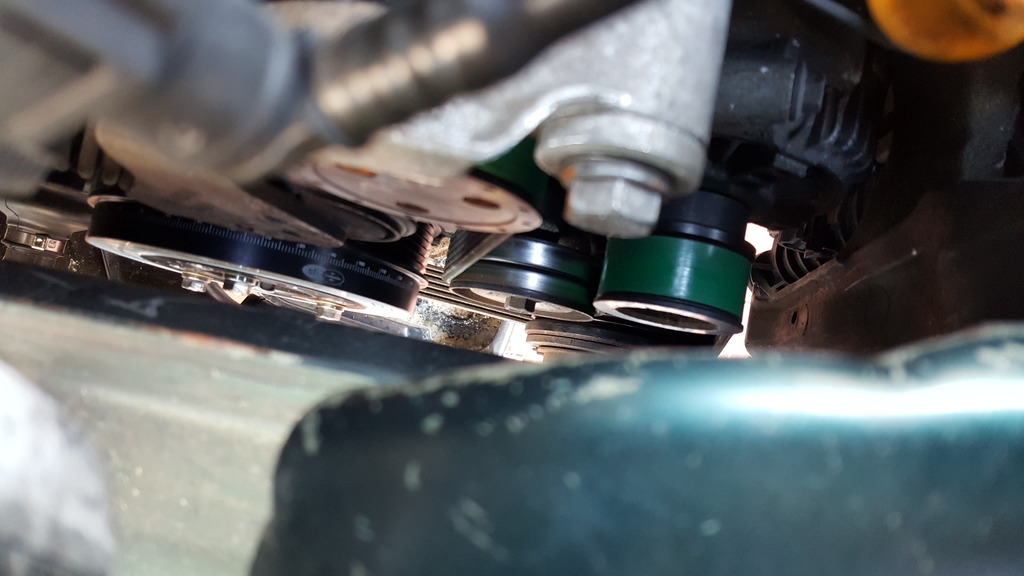
It was very easy to install the Damper. I thought it would be a lot harder, since last time i did something like this i did it all manual, but Guess when you have the right tools everything gets easy.
This was my friend and it could be yours if you are doing something this.
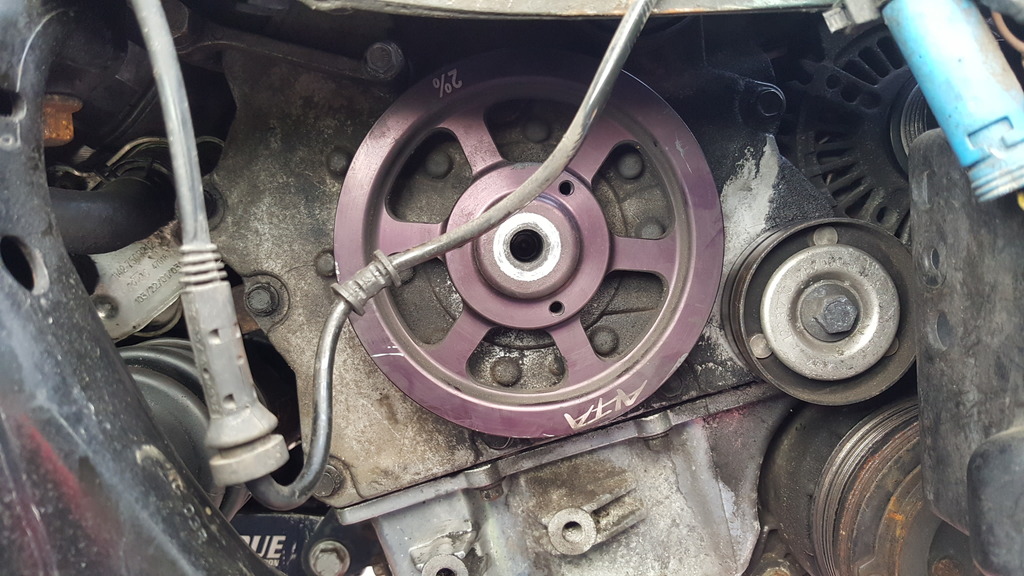
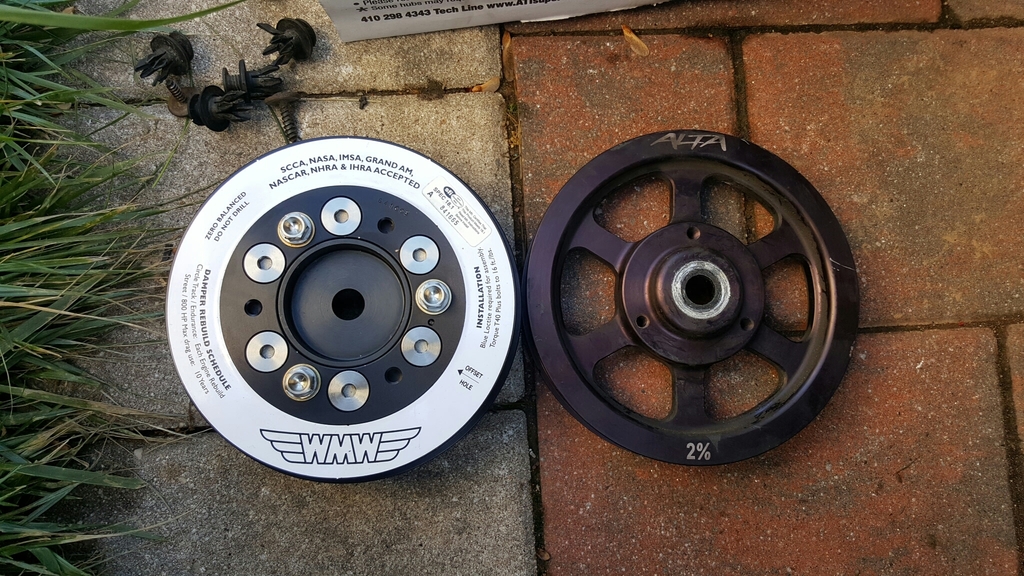
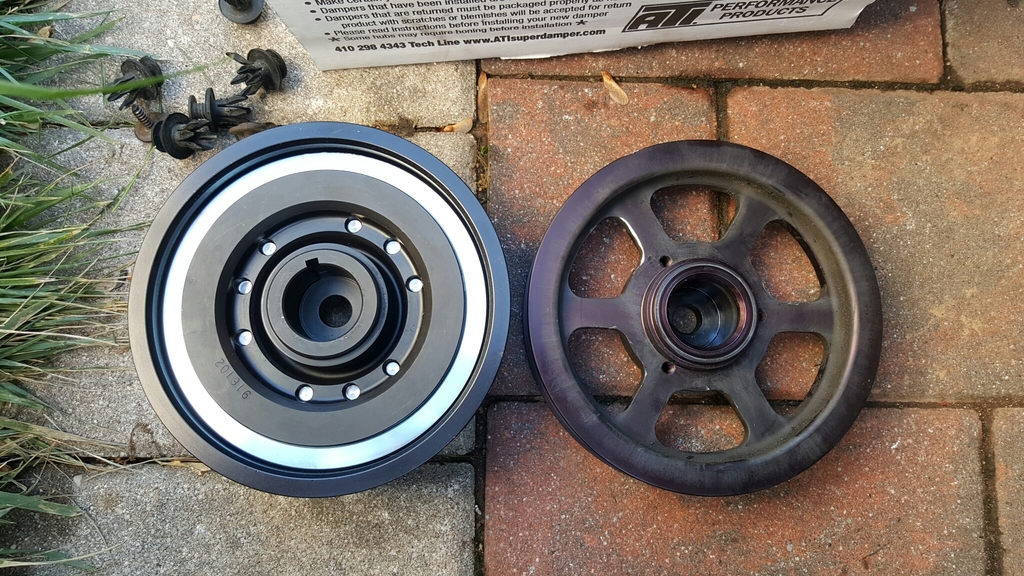
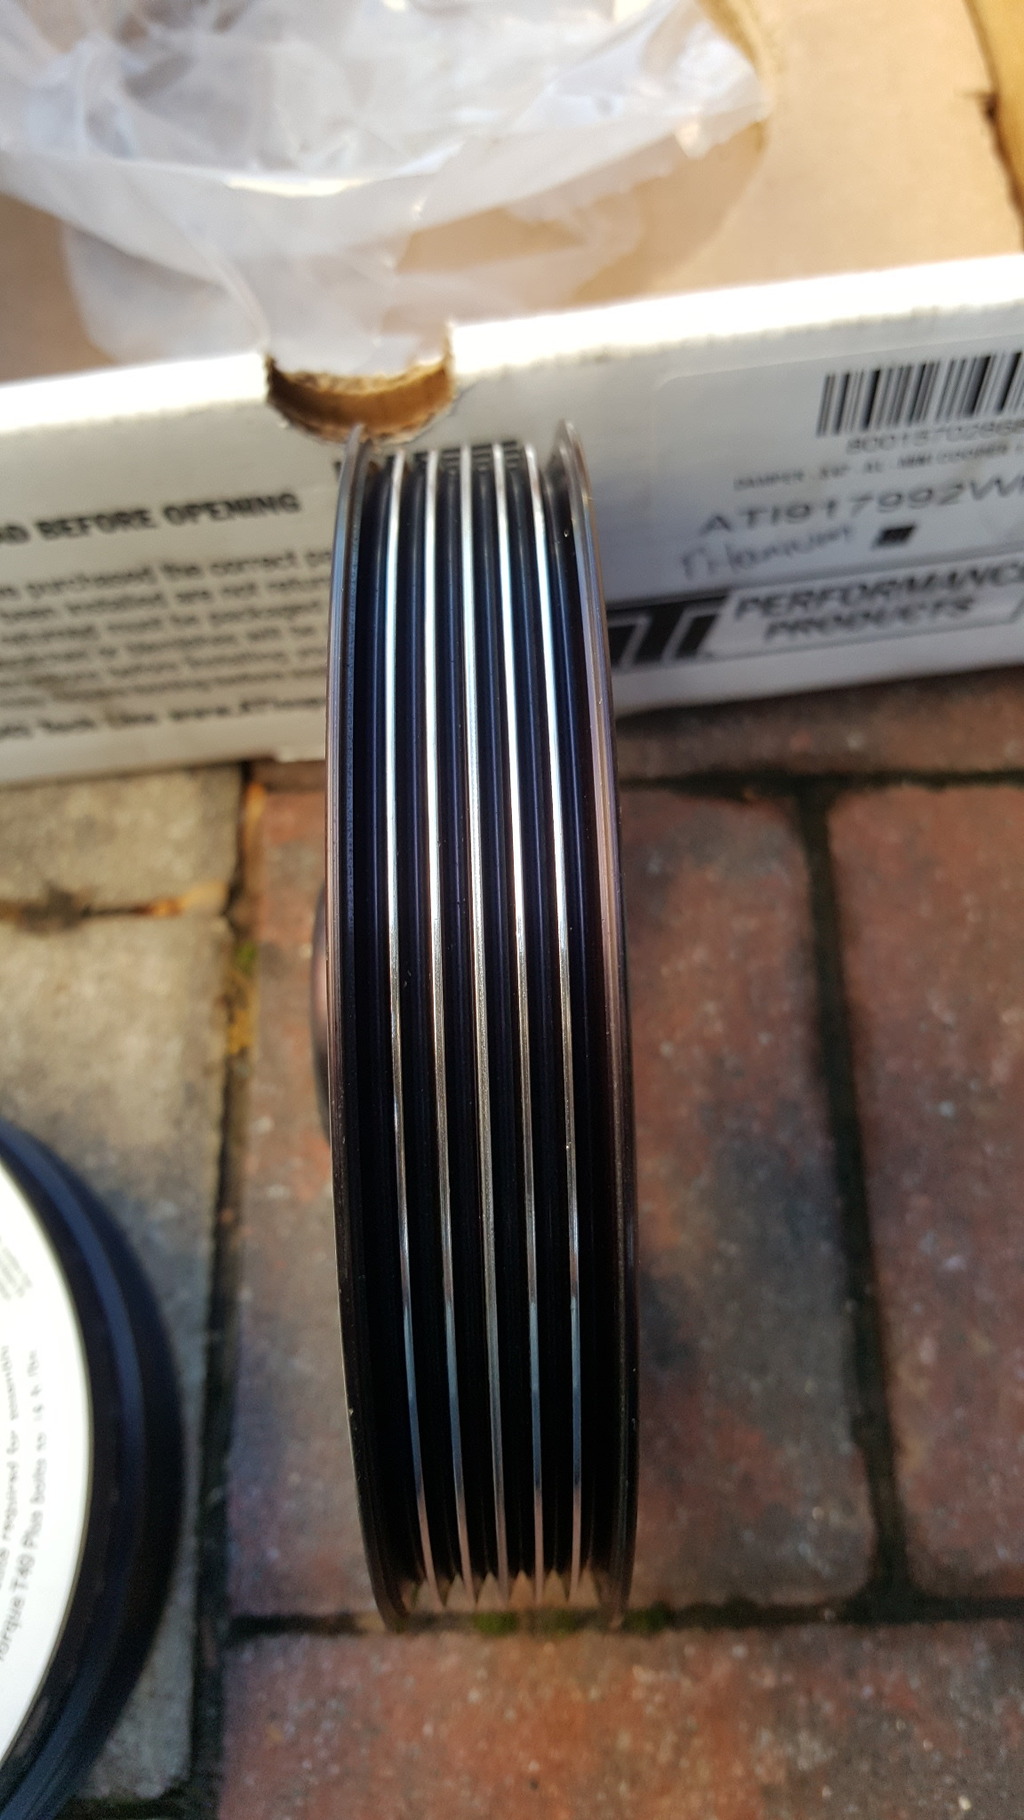
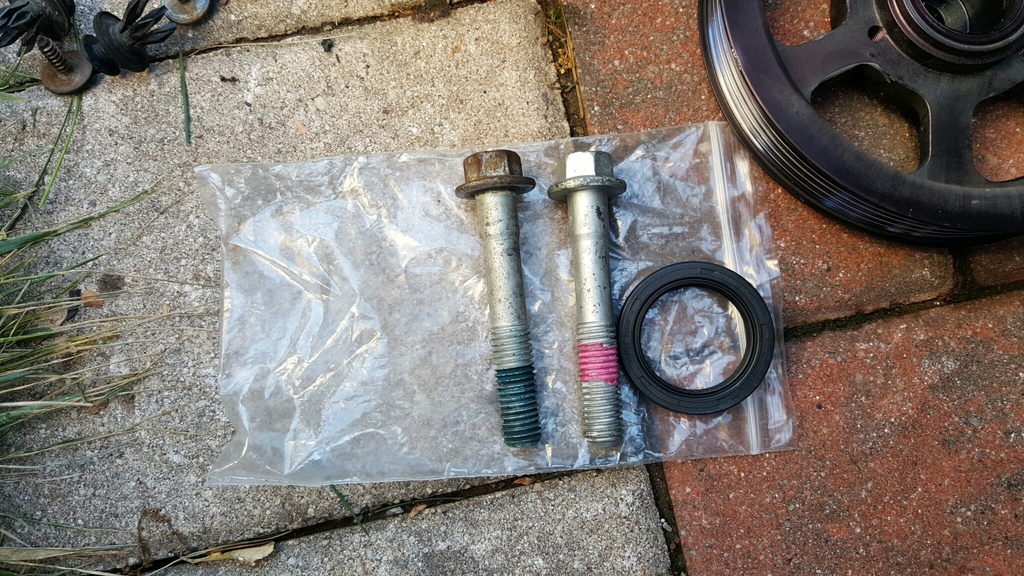
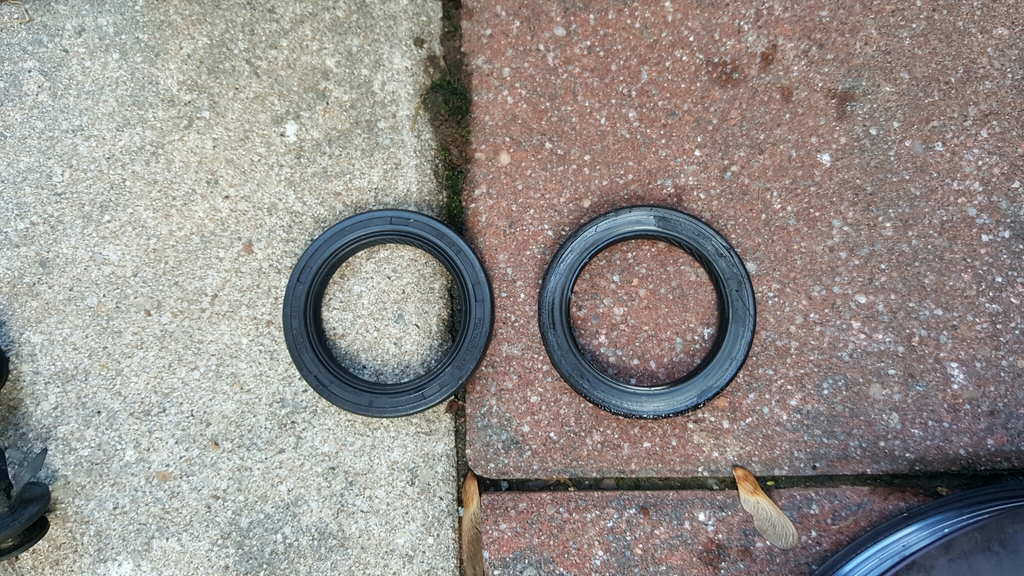
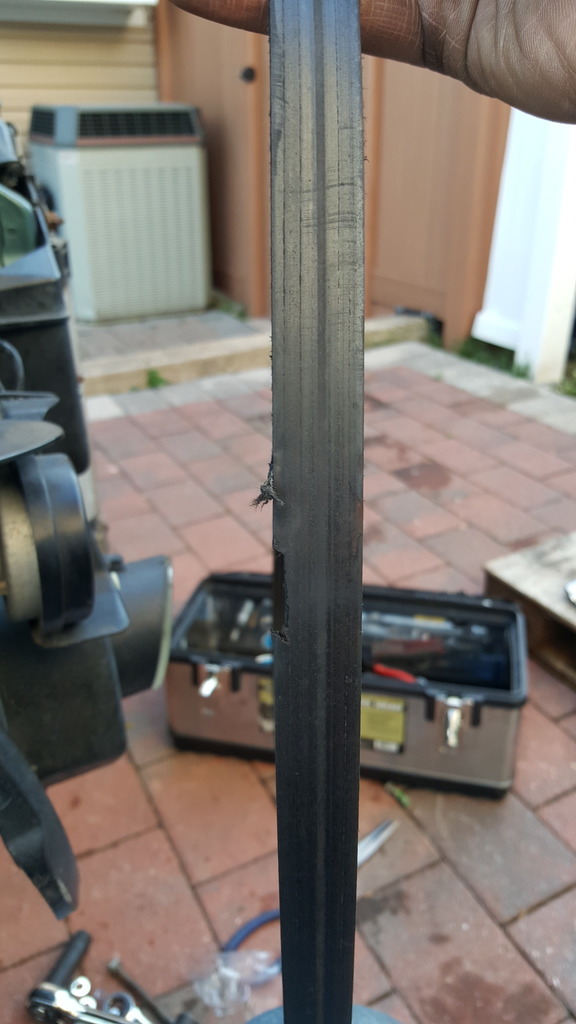
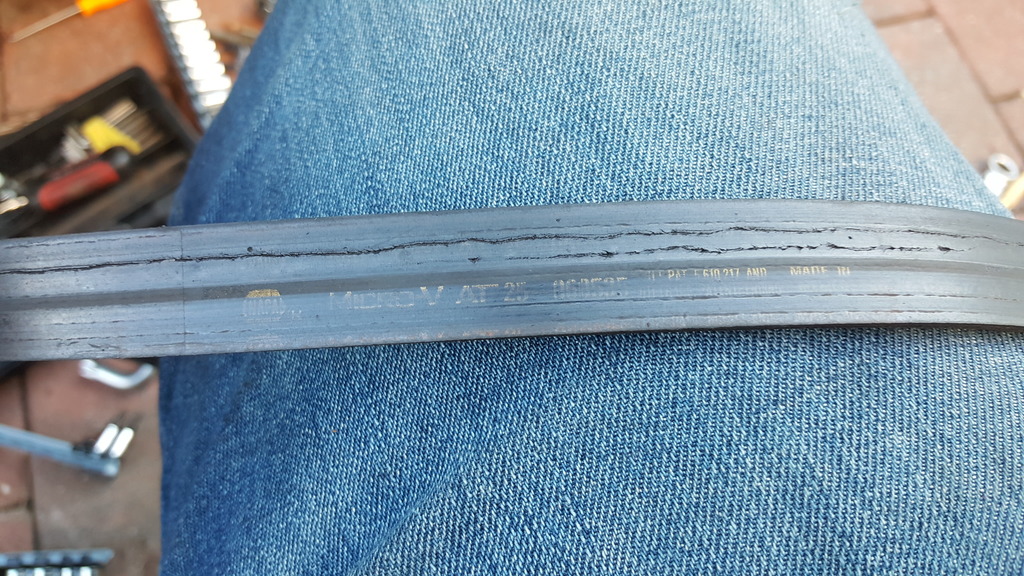
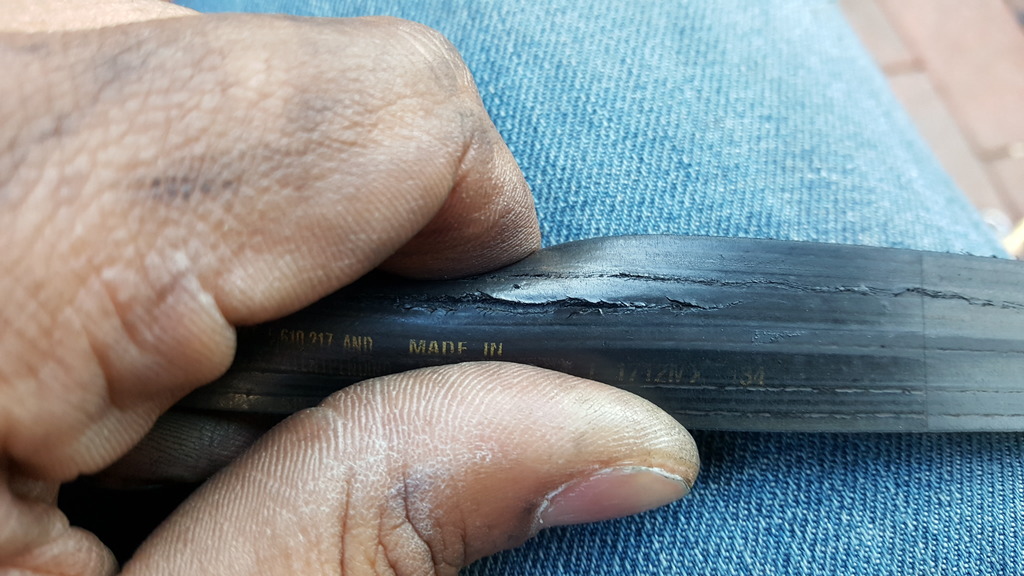
OK so replaced the 2% pulley With the ATI Damper/Front main seal/Crank Bolt/Belt. Nothing was wrong with the seal, but since i was already there it just made sense. same thing as the bolt. The belt really need to get replace picture below.
Here is the job complete.
K-Brace installed


It was very easy to install the Damper. I thought it would be a lot harder, since last time i did something like this i did it all manual, but Guess when you have the right tools everything gets easy.
This was my friend and it could be yours if you are doing something this.

OK so replaced the 2% pulley With the ATI Damper/Front main seal/Crank Bolt/Belt. Nothing was wrong with the seal, but since i was already there it just made sense. same thing as the bolt. The belt really need to get replace picture below.


Here is the job complete.


#13
05-08-2016, 08:10 AM
So i had ordered a replacement radiator support because the one that is on the car currently has the bottom of it missing. So i made a mistake and ordered a non S rad support. I think i can make it work since it looks like it the same thing just the snorkel for the NA VS the SC is in the wrong place. If any trimming is needed, i can do that as well. The question i have, is there anything else that is different. Do the NA/SC both use the same size Rad/fan ect.
I already got a quote to send it back and it like haft the price $65 to send it back.

I already got a quote to send it back and it like haft the price $65 to send it back.

Last edited by HaveATank; 05-08-2016 at 05:54 PM.
#14
05-08-2016, 08:22 AM

#15
05-08-2016, 06:59 PM
Radiator and Rad Support/Crank Position Sensor O-ring/coolant over flow tank
Today was a great day weather was Sunny with Zero chance of rain.
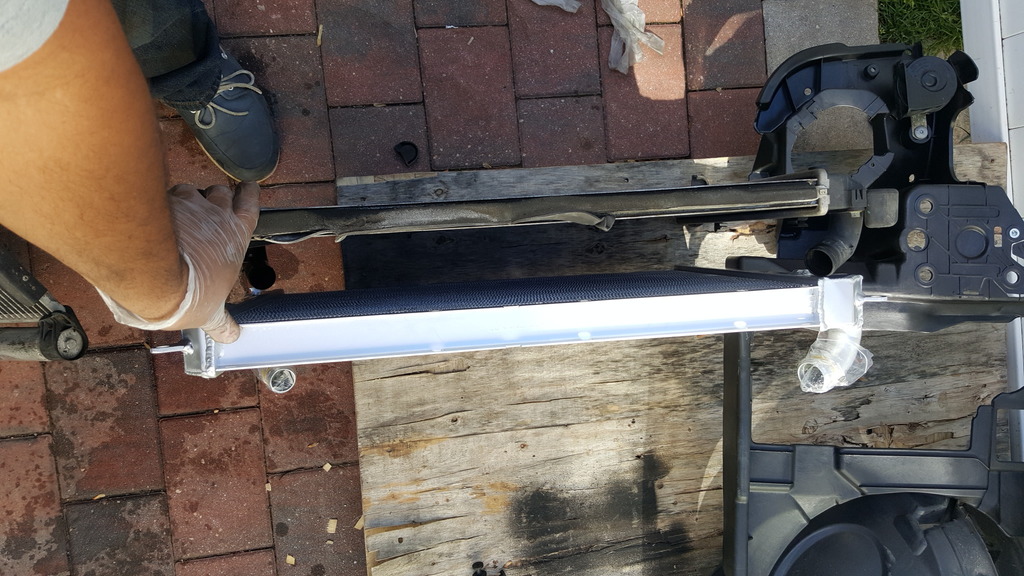
Started the day by replacing the Left/Driver Side wheel Spindle i had damaged trying to install the outer ball joint. Installed the Aluminum Radiator/Coolant Reservoir Tank and The Radiator support. While i was doing this i replaced the Crank sensor O-ring with a new one.
This is the only picture i took.
Installed Coolant OverFlow Tank. Forgot to take a picture of the tank installed.
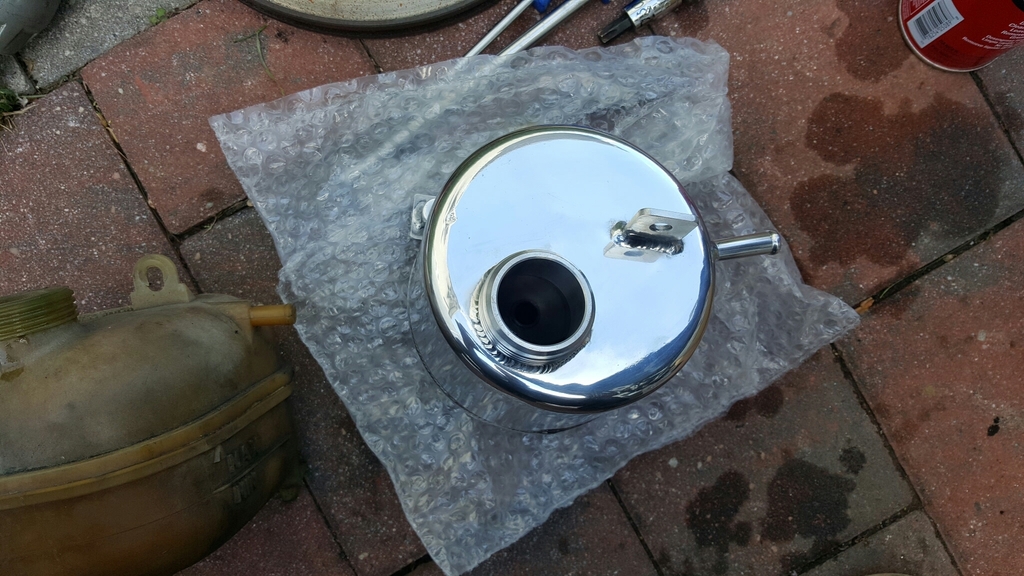
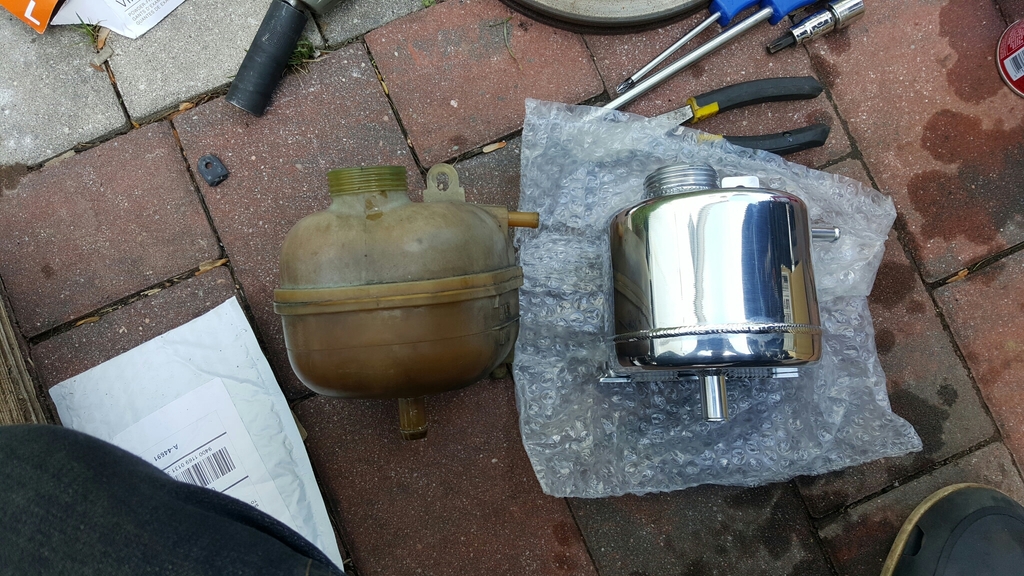
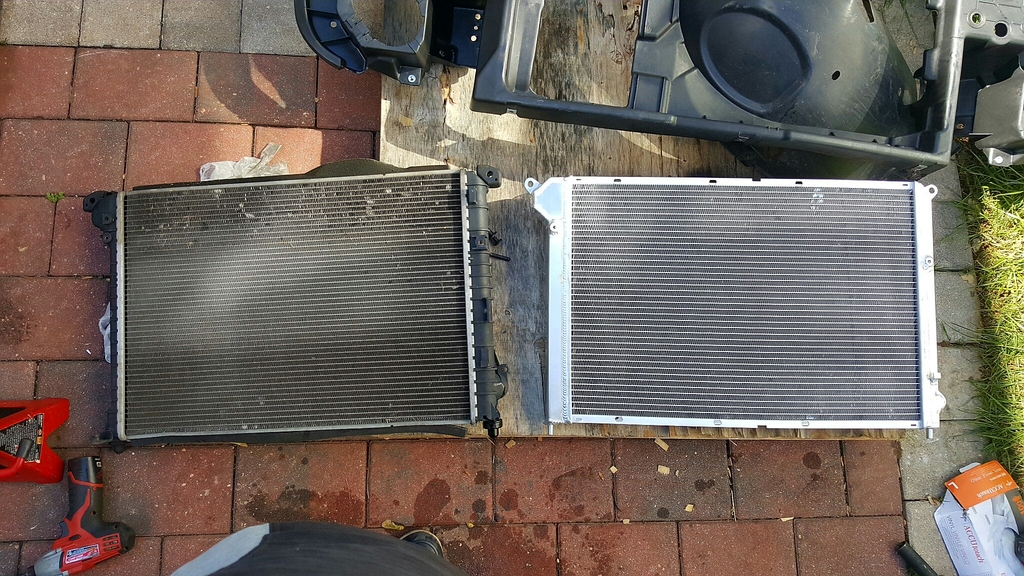
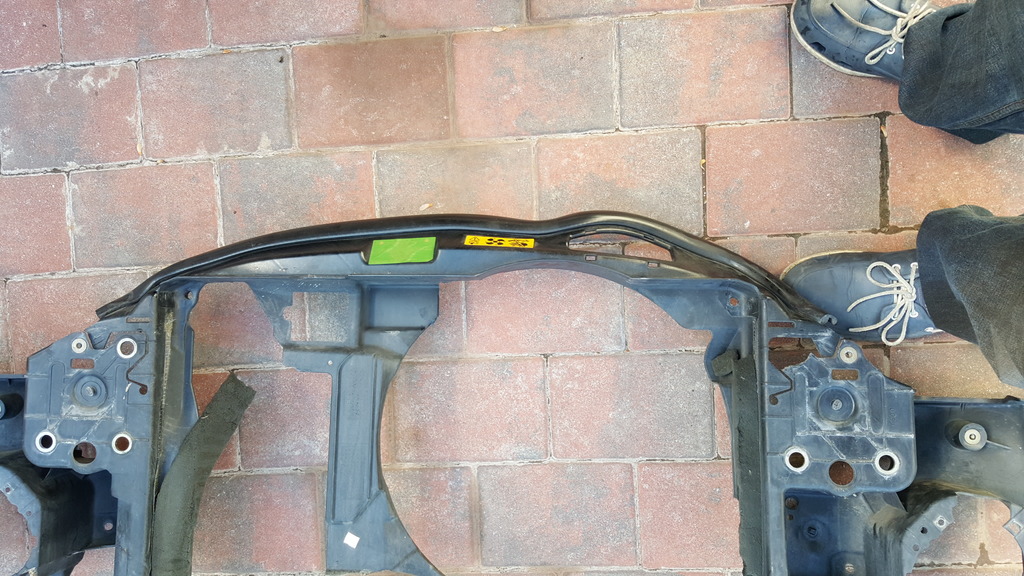
Here is the Aluminum Radiator, Don't see a problem putting the bumper back on since it about the same thickness as the stock Core at least at the ends.
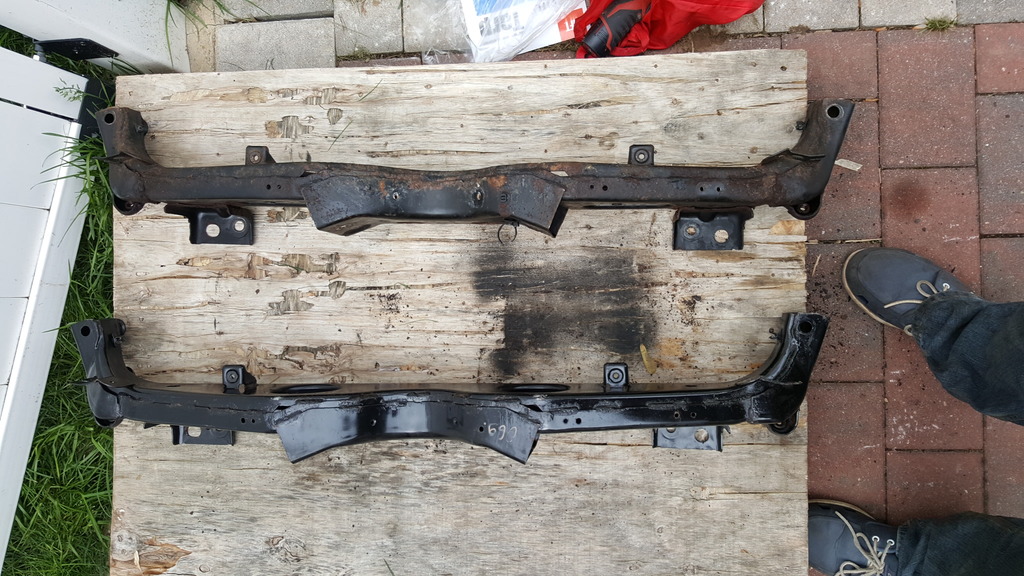
Rad Support or lack of lol.
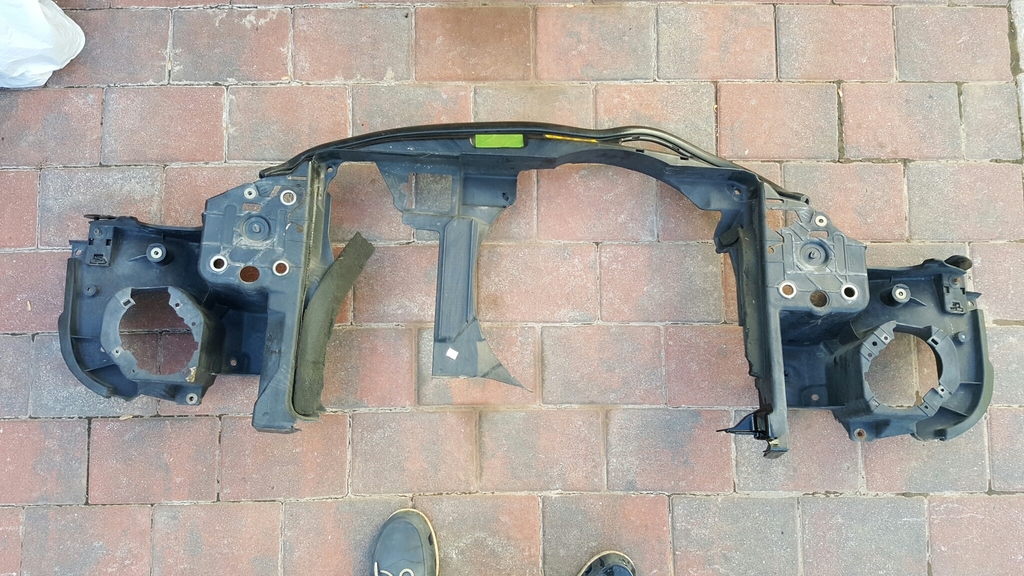
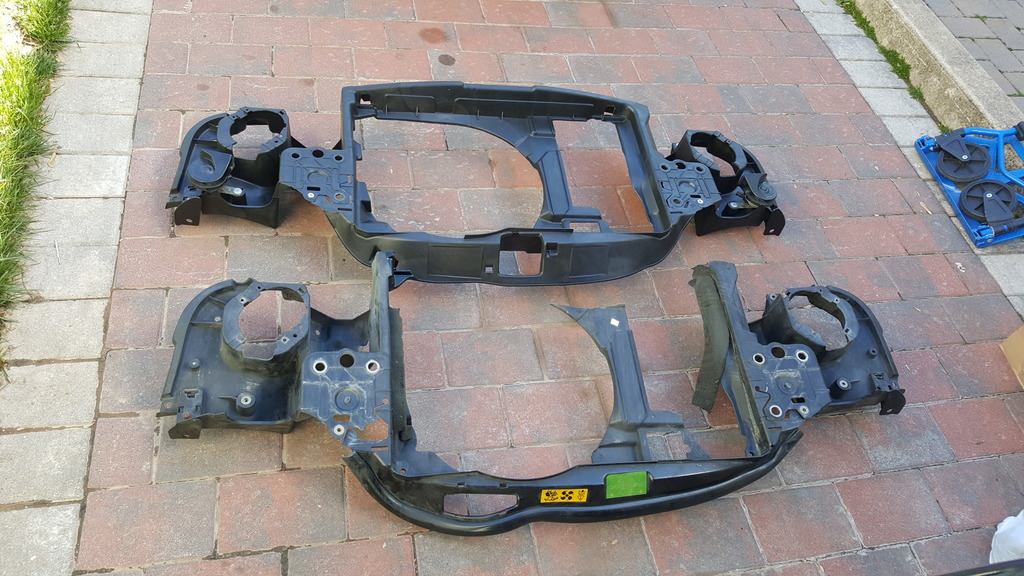
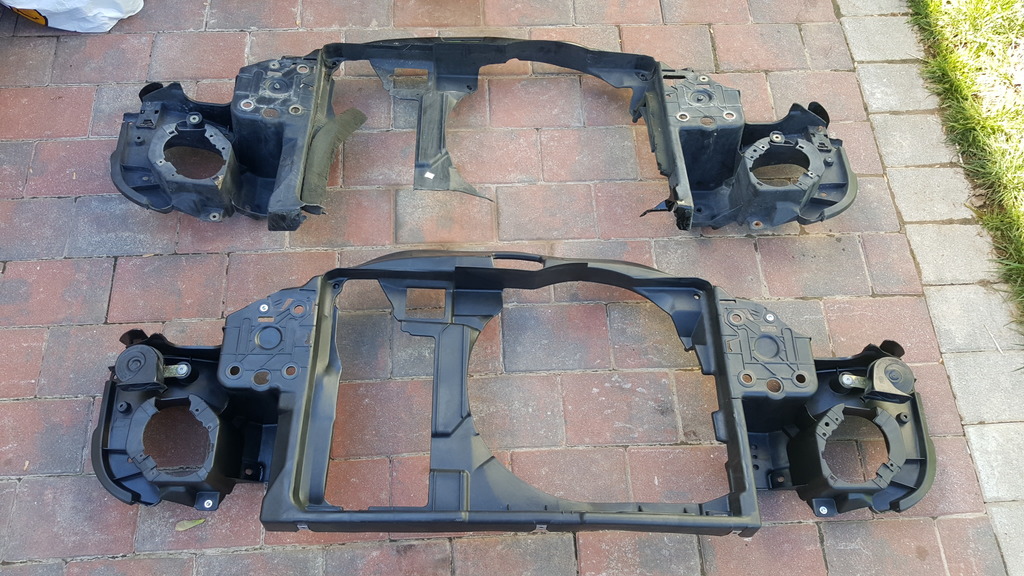
Mini Cooper Support
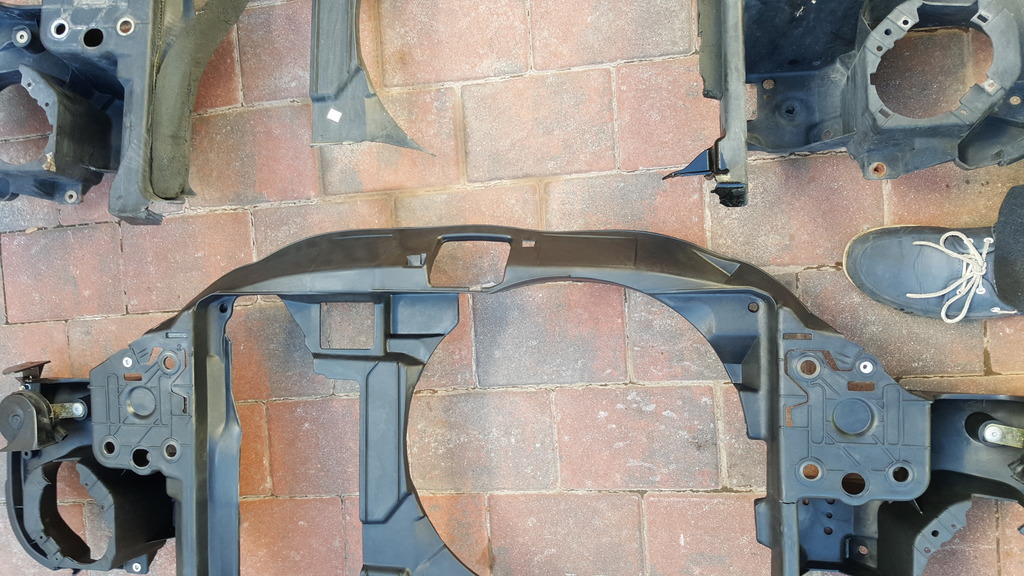
Mini Cooper S Support Nothing is different but the snorkel being at the wrong place.
Here is the old Vs New
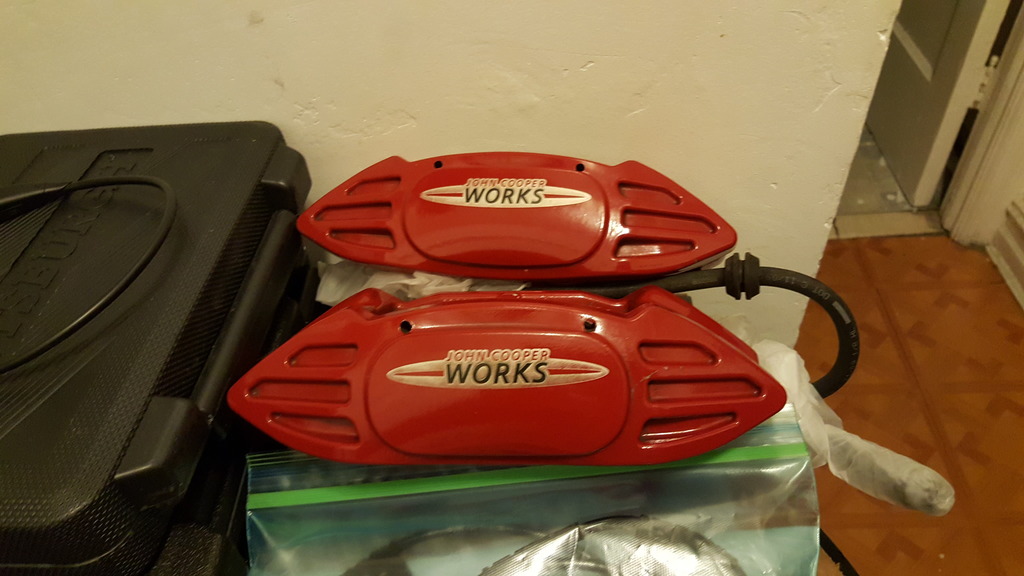
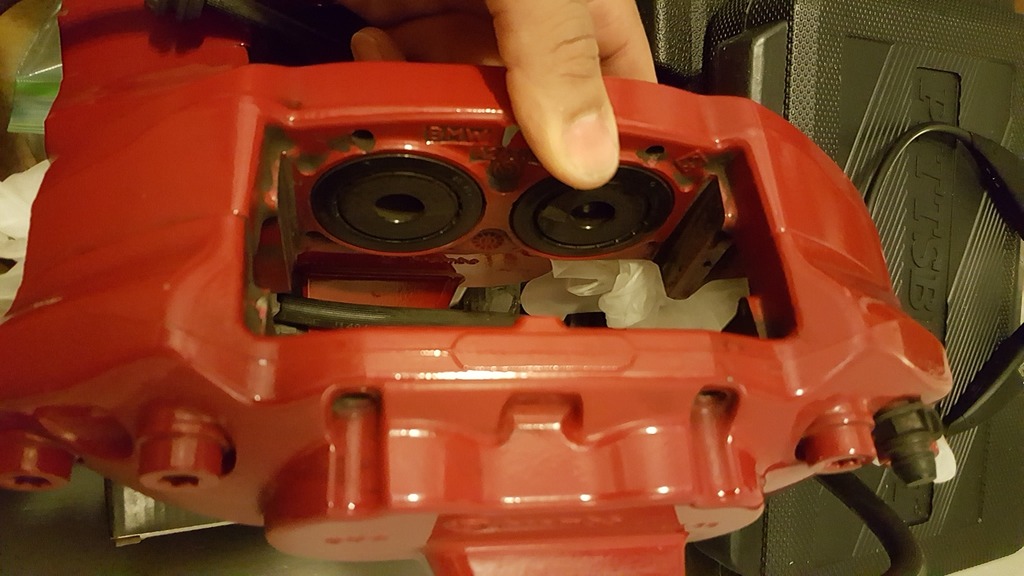
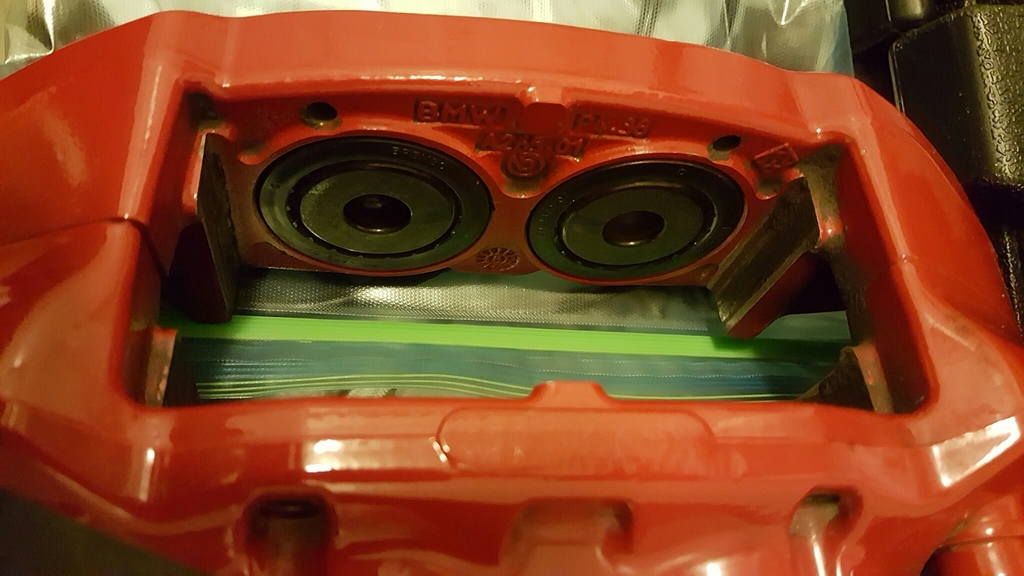
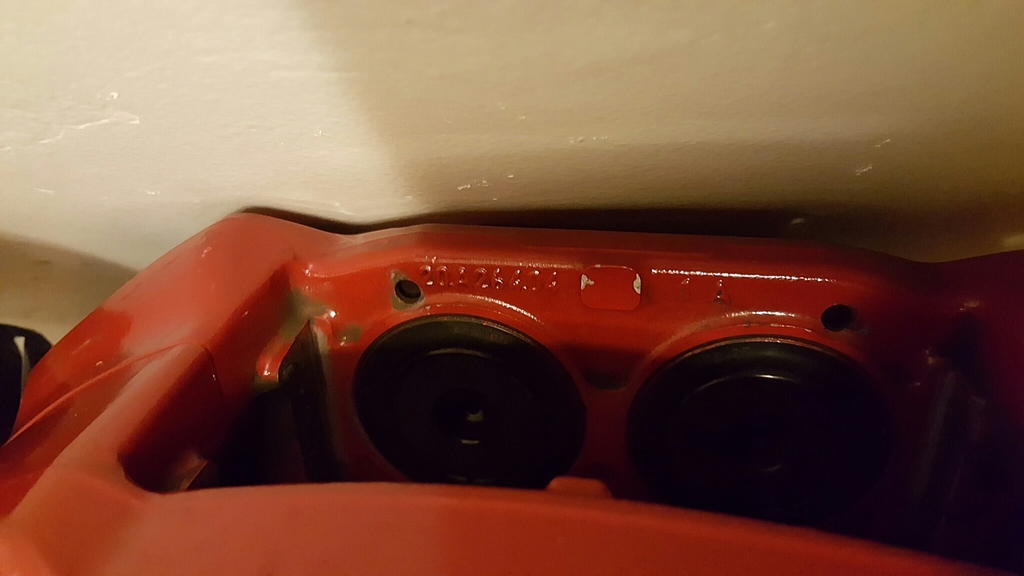
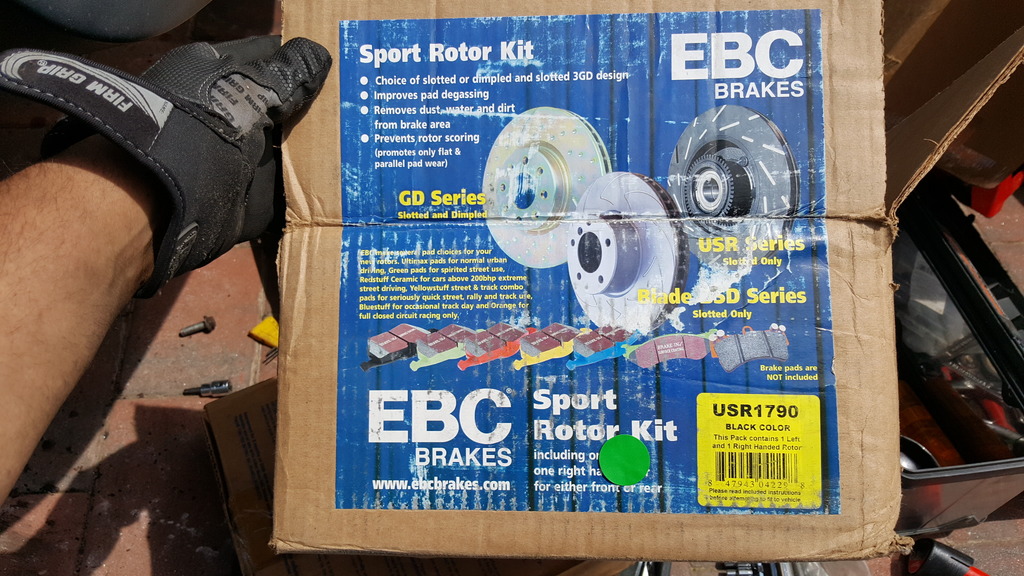
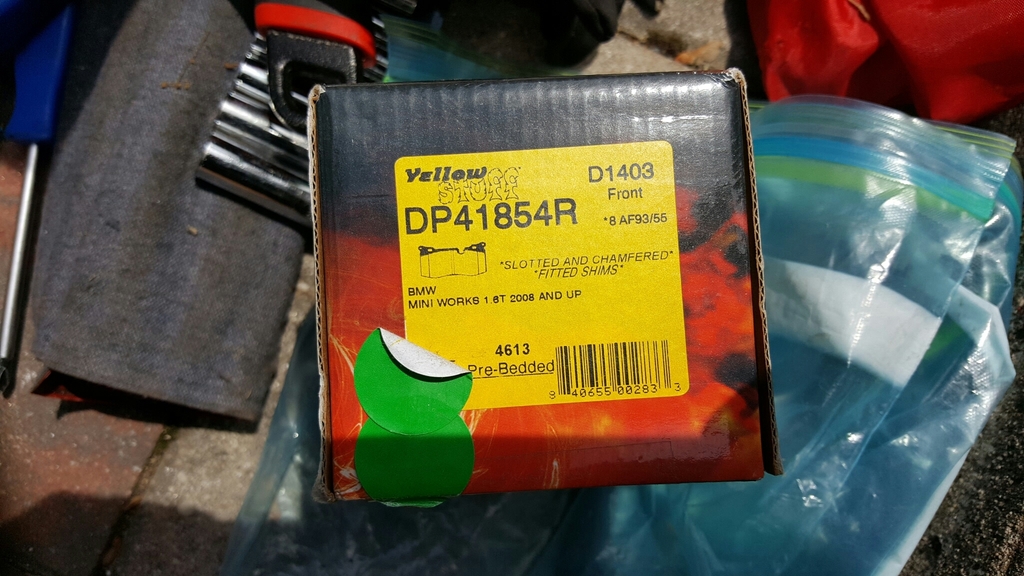
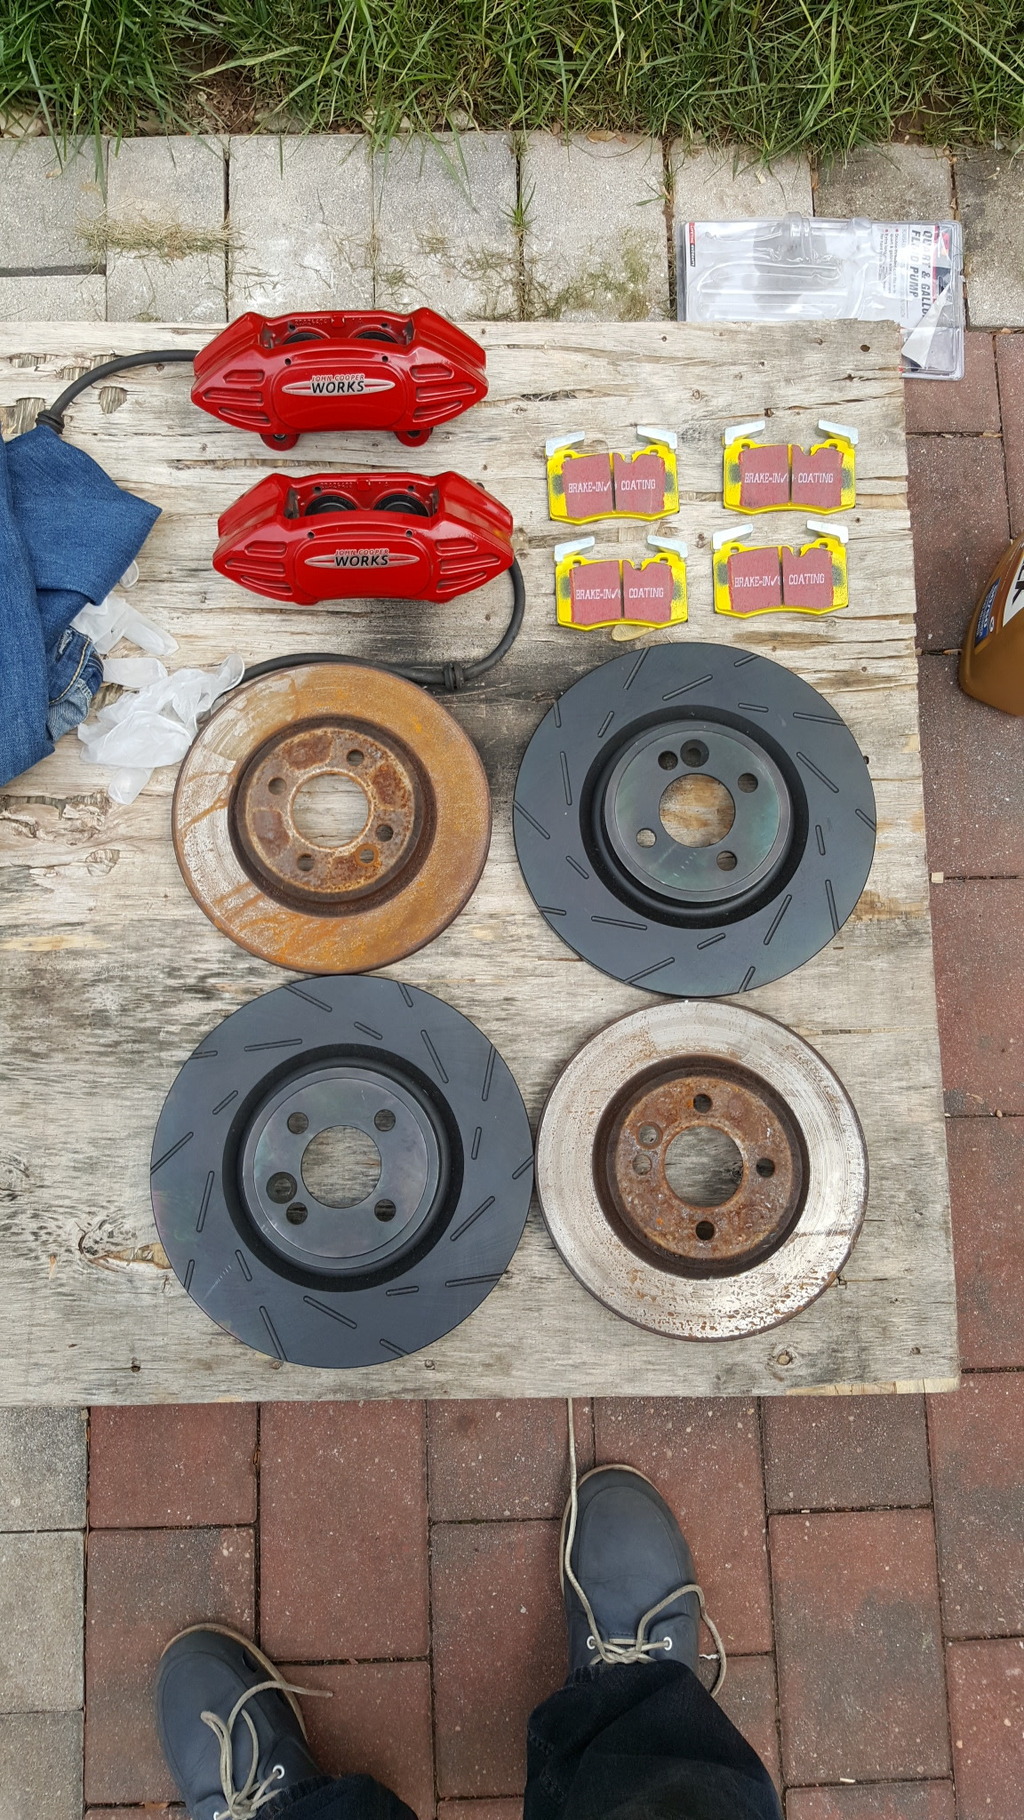
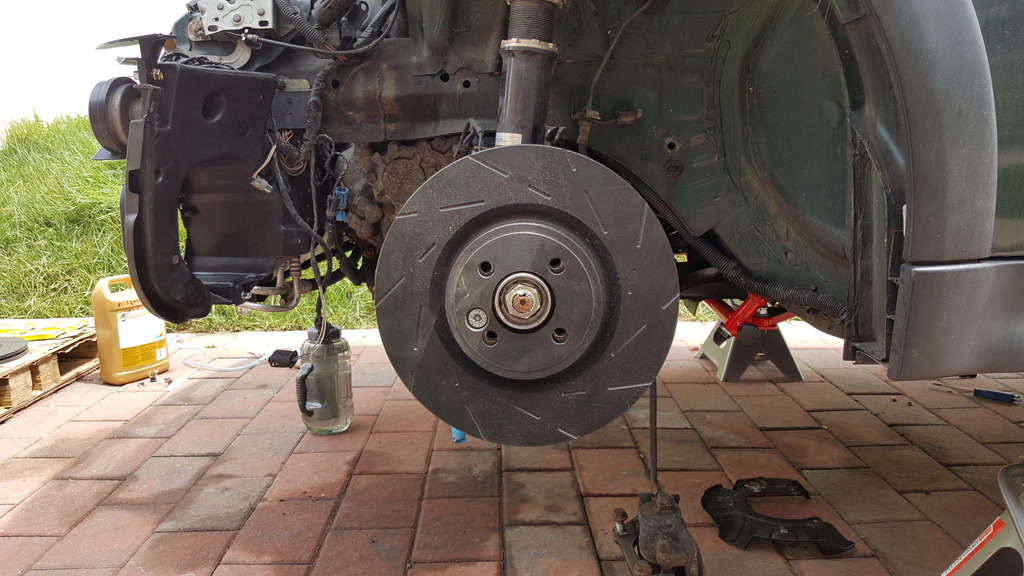
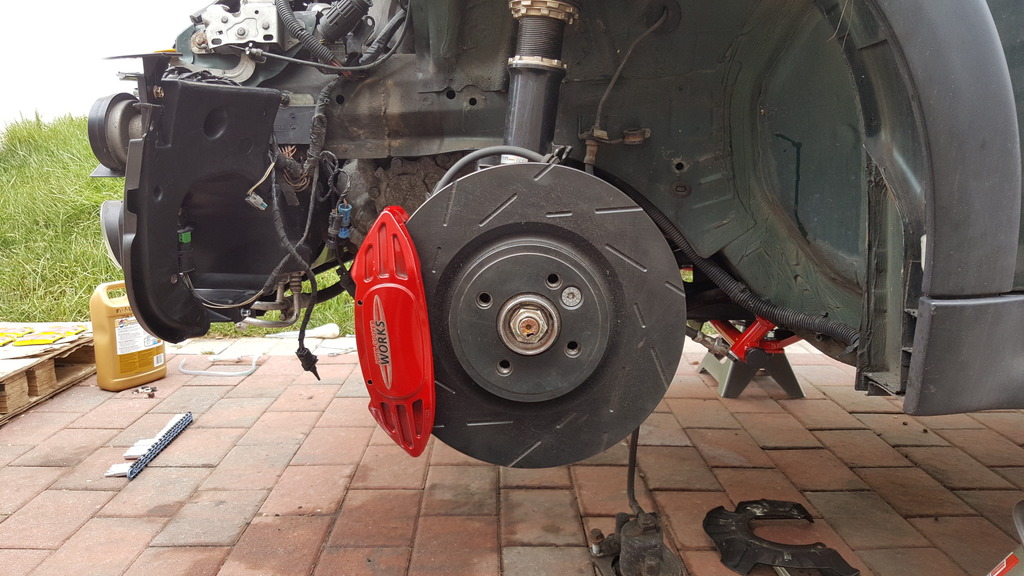
R56 JCW BBk Ready for installation. SS lines/Front Rotors/Front Brake Pads/Ti Shims come in tomorrow.

Started the day by replacing the Left/Driver Side wheel Spindle i had damaged trying to install the outer ball joint. Installed the Aluminum Radiator/Coolant Reservoir Tank and The Radiator support. While i was doing this i replaced the Crank sensor O-ring with a new one.
This is the only picture i took.

Installed Coolant OverFlow Tank. Forgot to take a picture of the tank installed.


Here is the Aluminum Radiator, Don't see a problem putting the bumper back on since it about the same thickness as the stock Core at least at the ends.


Rad Support or lack of lol.


Mini Cooper Support

Mini Cooper S Support Nothing is different but the snorkel being at the wrong place.

Here is the old Vs New

R56 JCW BBk Ready for installation. SS lines/Front Rotors/Front Brake Pads/Ti Shims come in tomorrow.


#16
05-08-2016, 11:08 PM

#19
05-10-2016, 06:19 PM
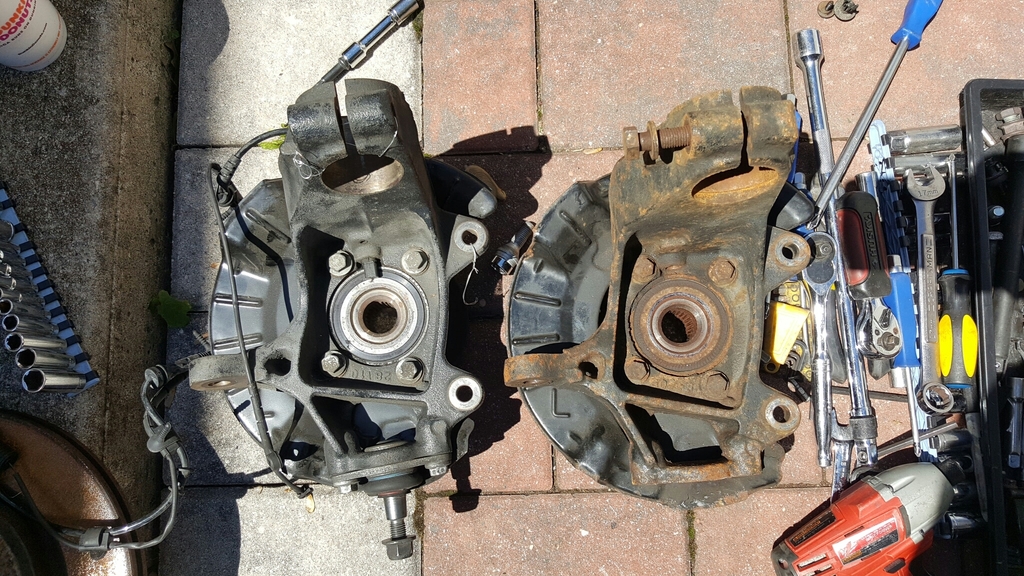
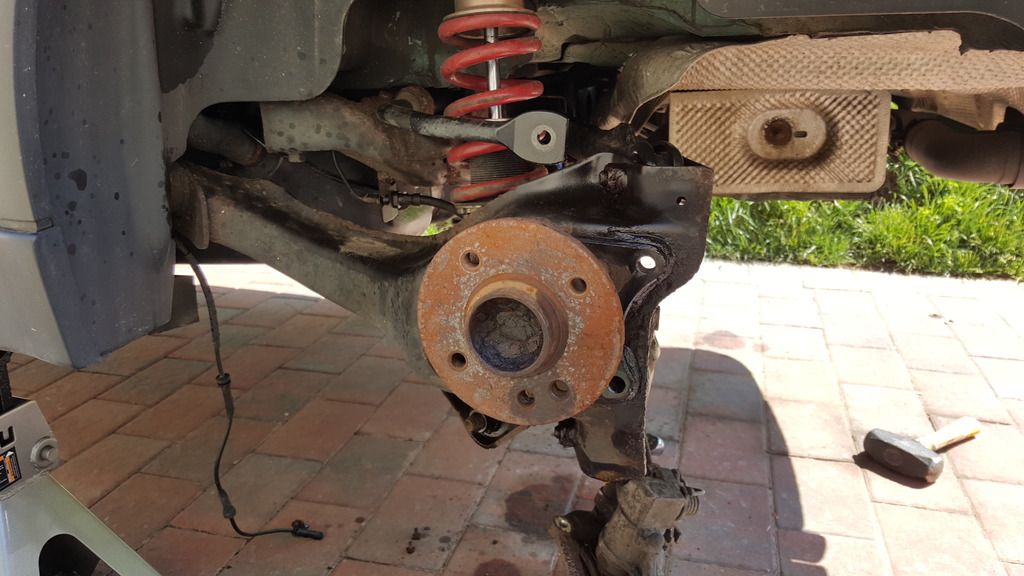
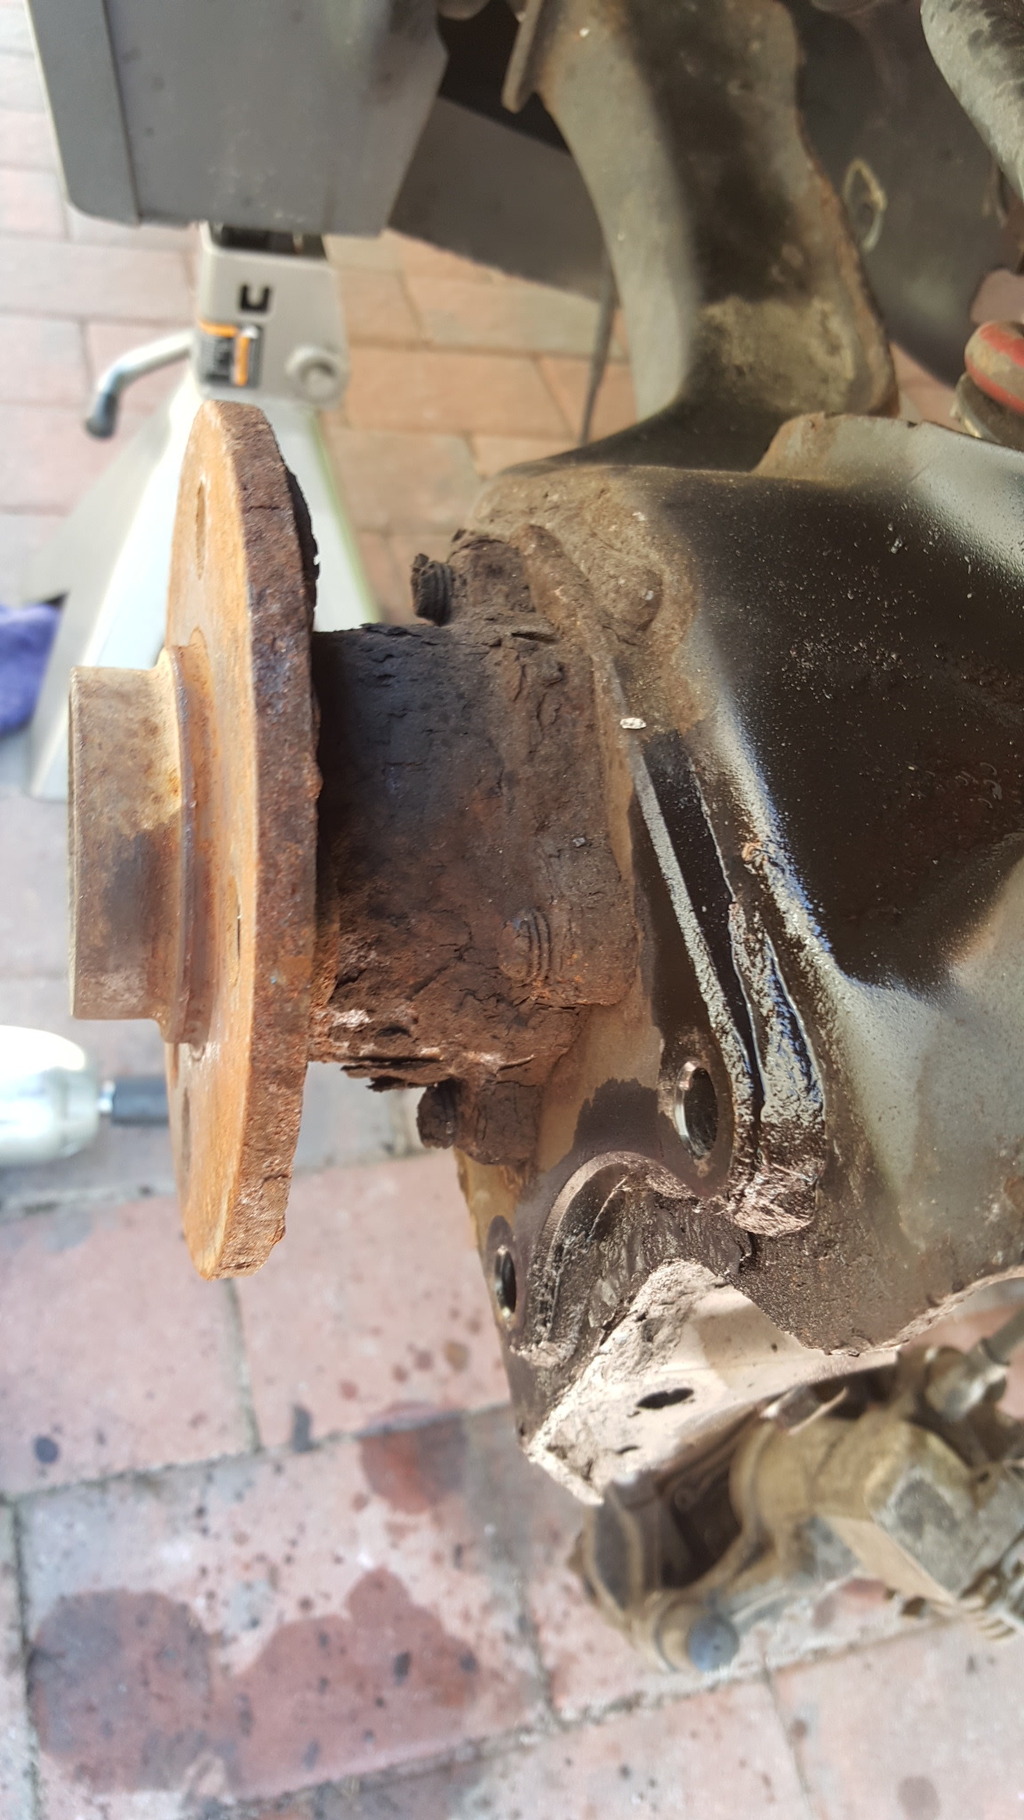
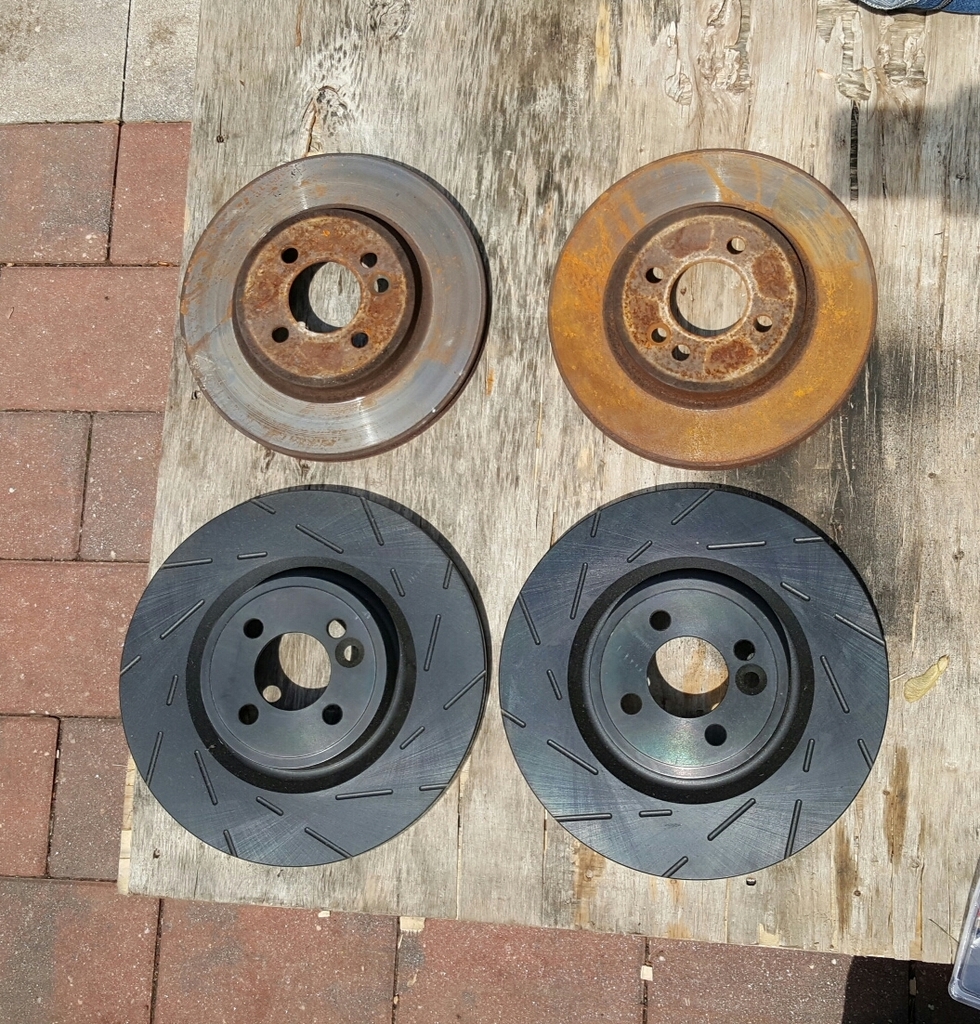
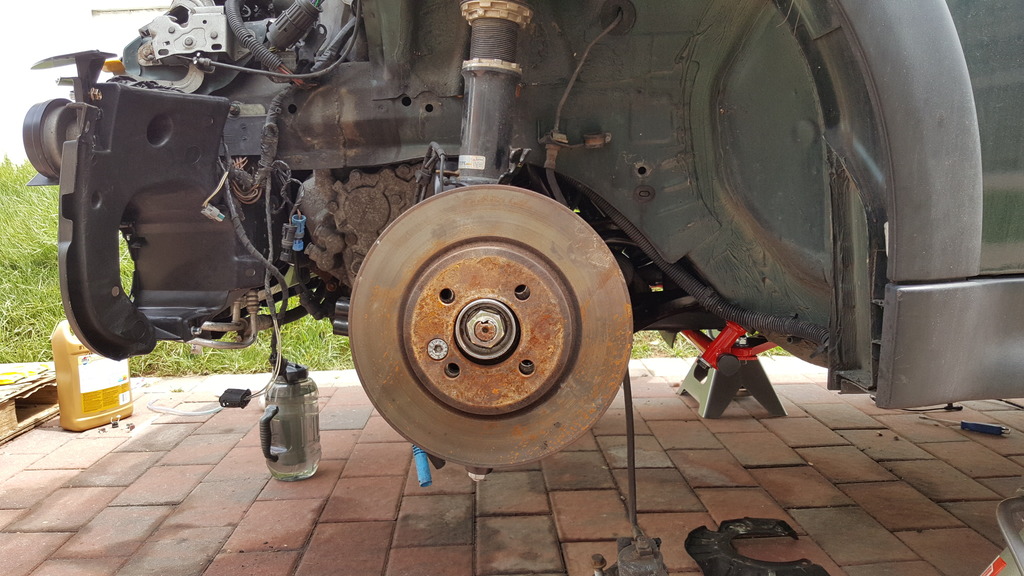
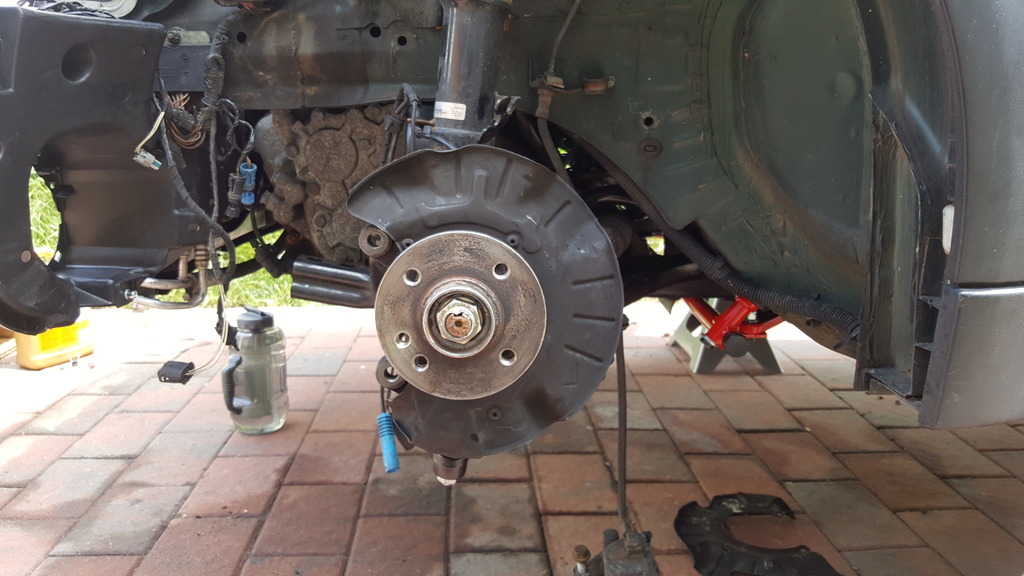
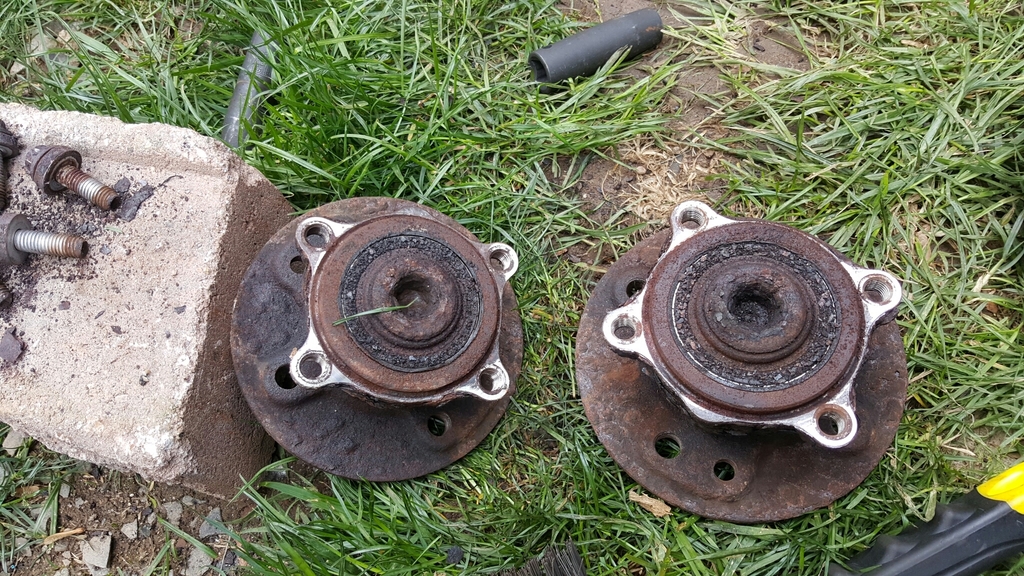
So yesterday I went out and took off the sub-frame and Trailing arms out. Turned our the Wheel Hubs was crazy with rust. I order placed and order for two of them. While in the process of doing that Fedex came with goodies, Since i was having trouble with some of the bolts. I just blasted it with PB and went to open and check out what i got. Turns out i got my Front Rotors and Front Pads. I decided to shift attention to the brakes. and let the rear get more penetration lol.
Here are the pictures
Shipment came in
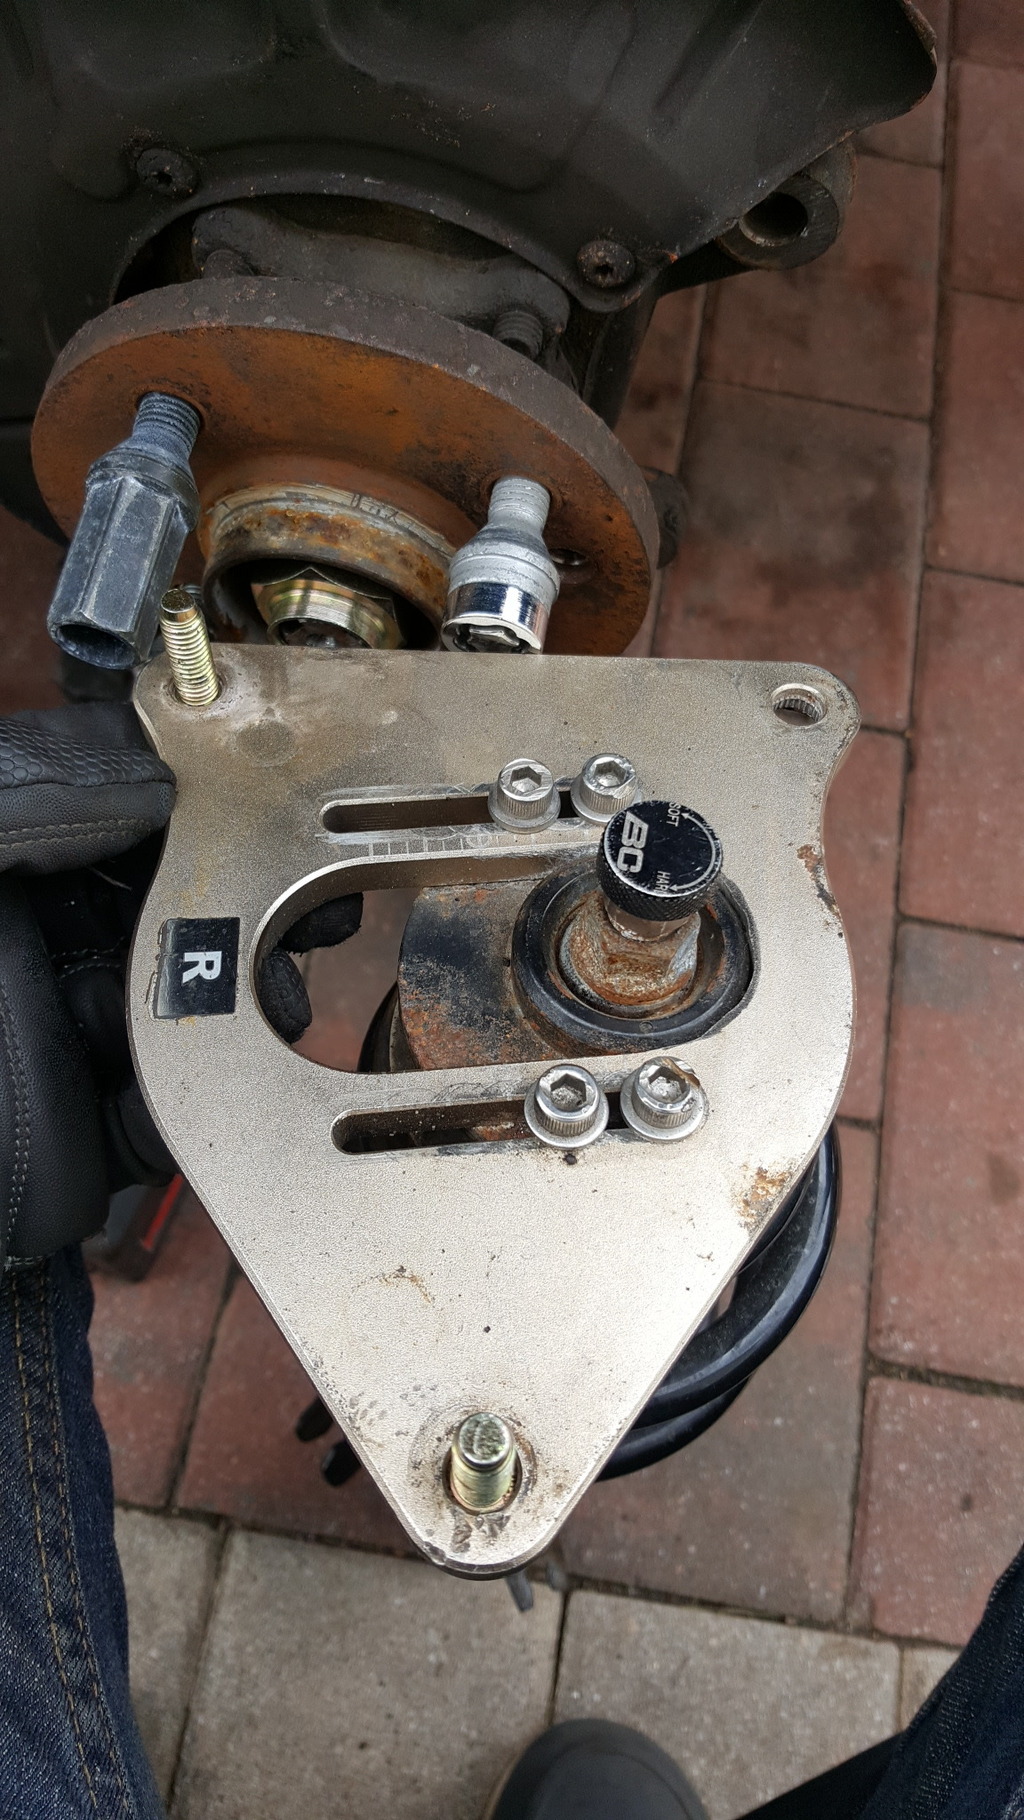
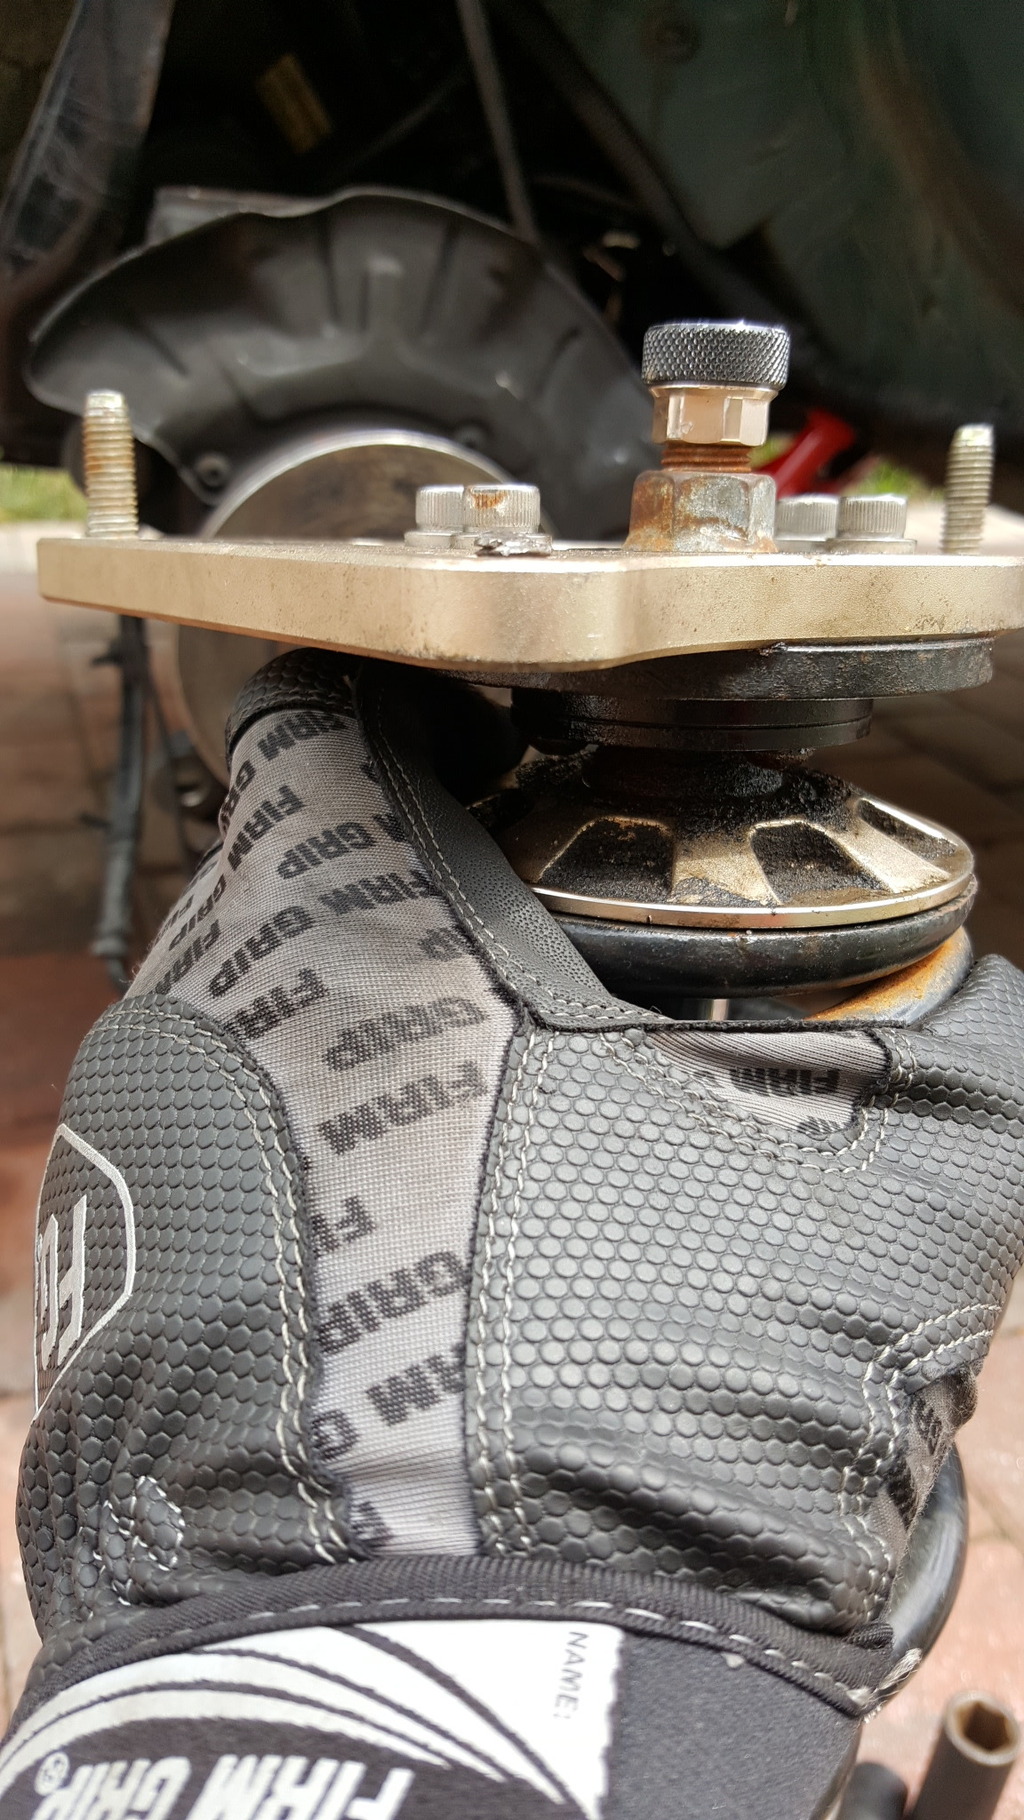
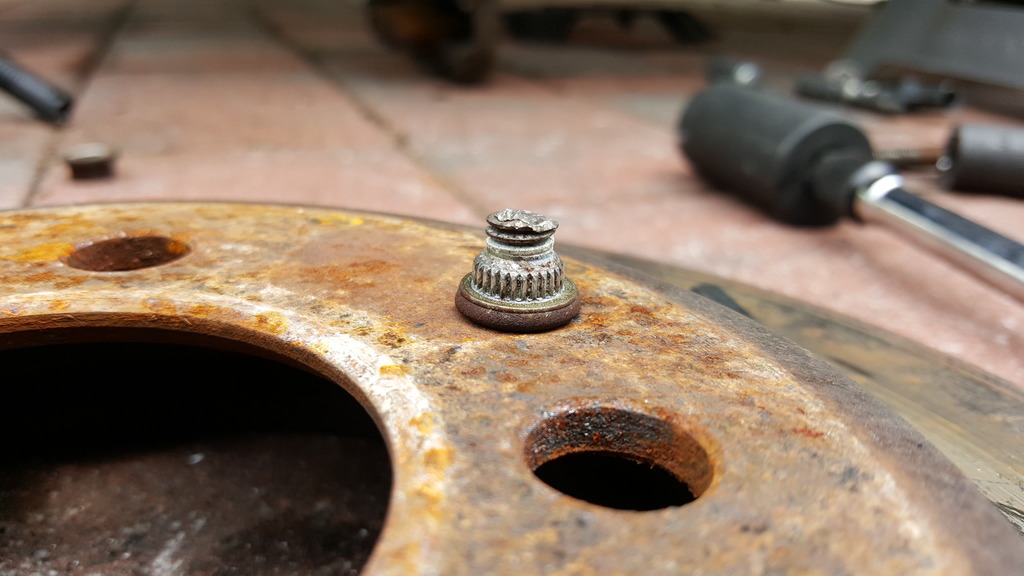
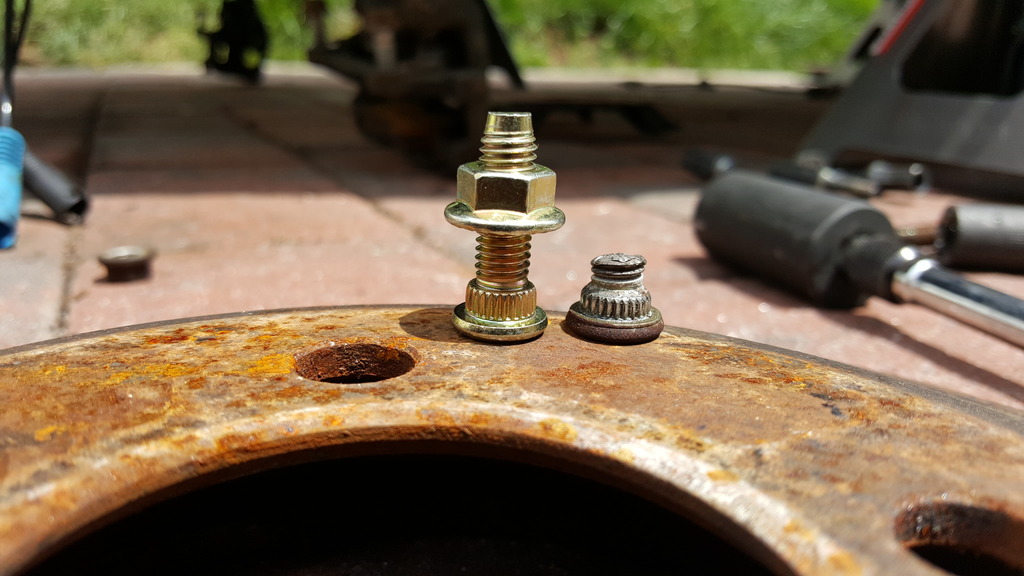
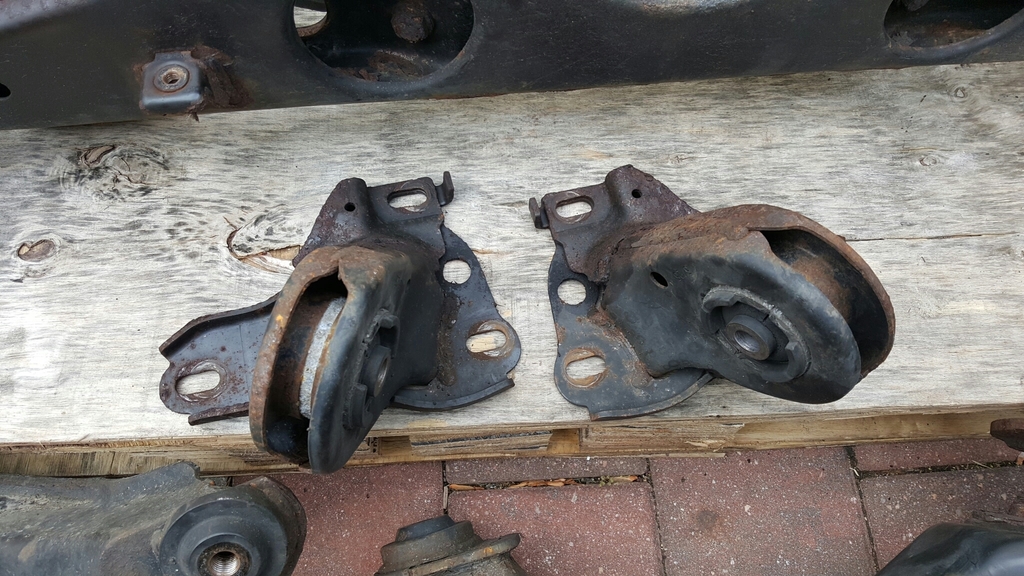
So i tried again in the rear and still no go. I Blasted again and went to work on the suspension. So the pillow ball mount studs needed some love so love it got. Also need to take out some negative camber because I will not be able to put the endlinks since they rub with the frame. Only notice after putting everything back together and went to install Endlinks. So maybe tomorrow.
Right Side (Passenger side) Had to install 3 new studs
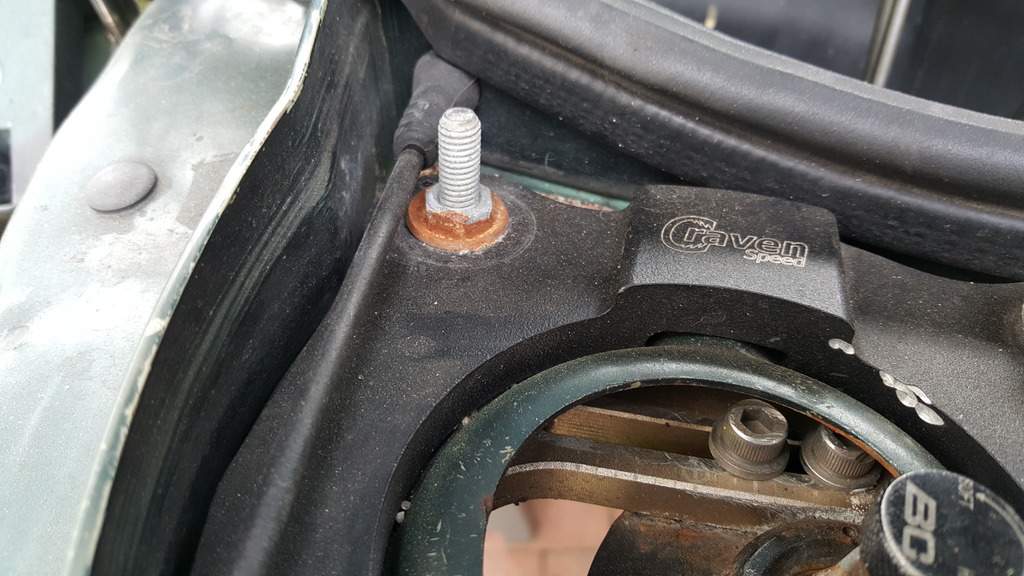
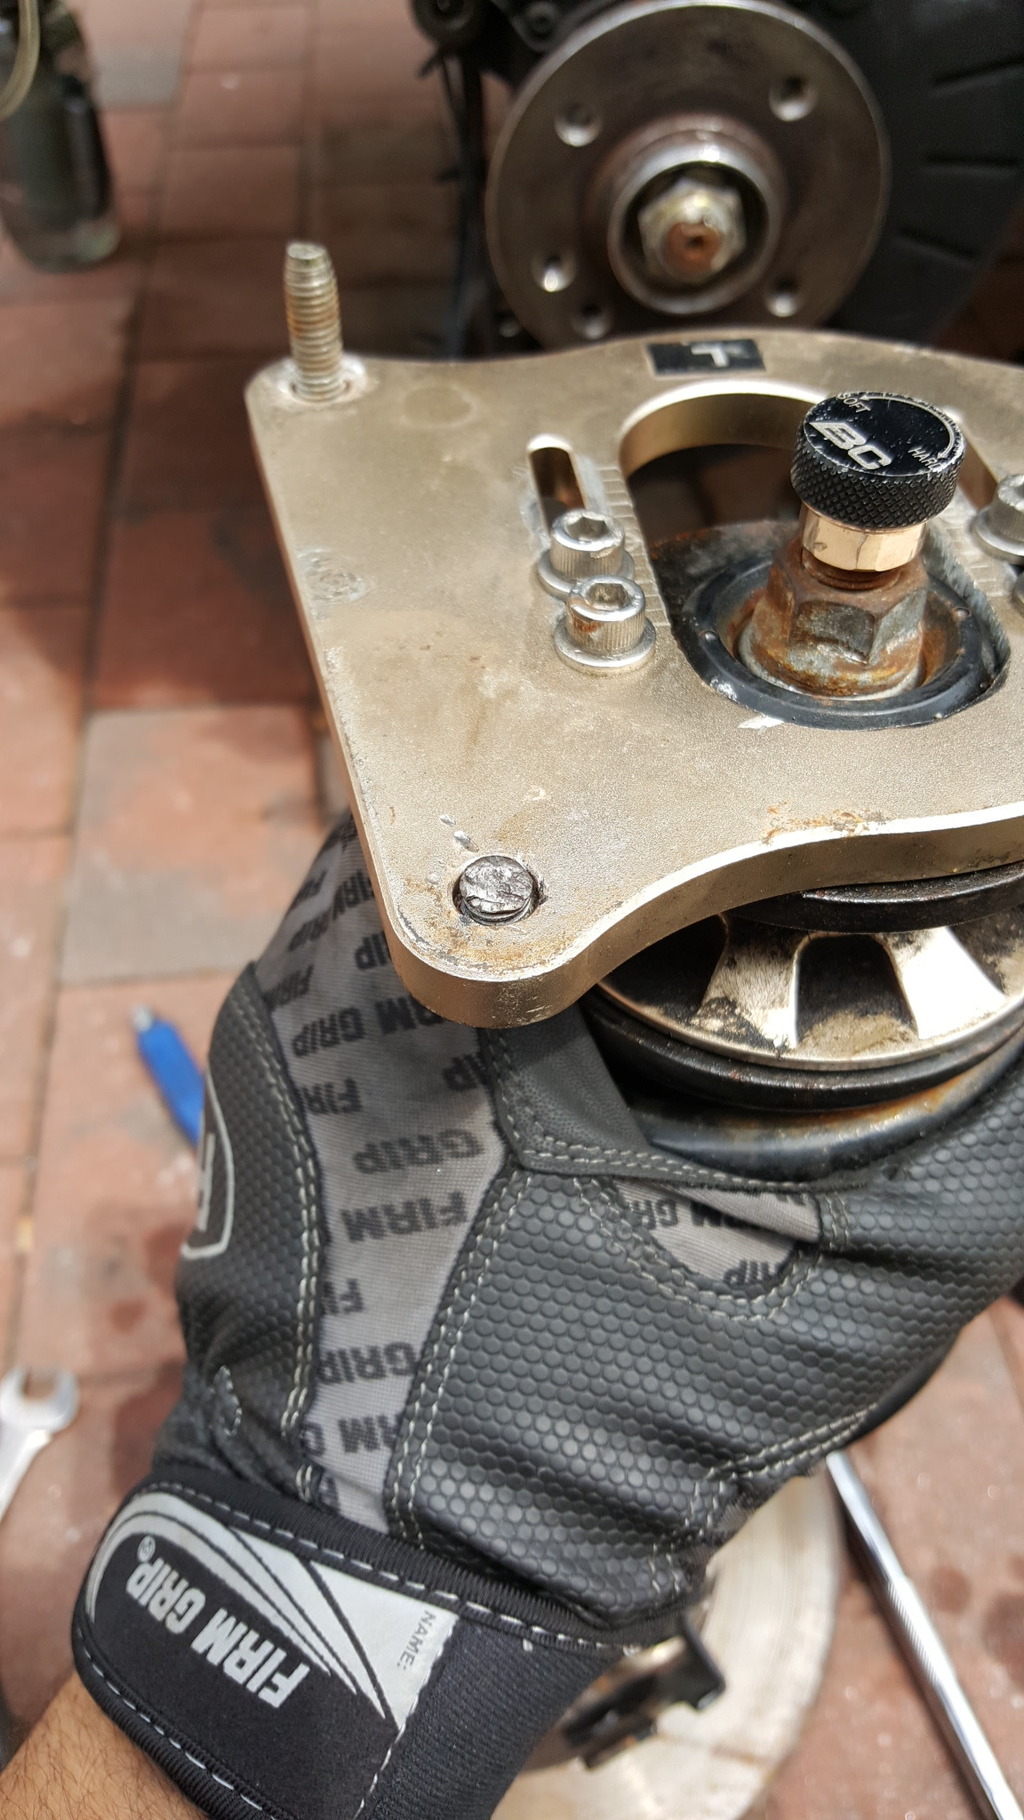
Left Side (driver side) Had to install One new stud.
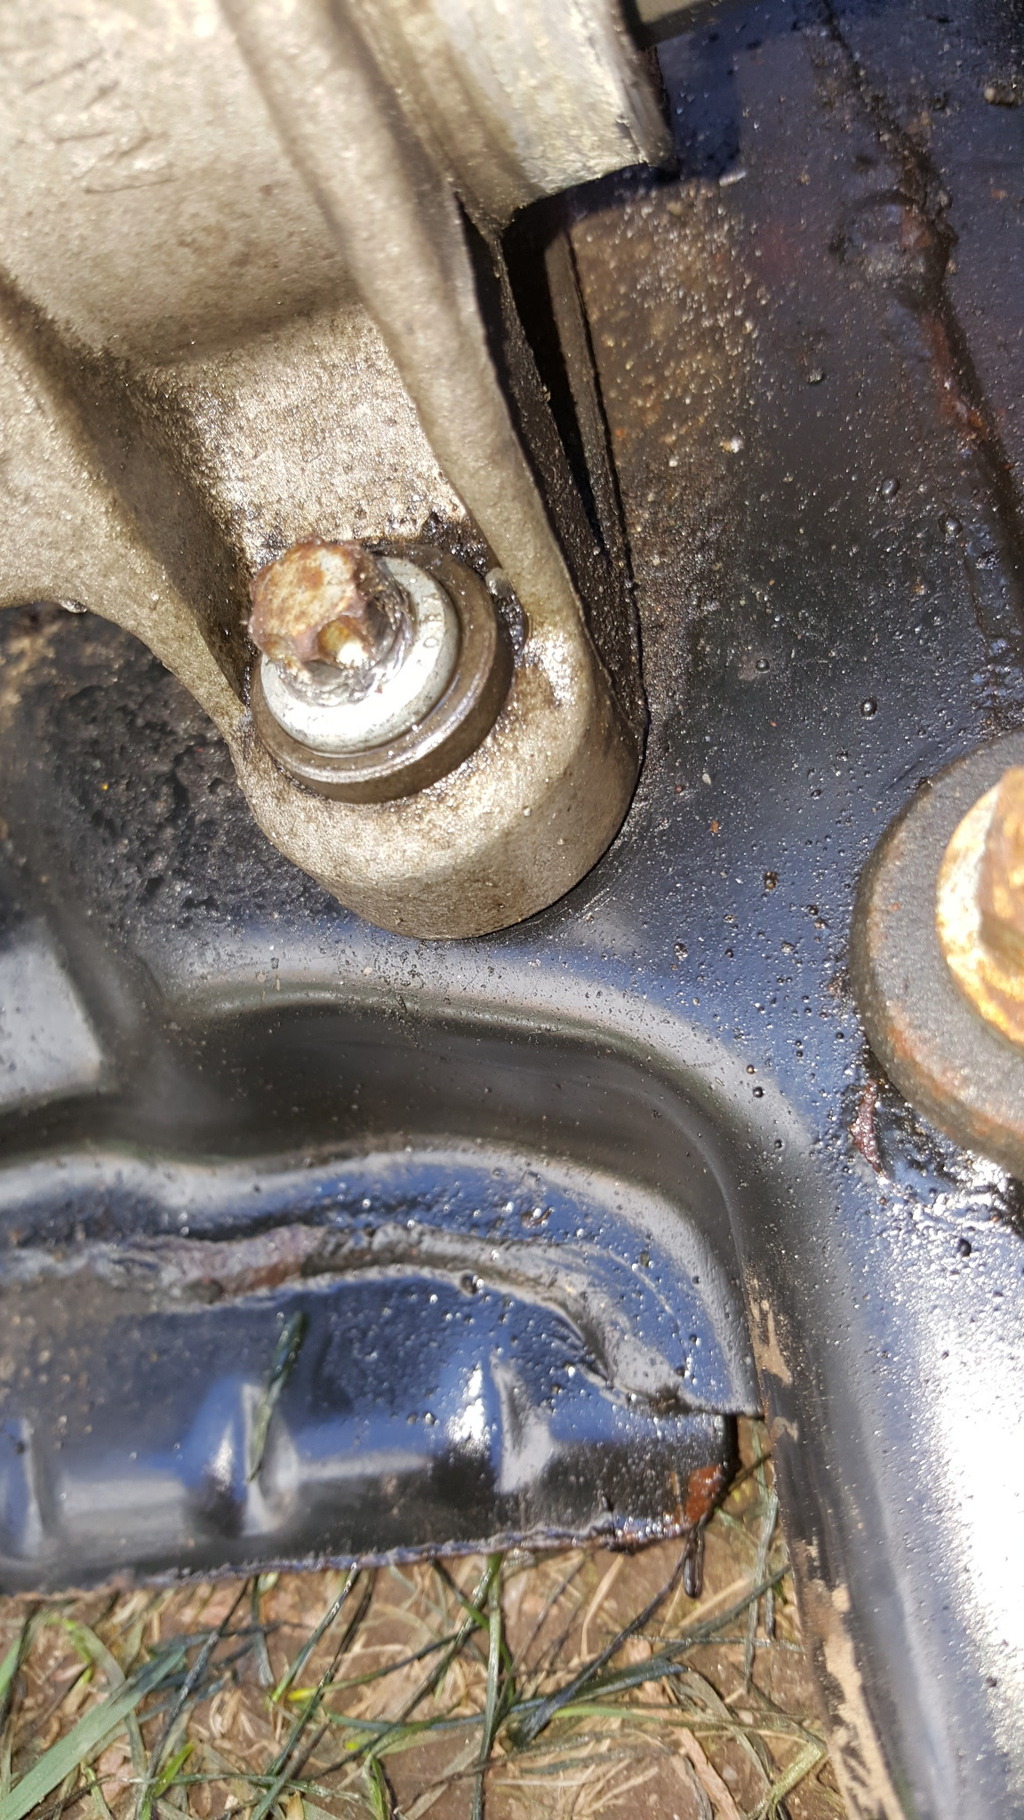
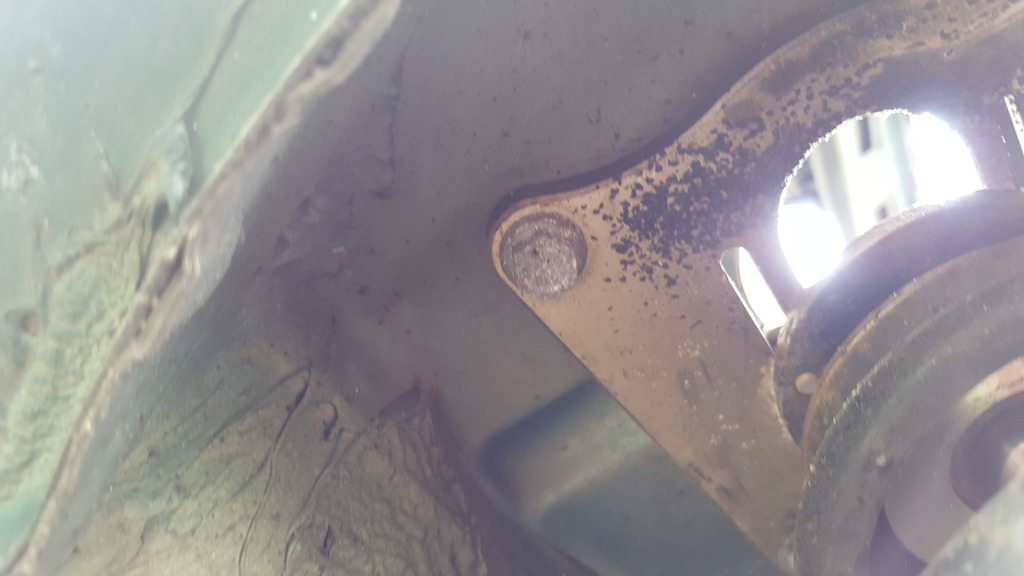
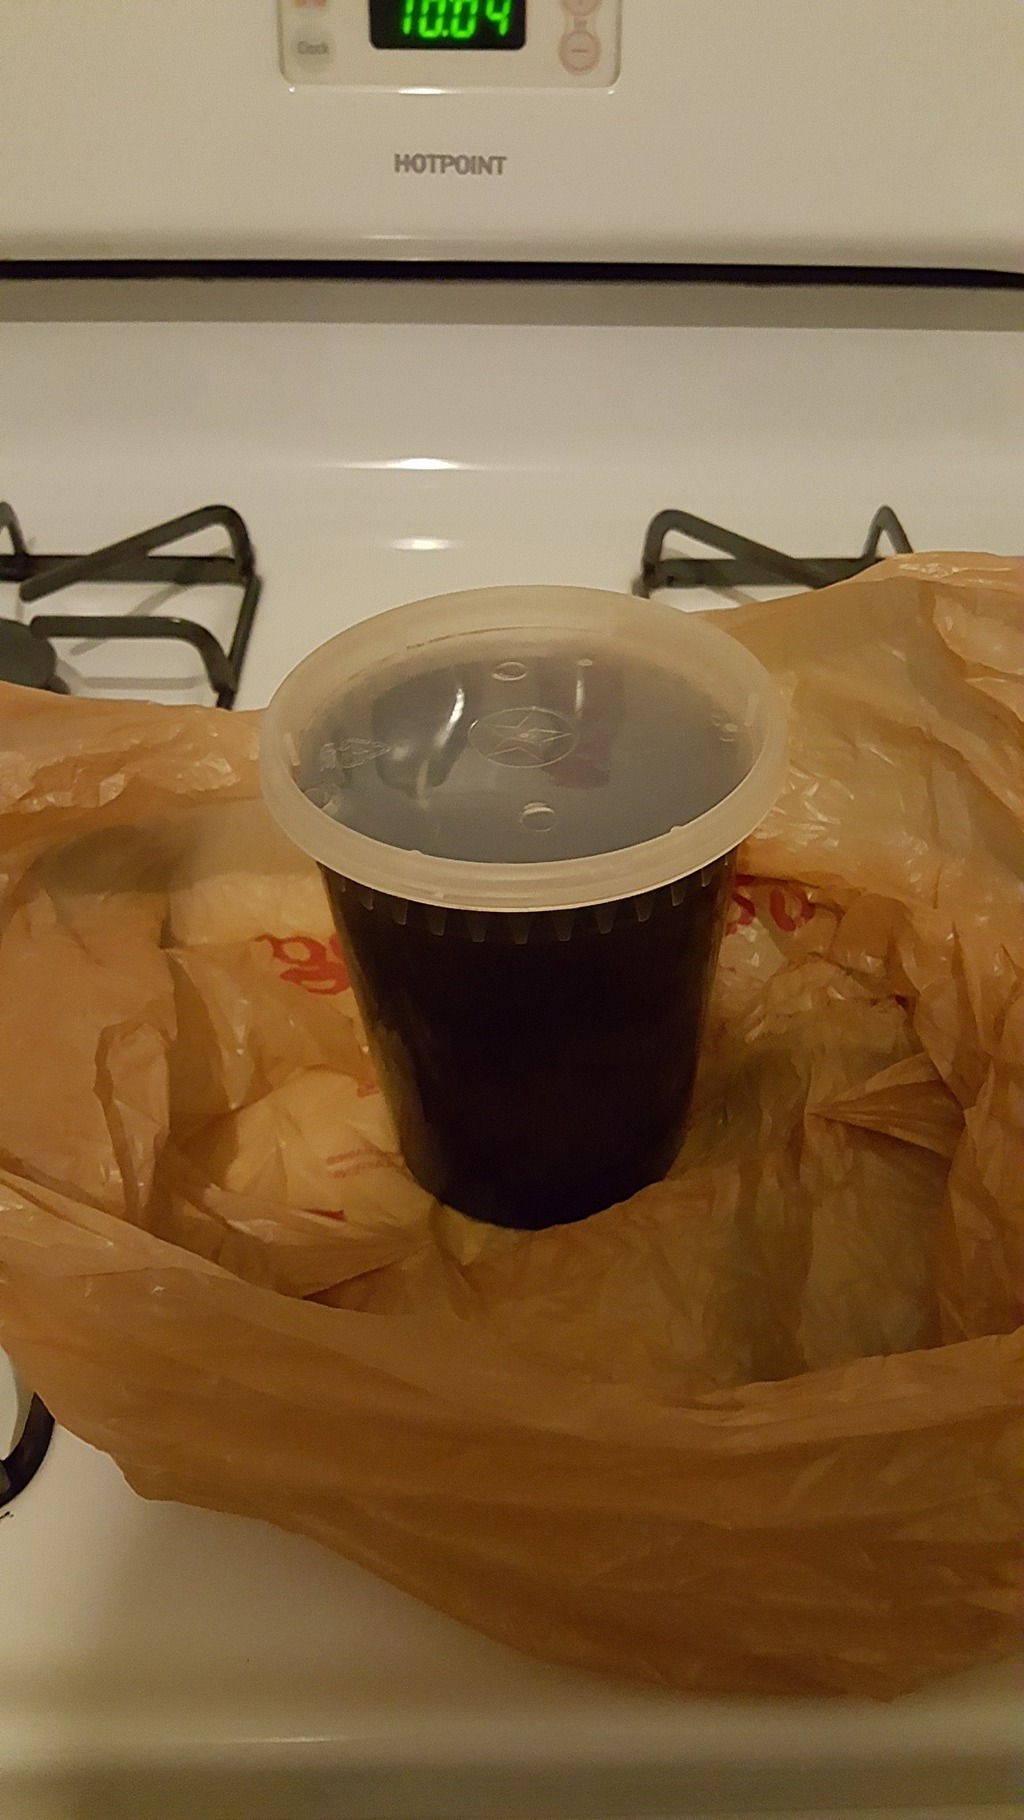
So finally worked my way back to the rear and full of surprises this car lol. Here is what i found. I was able to salvage the bolt. a Nice evpo rust and all the bolts came back to life.
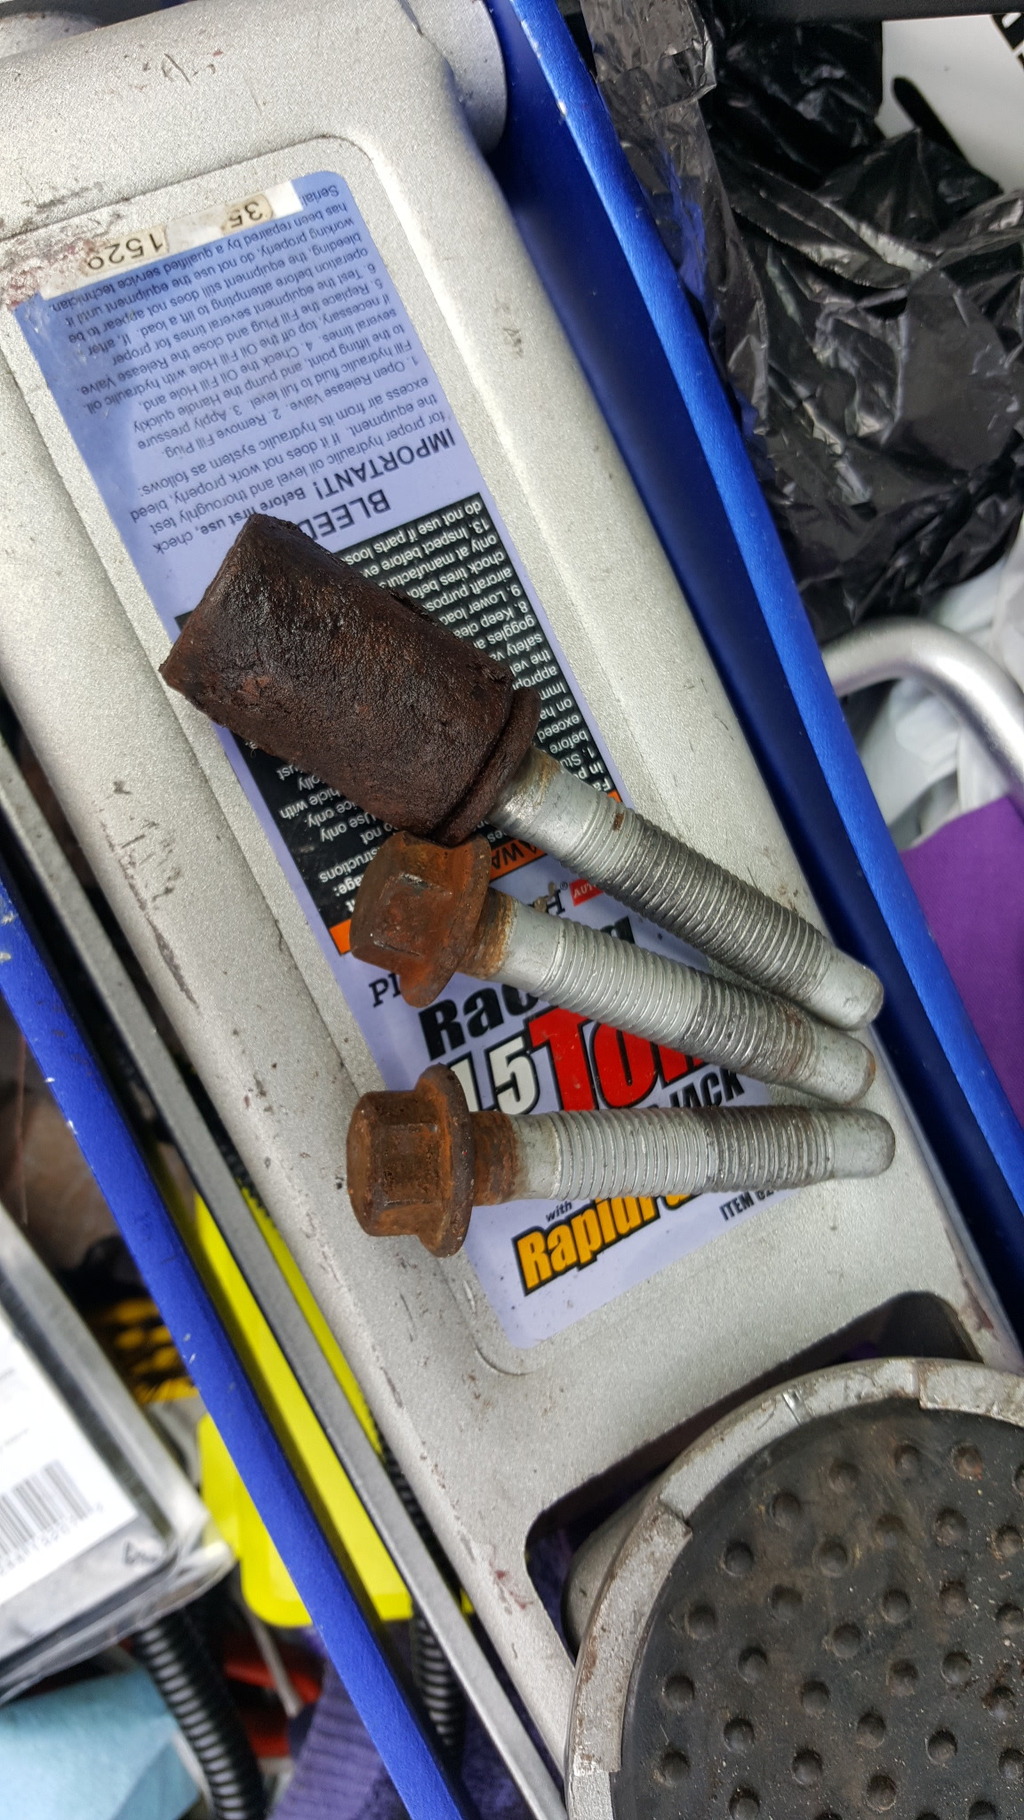
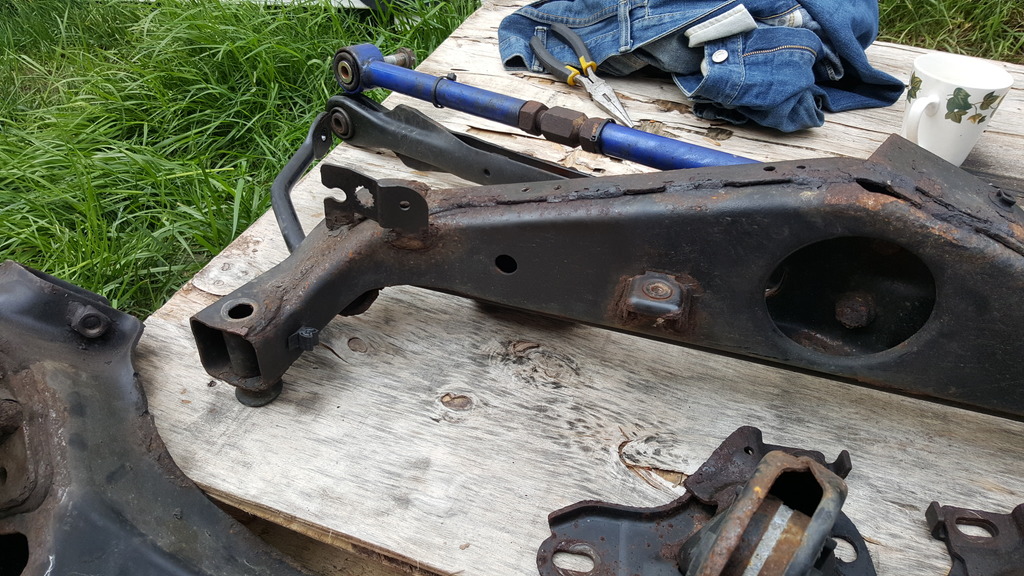
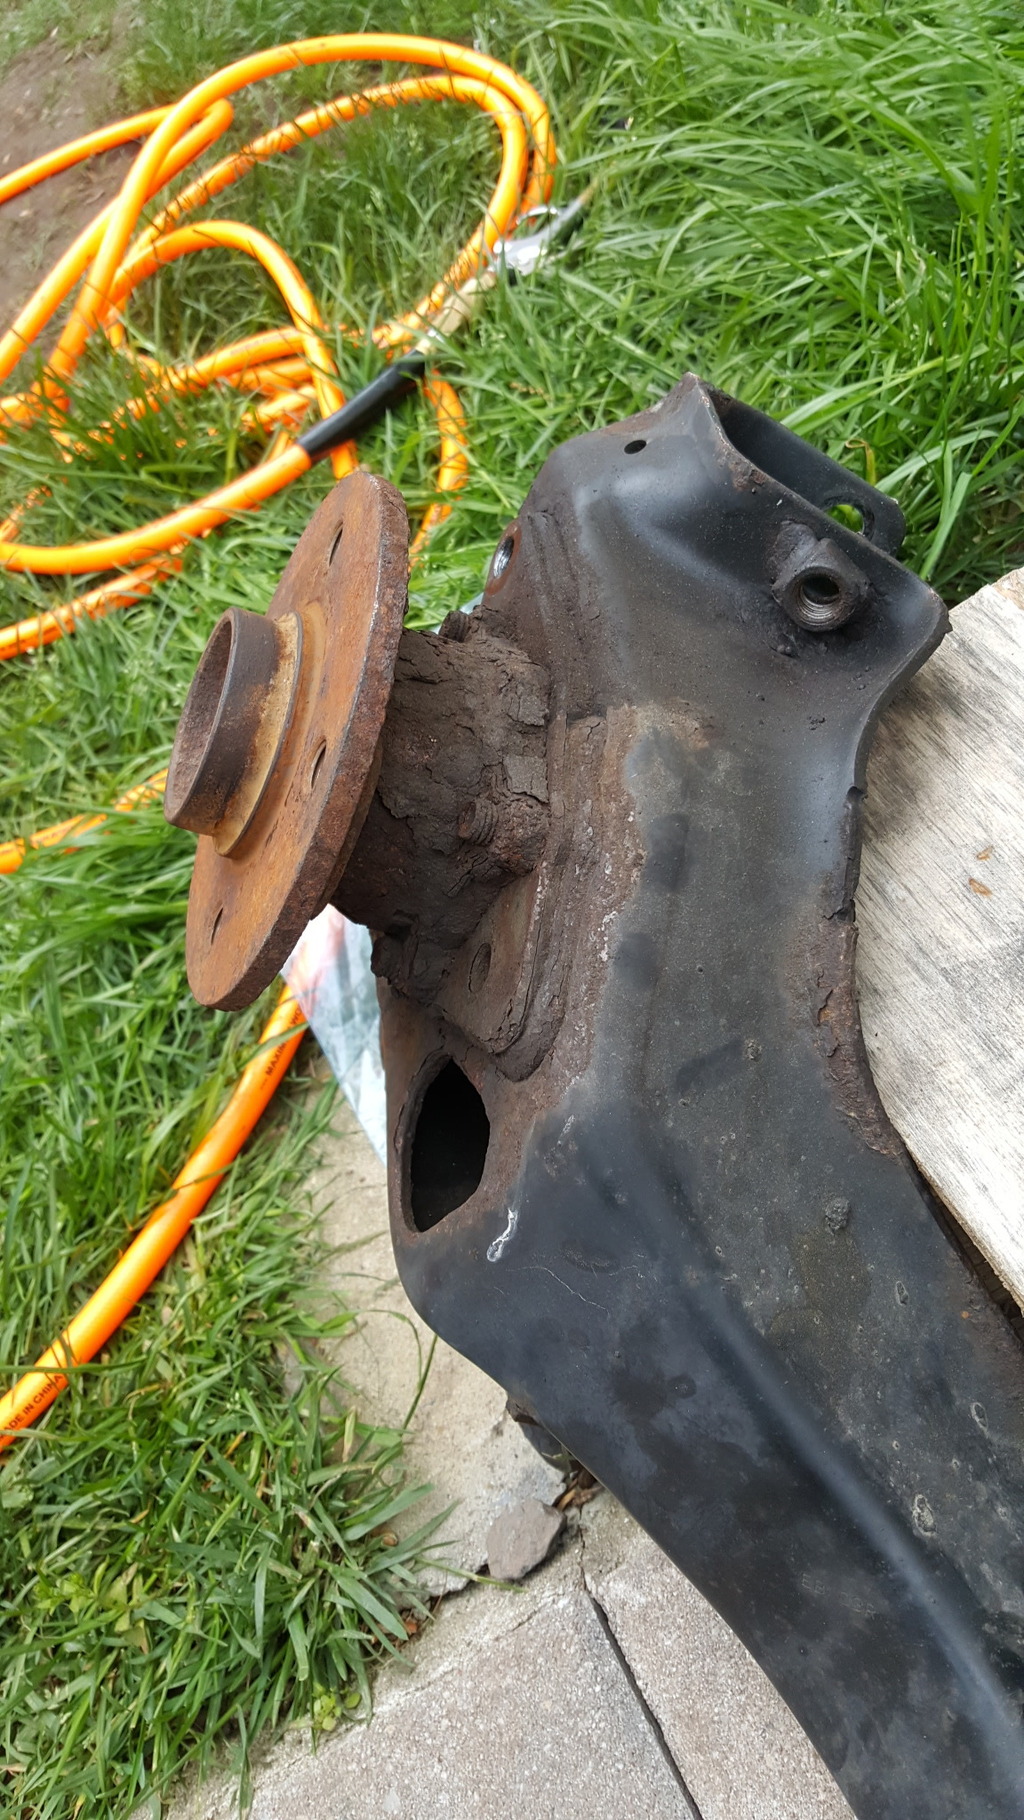
Rust Bath
Here are the pictures


Shipment came in


So i tried again in the rear and still no go. I Blasted again and went to work on the suspension. So the pillow ball mount studs needed some love so love it got. Also need to take out some negative camber because I will not be able to put the endlinks since they rub with the frame. Only notice after putting everything back together and went to install Endlinks. So maybe tomorrow.
Right Side (Passenger side) Had to install 3 new studs


Left Side (driver side) Had to install One new stud.


So finally worked my way back to the rear and full of surprises this car lol. Here is what i found. I was able to salvage the bolt. a Nice evpo rust and all the bolts came back to life.


Rust Bath

Last edited by HaveATank; 05-10-2016 at 06:57 PM.
#20
05-10-2016, 07:23 PM
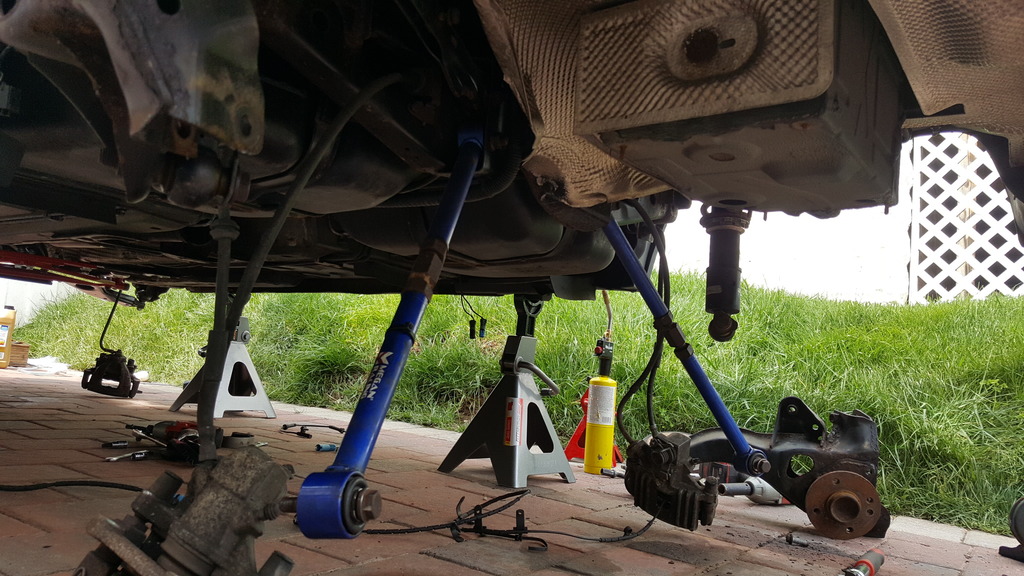
Installed Sub-frame Cross member and goodies.
Today cleaned as much rust as i could off the bolts. Also was able to salvage all the bolts off the sub frame and wheel bearings. Also cleaned all the threads on the bolts and installed the cross member/rear sub-frame. I wanted to do more, but the weather kept threatening to open up and that kept me from going all in.
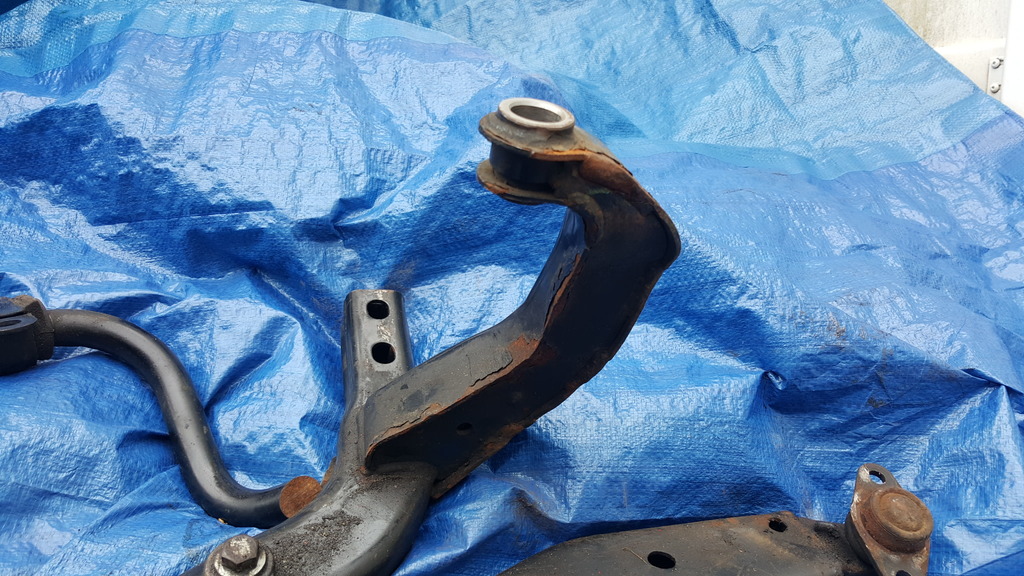
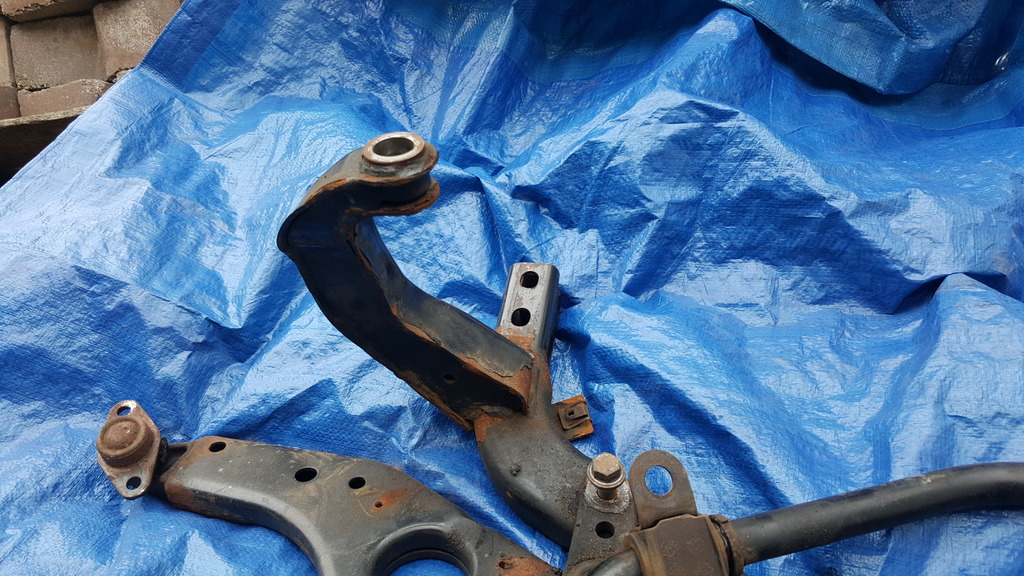
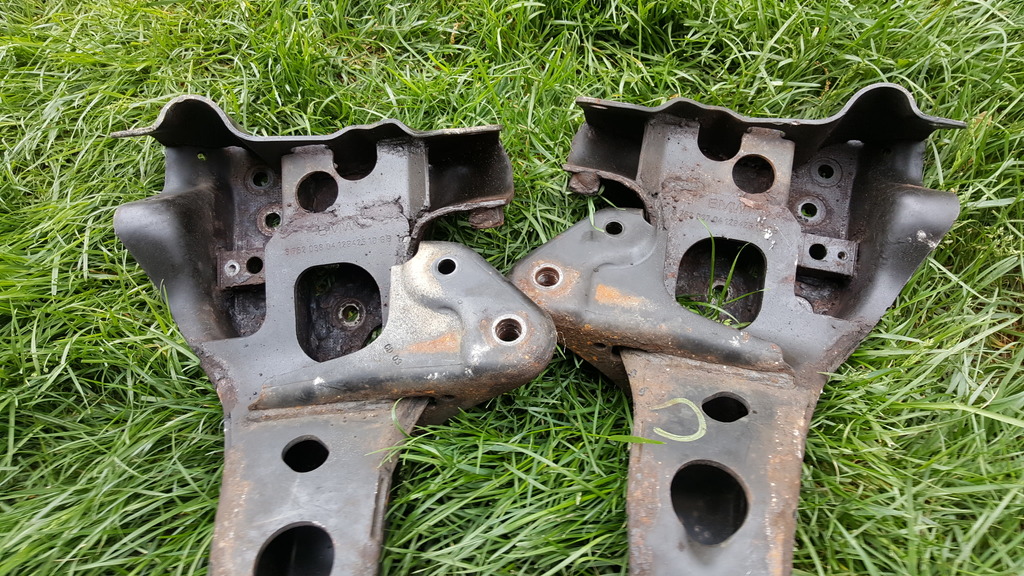
New used Rear Subframe
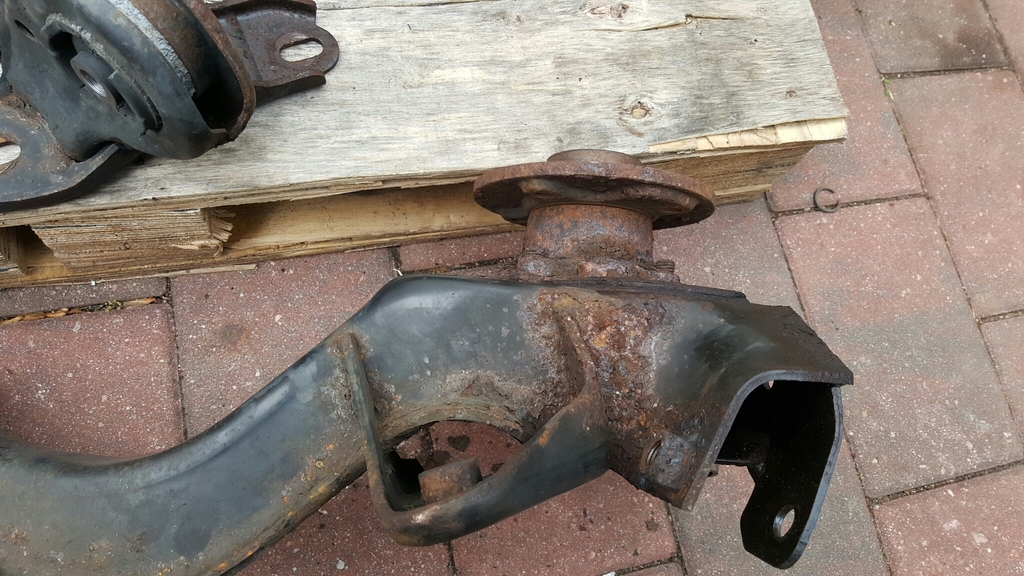
Old Trailing arms with no rusted yo bearings. was able to take it off with Fire and impact. Fire is your best friend when it comes to rust.
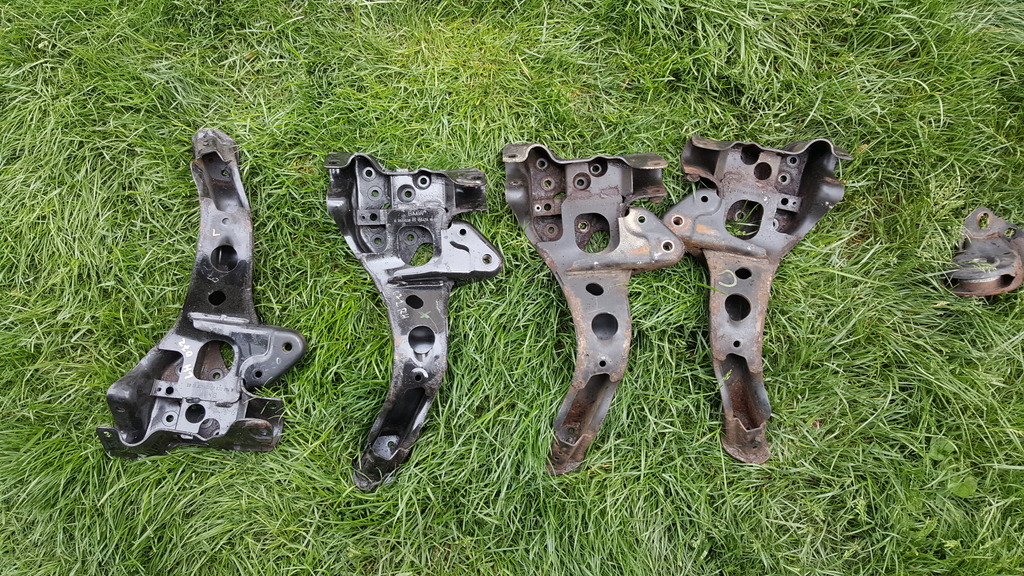
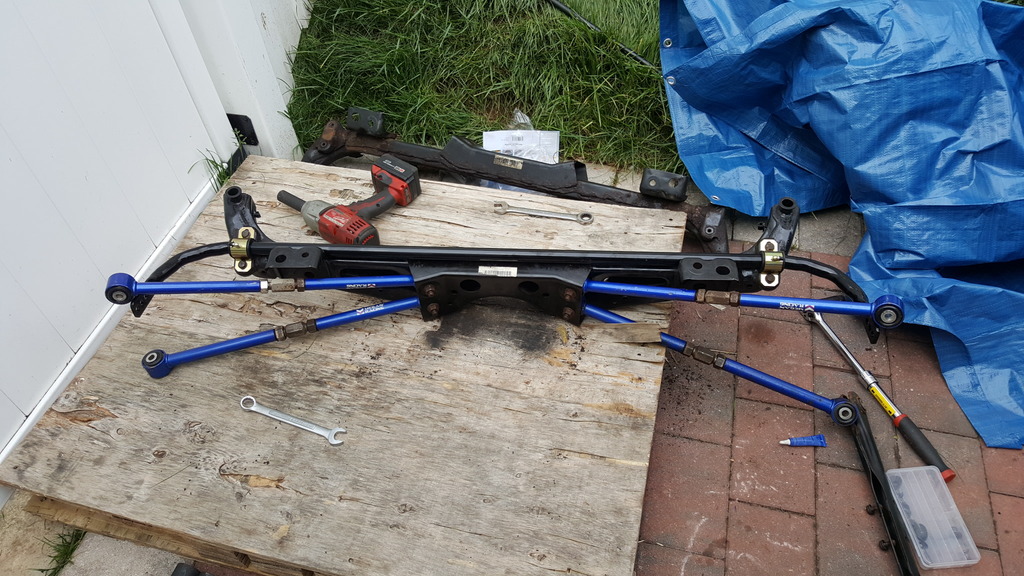
Everything assemble before it gets put in.
Rear Subframe all in. Before and After
Before
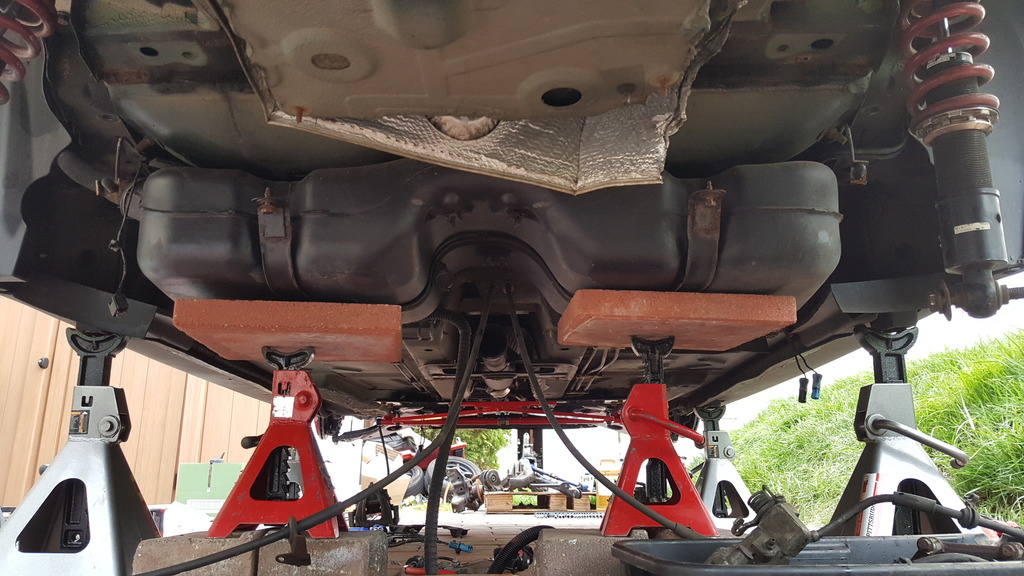
After
Got the final goodies from Way Motor Works.
New R56 Parking brake cables
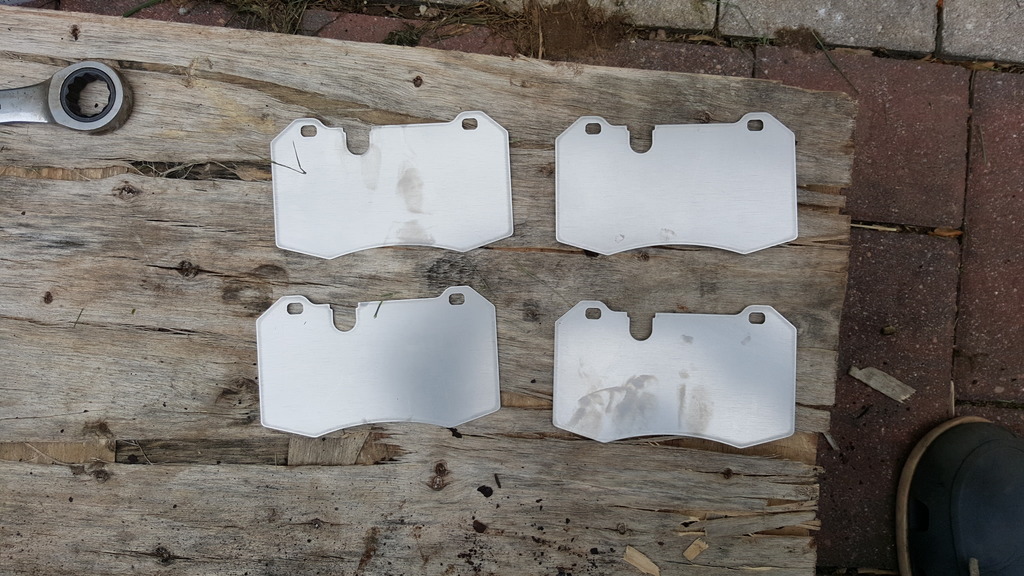
Also TI Shims came in today

New used Rear Subframe


Old Trailing arms with no rusted yo bearings. was able to take it off with Fire and impact. Fire is your best friend when it comes to rust.


Everything assemble before it gets put in.

Rear Subframe all in. Before and After
Before

After


Got the final goodies from Way Motor Works.
New R56 Parking brake cables

Also TI Shims came in today

#21
05-11-2016, 06:15 AM
Platinum Sponsor
This thread is like eye candy, makes me want to mod more and do some things to my R52 , like the superpro bushing upgrade.
I have the Gen 2 JCW 4 pots BBK on my Gen 1 R52 also. big improvement. I would also like toe paint the trailing arms and front arms as they are a bit rusted from 263K miles.
I have the Gen 2 JCW 4 pots BBK on my Gen 1 R52 also. big improvement. I would also like toe paint the trailing arms and front arms as they are a bit rusted from 263K miles.
__________________

MINI Guru/ MINI Owner Since 2004 | NEW Lifetime Part Replacement | Local Pickup
Milltek | Genuine MINI | Forge Motorsport | NM Engineering | ECS Performance | M7 Speed
Customer Service Hours: 8am-8pm EST|Sales Team Hours: 8am-11pm | SAT 10am-7pm 800.924.5172
MINI Guru/ MINI Owner Since 2004 | NEW Lifetime Part Replacement | Local Pickup
Milltek | Genuine MINI | Forge Motorsport | NM Engineering | ECS Performance | M7 Speed
Customer Service Hours: 8am-8pm EST|Sales Team Hours: 8am-11pm | SAT 10am-7pm 800.924.5172
#22
05-11-2016, 07:07 PM
This thread is like eye candy, makes me want to mod more and do some things to my R52 , like the superpro bushing upgrade.
I have the Gen 2 JCW 4 pots BBK on my Gen 1 R52 also. big improvement. I would also like toe paint the trailing arms and front arms as they are a bit rusted from 263K miles.
I have the Gen 2 JCW 4 pots BBK on my Gen 1 R52 also. big improvement. I would also like toe paint the trailing arms and front arms as they are a bit rusted from 263K miles.
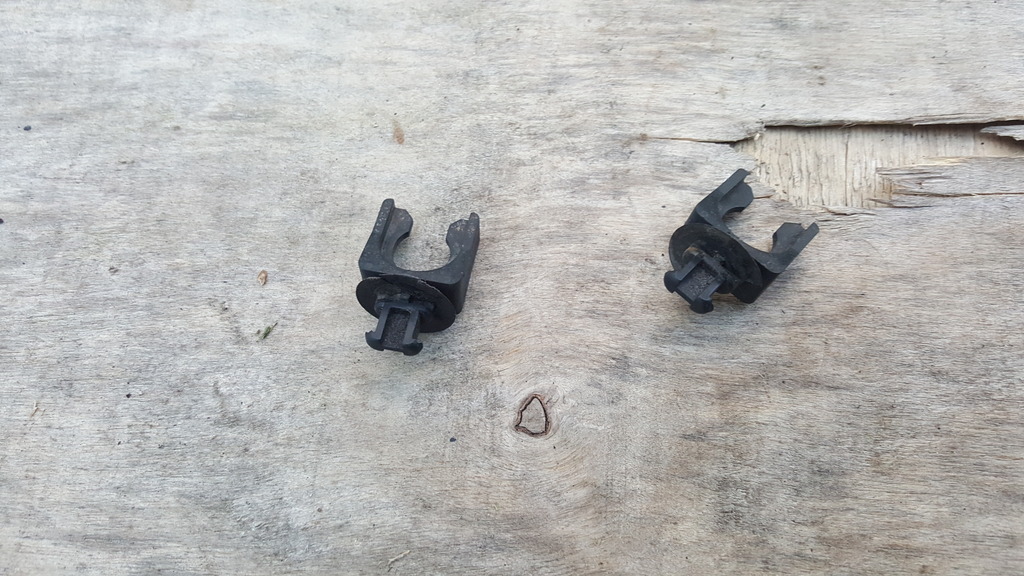
Also the salvage arms i got don't have the welded nut for the lower control arm and it came with this clip, but i only have one.


I was just chatting with customer service at ECS. They said they will get back to me. I can take it to get a nut welded, but trying to keep my cost down lol. Going to see how much you guy sell this for and depending on the price i will pick lol.
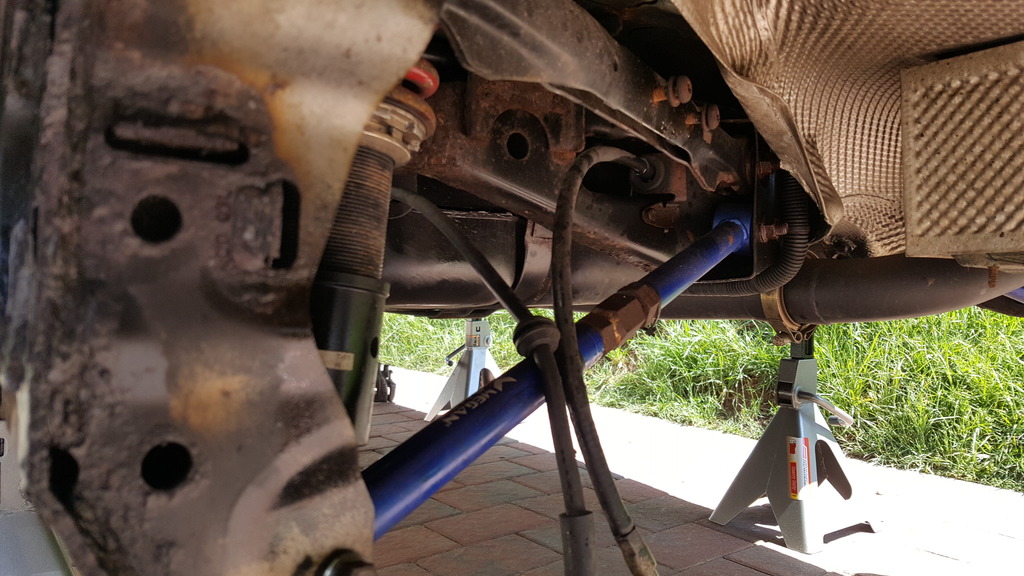
Other problem that i think i will have is the endlinks feel like they are too close to Axles on both sides. When you turn the wheel all the way L or R it rubs just a little, Don't know if the geometry will change once the car is actually on the ground. Any suggestion would be greatly appreciated.

Ill update with everything i did today.


#24
05-13-2016, 05:06 PM

#25
05-13-2016, 06:43 PM
Regarding the front Sway bar. Everything i have read about the fronts seems to point to it being good enough even for track use.