R50/R53 :: Hatch Talk (2002-2006) Cooper (R50) and Cooper S (R53) hatchback discussion.

R50/53 Painting door trims?

Thread Tools
 
Search this Thread
 
  #1  
Old 03-26-2015, 01:20 PM
rikaro's Avatar
rikaro
rikaro is offline
2nd Gear
Thread Starter
Join Date: Feb 2015
Posts: 133
Likes: 0
Received 7 Likes on 4 Posts
Painting door trims?

Hi guys. I want to repaint my door trims (handle and the "ring" around it) but I couldn't find any diy on removing the ring since it's plastic welded.

I suppose one can drill the plastic welds out, repaint, then assemble again with some sort of glue?

Any suggestions?

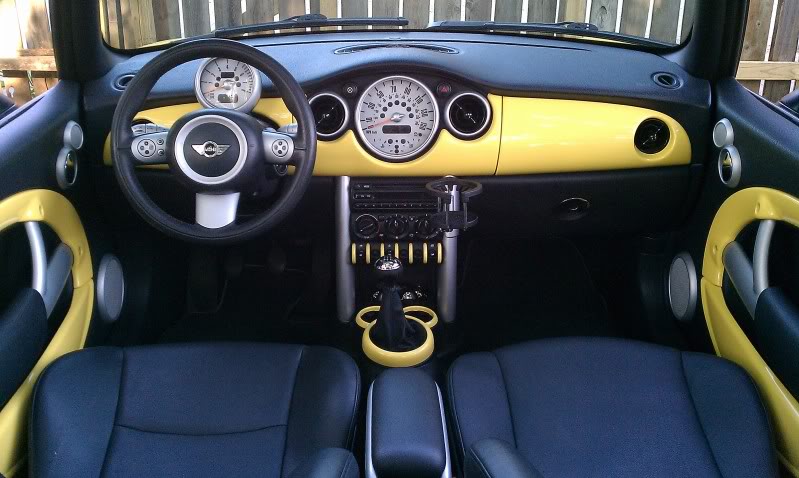
stolen mathen001's photos but I wanted to respray into a different color

Name:  IMAG0623.jpg
Views: 2734
Size:  71.8 KB
 
  #2  
Old 03-26-2015, 01:30 PM
FatherG's Avatar
FatherG
FatherG is offline
3rd Gear
Join Date: Mar 2014
Location: Turlock, CA
Posts: 239
Received 13 Likes on 10 Posts
I would not recommend removing them. Pulling them will eventually strip out whatever you use to replace the weld. I wanted to do the same with mine but decided not to.
 
  #3  
Old 03-26-2015, 02:07 PM
rikaro's Avatar
rikaro
rikaro is offline
2nd Gear
Thread Starter
Join Date: Feb 2015
Posts: 133
Likes: 0
Received 7 Likes on 4 Posts
I found a similar way from a fiat page.

http://www.fiat500usa.com/2012/10/fi...oor-panel.html

Time to get to work.

@fatherG thanks for the suggestion but i wasn't planning to take no for an answer :P
 
  #4  
Old 03-26-2015, 03:57 PM
rikaro's Avatar
rikaro
rikaro is offline
2nd Gear
Thread Starter
Join Date: Feb 2015
Posts: 133
Likes: 0
Received 7 Likes on 4 Posts
I took the first piece off. Accidentally drilled through one of the holes but it doesn't matter since I can cover it up with plastic filler before I paint
 
Attached Thumbnails Painting door trims?-image.jpg  
  #5  
Old 03-26-2015, 04:32 PM
FatherG's Avatar
FatherG
FatherG is offline
3rd Gear
Join Date: Mar 2014
Location: Turlock, CA
Posts: 239
Received 13 Likes on 10 Posts
So, keep us apprised of the progress. I am curious to see how you re-attach them as I may yet do the same with mine.
 
  #6  
Old 03-26-2015, 04:37 PM
rikaro's Avatar
rikaro
rikaro is offline
2nd Gear
Thread Starter
Join Date: Feb 2015
Posts: 133
Likes: 0
Received 7 Likes on 4 Posts
I'm going to see if i can seal it with silicon. I'll just get new panels if all else goes wrong but it should be fine.
 
  #7  
Old 03-26-2015, 06:44 PM
Filmy's Avatar
Filmy
Filmy is offline
5th Gear
iTrader: (4)
Join Date: Apr 2011
Location: Valley Village, CA, 91607
Posts: 660
Received 11 Likes on 10 Posts
IIRC, the coating on the dash and door "rings" is not what you think it is. I think it's some sort of vinyl coating or wrap. I see that others have painted theirs, but make sure you first put down a coat of something that won't cause that original coating to wrinkle/dissolve/worse.
 
  #8  
Old 03-26-2015, 09:14 PM
FatherG's Avatar
FatherG
FatherG is offline
3rd Gear
Join Date: Mar 2014
Location: Turlock, CA
Posts: 239
Received 13 Likes on 10 Posts
I painted my dash in a hammered finished paint and the rings in Chili red which the local auto paint house made up for me. I did sand the original finish off before priming and painting. See my Gallery.


The original silver is very thin and sand easily.
 
  #9  
Old 03-27-2015, 07:28 AM
Saltysalt's Avatar
Saltysalt
Saltysalt is offline
6th Gear
Join Date: Jan 2013
Location: Dover, NH
Posts: 2,257
Received 15 Likes on 13 Posts
so many people have painted rings, did they just mask them up and spray? I thought they would be able to come out
 
  #10  
Old 03-27-2015, 08:50 AM
Eric_Rowland's Avatar
Eric_Rowland
Eric_Rowland is offline
OVERDRIVE
iTrader: (3)
Join Date: May 2003
Location: Santa Cruz, CA
Posts: 13,374
Received 43 Likes on 38 Posts
Originally Posted by FatherG
I would not recommend removing them. Pulling them will eventually strip out whatever you use to replace the weld. I wanted to do the same with mine but decided not to.
I had a passenger accidentally rip out the door pocket (no, it's not a door pull ) and re-attached it with a glue gun. Been fine for years, and I don't expect any issues. IIRC, others who removed the trim used this method.
 
  #11  
Old 03-27-2015, 05:08 PM
rikaro's Avatar
rikaro
rikaro is offline
2nd Gear
Thread Starter
Join Date: Feb 2015
Posts: 133
Likes: 0
Received 7 Likes on 4 Posts
Originally Posted by Filmy
IIRC, the coating on the dash and door "rings" is not what you think it is. I think it's some sort of vinyl coating or wrap. I see that others have painted theirs, but make sure you first put down a coat of something that won't cause that original coating to wrinkle/dissolve/worse.
The huge ring trim (the one that circles around the whole panel) does look like there's a vinyl coat on there. I'm still thinking what to do with it. Sand + primer + paint? or just use something like plastidip? I personally want to stay away form plastidip if i can.
 
  #12  
Old 03-27-2015, 05:12 PM
rikaro's Avatar
rikaro
rikaro is offline
2nd Gear
Thread Starter
Join Date: Feb 2015
Posts: 133
Likes: 0
Received 7 Likes on 4 Posts
Update: Painted and silicon sealed it back in place. Will check how strong it is after it dries up.
 
Attached Thumbnails Painting door trims?-20150327-matt-kwok-r53panel-1.jpg   Painting door trims?-20150327-matt-kwok-r53panel-2.jpg  
  #13  
Old 03-27-2015, 06:32 PM
FatherG's Avatar
FatherG
FatherG is offline
3rd Gear
Join Date: Mar 2014
Location: Turlock, CA
Posts: 239
Received 13 Likes on 10 Posts
Are you only going to take the ovals/speaker covers off and not the actual pull/armrest bars off? In that case - I guess silicone will do. I was thinking that you are removing the armrest bars too.
 
  #14  
Old 03-27-2015, 07:53 PM
rikaro's Avatar
rikaro
rikaro is offline
2nd Gear
Thread Starter
Join Date: Feb 2015
Posts: 133
Likes: 0
Received 7 Likes on 4 Posts
Originally Posted by FatherG
Are you only going to take the ovals/speaker covers off and not the actual pull/armrest bars off? In that case - I guess silicone will do. I was thinking that you are removing the armrest bars too.

If you look at the pics, I've taken everything apart. I just start putting back the easier stuff first
 
  #15  
Old 03-30-2015, 11:35 PM
rikaro's Avatar
rikaro
rikaro is offline
2nd Gear
Thread Starter
Join Date: Feb 2015
Posts: 133
Likes: 0
Received 7 Likes on 4 Posts
So everything is back into place. So far so good. My suggestion is to use a good amount of silicon for the bottom piece. The reason is because the top piece is held up with bolts but the bottom isn't. Putting more would be safe just incase someone decided to close the door pulling the "storage" piece.
 
Attached Thumbnails Painting door trims?-image.jpg  
  #16  
Old 03-31-2015, 07:36 AM
FatherG's Avatar
FatherG
FatherG is offline
3rd Gear
Join Date: Mar 2014
Location: Turlock, CA
Posts: 239
Received 13 Likes on 10 Posts
That looks REALLY good! Nice work.


Two questions:


1) Did you simply drill out the welds? What size bit?
2) Can you can the ovals off without removing the bars?


Ok, actually three questions.
 
  #17  
Old 03-31-2015, 08:44 AM
Eric_Rowland's Avatar
Eric_Rowland
Eric_Rowland is offline
OVERDRIVE
iTrader: (3)
Join Date: May 2003
Location: Santa Cruz, CA
Posts: 13,374
Received 43 Likes on 38 Posts
How did you prep?
What did you paint it with?

(that's a total of five questions if you're keeping track. )
 
  #18  
Old 04-01-2015, 12:32 AM
rikaro's Avatar
rikaro
rikaro is offline
2nd Gear
Thread Starter
Join Date: Feb 2015
Posts: 133
Likes: 0
Received 7 Likes on 4 Posts
Originally Posted by FatherG
That looks REALLY good! Nice work.


Two questions:


1) Did you simply drill out the welds? What size bit?
2) Can you can the ovals off without removing the bars?


Ok, actually three questions.
1. Yes just drill out. Be careful not to drill to much otherwise it will go through the panel. I used the biggest drill bit I have. Don't remember the size but anything close to the size of the plastic welds will do. After all is drilled then push it through the drilled holes with a screwdriver until they pop out. The bottom piece has 3 long plastic welds. Using a cutter should be able to get them off but be cautious not to cut yourself.
2. Yes but I removed everything because it's the bars on mine that are worn

Originally Posted by Eric_Rowland
How did you prep?
What did you paint it with?

(that's a total of five questions if you're keeping track. )
I just found whatever is in the house to prep. Sand with 320 grid, primer then texture paint. The texture paint is aweful because they would wear prematurely when touched all the time but that's all I had at home at that time.
 
  #19  
Old 05-09-2015, 06:14 PM
roll_the_dice's Avatar
roll_the_dice
roll_the_dice is offline
1st Gear
Join Date: Aug 2014
Location: Manlius, NY
Posts: 26
Likes: 0
Received 0 Likes on 0 Posts
Originally Posted by rikaro
I took the first piece off. Accidentally drilled through one of the holes but it doesn't matter since I can cover it up with plastic filler before I paint
Nice job. I am wanting to do the same thing except I want to wrap my trim in real carbon fiber and repaint the actual door pull in gloss black. So my questions is this:

When you removed the door trim was it 3 pieces or 2?

In other words, was the top arch attached to the door pull or are those pieces separate?

Thanks for any insight you might give.
 
Related Topics
Thread
Thread Starter
Forum
Replies
Last Post
David Eric Rosenberg
R57 :: Cabrio Talk (2009+)
3
09-10-2015 12:34 PM
Filmy
Navigation & Audio
5
09-07-2015 08:27 PM
Southern Marylander
General MINI Talk
2
09-03-2015 05:46 AM
tag1260
MINI Parts for Sale
1
09-02-2015 07:42 PM
spackletooms
MINI Parts for Sale
0
09-01-2015 10:12 PM


Quick Reply: R50/53 Painting door trims?


All times are GMT -7. The time now is 02:57 AM.