CooperSAZ's 2005 LY/Blk R53
#1
 10-13-2013, 02:45 PM


CooperSAZ's 2005 LY/Blk R53
Long time no write...
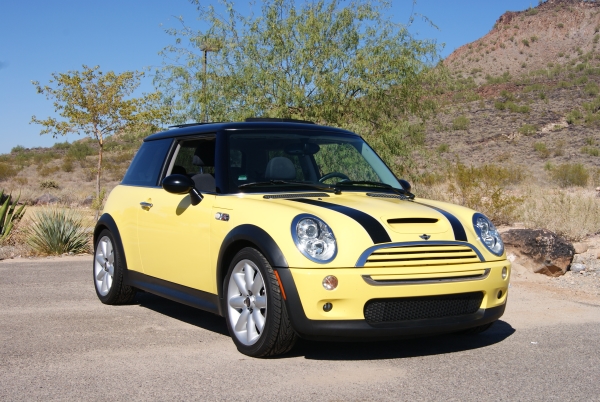
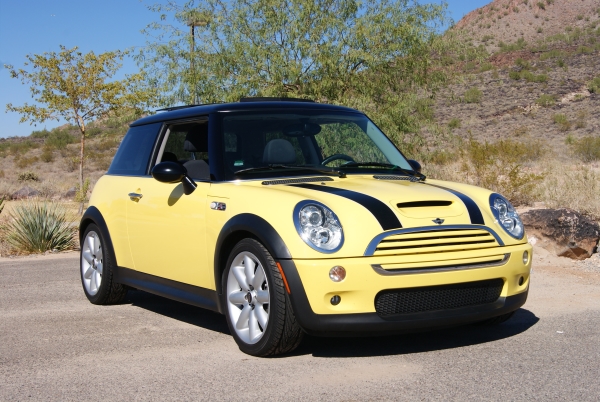
I am the original owner of my R53 Liquid Yellow MCS. Owned it since brand new as of November 11, 2004. Car has 89,500 miles on him now.
Recently, I've been experiencing some chatter from the enginebay and started researching it. Turns out that the suspect might be the belt tensioner.
Then the air conditioning died and only blew warm air. So its time to dive in and fix all of this. Recently, I decided to take the front bumper off along with the passenger side splash guard and go after the following:
- Main radiator fan assembly
- Crankshaft position sensor o-ring
- Belt tensioner
- A/C compressor clutch coil
- New JCW belt
The bumper cover and bumper are very straightforward to remove. Just bolts. Not happy that the MINI radiator fan assembly was failing at 89k miles, I decided to go with the TYC unit from RockAuto. Perfect fit and perfect connection. Plug and play replacement that is very straightforward. Maybe 1.0-1.5 hours
With the front bumper and cover off, I was able to swing the radiator out a bit to gain access to the crankshaft position sensor (�CPS�). I�ve read threads about ratcheting the motor back to gain a little more space but honestly, taking the front end apart was easier for me and allowed me ALL the space I needed. Once you locate the CPS sensor, it is a 10mm bolt that is NOT torqued on. Remove that and the sensor comes out with a little wiggle. My CPS sensor was weeping for a while so there was quite a lot of build up on the front of the engine block. But the O-Ring failed as it turned �square� instead of retaining its �round� attributes like a good little O-Ring should. Thus, allow oil to weep by� using a pic, I slide the old o-ring off. I lubed the new o-ring up and slide that back onto the sensor. Fits like a glove. Plug the sensor back on and lightly ratchet the 10mm bolt back onto the engine block. Done. Then I covered the ground with cardboard and went through about 3 cans of brake cleen spraying down the front of the motor. Looks brand NEW again. Maybe 10min to replace now that the front end was off. 30-40 minutes hosing down the motor with brake cleen.
Next, I tackled the belt tensioner. I went with the Gates (P/N=> 38404) from Amazon since I have read people going on 3-4 years with it without fail. Works for me and the price was right. This part is a little tricky maneuvering it out of the engine bay BUT it can be removed and installed WITHOUT messing with engine mounts. Time and patience is all you need. Once into place, reinsert the 16mm bolts on 1 end and then the other. Then the two middle 13mm bolts I believe. This part was not too bad using ratcheting wrenches and you get it as tight as you can. No room for torque wrenches here. But as TIGHT as YOU can. Start to finish was maybe 1.0 hour.
Now the larger problem. The A/C compressor clutch coil. Calling around town, the dealership wants $1,800-$1,900 to fix as they simply replace the entire unit. A local MINI shop wants $1,300-1,400 to replace. Go onto eBay and find the MINI coil guy, $105 shipped. I have NEVER replaced the clutch coil before. So what did I do? Cry foul and beg a buddy to assist! Haha He is a mechanic and is comfortable working on these things. So I played assistant and watched and learned.
Since the front end was off, we had access to ALL 3 bolts without ANY issues. Very easy and straightforward. There is an electrical connection to the coil that you have to disconnect. An impact is needed folks. Sorry. Without one, you are on your own with no idea how LONG this will take to take that torx bolt off. With an impact, I held the pulley was turning and my buddy impacted the bolt off in seconds. The tutorial I read on this site is very helpful! But from reading it, it appears that the pulley just slides off once the torx bolt is impacted off. Not the case. We had to use a pulley puller to remove the pulley. Then you start back up on the tutorial of removing the first snap ring, then the second and thus removing/replacing the clutch coil. Very easy and straightforward process, just take your time and keep it together with how things go back together. Lining things up perfectly and putting the snap rings back on is a MUST. We encountered a bit of �drag� once everything was back together so we took it apart again and again until everything was SEATED perfectly with NO drag. Then threadlocked the torx bolt and impact back onto the compressor assembly
For fun, I HAD the stock MCS belt on the car. So I opted for the JCW belt since I have the Alta 15% pulley on the car. We reassembled everything on the car and turned it on...
The chatter from the tensioner was GONE. Oh that is nice� Back to what the MINI SHOULD sound like. Belt was on and worked well. Hit the A/C button� click! A/C engages and cold air is back in the cabin! YUREKA!!! That was it! A/C fixed�
So as part of the test drive, I took it easy until I gained some confidence that everything would not fall apart on me. Then I got on him a little� the sound of the S/C whine (CAI) and the charger itself is intoxicating! The S/C sounds meaner and the car is more responsive now. I am sure this is attributable to the new tensioner and new JCW belt. Car is very quick now� This was Sunday.
Then on Thursday (10/10) on the way to work something bad happened. I picked up on a ticking sound coming from the MINI prior to all of the recent work. I was really hoping this tick would leave when everything was replaced. It did not� Tick still present.
On the way to work, feeling in a spirited mood, I get on him and POW! BLAH BLAH BLAH POP POP POP! Oh sh**! Look over, NO, repeat NO check engine light! Good sign.
Park the car at work and look underneath� sounds like an open header, LITERALLY! Last time I heard a car like this was at the track on a Saturday night!
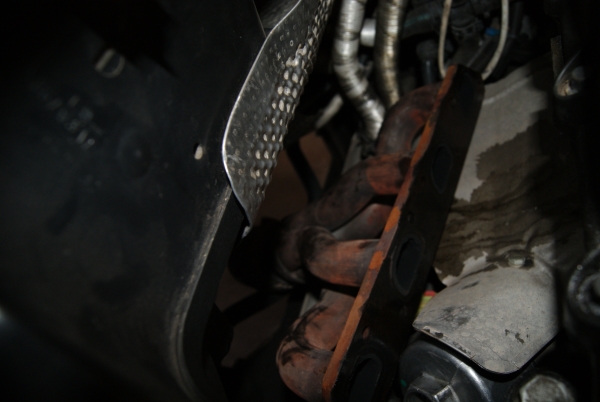
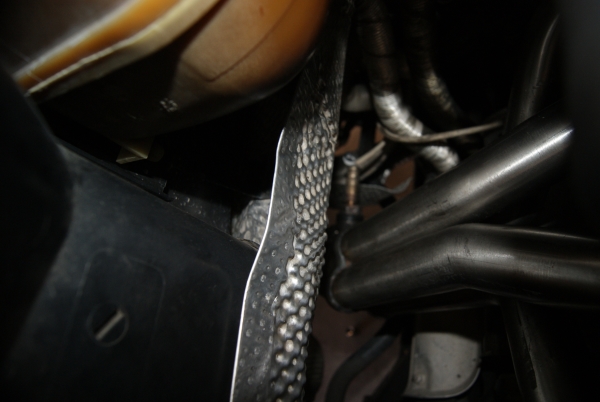
Get him back home and back on the ramps to get underneath. And this is what I found:
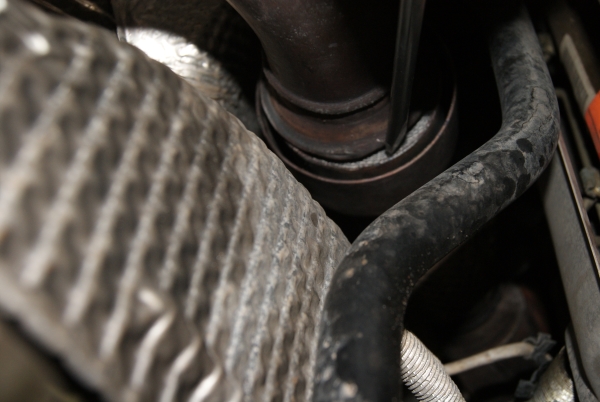

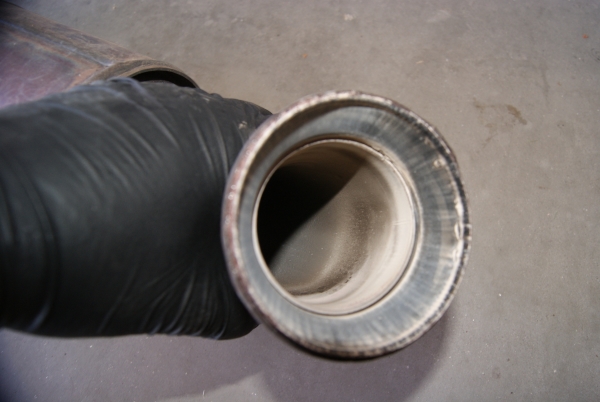
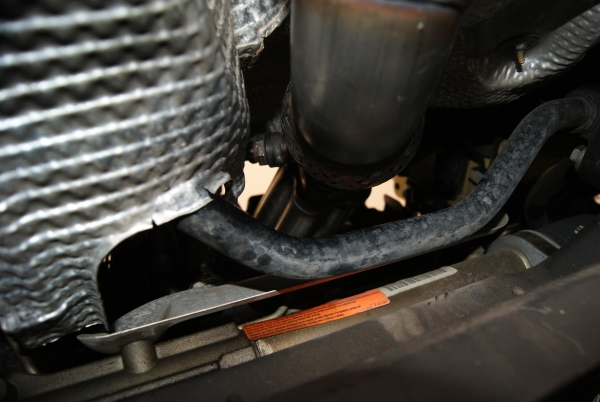
This is from underneath the car look up at the OEM header. Nice� Well done MINI, the joint at the pre-CAT finally snapped. That was the ticking I heard from the exhaust and the last go around completely busted the header. Now its in two pieces.
Looking for alternatives, I found the following:
- Used unit for $200-500. Why, this is an OEM design that will break again. But it is a cheaper alternative.
- Aftermarket headers that are one piece or one that you have to piece together. $300-700. From reading various threads, you just have NO guarantee that the car will not throw a check engine light.
- So then you proceed to the $900-1,200 replacement. Plug and play and no check engine lights.
So given that I have a Milltek catback on my MCS, I ABSOLUTELY love it. Better than original and better sounding that the JCW exhaust. No drone, not loud, just low and bassy� Just what I wanted. I put that on my car at 1,400 miles back in January of 2005 and never looked back.
So I started nosing around with the Milltek SS header for the R53. I like the idea that I will have the entire Milltek exhaust system on my car and the system will be made by a single manufacturer. Milltek is of GREAT quality and sound but pricey. I�ve wanted this piece on the car for SOME time now but could never justify spending the cash on it. Now, its easy! I need it to FIX my car since the OEM part failed.
Anyway, fingers are crossed for the header arriving before this weekend so I can get the car back up and running to return to work next week. From what I see, this is a 1.5-2.0 hour job so Saturday or Sunday works for me.
I�ve heard nothing but great things with the Milltek header and Milltek exhaust mated together. So I am trying to move past the cash spent and get excited about the additional hp and torque that will be gained.
I will try to take photos of the instill and any feedback post header install. Apologies for not documenting the main radiator fan, CPS o-ring, tensioner and A/C clutch coil fix. That would have been nice to share with the group to spread the knowledge base
Cheers.
I am the original owner of my R53 Liquid Yellow MCS. Owned it since brand new as of November 11, 2004. Car has 89,500 miles on him now.
Recently, I've been experiencing some chatter from the enginebay and started researching it. Turns out that the suspect might be the belt tensioner.
Then the air conditioning died and only blew warm air. So its time to dive in and fix all of this. Recently, I decided to take the front bumper off along with the passenger side splash guard and go after the following:
- Main radiator fan assembly
- Crankshaft position sensor o-ring
- Belt tensioner
- A/C compressor clutch coil
- New JCW belt
The bumper cover and bumper are very straightforward to remove. Just bolts. Not happy that the MINI radiator fan assembly was failing at 89k miles, I decided to go with the TYC unit from RockAuto. Perfect fit and perfect connection. Plug and play replacement that is very straightforward. Maybe 1.0-1.5 hours
With the front bumper and cover off, I was able to swing the radiator out a bit to gain access to the crankshaft position sensor (�CPS�). I�ve read threads about ratcheting the motor back to gain a little more space but honestly, taking the front end apart was easier for me and allowed me ALL the space I needed. Once you locate the CPS sensor, it is a 10mm bolt that is NOT torqued on. Remove that and the sensor comes out with a little wiggle. My CPS sensor was weeping for a while so there was quite a lot of build up on the front of the engine block. But the O-Ring failed as it turned �square� instead of retaining its �round� attributes like a good little O-Ring should. Thus, allow oil to weep by� using a pic, I slide the old o-ring off. I lubed the new o-ring up and slide that back onto the sensor. Fits like a glove. Plug the sensor back on and lightly ratchet the 10mm bolt back onto the engine block. Done. Then I covered the ground with cardboard and went through about 3 cans of brake cleen spraying down the front of the motor. Looks brand NEW again. Maybe 10min to replace now that the front end was off. 30-40 minutes hosing down the motor with brake cleen.
Next, I tackled the belt tensioner. I went with the Gates (P/N=> 38404) from Amazon since I have read people going on 3-4 years with it without fail. Works for me and the price was right. This part is a little tricky maneuvering it out of the engine bay BUT it can be removed and installed WITHOUT messing with engine mounts. Time and patience is all you need. Once into place, reinsert the 16mm bolts on 1 end and then the other. Then the two middle 13mm bolts I believe. This part was not too bad using ratcheting wrenches and you get it as tight as you can. No room for torque wrenches here. But as TIGHT as YOU can. Start to finish was maybe 1.0 hour.
Now the larger problem. The A/C compressor clutch coil. Calling around town, the dealership wants $1,800-$1,900 to fix as they simply replace the entire unit. A local MINI shop wants $1,300-1,400 to replace. Go onto eBay and find the MINI coil guy, $105 shipped. I have NEVER replaced the clutch coil before. So what did I do? Cry foul and beg a buddy to assist! Haha He is a mechanic and is comfortable working on these things. So I played assistant and watched and learned.
Since the front end was off, we had access to ALL 3 bolts without ANY issues. Very easy and straightforward. There is an electrical connection to the coil that you have to disconnect. An impact is needed folks. Sorry. Without one, you are on your own with no idea how LONG this will take to take that torx bolt off. With an impact, I held the pulley was turning and my buddy impacted the bolt off in seconds. The tutorial I read on this site is very helpful! But from reading it, it appears that the pulley just slides off once the torx bolt is impacted off. Not the case. We had to use a pulley puller to remove the pulley. Then you start back up on the tutorial of removing the first snap ring, then the second and thus removing/replacing the clutch coil. Very easy and straightforward process, just take your time and keep it together with how things go back together. Lining things up perfectly and putting the snap rings back on is a MUST. We encountered a bit of �drag� once everything was back together so we took it apart again and again until everything was SEATED perfectly with NO drag. Then threadlocked the torx bolt and impact back onto the compressor assembly
For fun, I HAD the stock MCS belt on the car. So I opted for the JCW belt since I have the Alta 15% pulley on the car. We reassembled everything on the car and turned it on...
The chatter from the tensioner was GONE. Oh that is nice� Back to what the MINI SHOULD sound like. Belt was on and worked well. Hit the A/C button� click! A/C engages and cold air is back in the cabin! YUREKA!!! That was it! A/C fixed�
So as part of the test drive, I took it easy until I gained some confidence that everything would not fall apart on me. Then I got on him a little� the sound of the S/C whine (CAI) and the charger itself is intoxicating! The S/C sounds meaner and the car is more responsive now. I am sure this is attributable to the new tensioner and new JCW belt. Car is very quick now� This was Sunday.
Then on Thursday (10/10) on the way to work something bad happened. I picked up on a ticking sound coming from the MINI prior to all of the recent work. I was really hoping this tick would leave when everything was replaced. It did not� Tick still present.
On the way to work, feeling in a spirited mood, I get on him and POW! BLAH BLAH BLAH POP POP POP! Oh sh**! Look over, NO, repeat NO check engine light! Good sign.
Park the car at work and look underneath� sounds like an open header, LITERALLY! Last time I heard a car like this was at the track on a Saturday night!
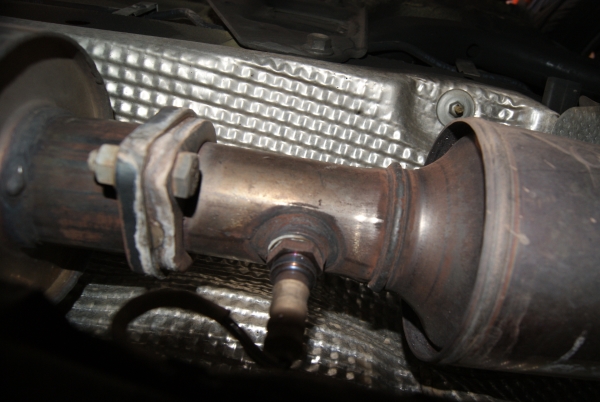
Get him back home and back on the ramps to get underneath. And this is what I found:
This is from underneath the car look up at the OEM header. Nice� Well done MINI, the joint at the pre-CAT finally snapped. That was the ticking I heard from the exhaust and the last go around completely busted the header. Now its in two pieces.
Looking for alternatives, I found the following:
- Used unit for $200-500. Why, this is an OEM design that will break again. But it is a cheaper alternative.
- Aftermarket headers that are one piece or one that you have to piece together. $300-700. From reading various threads, you just have NO guarantee that the car will not throw a check engine light.
- So then you proceed to the $900-1,200 replacement. Plug and play and no check engine lights.
So given that I have a Milltek catback on my MCS, I ABSOLUTELY love it. Better than original and better sounding that the JCW exhaust. No drone, not loud, just low and bassy� Just what I wanted. I put that on my car at 1,400 miles back in January of 2005 and never looked back.
So I started nosing around with the Milltek SS header for the R53. I like the idea that I will have the entire Milltek exhaust system on my car and the system will be made by a single manufacturer. Milltek is of GREAT quality and sound but pricey. I�ve wanted this piece on the car for SOME time now but could never justify spending the cash on it. Now, its easy! I need it to FIX my car since the OEM part failed.
Anyway, fingers are crossed for the header arriving before this weekend so I can get the car back up and running to return to work next week. From what I see, this is a 1.5-2.0 hour job so Saturday or Sunday works for me.
I�ve heard nothing but great things with the Milltek header and Milltek exhaust mated together. So I am trying to move past the cash spent and get excited about the additional hp and torque that will be gained.
I will try to take photos of the instill and any feedback post header install. Apologies for not documenting the main radiator fan, CPS o-ring, tensioner and A/C clutch coil fix. That would have been nice to share with the group to spread the knowledge base
Cheers.
#2
10-17-2013, 08:56 PM

3rd Gear
Join Date: Nov 2010
Location: Montreal
Posts: 269
Likes: 0
Received 0 Likes
on
0 Posts
#3
10-17-2013, 09:28 PM
I will try to document it as best I can. The exhaust manifold gasket just arrived today from SF MINI. Header should be tomorrow some time.
Saturday morning will be a good time to go after the header and oil change.
That works. I will try to grab a video clip of the sound once I am past thegun-shy phase! hehe
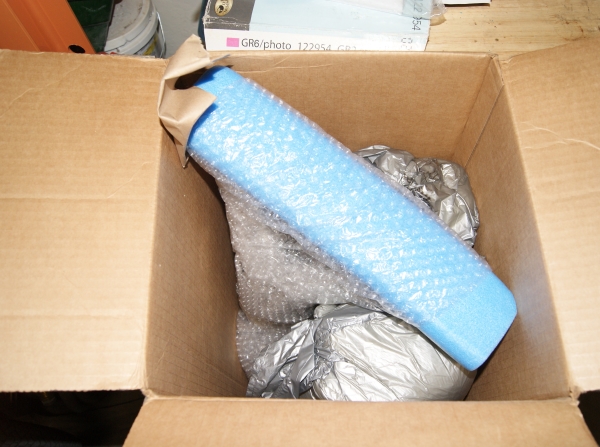
It was unfortunate timing. I was getting ready to put some money down on my other passion (besides the MINI) which is this:

They keep me busy...
The following users liked this post:
ssoliman (10-13-2020)
#4
10-17-2013, 09:31 PM
#6
10-18-2013, 07:35 PM

#7
10-19-2013, 03:55 PM
Ok, sounds like I need to look into these mounts then.
Spent some time installing the Milltek header this morning. All went according to plan and only took about 2 hours to install. The OEM unit WAS in two pieces so it made the removal a bit easier. Bottom piece dropped right off and the top piece was smaller and easier to maneuver over the sway bar.
All in all very happy with the item. Under 3500rpms it is pretty quiet. Over 3500 rpms it comes alive and there appears to be a monster under the hood. I was expecting to hear the S/C whine the most but there is now a low, bass-y, louder, tone coming from the engine bay. Lots of looks to see what is coming down the street when getting up to speed. Normal driving in a residential area is no change. Car is quiet and civlized.
I took pics of the process but I need to write up a process and include the pics probably tomorrow in case it helps someone else out.
No CEL and I am off and motoring again!
Trending Topics
#8
10-20-2013, 08:29 AM
Here is what I did as far as a process� I hope it helps someone out that may have the same issue.
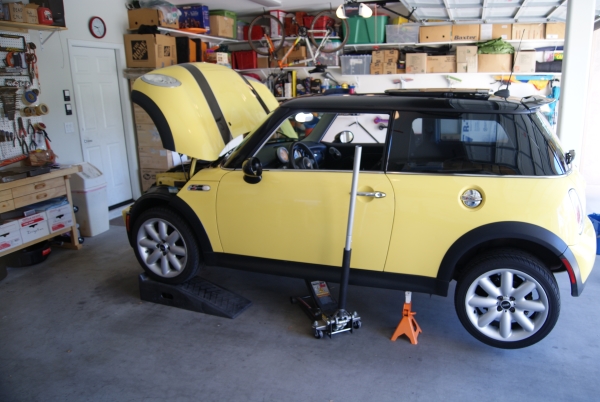
Step 1: Get the MINI lifted and off the ground. I used ramps up front and jackstands for the rear section. Then I put an additional jack on the driver side on the reinforced part underneath as a safety net.
Motor pics:
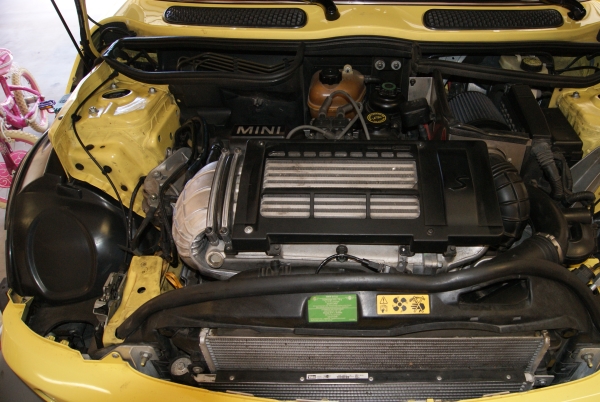
Just recently, I swapped out the belt tensioner (easy), new belt, crankshaft position sensor o-ring, radiator fan and A/C clutch coil. I was unable to snap a pic of the CPS o-ring, but the front of the block is dry as a bone now instead of covered in junk.
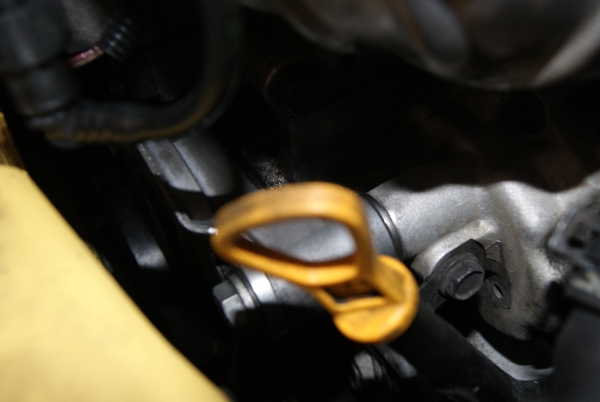
New tensioner:
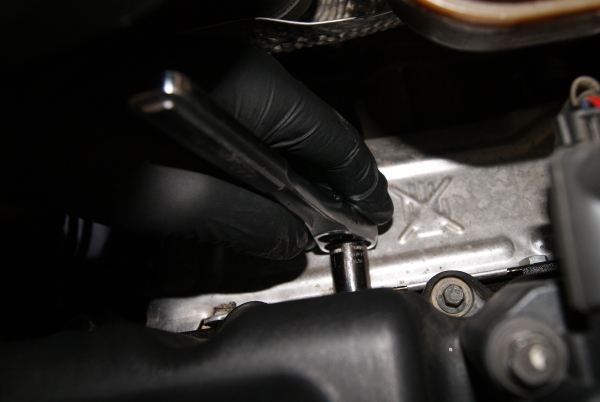
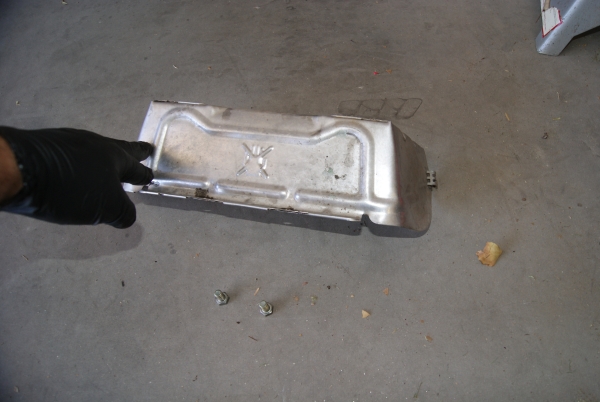
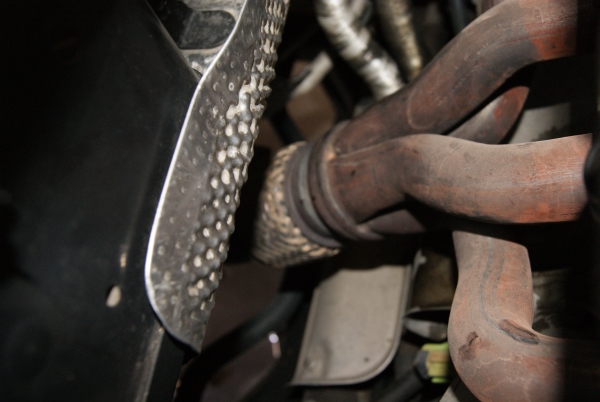
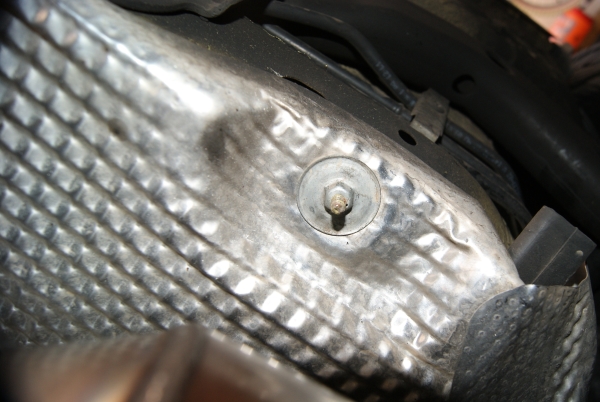
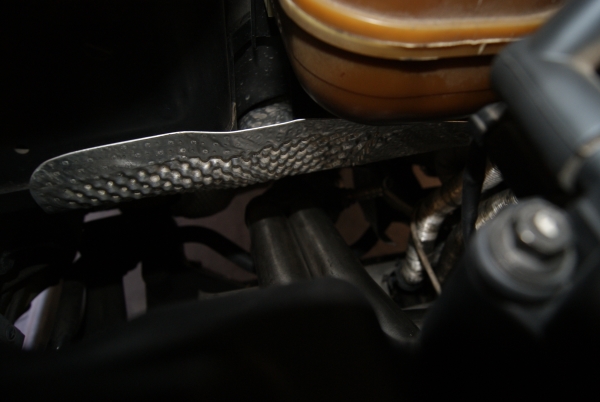
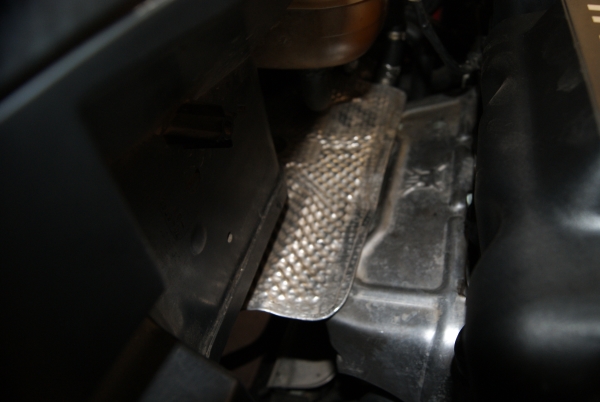
Step 2: Remove the heat shield covering the exhaust manifold (�header�).
This is accomplished by removing the two 13mm bolts.
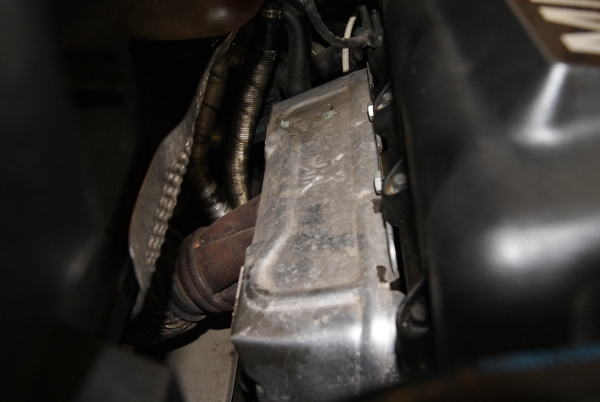
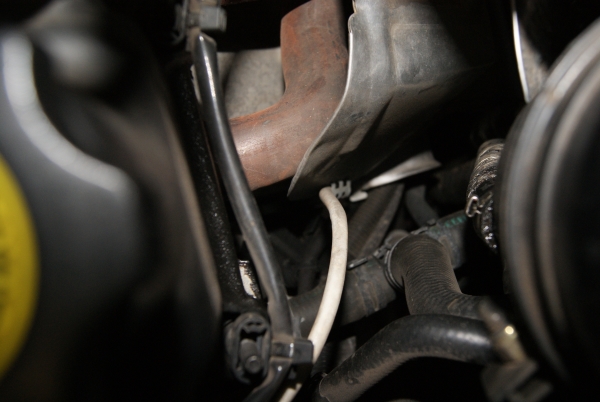
Here is a pic of the heat shield falling down. Need to pick that up and remove it. Tight fit, but you can sneak it out on the passenger side opening near the valve cover. White line is the O2 sensor line.
Step 1: Get the MINI lifted and off the ground. I used ramps up front and jackstands for the rear section. Then I put an additional jack on the driver side on the reinforced part underneath as a safety net.
Motor pics:
Just recently, I swapped out the belt tensioner (easy), new belt, crankshaft position sensor o-ring, radiator fan and A/C clutch coil. I was unable to snap a pic of the CPS o-ring, but the front of the block is dry as a bone now instead of covered in junk.
New tensioner:
Step 2: Remove the heat shield covering the exhaust manifold (�header�).
This is accomplished by removing the two 13mm bolts.
Here is a pic of the heat shield falling down. Need to pick that up and remove it. Tight fit, but you can sneak it out on the passenger side opening near the valve cover. White line is the O2 sensor line.
#9
10-20-2013, 08:32 AM
Step 3: Remove the two bolts connecting the header to the exhaust system:
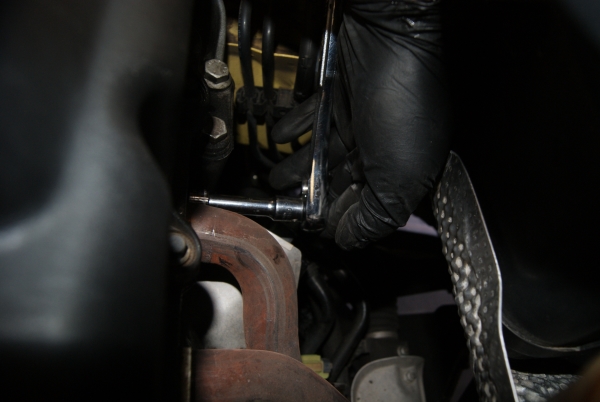
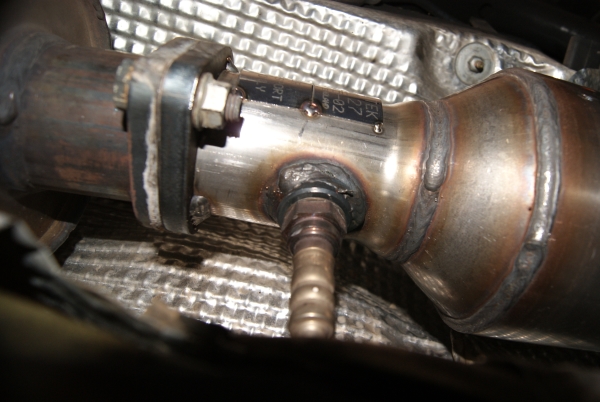
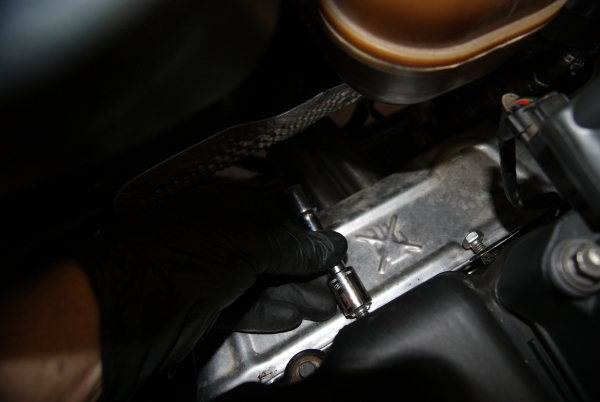
Step 4: Remove the two O2 sensors with a 22mm wrench. I did not have a 22mm so I used the next best thing.
Here is the lower O2 sensor (post CAT):
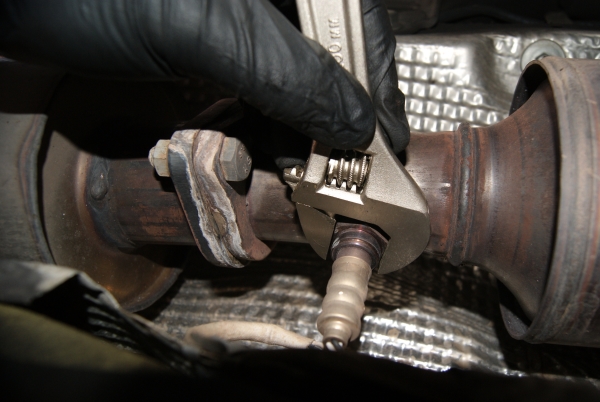
Here is the upper O2 sensor (pre CAT):
I found this to be a PITA only because it was in the middle of all the activity. Do you get to it from the enginebay (up top) or from underneath. Either way work and puts you in an awkward position but I believe I got it from the top.
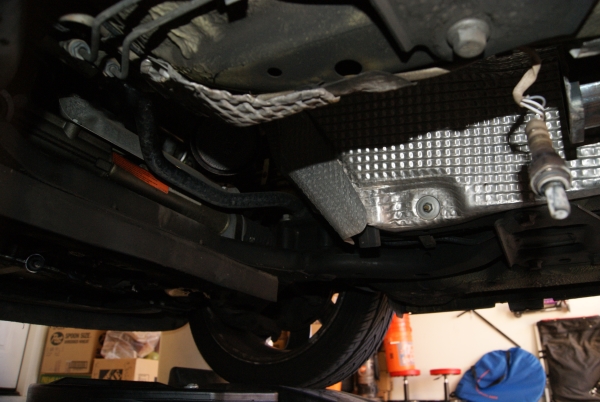
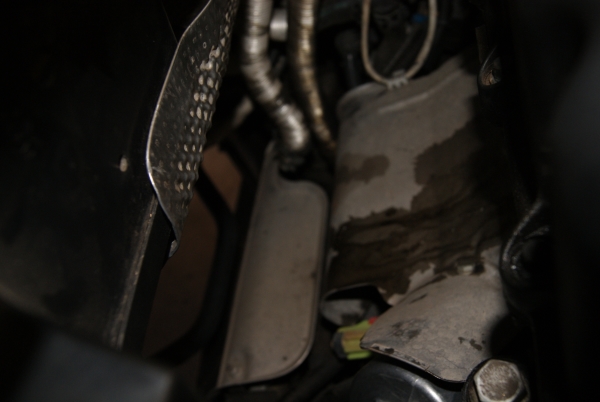
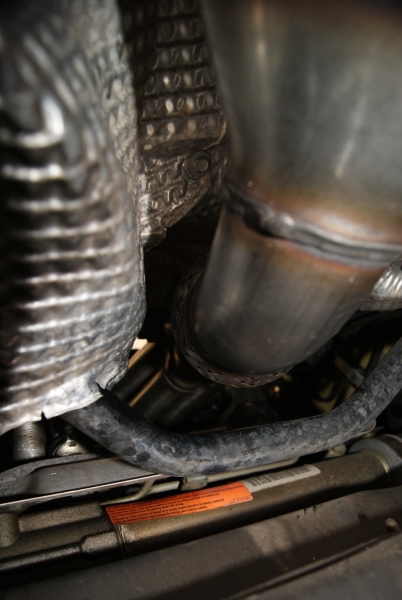
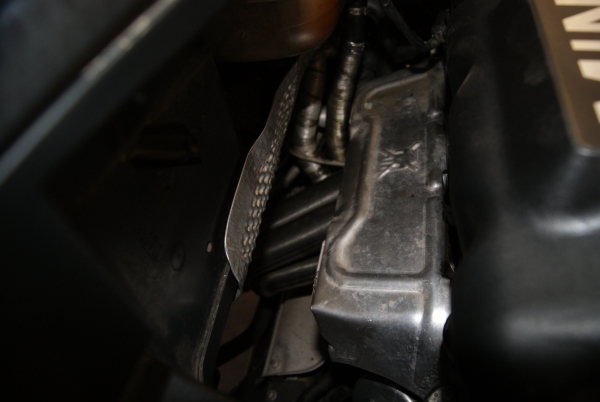
From underneath looking up at the O2 sensor in the distance:
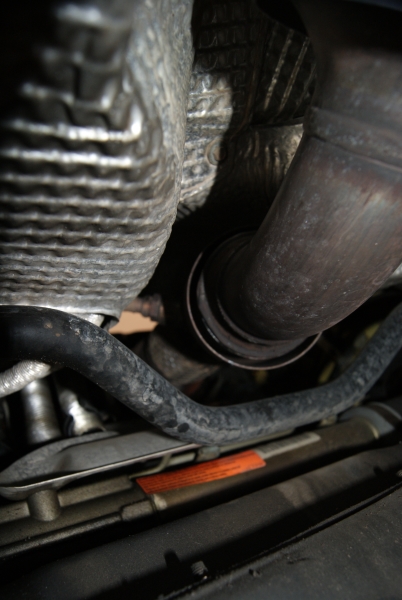
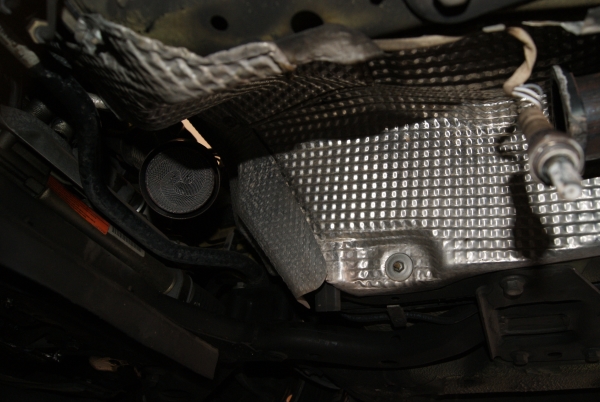
Space allowing you to get to the upper O2 sensor if that is what you choose:
Because my header was now in two pieces, when I removed the two connecting bolts (header to exhaust), it literally fell into my hands and could be removed from underneath the car:

Status pic from underneath. Post CAT O2 sensor dangling and bottom portion of exhaust removed.
Step 4: Remove the two O2 sensors with a 22mm wrench. I did not have a 22mm so I used the next best thing.
Here is the lower O2 sensor (post CAT):
Here is the upper O2 sensor (pre CAT):
I found this to be a PITA only because it was in the middle of all the activity. Do you get to it from the enginebay (up top) or from underneath. Either way work and puts you in an awkward position but I believe I got it from the top.
From underneath looking up at the O2 sensor in the distance:
Space allowing you to get to the upper O2 sensor if that is what you choose:
Because my header was now in two pieces, when I removed the two connecting bolts (header to exhaust), it literally fell into my hands and could be removed from underneath the car:
Status pic from underneath. Post CAT O2 sensor dangling and bottom portion of exhaust removed.
#10
10-20-2013, 08:35 AM
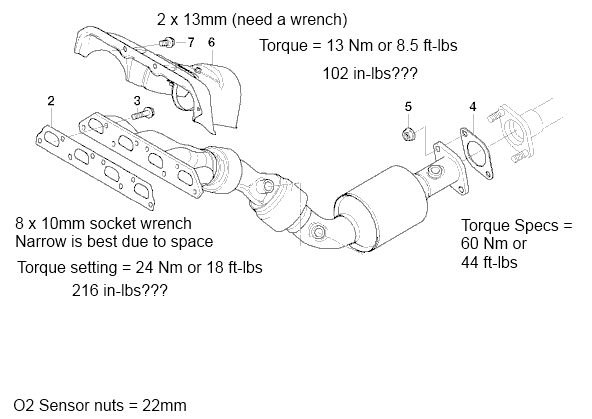
Step 5: Remove the eight 10mm manifold/header bolts. Might have to use a combination of no extension and 3-4 inch extension to loosen all of these bolts. They are held on by 18 ft-lbs of force so NOT a lot. Don�t get over carried away or you will have some unhappy knuckles.
Once all eight bolts are removed, the header will fall away from the cylinder head. The old gasket will most likely drop away as well. Pick up and remove the gasket. Note the way it is placed on the engine. Make sure the flared out side is facing the rear of the vehicle.
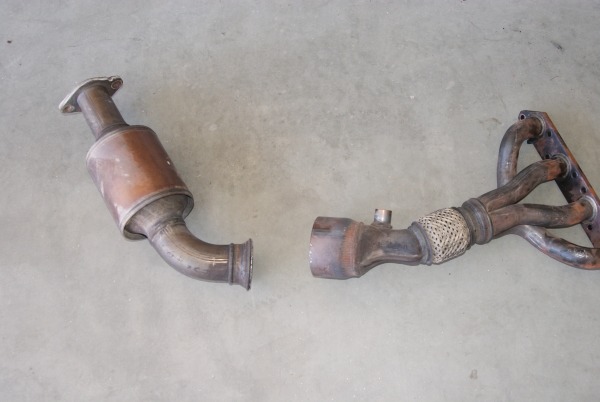
Nice color to that piece of hardware:
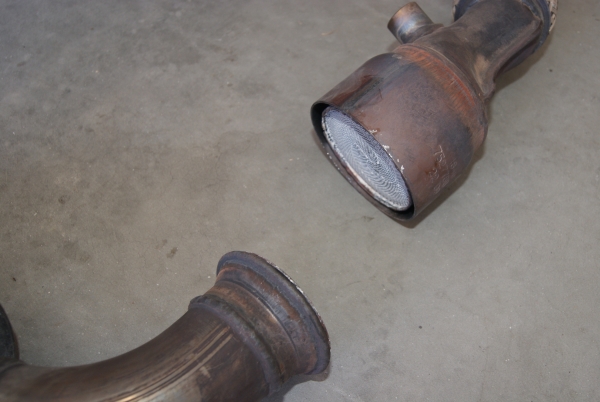
POS OEM Header now in two pieces:
I�ve owned a lot of Hondas over a long period of time and never have I seen this happen. Quite offensive�
Step 6: You will have to remove the driver side heat shield. This is accomplished by removing two 10mm spinners and two 8mm bolts. Simple and straightforward. This will allow you enough space to sneak the old header out of the engine bay and over the front sway bar. Patience prevails here�
Status pic with the header missing:
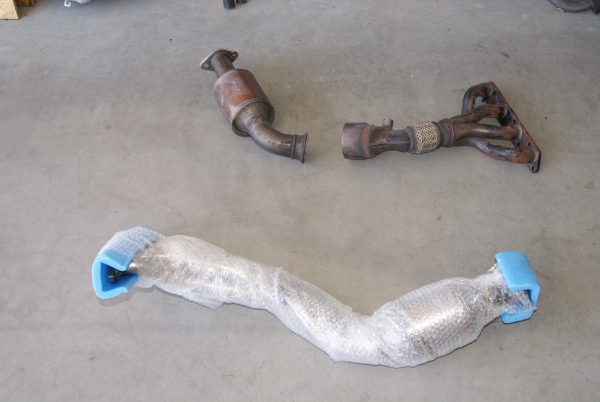
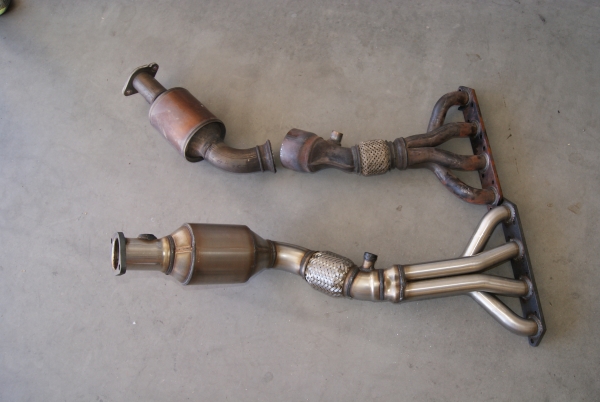
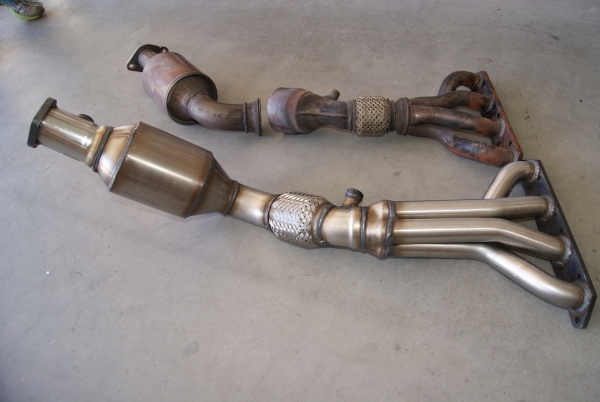
Old coldness vs New hotness:
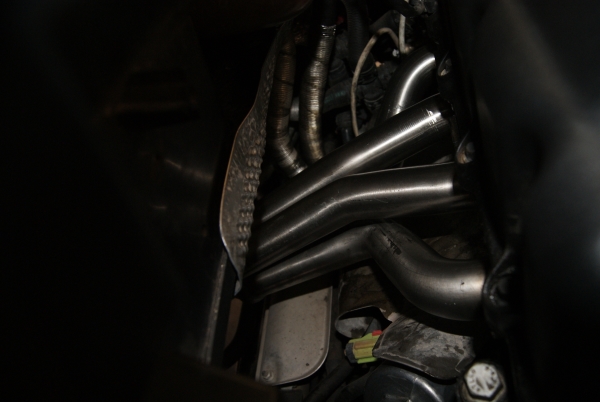
Step 7: Get back underneath the car and fish the header back through the hole created by the heat shield removal and over the sway bar. Once you get it into position, it will look like this:
The challenging part here is holding the new header in place with the new gasket lined up and then threading the manifold bolts back into the head. I started on one end and then thread the other end so the manifold is held in place.
Once you have all eight bolts threaded, I used a ratchet to turn the two center bolts until I met resistance. Then I alternated to the passenger side next bolt out, then the driver side bolt until I went back and forth enough and reached the outside bolt.
First round involved threading the bolts. Second was ratcheting them until I met resistance. Third round was getting the bolts tighter but not torqued. Fourth was tight and fifth was to test again to make sure nothing needed additional tightening.
I went through this to make sure there were no leaks. As you tighten one bolt it may loosen another that is not properly torqued. After this, all the bolts were tightened from the center out (to passenger/drive side) and I was ready to move on.
Once all eight bolts are removed, the header will fall away from the cylinder head. The old gasket will most likely drop away as well. Pick up and remove the gasket. Note the way it is placed on the engine. Make sure the flared out side is facing the rear of the vehicle.
Nice color to that piece of hardware:
POS OEM Header now in two pieces:
I�ve owned a lot of Hondas over a long period of time and never have I seen this happen. Quite offensive�
Step 6: You will have to remove the driver side heat shield. This is accomplished by removing two 10mm spinners and two 8mm bolts. Simple and straightforward. This will allow you enough space to sneak the old header out of the engine bay and over the front sway bar. Patience prevails here�
Status pic with the header missing:
Old coldness vs New hotness:
Step 7: Get back underneath the car and fish the header back through the hole created by the heat shield removal and over the sway bar. Once you get it into position, it will look like this:
The challenging part here is holding the new header in place with the new gasket lined up and then threading the manifold bolts back into the head. I started on one end and then thread the other end so the manifold is held in place.
Once you have all eight bolts threaded, I used a ratchet to turn the two center bolts until I met resistance. Then I alternated to the passenger side next bolt out, then the driver side bolt until I went back and forth enough and reached the outside bolt.
First round involved threading the bolts. Second was ratcheting them until I met resistance. Third round was getting the bolts tighter but not torqued. Fourth was tight and fifth was to test again to make sure nothing needed additional tightening.
I went through this to make sure there were no leaks. As you tighten one bolt it may loosen another that is not properly torqued. After this, all the bolts were tightened from the center out (to passenger/drive side) and I was ready to move on.
#11
10-20-2013, 08:50 AM
Step 8: Reinstall the driver side heat shield. Since the new header is in place, you will have to sneak the heat shield back into place and secure it with the spinners and bolts. Since the manifold is not connected to the exhaust yet, it will move around enough to gain access to each of these bolts.
Picture of spinner:
Step 9: Connect the header to the exhaust system using the two bolts/nuts.
Step 10: Reconnect the two O2 sensors using the 22mm wrench or whatever you have available.
Dark photo of connected O2 sensor
Step 11: Reattach the heat shield over the header and secure both 13mm bolts.
Now that you have everything connected and put back together, it's time to start it up. I was waiting for everything or something to explode, but I was pleasantly disappointed. Car started right up and sounded great. Pretty quiet at idle for what I was expecting.
PLEASE NOTE, any and every time you switch catalytic converters, they will smoke for the first or two times. It appears white and quickly disappates. It will take some time to heat things up for the first time until that smoke goes away. The area in which to watch is behind the engine and in front of the firewall. Where the new header is located.
Time to take him for a test drive around the block. Once that is complete, then go for a stroll through the neighborhood. Car is running well and no check engine lights. Then I went out on a major street to test the car under load. Works great! No check engine light (CEL).
At this point, there is still a little bit of smoke coming from under the hood at an intermittent street light. But do not worry, it goes away. I've put about 30 miles on him now since firing him up and there is no longer any smoke present.
Normal (residential) driving is relatively quiet and a non-factor. As you approach major streets where you will hit 40-45mph, you will start to hear a louder, more bass-y sound from the engine bay. Nothing offensive or annoying. Zero drone is heard.
Now if you decide to go WOT, then that is where this piece will be found. WOT and above 3500rpms, a deep growl will be emitted from the enginebay and you will quickly start to pick up speed. I expected the S/C whine and exhaust to be the primary sound bytes through this exercise but was wrong. I believe the header is now the primary driver (in cabin) and the S/C whine and exhaust are (barely) secondary sounds from the car. I like it... The pop/gurgle is still present. The car sounds like it should have from the factory for me. Sounds meaner. I prefer a car where the sound is not loud and whiney, but low and bass-y.
I will try and create a video from within the cabin in the near future to illustrate.
But overall, very very happy with the Milltek purchase. They work great together...
#12
10-20-2013, 02:22 PM
Took him for another spin today to continue testing and put some miles on the header before work tomorrow. Wow, lot more interesting to drive... The sound, the additional power, the weight transfer forward and back...
I have not even touched the radio yet... its been off...
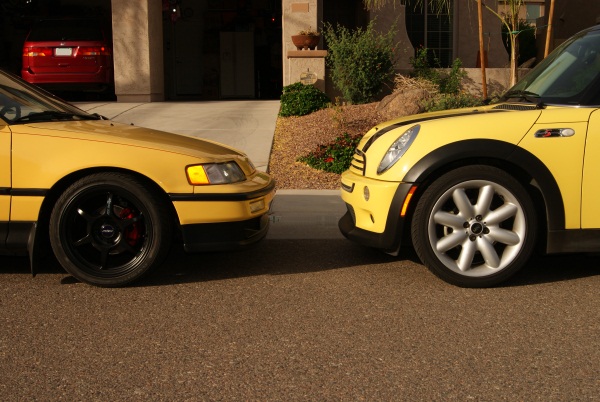
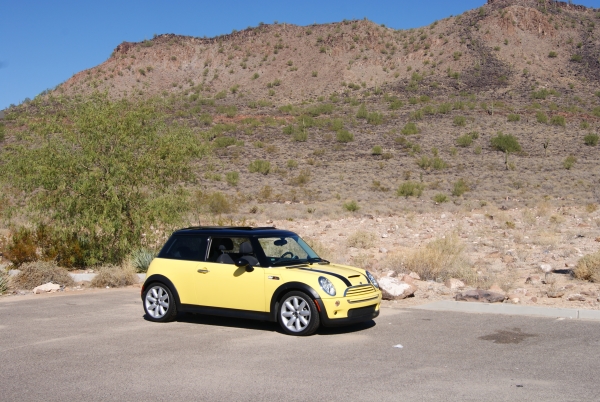
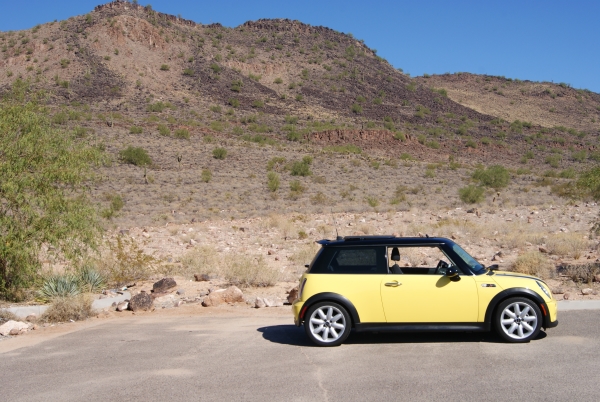
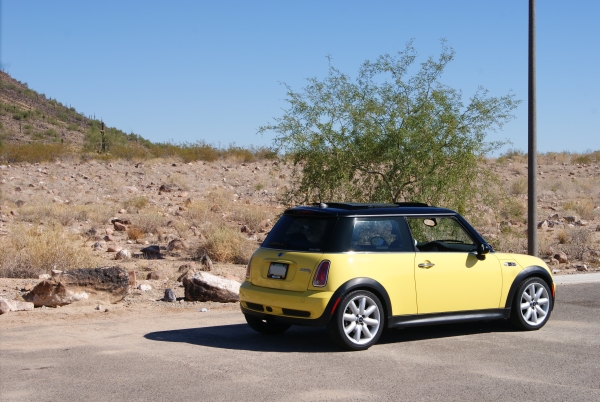
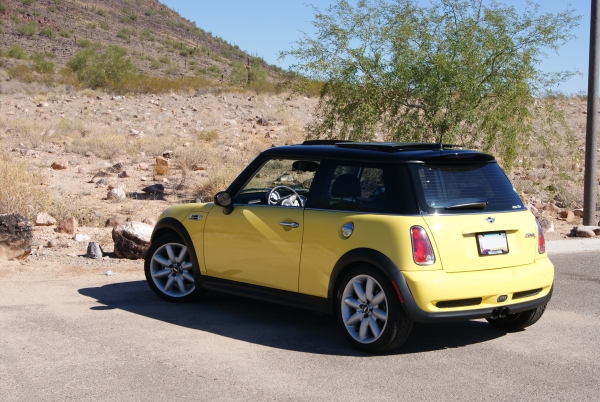
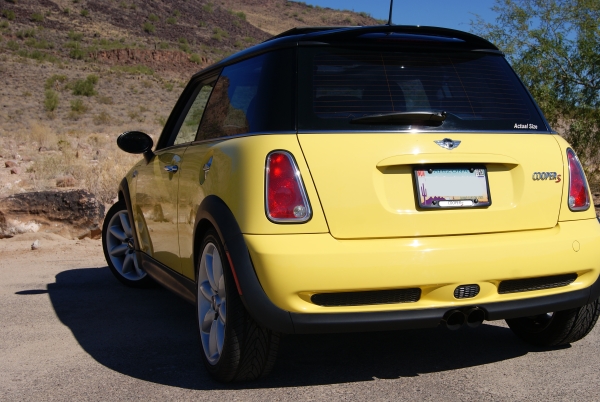
Cleaned him up since he has been sitting for about a week now prior to being fixed. Took him for a stroll and snapped a few pics.
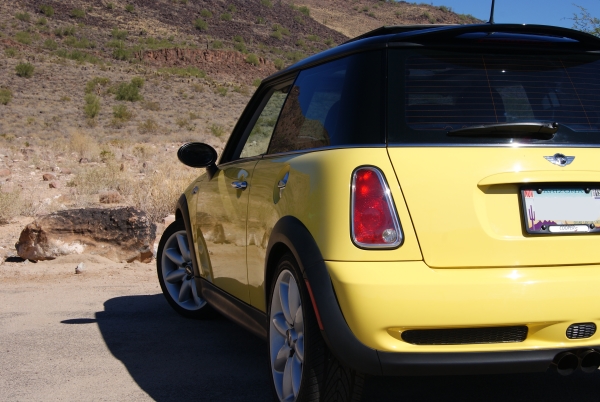
I have not even touched the radio yet... its been off...
Cleaned him up since he has been sitting for about a week now prior to being fixed. Took him for a stroll and snapped a few pics.
The following users liked this post:
ssoliman (10-13-2020)
#13
10-28-2013, 06:02 PM

#14
10-29-2013, 10:14 AM
CopperSAZ
One fantastic series of posts.
Milltek owes you big time. They must get some good business coming their way.
Very through and detailed.
It probably took just as much time to share this as it did to actually do it.
I'm really impressed!
Give this guy cudo's too the max!
One fantastic series of posts.
Milltek owes you big time. They must get some good business coming their way.
Very through and detailed.
It probably took just as much time to share this as it did to actually do it.
I'm really impressed!
Give this guy cudo's too the max!
Next up, I need to probably replace the crank pulley (after Holidays) and figure what I am going to do about the suspension. Coilovers? or Koni yellows and a spring set or stock springs...
#15
10-29-2013, 11:26 AM

#16
02-13-2014, 09:59 AM
Frustrated! I knew the crank pulley was coming due... 47k miles on the first before it went. And now 46.5k miles for what I believe has gone again. Almost like clock work.
Wife was driving the MINI to work yesterday (luckily) and only got 3-4 blocks away before she turned around and came home.
I check the gas cap hoping that was it. She filled the car up and was not aware of that fun tale. Then jumped in and went for a test drive. Car revs fine, but when you lightly drive it and hit about 2500-3000rpms, the car kicks back and gets you to lean forward and then goes into limp mode.
The car drives but it is only 'coast' mode. Enough to get home but ZERO power, it likes 10-15mph.
So I need to check the MINI out this weekend to verify that the pulley is going. Wife noticed a burning rubber smell previously. I heard an intermittent 'squeak' as well... As I would drive the car, I noticed a growing resistance as you climb to the top of the power band and would back off thinking the pulley was growing weak.
I had it on the TO DO within the next 2 weeks and it might have beat me to the punch. Just felt like a pulley kicking back because it can no longer handle the revolutions that the crank is putting on it.
Hopefully, with the ATI unit, this will be the LAST time I screw with the crank pulley.
When verified, I plan on ordering from WMW but they are buried now. Looks like I will take the 22nd/23rd and repair the MINI. I will try and take pictures for those interested in replacing the crank pulley.
#18
02-14-2014, 08:39 AM
Thanks. I thought about it and will probably stick with the stock sized unit. I dont want to get too wild or crazy. A couple of threads I have read did not notice a large increase with the oversized unit.
#19
02-14-2014, 09:20 AM

In case you're interested in an inexpensive fix to your crank pulley woes, I have a stock pulley I took off my 2004 MCS not because it was acting up but because I got an ATI from Way at the Dragon 2 years ago. He said my old one was in great shape and that I should sell it to somebody in need of one. Interested? Can send pix.
#20
02-14-2014, 07:25 PM
In case you're interested in an inexpensive fix to your crank pulley woes, I have a stock pulley I took off my 2004 MCS not because it was acting up but because I got an ATI from Way at the Dragon 2 years ago. He said my old one was in great shape and that I should sell it to somebody in need of one. Interested? Can send pix.
Thanks though!

#21
02-16-2014, 10:56 AM
Finally had the chance to jack the MINI up and take a look.
Pulley looks fine. I cannot see any structural damage to the exterior. Tensioner is in good shape, the new belt I put on is in great shape. So I turn the car over and let it idle, sounds fine, pulley is turning as you would expect to see...
Ok... engage the A/C compressor. I do not hear the traditional sound of the clutch engaging and the air coming out is a fraction of what normally comes out and its not ice cold. hmmmm....
Walk back around to the front right and take a look. AH HA moment! The belt is NO longer turning and the A/C compressor pulley is rocking back and forth. 9 o'clock to 3 o'oclock back to 9 o'oclock...
I believe this is enough for me. I suspect that the crank pulley has separated and the outer portion is now independent of the internal portion. It no longer has the torque to turn the belt and thus drive the alternator and a/c compressor. Could be worse, I have heard horror stories of the belt getting shredded, the tensioner being toasted... Last go around with this pulley launched into my right axle boot and shredded that... so new axle then... So I guess I should take this and be happy.
Back to the cabin, now I noticed the battery light on.
Time to order the parts for next Saturday morning.
#22
02-22-2014, 01:23 PM
Well that wasn't too bad. Quite easy and pretty straightforward.
Start to finish was about 90 minutes. But I will tell you, you most likely will need an impact. I have the Ingersoll Rand w7150, worked beautifully!
Ordered the parts from Way Motor Works. Thanks to them! Everything went according to plan for shipping.
I will try and do write up for anyone trying to decide if they want or can do this. Took some pics along the way and will post those as well.
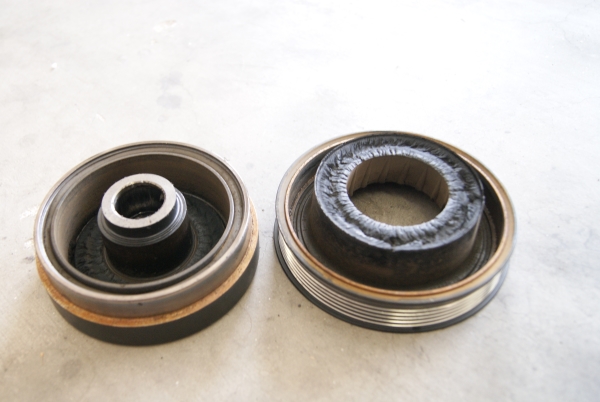
You read about the crank pulley failing but until you really see it in two pieces, one in each hand, it hits home. The way its built, no wonder it fails. I can't believe MINI will not redesign the part better. But I am very happy with the ATI part.
Start to finish was about 90 minutes. But I will tell you, you most likely will need an impact. I have the Ingersoll Rand w7150, worked beautifully!
Ordered the parts from Way Motor Works. Thanks to them! Everything went according to plan for shipping.
I will try and do write up for anyone trying to decide if they want or can do this. Took some pics along the way and will post those as well.
You read about the crank pulley failing but until you really see it in two pieces, one in each hand, it hits home. The way its built, no wonder it fails. I can't believe MINI will not redesign the part better. But I am very happy with the ATI part.
#23
02-24-2014, 09:42 AM

Thanks for the fine details and it sounds like you really enjoy the hobby of fixing your vehicles !
I looked at the Milltek header when my cat split apart but decided to have it welded back together while it was on the vehicle. The Milltek is a great option and for anyone with emission test concerns you can purchase a "spacer" for the 02 sensors.
I looked at the Milltek header when my cat split apart but decided to have it welded back together while it was on the vehicle. The Milltek is a great option and for anyone with emission test concerns you can purchase a "spacer" for the 02 sensors.
#24
02-25-2014, 06:43 PM
Ok, recently I had the crank pulley fail on our Cooper S. The first time was back in June of 2009 at 47,000 miles. Recently, for the second time at 93,500 miles. Or an interval of 46,500 miles. Almost like clockwork!
So instead of being insane (doing the same thing over and over and expecting a different outcome), I decided to install the ATI Super Damper. It has a rock solid reputation and it is no longer a �time bomb� like the MINI OEM pulley is.
So I researched the HOW TO on this pulley and decided it was not that bad to do. I have many automotive tools along with an impact. The step by step was straightforward. So I contacted WMW and ordered: 1) ATI Damper (stock), 2) Mini Puller, 3) New crank bolt and 4) new seal for behind the crank pulley.
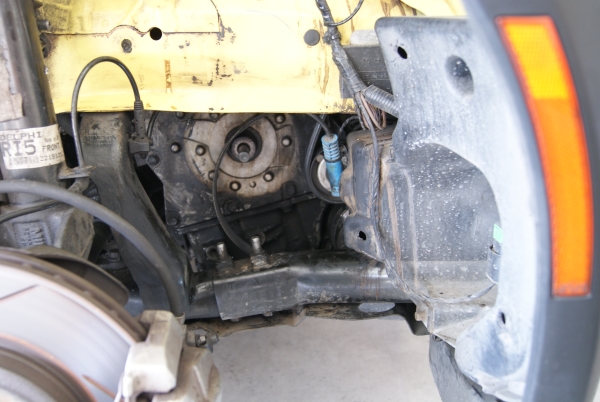
First off, I jacked the MINI up and placed a jackstand under the car. Secondary feature is leaving the jack underneath the car as well. I removed the lug nuts and passenger side wheel.
Step 2 is to remove right front fender (splash guard) that consists of 8 plastic rivets and 3 metal screws. I do not recommend using power tools (screwdriver) on these as they are easy to strip. Going rate for having one shipped to your door is about $5-6/each. Adds up. You can turn the wheels to the right to give you more access, but it is not necessary.
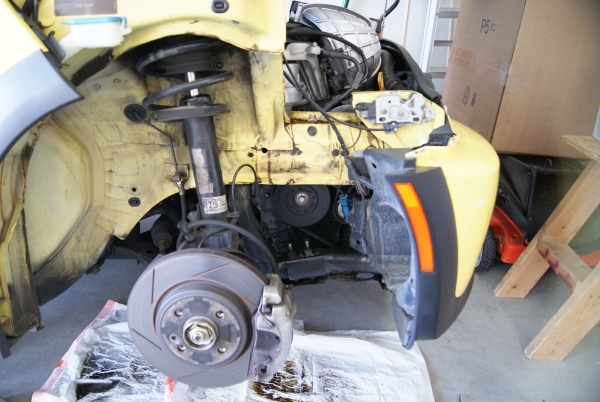
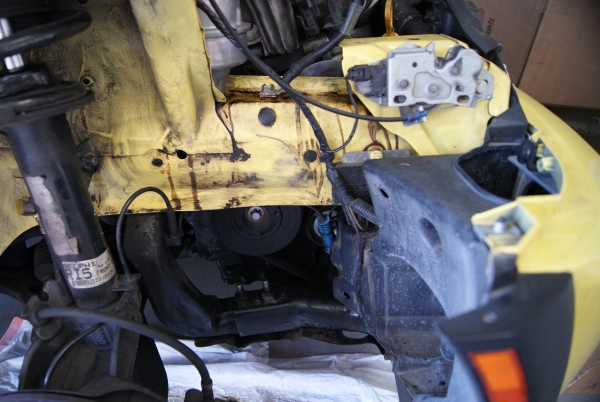
Step 4, we now have access to the damper. I decided to clean things up as well since it was a bit dirty.
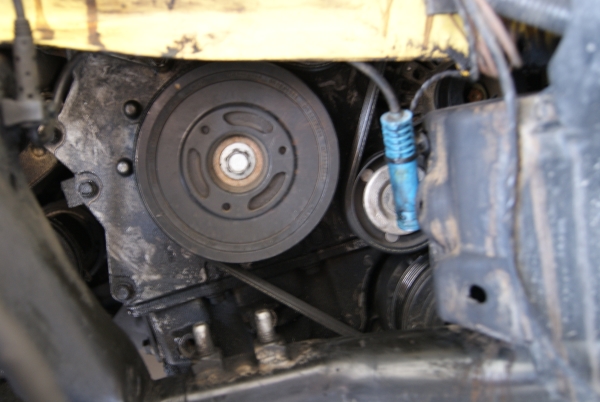
Step 5, time to remove the damper/pulley bolt. You will need a 15mm socket. At this point, I used the impact (Ingersoll Rand w7150) to remove the bolt in 2 seconds flat. I can�t imagine doing that by hand since the pulley will turn on you as well. Impact is the way to go!
So instead of being insane (doing the same thing over and over and expecting a different outcome), I decided to install the ATI Super Damper. It has a rock solid reputation and it is no longer a �time bomb� like the MINI OEM pulley is.
So I researched the HOW TO on this pulley and decided it was not that bad to do. I have many automotive tools along with an impact. The step by step was straightforward. So I contacted WMW and ordered: 1) ATI Damper (stock), 2) Mini Puller, 3) New crank bolt and 4) new seal for behind the crank pulley.
First off, I jacked the MINI up and placed a jackstand under the car. Secondary feature is leaving the jack underneath the car as well. I removed the lug nuts and passenger side wheel.
Step 2 is to remove right front fender (splash guard) that consists of 8 plastic rivets and 3 metal screws. I do not recommend using power tools (screwdriver) on these as they are easy to strip. Going rate for having one shipped to your door is about $5-6/each. Adds up. You can turn the wheels to the right to give you more access, but it is not necessary.
Step 4, we now have access to the damper. I decided to clean things up as well since it was a bit dirty.
Step 5, time to remove the damper/pulley bolt. You will need a 15mm socket. At this point, I used the impact (Ingersoll Rand w7150) to remove the bolt in 2 seconds flat. I can�t imagine doing that by hand since the pulley will turn on you as well. Impact is the way to go!
#25
02-25-2014, 06:47 PM
Step 6 requires you to have the MINI tensioner tool. This looks like an L and it has 2 pins on it. The idea of this tool is to mount it on the tensioner bolt (fulcrum) and insert the 2 pins into the belt tensioner. With the proper leverage, you will pull back compressing the spring. As you compress the spring, someone ELSE will drop the �key/pin� into the second hole whereby locking the tensioner in place and removing all tension of the pulleys. I cannot imagine that this can be done by a single person. But possible. I recommend printing off one of the MANY diagrams on how the MINI belt is routed when you are done.
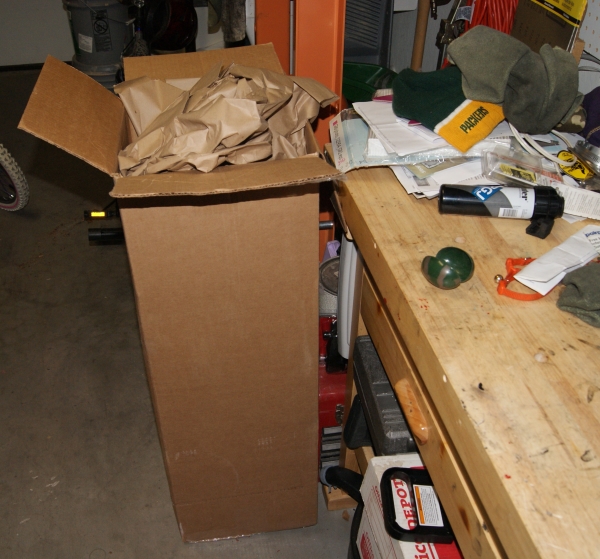
Step 7, removing the OEM damper with the puller. This is an interesting piece for sure. Pricey but I did not want to mess around with finding the right bolts for this or that� I wanted to get in and get out. The box it comes in was smaller than I anticipated, maybe 4 inches by 4 inches by 4 inches. Comes with this inside: circular puller portion attached to the main drive bolt, 3 x screws with washers ready to go, another main bolt along with 3 x smaller screws/washers.
I had to pull the 3 larger screws/washers out of the puller because they did not fit the OEM Damper threaded holes. I placed the 3 smaller screws/bolts (in the baggie) into the puller and they lined right up with the OEM damper. Next step is to use the other main looking bolt to insert it into the crankshaft and thread it. The hole in the crankshaft is deep (3-4 inches) so this bolt fills that area allowing you to press off of it and get the OEM damper off. Once threaded it is time to thread the puller (3 x small screws/washers) into the OEM damper�s threaded holes. Once mounted, screws tightened and main drive bolt aligned, the puller is ready. I went the extra step to use a wrench to tightened the 3 x smaller screws/washers to the pulley. I idea of those letting go made me paranoid. Everything was aligned and tightened.
I started off using a ratchet by hand to get the pulley to move. It offers resistance but not too bad. After a turn or two and noticing the pulley move, I used the impact again and the pulley came off in a few seconds. Love the impact!
Status Pic:

Below is the pulley as it came off the Cooper. Such a poor design you can see it in the pics. You can tell EXACTLY where it fails and you have to ask yourself WHY? Why would I put another MINI OEM damper on?
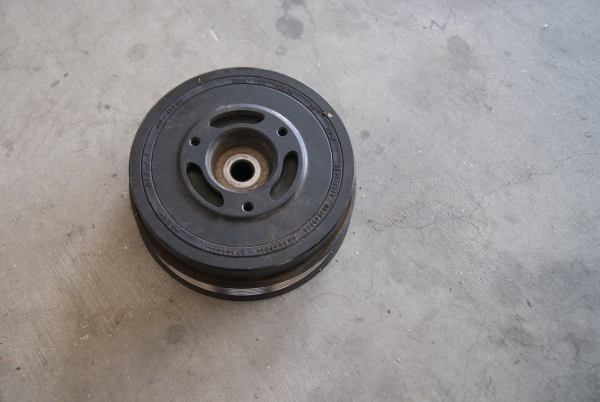

Step 7, removing the OEM damper with the puller. This is an interesting piece for sure. Pricey but I did not want to mess around with finding the right bolts for this or that� I wanted to get in and get out. The box it comes in was smaller than I anticipated, maybe 4 inches by 4 inches by 4 inches. Comes with this inside: circular puller portion attached to the main drive bolt, 3 x screws with washers ready to go, another main bolt along with 3 x smaller screws/washers.
I had to pull the 3 larger screws/washers out of the puller because they did not fit the OEM Damper threaded holes. I placed the 3 smaller screws/bolts (in the baggie) into the puller and they lined right up with the OEM damper. Next step is to use the other main looking bolt to insert it into the crankshaft and thread it. The hole in the crankshaft is deep (3-4 inches) so this bolt fills that area allowing you to press off of it and get the OEM damper off. Once threaded it is time to thread the puller (3 x small screws/washers) into the OEM damper�s threaded holes. Once mounted, screws tightened and main drive bolt aligned, the puller is ready. I went the extra step to use a wrench to tightened the 3 x smaller screws/washers to the pulley. I idea of those letting go made me paranoid. Everything was aligned and tightened.
I started off using a ratchet by hand to get the pulley to move. It offers resistance but not too bad. After a turn or two and noticing the pulley move, I used the impact again and the pulley came off in a few seconds. Love the impact!
Status Pic:
Below is the pulley as it came off the Cooper. Such a poor design you can see it in the pics. You can tell EXACTLY where it fails and you have to ask yourself WHY? Why would I put another MINI OEM damper on?