R50/53 Rear hatch water leak
#1
 03-24-2013, 08:25 AM


Join Date: Mar 2013
Location: Cape Cod Ma
Posts: 16
Likes: 0
Received 0 Likes
on
0 Posts
Rear hatch water leak
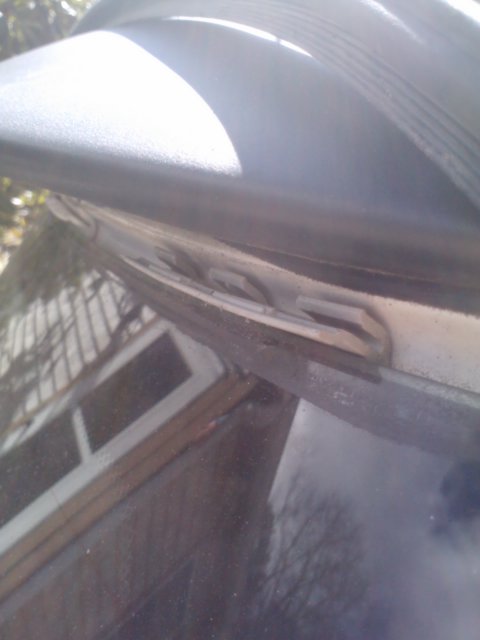
So I bought my mini about 6 months ago and I have had this water leak since I bought it. I originally thought it was my third brake light so I took that out and resealed it. Still leaks. I had my friend spray the entire hatch the other day while I sat in and watched where it was coming from. I have narrowed it down to the L-shaped clips that hold the upper window trim on. Has anyone had this problem? I don't really understand how they even seal in the first place as its just a clip going into hatch above the window seal unless they are supposed to have some kind of seal on them as well. Any help/suggestions is greatly appreciated.
#2
03-24-2013, 09:46 AM

Have you looked around the regular brake lights?
I suspect that water was only getting in the clips cause of the directed water stream....just letting the hose SIT on the roof, and letting the water drip might be more useful....
The regular brake lights should have a very soft foam gasket around the edge, about an inch or so from the part that sticks out...the lens.
The look at the sunroof drain....or the actual handle for the boot.
#3
03-24-2013, 09:56 AM
Join Date: Mar 2013
Location: Cape Cod Ma
Posts: 16
Likes: 0
Received 0 Likes
on
0 Posts
Have you looked around the regular brake lights?
I suspect that water was only getting in the clips cause of the directed water stream....just letting the hose SIT on the roof, and letting the water drip might be more useful....
The regular brake lights should have a very soft foam gasket around the edge, about an inch or so from the part that sticks out...the lens.
The look at the sunroof drain....or the actual handle for the boot.
I suspect that water was only getting in the clips cause of the directed water stream....just letting the hose SIT on the roof, and letting the water drip might be more useful....
The regular brake lights should have a very soft foam gasket around the edge, about an inch or so from the part that sticks out...the lens.
The look at the sunroof drain....or the actual handle for the boot.
#5
03-24-2013, 10:13 AM
Join Date: Mar 2013
Location: Cape Cod Ma
Posts: 16
Likes: 0
Received 0 Likes
on
0 Posts
#6
04-15-2013, 06:36 PM

I happen to have the same problem on my rear hatch but at the bottom. The water comes it at the clips in several places. I bought new clips and trim and removed the old ones. However, removal of the old clips required breaking them because there was no way to reach the proper release tab from the other side. The big problem is that it now looks like I must REMOVE THE REAR GLASS in order to insert the new clips!!!! What did you do? Did you replace the clips? If so, how did you get them inserted? I fear I am stuck visiting a glass place to help me finish this job.
#7
04-17-2013, 05:35 PM
Join Date: Mar 2013
Location: Cape Cod Ma
Posts: 16
Likes: 0
Received 0 Likes
on
0 Posts
I happen to have the same problem on my rear hatch but at the bottom. The water comes it at the clips in several places. I bought new clips and trim and removed the old ones. However, removal of the old clips required breaking them because there was no way to reach the proper release tab from the other side. The big problem is that it now looks like I must REMOVE THE REAR GLASS in order to insert the new clips!!!! What did you do? Did you replace the clips? If so, how did you get them inserted? I fear I am stuck visiting a glass place to help me finish this job.

Trending Topics
#8
04-17-2013, 06:34 PM
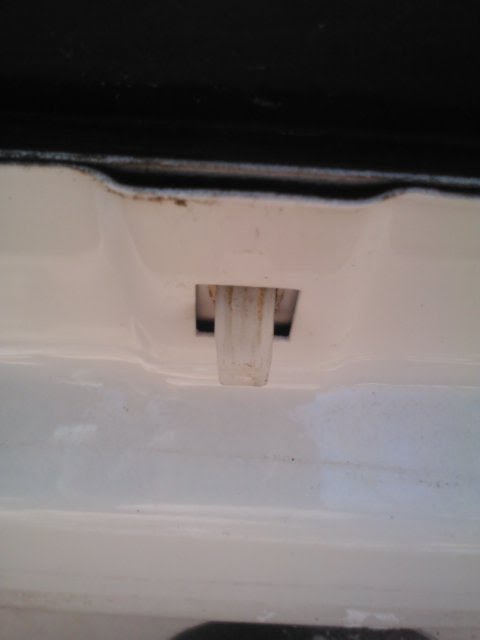
Yes, the new clips have a rubber ring at the bottom of it where it contacts the car. I would not call it a "seal" though. I think the rubber trim is supposed to hold back most of the water.
I went to an auto glass place today and they agreed with me about it. Problem is they won't do a "labor job" which they consider this is. Anyways, now I really regret breaking the clips. So I recommend leaving your clips alone and buy a new trim piece only. You can always resort to replacing the clips later if the trim alone is inadequate.
I went to an auto glass place today and they agreed with me about it. Problem is they won't do a "labor job" which they consider this is. Anyways, now I really regret breaking the clips. So I recommend leaving your clips alone and buy a new trim piece only. You can always resort to replacing the clips later if the trim alone is inadequate.
#9
04-18-2013, 11:23 AM
Join Date: Mar 2013
Location: Cape Cod Ma
Posts: 16
Likes: 0
Received 0 Likes
on
0 Posts
Yes, the new clips have a rubber ring at the bottom of it where it contacts the car. I would not call it a "seal" though. I think the rubber trim is supposed to hold back most of the water.
I went to an auto glass place today and they agreed with me about it. Problem is they won't do a "labor job" which they consider this is. Anyways, now I really regret breaking the clips. So I recommend leaving your clips alone and buy a new trim piece only. You can always resort to replacing the clips later if the trim alone is inadequate.
I went to an auto glass place today and they agreed with me about it. Problem is they won't do a "labor job" which they consider this is. Anyways, now I really regret breaking the clips. So I recommend leaving your clips alone and buy a new trim piece only. You can always resort to replacing the clips later if the trim alone is inadequate.
 I guess ill try replacing that trim before I take rear glass out and such.
#10
04-25-2013, 06:50 AM
I have now managed to repair my car. To answer your question, now that the trim is installed, it sits somewhat flush, but now I think the trim is not intended to seal. The seal is mostly accomplished with the clips. I pressed the new clips in with a painter's tool, carefully without scratching the car. It took a decent amount of force on some clips, and others went in easily. One clip broke on the way in and I had to buy another one. Once the clips were in place, the rubber seal underneath actually sealed very well. Before installing the trim, I hosed the car down and the seals held. (the black splotches in the picture is paint primer to protect from rust where I scratched the paint when removing the old clips)
#11
04-26-2013, 03:26 PM
Join Date: Mar 2013
Location: Cape Cod Ma
Posts: 16
Likes: 0
Received 0 Likes
on
0 Posts
I have now managed to repair my car. To answer your question, now that the trim is installed, it sits somewhat flush, but now I think the trim is not intended to seal. The seal is mostly Iaccomplished with the clips. I pressed the new clips in with a painter's tool, carefully without scratching the car. It took a decent amount of force on some clips, and others went in easily. One clip broke on the way in and I had to buy another one. Once the clips were in place, the rubber seal underneath actually sealed very well. Before installing the trim, I hosed the car down and the seals held. (the black splotches in the picture is paint primer to protect from rust where I scratched the paint when removing the old clips)
Last edited by LJcoop02; 04-27-2013 at 06:34 AM.
#12
04-29-2013, 06:41 PM
Yes, this is the lower part of the rear glass, and on an '05. Just to be clear to others: I did not have to break or remove the glass to get this done.
#13
05-25-2015, 10:32 PM
Rodney - thanks for posting your pictures. I know this is a super old thread but helpful as I've had a hatch leak and found a couple of the places, but didn't get it all. So I removed all the interior trim and had my wife run a hose. Sure enough those little clips had water pouring through them. I'm going to try a simpler first line of defense and bury them in silicone. If you have to break them to get them out anyway, I might as well try sealing them first.
Cheers!
Mitch
Cheers!
Mitch
#14
05-26-2015, 01:51 PM
Platinum Sponsor
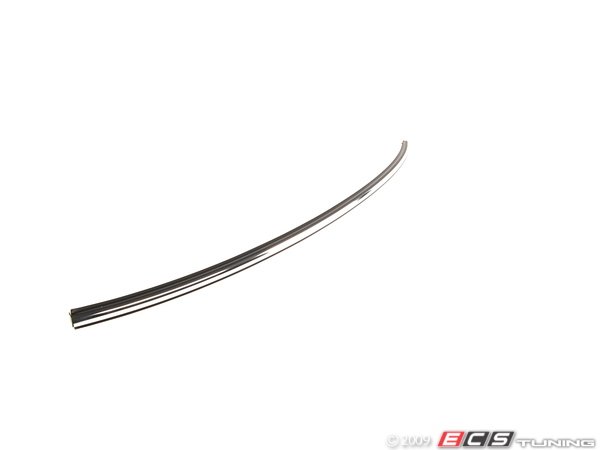
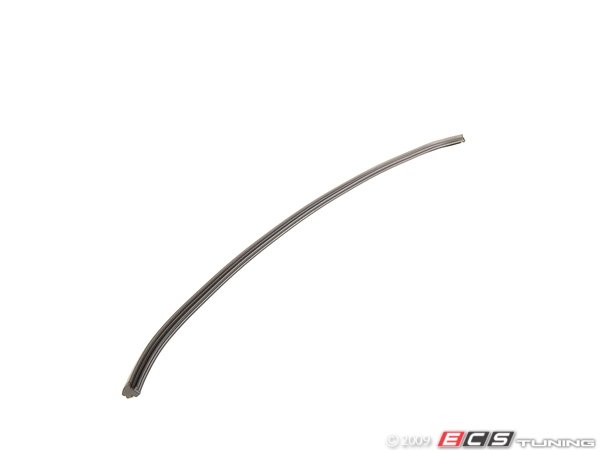
Clips at the bottom with new trim. Bottom rear window: 51137051531
http://www.ecstuning.com/Search/SiteSearch/51137051531/
http://www.ecstuning.com/Search/SiteSearch/51137051531/
__________________

MINI Guru/ MINI Owner Since 2004 | NEW Lifetime Part Replacement | Local Pickup
Milltek | Genuine MINI | Forge Motorsport | NM Engineering | ECS Performance | M7 Speed
Customer Service Hours: 8am-8pm EST|Sales Team Hours: 8am-11pm | SAT 10am-7pm 800.924.5172
MINI Guru/ MINI Owner Since 2004 | NEW Lifetime Part Replacement | Local Pickup
Milltek | Genuine MINI | Forge Motorsport | NM Engineering | ECS Performance | M7 Speed
Customer Service Hours: 8am-8pm EST|Sales Team Hours: 8am-11pm | SAT 10am-7pm 800.924.5172
#15
05-27-2015, 12:06 AM

5th Gear
Clips at the bottom with new trim. Bottom rear window: 51137051531 http://www.ecstuning.com/Search/SiteSearch/51137051531/
#16
05-27-2015, 08:56 AM
Platinum Sponsor
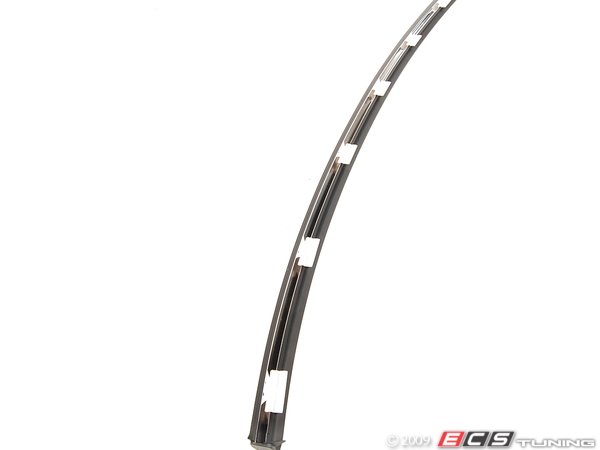
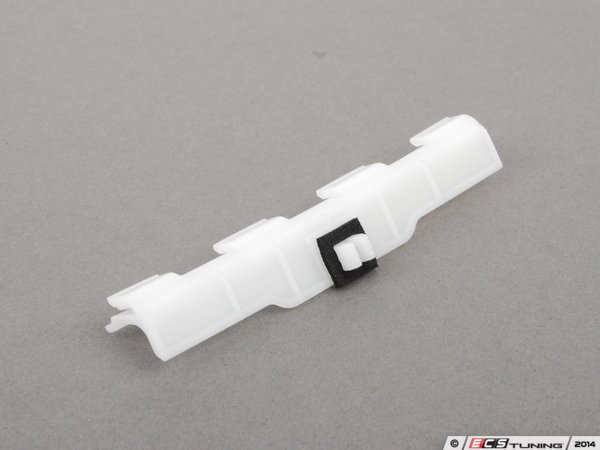
http://www.ecstuning.com/Search/SiteSearch/51317054068/
And
http://www.ecstuning.com/Search/SiteSearch/51317051502/
And
http://www.ecstuning.com/Search/SiteSearch/51317051502/
__________________
MINI Guru/ MINI Owner Since 2004 | NEW Lifetime Part Replacement | Local Pickup
Milltek | Genuine MINI | Forge Motorsport | NM Engineering | ECS Performance | M7 Speed
Customer Service Hours: 8am-8pm EST|Sales Team Hours: 8am-11pm | SAT 10am-7pm 800.924.5172
MINI Guru/ MINI Owner Since 2004 | NEW Lifetime Part Replacement | Local Pickup
Milltek | Genuine MINI | Forge Motorsport | NM Engineering | ECS Performance | M7 Speed
Customer Service Hours: 8am-8pm EST|Sales Team Hours: 8am-11pm | SAT 10am-7pm 800.924.5172
#17
06-14-2015, 04:34 AM
5th Gear
#18
06-15-2015, 02:02 PM

Well I sure hope your seal replacement fixes it.
If you have a Sunroof; they have four drains (each corner at sides) you must keep cleared.
In 1969, I foolishly traded in my (bought new) '67 Firebird Convertible because no one knew about the simple litttle drains for the 'top-to-body' trough, car was perfect in every other way. Ended up with the mother of all Lemons Grand Prix.
Cured me of all new cars for nearly 40 years, my MINI's a keeper for sure.
Art
#19
06-15-2015, 02:11 PM
Platinum Sponsor
Kahnfcouis , don't see any diagrams or special tool the clip does set under the edge of the glass. Can its wiggle out after you take that clip part off. Its so tight it looks like you have to do with the glass out. Do you have better pics of the old clip installed ?
__________________
MINI Guru/ MINI Owner Since 2004 | NEW Lifetime Part Replacement | Local Pickup
Milltek | Genuine MINI | Forge Motorsport | NM Engineering | ECS Performance | M7 Speed
Customer Service Hours: 8am-8pm EST|Sales Team Hours: 8am-11pm | SAT 10am-7pm 800.924.5172
MINI Guru/ MINI Owner Since 2004 | NEW Lifetime Part Replacement | Local Pickup
Milltek | Genuine MINI | Forge Motorsport | NM Engineering | ECS Performance | M7 Speed
Customer Service Hours: 8am-8pm EST|Sales Team Hours: 8am-11pm | SAT 10am-7pm 800.924.5172

Thread
Thread Starter
Forum
Replies
Last Post

