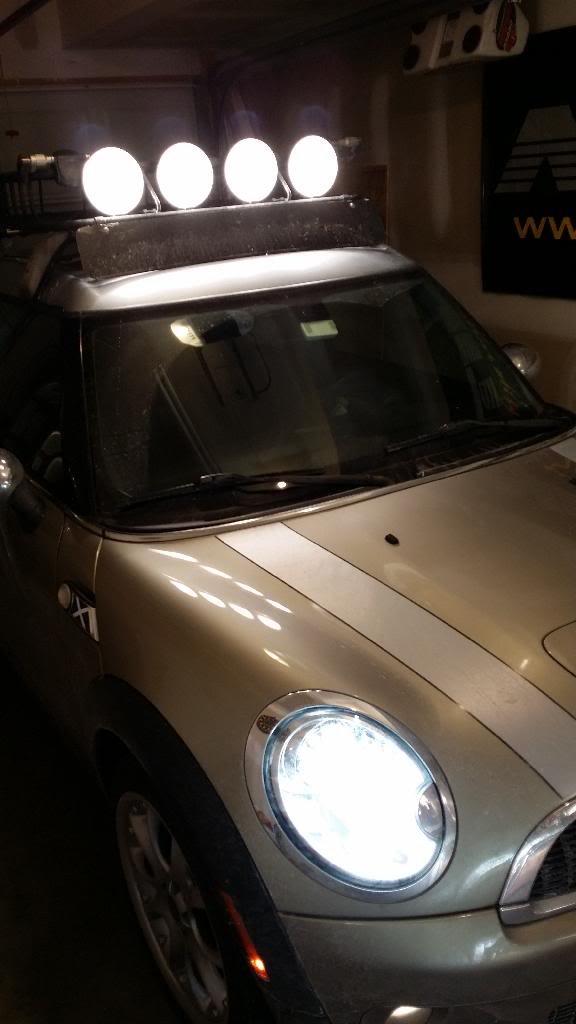
Interior/Exterior R56 roof rack
#401
There is a gap on mine. I believe if it touches the roof it will damage your paint eventually while driving on the highway.
I'm still waiting for info on the "shoulder bolts PN 82792354857". I've emailed four dealerships nearby and none of them answered. I knew my usual dealership has a crummy parts department (and now I am convinced pretty terrible maintenance as well based on my last visit)... but four dealership parts department all ignoring their email requests? I'll have to stop by sometime when nearby I guess to force MINI to take my money - haven't found any source online in Canada yet.
I'm still waiting for info on the "shoulder bolts PN 82792354857". I've emailed four dealerships nearby and none of them answered. I knew my usual dealership has a crummy parts department (and now I am convinced pretty terrible maintenance as well based on my last visit)... but four dealership parts department all ignoring their email requests? I'll have to stop by sometime when nearby I guess to force MINI to take my money - haven't found any source online in Canada yet.
#402
I haven't been able to use mine for a while now. I bought mine used and I think it was very heavily used for several years.
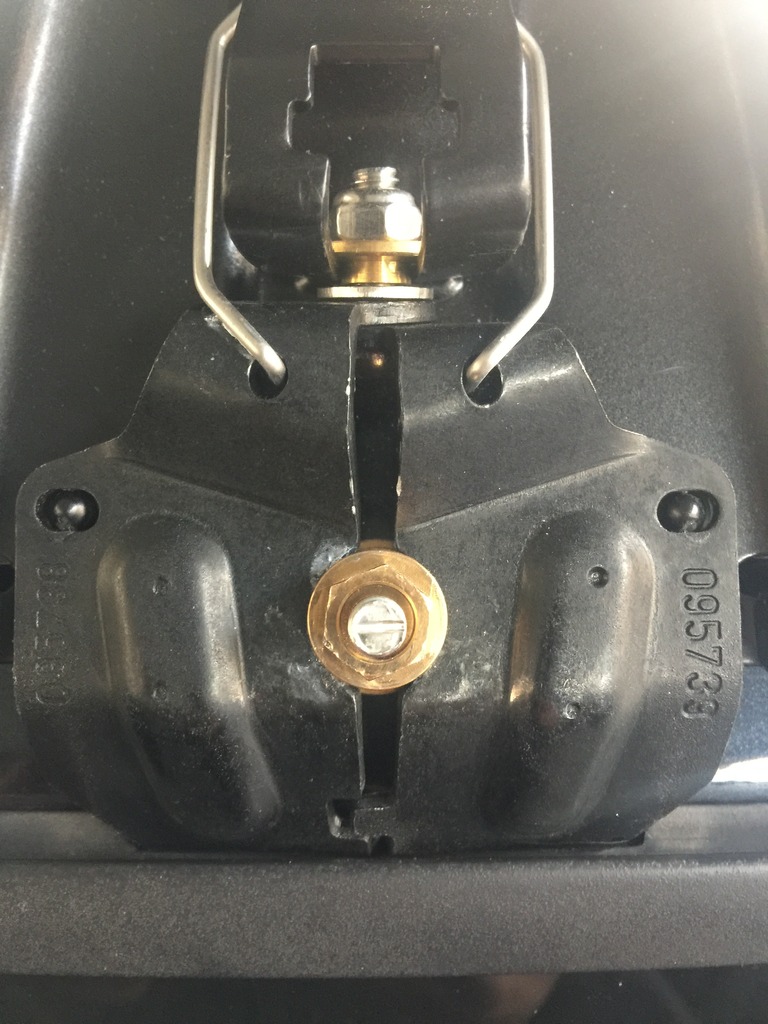
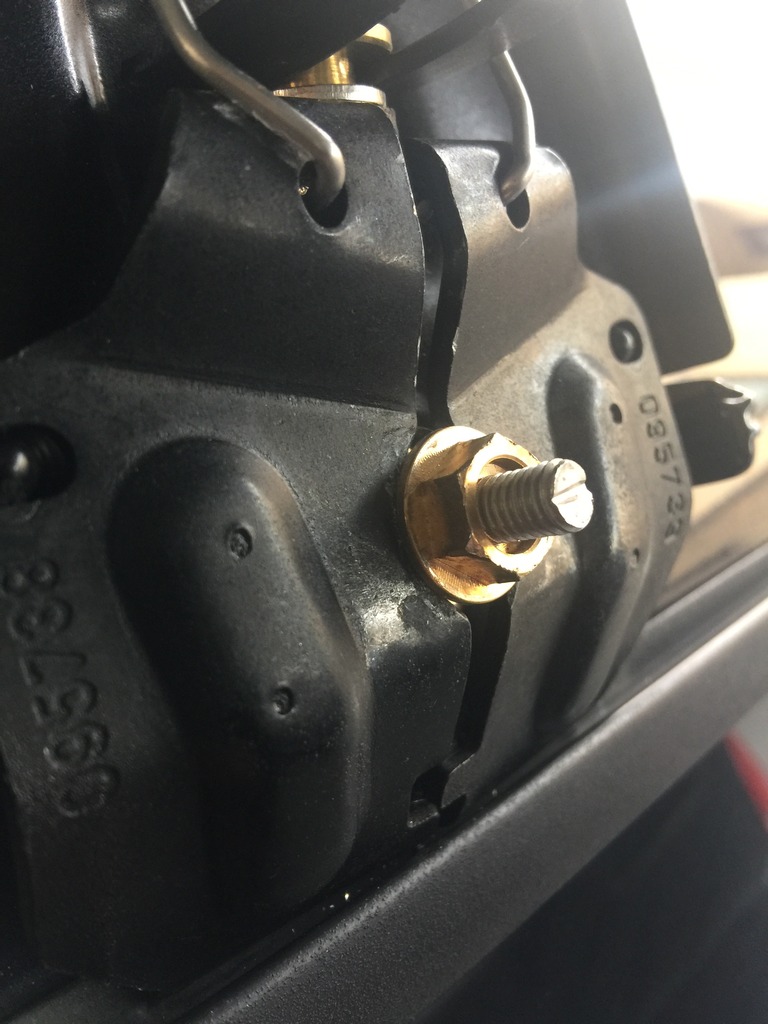
Anyways my torque wrench seemed to have busted because I stripped two of those brass nuts months ago and the little lines never lined up to indicate I reached the correct torque. I installed/removed the rack two times previous to this 'incident'.
We have been thinking about a roof box and buying a replacement rack would be $260 + shipping. Checked realOAM today and I see that there are now replacement brass nuts available! I don't remember them being there in the past.
Anyways, here are the details. I'm checking with my dealership but I expect them to be ridiculously over-priced. I'll just keep the rack on most of the time. I don't drive much on the highway so reduced gas mileage is not much of an issue.
http://www.realoem.com/bmw/showparts...71&hg=82&fg=51
Set of Shoulder Nuts (4pk): PN 82792354857
Torque Wrench 6NM 5mm: PN 82722230149
We have them here:
The nuts set currenlty will have to come from overseas, but are available.
#11 Set of Shoulder Nuts (4pk): PN 82792354857
http://www.ecstuning.com/Search/SiteSearch/82792354857/
#5 Torque Wrench 6NM 5mm: PN 82722230149
http://www.ecstuning.com/Search/SiteSearch/82722230149/

Thanks and hope that helps.
__________________

MINI Guru/ MINI Owner Since 2004 | NEW Lifetime Part Replacement | Local Pickup
Milltek | Genuine MINI | Forge Motorsport | NM Engineering | ECS Performance | M7 Speed
Customer Service Hours: 8am-8pm EST|Sales Team Hours: 8am-11pm | SAT 10am-7pm 800.924.5172

MINI Guru/ MINI Owner Since 2004 | NEW Lifetime Part Replacement | Local Pickup
Milltek | Genuine MINI | Forge Motorsport | NM Engineering | ECS Performance | M7 Speed
Customer Service Hours: 8am-8pm EST|Sales Team Hours: 8am-11pm | SAT 10am-7pm 800.924.5172
#404
Just spoke with Penske Parts, www.penskeparts.com (Inskip MINI in Rhode Island). From what they told me the nuts are not in stock at the North American Warehouse. They would have to be ordered from Germany.
If you contact them they will order the parts for you. Their cost is about $22.00 USD. But you would still have to pay for shipping and that would probably cost you about $20-25 unfortunately.
So maybe call your local dealer and ask them to special order them, or get them from the guys at ECS.
Others have also found regular nuts that will fit the threads and used a washer behind it.
#405
I've read through a good portion of the latter part of this thread. I have one question. Is the 2013 Hardtop S set up for this? I ask because, man, I can't see any evidence of perforation in the rain gutter seal. I looked. Then I read posts where people say it's not obvious. Then I looked again and couldn't see it. Then I read posts where people say it's really, really hard to see. Then I looked again. Every angle. Lifted up the edge to look around. Just can't find it. And I'm assuming without knowing exactly where to put it, it might damage the roof in some way if put in the wrong spot.
If it helps, for those who have done it, can you measure an exact length from, say, the read edge of the door window?
Thanks,
Mike Todd
If it helps, for those who have done it, can you measure an exact length from, say, the read edge of the door window?
Thanks,
Mike Todd
#407
#408
5th Gear
iTrader: (1)
Join Date: Jul 2011
Location: Seattle, WA
Posts: 625
Likes: 0
Received 0 Likes
on
0 Posts
https://www.northamericanmotoring.co...ml#post3387716
#410
Very good explanation for installation of your rack can be found here: http://turn17.com/?p=261
The cutouts are located at 9.25 inches and 36.25 inches as measured from the back of the post at top left of the driver side windows and top right of the passengers. They are 2.25 inches long.
The easiest part to see on my Mini were the vertical lines ( | ) on both sides of the cutout. These two lines are on the piece of rubber immediately adjacent to the roof. This is the part of the rubber that you slide the card behind.
Having found that I could then see the lines in the bottom of the rain gutter
( _ _ _ _ _ _ _ _ ) Slide the plastic card behind the rubber and use tweezers to pick the rubber up and away from the card and roof. I found it easier to use the tweezers to pick up the rubber and then used needle nosed pliers to remove the cutout. You will then have to use either one to remove the corners that did not come out with the rest of the cutout.
Now, if only I had not stripped one of my nuts....My rack would be on. Going to do the nut with washer fix posted here.
#417
Looks ok to me... I would usually push inwards on the two flaps with one hand while tightening the bolt with other hand using the little torque wrench. Very easy to strip the brass nuts so use the torque tool.
My replacement stainless steel nuts and washers have so far been holding up well... the trick is to never remove the rack - leave it installed at all times.
My replacement stainless steel nuts and washers have so far been holding up well... the trick is to never remove the rack - leave it installed at all times.


#420
Looks more or less ok to me... I would usually push inwards on the two flaps with one hand (the area just above the nut/bolt) while tightening the bolt with other hand using the little torque wrench. Very easy to strip the brass nuts so use the torque tool. See if you can push inwards anymore and if torque tool allows you to go any tighter.
My replacement stainless steel nuts and washers have so far been holding up well... the trick is to never remove the rack - leave it installed at all times.
My replacement stainless steel nuts and washers have so far been holding up well... the trick is to never remove the rack - leave it installed at all times.

#421
The designer of this mechanism should be sent to remedial engineering 101. And should be forced to take one of these off and put it back on once per day, for the rest of their life. This is rpobably the single worst design I have ever come across. 1000 easy ways to do this better. I hope they fired this person. Rant off.
#422
just as BMC Kid does i take mine on and off all the time. In the 8 years i have owned mine it has been on and off the car at least 800 times and i have NEVER NEVER NEVER stripped a brass nut or had any problem geting them on or off. In fact I can put both rakes on the car correctly in less than 3 minutes. Those that have problems putting it on or striping nuts just dont have them set up properly to begin with. The first time they go on the car there are screws on the underside of the rails that have to be lossened just enough (1/2 - 3/4 turn) to allow the mounting brakets and rails to slide against each other and then once the brackets are tight and mounted then the bolts connecting the rails and brakets need to be tightened and never touched again. After that is done they are easy to take on and off. I have helped many people up here in new england get the racks seg up properly when thier dealers could not and all of these people take them on and off regularly. If done correctly they should be easy on easy off.
#423
#424
Looks more or less ok to me... I would usually push inwards on the two flaps with one hand (the area just above the nut/bolt) while tightening the bolt with other hand using the little torque wrench. Very easy to strip the brass nuts so use the torque tool. See if you can push inwards anymore and if torque tool allows you to go any tighter.
My replacement stainless steel nuts and washers have so far been holding up well... the trick is to never remove the rack - leave it installed at all times.
My replacement stainless steel nuts and washers have so far been holding up well... the trick is to never remove the rack - leave it installed at all times.

#425
Sorry to bump an ancient thread... anybody have tips on installing the rain gutter caps?
I took the rack off my R56 since ski season isn't coming this year, but apparently I'm either too weak and pathetic to get the caps in or I'm doing it wrong. One side goes in, but then the other side won't move. I'm pretty sure the plastic lip is supposed to face up, but I've tried it both ways and failed.
I took the rack off my R56 since ski season isn't coming this year, but apparently I'm either too weak and pathetic to get the caps in or I'm doing it wrong. One side goes in, but then the other side won't move. I'm pretty sure the plastic lip is supposed to face up, but I've tried it both ways and failed.


