Interior/Exterior How Difficult Is It To Install Door Handles?
#1
 05-30-2008, 08:17 AM


Join Date: Apr 2008
Posts: 28
Likes: 0
Received 0 Likes
on
0 Posts
How Difficult Is It To Install Door Handles?
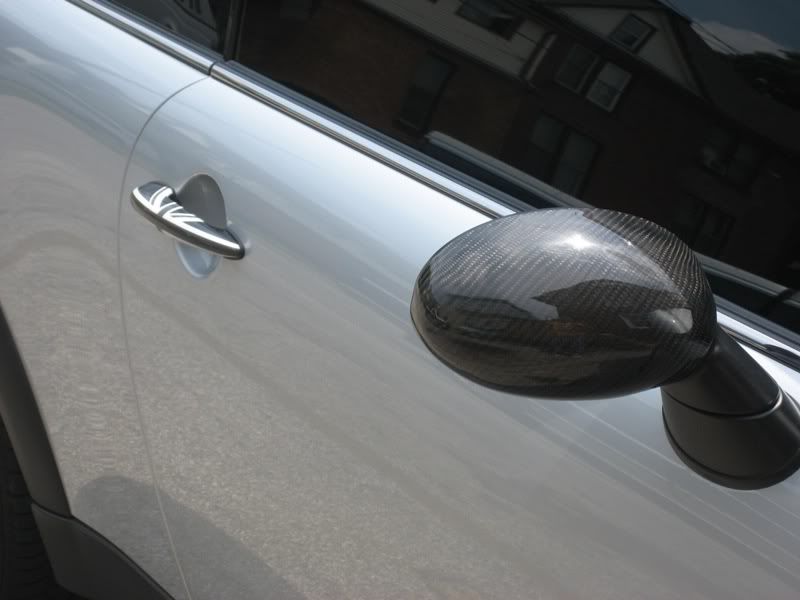
I want to add some checkered flag door handles to my 2008 MCS. It doesn't have the comfort access option, so I know they will fit.
I would like to do it myself, since getting to the dealer, paying for labor, waiting, etc., just doesn't fit into my 2-kids lifestyle.
Has anybody here installed their own door handles? How hard is it to do without screwing up the handles? I am a fair handyman, but no expert.
Thanks.
I would like to do it myself, since getting to the dealer, paying for labor, waiting, etc., just doesn't fit into my 2-kids lifestyle.
Has anybody here installed their own door handles? How hard is it to do without screwing up the handles? I am a fair handyman, but no expert.
Thanks.
#2
05-30-2008, 09:19 AM

6th Gear
Join Date: Apr 2003
Location: St. Louis
Posts: 2,405
Likes: 0
Received 0 Likes
on
0 Posts
#3
05-30-2008, 10:17 AM

4th Gear
Join Date: Apr 2008
Location: Catawba, VA
Posts: 499
Likes: 0
Received 0 Likes
on
0 Posts
I want to add some checkered flag door handles to my 2008 MCS. It doesn't have the comfort access option, so I know they will fit.
I would like to do it myself, since getting to the dealer, paying for labor, waiting, etc., just doesn't fit into my 2-kids lifestyle.
Has anybody here installed their own door handles? How hard is it to do without screwing up the handles? I am a fair handyman, but no expert.
Thanks.
I would like to do it myself, since getting to the dealer, paying for labor, waiting, etc., just doesn't fit into my 2-kids lifestyle.
Has anybody here installed their own door handles? How hard is it to do without screwing up the handles? I am a fair handyman, but no expert.
Thanks.

#4
05-30-2008, 11:17 AM
Join Date: Apr 2008
Posts: 28
Likes: 0
Received 0 Likes
on
0 Posts
#5
05-30-2008, 12:44 PM

#6
05-30-2008, 08:00 PM

4th Gear
Join Date: Apr 2007
Location: Mesa, AZ
Posts: 313
Likes: 0
Received 0 Likes
on
0 Posts

#7
05-30-2008, 08:19 PM

Trending Topics
#9
05-31-2008, 11:13 AM

3rd Gear
Join Date: Jul 2004
Location: NEW YORK
Posts: 207
Likes: 0
Received 0 Likes
on
0 Posts
#10
06-01-2008, 10:47 PM

#11
06-02-2008, 12:09 PM

5th Gear
Just did mine yesterday 
The R53 bolts that hold on the handle are torx bolts... so get a torx bit and get yourself one of those ratcheting wrenches that are worth their weight in gold and that will save you about 30min worth of work!!!
Also you can remove the rubber plug where the door lock goes thru the panel and see the bolts so you won't get taco neck!!

#14
06-02-2008, 02:54 PM

Auto on Sport Button guy
#15
06-02-2008, 04:02 PM


#19
06-27-2008, 10:33 AM

#20
06-27-2008, 06:22 PM
5th Gear
#21
07-24-2008, 11:44 PM
Auto on Sport Button guy
Door handles removed! Here's how.
I just finished my comfort access door handle install today. I replaced my chrome with the satin black wrap from Vinylstyles. Lyle offered up some good tips on how to do this, but then I remembered that thread on how to remove the door panels. I found removing and reinstalling the inner door panel to be the more difficult/tedious aspect of this install. So if you can make it this far, then you could definitely handle the door handle install. The pannel removal thread is not entirely accurate, but the pictures and info are quite helpful, so I will offer up some suggestions as an addendum to the link posted here.
https://www.northamericanmotoring.co...highlight=door
Ok. Following the steps mentioned in this thread.
Step 2: you do not need to disconnect the light in the arm rest.
Stop 6: Remove the speaker as mentioned. There are a total of 11 torx T30 shoulder screws to remove. If it's not a T30, leave it alone!
Step 8: Peer inside the hole where the speaker goes to see the L shaped bracket that connects up to the window track. This is where a T handle torx wrench inserted through the bottom of the door would come in really handy. I only had torx bits to use with my socket wrench, but that worked ok.
Step 10: This is explained rather well actually. At this point you would definitely benifit from a ratchet wrench with a T25 bit. The door will be hanging on by these last 3 screws. They are facining in the opposite direction of all the other T30 panel screws you have removed.
Moving beyond the door panel removal. Peer inside the door and you will see that the door handle is held in place by two 5mm allen bolts. Disconnect the black door handle cable, it just slips into place. You will see a rubber flap covering some holes in the door near the handle. Use a 5mm ball end allen wrench through the hole to get to the far side door handle screw. The other handle screw can be removed with an L key allen or better yet, an allen bit on the socket wrench to speed up a very tedious process!
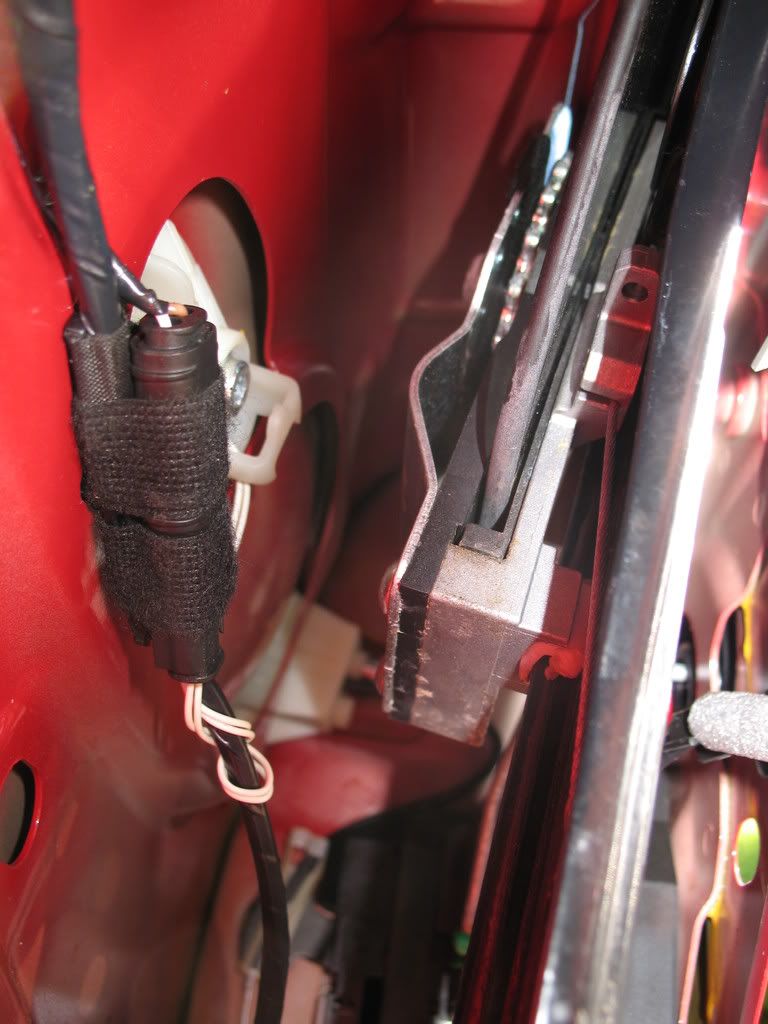
Here is a shot of the white blastic block that the door handle mates to. That block snaps into the door. You will see a silver 5mm allen bolt to remove as well as the cable harnes below it.

Here is the shot of my L key to get to this bolt. When reinstalling the bolt I had to use a socket extension on the end of the allen key to get enough torque to tighten the bolt all the way. A t handle ball end allen would be ideal here.
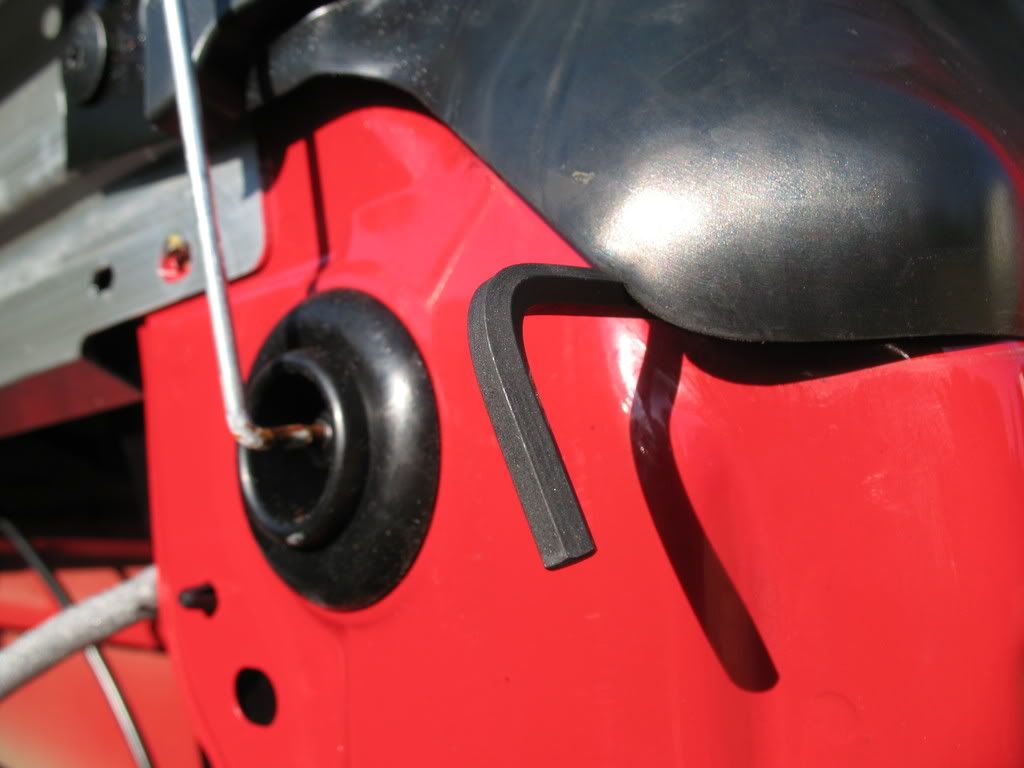
Here is a shot of the other allen bolt. Notice the tight working space. I would have really liked an allen bit on a socket wrench for this bolt. I used my L key and it's rather tedious. You can also see the plug for the comfort access. It's wrapped in a fabric tape. I had to cut the tape to disconnect it.
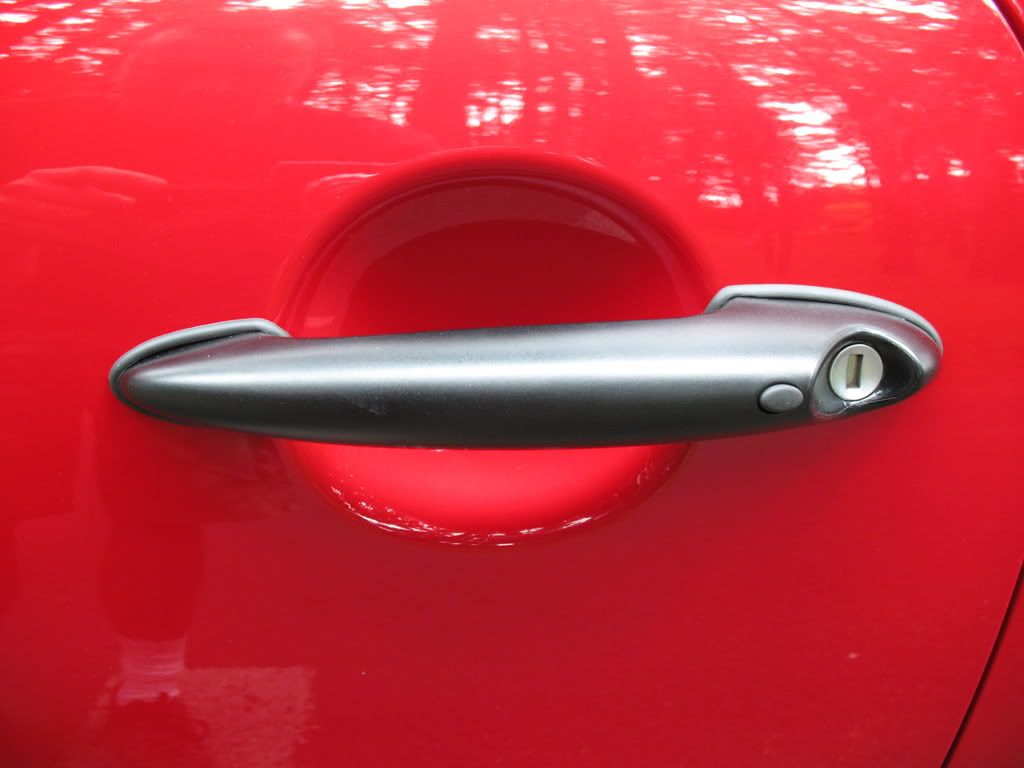
No more chrome!
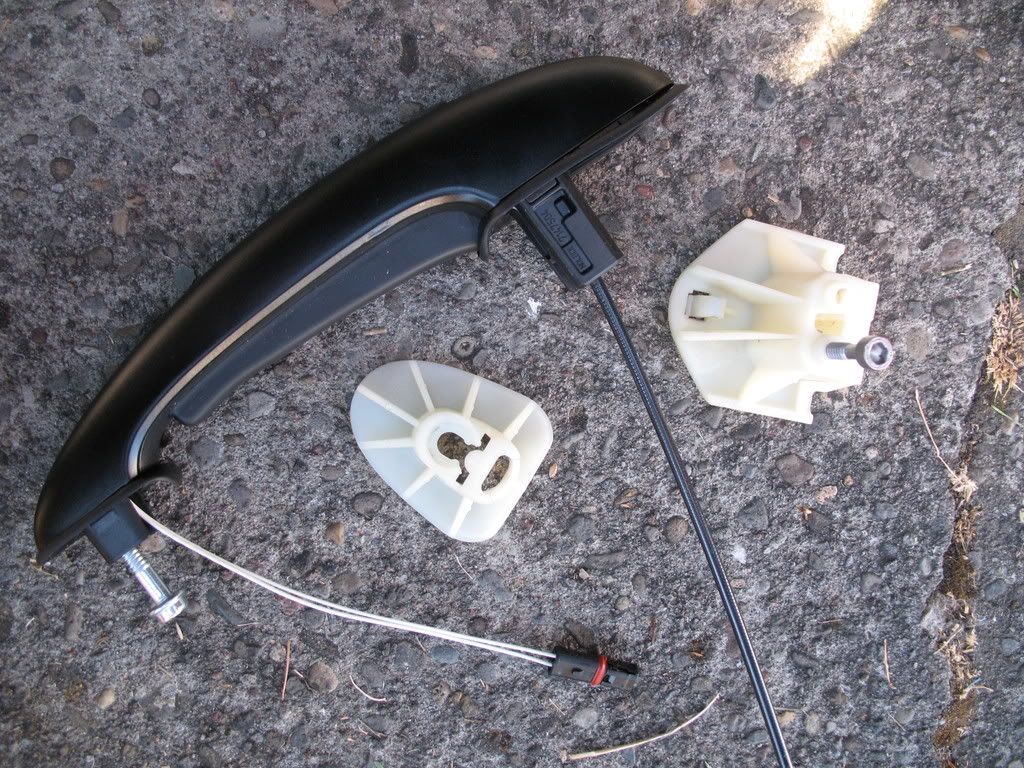
Lastly here is a shot of the satin door handle and it's associated parts.
https://www.northamericanmotoring.co...highlight=door
Ok. Following the steps mentioned in this thread.
Step 2: you do not need to disconnect the light in the arm rest.
Stop 6: Remove the speaker as mentioned. There are a total of 11 torx T30 shoulder screws to remove. If it's not a T30, leave it alone!
Step 8: Peer inside the hole where the speaker goes to see the L shaped bracket that connects up to the window track. This is where a T handle torx wrench inserted through the bottom of the door would come in really handy. I only had torx bits to use with my socket wrench, but that worked ok.
Step 10: This is explained rather well actually. At this point you would definitely benifit from a ratchet wrench with a T25 bit. The door will be hanging on by these last 3 screws. They are facining in the opposite direction of all the other T30 panel screws you have removed.
Moving beyond the door panel removal. Peer inside the door and you will see that the door handle is held in place by two 5mm allen bolts. Disconnect the black door handle cable, it just slips into place. You will see a rubber flap covering some holes in the door near the handle. Use a 5mm ball end allen wrench through the hole to get to the far side door handle screw. The other handle screw can be removed with an L key allen or better yet, an allen bit on the socket wrench to speed up a very tedious process!
Here is a shot of the white blastic block that the door handle mates to. That block snaps into the door. You will see a silver 5mm allen bolt to remove as well as the cable harnes below it.
Here is the shot of my L key to get to this bolt. When reinstalling the bolt I had to use a socket extension on the end of the allen key to get enough torque to tighten the bolt all the way. A t handle ball end allen would be ideal here.
Here is a shot of the other allen bolt. Notice the tight working space. I would have really liked an allen bit on a socket wrench for this bolt. I used my L key and it's rather tedious. You can also see the plug for the comfort access. It's wrapped in a fabric tape. I had to cut the tape to disconnect it.
No more chrome!
Lastly here is a shot of the satin door handle and it's associated parts.
Last edited by amazingrando; 07-27-2008 at 02:13 PM.
#22
07-24-2008, 11:57 PM

#23
07-25-2008, 12:12 AM
Auto on Sport Button guy
#24
07-25-2008, 03:02 PM

Only do it if you REALLY don't like the chrome
Did this on my R53. I LOVE the color matched handles but it was a pain to do. I bought a whole bunch of new tools that were best suited for the job and it's very time consuming. I took my time on both sides and it took me about 4-5 hours. If you are on the fence about the look of the handles, it's probably not worth the money or effort. BUT if you are looking to dechrome or if you want to add a detail that most people won't have, I'd say it was worth the effort, but it's not for the faint of heart.
#25
07-25-2008, 04:48 PM
Auto on Sport Button guy