Interior/Exterior My R56 Joey Mod... and how to do it
#1
 04-09-2008, 10:41 AM


My R56 Joey Mod... and how to do it
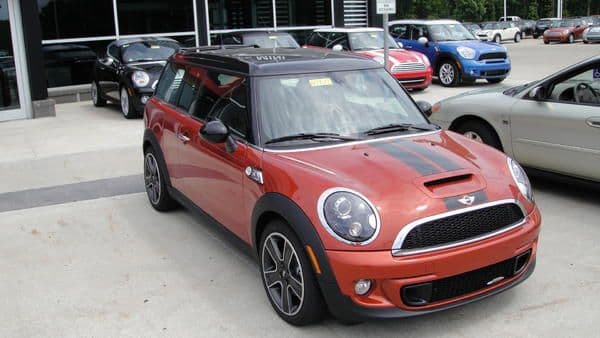
Let the black out process begin. After seeing this mod in person on a local mini (shooler) I came to the conclusion that I had to do it, it just looks amazing to me. There seemed to be no real official how to Joey Mod for the R56, so here I have a basic rundown of how I went about it, not that my way is the only way, but perhaps enough to help someone else out. I did however come to a point where I was scratching my head over how to get the projector trim piece off, that was the hard part.
Removing the headlights is rather easy, just remove the four 10mm bolts, unplug the headlight, and remove the 2 torx screws that hold the power wash assy on.
To get the headlights apart I used a heat gun. I takes a little patience, but just work your way around the headlight seam, using a large enough flat blade screwdriver to pry it apart. There are 2 metal clips that need removing as well. The benefit to doing it this way being that you do not need to remove the xenon bulbs.
4 torx screws separate the chrome piece from the clear and another 4 torx screws for the turn signal assy.
Now for the tricky part. To get the projector trim piece off, you need to release at least one of the two clips that hold it in (see picture) I used my screw driver to reach in and release it.
You will see a small T8 torx screw holding the clear lens in place, as well as a couple of clips. Keep in mind that most torx bit sets only go down to a T10. I had to go to the hardware store and buy a small bit set. These two pieces snap together.
So there ya have it, two parts to be painted and no masking required. As far as paint goes, I used Krylon fusion flat black and Chili Red paint from Minspeed. The trim pieces that I painted body color also recieved 3 coats of Krylon clear.
Update: I thought it might be good idea to mention that after a year or so the mod has held up really well, the only thing I would do different...high temp paint! I have also had my headlight trim and grill surround re-done with plasti-dip. I really like the look of both, so if I were doing it all over again from scratch, I would just get the plasti-dip, because it's readily available, durable and looks fantastic.
Last edited by amazingrando; 08-03-2009 at 02:27 PM.
#2
04-09-2008, 11:15 AM

#3
04-09-2008, 01:00 PM

 That was some work, well now you have saved others from having to do what I did! Good work!
#4
04-09-2008, 01:59 PM
Yeah, it really drove me nuts trying to figure out how to get that thing off.
Last edited by amazingrando; 04-09-2008 at 05:45 PM.

#7
04-09-2008, 08:15 PM

6th Gear
Join Date: May 2007
Location: Sacramento, Ca
Posts: 1,442
Likes: 0
Received 0 Likes
on
0 Posts
looks great!
heres a little update on mine though...
I was checking out my lights the other day and i noticed that some of the paint on the piece that attaches to the actual lens is blistering... im pretty sure its a sign that the paint is too hot.
I think the heat is coming from the metal "box" under the light, the ballast.
The same parts on both lights are experiencing the same deal but those are the only parts that are showing those signs.
I will open up the lights again when i get a chance and inspect the other parts. I will then strip the paint on the messed up parts and repaint them with Krylon High temperature paint.
Trending Topics
#8
04-09-2008, 10:00 PM
#9
04-09-2008, 10:02 PM
6th Gear
Join Date: May 2007
Location: Sacramento, Ca
Posts: 1,442
Likes: 0
Received 0 Likes
on
0 Posts

thats why i think its the ballast producing the heat... not the bulb since the projector shroud looks fine. Luckily this is the easiest part to take off . Should be a 15 minute job to get that piece separated from the main light housing... including baking time.
I will take them apart maybe this weekend and do some digging.
Last edited by ghosthound; 04-09-2008 at 10:07 PM.
#10
04-09-2008, 10:09 PM
#11
04-10-2008, 01:59 AM
6th Gear
Join Date: May 2007
Location: Sacramento, Ca
Posts: 1,442
Likes: 0
Received 0 Likes
on
0 Posts
#12
04-11-2008, 07:56 PM
Join Date: Mar 2008
Location: Cincinnati, Ohio
Posts: 622
Likes: 0
Received 0 Likes
on
0 Posts
#13
04-12-2008, 02:48 PM

5th Gear
Join Date: Apr 2006
Location: Richmond, VA
Posts: 801
Likes: 0
Received 0 Likes
on
0 Posts
#14
04-12-2008, 03:39 PM
Yep, I sanded mine. The paint is still soft though, but that is somewhat typical of spray paint, could take a month or more to fully cure. I spray painted the metal front entry door to my house some years back and it's hard as a rock now, but it took a while to get there. What I want, is to buy a second set of trim pieces to paint up and have on hand to swap out, then I could just rotate them out as they start to get rock chips.
Last edited by amazingrando; 04-12-2008 at 08:36 PM.
#15
04-13-2008, 01:40 PM
6th Gear
Join Date: May 2007
Location: Sacramento, Ca
Posts: 1,442
Likes: 0
Received 0 Likes
on
0 Posts
ok, i cracked open the lights to investigate the paint issue... as it turns out, the plastic is actually melted and warped from the heat. my best guess is that the black color absorbs a lot more heat than the chrome and it was enough to warp the plastic... i did my best to sand and repaint but since it wasnt necessarily a paint issue... i think i will need to come up with a longer term fix eventually.
I think i may end up getting a thin sheet of aluminum... possibly from a soda can, and shaping it to match the curve of the light and then gluing it in place. the aluminum wont suffer the heat distortion the plastic does so that should solve the problem.
I think i may end up getting a thin sheet of aluminum... possibly from a soda can, and shaping it to match the curve of the light and then gluing it in place. the aluminum wont suffer the heat distortion the plastic does so that should solve the problem.
#17
04-13-2008, 08:05 PM

 [/quote]
 I just had a vision. It'd be real sweet if there was a vent (were the shadow is...just in front of the windshield) in the shape of the shadow. I could see it vent down in towards the front of the car, with honeycomb matching the air scoop vent... Hmmm...too bad I don't have an R56...anyways, back to on topic
Nice Joey mod BTW
#18
04-14-2008, 07:11 AM

4th Gear
Join Date: Oct 2007
Location: Kansas City
Posts: 510
Likes: 0
Received 0 Likes
on
0 Posts
 My sig gives a hint.
#19
04-14-2008, 08:35 AM


#21
04-14-2008, 09:10 AM

#22
04-14-2008, 10:30 AM
#23
04-14-2008, 12:49 PM

#24
04-24-2008, 03:50 PM

I just did this yesterday myself. I found the directions useful but thought the tricky part could use a bit more explanation.
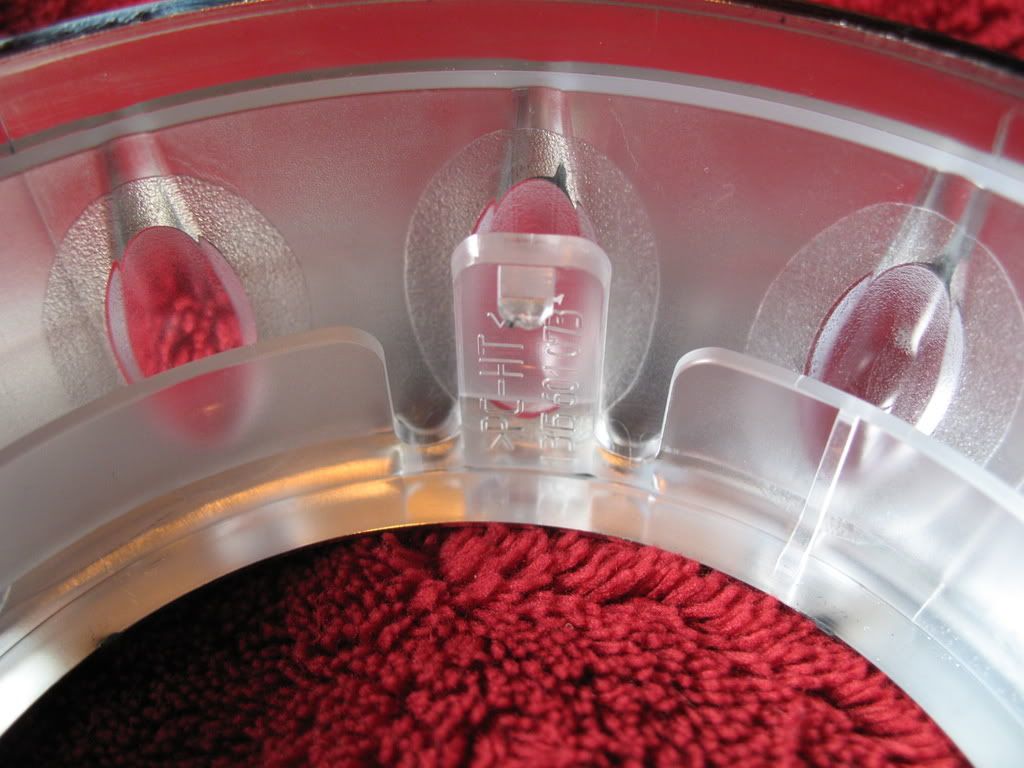
For the additional explanation I would like to say that when you get the part of your headlights that has the actual xenon bulb you're going to need to peer into the dome part. There should be a small gap that is the piece that you're going to paint and the base of the light thing. When you look in there you're going to be looking for a small plastic tab. If I remember correctly they should be located at 12 and 6 o'clock if you're looking at it straight on as if it were mounted on the car.
Once you use your screwdriver or letter opener in my case to release the tabs and pull that piece off, you'll need to get the plastic part removed from the chrome part that you're going to paint. I found this to be pretty difficult until I figured it out. I found an easy way for me was to use my letter opener or thin flathead screwdriver and start to pry the plastic part towards the middle starting near the screw that you removed. I slide my letter opener over to where the first clip is. I then pushed the plastic part above the clip by pushing from the small plastic lens type thing that goes through the hole of the chrome piece. Once you have it over the clip take your screwdriver or whatever and slide it from the other side of the clip over to the 2nd clip. Its too difficult to remove the two pieces by hand even though they are free from each other now. I took a 2nd screwdriver, while the 1st is still wedged in there to keep the plastic above the clip, and put it between the two pieces at the bottom. Then you just twist then move it around the base and keep doing this till the two pieces are free.
I also thought it should be mentioned that you might want to tape up the inside of this chrome piece before you paint it. When I snapped the two pieces together some of the paint rubbed off onto the plastic where it shows through the holes in the chrome. It was hard to get it off so I still have a few small red marks on that part of the plastic.
Enough of my ramblings, here are some pics.


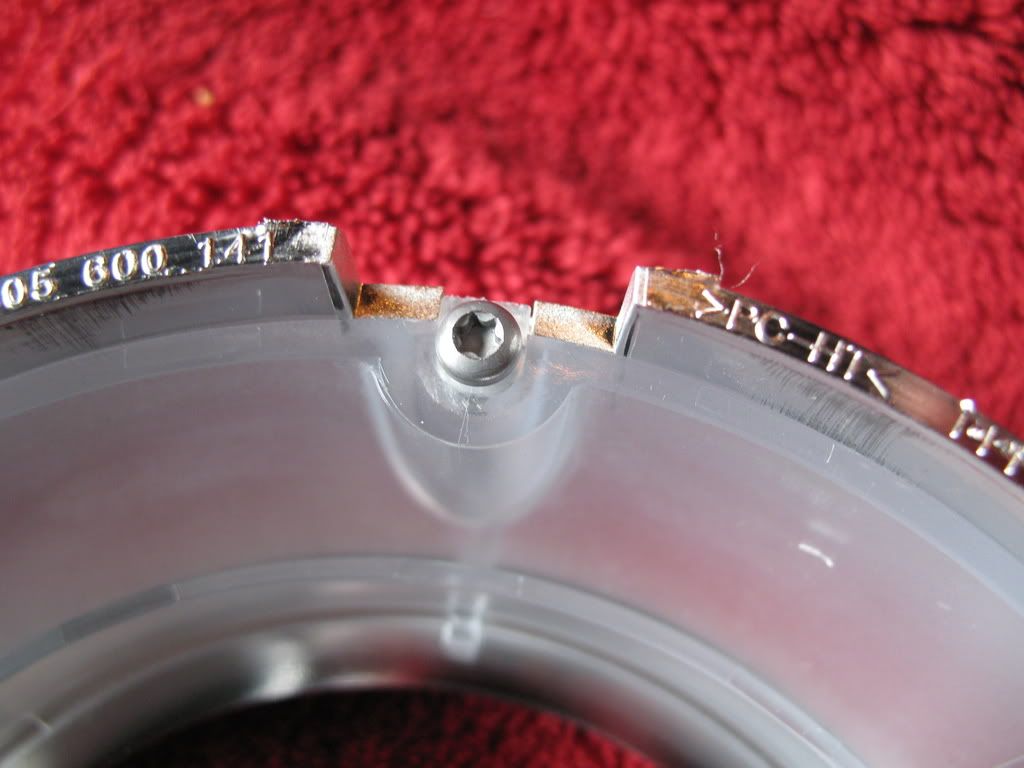
Now for the tricky part. To get the projector trim piece off, you need to release at least one of the two clips that hold it in (see picture) I used my screw driver to reach in and release it.
You will see a small T8 torx screw holding the clear lens in place, as well as a couple of clips. Keep in mind that most torx bit sets only go down to a T10. I had to go to the hardware store and buy a small bit set. These two pieces snap together.
You will see a small T8 torx screw holding the clear lens in place, as well as a couple of clips. Keep in mind that most torx bit sets only go down to a T10. I had to go to the hardware store and buy a small bit set. These two pieces snap together.
For the additional explanation I would like to say that when you get the part of your headlights that has the actual xenon bulb you're going to need to peer into the dome part. There should be a small gap that is the piece that you're going to paint and the base of the light thing. When you look in there you're going to be looking for a small plastic tab. If I remember correctly they should be located at 12 and 6 o'clock if you're looking at it straight on as if it were mounted on the car.
Once you use your screwdriver or letter opener in my case to release the tabs and pull that piece off, you'll need to get the plastic part removed from the chrome part that you're going to paint. I found this to be pretty difficult until I figured it out. I found an easy way for me was to use my letter opener or thin flathead screwdriver and start to pry the plastic part towards the middle starting near the screw that you removed. I slide my letter opener over to where the first clip is. I then pushed the plastic part above the clip by pushing from the small plastic lens type thing that goes through the hole of the chrome piece. Once you have it over the clip take your screwdriver or whatever and slide it from the other side of the clip over to the 2nd clip. Its too difficult to remove the two pieces by hand even though they are free from each other now. I took a 2nd screwdriver, while the 1st is still wedged in there to keep the plastic above the clip, and put it between the two pieces at the bottom. Then you just twist then move it around the base and keep doing this till the two pieces are free.
I also thought it should be mentioned that you might want to tape up the inside of this chrome piece before you paint it. When I snapped the two pieces together some of the paint rubbed off onto the plastic where it shows through the holes in the chrome. It was hard to get it off so I still have a few small red marks on that part of the plastic.
Enough of my ramblings, here are some pics.
#25
06-03-2008, 02:35 AM

i have one question do we need to sand all the chrome paint off first?? and what type of sand paper u use?? sry for this dumb question
 and is there any chance that something will go wrong?? and if something do go wrong how much will a new headlights cost??
thanls
and what type of sand paper u use?? sry for this dumb question and is there any chance that something will go wrong?? and if something do go wrong how much will a new headlights cost??thanls
Last edited by PH1L; 06-03-2008 at 02:44 AM.