When you click on links to various merchants on this site and make a purchase, this can result in this site earning a commission. Affiliate programs and affiliations include, but are not limited to, the eBay Partner Network.
This how-to describes how to install the Cravenspeed short shifter (link), though the steps should be fairly similar for other short shift kits out there. It's not terribly difficult, but it can be frustrating at times. I would estimate 3-5 hours, depending on skill level and what route you go for the dust cover (more on that later).
I chose the Cravenspeed because it is able to be adjusted up and down. I really liked my B&M short shifter on my R53, but other people seemed to have trouble with the short throw and extra umph required to shift. I don't let other people drive my car too often, but it's nice to be able to lengthen the throw if needed.
Tools needed:
Jack stands - 2 should work, but 4 is better
Small flathead screwdriver(s)
Large flathead screwdriver
8mm socket
10mm socket
13mm socket
16mm socket
Torx T30 socket or driver
Torx T40 socket or driver
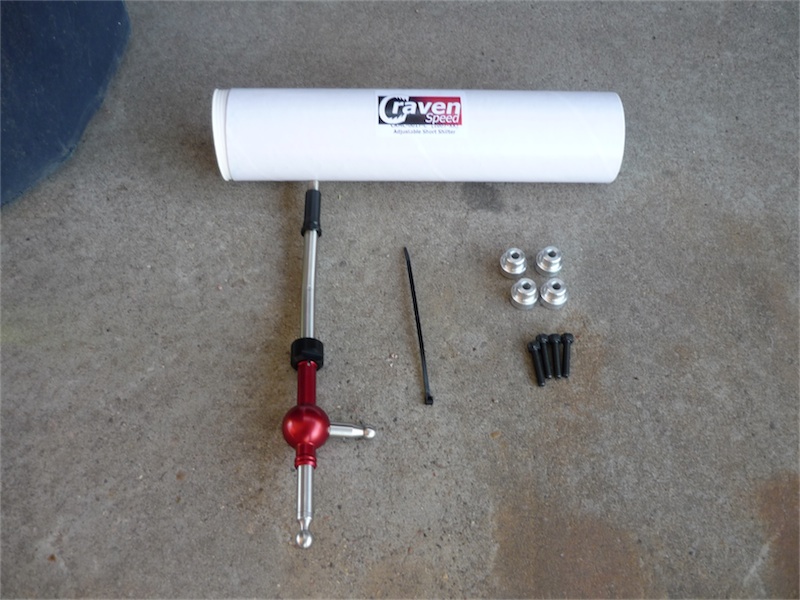
Step 0: Here's what you get in the kit. Short shifter, zip tie for the shift boot, and bushings for removing play from the shift box.
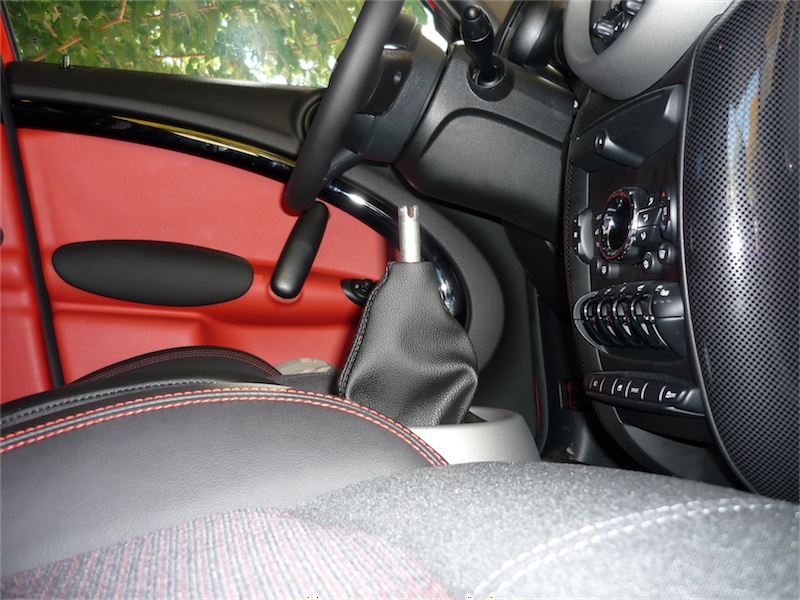
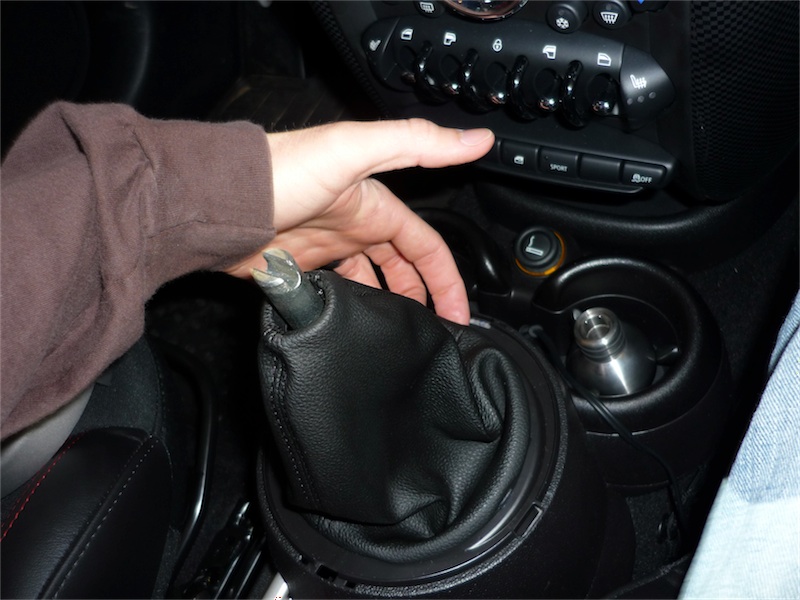
Step 1: Remove the stock shift ****. This can be done by pulling straight up on the **** until it pops off. Just don't hit yourself in the face!
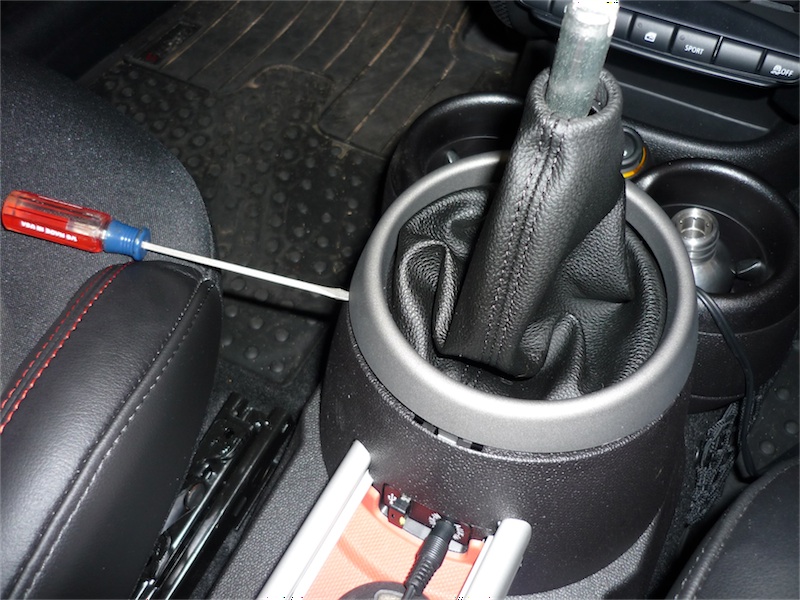
Step 2: Next is to remove the plastic trim around the shifter. I used a couple of small flatheads to ease it off. You can also use a plastic putty knife or credit card if you're worried about damaging the plastic. The ring has 4 clips, one at each cardinal direction.
Step 3: Remove the shift boot. This can be done with just your fingers (both hands are recommended). Just squeeze it inward a bit as you pull up and it should pop off.
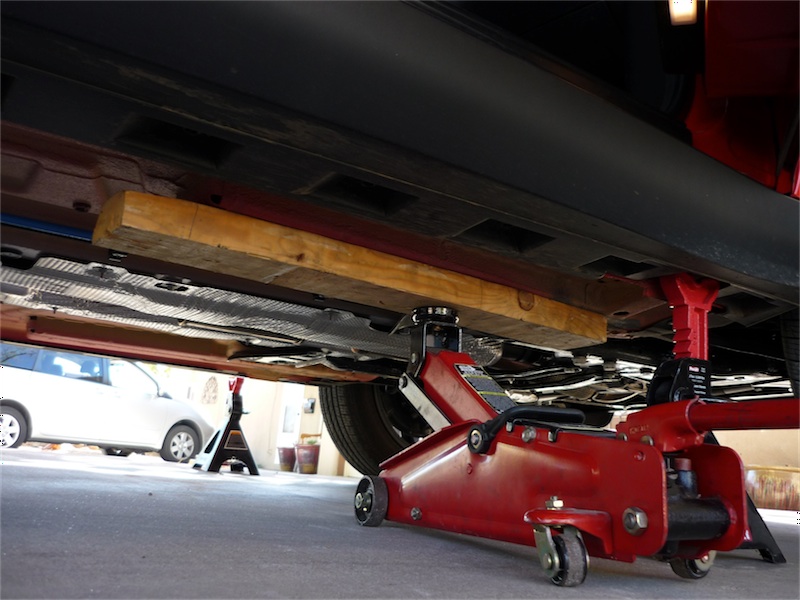
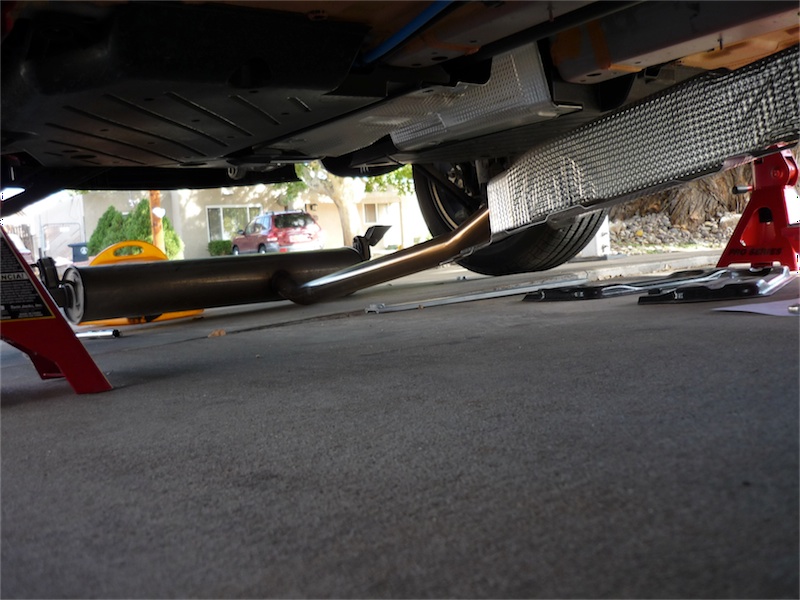
Step 4. You're done inside the car for now. Next step is to jack the car up. This pic shows where I put the jack, using a 2x4 to spread the load a bit. Placing the jack here will allow you to put two jack stands on one side, then do the other side. There's a perfect cutout in the trim that the jack stands fit into.
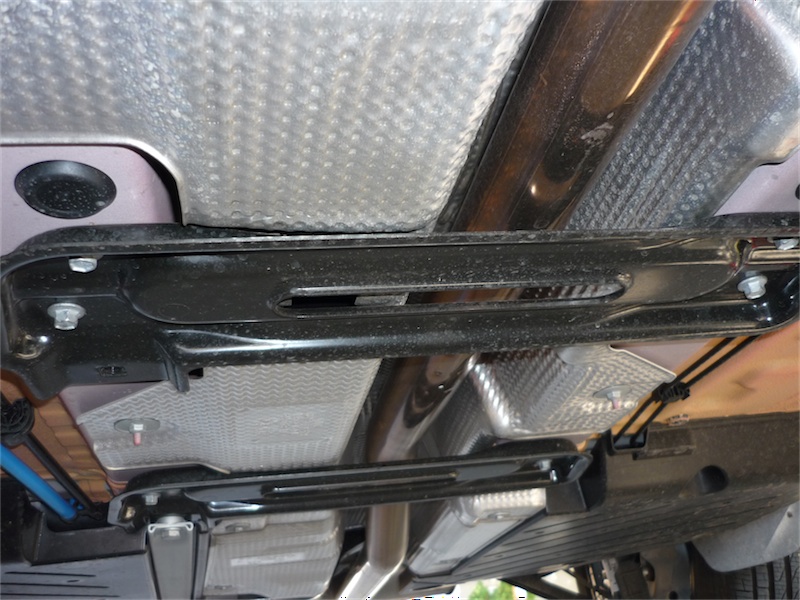
Step 5: The next task is to lower the exhaust. There are two black brackets underneath the car that must be removed. Each is held on with 4 10mm bolts.
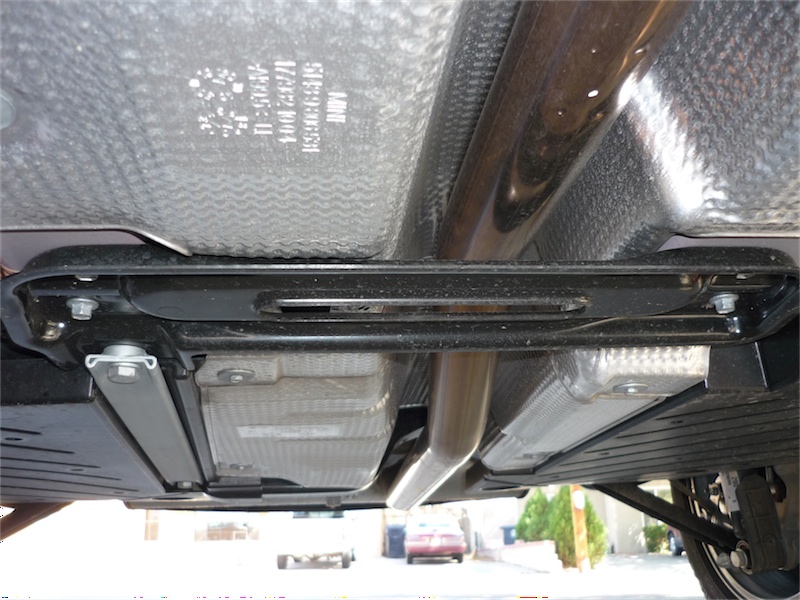
Step 6: The rearmost bracket also an additional support piece that must be removed. It is the long silver piece in the left side of the picture. It is held on with 2 16mm bolts. There are also 2 8mm head shield screws just beyond this bracket that should be removed. There are 10 10mm nuts holding the rest of the heat shield on the car. You can either remove them now or wait until the exhaust is down.
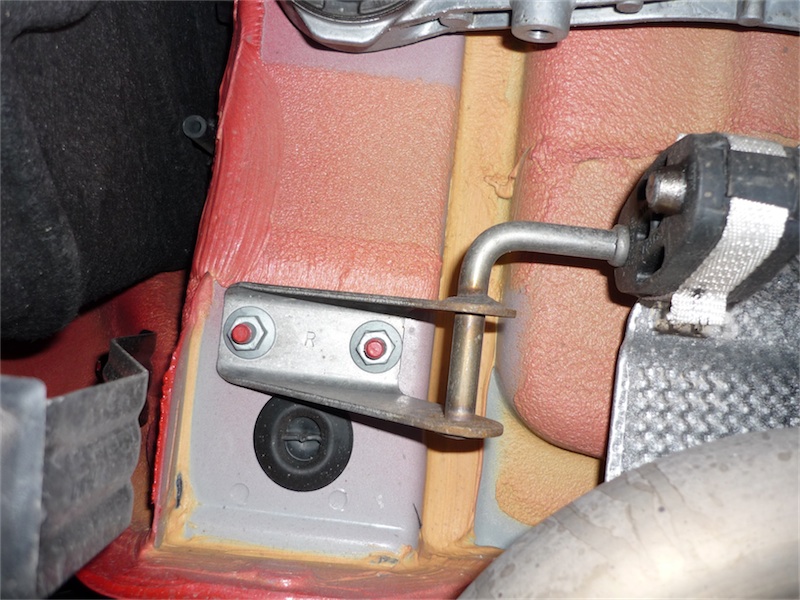
Step 7: At the rear of the car, the muffler is held up by two brackets, each with 2 13mm nuts. Remove these, and CAREFULLY lower the exhaust. Note: it's kind of awkward to lower, so you may want to put a box underneath in case you drop it.
Step 8: After the exhaust is on the ground, lower the heat shield and slide it toward the rear of the car so you can get to the shift box.
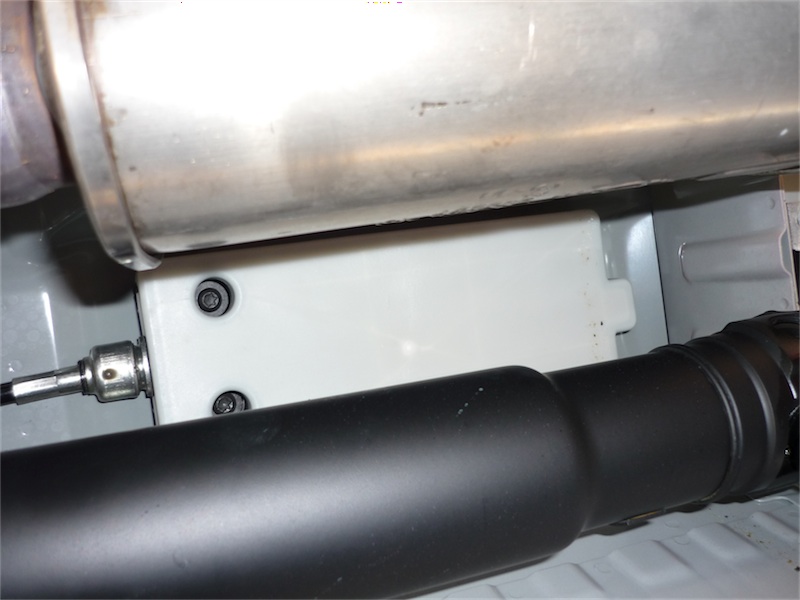
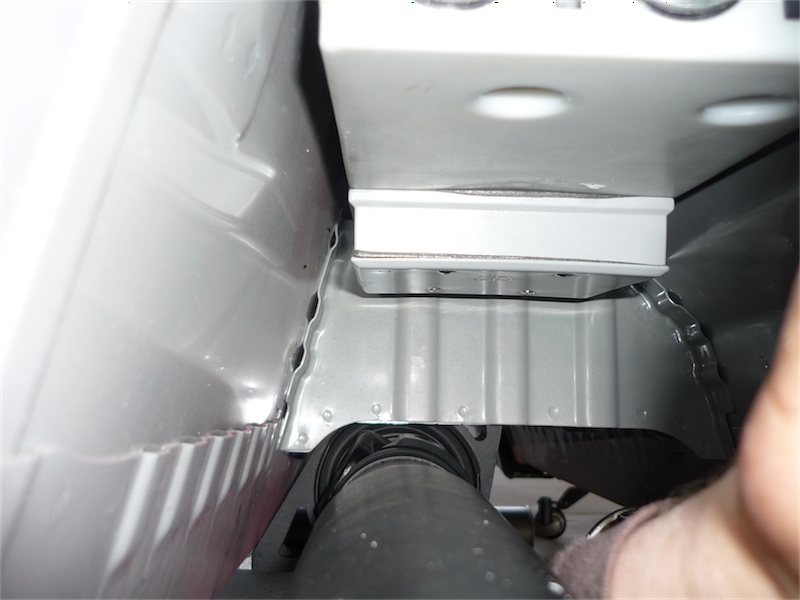
Step 9: Here you can see the underside of the shift box, covered by a white dust cover. Top pipe in the picture is the exhaust, and the bottom is the driveshaft for the All4. If you don't have the All4, you will have a much easier time of getting to the shift box.
Step 10: The shift cover is held on with 9 tabs, 3 on each side, 2 in the front and 1 in the rear. Getting the cover off is really easy if you have a dozen slender arms with bi-directional elbows, but quite tricky for the rest of us. My recommendation is to make a hooked tool to release them. I used a paint can opener and put a 45 degree bend in it, but bending a flathead may also work. I don't think there's any way to get to the 3 on the passenger side, but if you can get the other 6 to release, it should pop off.
Step 11: Here you can see the shift cables that attach to the bottom of the shift lever. You need to pop these off. I used a large flathead screwdriver and got them off without too much effort. I've read that some people had luck with the claw on a hammer if the screwdriver doesn't do it for you.
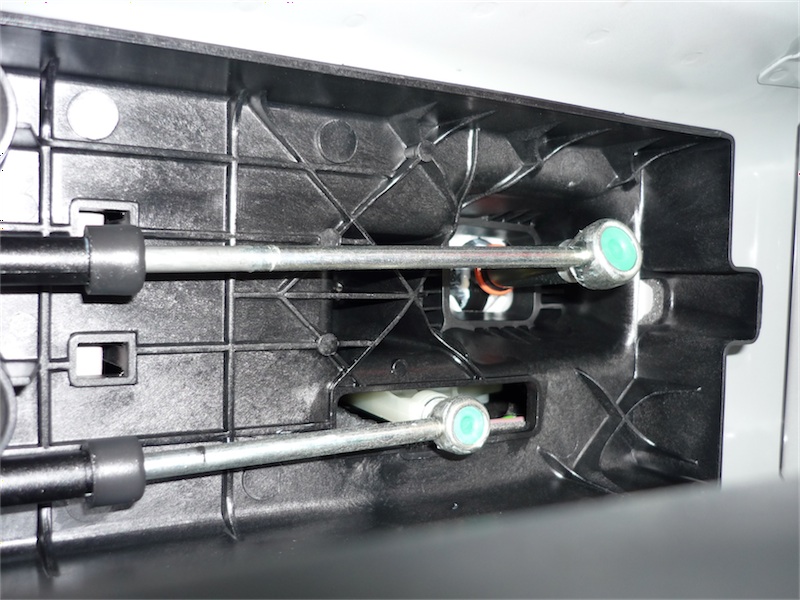
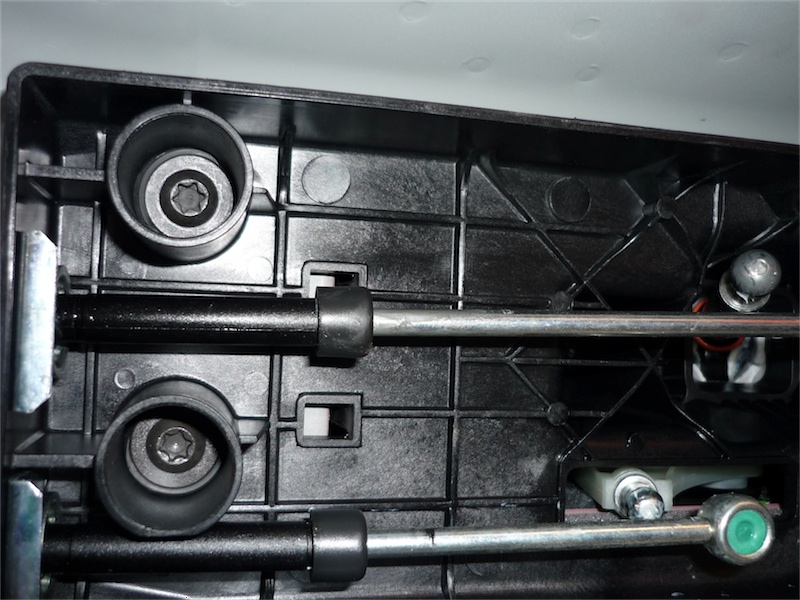
Step 12: There are 4 bolts holding the shift box to the car with rubber grommets. Replacing these with the included metal bushings gets rid of some of the slop of the standard shift assembly. You can unscrew these bolts using a Torx T40 socket or driver. [Note for those without All4: since you don't have a driveshaft in the way, you can probably remove the entire shift box, which makes the next steps a little easier. To do this, use a pair of slip joint pliers to pull out the two silver clips on the left side of the picture. This will allow you to slide the cable links out of the box and pull the whole shift assembly out of the car. I don't know for sure that this works, but that's how I did it on my 2003 and it made things easier.]
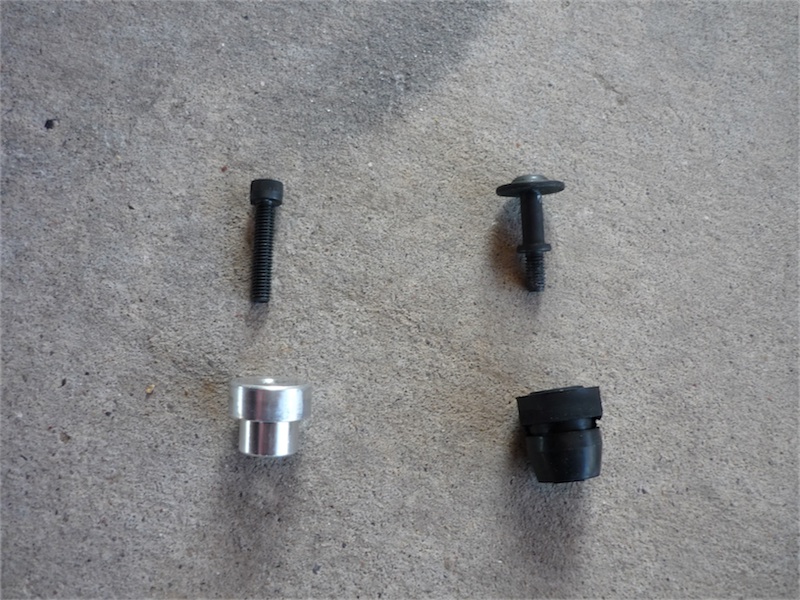
Step 13: Remove the 4 screws/rubber bushings. You can pry out the two rear ones with a screwdriver and push the 2 front ones out from inside the car. Replace with the metal ones using the supplied bolts. You want to insert the bolt into the large end of the bushing and then insert upward into the car. The bolts have an allen head on them, but I used a Torx T30 socket to tighten them because it was already under the car with me (there wasn't any play, so I didn't worry about stripping anything).
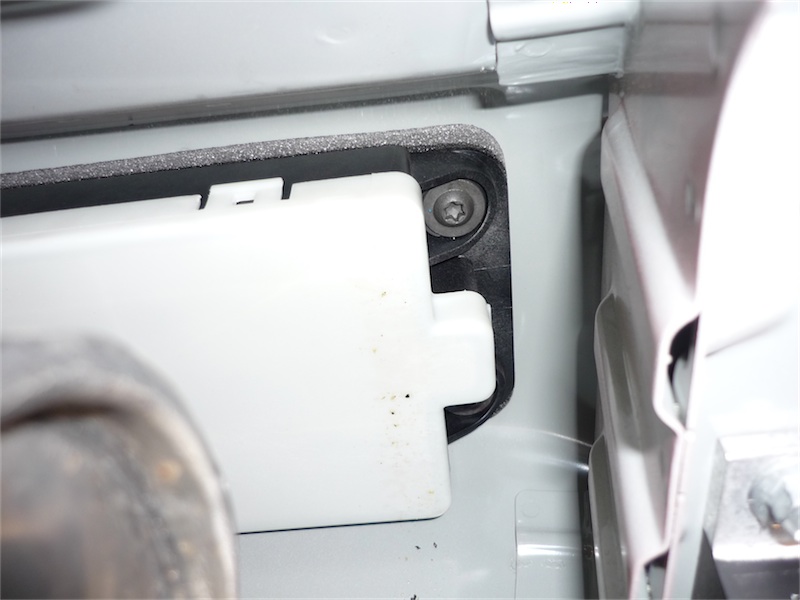
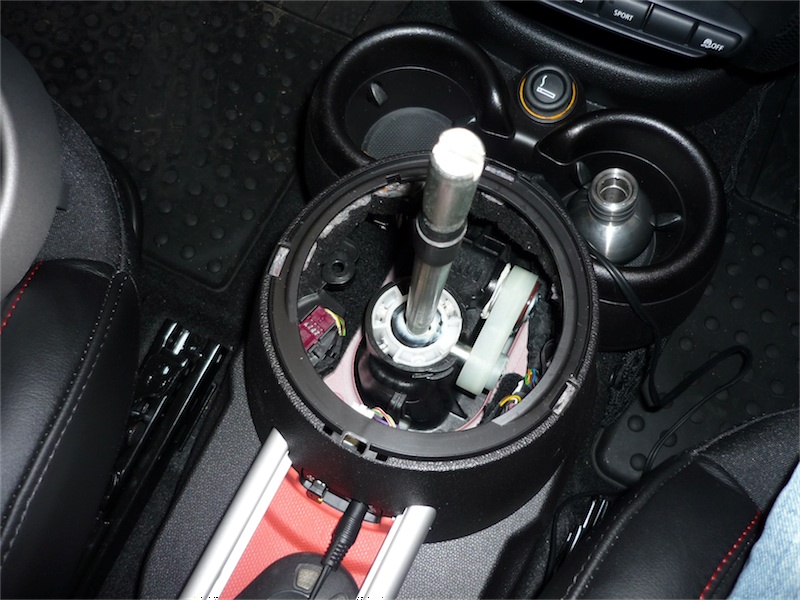
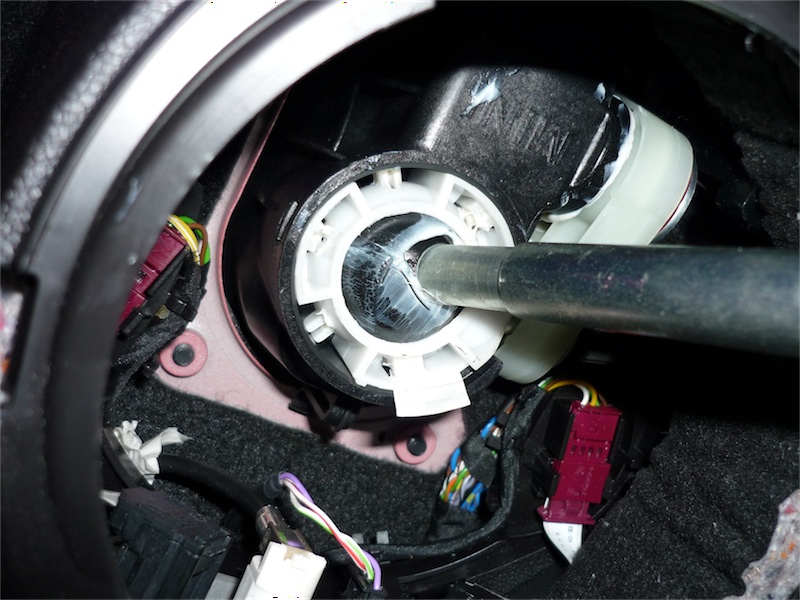
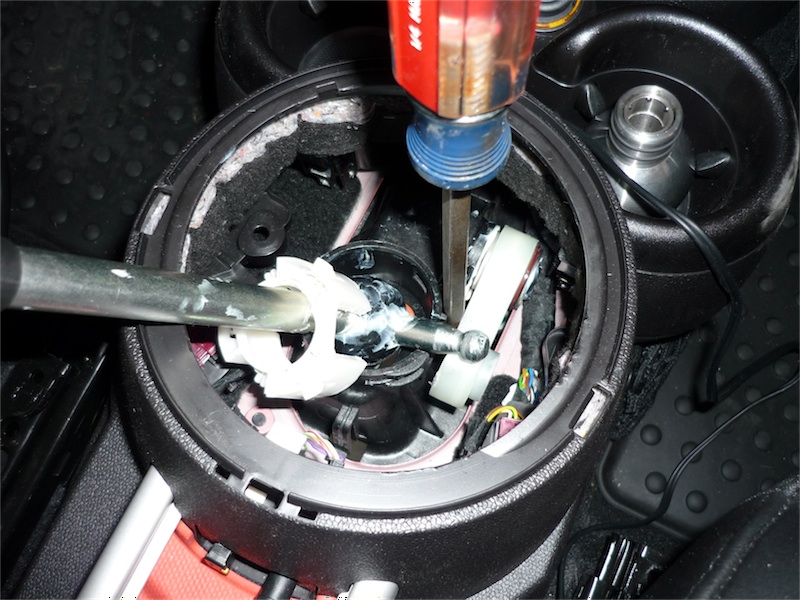
Step 14: Now you're finally ready to remove the old shift lever, which is probably the most frustrating part. First you need to remove the white plastic housing around the base of the lever. It is held in with 3 clips that need to be all depressed simultaneously.
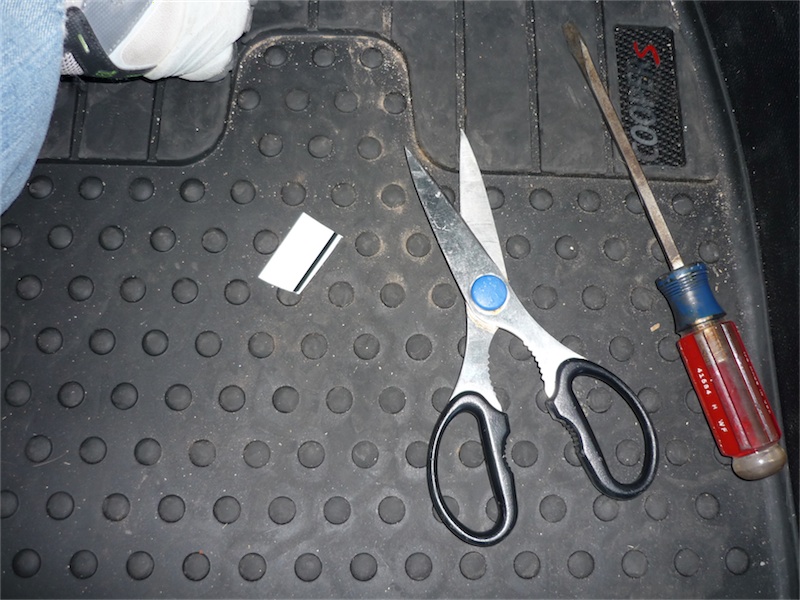
Step 15: To keep the 3 clips depressed at the same time, you need something thin and flexible, yet sturdy enough to be pushed into the gap. I used an old garage sale sign, and cut 3 small pieces.
Step 16: Here you can see one of the pieces in place. It's a tight fit, but getting all three in there will release the housing around the lever.
Step 17: Next is to free the part of the lever that juts to the right 90 degrees. I used a screwdriver to SLOWLY pry the plastic guide away far enough to get the arm out. The plastic will bend quite a bit, but try not to pry so hard that you break it.
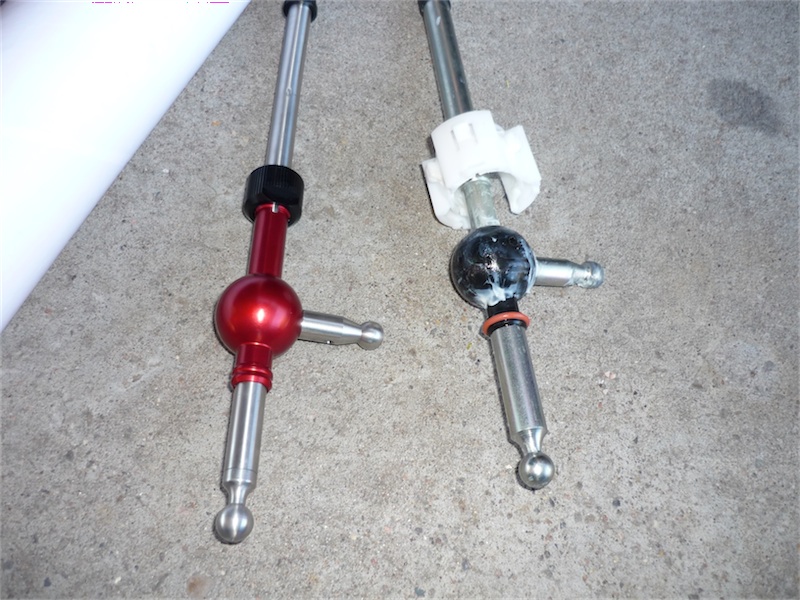
Step 18: Move the housing and orange o-ring to the new shifter.
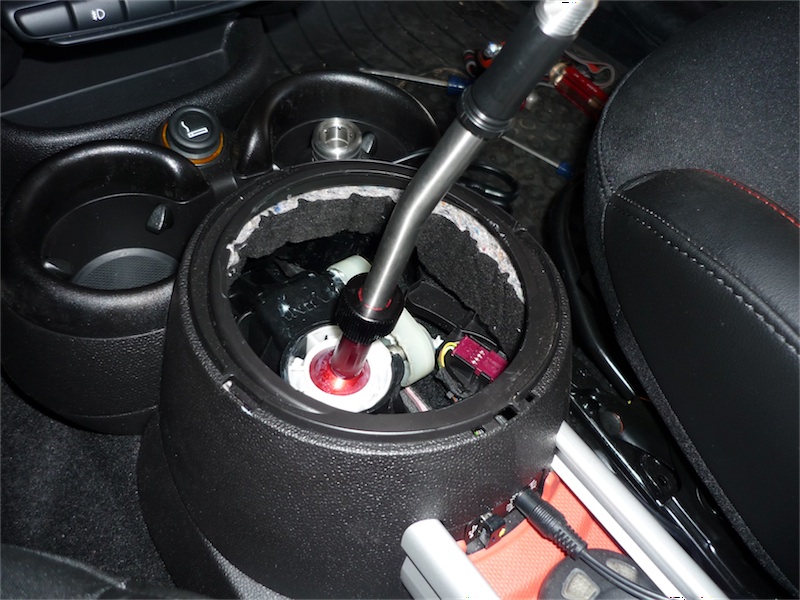
Step 19: Now basically do everything in reverse. Getting the new shift lever back in the box is tricky, but once that step is done, it's smooth sailing.
================================================== ==================
Interlude: You have a decision to make when it comes to putting the white dust cover back on. The short shift lever extends further than the stock dust cover when on lower settings. This means with the cover back on, you are limited to longer throws.
Options:
1. Put the stock cover back on. You can only shorten the throw by about 1/4" before it bottoms out.
2. Leave the cover off. This allows full range of the short shifter, though this exposes the shift box to road dirt (though the heat shield will keep out most of it).
3. Cut a hole in the cover. This allows less dirt in, but still exposes the shift box to the elements.
4. Buy an extension to the cover that allows for more travel. Outmotoring sells one from NM Engineering for around $90 (link). It adds about another inch, which allows almost the shortest setting.
5. Build your own extension. The next few steps talk about making your own extension for around $10. Like the NM Engineering one, it adds about an inch and allows almost the shortest throw.
================================================== ==================
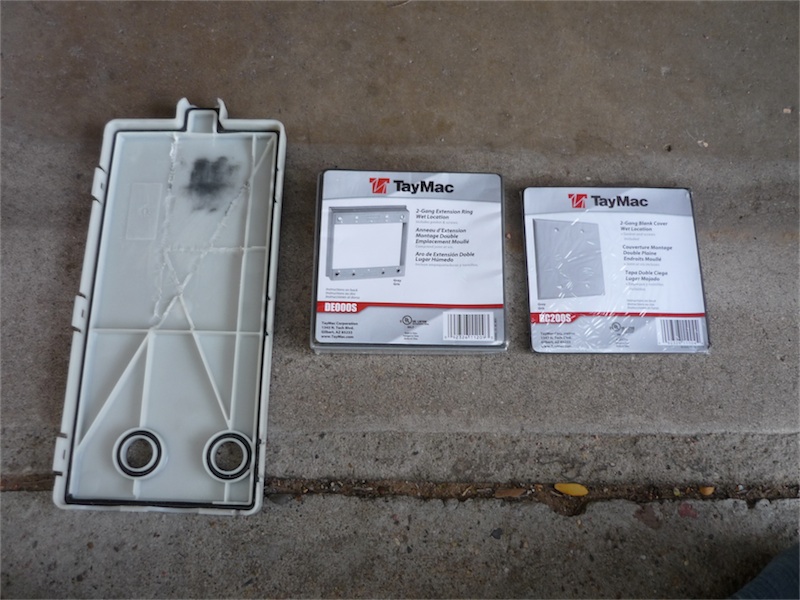
Step 20: Here you can see the black scuff marks where the shifter rubs on the dust cover. I tried trimming the inside and grinding it smooth, but it didn't really make much difference. To the right are the two parts needed to make the extension box (Taymac 2-Gang Outlet Box Extension and Taymac 2-Gang Blank Cover).
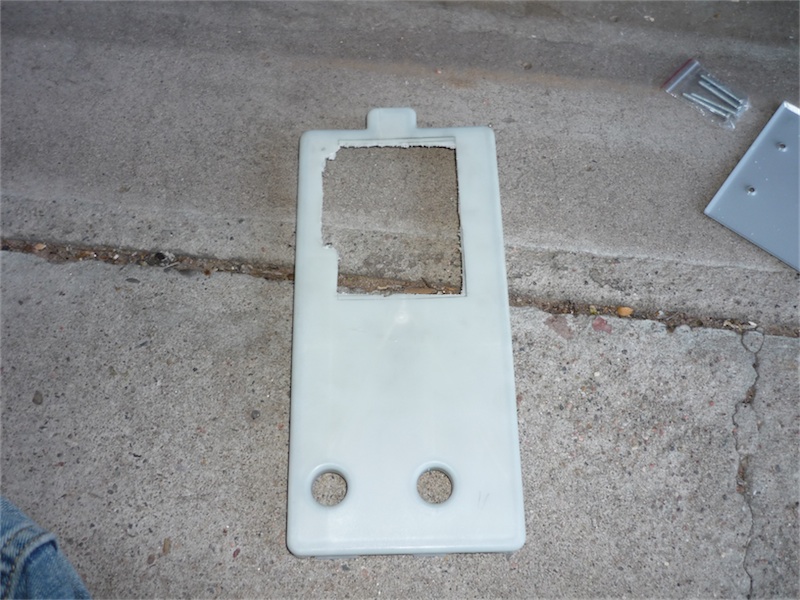
Step 21: I used my good friends Mr Hacksaw and Mr Dremel to cut out a hole in the cover. You have to cut out a little extra on one side so you can reach 5th and 6th without hitting anything.
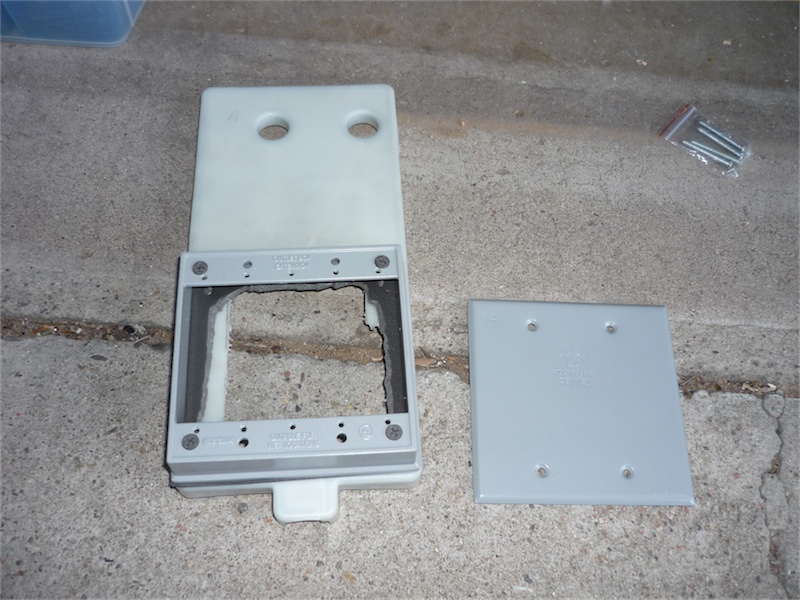
Step 22: Attach the outlet box extension, then attach the blank cover on top. I used drywall screws since I already had some, but any should do. Both parts come with gaskets included, which should keep out any dirt or water.
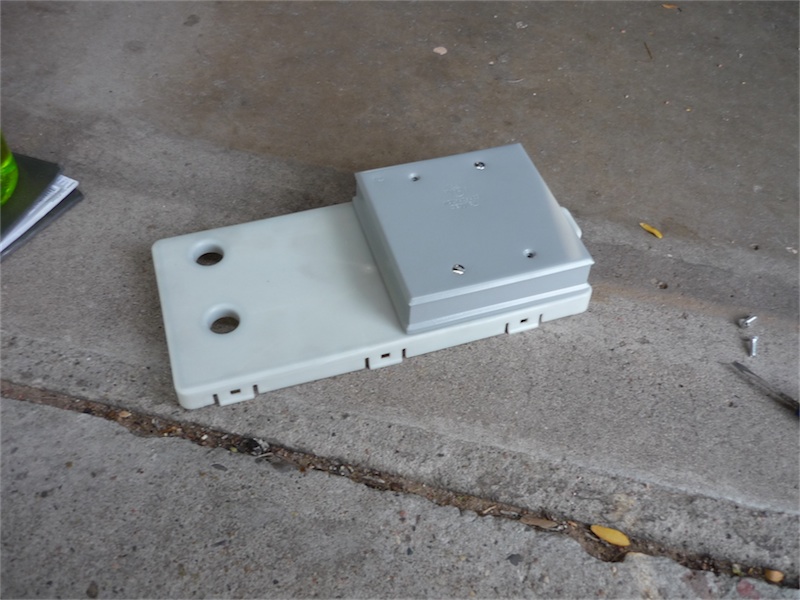
Step 23: Once it's fully assembled, it looks very tidy.
Step 24: Just pop it back into place under the shift box. It should just barely fit between the exhaust and driveshaft.
Step 25: After everything underneath the car is fully assembled, you can use the zip tie included with the new shifter to shorten up the shift boot. Pop out the collar at the top, flip inside out, and insert onto the shifter. Zip tie where you want it, flip the shift boot right-side out, then snap back into place (I don't have a picture of this because I'm going an alternate route).
Alternately, you can get a shift well cover from Cravenspeed (link) that eliminates the shift boot and allows you to adjust the throw without taking anything apart. I'll update the thread with pictures as soon as my cover gets here (I'm just riding with an open shift well in the mean time).
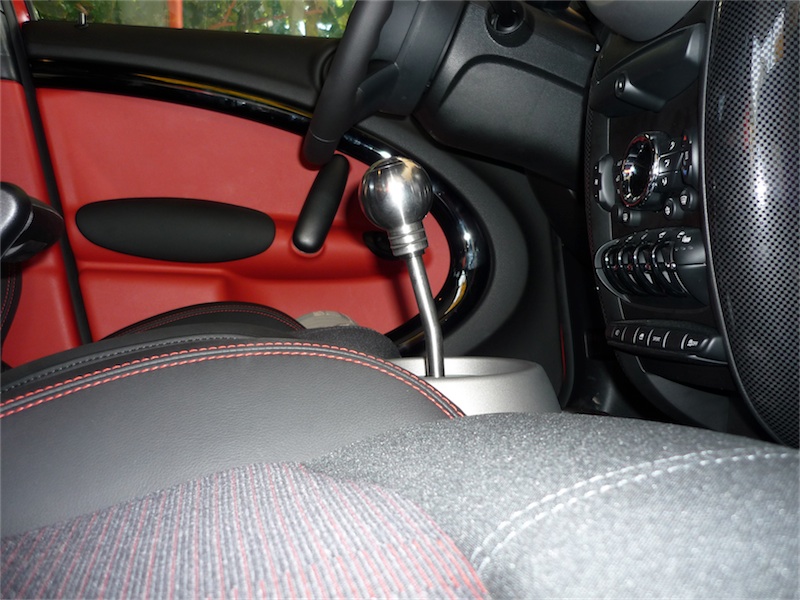
Longest throw:
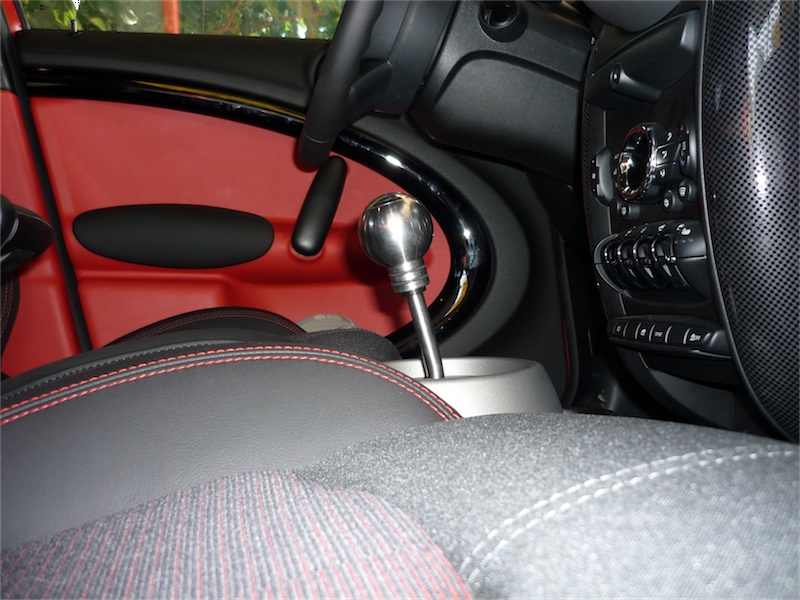
Shortest throw:
================================================== ==================
Final thoughts:
Overall I've been really happy with the shifter so far. I can't stop moving it up and down!
The do-it-yourself extension box turned out very well. It was somewhat tedious and required a number of trips under the car to test fit, but if you have the time and want to save a few bucks it's worth it.
Let me know if you have any questions or a better method for a particular step.
I finally got my Cravenspeed shift well cover, and despite it saying Countryman on the product page, it doesn't fit! I guess I'll have to put the boot back on until some other option exists.
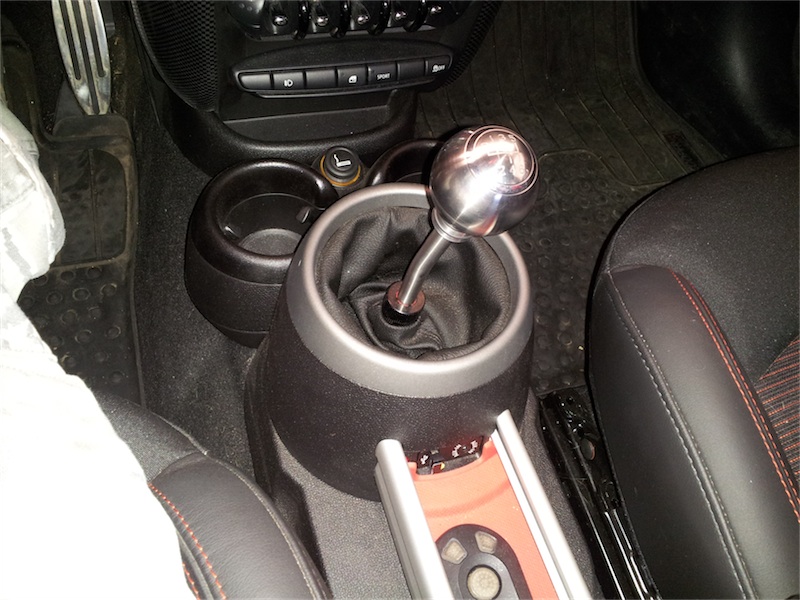
I ended up bunching up the shift gaiter under the adjustment point on the shifter, since I didn't want to ride with an open shift well. I did this forever ago, but just got around to taking a picture last week.
I jacked up the car yesterday with the intention of removing the cover underneath because I was tired of it rubbing in the lowest setting*, but noticed it wasn't bottoming out at the base of the shifter, but on the shift linkage. It was hitting some of the cross pieces on the cover, and not on my extension box like I assumed. I trimmed a bit with a pair of sidecutters, and now can go to the lowest setting.
*I tried locking it down just above the lowest setting, but it tends to slowly drift downward over a week or so until it's bottoming out again.
The inside of the shift box was pristine, so I'm very pleased with it, especially now that I can go all the way down.
I'm going to do this mod as well. Great write-up. Can you shoot a pic of the Cravenspeed cover that wouldn't fit. From the write up, sounds like you could create something to work. If not I bet the collective NAM group could.
They first shipped me the 1st Gen by mistake which wouldn't fit, then they shipped me the 2nd Gen which was even further off. They have since updated the page to say "Not Countryman Compatible".
Apologize for waking up the dead lol but I'm wondering if the extension for the cover needs to be done for an R56 also as I can't seem to find anything on NAM or Google in regards to it.
Thanks for bringing this up from the dead! I've been wanting to do a short throw, but didn't want to spend $90 on the new cover. This DIY makes me want to "headdesk" and say "why didn't I think of that?" :-D
5JCW6, this extension for the cover would need to be done also. Should be pretty much the same.
Thanks for waking this up. I'd never seen the thread or the use of the (Taymac 2-Gang Outlet Box Extension and Taymac 2-Gang Blank Cover). It's a cool idea which fits surprisingly well.
Thanks for bringing this up from the dead! I've been wanting to do a short throw, but didn't want to spend $90 on the new cover. This DIY makes me want to "headdesk" and say "why didn't I think of that?" :-D
5JCW6, this extension for the cover would need to be done also. Should be pretty much the same.
Great thanks for answering lol let me know if it works for you!
Thanks for waking this up. I'd never seen the thread or the use of the (Taymac 2-Gang Outlet Box Extension and Taymac 2-Gang Blank Cover). It's a cool idea which fits surprisingly well.
No prob, it's a genius idea hopefully helps a couple of ppl out!!
Im bumping this cause you just saved me $80 on a nm cover, and its a great writeup. The guy on youtube ripped apart his interior, and totally removed the exhaust, which I was not looking forward to. Im glad to see it doesnt need to happen - it will save a lot of time!
Has anyone else installed an updated fulcrum bushing up top (wmw or other) and can comment on the feel/change from stock? Someone said it made it grind and went back to the stock white cup.
4641249[/url]]Excellent write up, thank you.
Found a Shift Well Cover option & have it on order. Will update results. https://black-flag-usa.myshopify.com/
 10-29-2011, 08:01 AM