How To Installing a Escort Radar detector with SmartCord
#1
 10-18-2009, 06:56 PM


Installing a Escort Radar detector with SmartCord
First get the radar detector, for this install we'll use and Escort 8500, with the S7 radar antenna.
First remove the plastic dash piece behind the steering wheel/ tachometer. Remove the rubber seal, so it doesn't get damaged during the install process and there's more room to work. In the process of removing this piece also take the parcel shelf out, for easy of working space.
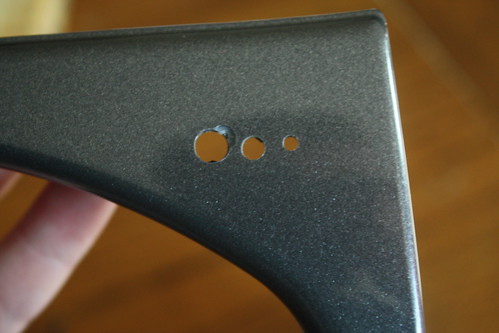
Then mark and drill holes, two for the LEDs and one for the mute button.
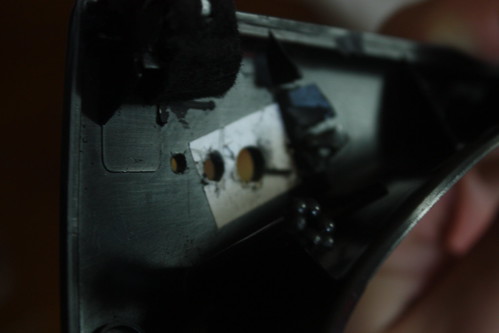
Then use a dremel type tool remove some of the supporting plastic off the rear of the panel so there's room for the smart cord box.....
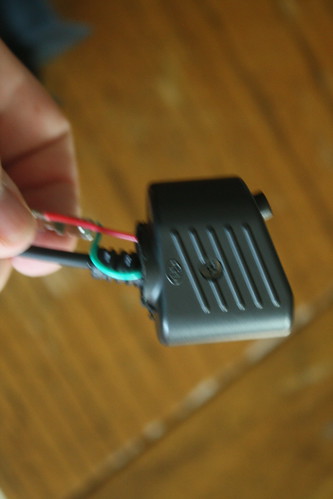
Instead of springing the additional $30 for another smart cord, we'll be using the supplied smart cord from the package, so while your dremel is still out, hack off the end of the "plug" so everything will fit when it get's put into the MINI.
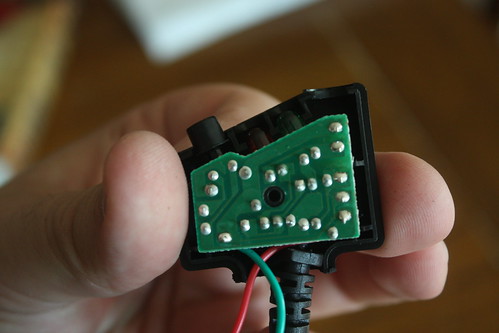
Remove the coiled cord from it's home hole, and twist it so it can easily re-route out the rear of the box.
Remove the plug components, and attach extension wires, approximately 3ft in length. Then attach the red wire to an add-a-fuse, and I attached the negative (green) to a loop, that slips neatly under a bolt for a secure ground.
Then glue your "box" to the back side of the dash piece
While that sets, let's go out to the MINI and run the wire and place the detector.
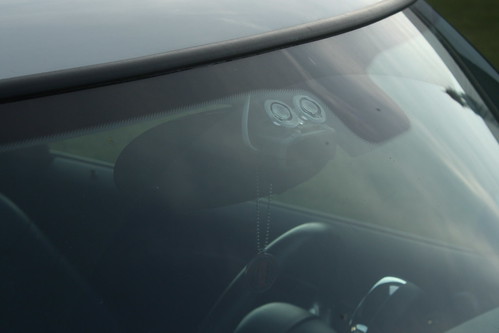
While we're waiting for the "visor clip" to be shipped, the Escort is suction cup mounted. Start running the flat phone cord here, we used a gray phone cord that closely matches the headliner color, start at the radar detector, and it's good to leave a few extra inches of cord tucked into the visor right above it, then work across the left of the roof line.

Then after crossing the roof, down the A-pillar, next to the glass, there is ample room to tuck the cord away, entirely out of sight.
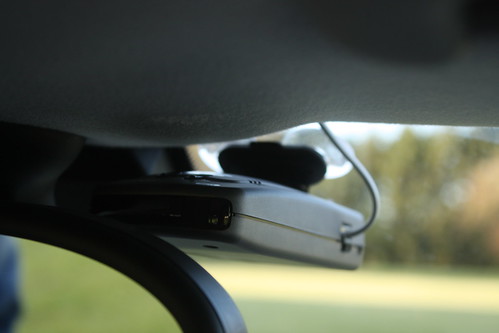
If you look closely here, you'll see all we'll be able to see of the power cable, tucked underneath the Garmin power cord.
Remove the side cover to the dash, slip the remaining cord under the dash and replace the cover, at the top there's a notch where the cord with safely fit.
Now that the glue has dried, we'll bring that out to the MINI and get all the wires in place.
Use a phone cord coupler to attach the coiled cord of the smart cord to the gray cord we just installed.
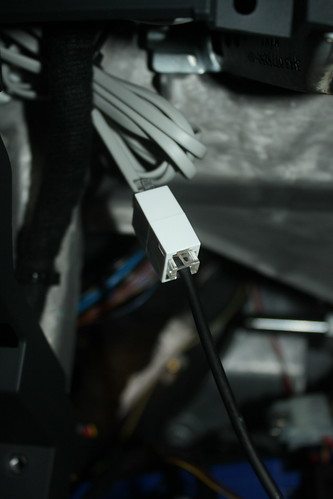
There is ample room to tuck this on the left side of the dash support beam on the left of the photo, this will keep it safely out of the way of being pinched upon re-installing the parcel shelf.
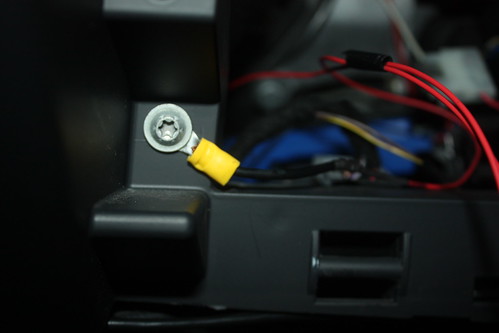
Attach your ground....and your add a fuse.....
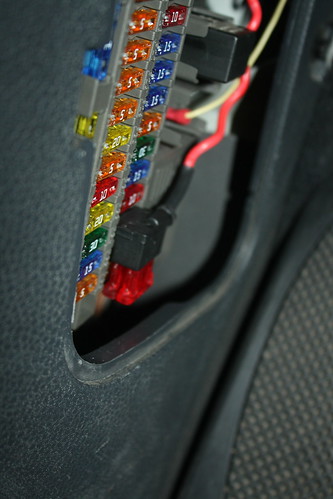
Be sure to choose a fuse that is "switched" so as not to drain your MINI's battery. The one being used for this install only becomes active when the key is in the "run" position. Test your electronics, replace the rubber steering colum seal to the dash piece, and return the dash piece and parcel shelf to their original places.
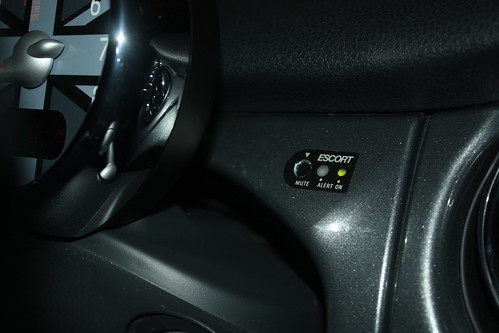
Now enjoy your install and drive safe. Here's the photos of how this one turned out in the end.
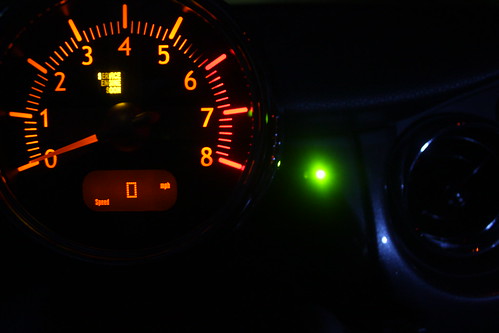
Running....
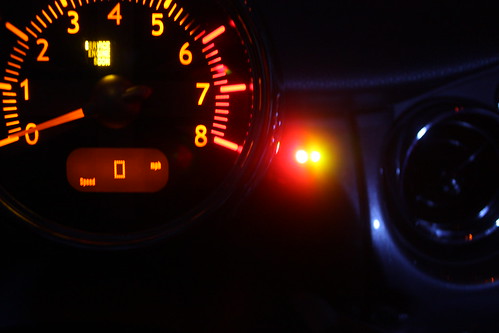
Alerting....
Exterior...
As always, morality of using a radar detector, how you drive, and how you install, and what your state's laws are regarding use are your responsibilty, and your liability; not mine, this is merely how I installed the detector on this particular vehicle.
First remove the plastic dash piece behind the steering wheel/ tachometer. Remove the rubber seal, so it doesn't get damaged during the install process and there's more room to work. In the process of removing this piece also take the parcel shelf out, for easy of working space.
Then mark and drill holes, two for the LEDs and one for the mute button.
Then use a dremel type tool remove some of the supporting plastic off the rear of the panel so there's room for the smart cord box.....
Instead of springing the additional $30 for another smart cord, we'll be using the supplied smart cord from the package, so while your dremel is still out, hack off the end of the "plug" so everything will fit when it get's put into the MINI.
Remove the coiled cord from it's home hole, and twist it so it can easily re-route out the rear of the box.
Remove the plug components, and attach extension wires, approximately 3ft in length. Then attach the red wire to an add-a-fuse, and I attached the negative (green) to a loop, that slips neatly under a bolt for a secure ground.
Then glue your "box" to the back side of the dash piece
While that sets, let's go out to the MINI and run the wire and place the detector.
While we're waiting for the "visor clip" to be shipped, the Escort is suction cup mounted. Start running the flat phone cord here, we used a gray phone cord that closely matches the headliner color, start at the radar detector, and it's good to leave a few extra inches of cord tucked into the visor right above it, then work across the left of the roof line.
Then after crossing the roof, down the A-pillar, next to the glass, there is ample room to tuck the cord away, entirely out of sight.
If you look closely here, you'll see all we'll be able to see of the power cable, tucked underneath the Garmin power cord.
Remove the side cover to the dash, slip the remaining cord under the dash and replace the cover, at the top there's a notch where the cord with safely fit.
Now that the glue has dried, we'll bring that out to the MINI and get all the wires in place.
Use a phone cord coupler to attach the coiled cord of the smart cord to the gray cord we just installed.
There is ample room to tuck this on the left side of the dash support beam on the left of the photo, this will keep it safely out of the way of being pinched upon re-installing the parcel shelf.
Attach your ground....and your add a fuse.....
Be sure to choose a fuse that is "switched" so as not to drain your MINI's battery. The one being used for this install only becomes active when the key is in the "run" position. Test your electronics, replace the rubber steering colum seal to the dash piece, and return the dash piece and parcel shelf to their original places.
Now enjoy your install and drive safe. Here's the photos of how this one turned out in the end.
Running....
Alerting....
Exterior...
As always, morality of using a radar detector, how you drive, and how you install, and what your state's laws are regarding use are your responsibilty, and your liability; not mine, this is merely how I installed the detector on this particular vehicle.
#2
10-18-2009, 07:20 PM

Interesting place to put the remote....i never thought of that...mine is Velcro'ed to my Parcel shelf.....been meaning to find a better spot for it, its just a bit too far away to mute quickly...I have a 9500I, and would love to mount it up high too like my old 8500, but then the GPS antenna will not have a clear view of the sky for the "additional" features.
One tip....check the voltage on the display....you might need to shorten the cord a bit if it has dropped too much from the extra cord you used, or your performance/detector life may suffer.....should be ok though....I like it....Might do it to mine soon!!
One tip....check the voltage on the display....you might need to shorten the cord a bit if it has dropped too much from the extra cord you used, or your performance/detector life may suffer.....should be ok though....I like it....Might do it to mine soon!!

#4
10-20-2009, 09:50 PM
Okay! I'm all finished up! Thinking about it now, I wish I would have changed the green led to a blue one, I have some laying around but it's already all back together! Maybe I will do it when I do my gauges next week! Here you go! Thanks for the idea! I was going to order a hardwire cord and do this but you saved me 30 bucks!
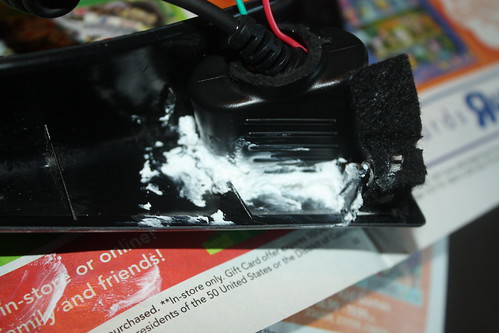
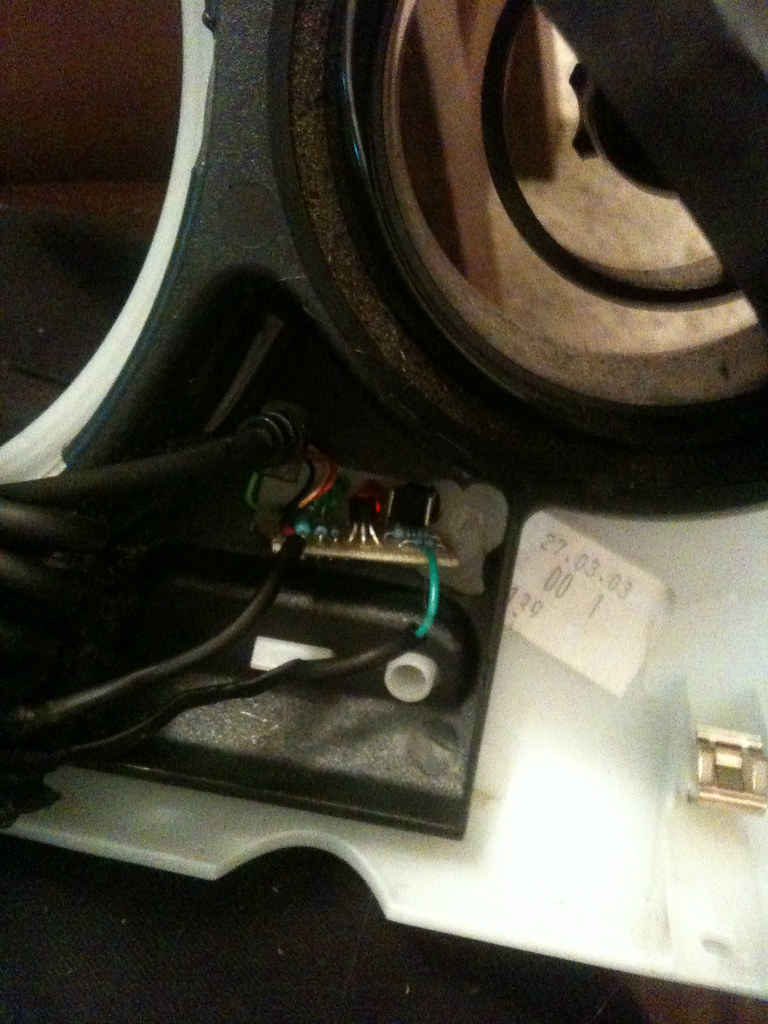
Here is the inside, I left mine apart because I used a different spot and didn't have room for anything else. Had to do some cutting with the dremel (best tool in the world!) then hot glued it in!
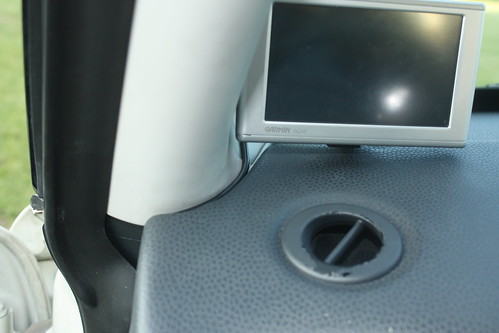
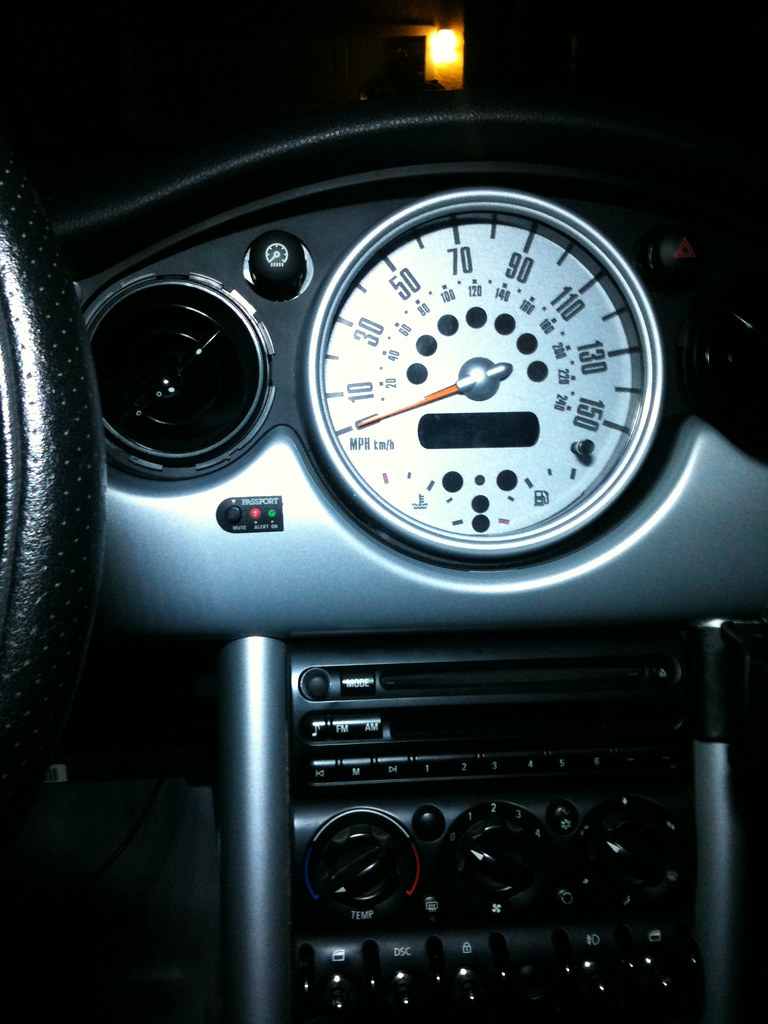
and here is the finished product!
also, I ran the wire up the dash because I keep my radar right above the wiper senser, the cord comes out right too it! Will take another picture of that tomorrow!
Here is the inside, I left mine apart because I used a different spot and didn't have room for anything else. Had to do some cutting with the dremel (best tool in the world!) then hot glued it in!
and here is the finished product!
also, I ran the wire up the dash because I keep my radar right above the wiper senser, the cord comes out right too it! Will take another picture of that tomorrow!
#5
10-22-2009, 02:28 PM
What model detector do you have....I'm thinking that I might move my 9500i to the same spot you guys are using to try it out.....maybe the GPS reception will be good enuff. The last SmartCord I bought was at BESTBUY....cheaper than online...hard to believe....got the blue one. One reminder...HOT GLUE+ car interior....not too good of a combo...some silicone might be a better...and much less messy option come the first warm day anyway!! But I like it, very nice looking....still debating the spot for mine...
#6
10-22-2009, 06:03 PM
I have been using Hot Glue for years, and I live in Houston, super hot and have never had a problem! Seems to work great for me on many different vehicles including my bike! I don't have the GPS radar, it's just a Passport 8500. Is there any way to open up the radar and change the LED's in there to blue instead of red? I didn't buy the blue one because at the time I have red lighting, now I have a different car and different gauges (this weekend they will be blue!) I was wondering if I could change it??!? And like I said, I keep mine right above the wiper sensor down on the dash, the senor on the radar goes right out the rear window without anything blocking it's path. I don't really like it so high up, but that's just me! To each his own!

Thread
Thread Starter
Forum
Replies
Last Post
siriuszero
F55/F56 :: Hatch Talk (2014+)
18
09-17-2015 04:41 AM