Electrical R52 retrofit Bluetooth, Heated Seats, Powerfold Mirrors, Aux Gauges,
#1
 06-06-2013, 09:57 PM

R52 retrofit Bluetooth, Heated Seats, Powerfold Mirrors, Aux Gauges,
So this is a big job and a picture heavy thread.
Here are the resources I used, special thanks to MotoringFile Bradnic and ECS Tuning.
http://www.kneb.net/bmw/MINI/miniheatedseats.pdf
https://www.northamericanmotoring.co...-retrofit.html
http://www.minipeople.lt/failai/db/2...nstruments.pdf
http://www.bimmerforums.co.uk/forum/...ell-rs-t73387/
www.theautopartsshop.com
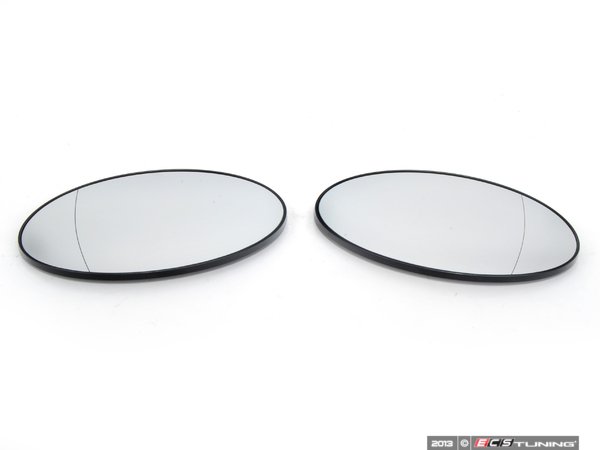
Door Mirror 51167192473 ULO W0133-1917648 $120.64
Door Mirror 51167192474 ULO W0133-1917647 $122.54
ECS tuning
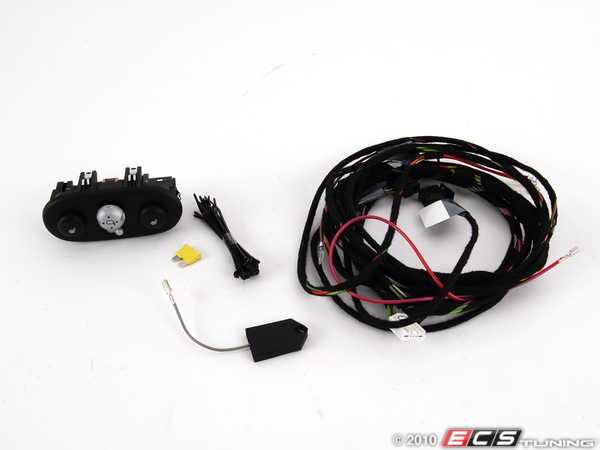
61120144084 Cable set heated seats
61138364624 Socket housing for mirrors 8pol
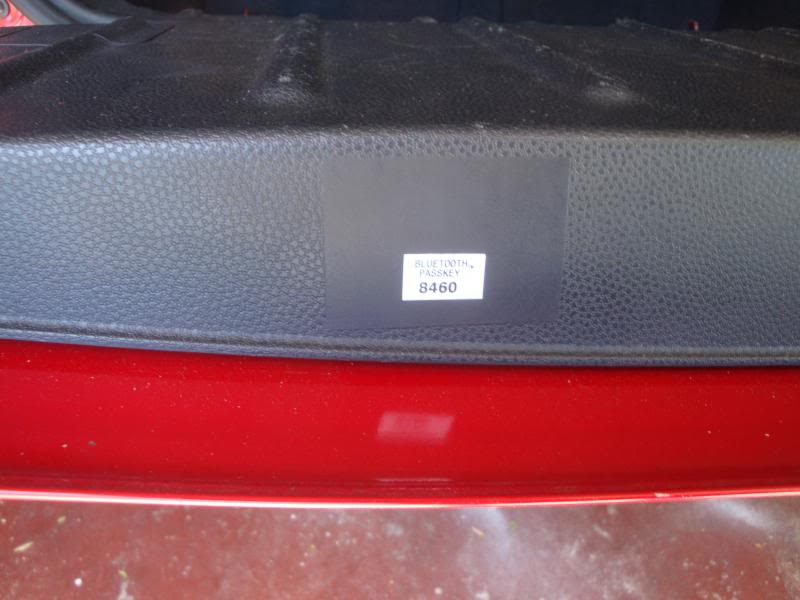
84640404810 BT retrofit kit with ULF
Aux guages 82940415253
partslane.com
82110306852 65750029310 65750397059 alarm retrofit kit $259
eBay
E46 Mirror fold module & R50 switch - eBay UK used
Amazon
Aux in
So I'll refer you to Bradnic's excellent thread above for the disassembly instructions with many photos.
For me I wanted to do as much of the wiring in one go. I had already installed the mirrors and wired the doors and door connectors. I'll cover that at the end.
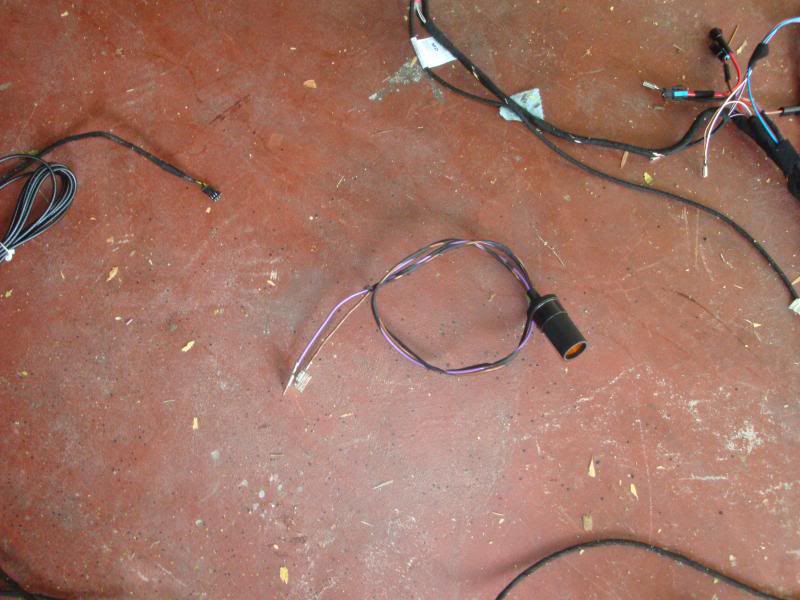
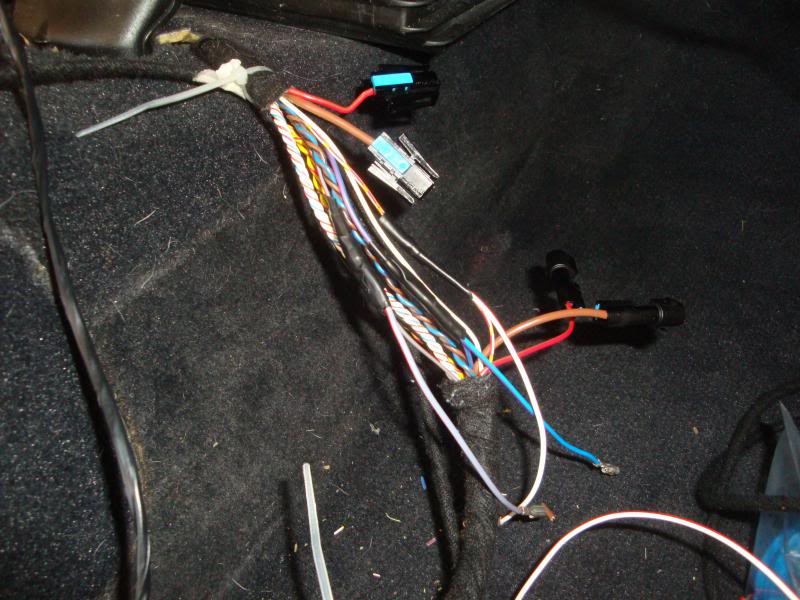
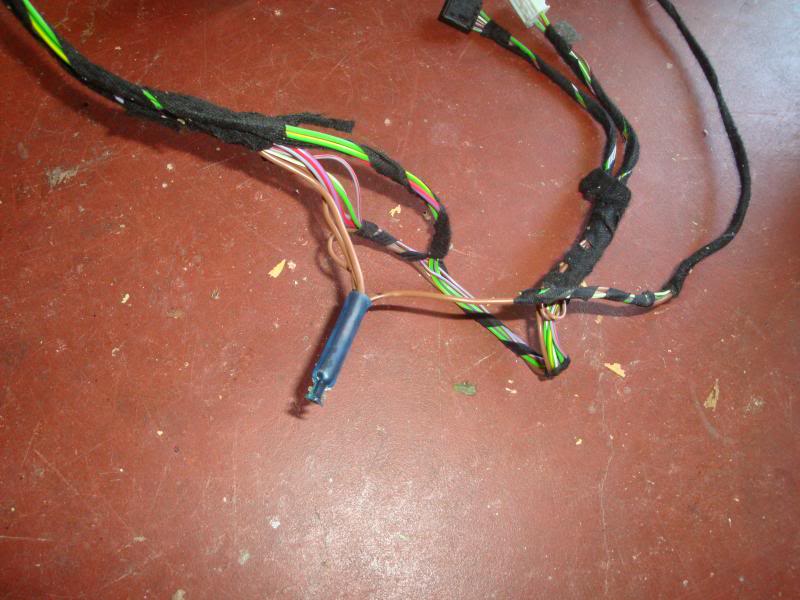
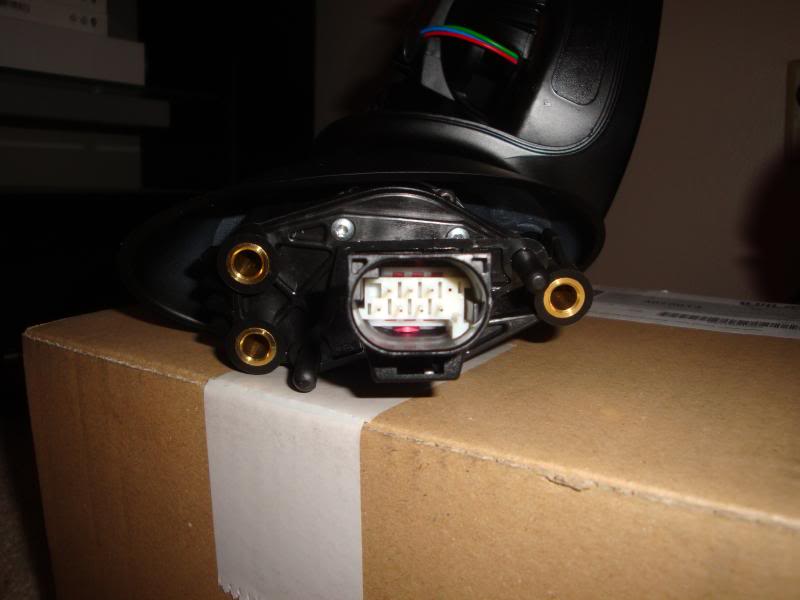
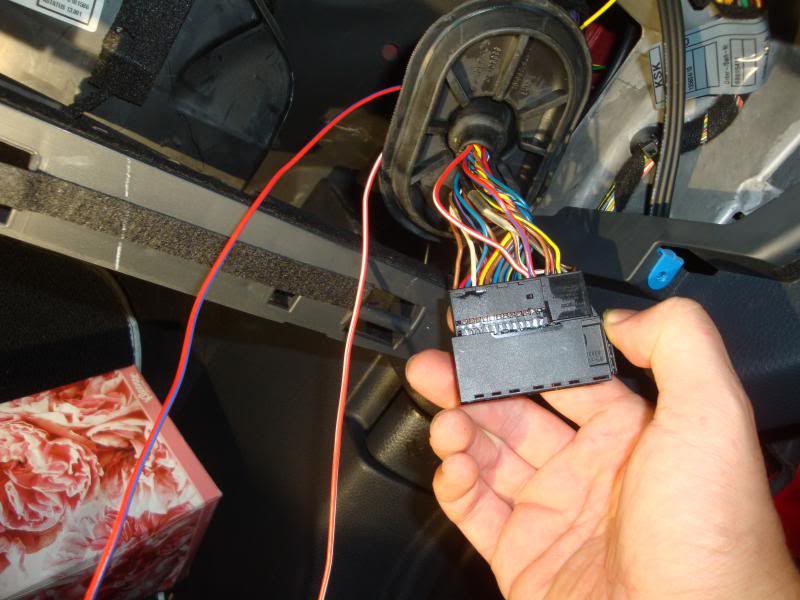
Here's the BT, mirror and heated seat harness, along with the aux gauges harness and a small cable I'd made for a cigarette charger, ready to go into the car. The bagged cables will become the mirror fold module harness.
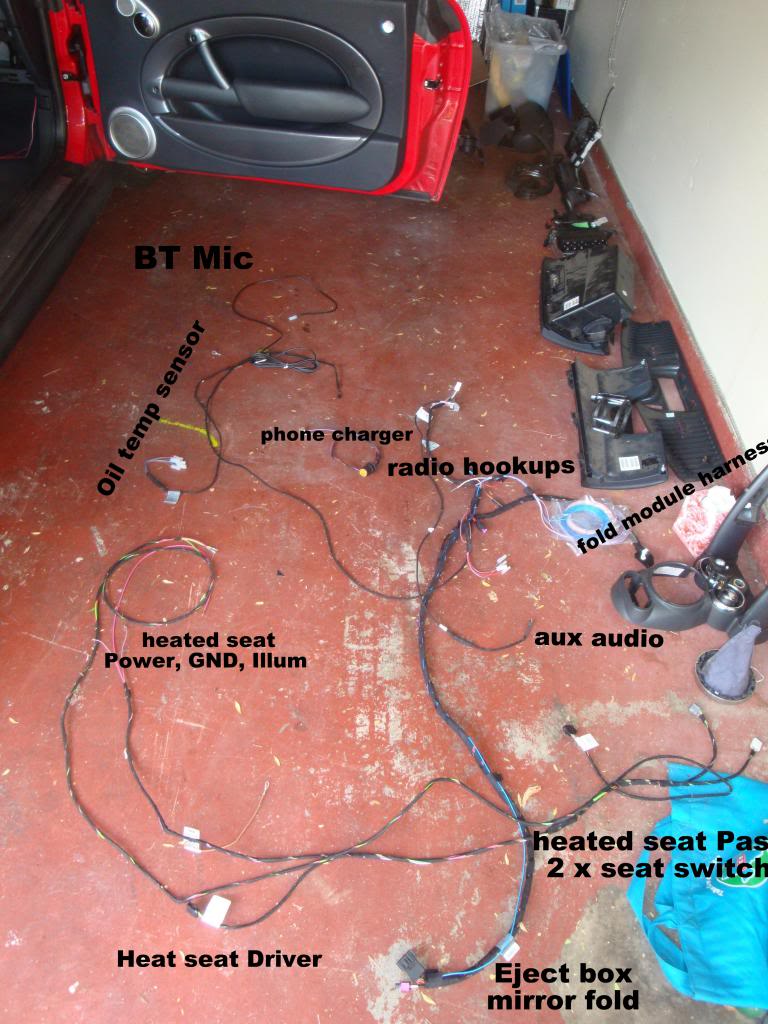
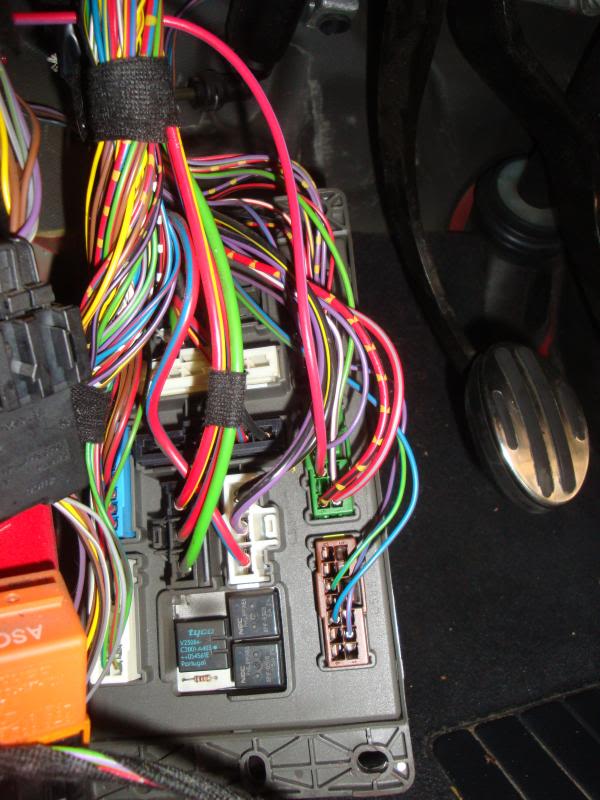
In this picture you can see the BMW fan connectors I used to break out the Illumination, iBus, IGN. Power for the mirrors comes from the fuse box and the mirror module and cig lighter use local grounds.
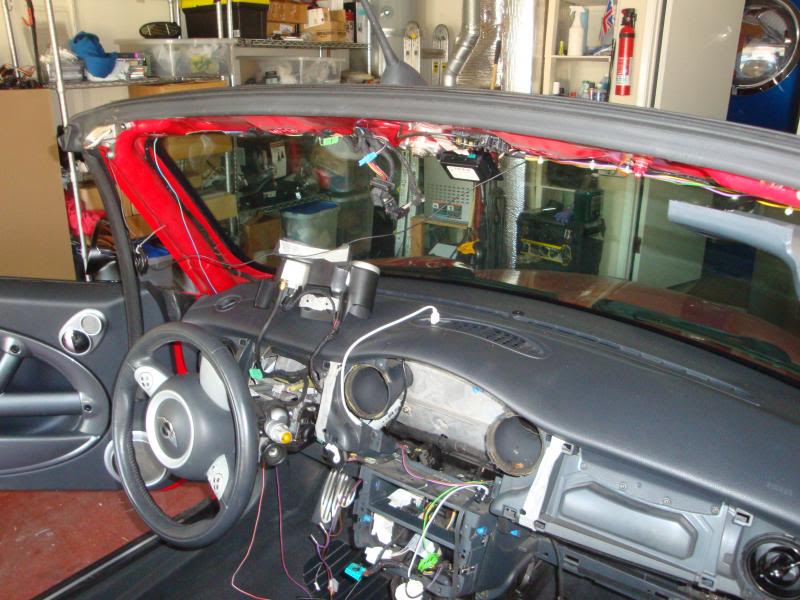
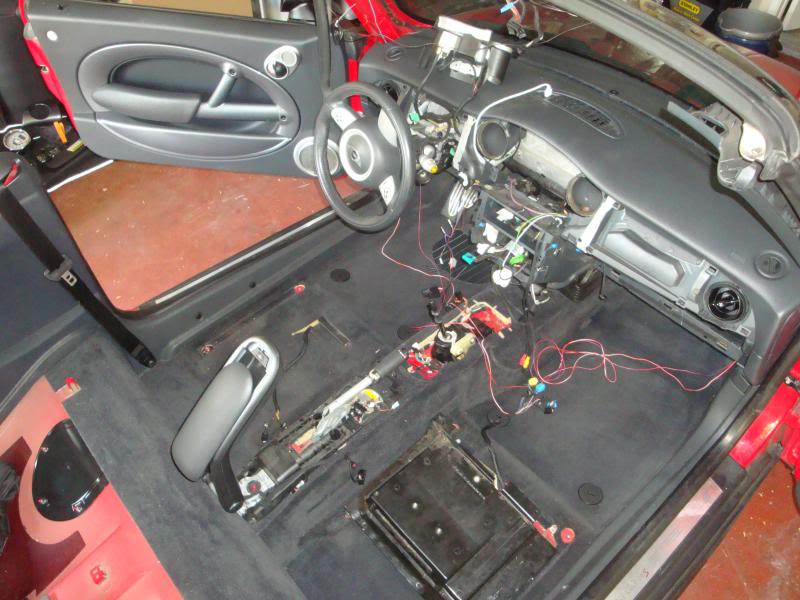
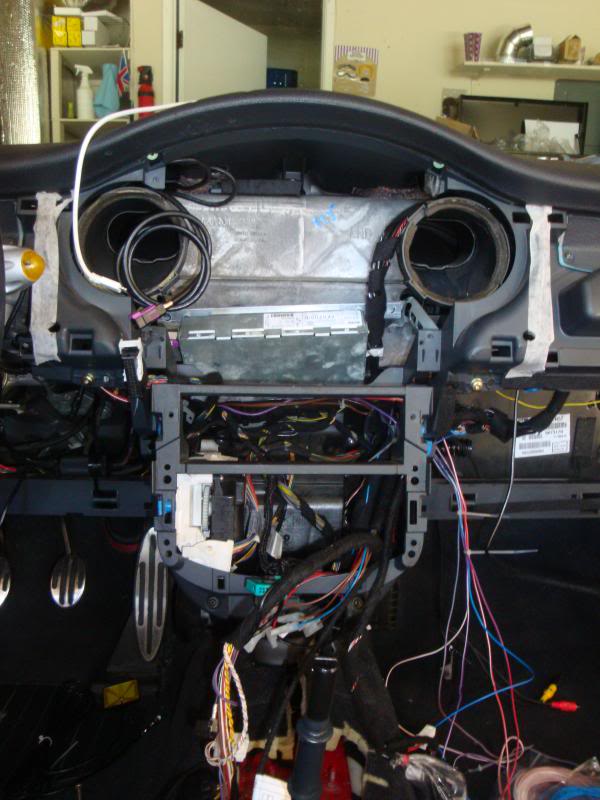
Next up is the disassembly of the car. Seats out, clocks out, console out, steering cowel out, armrest out, HK amp out, driver's side sill trim out.
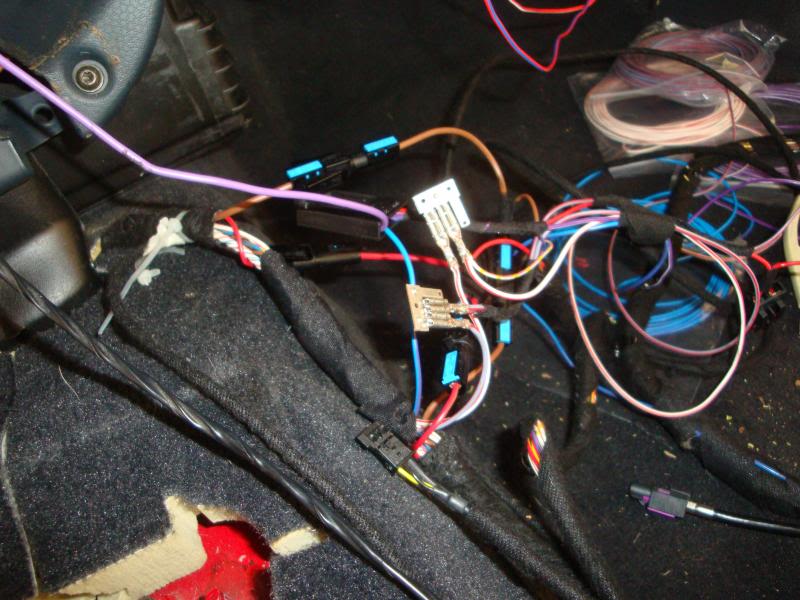
The RT/WS and RT/BL wires are for the mirror fold as these pics are a bit out of sequence.
The green and white wire are ones I added for a project that I remove during this install.
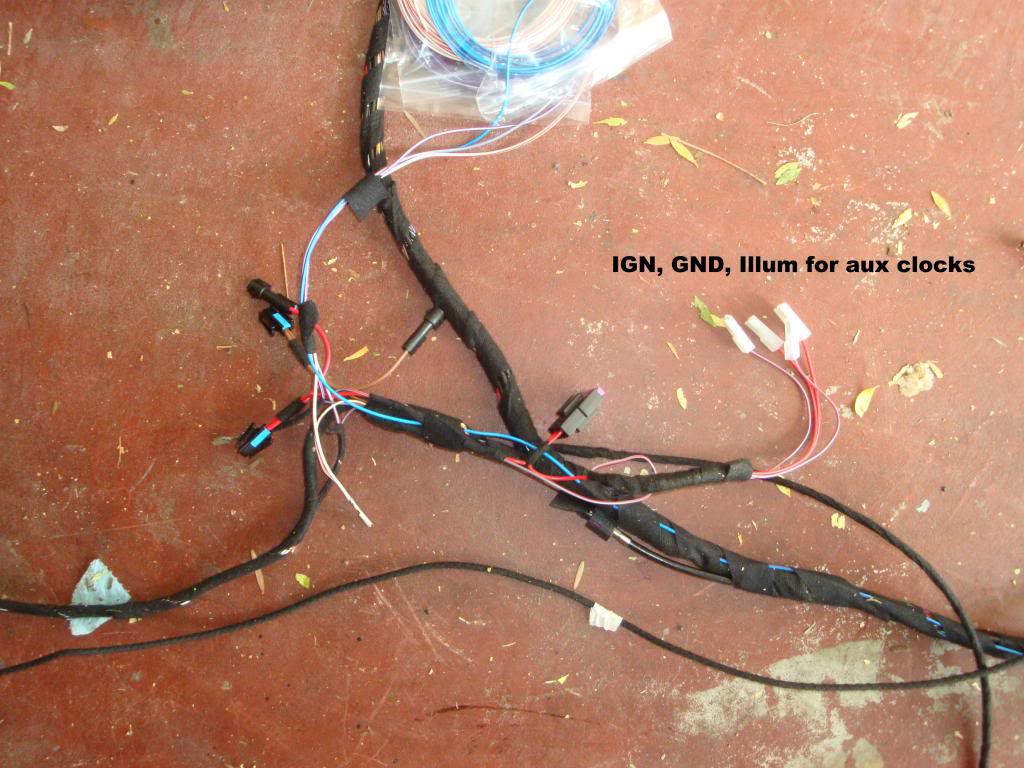
I made the cuts to the radio harness close to the carpet. I soldered on the connections to the power, GND, iBus, IGN and Illum.
Then made the fan connections.
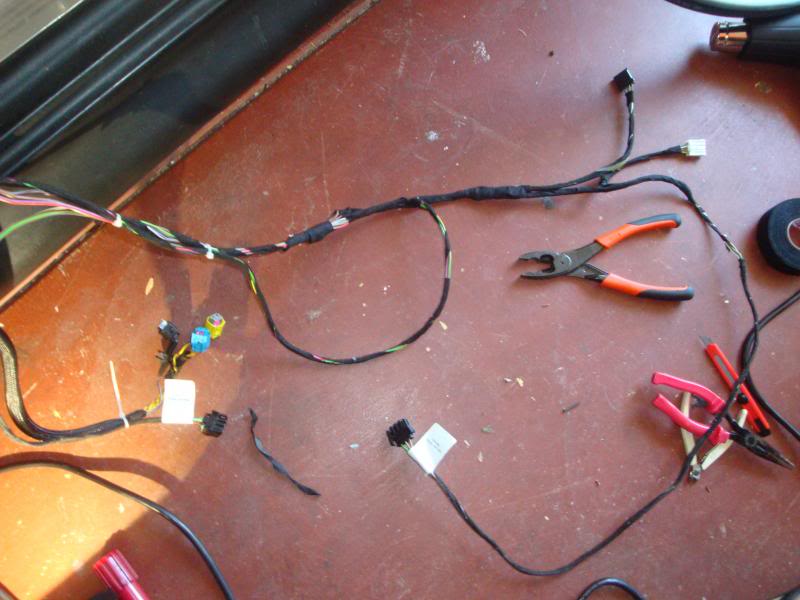
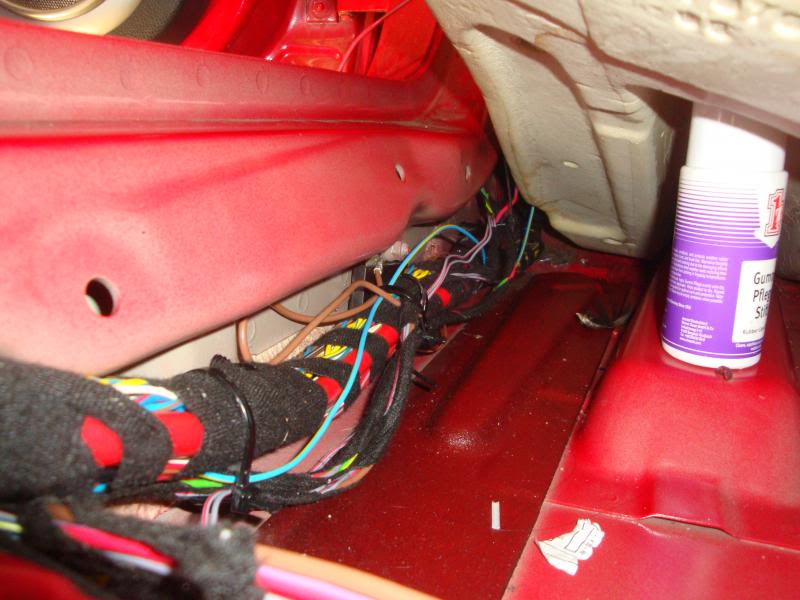
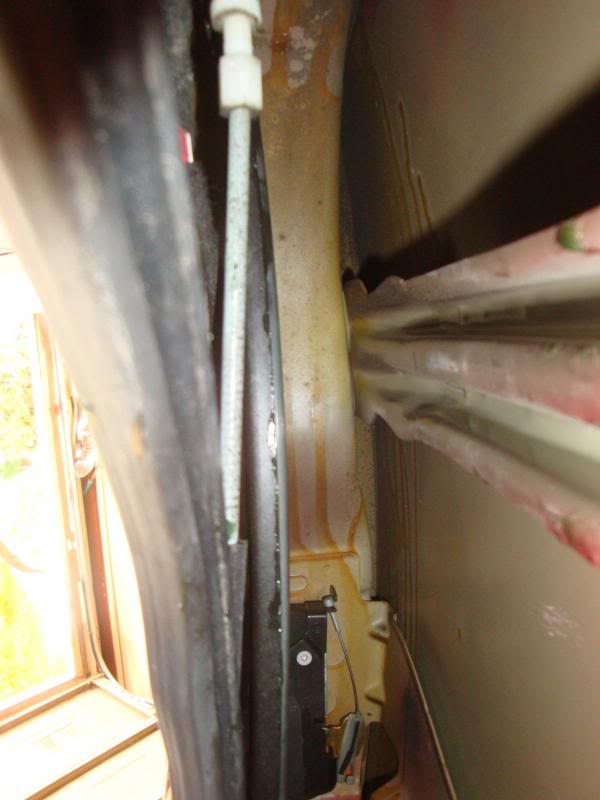
Next I started to run the cables. It was necessary to wind back the fabric tape and release about 12" more mic cable from the harness.
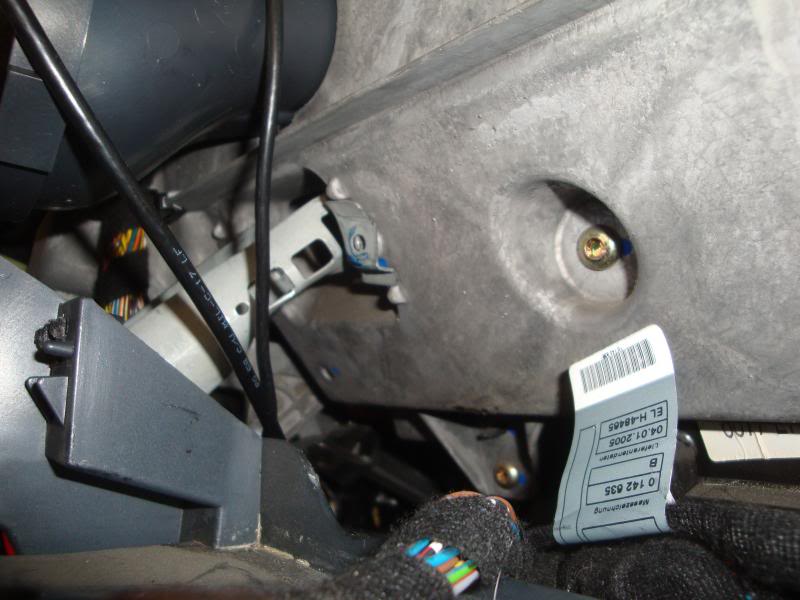
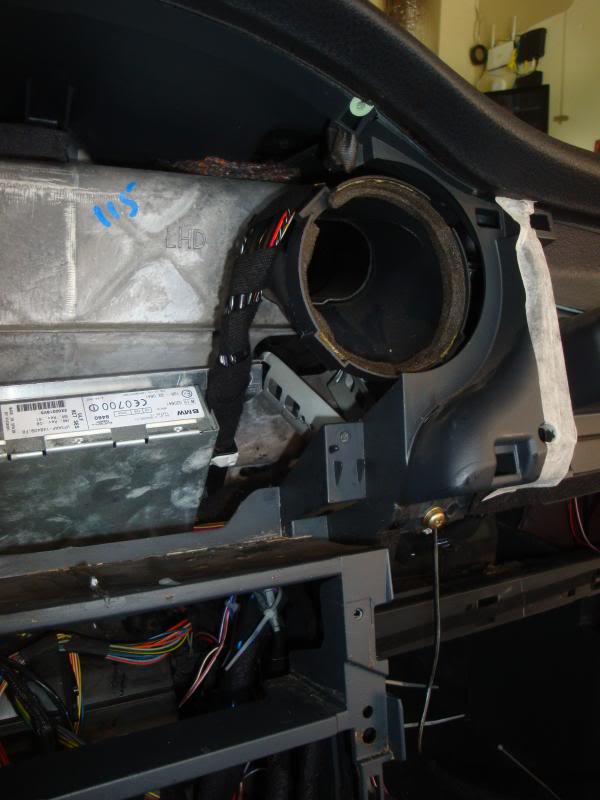
Next it was necessary to remove and bend this bracket with a hammer.

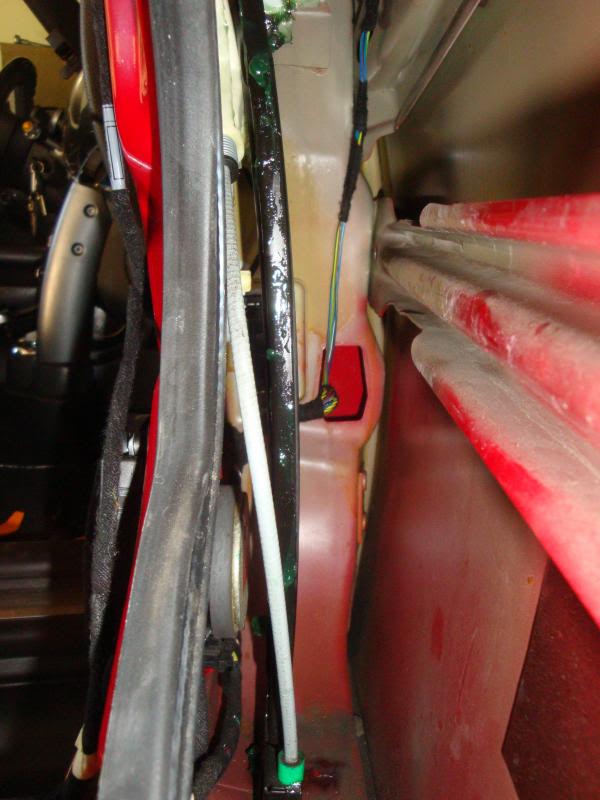
I wrapped the BT antenna in fabric tape and routes the cables this way.
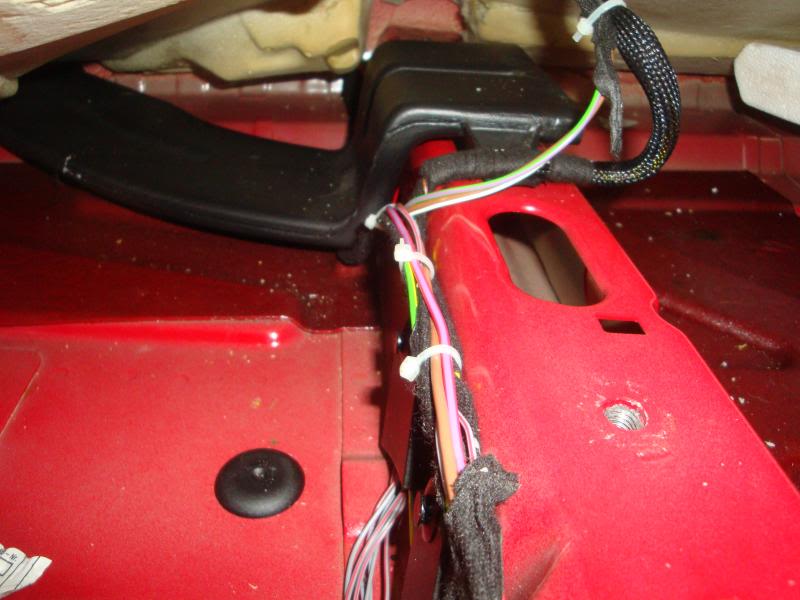
I hate to damage OEM stuff, but I've been in here before and it's much easier to cut the carpet between the shifter and the console. When the trim is back it clamps the carpet well, and it cannot show.
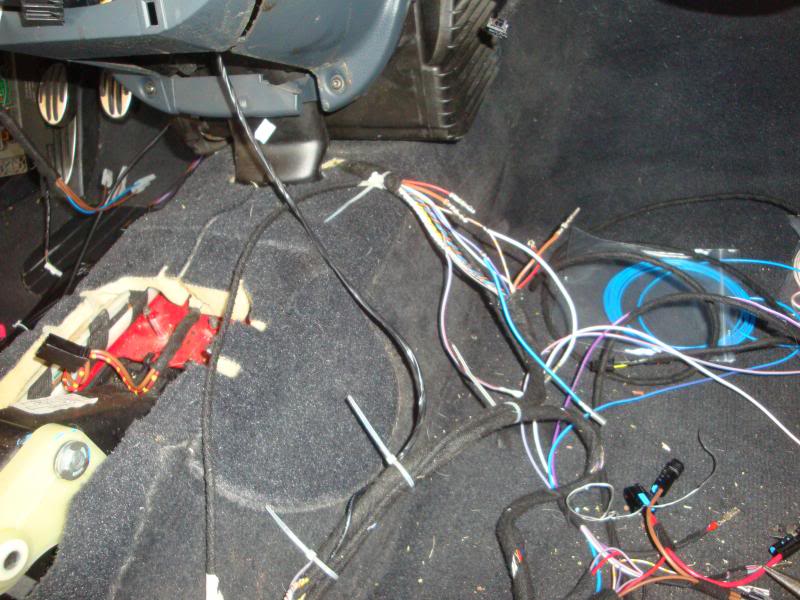
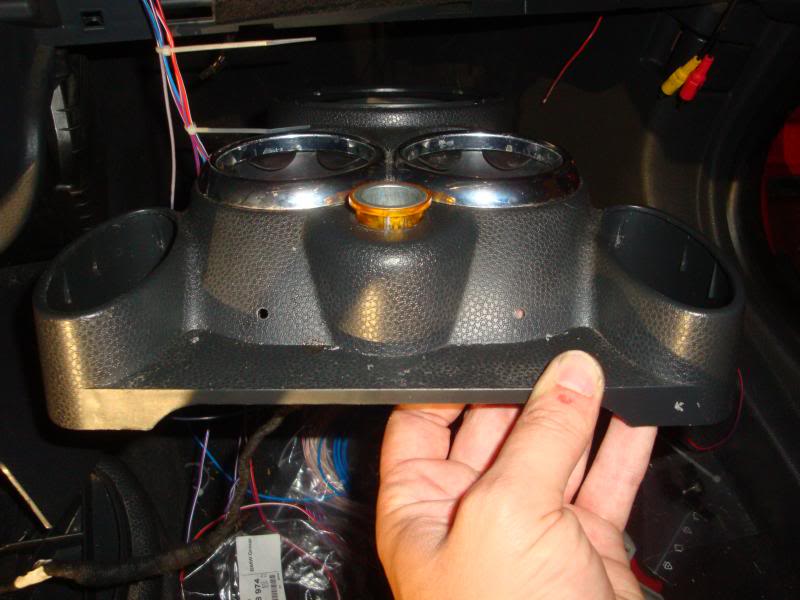
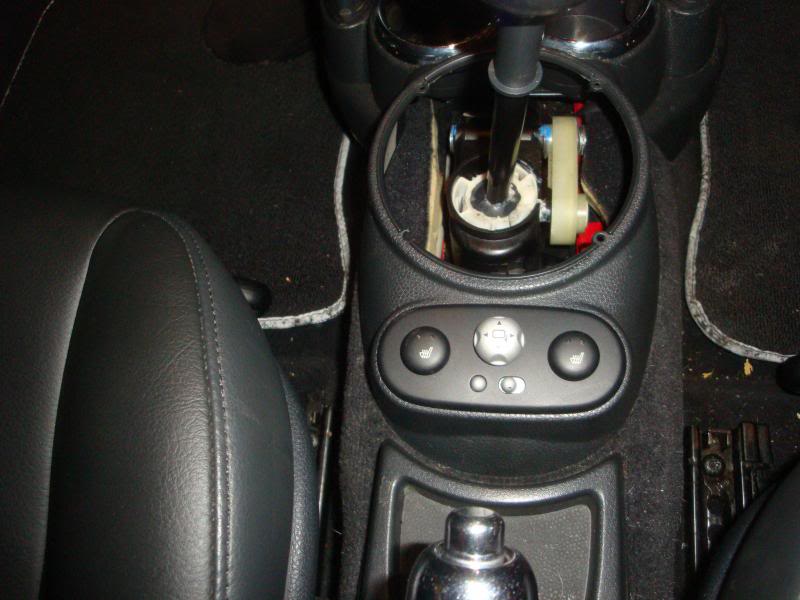
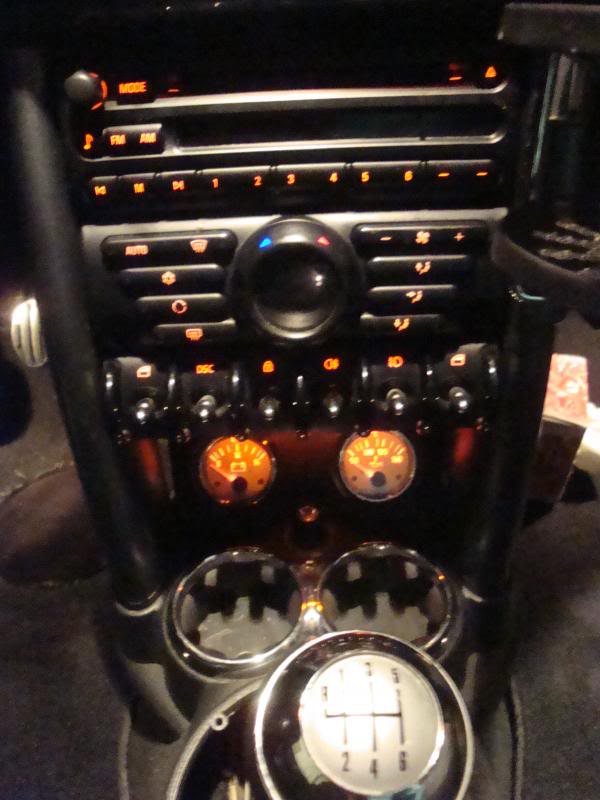
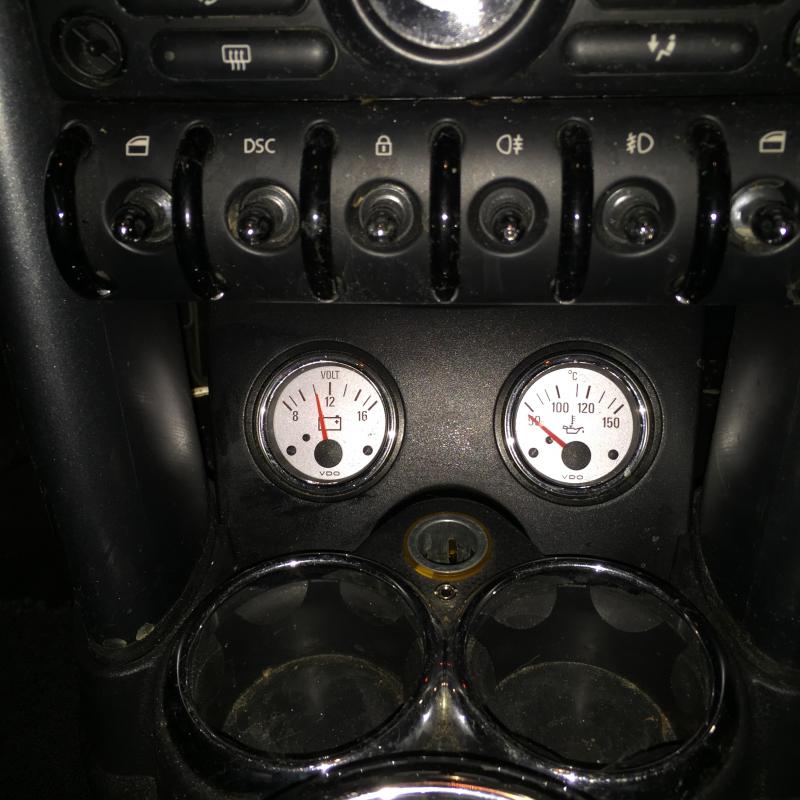
I drilled out the fixing holes for the aux gauges and the aux audio into the lower cupholder.
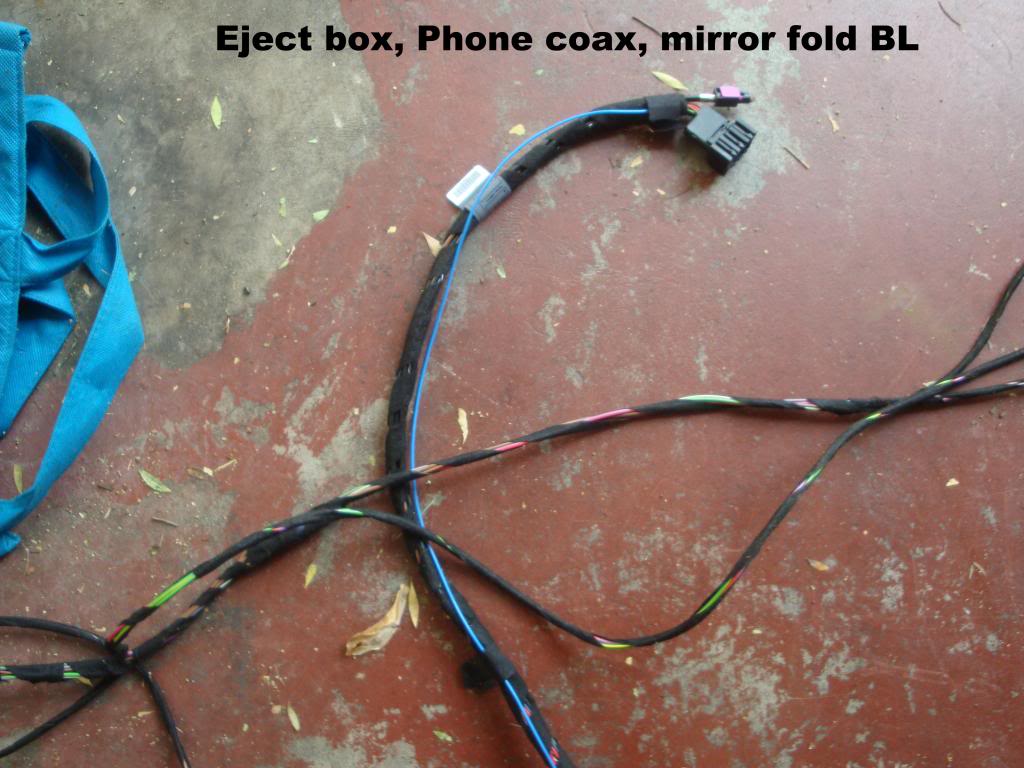
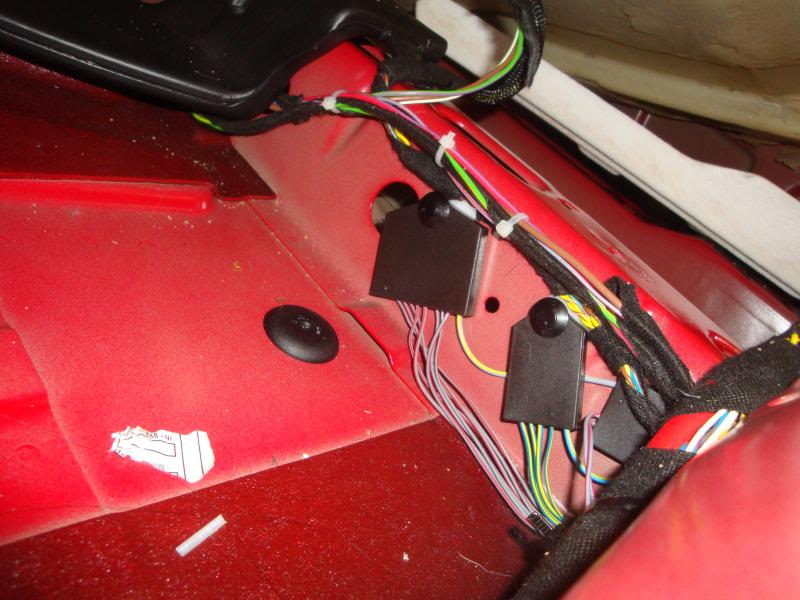
I ran the Eject box harness and picked up the mirror fold switch signal.
Next up is the heated seat harness. I dunno if it's because I have a convertible with additional underfloor braces, but the harness as supplied doesn't leave enough length to allow the seats to slide. I Unwrapped the cable, cut the GND to the passenger side and extended it, adding about 12" of seperation between the two seat connectors.
Before
After
More seat pics.
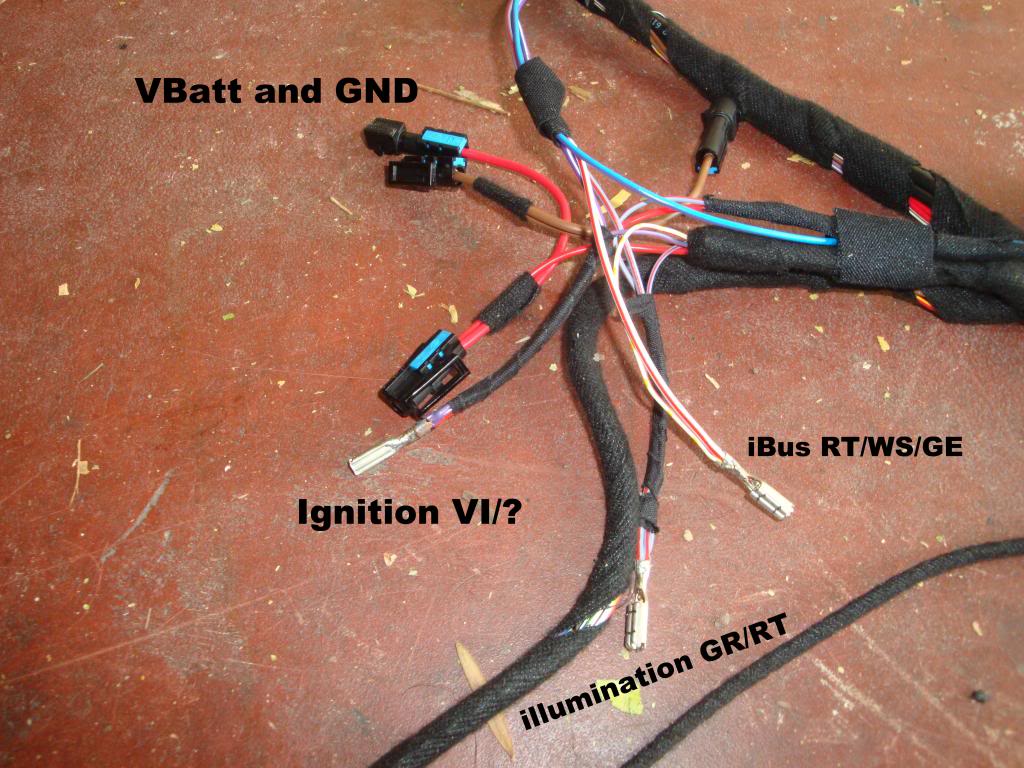
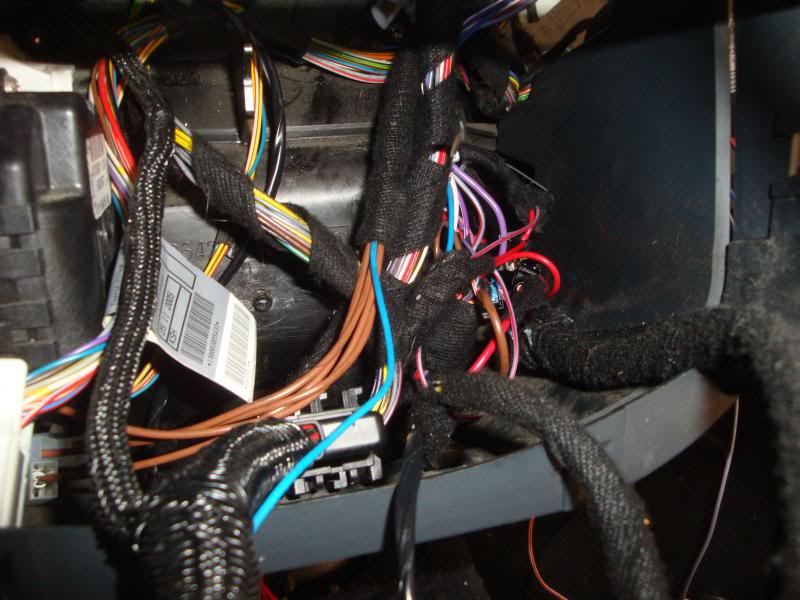
In this pic you can see the reverse wire I used for the EC mirror retrofit. the GR/RT needed a new fan connector breakout (GR/GE wire) which was supplied with the retrofit harness for the seat heat.
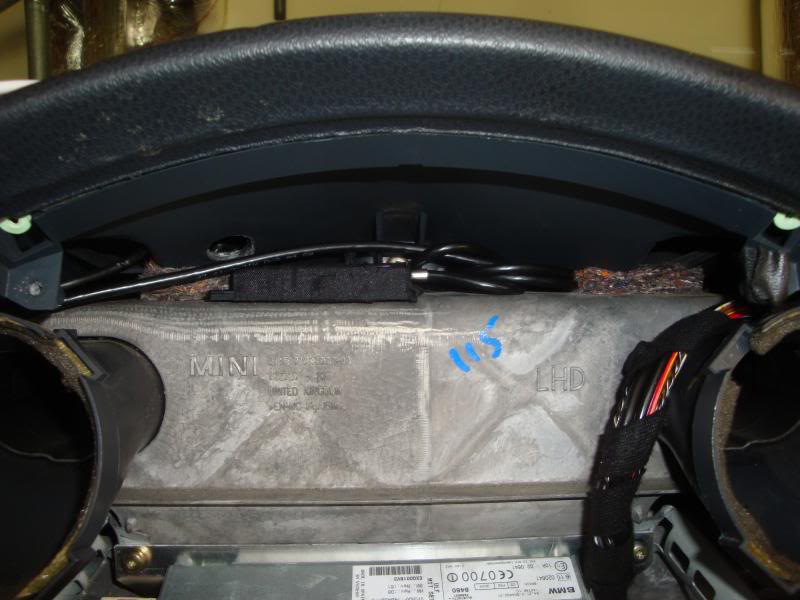
Plently of surplus wire here for RHD applications; GND and Illum.
Power from the fuse box.
And there is a hookup to the ignition switch too.
The mic wire went up the passenger side as it's a more natural route from the ULF.
The oil temp is routed into the engine bay as described in the PDF and the gauges are fitted and wired up.
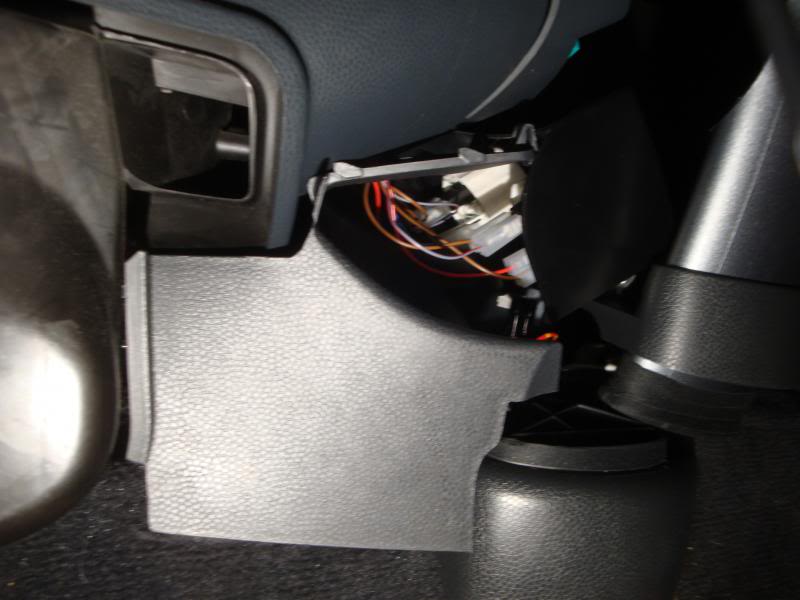
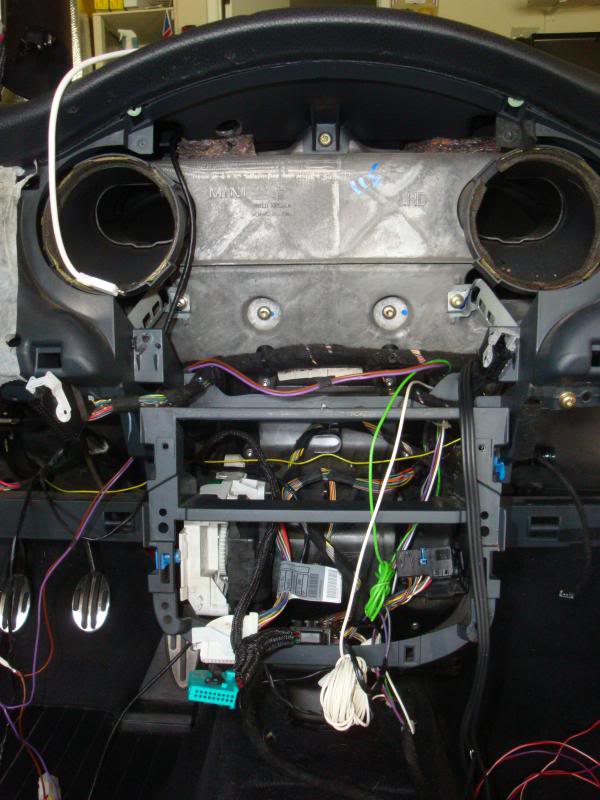
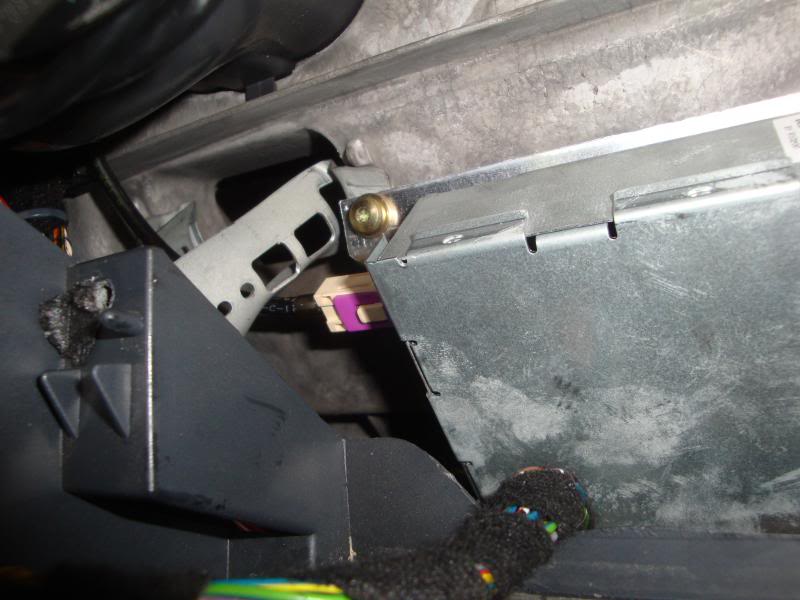
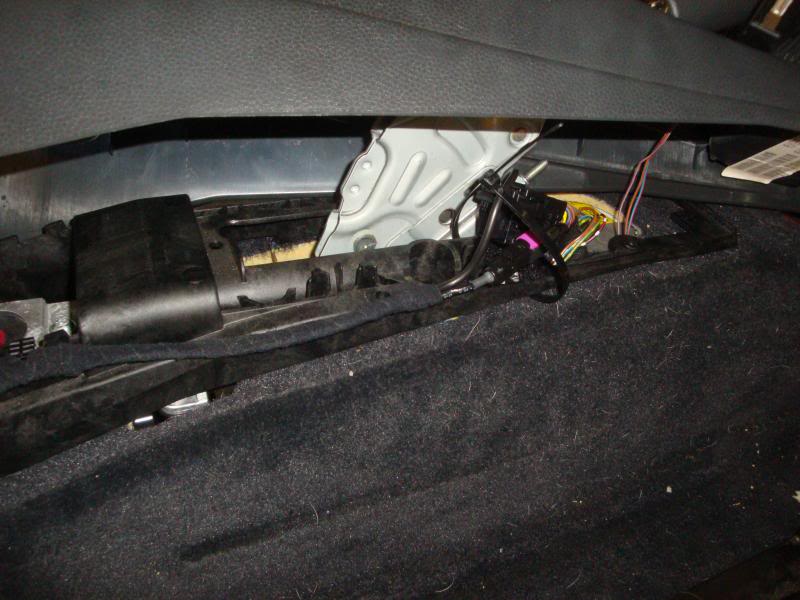
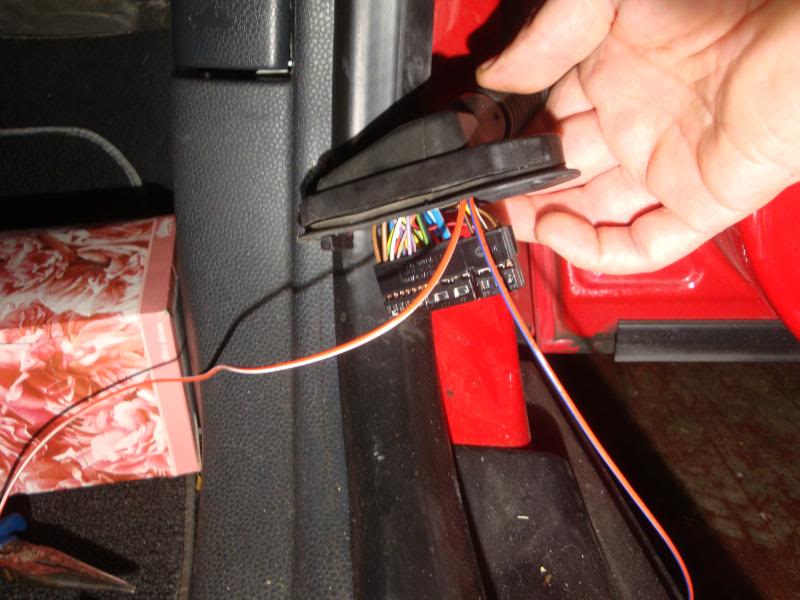
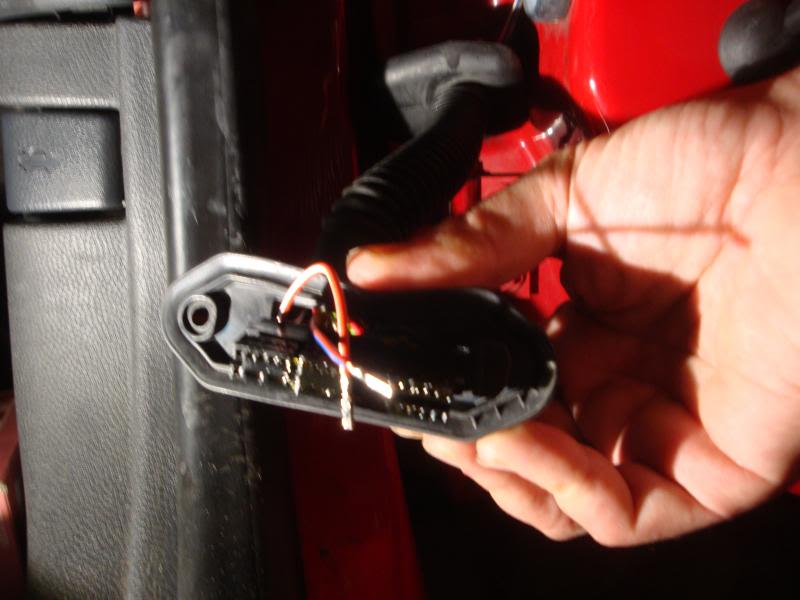
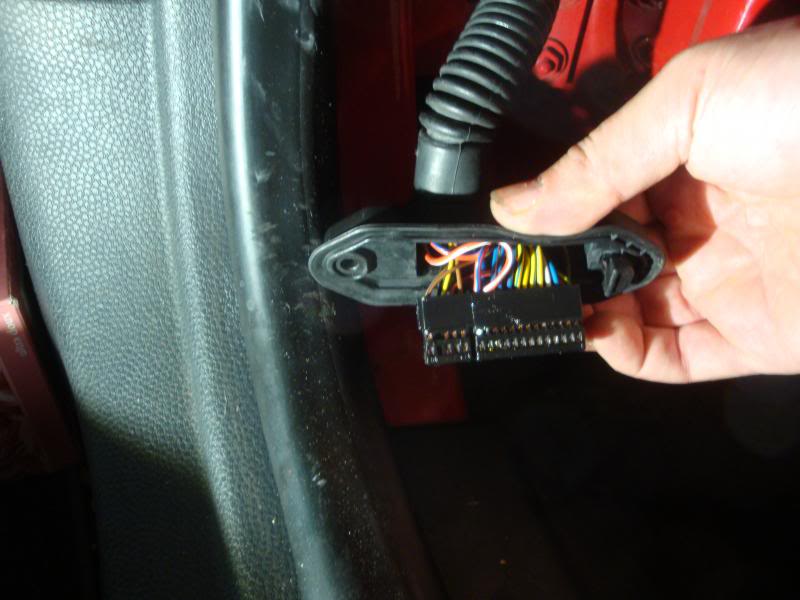
And finally in the dash the mirror fold connector. there is an illum cable taped back in that harness that I don't need (brain fart!) and also a set of IGN, iBus and GND broken out in the 3 pin connector for a Relser interface for Navcoder coding.
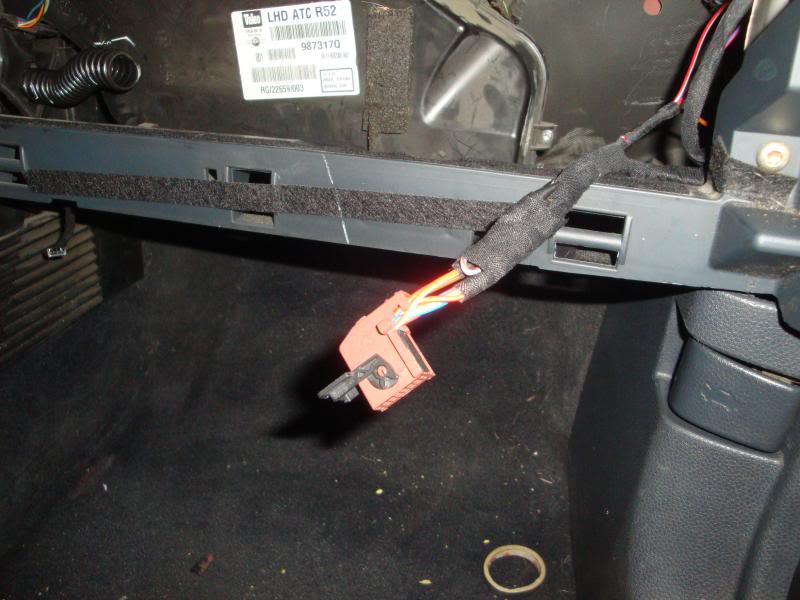
I wrapped the module in fabric tape to stop it vibrating, and ziptied it but making sure it won't interfere with the motorized vent flap. Leave enough slack to fit the glovebox body without tugging on your harness.

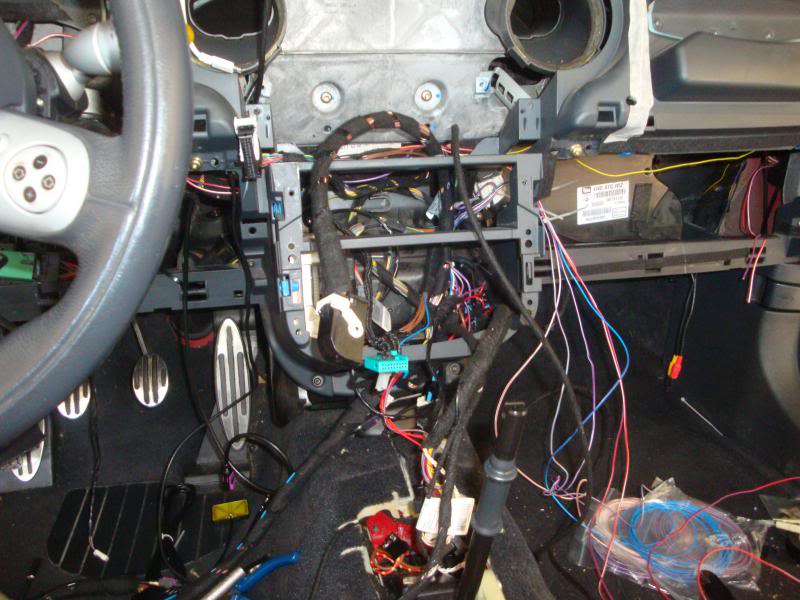
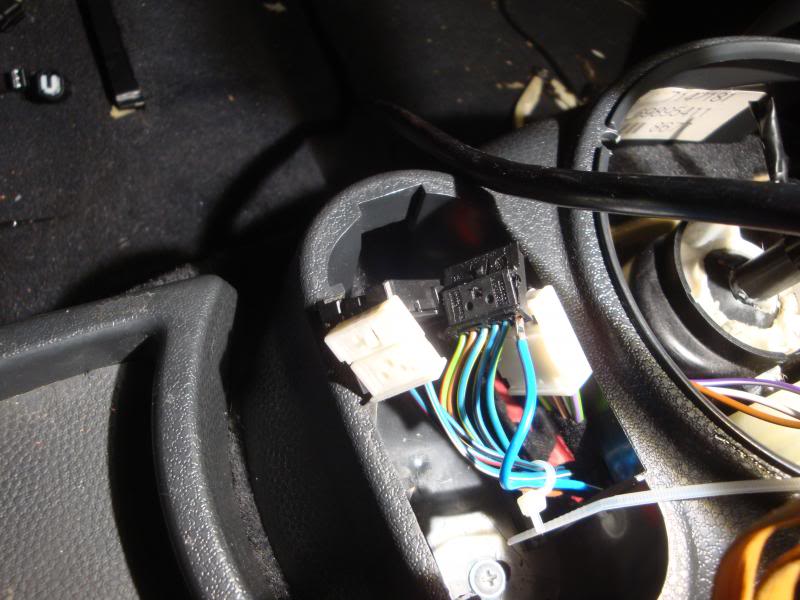
This is the way the cables are arranged behind the radio. The AC controls are fitted after the radio is in place to assist in routing the radio cables without damage.
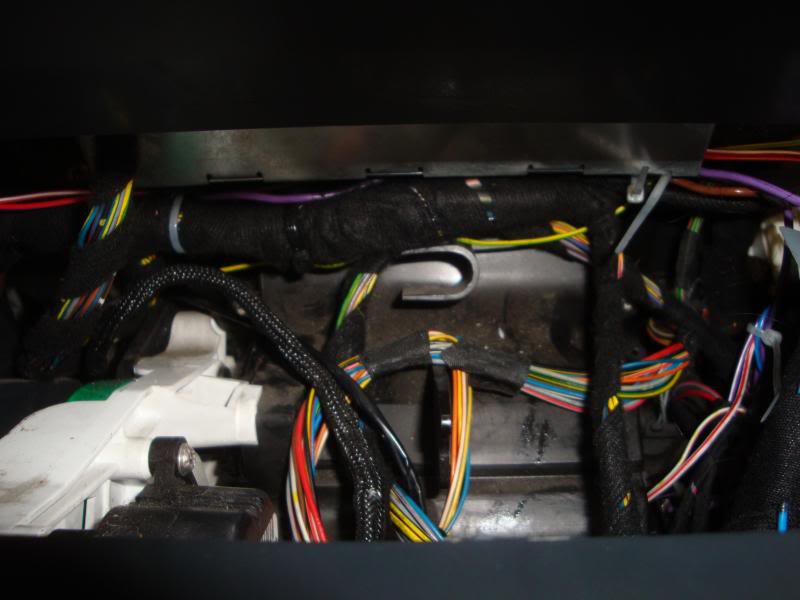
Here you can see the iBus, IGN and Illum fan connectors folded back into some empty space behind the toggle switches. You can also see the GND and Power D system connectors for the ULF.
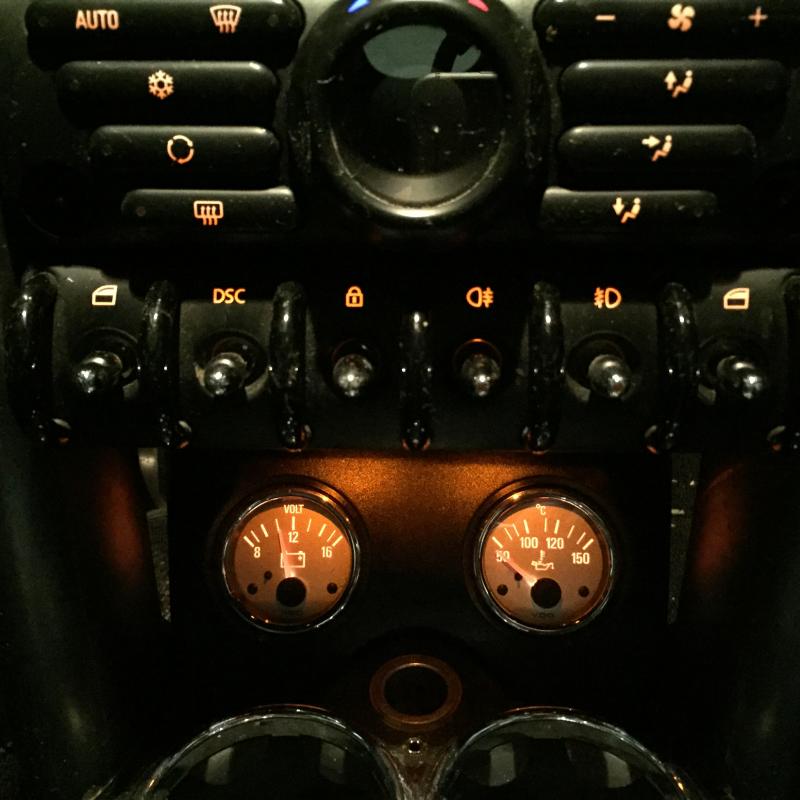
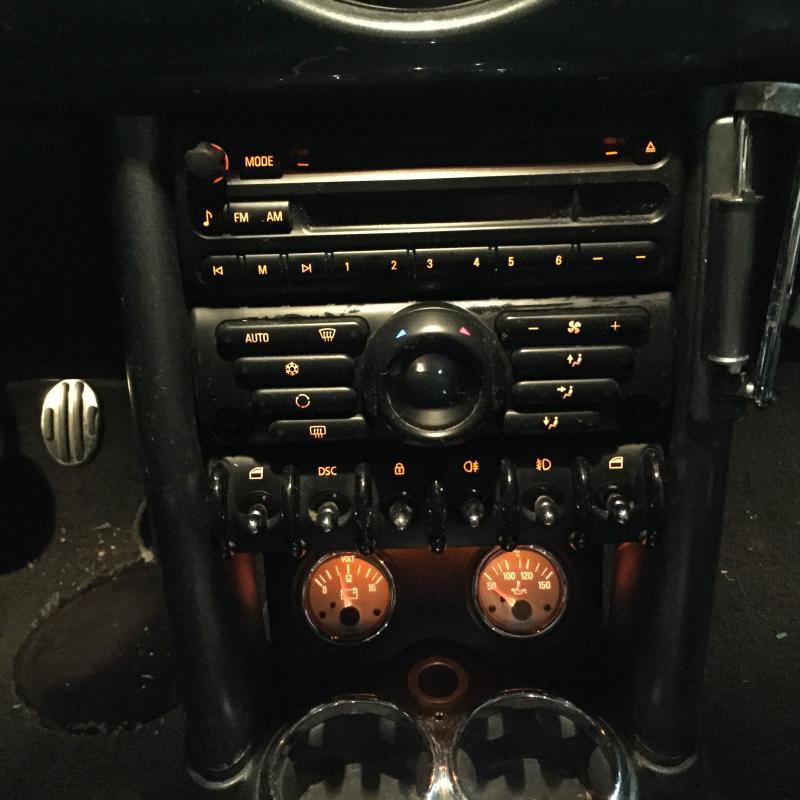
And the final result in the dash.


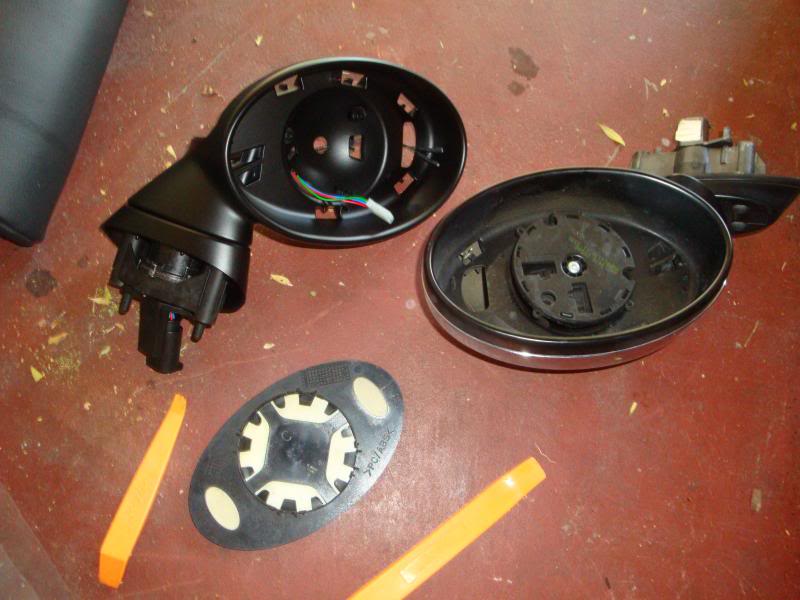
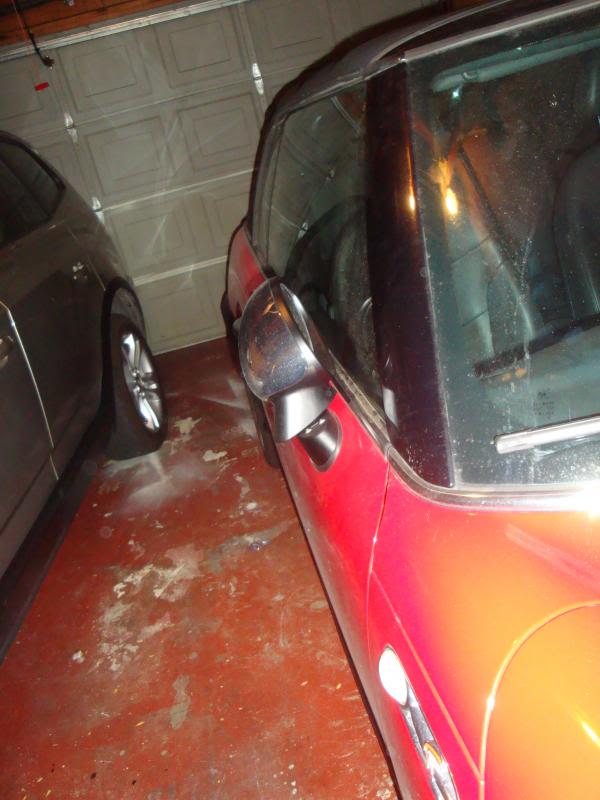
The mirrors.
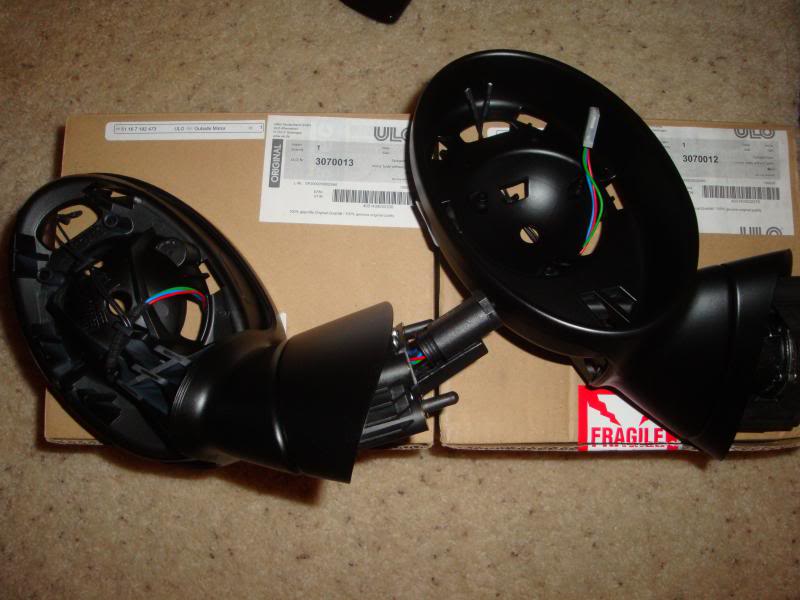
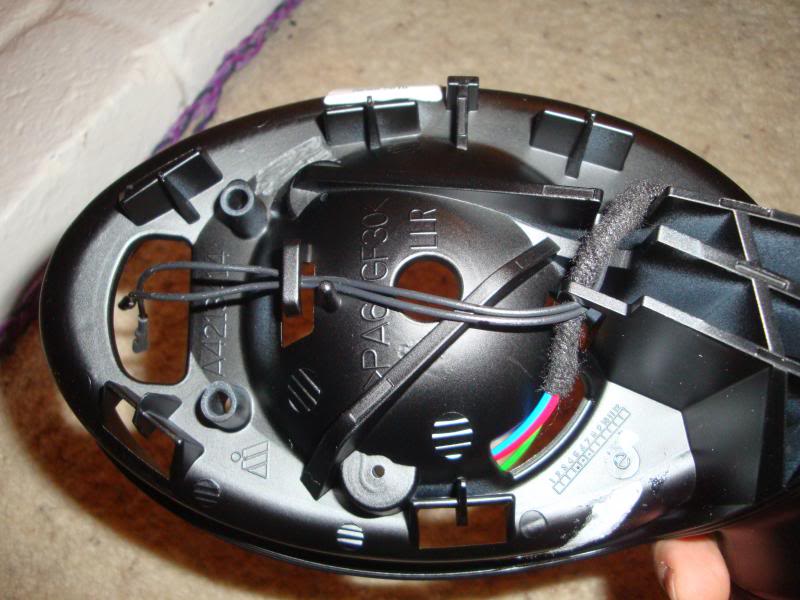
You can tell they are genuine because they have the three splines on the back and the OEM mirror covers fit.
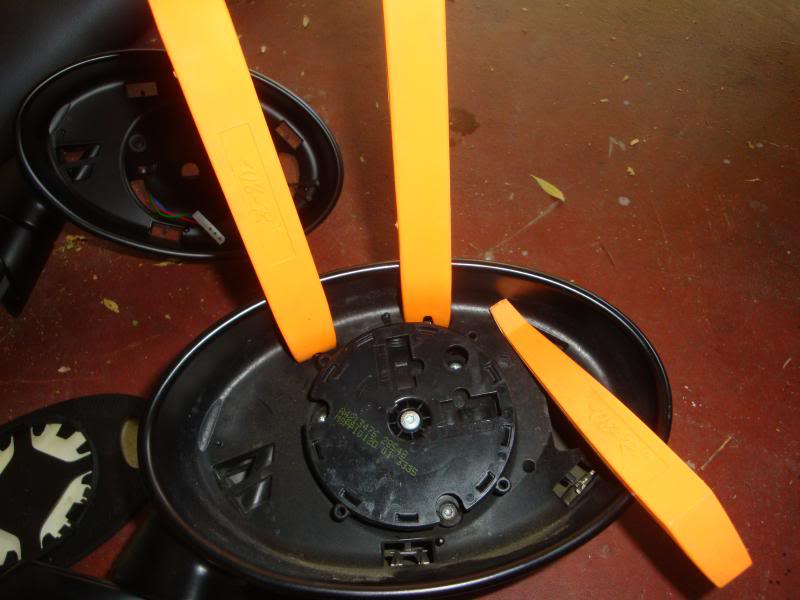
First rotate the mirrors towards the sky and windscreen until you can see behind it to the fixing clips. Pop off the mirror glass gently but firmly.
Next drop the windows, rotate the mirrors into the service position (interference fit with the window) and undo the bolts.
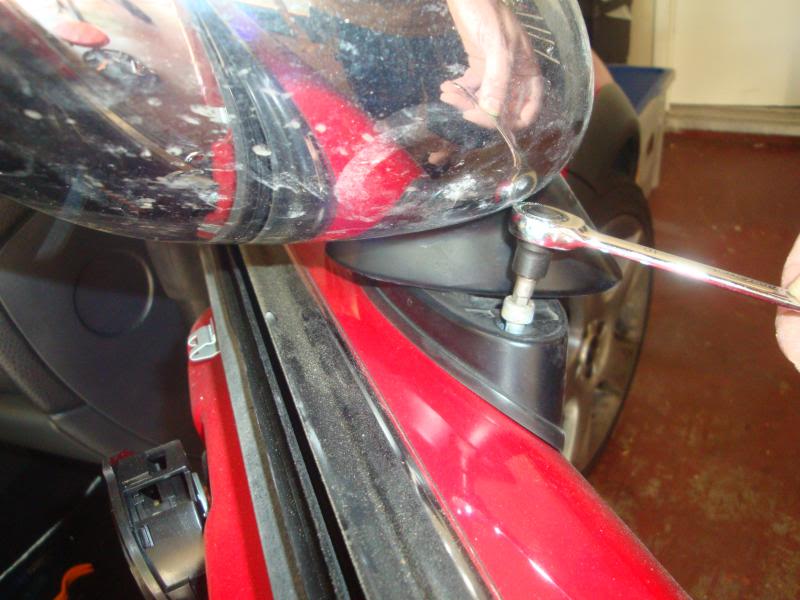
Then move the mirror out of the service position, raise both the windows and pull the battery GND.
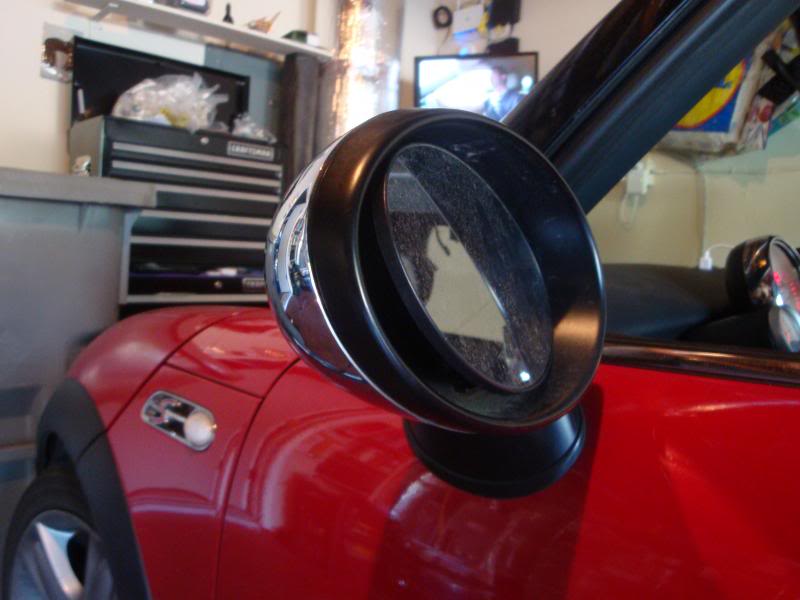
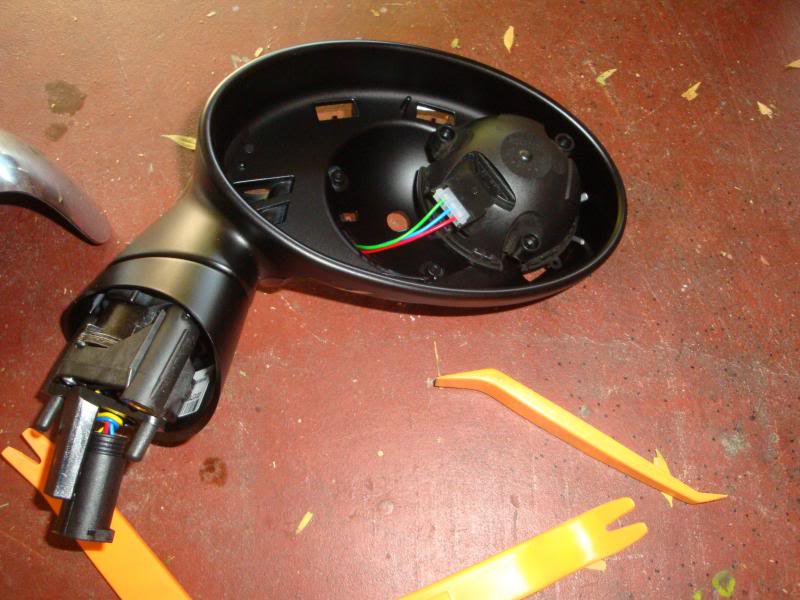
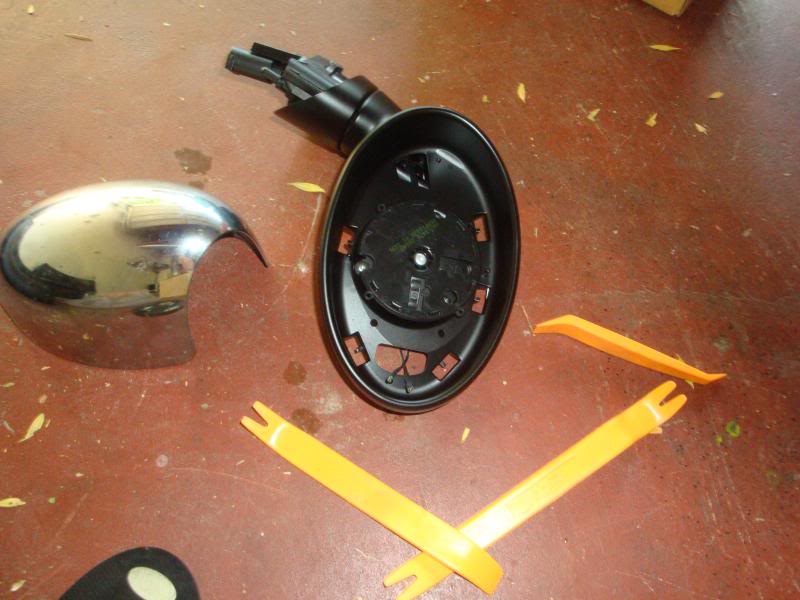
Swap the guts and covers onto the new mirror, it's a grubby job. Now is a good time to Brasso your chrome covers.
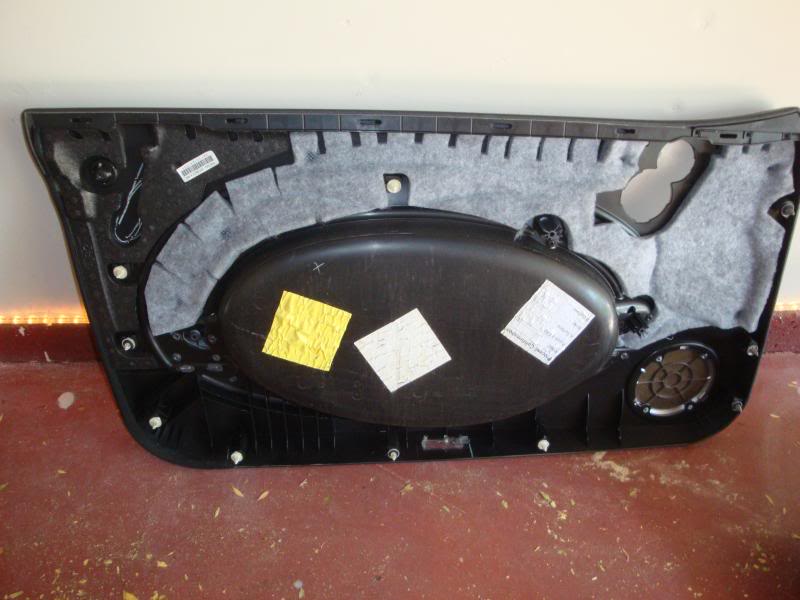
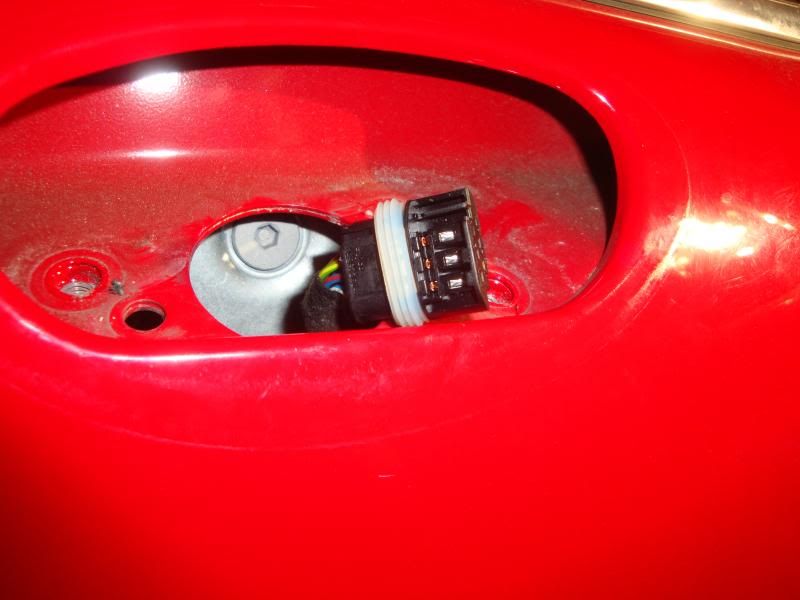
Use one of the many online guides to remove the door card.
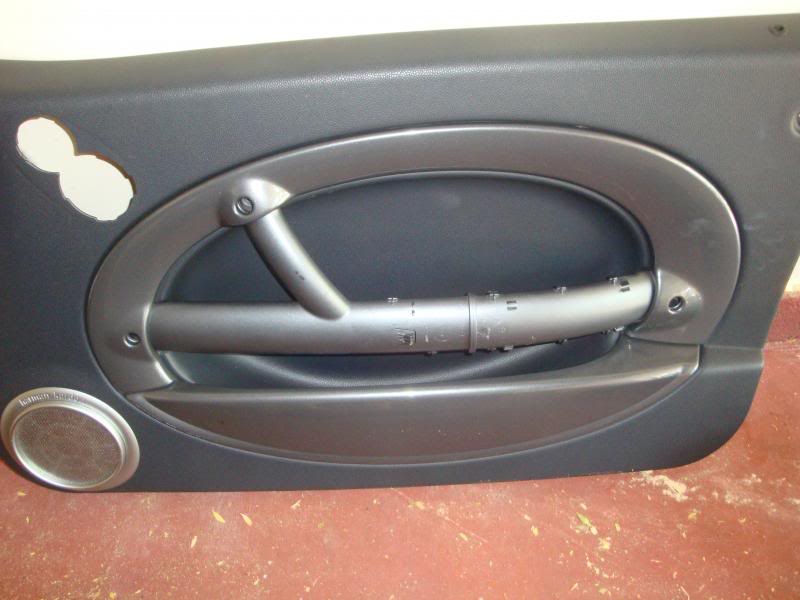
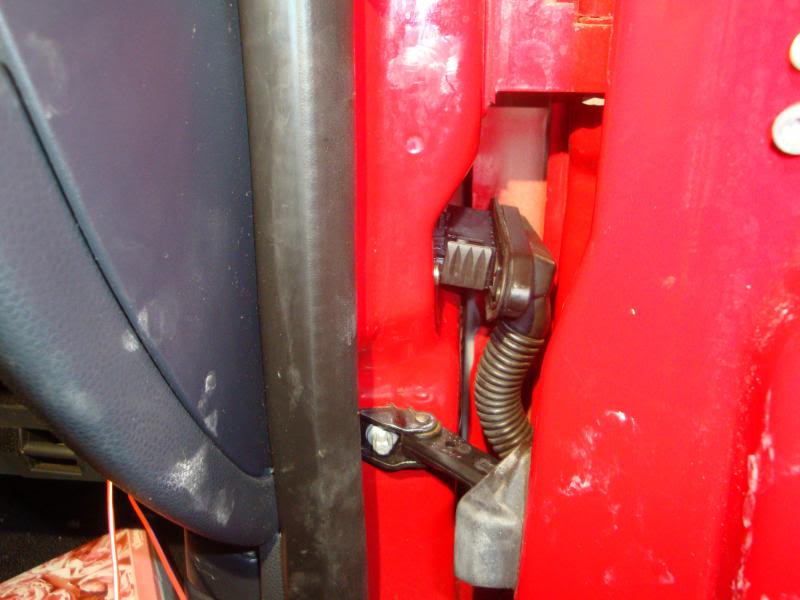
Undo and withdraw the door multiplug. Pull the plastic part closest to you and the connector will separate. Wear latex gloves due to a water repellent grease inside the connector.
Use any method possible to run the wires. It will drive you nuts. I used an Awl on one side, and on the other I had to 'worm" the rubber boot until the cable popped out. It took ages and made me very angry.
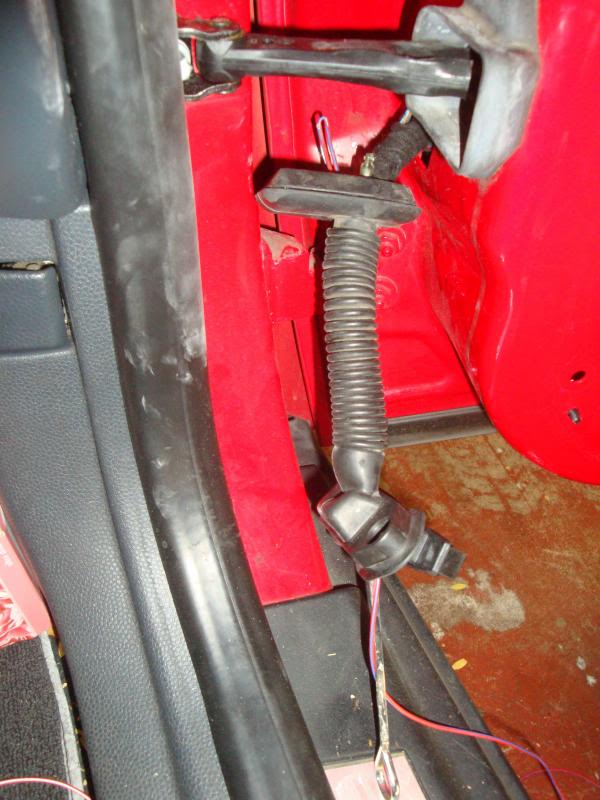
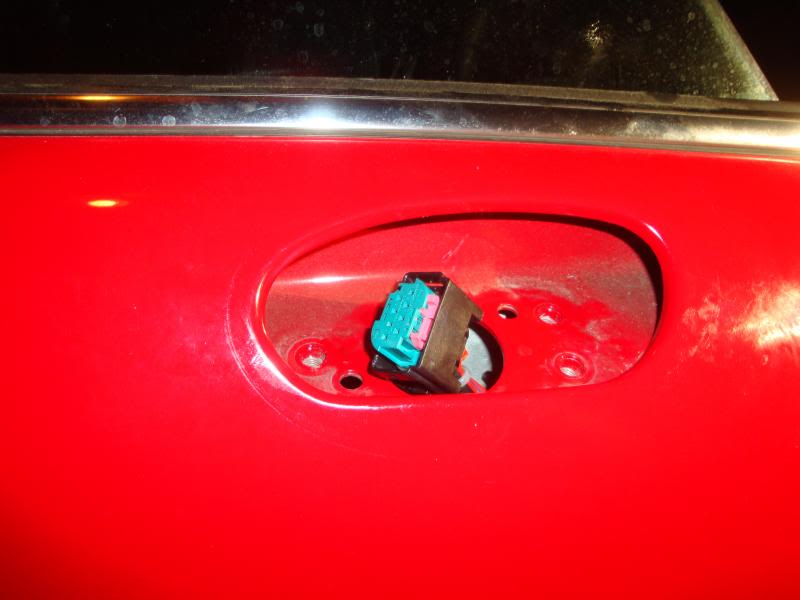
Tie on the second cable and draw through.

And connect to the multiplug.
Add the terminations and waterproofing to the cables. Note these rubber bits are both the wrong size and backwards, I changed this at the connector assembly but didn't snap a pic.

Inside the door run the cables, be aware the window moves, ziptie the new cables to the existing mirror harness judiciously to prevent damage when the window moves.
Slide back the old connector shell and remove the old connector.
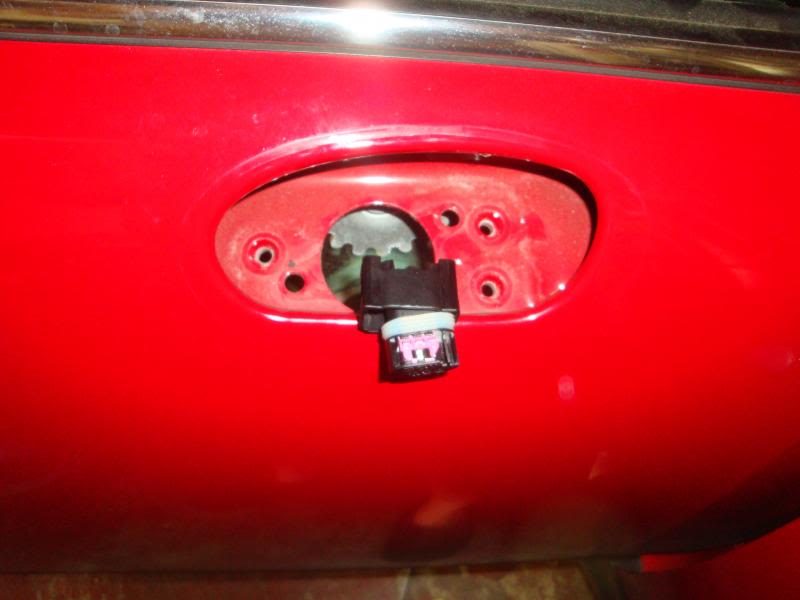
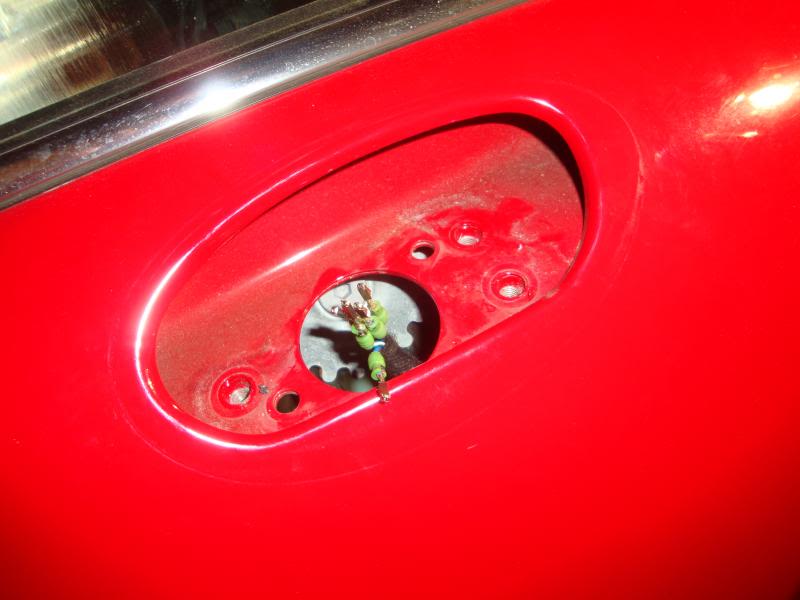
Slide the new connector shell down the loom. Add the pins to the new connector.
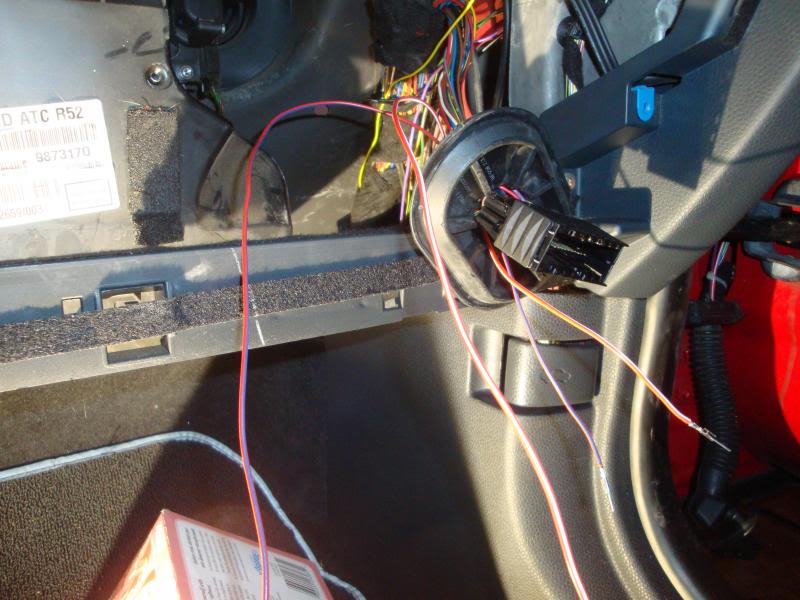
Inside the car remove the rubber plug that connects to the door multiplug an add the wires and pins.
Next lube your window mechanisms with a waterproof lube (both sides of that black bar) and reassemble the door card.
And fit the switch and test.

And that's it! Took ages this one! Not shown are two local GNDs, one for the mirror fold module and the other for the cig lighter. Not shown is the GND connection for the oil temp sender, but that's covered in the PDF. Also not shown there is a connection soldered at the fuse box for permanent live for the mirror fold module.
I didn't hook in the speed signal inhibit to the mirror fold module. You can pick it up from the ECU in the passenger kick panel if desired.
I didn't run the phone antenna because it's ungainly if you have an RLS, Bradnic didn't think much of it's performance, and it's probably for the European GSM bands based on the fact the BT kit is from Germany.
Thanks for reading!
Here are the resources I used, special thanks to MotoringFile Bradnic and ECS Tuning.
http://www.kneb.net/bmw/MINI/miniheatedseats.pdf
https://www.northamericanmotoring.co...-retrofit.html
http://www.minipeople.lt/failai/db/2...nstruments.pdf
http://www.bimmerforums.co.uk/forum/...ell-rs-t73387/
www.theautopartsshop.com
Door Mirror 51167192473 ULO W0133-1917648 $120.64
Door Mirror 51167192474 ULO W0133-1917647 $122.54
ECS tuning
61120144084 Cable set heated seats
61138364624 Socket housing for mirrors 8pol
84640404810 BT retrofit kit with ULF
Aux guages 82940415253
partslane.com
82110306852 65750029310 65750397059 alarm retrofit kit $259
eBay
E46 Mirror fold module & R50 switch - eBay UK used
Amazon
Aux in
So I'll refer you to Bradnic's excellent thread above for the disassembly instructions with many photos.
For me I wanted to do as much of the wiring in one go. I had already installed the mirrors and wired the doors and door connectors. I'll cover that at the end.
Here's the BT, mirror and heated seat harness, along with the aux gauges harness and a small cable I'd made for a cigarette charger, ready to go into the car. The bagged cables will become the mirror fold module harness.


In this picture you can see the BMW fan connectors I used to break out the Illumination, iBus, IGN. Power for the mirrors comes from the fuse box and the mirror module and cig lighter use local grounds.

Next up is the disassembly of the car. Seats out, clocks out, console out, steering cowel out, armrest out, HK amp out, driver's side sill trim out.


The RT/WS and RT/BL wires are for the mirror fold as these pics are a bit out of sequence.

The green and white wire are ones I added for a project that I remove during this install.
I made the cuts to the radio harness close to the carpet. I soldered on the connections to the power, GND, iBus, IGN and Illum.

Then made the fan connections.

Next I started to run the cables. It was necessary to wind back the fabric tape and release about 12" more mic cable from the harness.

Next it was necessary to remove and bend this bracket with a hammer.


I wrapped the BT antenna in fabric tape and routes the cables this way.


I hate to damage OEM stuff, but I've been in here before and it's much easier to cut the carpet between the shifter and the console. When the trim is back it clamps the carpet well, and it cannot show.

I drilled out the fixing holes for the aux gauges and the aux audio into the lower cupholder.

I ran the Eject box harness and picked up the mirror fold switch signal.


Next up is the heated seat harness. I dunno if it's because I have a convertible with additional underfloor braces, but the harness as supplied doesn't leave enough length to allow the seats to slide. I Unwrapped the cable, cut the GND to the passenger side and extended it, adding about 12" of seperation between the two seat connectors.

Before

After
More seat pics.


In this pic you can see the reverse wire I used for the EC mirror retrofit. the GR/RT needed a new fan connector breakout (GR/GE wire) which was supplied with the retrofit harness for the seat heat.
Plently of surplus wire here for RHD applications; GND and Illum.

Power from the fuse box.

And there is a hookup to the ignition switch too.
The mic wire went up the passenger side as it's a more natural route from the ULF.
The oil temp is routed into the engine bay as described in the PDF and the gauges are fitted and wired up.

And finally in the dash the mirror fold connector. there is an illum cable taped back in that harness that I don't need (brain fart!) and also a set of IGN, iBus and GND broken out in the 3 pin connector for a Relser interface for Navcoder coding.

I wrapped the module in fabric tape to stop it vibrating, and ziptied it but making sure it won't interfere with the motorized vent flap. Leave enough slack to fit the glovebox body without tugging on your harness.

This is the way the cables are arranged behind the radio. The AC controls are fitted after the radio is in place to assist in routing the radio cables without damage.

Here you can see the iBus, IGN and Illum fan connectors folded back into some empty space behind the toggle switches. You can also see the GND and Power D system connectors for the ULF.


And the final result in the dash.


The mirrors.


You can tell they are genuine because they have the three splines on the back and the OEM mirror covers fit.
First rotate the mirrors towards the sky and windscreen until you can see behind it to the fixing clips. Pop off the mirror glass gently but firmly.

Next drop the windows, rotate the mirrors into the service position (interference fit with the window) and undo the bolts.

Then move the mirror out of the service position, raise both the windows and pull the battery GND.
Swap the guts and covers onto the new mirror, it's a grubby job. Now is a good time to Brasso your chrome covers.


Use one of the many online guides to remove the door card.


Undo and withdraw the door multiplug. Pull the plastic part closest to you and the connector will separate. Wear latex gloves due to a water repellent grease inside the connector.

Use any method possible to run the wires. It will drive you nuts. I used an Awl on one side, and on the other I had to 'worm" the rubber boot until the cable popped out. It took ages and made me very angry.

Tie on the second cable and draw through.


And connect to the multiplug.


Add the terminations and waterproofing to the cables. Note these rubber bits are both the wrong size and backwards, I changed this at the connector assembly but didn't snap a pic.

Inside the door run the cables, be aware the window moves, ziptie the new cables to the existing mirror harness judiciously to prevent damage when the window moves.
Slide back the old connector shell and remove the old connector.


Slide the new connector shell down the loom. Add the pins to the new connector.

Inside the car remove the rubber plug that connects to the door multiplug an add the wires and pins.


Next lube your window mechanisms with a waterproof lube (both sides of that black bar) and reassemble the door card.

And fit the switch and test.


And that's it! Took ages this one! Not shown are two local GNDs, one for the mirror fold module and the other for the cig lighter. Not shown is the GND connection for the oil temp sender, but that's covered in the PDF. Also not shown there is a connection soldered at the fuse box for permanent live for the mirror fold module.
I didn't hook in the speed signal inhibit to the mirror fold module. You can pick it up from the ECU in the passenger kick panel if desired.
I didn't run the phone antenna because it's ungainly if you have an RLS, Bradnic didn't think much of it's performance, and it's probably for the European GSM bands based on the fact the BT kit is from Germany.
Thanks for reading!
Last edited by joylove; 07-01-2013 at 06:33 PM.
The following users liked this post:
ZigDuDim (01-03-2019)
#2
07-01-2013, 06:18 PM
#3
07-03-2013, 02:08 PM

Platinum Sponsor
Nice job and write up.
Gauges look very good.
We have the Euro blind spot mirrors / heated for the Gen 1, if you are looking to add another feature.
http://www.ecstuning.com/Search/SiteSearch/51167160775/ES2608508/
Let me know if you need anything else. I say this is an all in one project.
Gauges look very good.
We have the Euro blind spot mirrors / heated for the Gen 1, if you are looking to add another feature.
http://www.ecstuning.com/Search/SiteSearch/51167160775/ES2608508/
Let me know if you need anything else. I say this is an all in one project.
__________________

MINI Guru/ MINI Owner Since 2004 | NEW Lifetime Part Replacement | Local Pickup
Milltek | Genuine MINI | Forge Motorsport | NM Engineering | ECS Performance | M7 Speed
Customer Service Hours: 8am-8pm EST|Sales Team Hours: 8am-11pm | SAT 10am-7pm 800.924.5172
MINI Guru/ MINI Owner Since 2004 | NEW Lifetime Part Replacement | Local Pickup
Milltek | Genuine MINI | Forge Motorsport | NM Engineering | ECS Performance | M7 Speed
Customer Service Hours: 8am-8pm EST|Sales Team Hours: 8am-11pm | SAT 10am-7pm 800.924.5172
#4
07-03-2013, 02:30 PM
Thanks, I can snap a better pic of the gauges if you want one for the website.
The heated mirrors are tempting - I don't have heated glass at the moment but I'm blessed with a garage so frost generally isn't an issue.
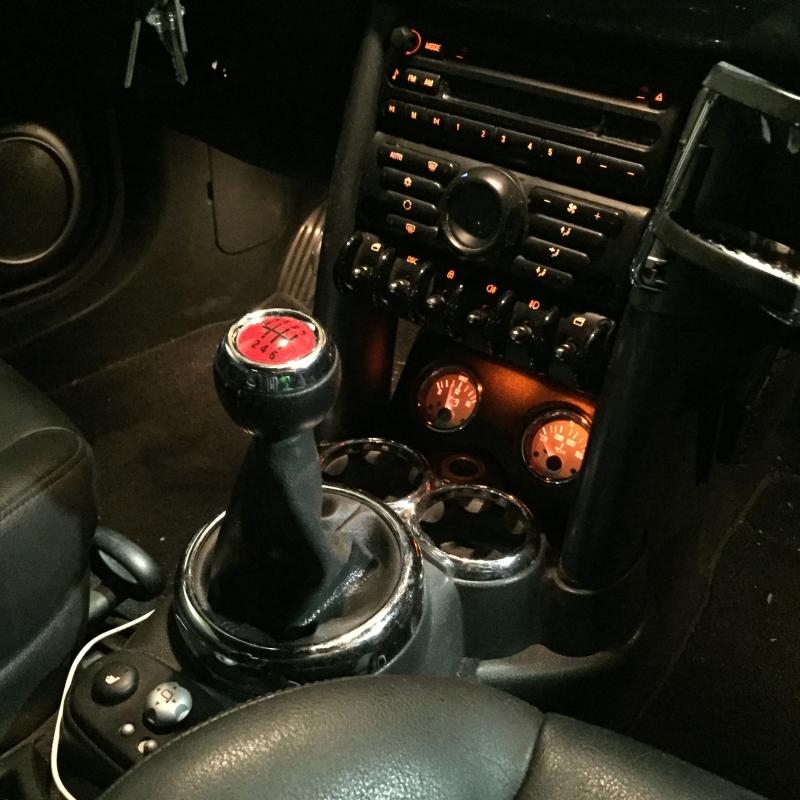
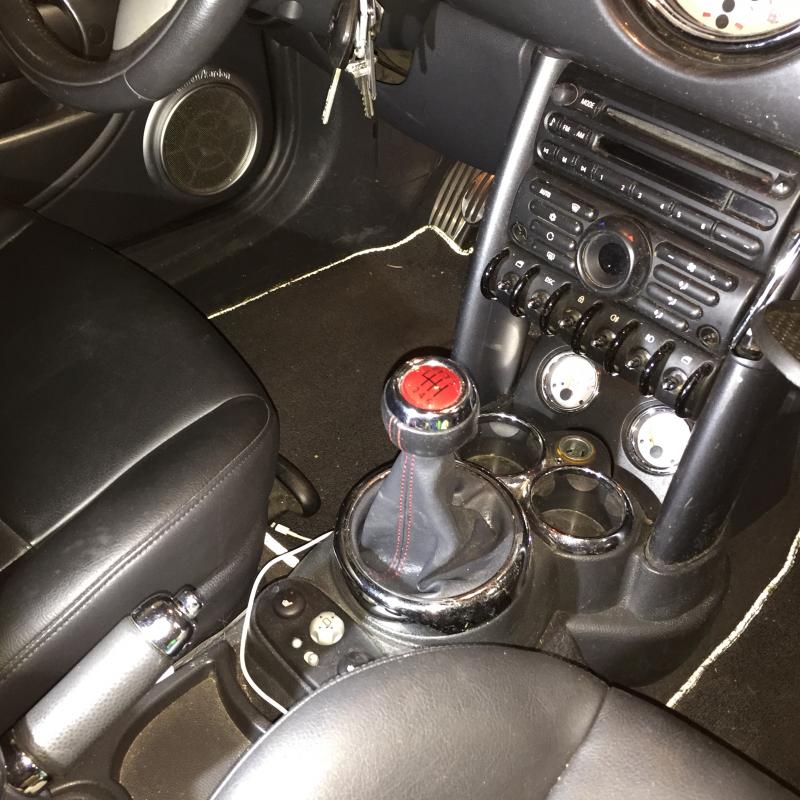
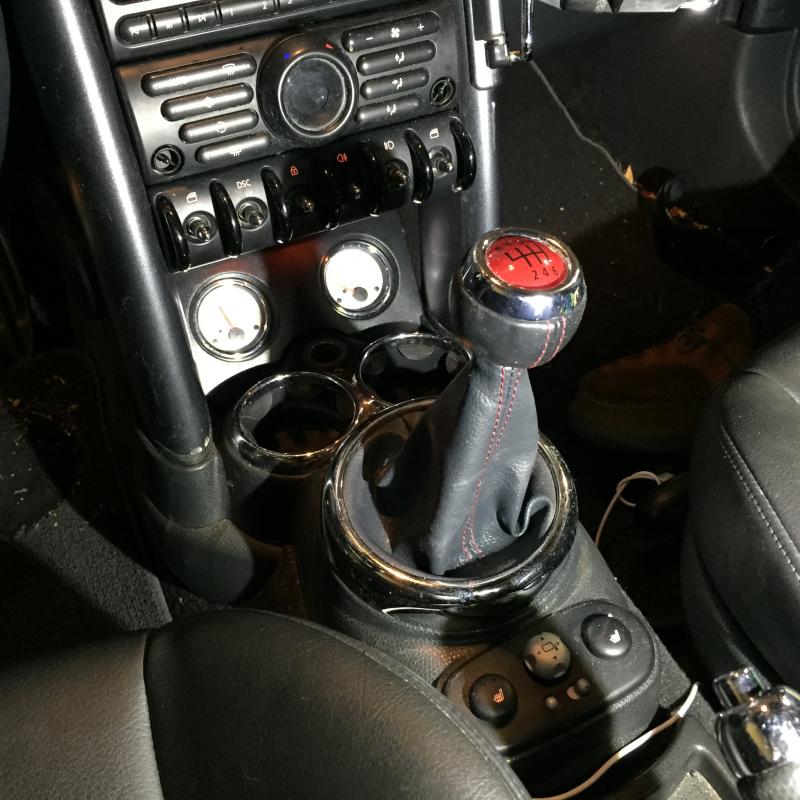
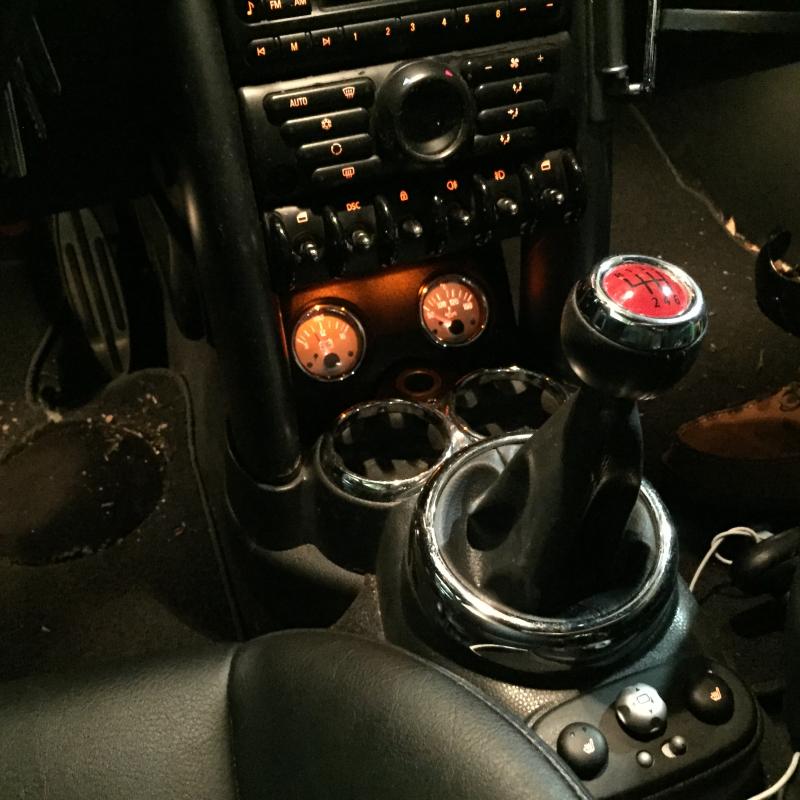
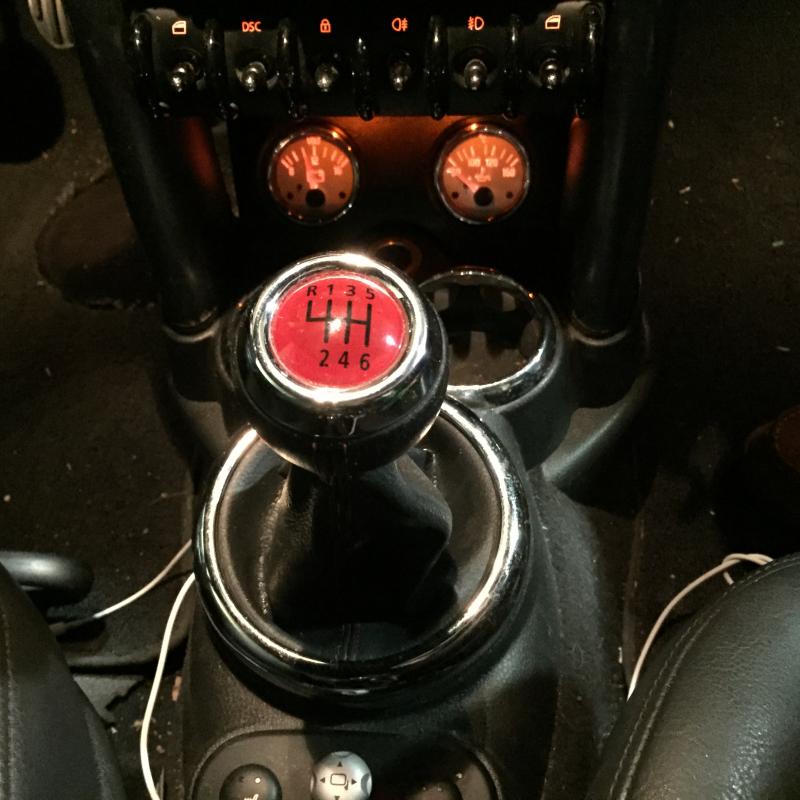
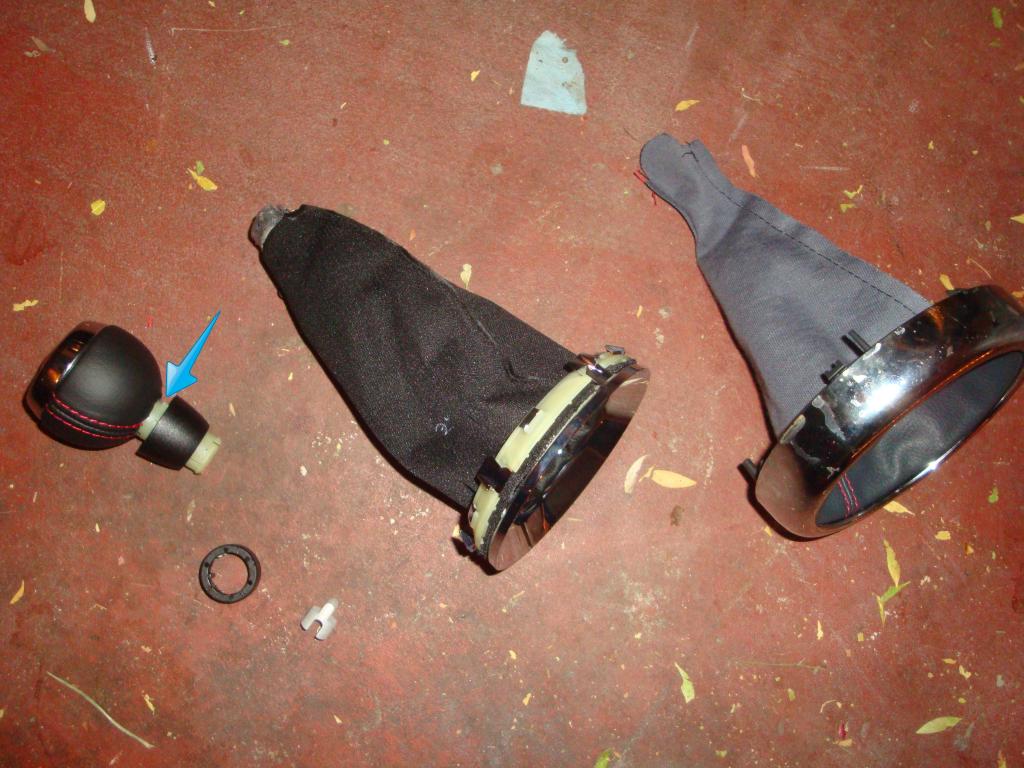
I also fitted the R56 GP red shift **** the following weekend with the JCW red-stitched shift and handbrake boots which I'm particularly happy with. Adds just a splash of red to match the body.
The heated mirrors are tempting - I don't have heated glass at the moment but I'm blessed with a garage so frost generally isn't an issue.
I also fitted the R56 GP red shift **** the following weekend with the JCW red-stitched shift and handbrake boots which I'm particularly happy with. Adds just a splash of red to match the body.
#5
08-08-2013, 01:36 PM
Platinum Sponsor
Thanks jovelove looks good as always, I would like to see that GP 2 **** in a Gen 1. Post up pics when you get that mod done .
and.
Update to thread:
Hello guys I just wanted to update the thread with some of the latest info from MINI.
We have received several kit from MINI with the Bluetooth ULF not in the package on newer stocked kits. They have determined that the kits before did come with the ULF before and the kits now will not come with the ULF. It will have to be purchased separately.
We tried to get the old ULF but it has been discontinued. We did some work and found an updated ULF module which is a shared unit on the MINI and BMW side . The ULF have had multiple super-session over the years.
So, this kit is much like the Gen 2 Bluetooth kit where the ULF module is separate. It has been updated on our website.
Thanks and I hope that helps with future installs.
.and.
Update to thread:
Hello guys I just wanted to update the thread with some of the latest info from MINI.
We have received several kit from MINI with the Bluetooth ULF not in the package on newer stocked kits. They have determined that the kits before did come with the ULF before and the kits now will not come with the ULF. It will have to be purchased separately.
We tried to get the old ULF but it has been discontinued. We did some work and found an updated ULF module which is a shared unit on the MINI and BMW side . The ULF have had multiple super-session over the years.
So, this kit is much like the Gen 2 Bluetooth kit where the ULF module is separate. It has been updated on our website.
Thanks and I hope that helps with future installs.
__________________
MINI Guru/ MINI Owner Since 2004 | NEW Lifetime Part Replacement | Local Pickup
Milltek | Genuine MINI | Forge Motorsport | NM Engineering | ECS Performance | M7 Speed
Customer Service Hours: 8am-8pm EST|Sales Team Hours: 8am-11pm | SAT 10am-7pm 800.924.5172
MINI Guru/ MINI Owner Since 2004 | NEW Lifetime Part Replacement | Local Pickup
Milltek | Genuine MINI | Forge Motorsport | NM Engineering | ECS Performance | M7 Speed
Customer Service Hours: 8am-8pm EST|Sales Team Hours: 8am-11pm | SAT 10am-7pm 800.924.5172
Last edited by ECSTuning; 08-09-2013 at 05:38 AM.
#6
09-24-2013, 11:28 AM

Please excuse my ignorance, but I looked over the heated seat retro-fit instructions you linked, and the required parts list.
Does this mean that the seats have the heaters built in, its just a matter of wiring them up? (not to trivialize, it's still a pain, I'm just asking if the seat had to be opened up, or replaced).
-JM
Does this mean that the seats have the heaters built in, its just a matter of wiring them up? (not to trivialize, it's still a pain, I'm just asking if the seat had to be opened up, or replaced).
-JM
#7
09-24-2013, 11:49 AM
Platinum Sponsor
Yea, most have the element. But you have to check if you have the wiring which tells you having the element , MINI gave most seats the heating element / plug pre-installed 12/2001- . Its was in and out with the seat productions. But its good to check:
Note : You will have to check under your MINI seats ( passenger and driver towards the front under the bottom cushion) to see if the extra seat plug/ emptly plug socket is there for this upgrade to work.
Joy love just needed the 61120144084 because I believe JL already had some other parts from the heated kit and using the powerfold-in mirror switch.
Part number 61110145996 is the full kit:
http://www.ecstuning.com/Search/SiteSearch/61110145996/
I am sure JL can add more to this as really doing a nice job on multiple installs at such a high caliber of technical info.
Thanks
__________________
MINI Guru/ MINI Owner Since 2004 | NEW Lifetime Part Replacement | Local Pickup
Milltek | Genuine MINI | Forge Motorsport | NM Engineering | ECS Performance | M7 Speed
Customer Service Hours: 8am-8pm EST|Sales Team Hours: 8am-11pm | SAT 10am-7pm 800.924.5172
MINI Guru/ MINI Owner Since 2004 | NEW Lifetime Part Replacement | Local Pickup
Milltek | Genuine MINI | Forge Motorsport | NM Engineering | ECS Performance | M7 Speed
Customer Service Hours: 8am-8pm EST|Sales Team Hours: 8am-11pm | SAT 10am-7pm 800.924.5172
Trending Topics
#8
09-24-2013, 11:59 AM
As above, some cars do, some cars don't, it's a lottery (Actually it's based on year and body-shape, plus factory stock levels, but the result is still the same, you have to take a torch and have a look).
Yes I had the switch pack already for the powerfold, so I only needed the harness, ECS found the harness PN for me. :D
https://www.northamericanmotoring.co...s-in-them.html
The heated seat connector is a chunky round pin 2.5mm D system type, and visibly different from all the others.
Yes I had the switch pack already for the powerfold, so I only needed the harness, ECS found the harness PN for me. :D
https://www.northamericanmotoring.co...s-in-them.html
The heated seat connector is a chunky round pin 2.5mm D system type, and visibly different from all the others.
#9
09-25-2013, 12:42 PM

I was one of the unlucky ones - my car did not come with the elements in the seats (leather, lapis blue/panther black). Got everything wired up for heated seats using the kit...mostly straightforward install, just a bit time consuming. Now I just need to keep an eye out for some seats...or just save up enough for brand new ones...
#10
12-29-2014, 11:52 PM
Some updates.
Less blurry now!
They come in a full pack, for the Heated Seats / mirror switch version. Then the set for heated seat / mirror switch / fold in mirror version ( which is a little more rare ).
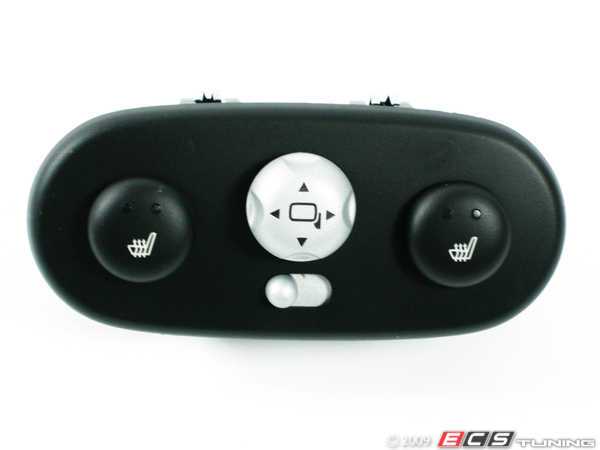
Center Console Heated Seats / Power Mirror Switch ( non power fold in mirrors ) version
Part # 61316918217
http://www.ecstuning.com/Search/SiteSearch/61316918217/
&
Center Console Heated Seats / Power Mirror Switch / Power Fold Part # 61316918216
http://www.ecstuning.com/Search/SiteSearch/61316918216/
Looks like this: with the extra button for powerfold.

Just make sure you get the right one. Most lily the switch is stuck / broken , if you cleaned it and it still does not work.
Thanks
Center Console Heated Seats / Power Mirror Switch ( non power fold in mirrors ) version
Part # 61316918217
http://www.ecstuning.com/Search/SiteSearch/61316918217/
&
Center Console Heated Seats / Power Mirror Switch / Power Fold Part # 61316918216
http://www.ecstuning.com/Search/SiteSearch/61316918216/
Looks like this: with the extra button for powerfold.
Just make sure you get the right one. Most lily the switch is stuck / broken , if you cleaned it and it still does not work.
Thanks
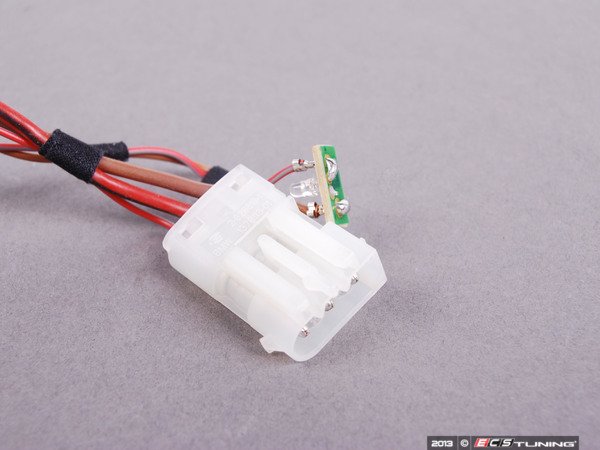
Found a three pol ( white ) but its on E90 BMW cigar socket: It used on some BMW / MINI cig sockets.
Socket MINI 61346977682 ~15.00
http://www.ecstuning.com/Search/SiteSearch/61346977682/
Hope that helps.
For this plug on your wiring harness ?:
**Edit , I was able to finally find a valid part number off of one of the other sockets not from the E39 but E90 above.
Looks like I was able to find it. It comes in white in a pack of 10. I am glad I found it , but it took me some serious digging on the BMW side of thing I know. You have to know the common parts are they are not all on the ETK shared on BMW and MINI.
Socket Housing part # 61131378113 pack of 10
http://www.ecstuning.com/Search/SiteSearch/61131378113/
Thanks
#11
12-30-2014, 11:56 AM
Platinum Sponsor
Very nice , did you just cut a bigger U in the shifter base rod or file down the insert on the bottom of the ****?
Looks great nice mod.
Looks great nice mod.
__________________
MINI Guru/ MINI Owner Since 2004 | NEW Lifetime Part Replacement | Local Pickup
Milltek | Genuine MINI | Forge Motorsport | NM Engineering | ECS Performance | M7 Speed
Customer Service Hours: 8am-8pm EST|Sales Team Hours: 8am-11pm | SAT 10am-7pm 800.924.5172
MINI Guru/ MINI Owner Since 2004 | NEW Lifetime Part Replacement | Local Pickup
Milltek | Genuine MINI | Forge Motorsport | NM Engineering | ECS Performance | M7 Speed
Customer Service Hours: 8am-8pm EST|Sales Team Hours: 8am-11pm | SAT 10am-7pm 800.924.5172
#12
12-30-2014, 12:34 PM
Then I secured the shifter boot with a ziptie to the shift arm (per R50) and the **** wedges down to close the gap. No WMW shift adaptor required.
#13
12-30-2014, 12:38 PM
Platinum Sponsor
Ah.. Works nice with the old GP 1 boot. Had some people think they could cut and peal back the GP2 boot so they could use it in a gen 1 . Dont think it would even be close.
Thanks for the info.
Thanks for the info.
__________________
MINI Guru/ MINI Owner Since 2004 | NEW Lifetime Part Replacement | Local Pickup
Milltek | Genuine MINI | Forge Motorsport | NM Engineering | ECS Performance | M7 Speed
Customer Service Hours: 8am-8pm EST|Sales Team Hours: 8am-11pm | SAT 10am-7pm 800.924.5172
MINI Guru/ MINI Owner Since 2004 | NEW Lifetime Part Replacement | Local Pickup
Milltek | Genuine MINI | Forge Motorsport | NM Engineering | ECS Performance | M7 Speed
Customer Service Hours: 8am-8pm EST|Sales Team Hours: 8am-11pm | SAT 10am-7pm 800.924.5172
#15
01-03-2019, 07:34 AM


Thread
Thread Starter
Forum
Replies
Last Post
marendt428
MINI Parts for Sale
68
11-14-2015 10:03 AM
marendt428
MINIs & Minis for Sale
0
08-08-2015 04:44 AM