How To Suspension:: Install Rear Sway Bar, 56k beware
#1
 05-13-2012, 06:18 PM

Suspension:: Install Rear Sway Bar, 56k beware
I picked up a Hotchkis rear sway bar while at MOTD and was not able to have it installed while there. I came on here and saw that there was not a How-to so I decided with the directions that came with the bar to make my own. I have included a lot of photos and am going to try to keep it simple and on track. If you can do basic maintenance you can handle this installation. Set yourself with anywhere between 2 and 6 hours for the installation, it took me just over 3 hours to complete this.
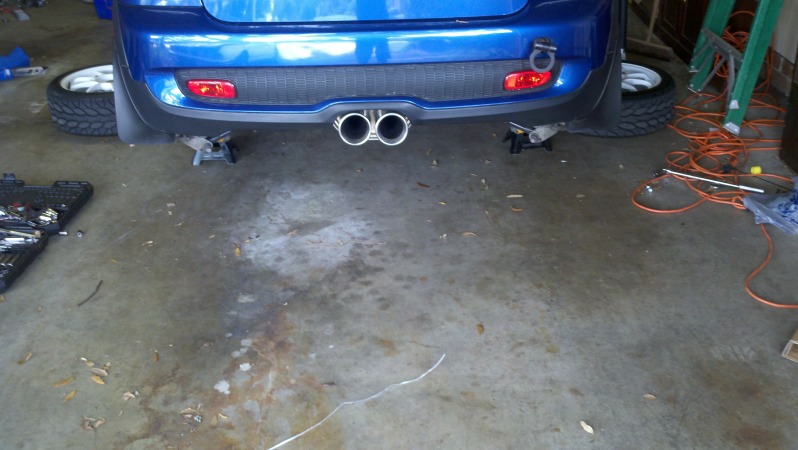
1. Raise your MINI and place jack stands under it. To help around 10 to 14 inches of clearance makes this super easy. After raising it remove your rear wheels.
2. Look and see how the stock bar is positioned, this will help you on re installation. Disconnect the bolt on the bar attached to the end link. There is a nut on the back side that requires a 16mm box wrench and the front nut is also a 16mm that you can use a socket for.
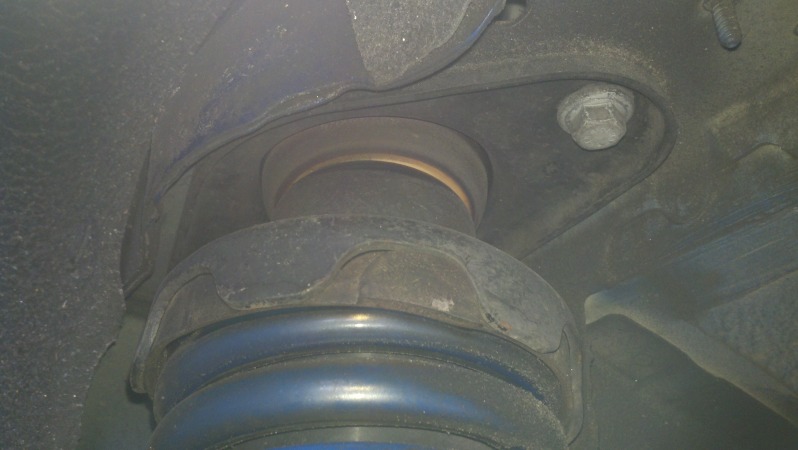
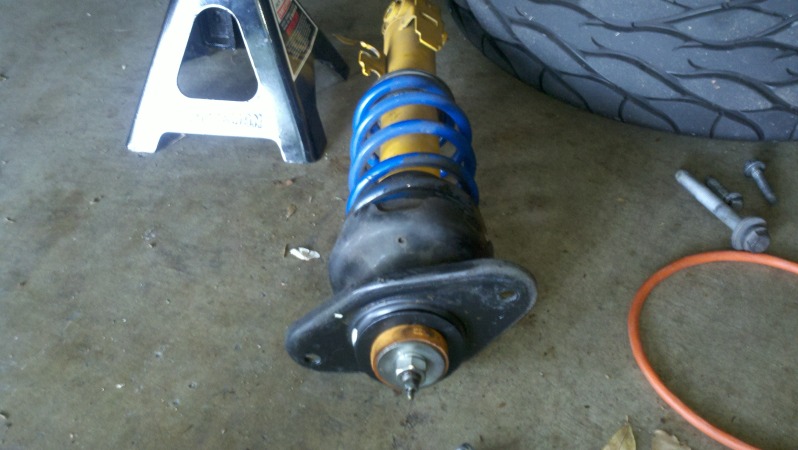
3. Now it is time to drop the springs/struts. There are 2 bolts at the top that require a 13mm socket with an extension so that you can get to the bolts. You can remove just one and still be able to get the bar out place the new one in but, it is a lot easier if you do both sides.
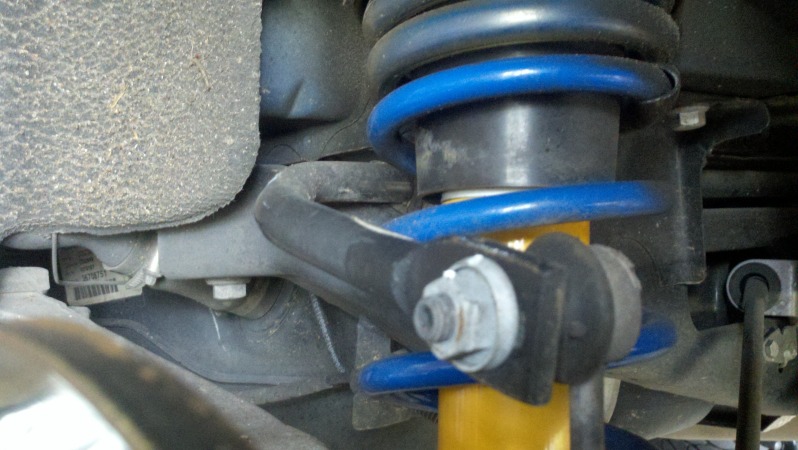
4. The bottom part of the shocks require a 18mm socket. When you pull the bolt out make sure that you have your hand at the bottom of the shock so that it does not drop straight to the floor.
5. At this point in my install I decided to tighten up my Koni yellows to help from hitting bumps and rubbing the rear tires.
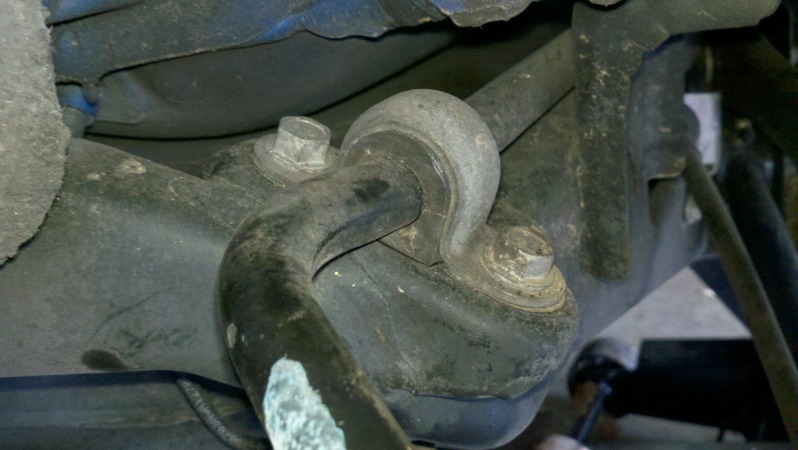
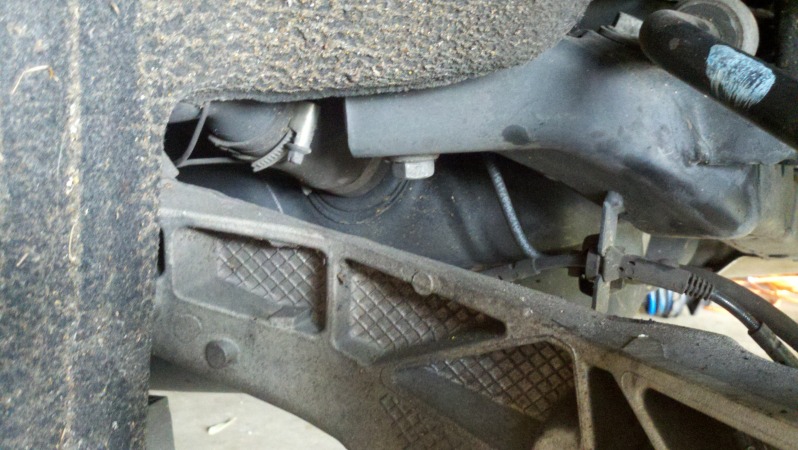
6. The next portion is for the sway bar bushings and brackets. Remove both
the bolts on the bracket with a 13mm socket. After which you can remove the metal bracket. Next you can either slide the bushings off or just pull the off as there is an opening on the side of them.
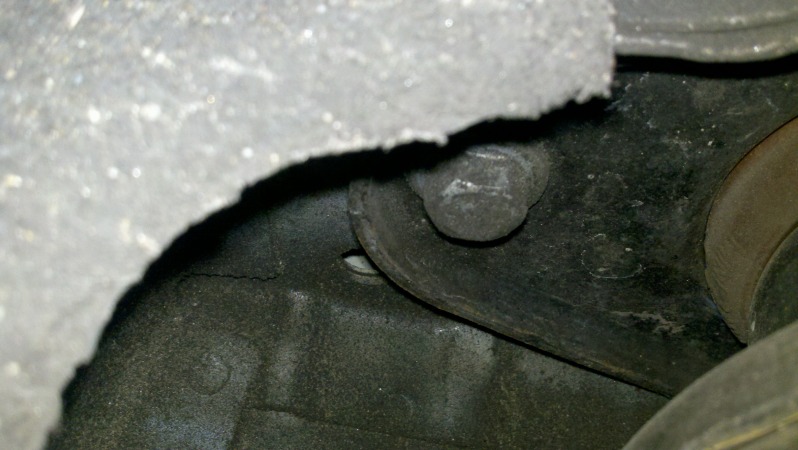
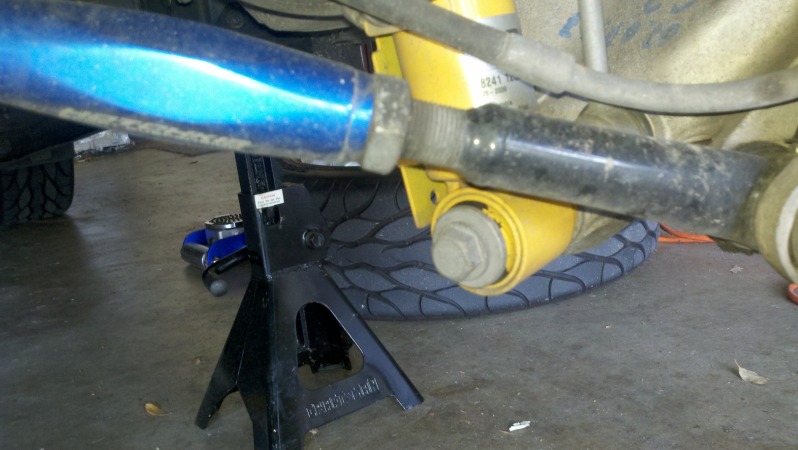
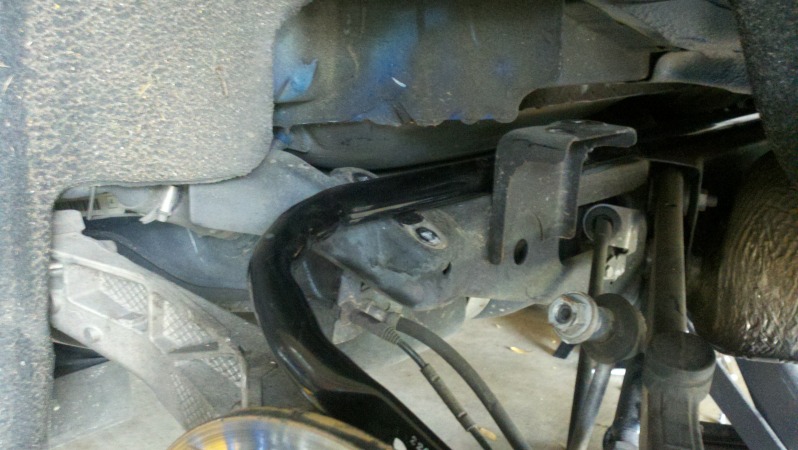
7. Next is the fun part. Have your jack ready at a good point of the subframing. I used a spot next to the heat shield by the muffle becasue my jack fit perfectly. Raise your jack just high enough that there is about 1/2' between it and the subframe. Once you have done that you are now ready to realse the subframe bolts. there are 4 of them all 16mm and an extension would be a good idea to help.
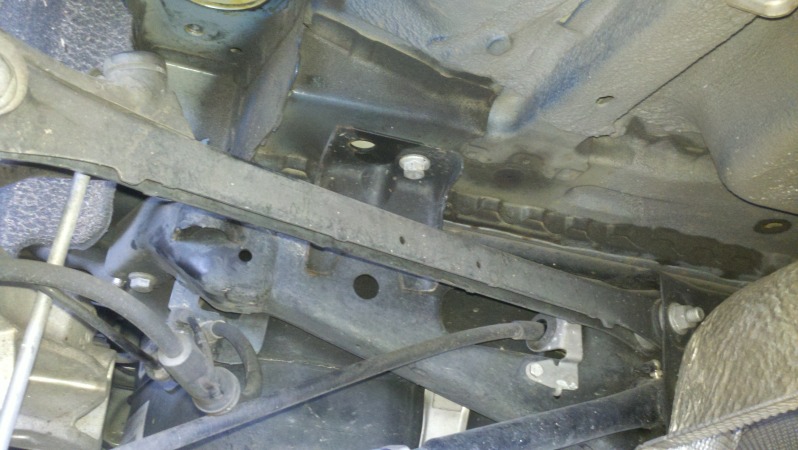
8. Now lower down sub frame down so that you can work out the stock bar. This step is best left up to what works best for you. I slid the bar between the body and the sub framing. Once out repeat in the opposite way with the new bar. Make sure that you grease the new bushings before installing them to prevent squeaking.
9. Everything goes back together in reverse as these instructions.
***Note*** When re installing the shocks attach the bolts at top and then use your jack to help compress the shock so that you can the bottom bolt back in. This parts is a little tedious but, not completely impossible.
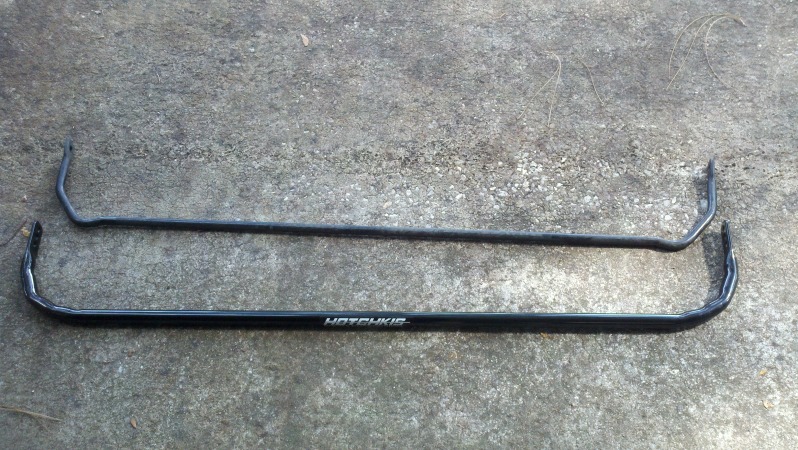
Here is a comparison of the stock and the Hotchkis bar next to each other.
Hopefully this works for everyone. If you have any questions please ask and have fun enjoying your new sway bar.
1. Raise your MINI and place jack stands under it. To help around 10 to 14 inches of clearance makes this super easy. After raising it remove your rear wheels.
2. Look and see how the stock bar is positioned, this will help you on re installation. Disconnect the bolt on the bar attached to the end link. There is a nut on the back side that requires a 16mm box wrench and the front nut is also a 16mm that you can use a socket for.
3. Now it is time to drop the springs/struts. There are 2 bolts at the top that require a 13mm socket with an extension so that you can get to the bolts. You can remove just one and still be able to get the bar out place the new one in but, it is a lot easier if you do both sides.
4. The bottom part of the shocks require a 18mm socket. When you pull the bolt out make sure that you have your hand at the bottom of the shock so that it does not drop straight to the floor.
5. At this point in my install I decided to tighten up my Koni yellows to help from hitting bumps and rubbing the rear tires.
6. The next portion is for the sway bar bushings and brackets. Remove both
the bolts on the bracket with a 13mm socket. After which you can remove the metal bracket. Next you can either slide the bushings off or just pull the off as there is an opening on the side of them.
7. Next is the fun part. Have your jack ready at a good point of the subframing. I used a spot next to the heat shield by the muffle becasue my jack fit perfectly. Raise your jack just high enough that there is about 1/2' between it and the subframe. Once you have done that you are now ready to realse the subframe bolts. there are 4 of them all 16mm and an extension would be a good idea to help.
8. Now lower down sub frame down so that you can work out the stock bar. This step is best left up to what works best for you. I slid the bar between the body and the sub framing. Once out repeat in the opposite way with the new bar. Make sure that you grease the new bushings before installing them to prevent squeaking.
9. Everything goes back together in reverse as these instructions.
***Note*** When re installing the shocks attach the bolts at top and then use your jack to help compress the shock so that you can the bottom bolt back in. This parts is a little tedious but, not completely impossible.
Here is a comparison of the stock and the Hotchkis bar next to each other.
Hopefully this works for everyone. If you have any questions please ask and have fun enjoying your new sway bar.
The following 3 users liked this post by Porthos:

#3
05-17-2012, 05:17 PM
#5
05-22-2012, 01:27 PM
#6
05-30-2012, 07:40 AM
#7
05-30-2012, 08:42 AM

Good writup and pics on this...thanks, I'm hoping to do this..hopefully in the not too distant future.
...recently I was switching out my wheels, and noticed that there is some rub marks on my stock sway bar...looks exactly in the same way and spot that it seems to appear on yours.
..I'm wondering is this is common maybe during a full compression of suspension on these cars? ..and hopefully a thicker swaybar would not be a potential for even more contact?
thanks
J
Trending Topics
#9
07-01-2012, 01:50 PM

New Hotchkiss
I just did in on my 2010 R57S convertible. It took me 4 hours, since the Conv has an extra subframe bolt centered above the muffler. I had to go get a stubby ratchet, and I guarantee you that the bolt is not torqued to 122 ft/lbs like the other 4. I just took it for a ride around the block and there's no squeaks. It's a little misty today in SF so it's not a good day to test the limits of a new sway bar!

#12
12-30-2012, 08:25 AM
6th Gear
An easy way to get floor stands under all four jack points:
http://www.blimeycabrio.com/?s=how+a+stud&x=10&y=6
Scroll down to the April 28th entry. I added a length of angle iron bolted to the 2X4 to help keep it rigid.
While you're in Blimey's blog, spend some time browsing through it. There's lots of neat stuff.
http://www.blimeycabrio.com/?s=how+a+stud&x=10&y=6
Scroll down to the April 28th entry. I added a length of angle iron bolted to the 2X4 to help keep it rigid.
While you're in Blimey's blog, spend some time browsing through it. There's lots of neat stuff.
#13
01-08-2013, 02:19 PM

I just completed this job. I basically followed the above instructions. It definitely helps to pull both rear shocks and it really only takes four or five minutes to do including reinstallation. My only problems were: 1) figuring out a place to put a jack to hold the rear subframe (I ended up putting it under the plastic bolted to the subframe - does the original poster not have plastic underbody panels?) and 2) getting the subframe to lower.
I didn't drop the subframe all the way, but, I had all but the passenger side front bolt completely off. It still wouldn't sag all the way on that bolt, but, I was able to wiggle it enough to get the sway bar out and (with additional wrestling) get the Hotchkiss in. Then, I had a tiny bit of trouble lining the subframe back up - I used a phillips head screwdriver in the drivers rear most bolt hole of the subframe to lever it into place.
The whole job took me about two hours and forty five minutes.
Bob
#14
02-20-2013, 07:58 PM

Join Date: Apr 2004
Location: charleston, SC
Posts: 1,874
Likes: 0
Received 0 Likes
on
0 Posts
#15
02-21-2013, 07:15 AM


#17
03-04-2013, 09:44 AM

4th Gear
Join Date: Feb 2009
Location: Chicago, IL
Posts: 347
Likes: 0
Received 0 Likes
on
0 Posts
are there torque specs for the swaybar bushing mounts, end link connectors and/or subframe bolts? or is it just as tight as you can make it?
Also, is there any need to upgrade any bushings if utilizing the stock 'sport' (non-jcw) suspension? Car is mostly used for autox and occasional track use.
Also, is there any need to upgrade any bushings if utilizing the stock 'sport' (non-jcw) suspension? Car is mostly used for autox and occasional track use.
Last edited by minimini482; 03-04-2013 at 09:55 AM.
#18
03-04-2013, 11:13 AM
#19
03-04-2013, 11:17 AM
4th Gear
Join Date: Feb 2009
Location: Chicago, IL
Posts: 347
Likes: 0
Received 0 Likes
on
0 Posts
#20
03-04-2013, 04:50 PM
4th Gear
Join Date: Feb 2009
Location: Chicago, IL
Posts: 347
Likes: 0
Received 0 Likes
on
0 Posts
#21
03-04-2013, 09:16 PM
I'm guessing no alignment check is needed. You're not altering anything that might affect alignment e.g. ride height, tire size, etc.. The Alta instructions are full of safety disclaimers that the sway bar will affect your handling and encouraging you to drive cautiously until you you become accustomed to the new feel. No mention is made of the requirement to check the alignment after install.
#22
03-04-2013, 09:20 PM
#23
03-05-2013, 09:29 AM
4th Gear
Join Date: Feb 2009
Location: Chicago, IL
Posts: 347
Likes: 0
Received 0 Likes
on
0 Posts
#24
03-07-2013, 08:40 PM
I installed my Alta 22mm sway bar today using the instructions above. I'm no mechanic but it all seemed pretty straightforward. Took me about 3 1/2 hrs in my garage using 2 jack stands. I don't recommend removing all 4 bolts connecting the subframe to the bottom of the car. Remove both bolts on the right side and just loosen the bolts on the left about 1/2". Pull the old bar out the left side and insert the new bar from the right. Leaving 2 bolts still slightly installed on the left will make it easier to line up and reinstall the 2 bolts on the right. The only problem I had was removing the bottom bolts on the shocks (must've been installed by Godzilla). I used a torque wrench and oem specs for the reassembly. Car feels more anxious to turn now and body roll appears to be reduced. I used the middle mounting hole on the Alta bar.
#25
03-07-2013, 08:47 PM