
New Owner...
#1
 09-18-2011, 10:26 AM


New Owner...
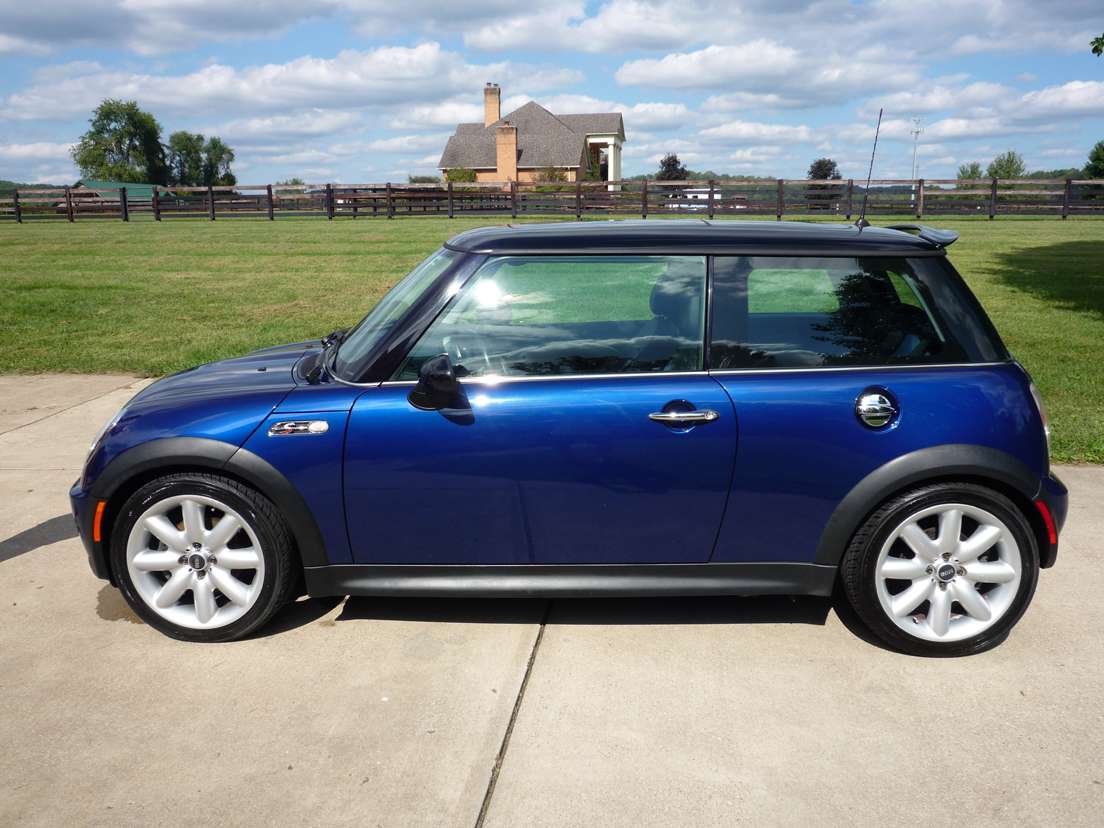
Hello Mini owners! I would like to take this opportunity to introduce myself. I am a regular on other forums and hoping that this Mini forum is as busy as other I am involved.
The fiancee has been looking for a 'new' vehicle for some time (she has such a difficult time making decisions! ...lol). She used to drive a Saturn SL and it served her well as dog-transport/daily driver and still getting 30+ MPG. She (ahem..'I') could have continued to repair the shifter bushing and clutch and add to the 258k on the odometer but she finally agreed to upgrade. She likes a 'cute' & good gas milage car...and I wanted her to buy something built solid and lots of fun to drive.
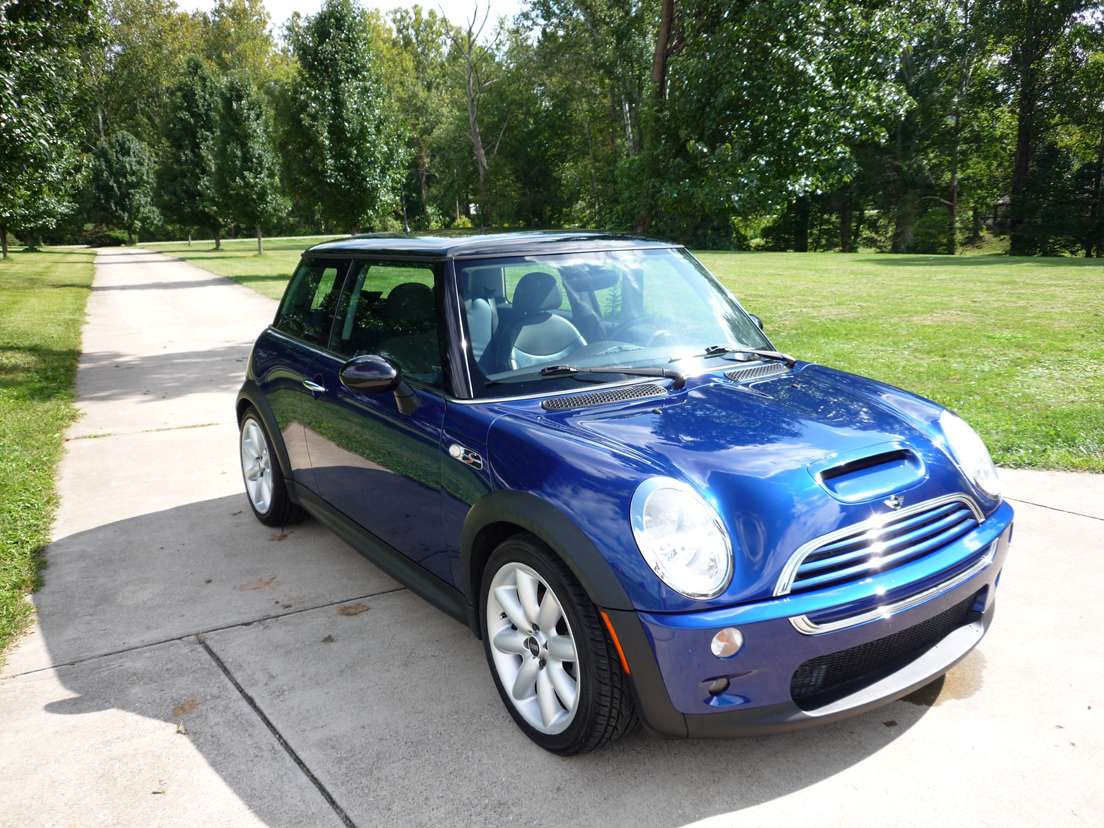
I am a Toyota fan...I have two Supra MK2's. One is a family heirloom turned into a street legal beast with every system being overhauled/upgraded just to keep it interesting. A second one was purchased as a daily driver. I also have respect for the history of the Cooper and also German engineering. Since the finance owns a 1967 beetle where her father and myself rebuilt a 1600 engine, I continued to encourage her to seriously look at Mini's. After driving a Cooper, she enjoyed the test drive but I needed a car with more aggression. Enter the 'S'.
The R53 is a blast to drive and is getting plenty of attention here locally. The local used dealer did very little to get it ready, and even used regular dino in an oil change. I am very picky with my car care and will be changing all fluids to synthetic and will upgrade parts as they need replaced.
We are both very excited about the purchase and I hope to learn much from others in this forum.
I am currently searching for the service intervals for the 2004 Cooper S...if you can send me in the right direction, I would appreciate it.
Thanks for reading. Pics and more posts to come soon.
The fiancee has been looking for a 'new' vehicle for some time (she has such a difficult time making decisions! ...lol). She used to drive a Saturn SL and it served her well as dog-transport/daily driver and still getting 30+ MPG. She (ahem..'I') could have continued to repair the shifter bushing and clutch and add to the 258k on the odometer but she finally agreed to upgrade. She likes a 'cute' & good gas milage car...and I wanted her to buy something built solid and lots of fun to drive.
I am a Toyota fan...I have two Supra MK2's. One is a family heirloom turned into a street legal beast with every system being overhauled/upgraded just to keep it interesting. A second one was purchased as a daily driver. I also have respect for the history of the Cooper and also German engineering. Since the finance owns a 1967 beetle where her father and myself rebuilt a 1600 engine, I continued to encourage her to seriously look at Mini's. After driving a Cooper, she enjoyed the test drive but I needed a car with more aggression. Enter the 'S'.
The R53 is a blast to drive and is getting plenty of attention here locally. The local used dealer did very little to get it ready, and even used regular dino in an oil change. I am very picky with my car care and will be changing all fluids to synthetic and will upgrade parts as they need replaced.
We are both very excited about the purchase and I hope to learn much from others in this forum.
I am currently searching for the service intervals for the 2004 Cooper S...if you can send me in the right direction, I would appreciate it.
Thanks for reading. Pics and more posts to come soon.

#4
09-21-2011, 04:57 PM

2nd Gear
Join Date: Sep 2011
Location: Maryland
Posts: 120
Likes: 0
Received 0 Likes
on
0 Posts


#6
02-02-2015, 09:22 PM
Major Repairs Update...
Our 2004 Mini Cooper S (R53) has given us many years of reliable service. The car was bone stock once purchased from the used car dealer. Once in our possession, the following parts were changed: coil, spark plugs, spark plug wires, shocks, struts, strut bearings, brake pads, rotors, brake lines, windshield wipers, and all fluids. Over time, a Way Motor Works (WMW) rear lower sway bar was installed, which greatly improved the stability of the car. A DDM cold-air intake was installed, along with a dry filter and profilter, instead of the oiled foam filter. Then a M7 upper strut bar with strut tower defenders was installed to improve stability.
This is a great little car and part of the family. With approximately 149k miles on the odometer, the clutch started slipping in 5/6th gear and during more spirited launches. No surprise to this forum, you will see the extent to which the car needs broken down to get to the clutch, so it was decided to replace many seals and give the Mini some nice upgrades.
The following parts were obtained:
� WMW 15% pulley, serpentine belt, and colder NGK spark plugs
� NGK Spark plug wires
� Craven Speed R53 supercharger pulley puller
� Supercharger oil � 8 oz.
� OEM water pump
� Water pump flange
� OEM thermostat and gasket
� Brass coolant bleeder screw
� ATI Super Damper Crank pulley R53, with new crank bolt
� WMW tensioner stop
� Gates 38404 belt tensioner
� Gates 36168 idler pulley
� Supercharger inlet gasket
� Supercharger outlet gasket
� OEM MAP sensor tube
� Valeo clutch and flywheel kit
� Clutch throw out bearing guide tube
� OEM shift cables
� OEM shift ****
� OEM clutch slave cylinder
� Rear main seal
� Front main seal
� Camshaft position sensor O-ring
� Crankshaft position sensor O-ring
� Dipstick tube O-ring
� Valve cover gasket with spark plug tube seals
� OEM valve cover bolts
� OEM oil pan gasket
� WMW Aftermarket upper engine mount with OEM Torx bolt
� OEM lower engine mount
� Powerflex front control arm polyurethane bushing kit
� Powerflex front sway bar bushings
� Powerflex steering rack bushing
� Powerflex gear box mount polyurethane bushing insert
� Powerflex lower engine mount polyurethane bushing insert
� OEM cabrio cross braces
� TSW XBrace
� Craven dipstick
� Power steering fan
� Power steering pressure line
� Power steering suction line
� WMW Stratmosphere catback exhaust, resonated
� OEM set of 12mm lug bolts
� Wheel hanger lug bolt guide tube
� Cardone 60-9279 Remanufactured CV axle, with new axle nut
� Bentley Mini Service& Repair manual
� Amsoil coolant boost
� Amsoil signature series 5W-30
� Amsoil syncromesh transmission fluid
� Amsoil brake fluid
� Prestone coolant
� A case of brake cleaner
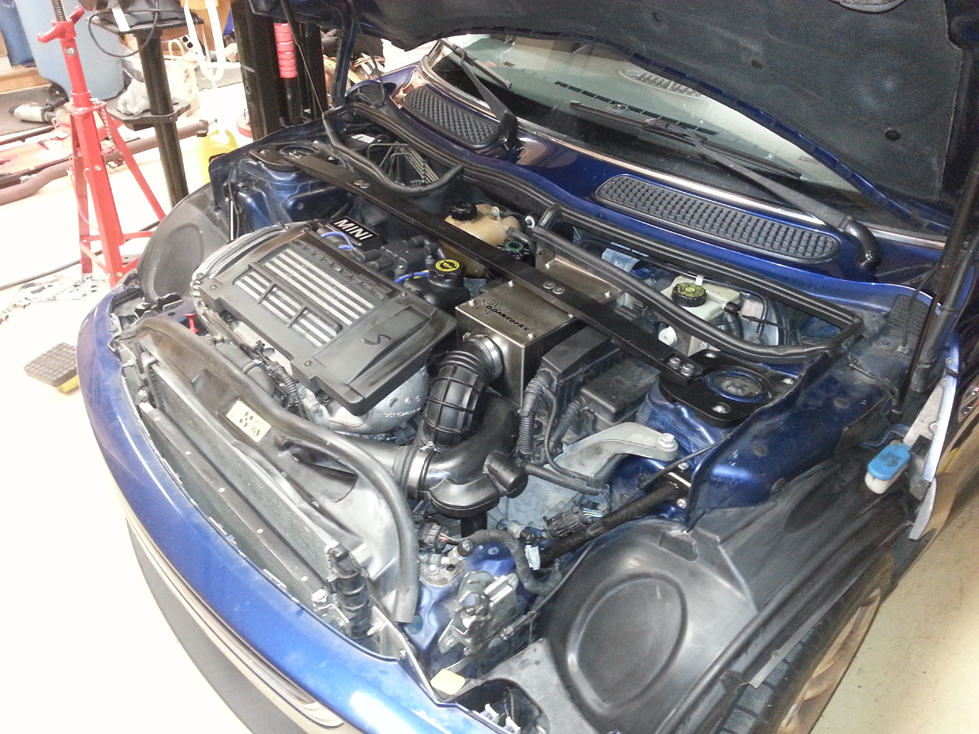
With that parts list, I better get to work! Enough typing�here are a few images of the progress.
Starting to disassemble this oily mess!
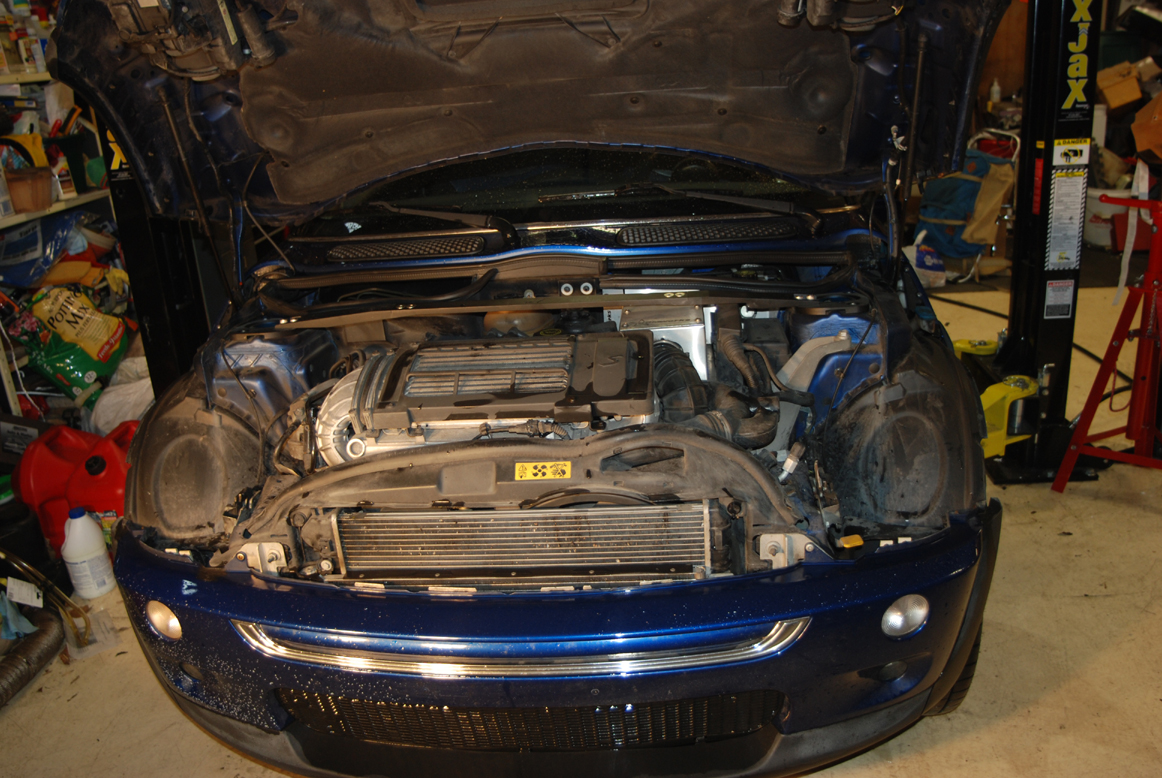
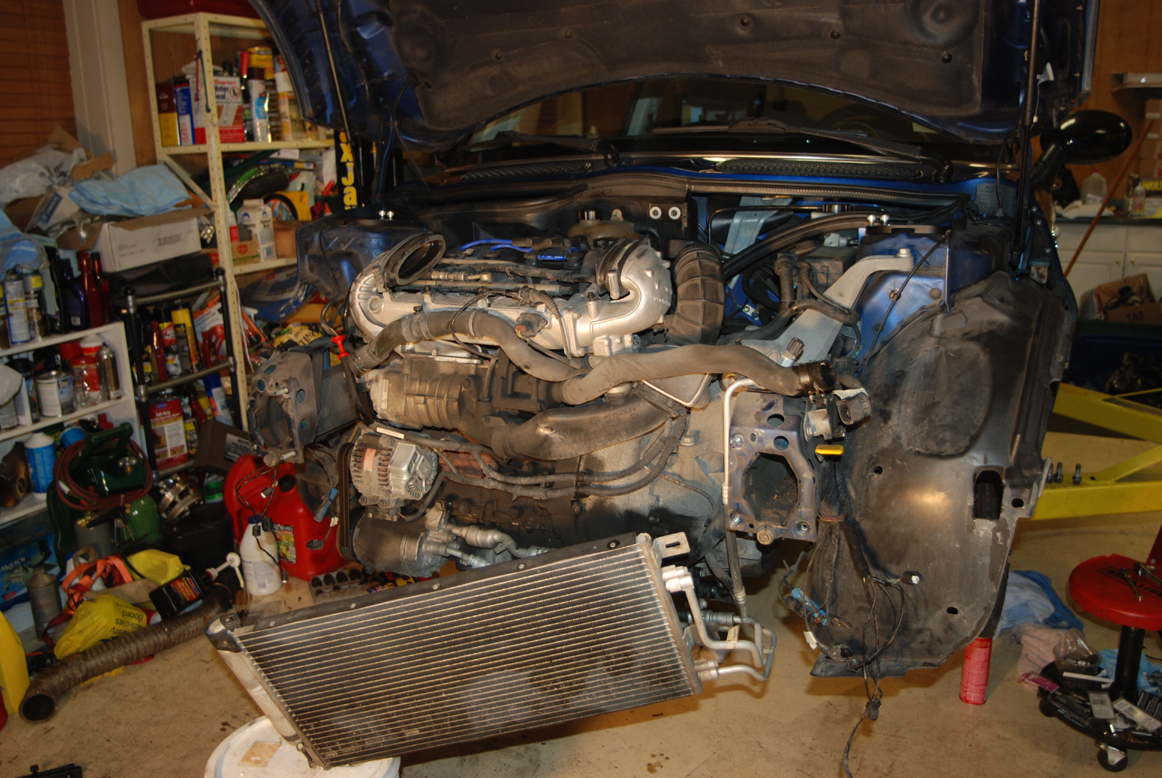
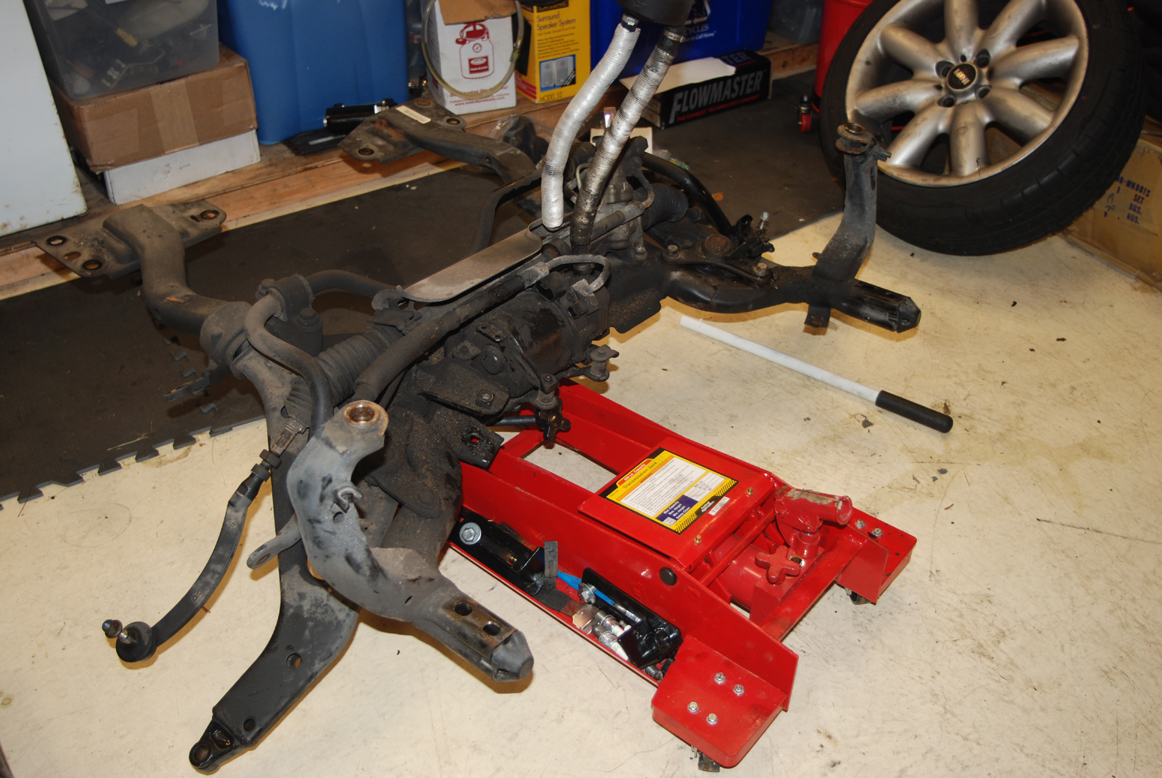
Wow, look at the residual oil on this subframe!
Parts laying everywhere!
[IMG]https://farm8.staticflickr.com/7445/16431074741_735791efc7_o.jpg[\IMG]
Subframe in pieces, changing the bushings...

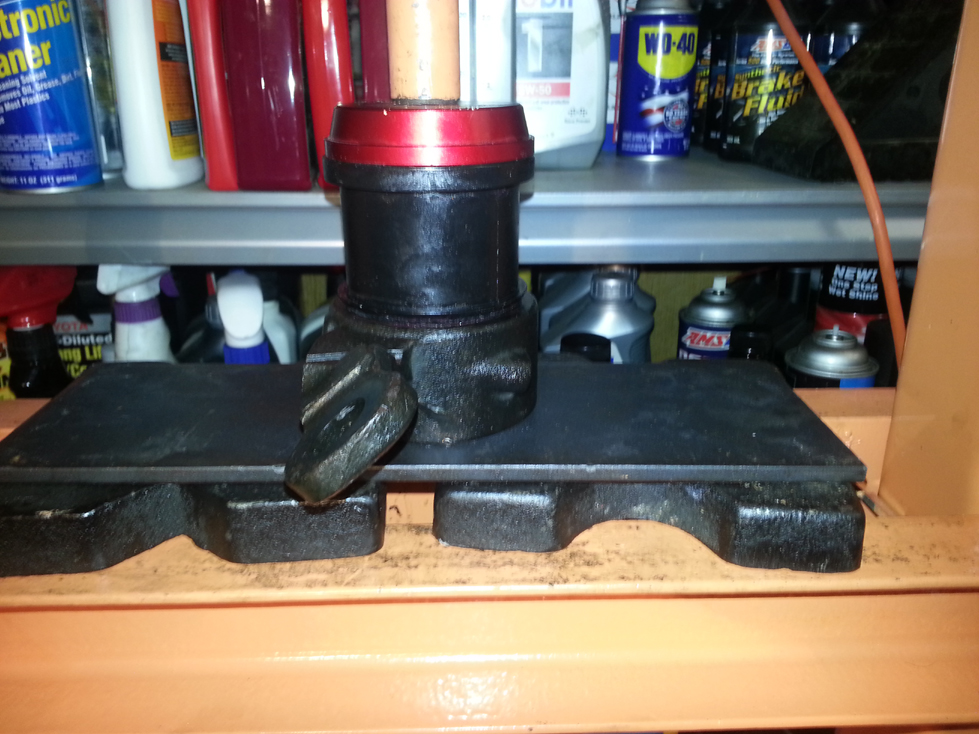
Used the press to install some subframe bushings...
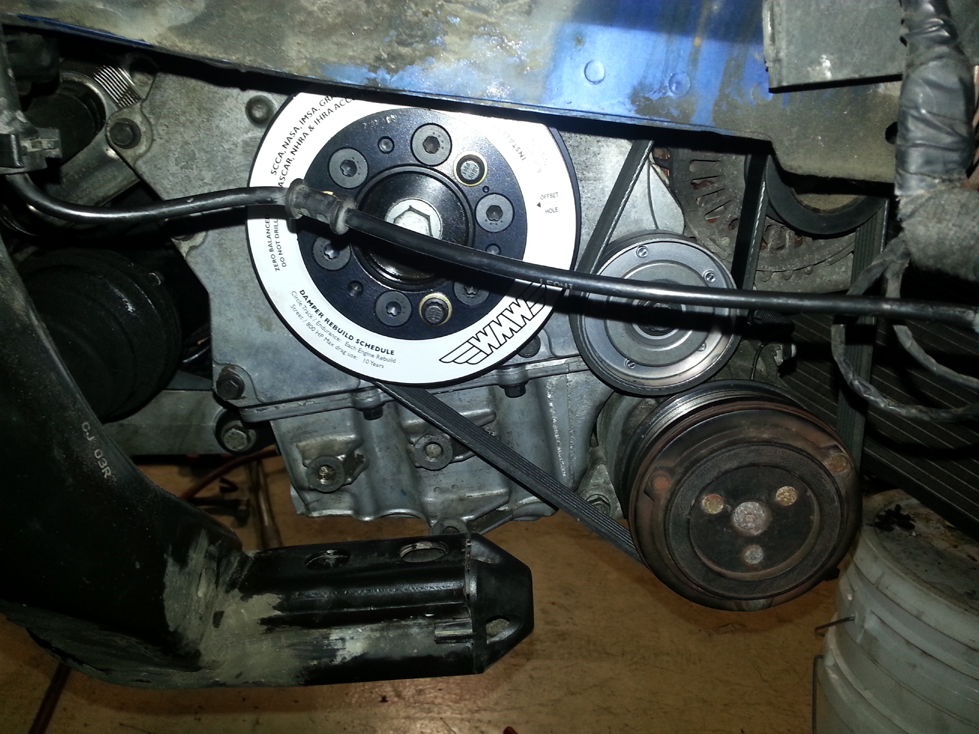
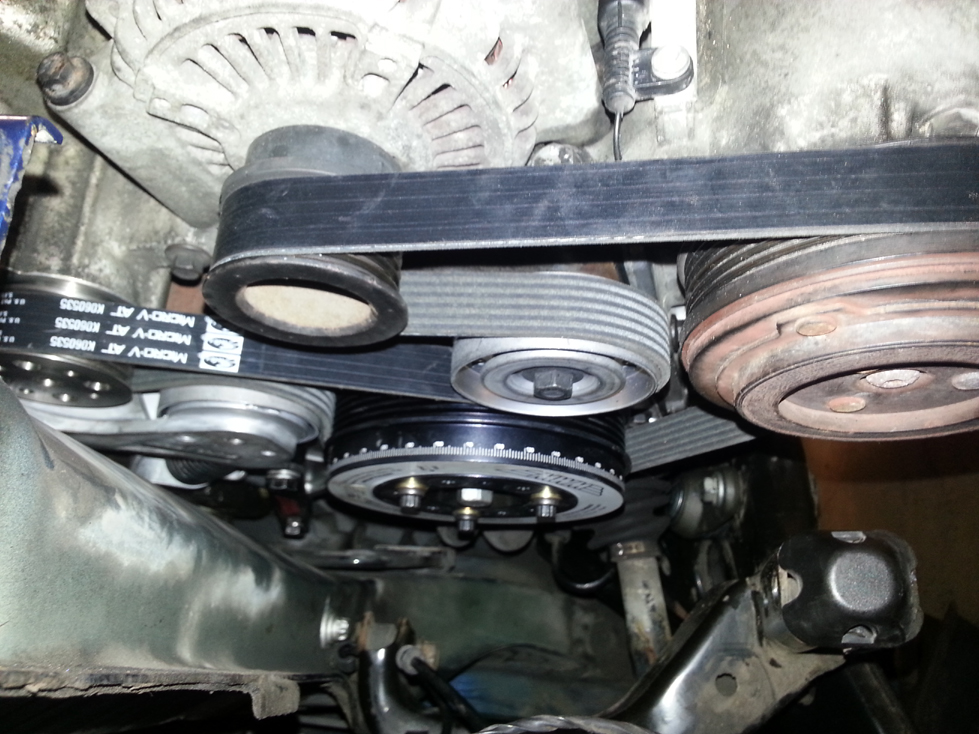
Subframe, oil pan gasket, and pulleys finished...
A closer look at the new ATI pulley, idler, 15% WMW pulley, tensioner, etc.
New exhaust, WMW XBrace, and other new parts on display...I didn't realize that the cell phone was going to take such poor images. Sorry for the blurry pics...but you get the idea.
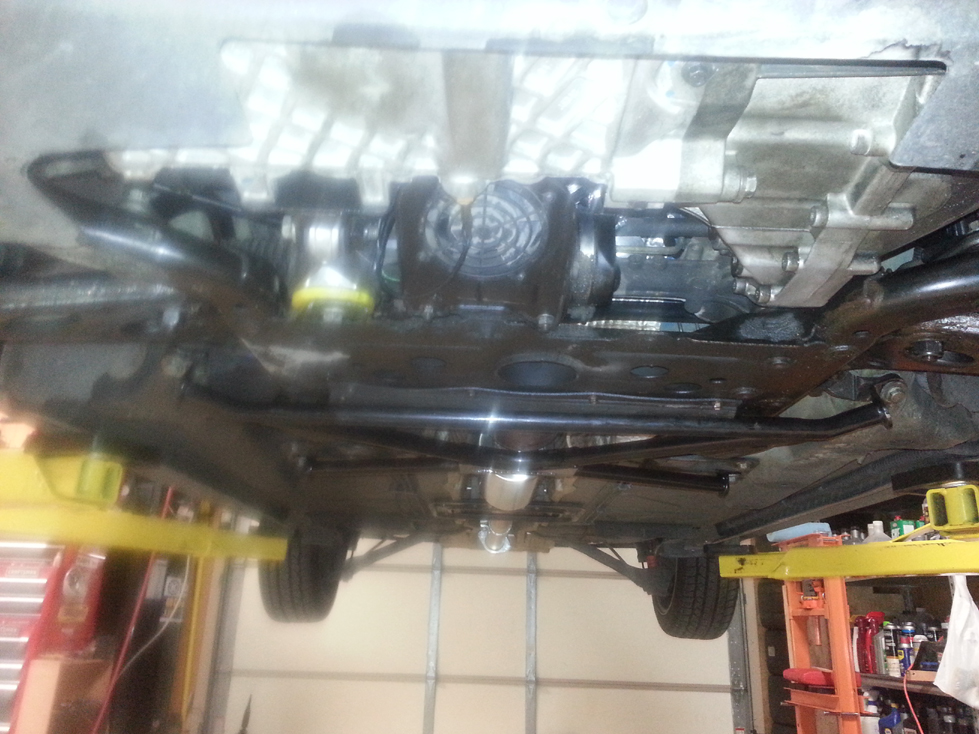
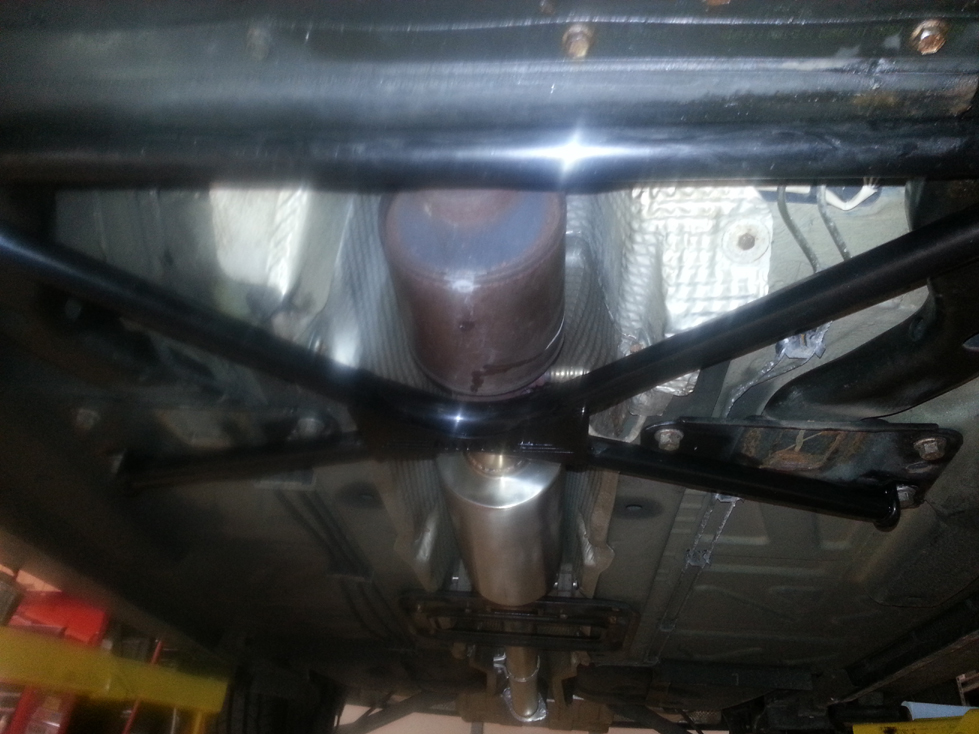
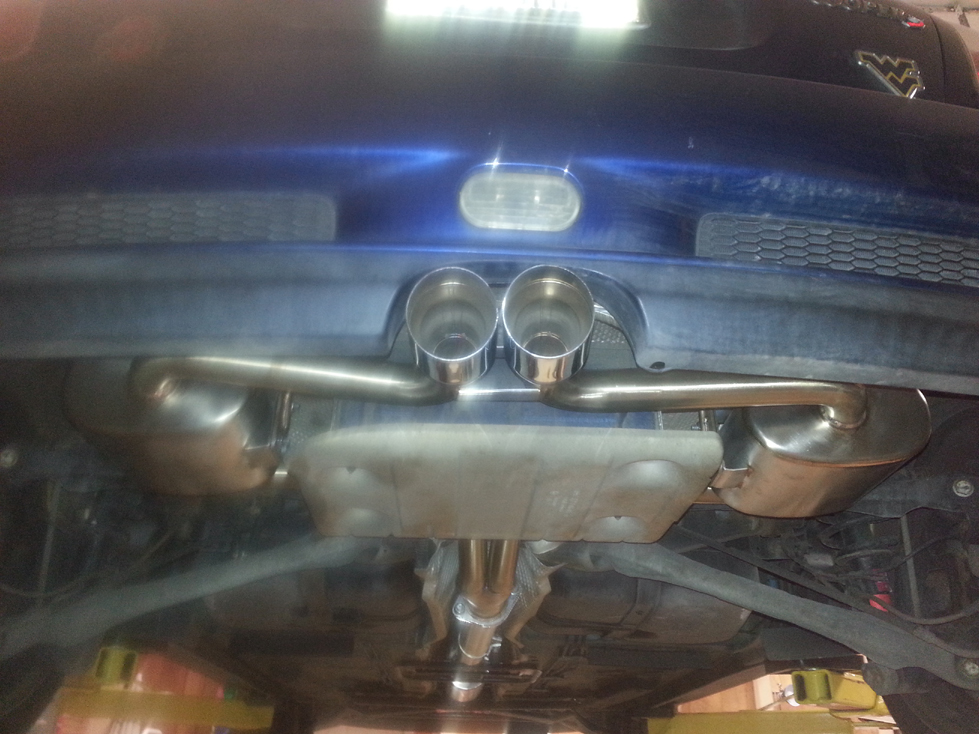
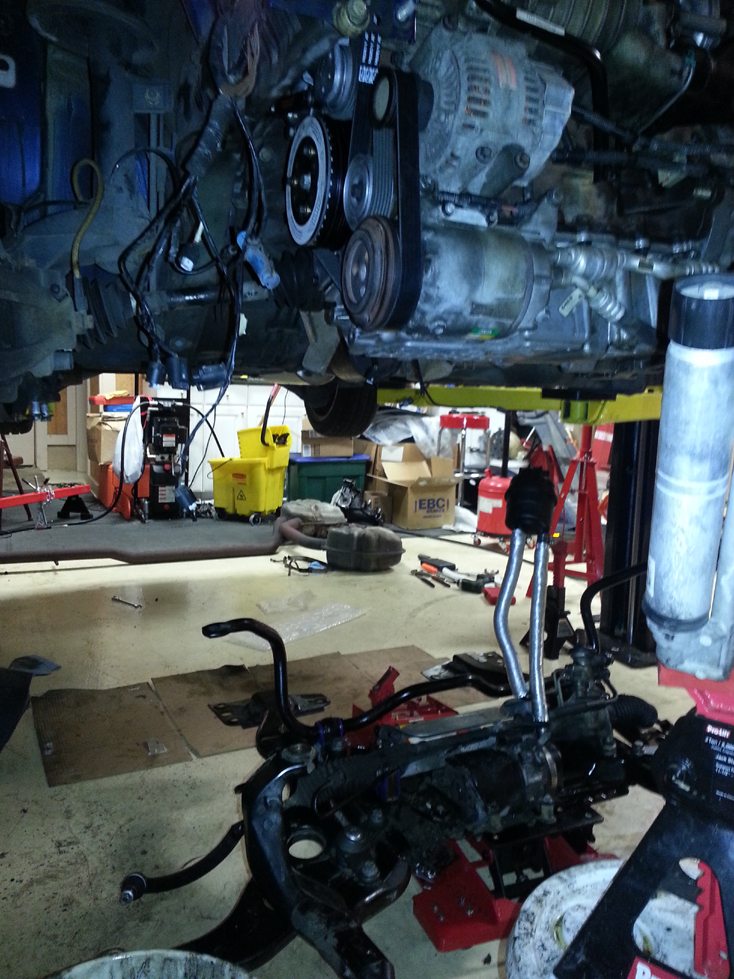
The Mini on the rack, checking for leaks...

The test drive successful...job complete!
There are a few of people to thank. First, ModMini has posted videos on YouTube. Without these videos, the job/procedure would have been much more difficult! Pelican parts has several step-by-step guides that were a big help. Last but not least, Way at WMW not only offered reasonable prices, but was available for technical assistance. I would highly recommend WMW for your next Mini project. Thank you guys!
This is a great little car and part of the family. With approximately 149k miles on the odometer, the clutch started slipping in 5/6th gear and during more spirited launches. No surprise to this forum, you will see the extent to which the car needs broken down to get to the clutch, so it was decided to replace many seals and give the Mini some nice upgrades.
The following parts were obtained:
� WMW 15% pulley, serpentine belt, and colder NGK spark plugs
� NGK Spark plug wires
� Craven Speed R53 supercharger pulley puller
� Supercharger oil � 8 oz.
� OEM water pump
� Water pump flange
� OEM thermostat and gasket
� Brass coolant bleeder screw
� ATI Super Damper Crank pulley R53, with new crank bolt
� WMW tensioner stop
� Gates 38404 belt tensioner
� Gates 36168 idler pulley
� Supercharger inlet gasket
� Supercharger outlet gasket
� OEM MAP sensor tube
� Valeo clutch and flywheel kit
� Clutch throw out bearing guide tube
� OEM shift cables
� OEM shift ****
� OEM clutch slave cylinder
� Rear main seal
� Front main seal
� Camshaft position sensor O-ring
� Crankshaft position sensor O-ring
� Dipstick tube O-ring
� Valve cover gasket with spark plug tube seals
� OEM valve cover bolts
� OEM oil pan gasket
� WMW Aftermarket upper engine mount with OEM Torx bolt
� OEM lower engine mount
� Powerflex front control arm polyurethane bushing kit
� Powerflex front sway bar bushings
� Powerflex steering rack bushing
� Powerflex gear box mount polyurethane bushing insert
� Powerflex lower engine mount polyurethane bushing insert
� OEM cabrio cross braces
� TSW XBrace
� Craven dipstick
� Power steering fan
� Power steering pressure line
� Power steering suction line
� WMW Stratmosphere catback exhaust, resonated
� OEM set of 12mm lug bolts
� Wheel hanger lug bolt guide tube
� Cardone 60-9279 Remanufactured CV axle, with new axle nut
� Bentley Mini Service& Repair manual
� Amsoil coolant boost
� Amsoil signature series 5W-30
� Amsoil syncromesh transmission fluid
� Amsoil brake fluid
� Prestone coolant
� A case of brake cleaner
With that parts list, I better get to work! Enough typing�here are a few images of the progress.
Starting to disassemble this oily mess!
Wow, look at the residual oil on this subframe!
Parts laying everywhere!
[IMG]https://farm8.staticflickr.com/7445/16431074741_735791efc7_o.jpg[\IMG]
Subframe in pieces, changing the bushings...
Used the press to install some subframe bushings...
Subframe, oil pan gasket, and pulleys finished...
A closer look at the new ATI pulley, idler, 15% WMW pulley, tensioner, etc.
New exhaust, WMW XBrace, and other new parts on display...I didn't realize that the cell phone was going to take such poor images. Sorry for the blurry pics...but you get the idea.
The Mini on the rack, checking for leaks...
The test drive successful...job complete!
There are a few of people to thank. First, ModMini has posted videos on YouTube. Without these videos, the job/procedure would have been much more difficult! Pelican parts has several step-by-step guides that were a big help. Last but not least, Way at WMW not only offered reasonable prices, but was available for technical assistance. I would highly recommend WMW for your next Mini project. Thank you guys!
#7
02-02-2015, 09:39 PM

2nd Gear
Join Date: Jan 2015
Location: Northwest
Posts: 124
Likes: 0
Received 0 Likes
on
0 Posts
Trending Topics
#8
02-03-2015, 05:31 AM

#10
02-03-2015, 08:16 PM

#11
02-05-2015, 06:05 AM
Too long! I think we were down just around 3-4 weeks. The reason is that I would place a big order to WMW, get into the project and become stuck on an issue and then place another big order....I think a total of 3-4 orders. Way came through and had faster turnaround than other companies commonly used. I also cleaned and even painted some parts of the subframe. I am slow but meticulous.
Way, thanks for the compliment. You will get some more business soon. A couple interior items and such on the horizon. She has driven over 300 miles....soon....the upgrades are going to get a workout soon! Haha
#12
02-05-2015, 06:08 AM
As I am changing the oil in one of my Supras, she turns and says, "You know, you could race the Mini too during an SCCA SOLO event, if you will buy another set of wheels and tires." AAaarrrrgghhh! Haha. I would have installed a OS Giken LSD and a different clutch if I were going to race the Mini. Now she tells me! Haha. I gave her a hug, "Thanks baby but I will stick with my Supra." Honestly, I would hate to have to get to that top bell housing bolt again!!
#13
05-12-2015, 08:07 PM
A new oil leak !! Help!
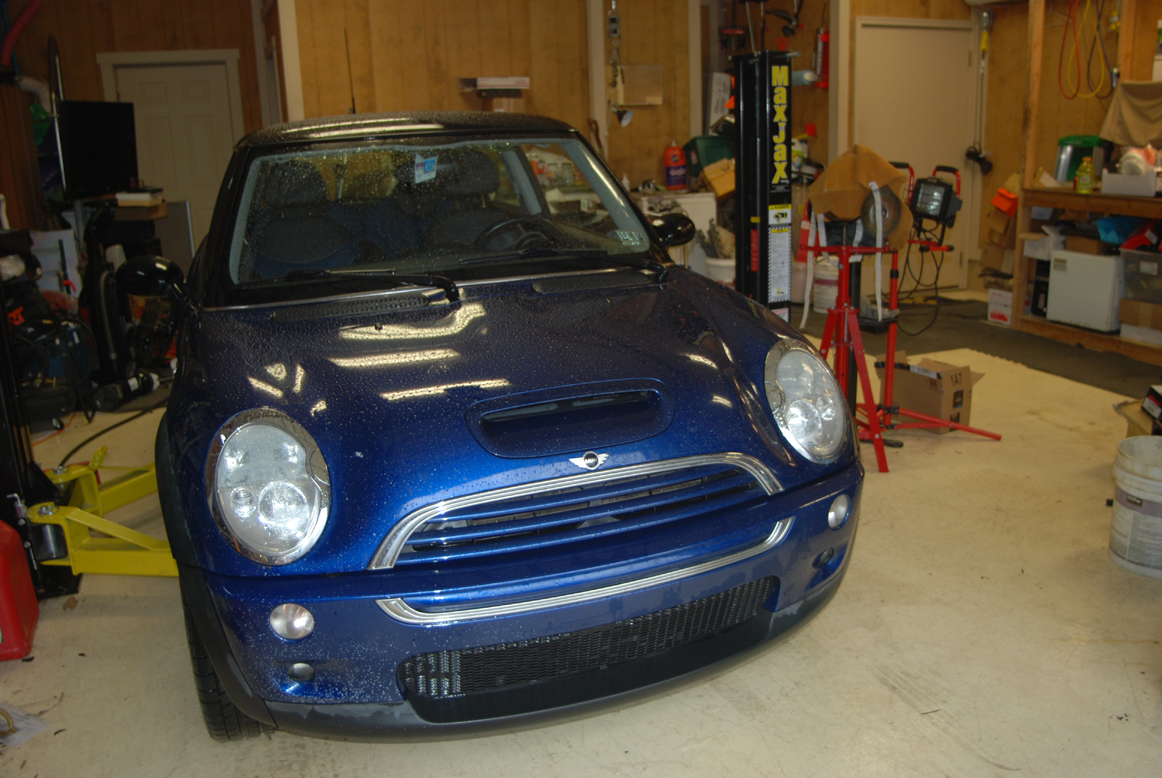
I have an issue that I am afraid I do not want to know the answer. The Mini was left in the driveway. Tis the season for storms and there is a chance for hail, so I have her move into a garage. I notice a puddle of oil in the driveway and assume a delivery vehicle had left its mark. After a few hours, I check on the Mini....and there is a small puddle on the garage floor! We move it back to the workshop lift and I am see oil concentrated at the seam where the transmission and engine mate. I am praying that it is not the rear main seal. I made a video so that someone with more experience could either confirm or deny the rear main status. I was careful and used a new small rubber mallet to ensure that the seal was even with the block. I used the technique demonstrated by ModMini YouTube videos. Could it possibly be something else besides the rear main seal? Is it possible I got a bad seal?!?
You can see the list of parts listed above that were changed. This is the first sign of trouble. For 3 months, not a drop of oil and now the level is on the ADD mark. This is a bad leak and should not be driven until it is corrected. Is there anything else that it could be, or do I need to start tearing it apart again? I appreciate your time and comments.
You can see the list of parts listed above that were changed. This is the first sign of trouble. For 3 months, not a drop of oil and now the level is on the ADD mark. This is a bad leak and should not be driven until it is corrected. Is there anything else that it could be, or do I need to start tearing it apart again? I appreciate your time and comments.
Last edited by CLToy; 05-12-2015 at 08:57 PM. Reason: video link added...
#14
05-18-2015, 06:22 PM

#15
05-19-2015, 11:26 AM

Vendor
__________________
Your Trusted Source For DIY and Parts
FREE SHIPPING over $99 click here
MINI Parts | DIY Help | Facebook | Twitter | Instagram | YouTube | Promos
888.280.7799 | 6am - 5pm PST

FREE SHIPPING over $99 click here
MINI Parts | DIY Help | Facebook | Twitter | Instagram | YouTube | Promos
888.280.7799 | 6am - 5pm PST
#16
06-13-2015, 09:42 AM
I dedicated some time to tearing into the Mini. It was the rear main seal. Check this out...
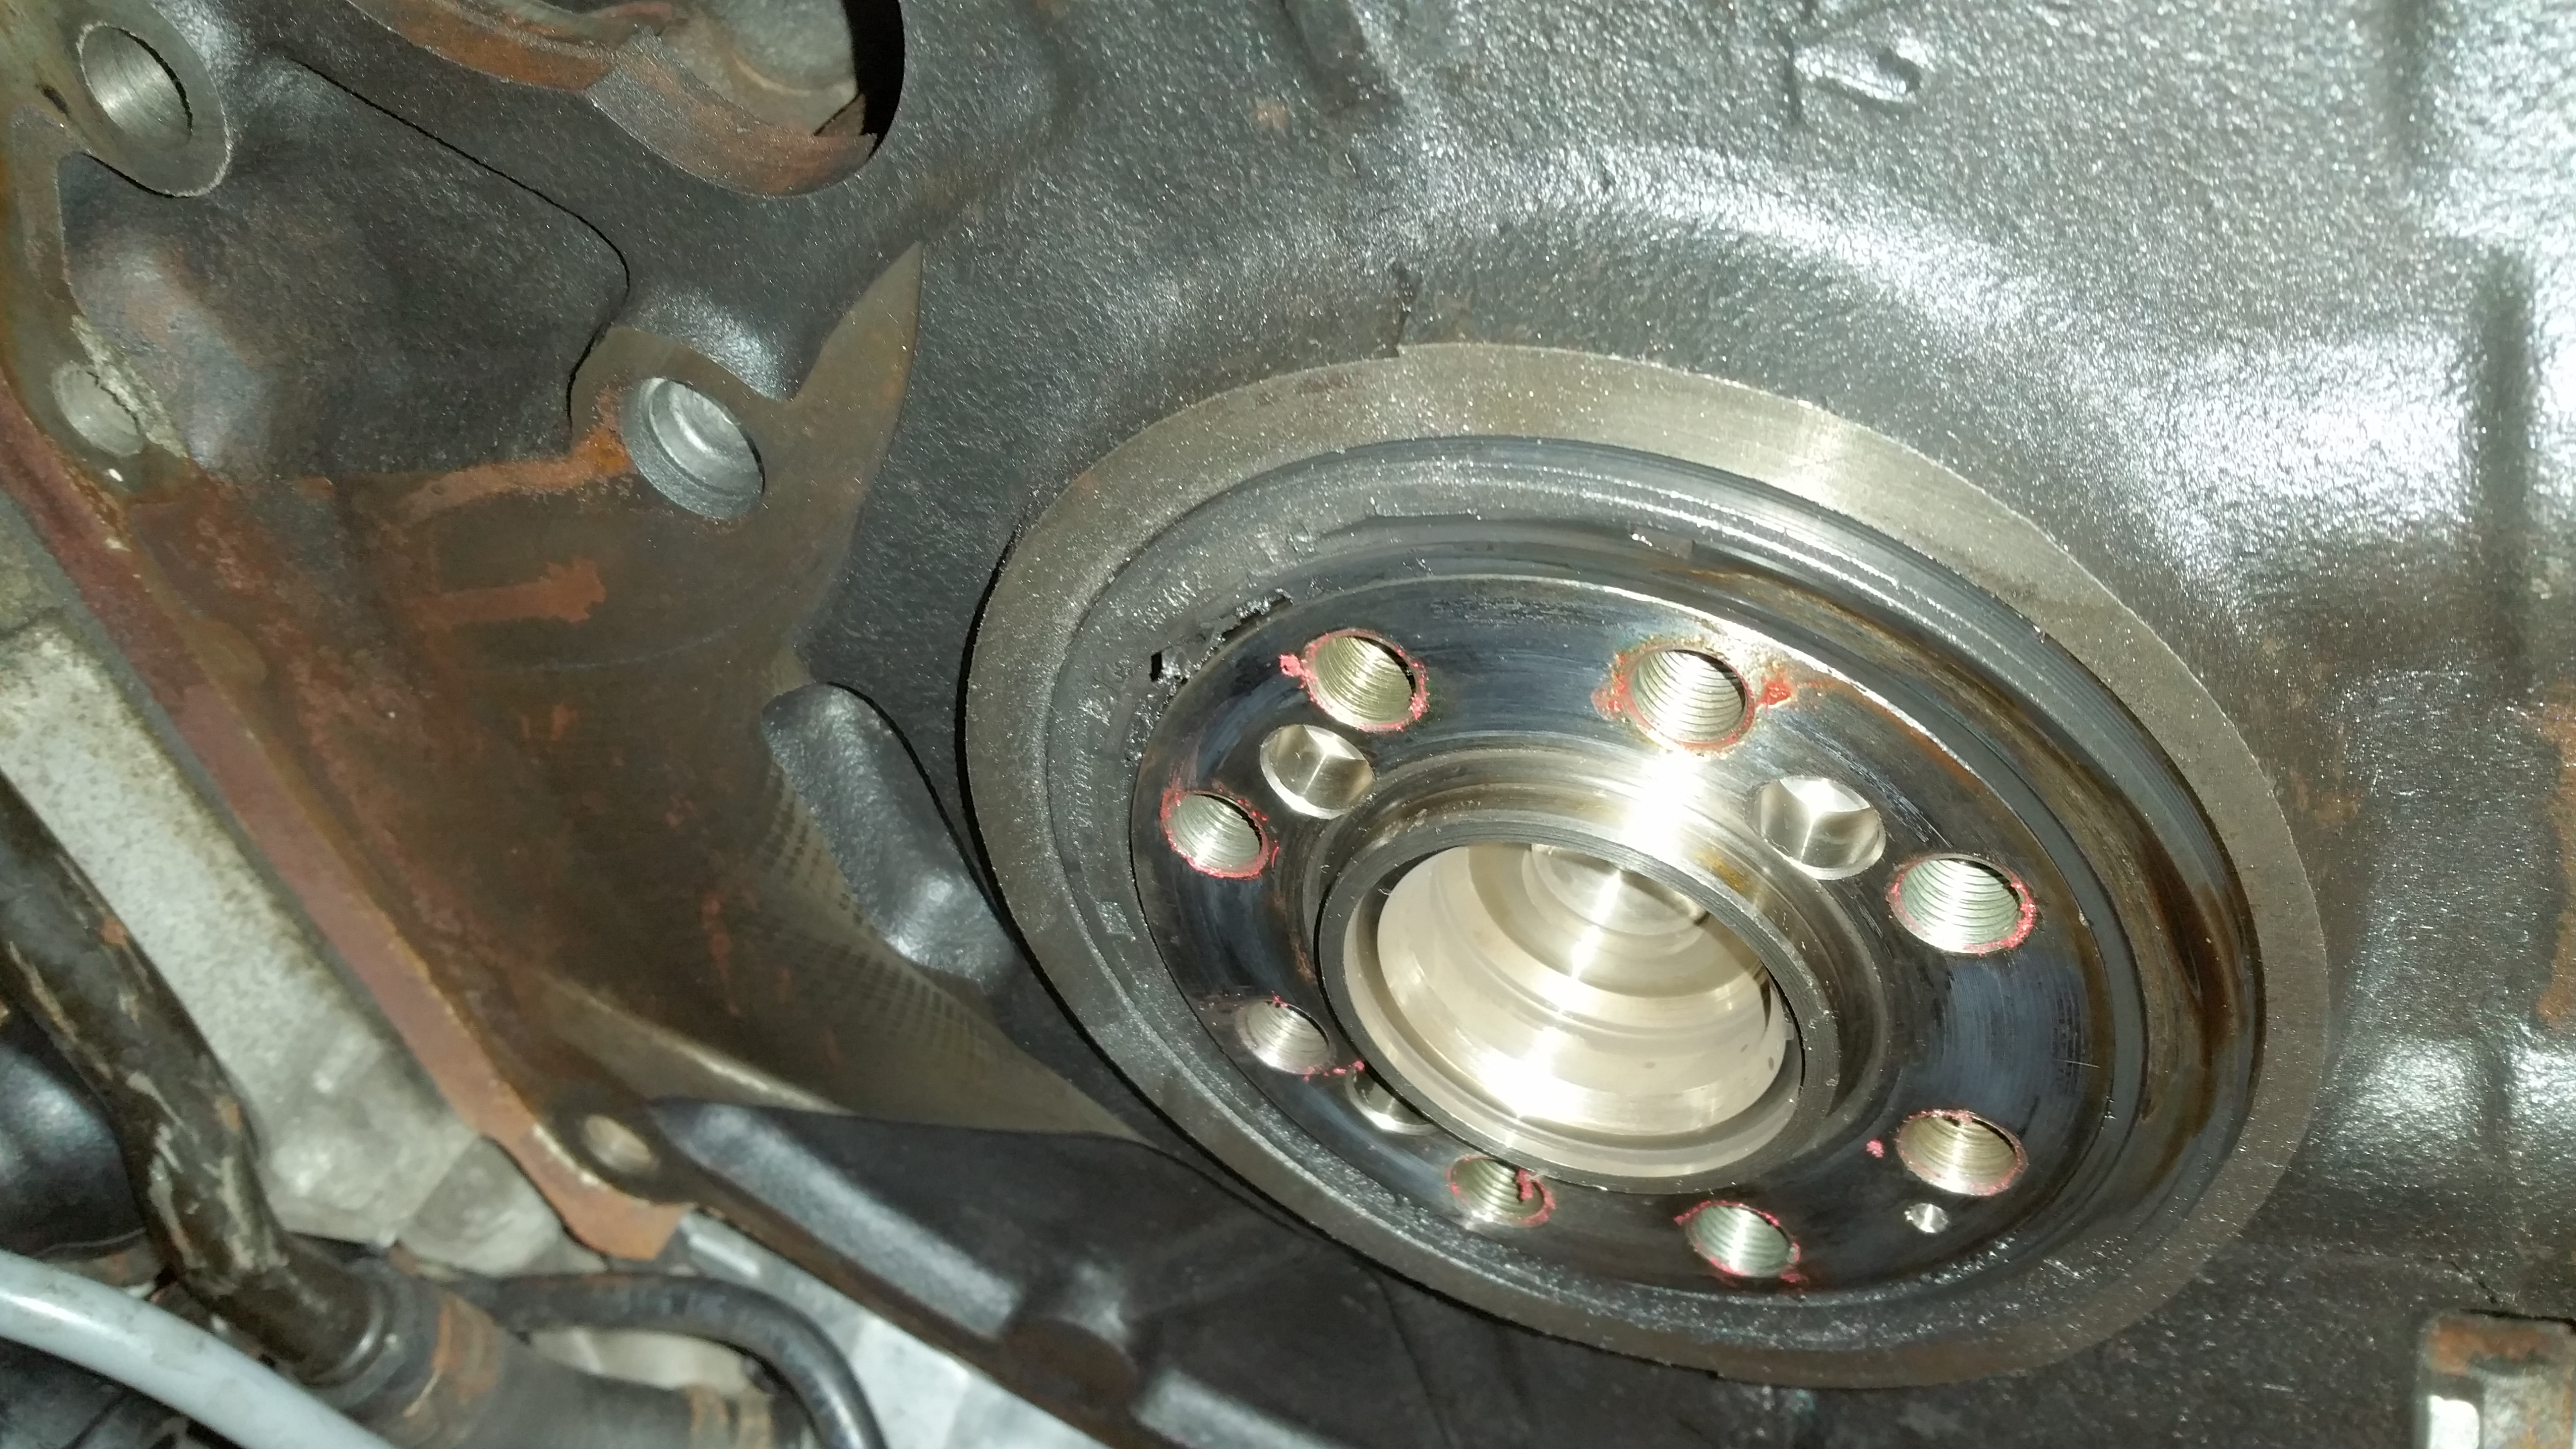
The seal, which was an OEM replacement, pushed out at the bottom and was rubbing the flywheel so much that the rubber coating is gone. Additionally, the inner section of the seal, at the 1 o'clock position, is chewed up. I really do not understand that. I will check the crank for any burrs but it seemed smooth to me at the time. Did I just fold that section under when installing and it got chewed up? The spring is surprisingly still in place.
Time to put all this together and be sure that it is tapped all the way in...again.
Thanks all. I appreciate the comments and suggestions.
#17
06-14-2015, 07:34 PM
Finishing the repair...
Repair complete, and it only took 26 hours from tear down to test drive. All for a rear main seal....but there was another surprise.
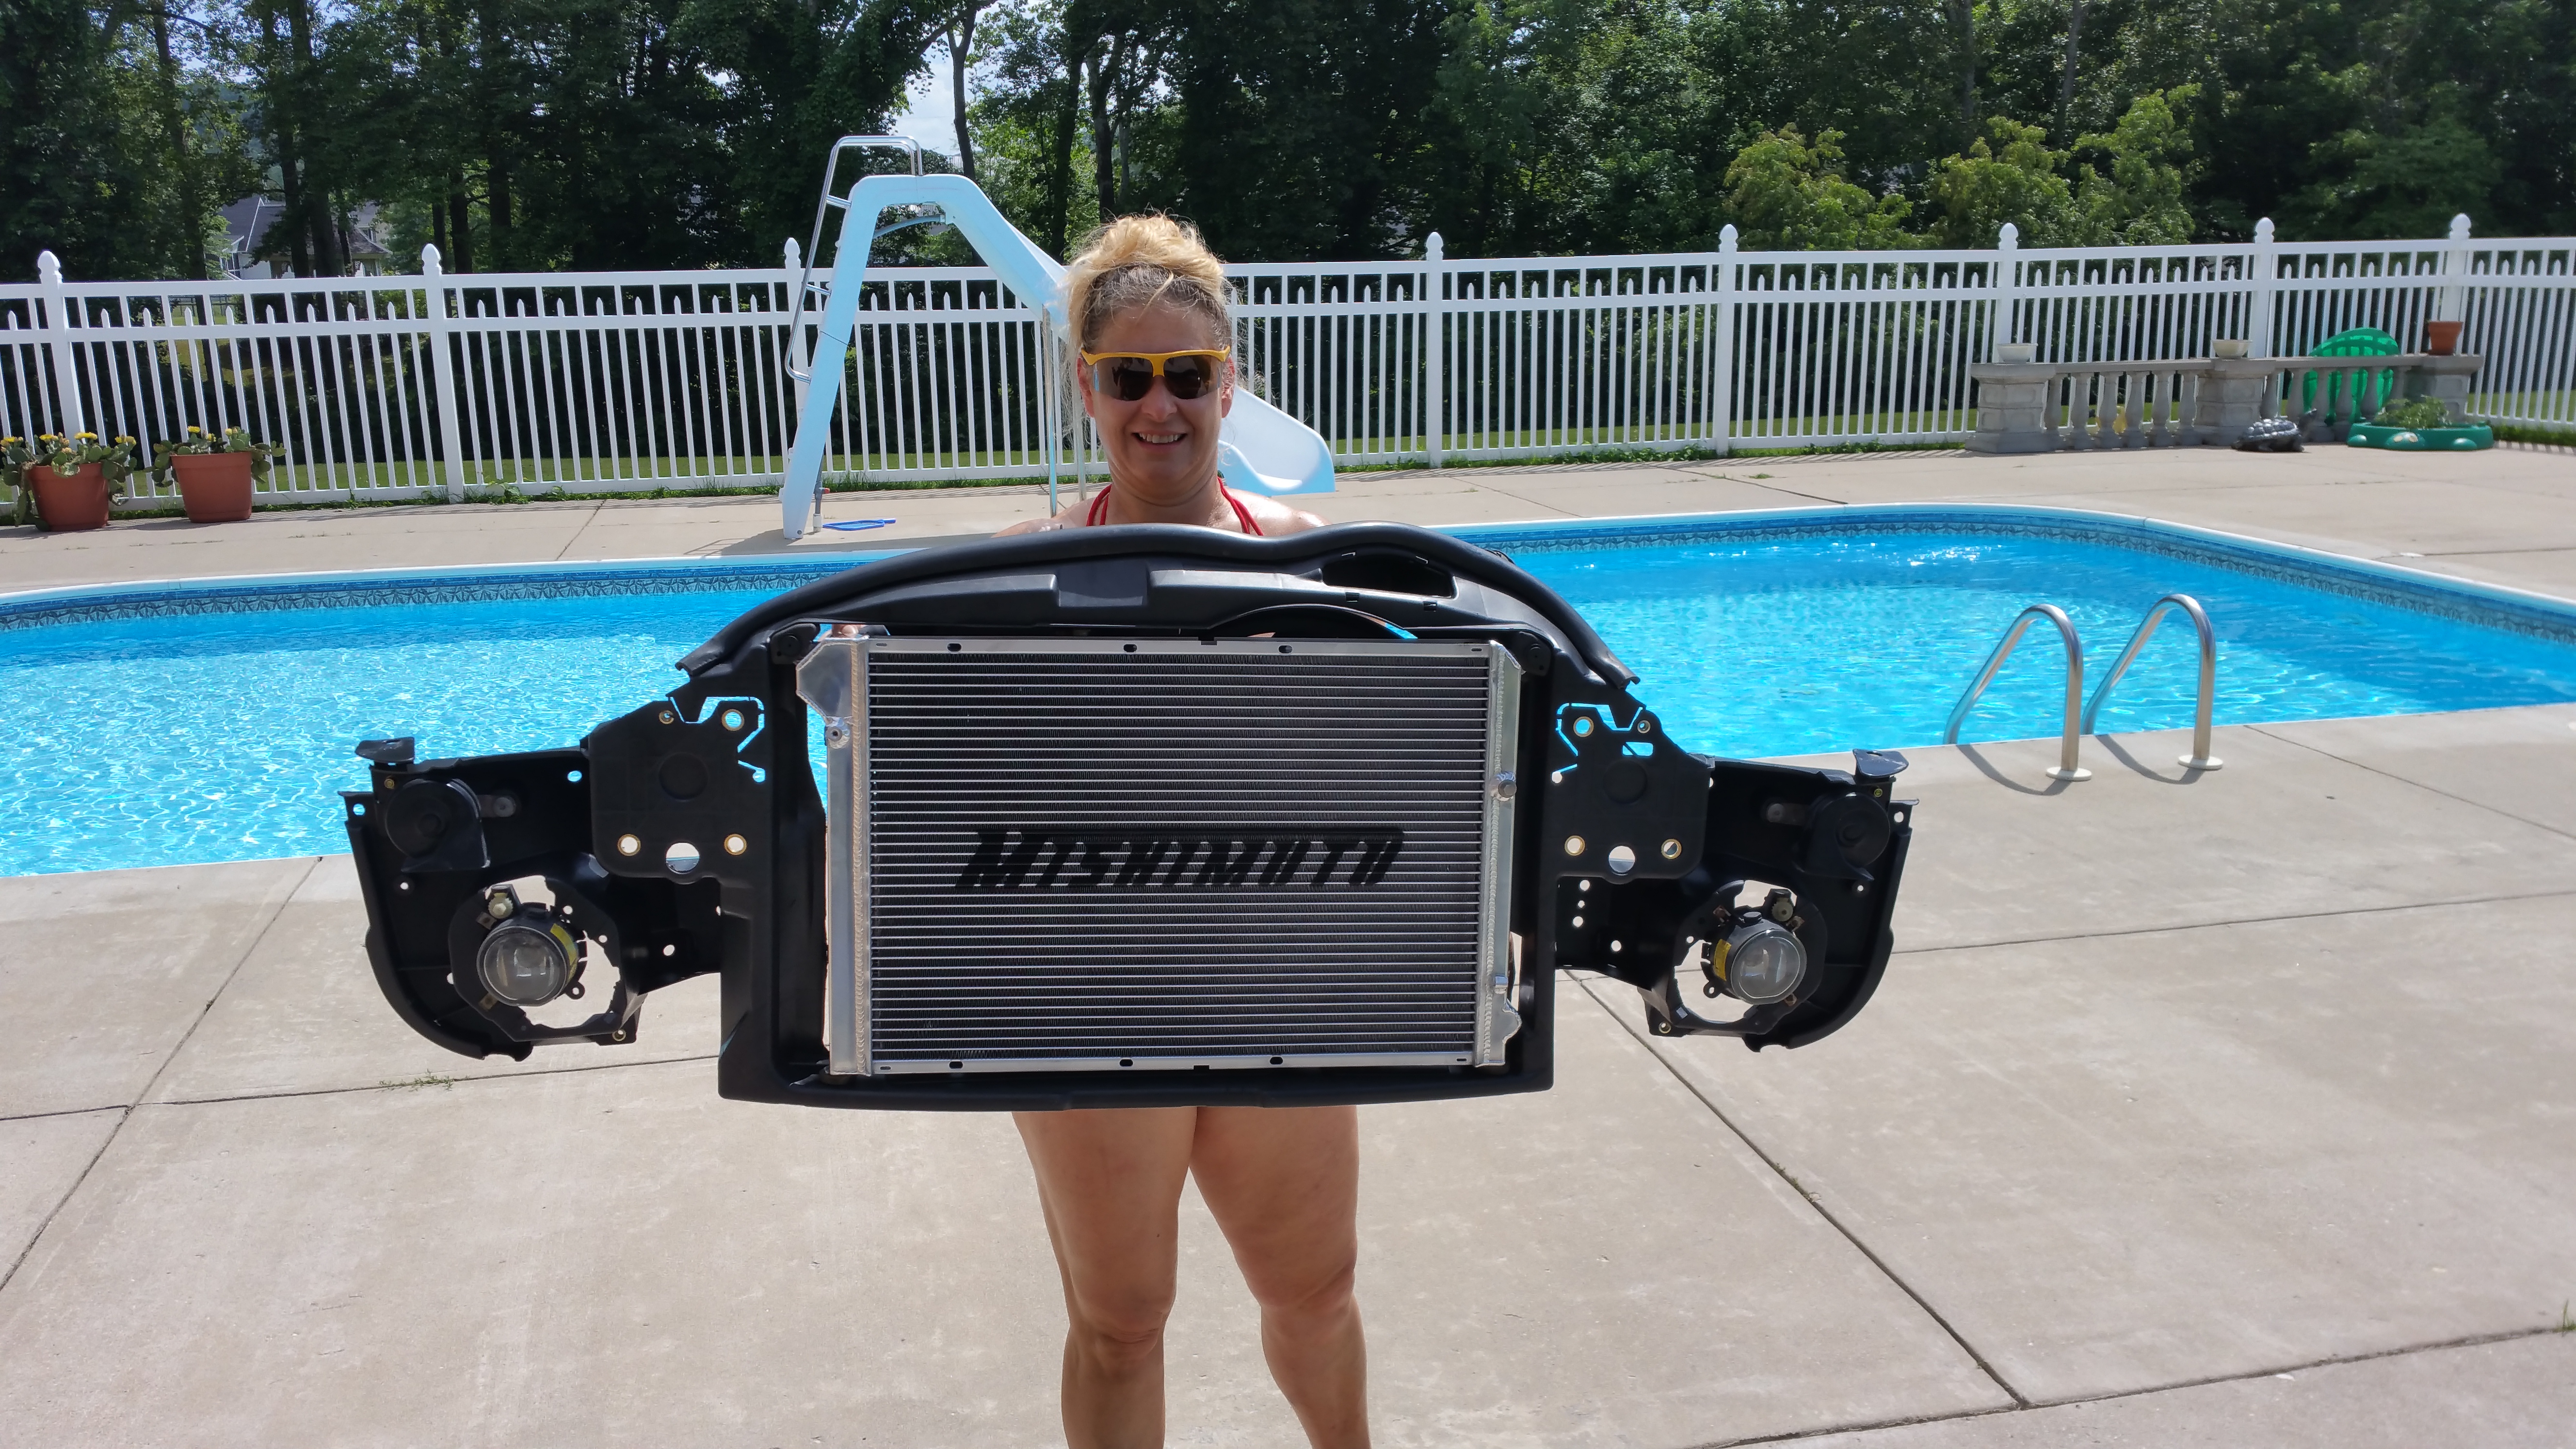
We found another leak during tear down. The radiator tank was low and the OEM radiator was leaking at the edge. Why on earth did BMW use plastic end tanks?!? I am sure that it has been debated before but I would love to kick the chief designer of the Mini square in the ... anyway I digress.
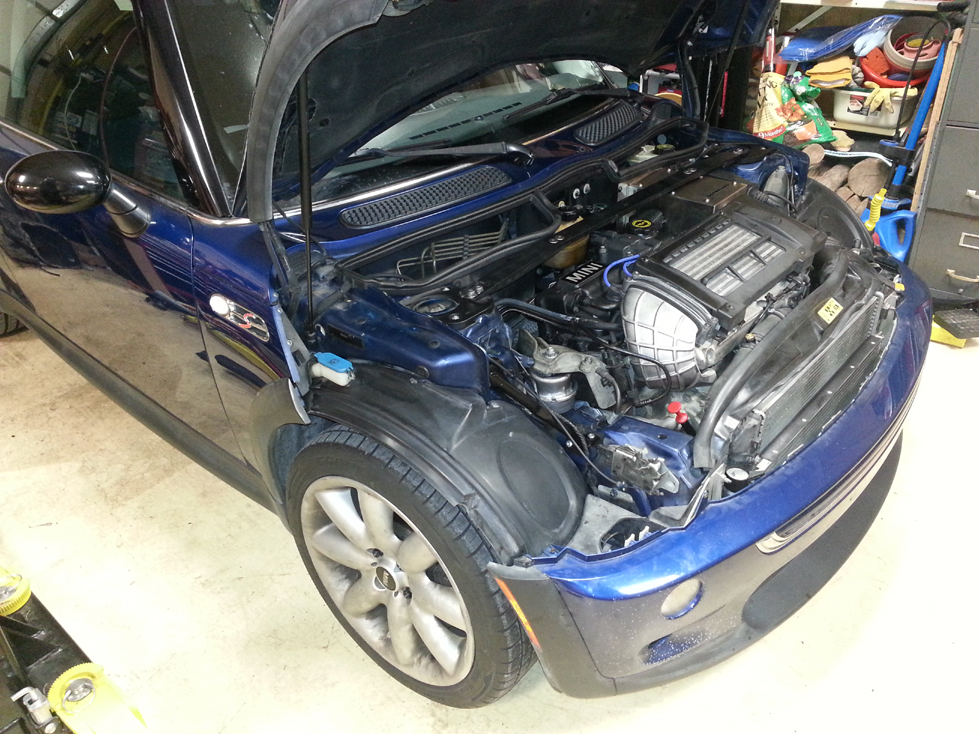
We replaced the front plastic header panel with an aftermarket one and installed a Mishimoto radiator. Here is Jamie showing off her work after transferring old to new...
I would also like to mention that I do not like the Craven Speed dipstick immediately after an oil change. You just cant see the clear oil on the dipstick. I am likely to purchase an oem dipstick just to use a day after an oil change to ensure that oil levels are correct and then switch back to the Craven Speed. Once the oil gets some miles, the Craven Speed is nice...but not until then.
Wish us luck; I do not want to have to tear this down again. She is glad to have her car back and we are praying that this will give us years of service and hope to enjoy the Mini once again.
Chadrick
We found another leak during tear down. The radiator tank was low and the OEM radiator was leaking at the edge. Why on earth did BMW use plastic end tanks?!? I am sure that it has been debated before but I would love to kick the chief designer of the Mini square in the ... anyway I digress.
We replaced the front plastic header panel with an aftermarket one and installed a Mishimoto radiator. Here is Jamie showing off her work after transferring old to new...
I would also like to mention that I do not like the Craven Speed dipstick immediately after an oil change. You just cant see the clear oil on the dipstick. I am likely to purchase an oem dipstick just to use a day after an oil change to ensure that oil levels are correct and then switch back to the Craven Speed. Once the oil gets some miles, the Craven Speed is nice...but not until then.
Wish us luck; I do not want to have to tear this down again. She is glad to have her car back and we are praying that this will give us years of service and hope to enjoy the Mini once again.
Chadrick
#18
03-26-2017, 03:29 PM
Added accessories...
Quick update...
The mishimoto radiator in the previous post failed. I was concerned this would be a struggle but Mishimoto replaced it without issue. I am sure it helped that the Mini dealership receipt stated the radiator was defective.
We added a few parts since then. The bolt in the rear lower control arm that holds the shock to the arm snapped and dropped the shock onto the road. This could have been because of an old bolt or combined with the weight of the spare tire carrier. I fixed this by drilling out the OEM threads and snapped bolt and added a longer Grade 10 bolt through the arm and lower shock mounting point. I also thought maybe the old suspension needed some help, so I ordered the Megan Racing coilover kit from WMW. I was worried that the height would be too low, but I was able to get OEM ride height...or maybe the previously accepted sagging springs OEM ride height. I also installed lower adjustable control arms and will dial out more negative camber at the next alignment. Don't want to wear the new Cooper RS3 tires prematurely. (Thinking of setting to 0.5 degrees negative camber)
Now that the suspension has been firmed up, it feels so much better and better capable of handling the increased weight from the MiniFini spare tire link.
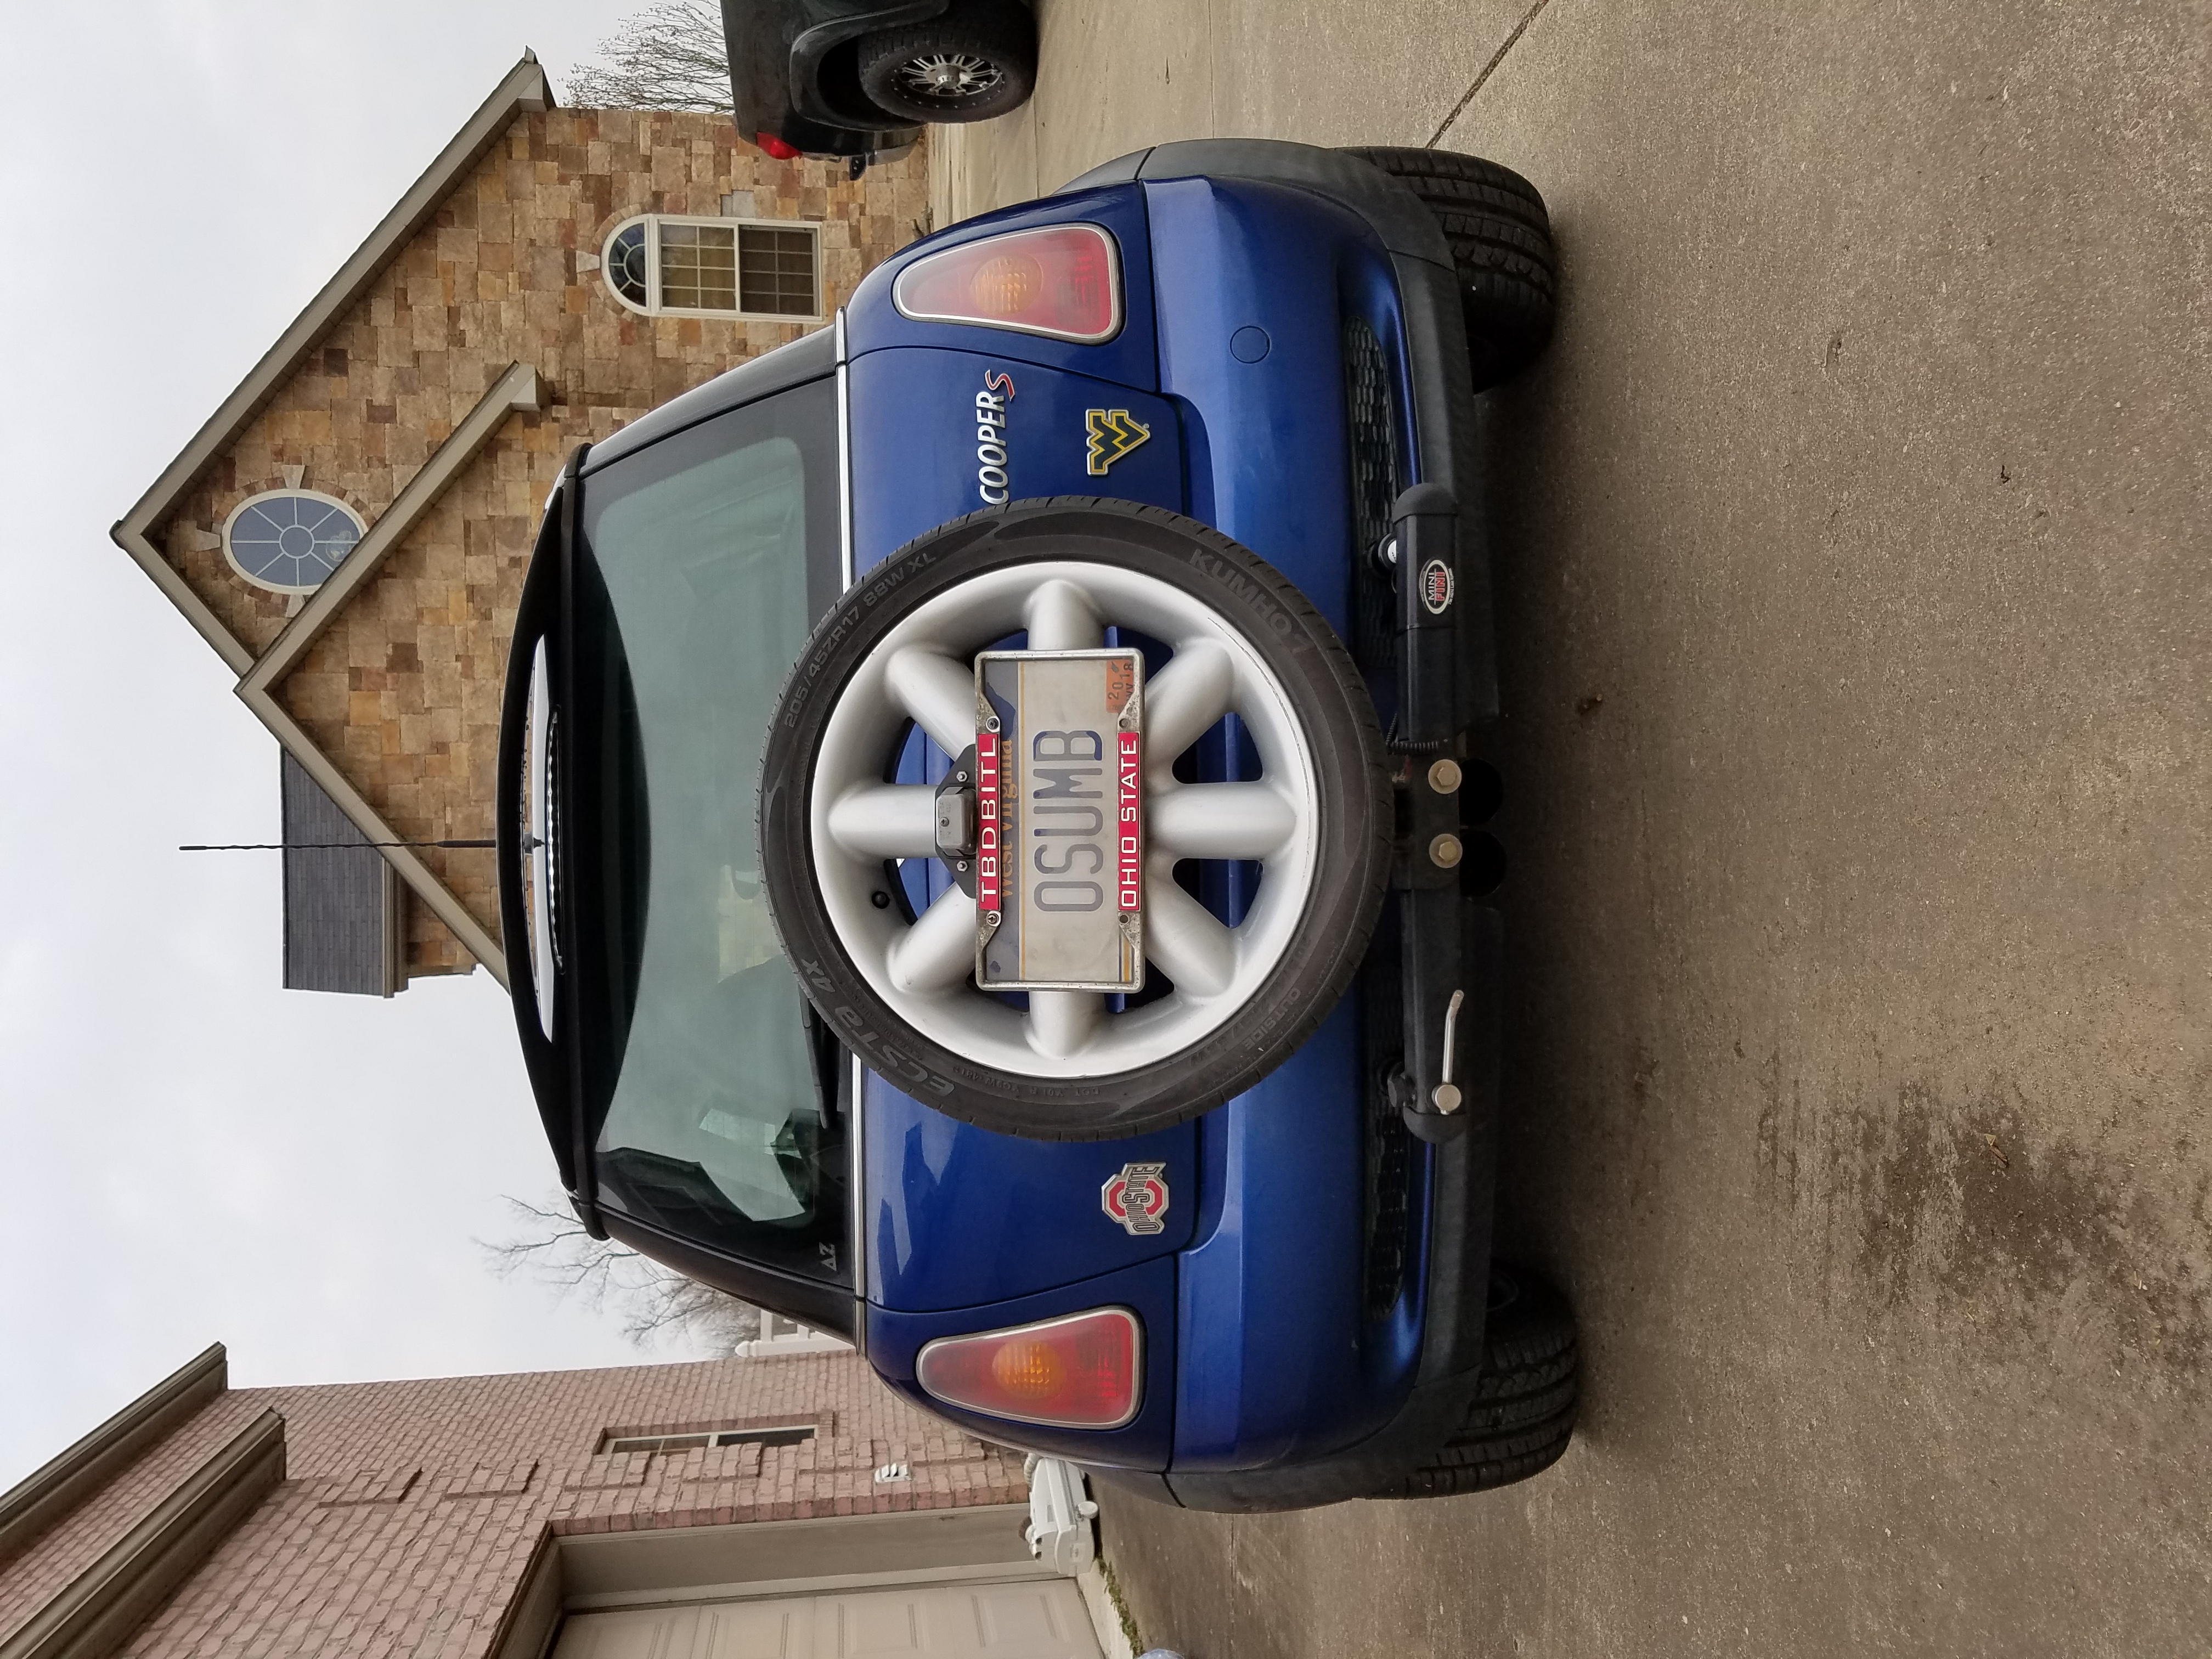
Then was to address the reduced vision at night...the Alta Rally light bar and 4 Hella Black Magic lights were installed. I would have like to install 4 new LED lights but this combination looks more period correct here...

She is still enjoying this car.
The mishimoto radiator in the previous post failed. I was concerned this would be a struggle but Mishimoto replaced it without issue. I am sure it helped that the Mini dealership receipt stated the radiator was defective.
We added a few parts since then. The bolt in the rear lower control arm that holds the shock to the arm snapped and dropped the shock onto the road. This could have been because of an old bolt or combined with the weight of the spare tire carrier. I fixed this by drilling out the OEM threads and snapped bolt and added a longer Grade 10 bolt through the arm and lower shock mounting point. I also thought maybe the old suspension needed some help, so I ordered the Megan Racing coilover kit from WMW. I was worried that the height would be too low, but I was able to get OEM ride height...or maybe the previously accepted sagging springs OEM ride height. I also installed lower adjustable control arms and will dial out more negative camber at the next alignment. Don't want to wear the new Cooper RS3 tires prematurely. (Thinking of setting to 0.5 degrees negative camber)
Now that the suspension has been firmed up, it feels so much better and better capable of handling the increased weight from the MiniFini spare tire link.
Then was to address the reduced vision at night...the Alta Rally light bar and 4 Hella Black Magic lights were installed. I would have like to install 4 new LED lights but this combination looks more period correct here...
She is still enjoying this car.
Last edited by CLToy; 03-26-2017 at 03:41 PM.

Thread
Thread Starter
Forum
Replies
Last Post
Way2Fst4U
R60 :: Countryman Talk (2010-2015)
3
05-04-2015 07:38 AM
dunphyj
MINI Parts for Sale
2
06-14-2014 12:30 AM